文章
Miss Chen
2021年03月31日

Summer came quietly,
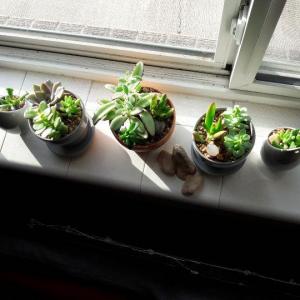
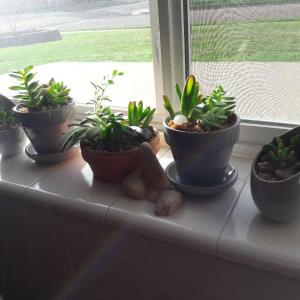
In order to add a beautiful scenery to the windowsill
Many friends around
Start a gust of wind
Growing succulents
Or some plants that can be grown on the balcony.

Today
Just share it with everyone
How to protect flowers??

1. White vinegar cures yellow leaves
Applicable species: Camellia, azalea, frangipani, osmanthus, Milan, gardenia, jasmine and other acid-loving plants.
When growing flowers, flowers and leaves are often withered. If it is not for lack of water, it may be yellowing disease.
White vinegar and water are diluted in a ratio of 1:500 and placed in a small spray bottle, and sprayed on the leaves in the morning, spraying once every 2 days.
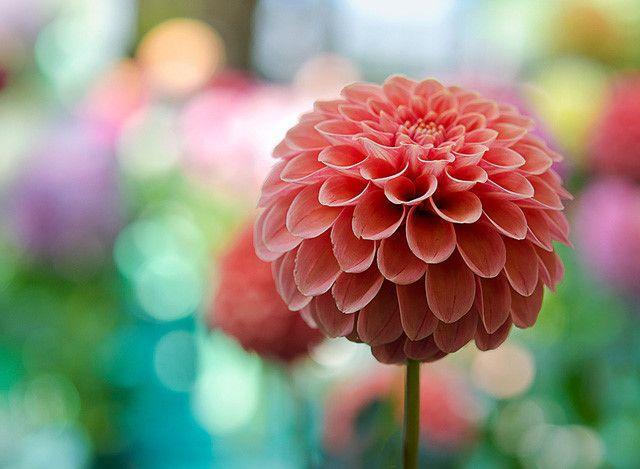
2. Beer to promote flowers
Applicable species: Foliage plants such as green radish, Brazilian ironwood, monstera, geranium, Chlorophytum, Dieffenbachia.
Wiping the leaves with beer can make the leaves green and bright, and watering on the roots can also make the plants grow vigorously and bloom in time.
Dilute the water and beer in a certain proportion, mix them evenly, and pour them on the roots of foliage plants. Twice a month, the flowers can be fresh and bright.
Pour a little beer in the vase when arranging flowers to make the colors of the flowers radiant.

3. Use waste oil to grow flowers
Applicable species: night flower, rose, clivia, longevity flower, honeysuckle and other fertilizer-loving plants.
Every time you clean the range hood, don't throw away the waste oil in the oil collecting cup. It is a good partner for plant-loving plants.
Insert holes at the edge of the flowerpot. Generally, insert two holes in the pot with a diameter of 15 cm, and three holes with a diameter of 25 cm. Pour waste oil into the hole and cover it with soil. The fertilizer effect can be maintained for two to three months.

4. Soapy water kills insects
Applicable species: all insect-bearing plants.
When there are pests on plants, try soapy water. It can kill many soft-shell pests, such as aphids, red spiders, and ants.
Dissolve the soap with rainwater, well water, cold boiled water, etc., and keep the concentration below 1%. Spray the solution on the leaf surface and back of diseased leaves in the morning, and don't spray it if there is no insect damage.
Soapy water tends to make the soil alkaline, so it is generally not used for watering flowers, but the insecticidal effect is not bad.
The above method is the secret recipe that Xiaon tried. Dear friends, you can choose the right method according to your flower type!
In order to add a beautiful scenery to the windowsill
Many friends around
Start a gust of wind
Growing succulents
Or some plants that can be grown on the balcony.

Today
Just share it with everyone
How to protect flowers??

1. White vinegar cures yellow leaves
Applicable species: Camellia, azalea, frangipani, osmanthus, Milan, gardenia, jasmine and other acid-loving plants.
When growing flowers, flowers and leaves are often withered. If it is not for lack of water, it may be yellowing disease.
White vinegar and water are diluted in a ratio of 1:500 and placed in a small spray bottle, and sprayed on the leaves in the morning, spraying once every 2 days.

2. Beer to promote flowers
Applicable species: Foliage plants such as green radish, Brazilian ironwood, monstera, geranium, Chlorophytum, Dieffenbachia.
Wiping the leaves with beer can make the leaves green and bright, and watering on the roots can also make the plants grow vigorously and bloom in time.
Dilute the water and beer in a certain proportion, mix them evenly, and pour them on the roots of foliage plants. Twice a month, the flowers can be fresh and bright.
Pour a little beer in the vase when arranging flowers to make the colors of the flowers radiant.

3. Use waste oil to grow flowers
Applicable species: night flower, rose, clivia, longevity flower, honeysuckle and other fertilizer-loving plants.
Every time you clean the range hood, don't throw away the waste oil in the oil collecting cup. It is a good partner for plant-loving plants.
Insert holes at the edge of the flowerpot. Generally, insert two holes in the pot with a diameter of 15 cm, and three holes with a diameter of 25 cm. Pour waste oil into the hole and cover it with soil. The fertilizer effect can be maintained for two to three months.

4. Soapy water kills insects
Applicable species: all insect-bearing plants.
When there are pests on plants, try soapy water. It can kill many soft-shell pests, such as aphids, red spiders, and ants.
Dissolve the soap with rainwater, well water, cold boiled water, etc., and keep the concentration below 1%. Spray the solution on the leaf surface and back of diseased leaves in the morning, and don't spray it if there is no insect damage.
Soapy water tends to make the soil alkaline, so it is generally not used for watering flowers, but the insecticidal effect is not bad.
The above method is the secret recipe that Xiaon tried. Dear friends, you can choose the right method according to your flower type!
0
0
文章
莹723
2021年03月01日

Though it’s still too cold to direct sow seeds outside, there are plenty that you can start off inside in February. A propagator is ideal if you have one, though a warm, bright windowsill is fine, too.
By sowing seeds early on in the year, you can be enjoying beautiful blooms and tasty crops for a larger part of the year. The season of interest can then be extended by carrying out repeated sowings from March onwards.

Once your seeds have grown into young plants and are ready to go out outside see our guide to the best cold frames to help you harden your plants before they go in the ground.
1.Cosmos
Cosmos are easy flowers to grow and they look great in borders or meadows. Go for annuals like Cosmos bipinnatus or C. sulphureus, and choose single-flowered varieties like ‘Fizzy Pink’ to please pollinators. The seeds need light to germinate, so sow on top of seed compost in a tray, then prick out when large enough to handle.

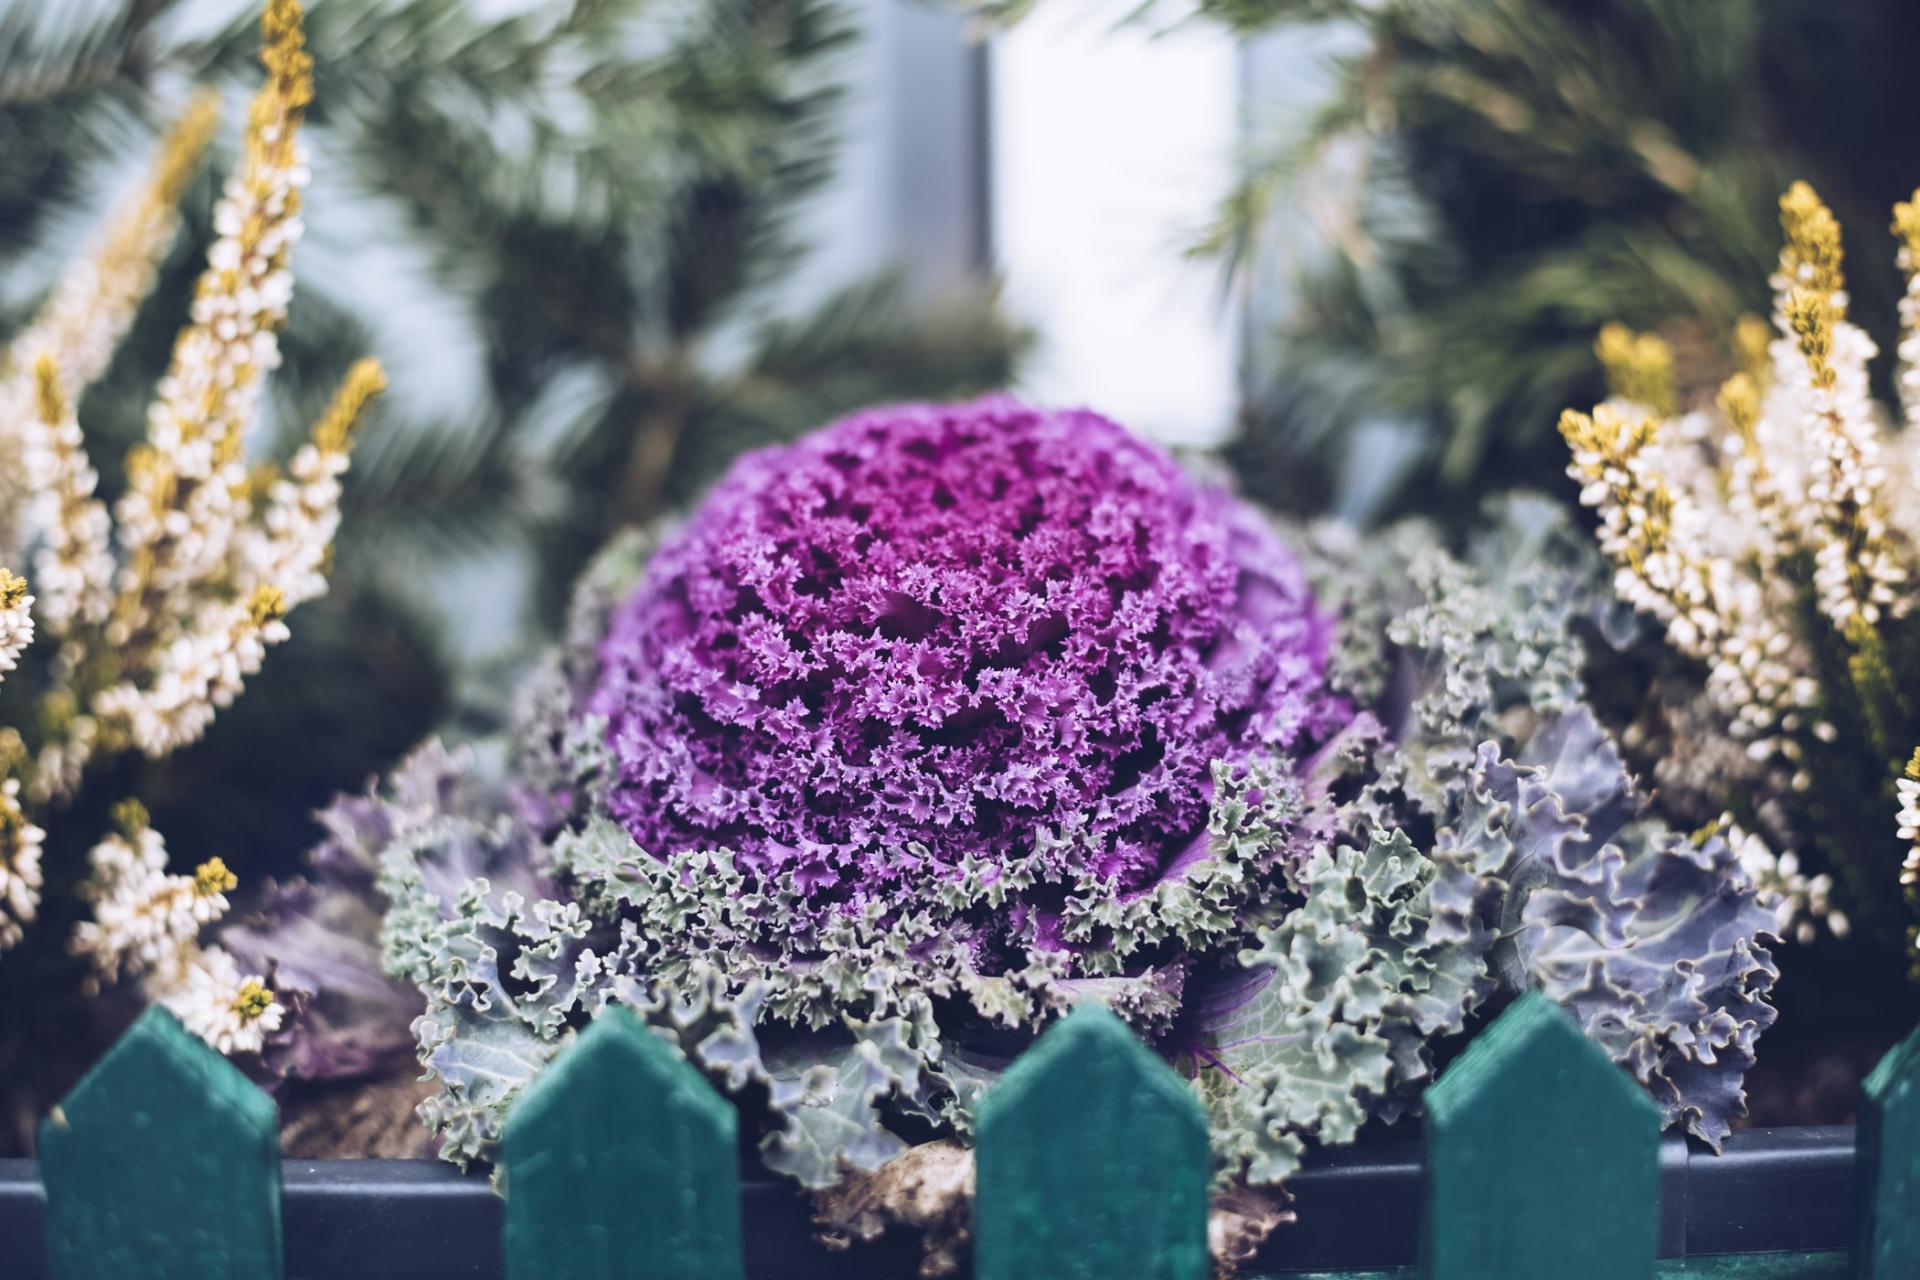
2.Kale
Red kale is very hardy, but kale seeds need to be started off indoors during winter. Sow them indoors in modules or 7cm pots, with 2-3 seeds per module, then thin to leave the healthiest seedling.
3.Sweet peas
Pink sweet pea ‘First Flame’Sweet peas provide a heady summer scent and growing them from seed couldn’t be easier. Biodegradable pots or cardboard tubes are best, as they allow the sweet peas to be planted out in their containers. Sow individually then place on a sunny windowsill, in a greenhouse, or in a heated propagator.

4.Tomatoes
Sowing tomato seeds in a tray in a propagator or on a sunny windowsill, tomatoes should germinate within two weeks. Sow tomato seeds in pots of seed compost, or in trays, and place in a heated propagator or on a warm windowsill, keeping the compost moist.

5.Salvias
Vivid blue Salvia patens, like this Salvia patens, are great for providing structure and height in the garden, and can be grown in borders or containers. Sow the seeds under cover in February, on top of seed compost. Cover the seeds with a fine layer of compost, then grow in a light, warm spot, keeping the compost moist. Other salvias you could sow in February include Salvia splendens and Salvia farinacea.

By sowing seeds early on in the year, you can be enjoying beautiful blooms and tasty crops for a larger part of the year. The season of interest can then be extended by carrying out repeated sowings from March onwards.

Once your seeds have grown into young plants and are ready to go out outside see our guide to the best cold frames to help you harden your plants before they go in the ground.
1.Cosmos
Cosmos are easy flowers to grow and they look great in borders or meadows. Go for annuals like Cosmos bipinnatus or C. sulphureus, and choose single-flowered varieties like ‘Fizzy Pink’ to please pollinators. The seeds need light to germinate, so sow on top of seed compost in a tray, then prick out when large enough to handle.

2.Kale
Red kale is very hardy, but kale seeds need to be started off indoors during winter. Sow them indoors in modules or 7cm pots, with 2-3 seeds per module, then thin to leave the healthiest seedling.

3.Sweet peas
Pink sweet pea ‘First Flame’Sweet peas provide a heady summer scent and growing them from seed couldn’t be easier. Biodegradable pots or cardboard tubes are best, as they allow the sweet peas to be planted out in their containers. Sow individually then place on a sunny windowsill, in a greenhouse, or in a heated propagator.

4.Tomatoes
Sowing tomato seeds in a tray in a propagator or on a sunny windowsill, tomatoes should germinate within two weeks. Sow tomato seeds in pots of seed compost, or in trays, and place in a heated propagator or on a warm windowsill, keeping the compost moist.

5.Salvias
Vivid blue Salvia patens, like this Salvia patens, are great for providing structure and height in the garden, and can be grown in borders or containers. Sow the seeds under cover in February, on top of seed compost. Cover the seeds with a fine layer of compost, then grow in a light, warm spot, keeping the compost moist. Other salvias you could sow in February include Salvia splendens and Salvia farinacea.

0
0
文章
莹723
2021年01月25日

These low-light varieties won't want anything to do with your already crowded windowsill.
1.Calathea
Its patterned leaves (in colors like rose, white, and yellow) makes this plant a welcome addition to any room — and too much direct light might actually fade its lovely markings.

2.Dieffenbachia
Filtered light is best for this plant. Try using a curtain as a barrier between it and the sun, especially during the the spring and summer when the plant is producing new, tender leaves.

3.Dragon Tree
Spiky leaves that grow upwards and have a red outline makes the name of this plant absolutely perfect. But direct sunlight could damage them – so give this guy some sun and some shade.

4.Spider Plants
This plant's adaptability makes it super easy to grow and therefore quite popular — it's also easy to propagate and share with others. It can stand up to a lot of neglect, and will thrive in indirect light.

5.Heart-Leaf Philodendron
The sweetheart plant (a nickname given because of the shape of its glossy leaves) can stand dim rooms, but requires pinching to prevent it from growing in long, single stems.

6.Bromeliads
Didn't expect to find a tropical plant on this list? This houseplant can actually survive on florescent light alone and thrives in humid conditions like bathrooms.

7.Peace Lily
If you often forget to water your plants, pick up one of these low-maintenance ones: It actually needs to dry out between waterings, meaning you can wait longer.

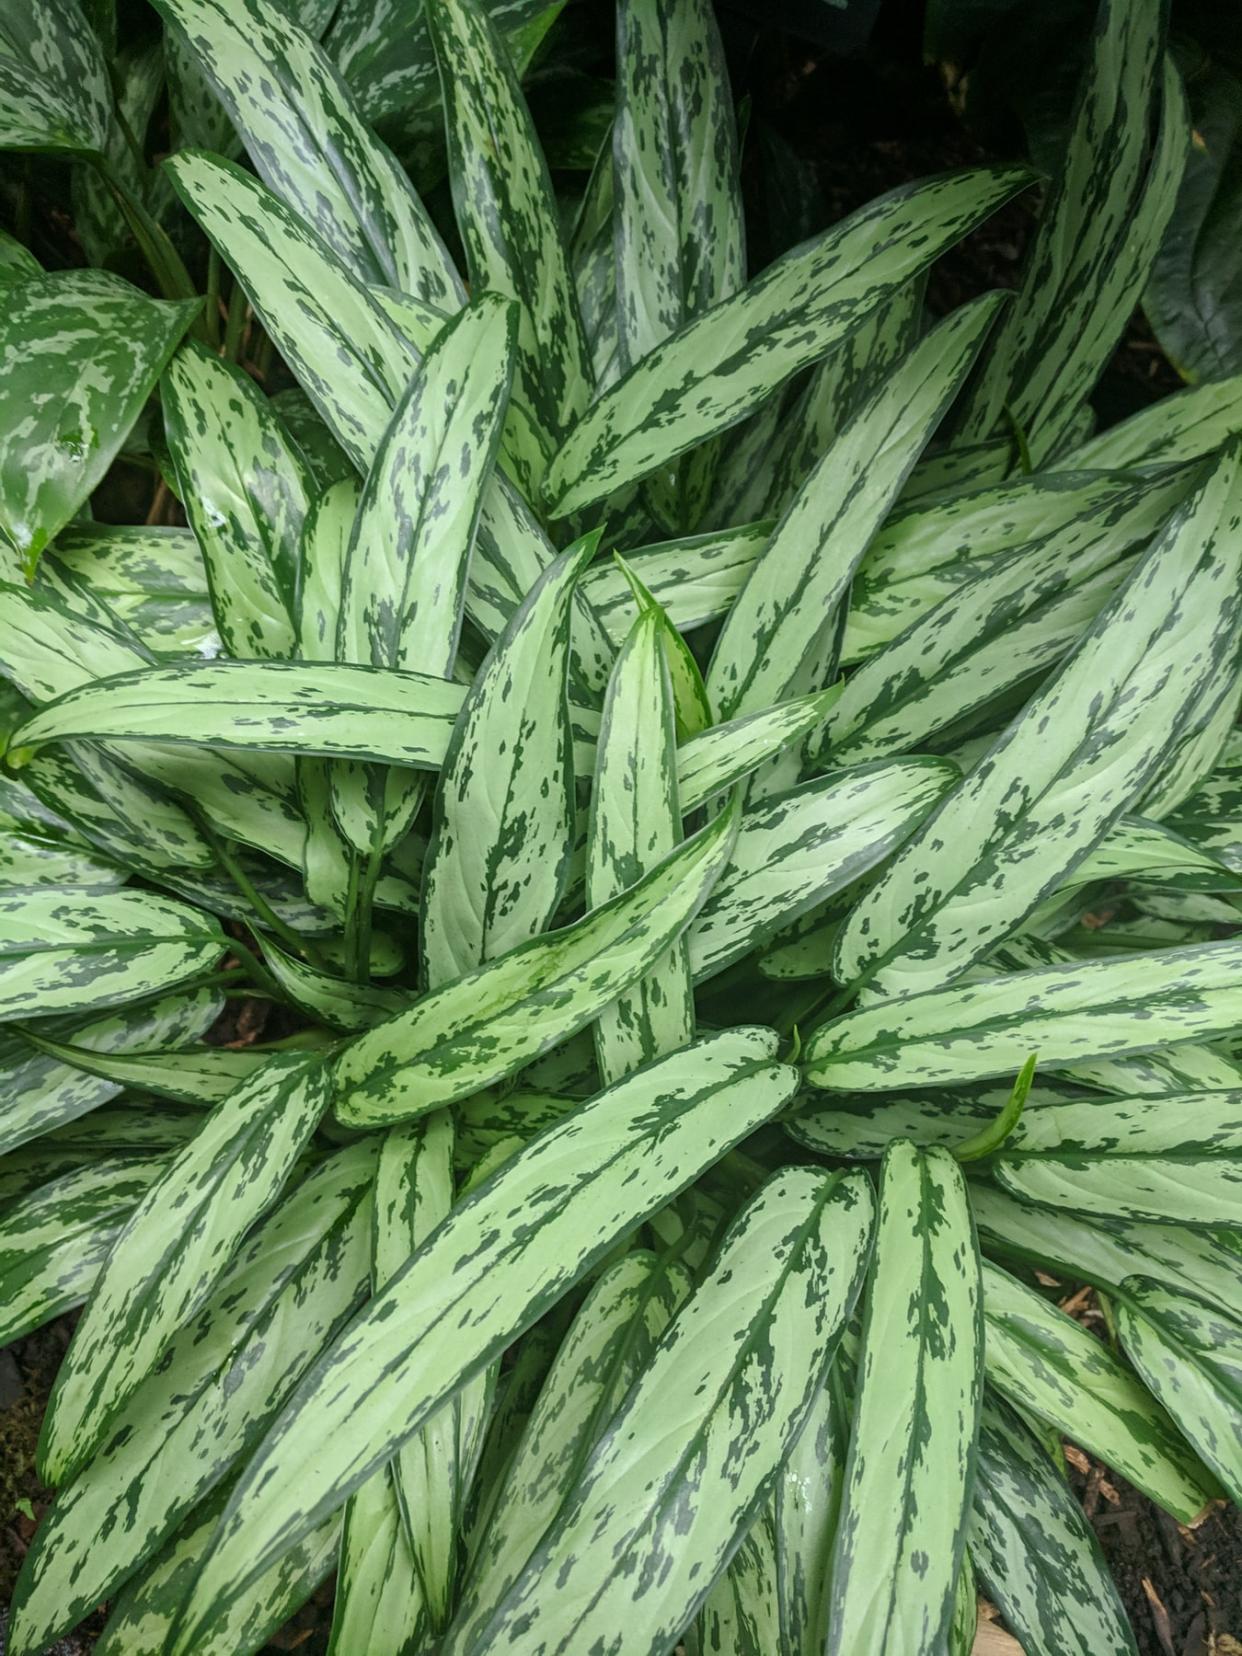
8.Chinese Evergreen
Since this plant is one of the most durable indoor plants (it does quite well in low light) and only needs to be fertilized once or twice a year, it's ideal for beginner gardeners.
9.Snake Plant
While the name is fun, this succulent is pretty tame when it comes to maintenance. More light will help it grow, but it can tolerate darkness—just watch out for root rot caused by overwatering.

10.Cast-Iron Plant
The leathery leaves on this houseplant are super tolerant not only to low light but also heat, cold, you name it. However, patience is required as it grows super slowly.

1.Calathea
Its patterned leaves (in colors like rose, white, and yellow) makes this plant a welcome addition to any room — and too much direct light might actually fade its lovely markings.

2.Dieffenbachia
Filtered light is best for this plant. Try using a curtain as a barrier between it and the sun, especially during the the spring and summer when the plant is producing new, tender leaves.

3.Dragon Tree
Spiky leaves that grow upwards and have a red outline makes the name of this plant absolutely perfect. But direct sunlight could damage them – so give this guy some sun and some shade.

4.Spider Plants
This plant's adaptability makes it super easy to grow and therefore quite popular — it's also easy to propagate and share with others. It can stand up to a lot of neglect, and will thrive in indirect light.

5.Heart-Leaf Philodendron
The sweetheart plant (a nickname given because of the shape of its glossy leaves) can stand dim rooms, but requires pinching to prevent it from growing in long, single stems.

6.Bromeliads
Didn't expect to find a tropical plant on this list? This houseplant can actually survive on florescent light alone and thrives in humid conditions like bathrooms.

7.Peace Lily
If you often forget to water your plants, pick up one of these low-maintenance ones: It actually needs to dry out between waterings, meaning you can wait longer.

8.Chinese Evergreen
Since this plant is one of the most durable indoor plants (it does quite well in low light) and only needs to be fertilized once or twice a year, it's ideal for beginner gardeners.

9.Snake Plant
While the name is fun, this succulent is pretty tame when it comes to maintenance. More light will help it grow, but it can tolerate darkness—just watch out for root rot caused by overwatering.

10.Cast-Iron Plant
The leathery leaves on this houseplant are super tolerant not only to low light but also heat, cold, you name it. However, patience is required as it grows super slowly.

1
0
文章
ritau
2020年08月20日

Succulents are cute, versatile plants that can thrive both indoors and out! They make perfect indoor houseplants for small spaces, provided that you have a sunny windowsill. Get your set-up ready first by choosing a type of succulent, a well-drained container, and a well-draining soil. Then carefully pot your succulent in its new home as soon as possible to help it thrive. Care for your succulent by providing it with plenty of sunlight and a bit of water whenever the soil feels dry.
1. Choose a Zebra Plant or Gollum Jade succulent if you’re a beginner. While succulents are relatively easy to grow indoors, some varieties are easier than others! Stick to the Haworthia, Jade, or Gasteria varieties if you are unsure about what types to start with. All of these types are relatively drought-resistant and tend to grow well in indoor environments.
-If you’re in doubt about what sort of succulent to choose, pick one with green leaves such as agave or aloe. Succulents with green leaves tend to be the most forgiving and grow best indoors, compared to the purple, grey, or orange-leaved varieties.
-Zebra Plants have glossy green leaves with silver veins, creating a zebra-like appearance. They also have bright yellow flowers when they bloom.
-Gollum Jade succulents have green, tube-shaped leaves with red tips. Small white flowers form in winter.
2. Choose a pot slightly larger than your succulent, and make sure it has draining holes. You’ll find a wide variety of different terra-cotta pots available at your local gardening center! Pick a container that is just a bit bigger than the succulent to start with. Terra-cotta pots are ideal because they’re breathable, dry well, and draw water away from the soil. You can also choose a ceramic, metal, or plastic pot if you prefer, provided that it has good drainage.
-Holes for water drainage are essential, as succulents need to dry out their roots in order to survive. The roots will begin to rot otherwise.
-Succulents tend to grow as big as the pot they’re in.
-Glass pots don’t tend to work well for succulents, as there usually aren’t drainage holes.
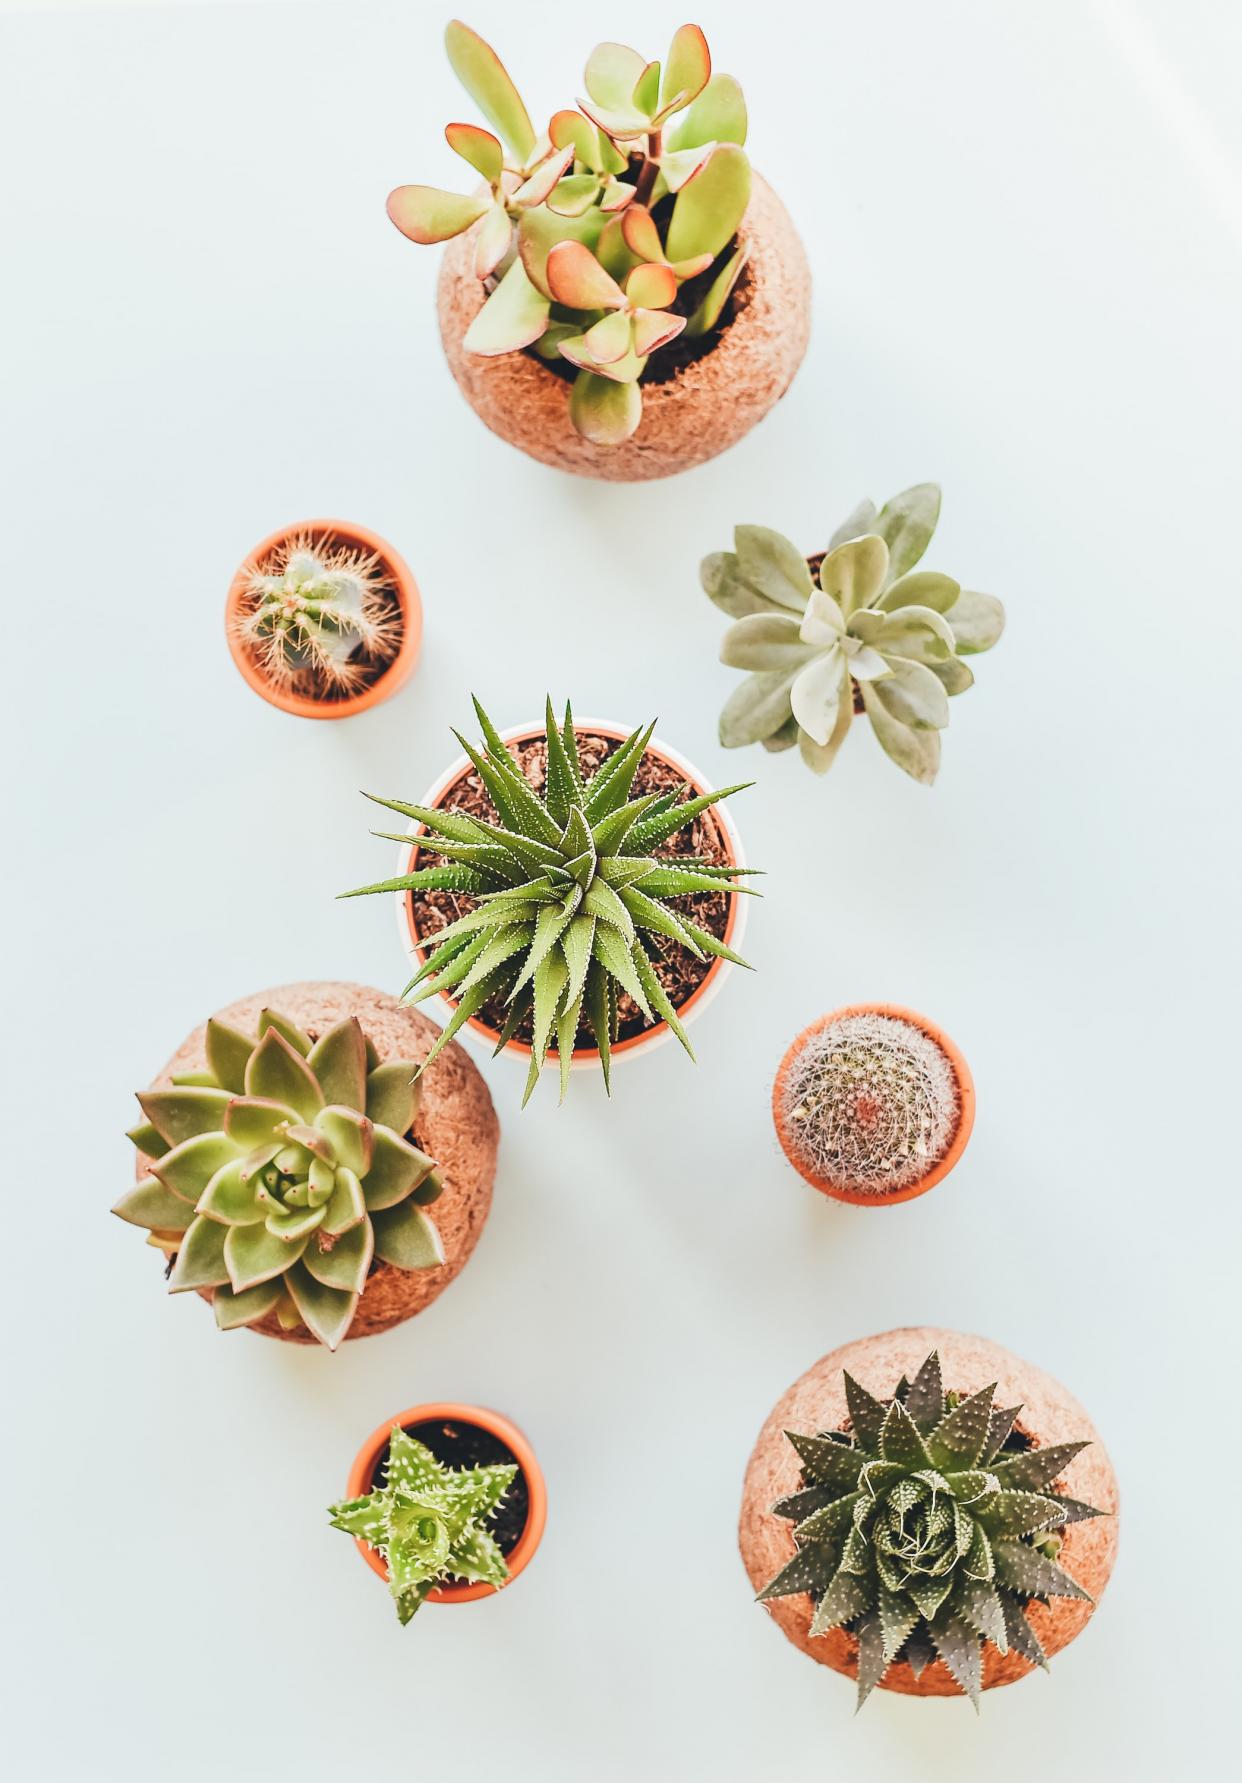
3. Pick a soil with 1⁄4 in (0.64 cm) particles to provide the best drainage. Succulents thrive in soils that drain well, so you need to pick a loosely compacted soil that will draw the water away. You can either choose a specialty succulent soil such as a cactus mix or make your own succulent-friendly soil. Simply mix 4 parts of regular gardening soil with 1 part of pumice, perlite, or turface to create a gritty, chunky mix.
-Crushed lava is also a good option.
4. Remove the succulent from the nursery pot within 24 hours of getting it. Succulents are often sold in small, plastic pots with very poorly drained soil. In order for your succulent to thrive, it needs to get out of that soil as soon as possible! Squeeze the plastic pot and gently pull the succulent upwards to remove it. If the succulent feels stuck, use scissors to cut the plastic pot away from the roots.
5. Suspend the succulent in the new pot as you fill it with soil. Succulent roots tend to be quite shallow and brittle, so do your best to protect these as you go about planting. Gently fill the sides of the pot with the soil, being careful not to damage the roots. Continue supporting the succulent until the pot is full and the succulent feels secure.
- If you're having trouble getting the soil around the roots, use your fingers to push and arrange the soil.
6. Space the succulents apart if you're planting more than 1 in a pot. Succulents don’t mind sharing a pot as long as each plant has breathing space. Leave a gap that's approximately 3–4 in (7.6–10.2 cm) between each succulent to ensure that the air can flow well and that each plant gets plenty of light.
-Outdoor succulents are fine being clumped close together because there is greater light and air flow in outdoor environments.
-Succulents naturally grow in warm, arid climates, which is why they require good air circulation to survive.
7. Keep the succulent in a bright spot with at least 6 hours of sun per day. Generally, indoor succulents love bright light and will thrive. Place the succulent on a sunny south or west-facing windowsill to ensure that it gets plenty of sun. It's okay if the succulent doesn't get full sun all day long, provided that it gets a minimum of 6 hours.
-If you notice the leaves are getting scorched, try using a sheer curtain to provide the succulent with a bit of protection.
8. Get a pitcher, watering can, or pipette to water the succulent. Succulents do best when the water is delivered directly to the soil rather than drenched over the whole plant. Find a tool that works for the size of your succulent. For example, pitchers or watering cans are good for larger succulents, while pipettes are best for very young or small plants.
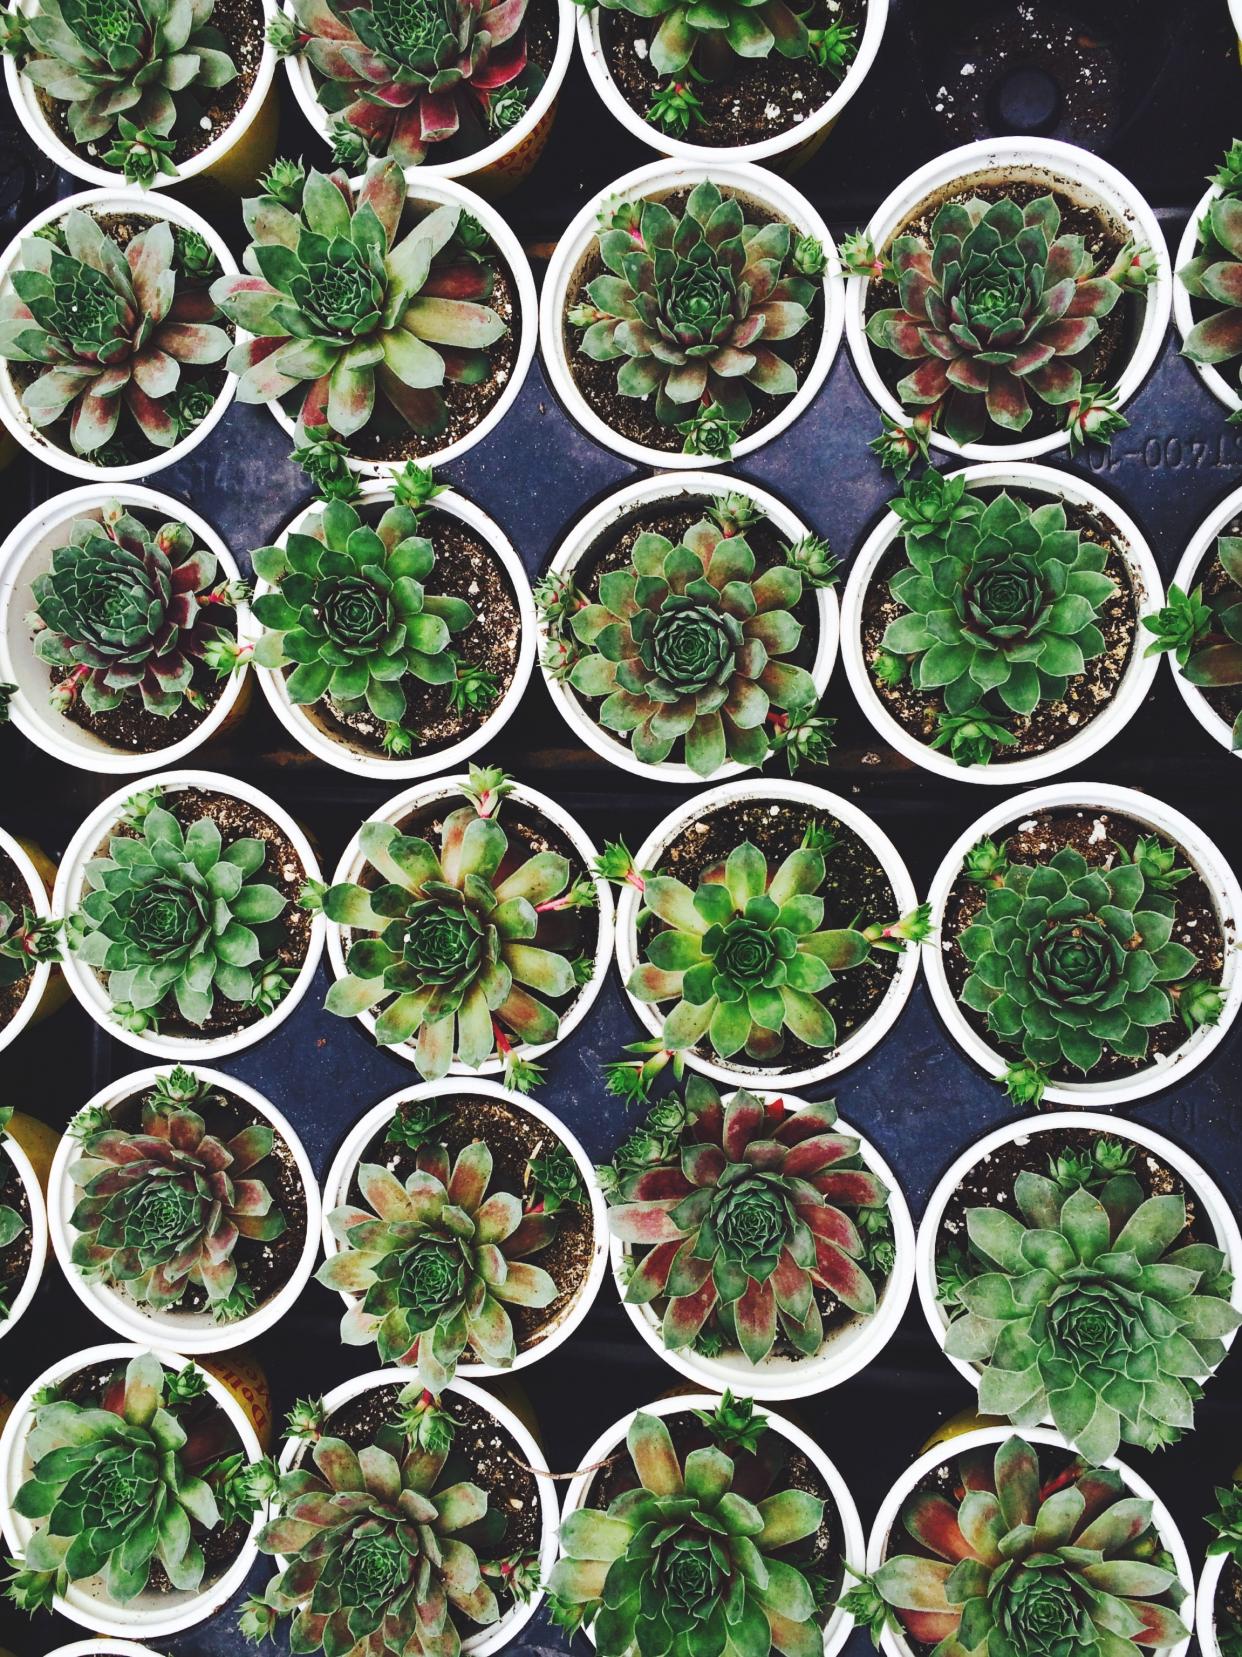
9. Give the succulent water every 1-3 weeks, whenever the soil feels dry. The easiest way to kill an indoor succulent is by overwatering! Feel the soil every 3-4 days to check the moisture level. Only water the succulent when the water feels completely dry and never when it’s damp or wet.
-How often you need to water your succulent depends on the variety, the climate, and the size of the plant. When you first get the plant, check the moisture level regularly until you work out what frequency is best.
10. Water the succulent until you see water exiting the drainage holes. Hold the pot over a sink while you water it and keep an eye on the water flow. Use the pitcher, watering can, or pipette to add water directly into the soil and stop the flow immediately when you see the water leaving the container.
1. Choose a Zebra Plant or Gollum Jade succulent if you’re a beginner. While succulents are relatively easy to grow indoors, some varieties are easier than others! Stick to the Haworthia, Jade, or Gasteria varieties if you are unsure about what types to start with. All of these types are relatively drought-resistant and tend to grow well in indoor environments.
-If you’re in doubt about what sort of succulent to choose, pick one with green leaves such as agave or aloe. Succulents with green leaves tend to be the most forgiving and grow best indoors, compared to the purple, grey, or orange-leaved varieties.
-Zebra Plants have glossy green leaves with silver veins, creating a zebra-like appearance. They also have bright yellow flowers when they bloom.
-Gollum Jade succulents have green, tube-shaped leaves with red tips. Small white flowers form in winter.
2. Choose a pot slightly larger than your succulent, and make sure it has draining holes. You’ll find a wide variety of different terra-cotta pots available at your local gardening center! Pick a container that is just a bit bigger than the succulent to start with. Terra-cotta pots are ideal because they’re breathable, dry well, and draw water away from the soil. You can also choose a ceramic, metal, or plastic pot if you prefer, provided that it has good drainage.
-Holes for water drainage are essential, as succulents need to dry out their roots in order to survive. The roots will begin to rot otherwise.
-Succulents tend to grow as big as the pot they’re in.
-Glass pots don’t tend to work well for succulents, as there usually aren’t drainage holes.

3. Pick a soil with 1⁄4 in (0.64 cm) particles to provide the best drainage. Succulents thrive in soils that drain well, so you need to pick a loosely compacted soil that will draw the water away. You can either choose a specialty succulent soil such as a cactus mix or make your own succulent-friendly soil. Simply mix 4 parts of regular gardening soil with 1 part of pumice, perlite, or turface to create a gritty, chunky mix.
-Crushed lava is also a good option.
4. Remove the succulent from the nursery pot within 24 hours of getting it. Succulents are often sold in small, plastic pots with very poorly drained soil. In order for your succulent to thrive, it needs to get out of that soil as soon as possible! Squeeze the plastic pot and gently pull the succulent upwards to remove it. If the succulent feels stuck, use scissors to cut the plastic pot away from the roots.
5. Suspend the succulent in the new pot as you fill it with soil. Succulent roots tend to be quite shallow and brittle, so do your best to protect these as you go about planting. Gently fill the sides of the pot with the soil, being careful not to damage the roots. Continue supporting the succulent until the pot is full and the succulent feels secure.
- If you're having trouble getting the soil around the roots, use your fingers to push and arrange the soil.
6. Space the succulents apart if you're planting more than 1 in a pot. Succulents don’t mind sharing a pot as long as each plant has breathing space. Leave a gap that's approximately 3–4 in (7.6–10.2 cm) between each succulent to ensure that the air can flow well and that each plant gets plenty of light.
-Outdoor succulents are fine being clumped close together because there is greater light and air flow in outdoor environments.
-Succulents naturally grow in warm, arid climates, which is why they require good air circulation to survive.
7. Keep the succulent in a bright spot with at least 6 hours of sun per day. Generally, indoor succulents love bright light and will thrive. Place the succulent on a sunny south or west-facing windowsill to ensure that it gets plenty of sun. It's okay if the succulent doesn't get full sun all day long, provided that it gets a minimum of 6 hours.
-If you notice the leaves are getting scorched, try using a sheer curtain to provide the succulent with a bit of protection.
8. Get a pitcher, watering can, or pipette to water the succulent. Succulents do best when the water is delivered directly to the soil rather than drenched over the whole plant. Find a tool that works for the size of your succulent. For example, pitchers or watering cans are good for larger succulents, while pipettes are best for very young or small plants.

9. Give the succulent water every 1-3 weeks, whenever the soil feels dry. The easiest way to kill an indoor succulent is by overwatering! Feel the soil every 3-4 days to check the moisture level. Only water the succulent when the water feels completely dry and never when it’s damp or wet.
-How often you need to water your succulent depends on the variety, the climate, and the size of the plant. When you first get the plant, check the moisture level regularly until you work out what frequency is best.
10. Water the succulent until you see water exiting the drainage holes. Hold the pot over a sink while you water it and keep an eye on the water flow. Use the pitcher, watering can, or pipette to add water directly into the soil and stop the flow immediately when you see the water leaving the container.
0
0
文章
Dummer. ゛☀
2017年10月02日

Salads and sautés are probably not the first things that come to mind when you see the succulent adorning your windowsill. But did you know that a lot of common succulents can also be healthy and delicious additions to your dinner plate?
Here are seven succulents that do double duty as garden adornments and nutritional powerhouses.

1. Saguaro
Ubiquitous in the backdrop of every old Western movie, the massive saguaro serves as more than a desert decoration. The night-blooming white flowers, which are the state flower of Arizona, produce greenish-pink fruit that contains bright red, slightly sweet pulp and small black seeds that give it a nutty flavor. The Tohono O’odham tribe of Arizona and Mexico has long used the fruit to make everything from jams and syrups to ceremonial wines.
How to Eat It: Chop the juicy pulp into salsa or even bake them into biscuits.
Health Benefits: Saguaro fruit is high in fiber, vitamin C, and B12.

2. Opuntia
You’ve probably seen these on the menu of Mexican restaurants as “nopales”. They have a mild, neutral flavor similar to green beans, and a slightly chewy texture. Its fruit, called “tuna” in Mexico, but commonly known as the prickly pear stateside, tastes like a combination of bubblegum and watermelon.
How to Eat It: Opuntia has flat, oval leaves that can be boiled or grilled and used in salads, soups, salsas, and tacos. The fruit can be peeled, sliced, and eaten raw or juiced.
Health Benefits: The leaves are packed with fiber and calcium and just 23 calories per cup. The fruit is also low in calories and high in vitamin C.

3. Stonecrops
These flowering succulents, also known as Sedums, encompass up to 600 species of plants. Their leaves have a mild peppery, bitter flavor, and are a flavorful addition to salads and stir-frys. Be sure to eat them in moderation, however, because large quantities can cause stomach upset.
How to Eat It: Its bitterness can be mellowed out by sautéing. Red flowering sedum leaves, stems, and tubers are safe to eat raw in salads, but yellow flowering sedums have a mild toxicity and need to be cooked.
Health Benefits: They’re believed to relieve coughs and lower blood pressure, and they can be applied to the skin to relieve burns, cuts, hemorrhoids, and eczema, although there isn’t any research yet to back these claims.
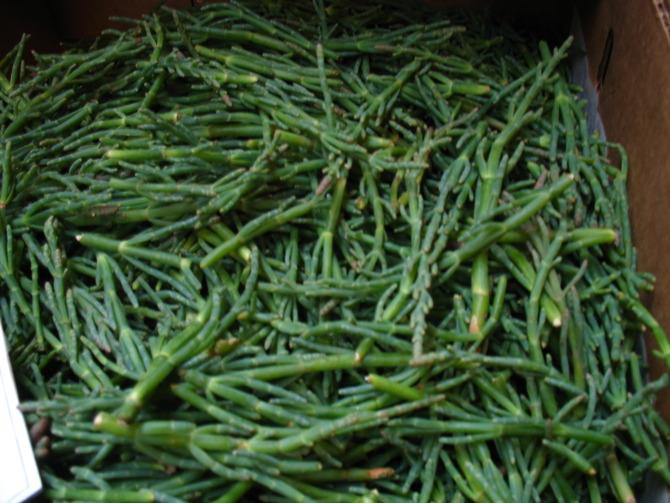
4. Sea Beans
Salicornia, or Sea Beans, are a succulent that grows on salt marshes and sandy beaches. They are gaining popularity amongst gourmet chefs and popping up in more grocery stores across the country.
How to Eat It: These “beans” can be eaten raw or pan-fried and have a flavor and texture similar to asparagus. A quick blanch can mellow out the intense sea salt flavor.
Health Benefits: High in protein, calcium, iron, and iodine.

5. Dragon Fruit
Who knew that the candy-colored dragon fruit, or pitaya, came from a cactus? These bright pink fruits come from a night-blooming cactus commonly known as the Queen of the Night. Despite their flashy appearance, their flavor is very mild—many compare it to a bland, slightly sweet melon or kiwi.
How to Eat It: Simply slice it open, scoop out the white pulp, and eat, or add it to smoothies and shakes.
Health Benefits: What it lacks in intense flavor, it makes up for in nutritional content. It’s low in calories and high in protein, fiber, vitamin C, iron, and calcium.
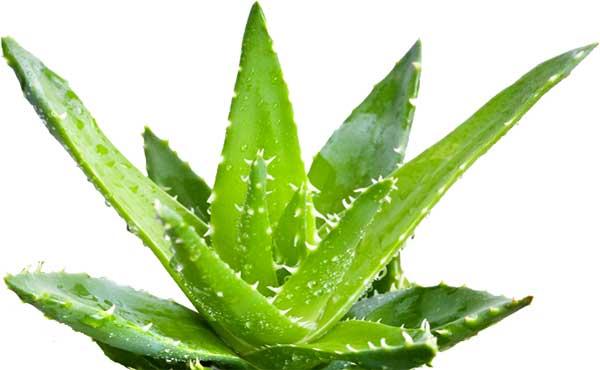
6. Aloe
You already know about this spiny succulent’s applications in treating burns, rashes, and minor cuts and scrapes, but its benefits extend much further.
How to Eat It: Peel away the tough, bitter outer leaf and blend the translucent inner part into drinks and smoothies, chop it into salads, or poach slices in water to get rid of the slimy texture.
Health Benefits: Scientists have identified over 75 phytochemicals in Aloe including high levels of antioxidants, vitamins B1, B2, B6, C, E, and folic acid. There’s also evidence that it can relieve constipation. However, large amounts can potentially be bad for your kidneys, so eat in moderation.
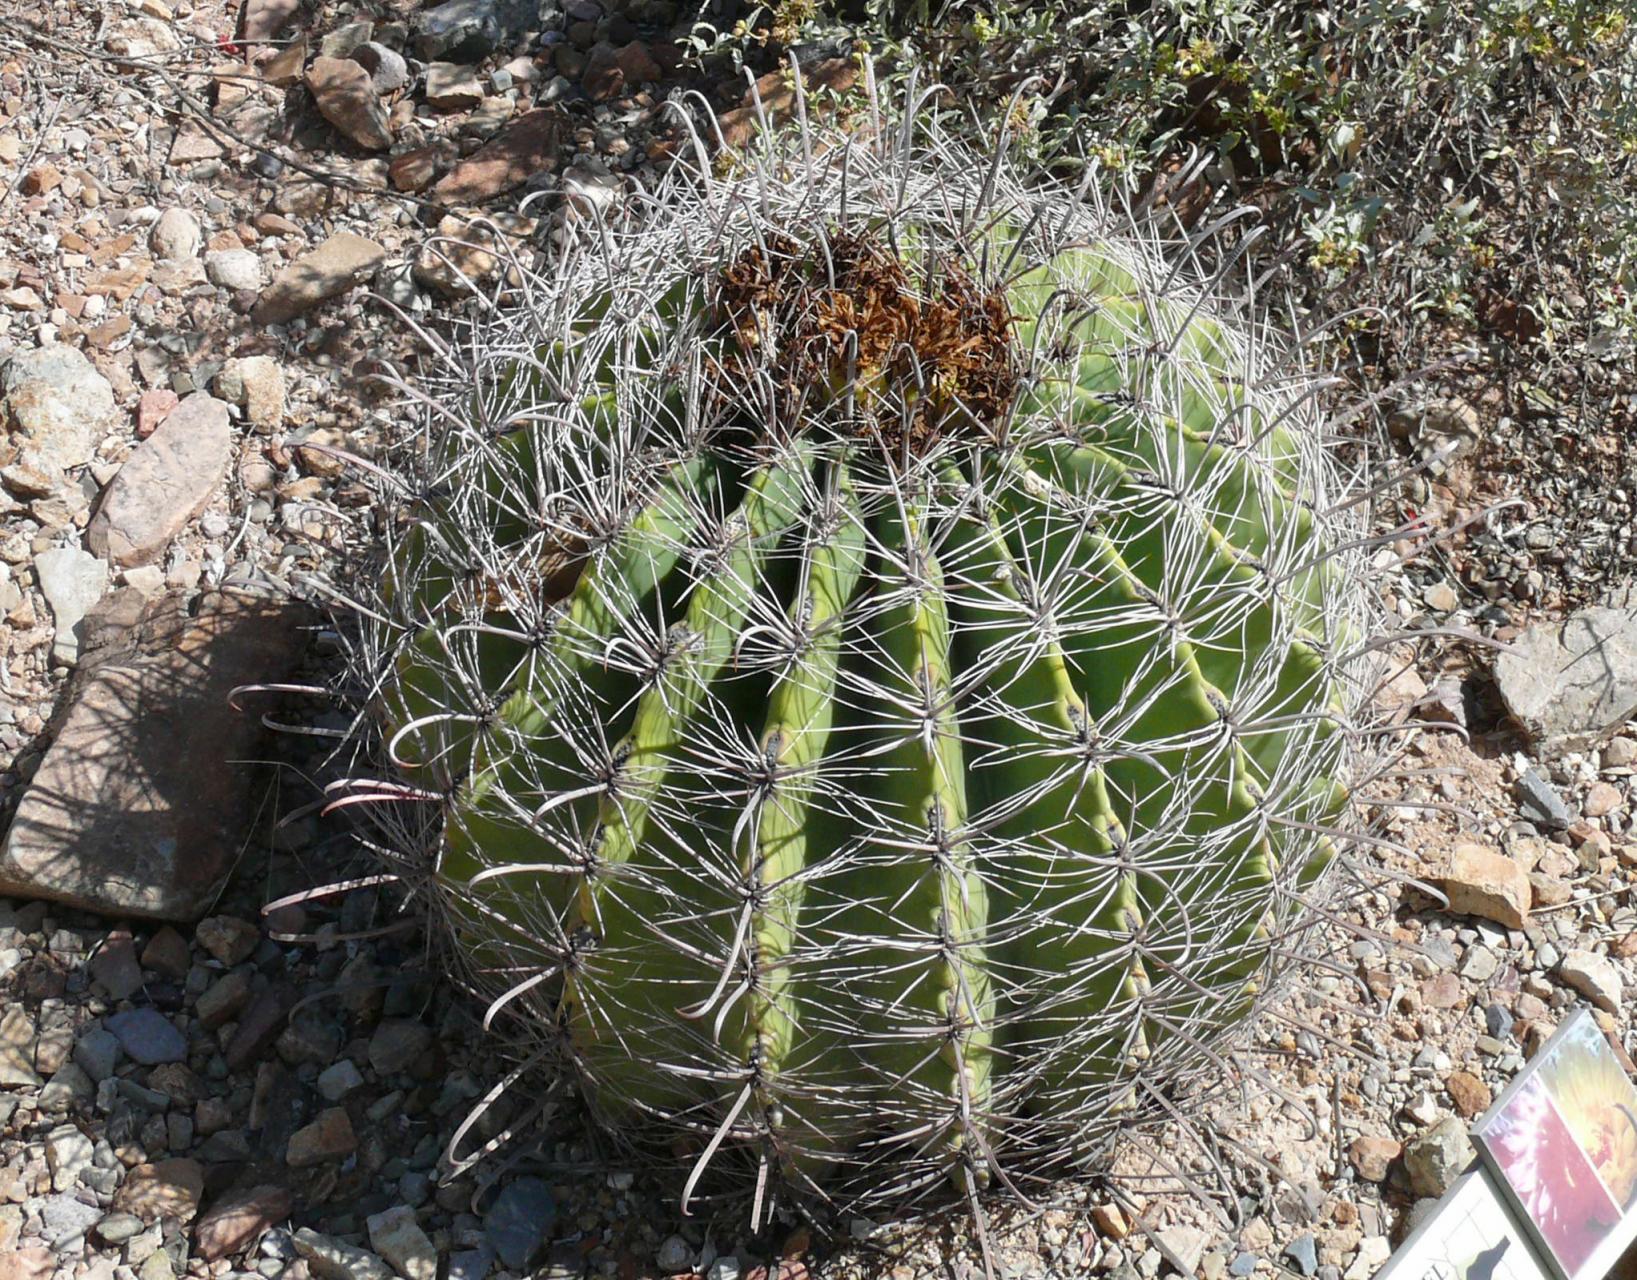
7. Ferocactus (Barrel Cactus)
The large, hard spines on this Southwestern American succulent make it look more like a menace than a tasty treat, but it’s completely edible. Its bright red flowers wilt to produce yellow fruit that resembles a miniature pineapple. Native Americans traditionally ate the flowers and even the flesh of the plant itself, but they’re not very palatable (but useful if you ever get lost in the desert!).
How to Eat It: The fruit has a slightly slimy pulp with edible black seeds, and can be picked right off the cactus and eaten raw. Its flavor is slightly tart and reminiscent of lemon and kiwi.
Health Benefits: Cactus fruits are high in vitamins A and C.
Here are seven succulents that do double duty as garden adornments and nutritional powerhouses.

1. Saguaro
Ubiquitous in the backdrop of every old Western movie, the massive saguaro serves as more than a desert decoration. The night-blooming white flowers, which are the state flower of Arizona, produce greenish-pink fruit that contains bright red, slightly sweet pulp and small black seeds that give it a nutty flavor. The Tohono O’odham tribe of Arizona and Mexico has long used the fruit to make everything from jams and syrups to ceremonial wines.
How to Eat It: Chop the juicy pulp into salsa or even bake them into biscuits.
Health Benefits: Saguaro fruit is high in fiber, vitamin C, and B12.

2. Opuntia
You’ve probably seen these on the menu of Mexican restaurants as “nopales”. They have a mild, neutral flavor similar to green beans, and a slightly chewy texture. Its fruit, called “tuna” in Mexico, but commonly known as the prickly pear stateside, tastes like a combination of bubblegum and watermelon.
How to Eat It: Opuntia has flat, oval leaves that can be boiled or grilled and used in salads, soups, salsas, and tacos. The fruit can be peeled, sliced, and eaten raw or juiced.
Health Benefits: The leaves are packed with fiber and calcium and just 23 calories per cup. The fruit is also low in calories and high in vitamin C.

3. Stonecrops
These flowering succulents, also known as Sedums, encompass up to 600 species of plants. Their leaves have a mild peppery, bitter flavor, and are a flavorful addition to salads and stir-frys. Be sure to eat them in moderation, however, because large quantities can cause stomach upset.
How to Eat It: Its bitterness can be mellowed out by sautéing. Red flowering sedum leaves, stems, and tubers are safe to eat raw in salads, but yellow flowering sedums have a mild toxicity and need to be cooked.
Health Benefits: They’re believed to relieve coughs and lower blood pressure, and they can be applied to the skin to relieve burns, cuts, hemorrhoids, and eczema, although there isn’t any research yet to back these claims.

4. Sea Beans
Salicornia, or Sea Beans, are a succulent that grows on salt marshes and sandy beaches. They are gaining popularity amongst gourmet chefs and popping up in more grocery stores across the country.
How to Eat It: These “beans” can be eaten raw or pan-fried and have a flavor and texture similar to asparagus. A quick blanch can mellow out the intense sea salt flavor.
Health Benefits: High in protein, calcium, iron, and iodine.

5. Dragon Fruit
Who knew that the candy-colored dragon fruit, or pitaya, came from a cactus? These bright pink fruits come from a night-blooming cactus commonly known as the Queen of the Night. Despite their flashy appearance, their flavor is very mild—many compare it to a bland, slightly sweet melon or kiwi.
How to Eat It: Simply slice it open, scoop out the white pulp, and eat, or add it to smoothies and shakes.
Health Benefits: What it lacks in intense flavor, it makes up for in nutritional content. It’s low in calories and high in protein, fiber, vitamin C, iron, and calcium.

6. Aloe
You already know about this spiny succulent’s applications in treating burns, rashes, and minor cuts and scrapes, but its benefits extend much further.
How to Eat It: Peel away the tough, bitter outer leaf and blend the translucent inner part into drinks and smoothies, chop it into salads, or poach slices in water to get rid of the slimy texture.
Health Benefits: Scientists have identified over 75 phytochemicals in Aloe including high levels of antioxidants, vitamins B1, B2, B6, C, E, and folic acid. There’s also evidence that it can relieve constipation. However, large amounts can potentially be bad for your kidneys, so eat in moderation.

7. Ferocactus (Barrel Cactus)
The large, hard spines on this Southwestern American succulent make it look more like a menace than a tasty treat, but it’s completely edible. Its bright red flowers wilt to produce yellow fruit that resembles a miniature pineapple. Native Americans traditionally ate the flowers and even the flesh of the plant itself, but they’re not very palatable (but useful if you ever get lost in the desert!).
How to Eat It: The fruit has a slightly slimy pulp with edible black seeds, and can be picked right off the cactus and eaten raw. Its flavor is slightly tart and reminiscent of lemon and kiwi.
Health Benefits: Cactus fruits are high in vitamins A and C.
1
1
文章
Dummer. ゛☀
2017年10月01日

Salads and sautés are probably not the first things that come to mind when you see the succulent adorning your windowsill. But did you know that a lot of common succulents can also be healthy and delicious additions to your dinner plate?
Here are seven succulents that do double duty as garden adornments and nutritional powerhouses.
1. Saguaro
Ubiquitous in the backdrop of every old Western movie, the massive saguaro serves as more than a desert decoration. The night-blooming white flowers, which are the state flower of Arizona, produce greenish-pink fruit that contains bright red, slightly sweet pulp and small black seeds that give it a nutty flavor. The Tohono O’odham tribe of Arizona and Mexico has long used the fruit to make everything from jams and syrups to ceremonial wines.
How to Eat It: Chop the juicy pulp into salsa or even bake them into biscuits.
Health Benefits: Saguaro fruit is high in fiber, vitamin C, and B12.
2. Opuntia
You’ve probably seen these on the menu of Mexican restaurants as “nopales”. They have a mild, neutral flavor similar to green beans, and a slightly chewy texture. Its fruit, called “tuna” in Mexico, but commonly known as the prickly pear stateside, tastes like a combination of bubblegum and watermelon.
How to Eat It: Opuntia has flat, oval leaves that can be boiled or grilled and used in salads, soups, salsas, and tacos. The fruit can be peeled, sliced, and eaten raw or juiced.
Health Benefits: The leaves are packed with fiber and calcium and just 23 calories per cup. The fruit is also low in calories and high in vitamin C.
3. Stonecrops
These flowering succulents, also known as Sedums, encompass up to 600 species of plants. Their leaves have a mild peppery, bitter flavor, and are a flavorful addition to salads and stir-frys. Be sure to eat them in moderation, however, because large quantities can cause stomach upset.
How to Eat It: Its bitterness can be mellowed out by sautéing. Red flowering sedum leaves, stems, and tubers are safe to eat raw in salads, but yellow flowering sedums have a mild toxicity and need to be cooked.
Health Benefits: They’re believed to relieve coughs and lower blood pressure, and they can be applied to the skin to relieve burns, cuts, hemorrhoids, and eczema, although there isn’t any research yet to back these claims.
4. Sea Beans
Salicornia, or Sea Beans, are a succulent that grows on salt marshes and sandy beaches. They are gaining popularity amongst gourmet chefs and popping up in more grocery stores across the country.
How to Eat It: These “beans” can be eaten raw or pan-fried and have a flavor and texture similar to asparagus. A quick blanch can mellow out the intense sea salt flavor.
Health Benefits: High in protein, calcium, iron, and iodine.
5. Dragon Fruit
Who knew that the candy-colored dragon fruit, or pitaya, came from a cactus? These bright pink fruits come from a night-blooming cactus commonly known as the Queen of the Night. Despite their flashy appearance, their flavor is very mild—many compare it to a bland, slightly sweet melon or kiwi.
How to Eat It: Simply slice it open, scoop out the white pulp, and eat, or add it to smoothies and shakes.
Health Benefits: What it lacks in intense flavor, it makes up for in nutritional content. It’s low in calories and high in protein, fiber, vitamin C, iron, and calcium.
6. Aloe
You already know about this spiny succulent’s applications in treating burns, rashes, and minor cuts and scrapes, but its benefits extend much further.
How to Eat It: Peel away the tough, bitter outer leaf and blend the translucent inner part into drinks and smoothies, chop it into salads, or poach slices in water to get rid of the slimy texture.
Health Benefits: Scientists have identified over 75 phytochemicals in Aloe including high levels of antioxidants, vitamins B1, B2, B6, C, E, and folic acid. There’s also evidence that it can relieve constipation. However, large amounts can potentially be bad for your kidneys, so eat in moderation.
7. Ferocactus (Barrel Cactus)
The large, hard spines on this Southwestern American succulent make it look more like a menace than a tasty treat, but it’s completely edible. Its bright red flowers wilt to produce yellow fruit that resembles a miniature pineapple. Native Americans traditionally ate the flowers and even the flesh of the plant itself, but they’re not very palatable (but useful if you ever get lost in the desert!).
How to Eat It: The fruit has a slightly slimy pulp with edible black seeds, and can be picked right off the cactus and eaten raw. Its flavor is slightly tart and reminiscent of lemon and kiwi.
Health Benefits: Cactus fruits are high in vitamins A and C.

Here are seven succulents that do double duty as garden adornments and nutritional powerhouses.
1. Saguaro
Ubiquitous in the backdrop of every old Western movie, the massive saguaro serves as more than a desert decoration. The night-blooming white flowers, which are the state flower of Arizona, produce greenish-pink fruit that contains bright red, slightly sweet pulp and small black seeds that give it a nutty flavor. The Tohono O’odham tribe of Arizona and Mexico has long used the fruit to make everything from jams and syrups to ceremonial wines.

How to Eat It: Chop the juicy pulp into salsa or even bake them into biscuits.
Health Benefits: Saguaro fruit is high in fiber, vitamin C, and B12.
2. Opuntia
You’ve probably seen these on the menu of Mexican restaurants as “nopales”. They have a mild, neutral flavor similar to green beans, and a slightly chewy texture. Its fruit, called “tuna” in Mexico, but commonly known as the prickly pear stateside, tastes like a combination of bubblegum and watermelon.

How to Eat It: Opuntia has flat, oval leaves that can be boiled or grilled and used in salads, soups, salsas, and tacos. The fruit can be peeled, sliced, and eaten raw or juiced.
Health Benefits: The leaves are packed with fiber and calcium and just 23 calories per cup. The fruit is also low in calories and high in vitamin C.
3. Stonecrops
These flowering succulents, also known as Sedums, encompass up to 600 species of plants. Their leaves have a mild peppery, bitter flavor, and are a flavorful addition to salads and stir-frys. Be sure to eat them in moderation, however, because large quantities can cause stomach upset.

How to Eat It: Its bitterness can be mellowed out by sautéing. Red flowering sedum leaves, stems, and tubers are safe to eat raw in salads, but yellow flowering sedums have a mild toxicity and need to be cooked.
Health Benefits: They’re believed to relieve coughs and lower blood pressure, and they can be applied to the skin to relieve burns, cuts, hemorrhoids, and eczema, although there isn’t any research yet to back these claims.

4. Sea Beans
Salicornia, or Sea Beans, are a succulent that grows on salt marshes and sandy beaches. They are gaining popularity amongst gourmet chefs and popping up in more grocery stores across the country.
How to Eat It: These “beans” can be eaten raw or pan-fried and have a flavor and texture similar to asparagus. A quick blanch can mellow out the intense sea salt flavor.
Health Benefits: High in protein, calcium, iron, and iodine.
5. Dragon Fruit
Who knew that the candy-colored dragon fruit, or pitaya, came from a cactus? These bright pink fruits come from a night-blooming cactus commonly known as the Queen of the Night. Despite their flashy appearance, their flavor is very mild—many compare it to a bland, slightly sweet melon or kiwi.
How to Eat It: Simply slice it open, scoop out the white pulp, and eat, or add it to smoothies and shakes.

Health Benefits: What it lacks in intense flavor, it makes up for in nutritional content. It’s low in calories and high in protein, fiber, vitamin C, iron, and calcium.
6. Aloe
You already know about this spiny succulent’s applications in treating burns, rashes, and minor cuts and scrapes, but its benefits extend much further.
How to Eat It: Peel away the tough, bitter outer leaf and blend the translucent inner part into drinks and smoothies, chop it into salads, or poach slices in water to get rid of the slimy texture.
Health Benefits: Scientists have identified over 75 phytochemicals in Aloe including high levels of antioxidants, vitamins B1, B2, B6, C, E, and folic acid. There’s also evidence that it can relieve constipation. However, large amounts can potentially be bad for your kidneys, so eat in moderation.

7. Ferocactus (Barrel Cactus)
The large, hard spines on this Southwestern American succulent make it look more like a menace than a tasty treat, but it’s completely edible. Its bright red flowers wilt to produce yellow fruit that resembles a miniature pineapple. Native Americans traditionally ate the flowers and even the flesh of the plant itself, but they’re not very palatable (but useful if you ever get lost in the desert!).

How to Eat It: The fruit has a slightly slimy pulp with edible black seeds, and can be picked right off the cactus and eaten raw. Its flavor is slightly tart and reminiscent of lemon and kiwi.
Health Benefits: Cactus fruits are high in vitamins A and C.
0
0
文章
Dummer. ゛☀
2017年09月19日

Mealybugs are a pest common to cacti and succulents. Greenhouse and windowsill assemblages are especially vulnerable to the critters. You can eliminate mealybugs temporarily, but they are difficult to eradicate completely, especially in large groupings of plants. Deal effectively with mealybugs and restore healthy environmental conditions in your cactus collection to prevent future infestations.
About Mealybugs
Mealybugs are gray or light brown insects 2 to 3 millimeters long. They resemble woodlice. Mealybugs can accumulate around the base of a cactus or just beneath the soil around its growing point. An early sign of a mealybug problem is a secretion that resembles white fluff on the plant. This is where the bugs reproduce. Fallen needles may also indicate a mealybug presence. Squashed bugs leave red or green stains. Ants farm mealybugs for their sweet secretions; an ant problem near a cactus may be an indication of mealybugs.
Natural Remedies
There are many effective nonchemical approaches to dealing with mealybugs. Experiment to find the best method for your cactus. Dab bugs and white fluff with denatured alcohol on a cotton swab to kill the insects. Repeat this treatment as often as is necessary to remove all bugs from the plant, checking it thoroughly once every three weeks. Fumigant smoke cones may be effective if used regularly, especially in large groupings of plants in a greenhouse. Alternatively, spray cactus with several drops of dish soap diluted in a cup of water. For a biological control, introduce a mealybug predator such as Cryptolaemus montrouzieri. Be aware that the effectiveness of biological controls for mealybugs in home settings can be low, as maintaining a balance of predators and pray can be difficult. Manage an ant problem to deter mealybug farming.
Chemical Remedies
Systemic insecticides poison bugs that ingest the cactus’ sap. Human skin, however, may also absorb these poisons. Imidacloprid is effective against mealybugs and is lower in toxicity to animals than some other chemical treatments. Water plants with imidacloprid once every several months during active growth. To deal with a root infestation, immerse the cactus’s pot in a bucket containing insecticide and a few drops of dish soap. Let the plant dry completely after this treatment. Be sure that no mealybugs survive a chemical treatment to help deter the bugs from becoming resistant to insecticide.
Preventative Care
Isolate a newly acquired cactus for two to three weeks to observe whether it contains mealybugs. Inspect all of your cactus plants regularly to intercept a mealybug infestation while it is small, before it spreads to nearby plants. Notice any dramatic changes in your cactus’s condition, such as discoloration or sudden limpness, as these may be signs of a mealybug problem that is not readily visible. Keep the area around your cactus clean and free of dried leaves and dropped flowers, as rotting organic matter provides an ideal home for a wide range of pests and diseases.

About Mealybugs
Mealybugs are gray or light brown insects 2 to 3 millimeters long. They resemble woodlice. Mealybugs can accumulate around the base of a cactus or just beneath the soil around its growing point. An early sign of a mealybug problem is a secretion that resembles white fluff on the plant. This is where the bugs reproduce. Fallen needles may also indicate a mealybug presence. Squashed bugs leave red or green stains. Ants farm mealybugs for their sweet secretions; an ant problem near a cactus may be an indication of mealybugs.

Natural Remedies
There are many effective nonchemical approaches to dealing with mealybugs. Experiment to find the best method for your cactus. Dab bugs and white fluff with denatured alcohol on a cotton swab to kill the insects. Repeat this treatment as often as is necessary to remove all bugs from the plant, checking it thoroughly once every three weeks. Fumigant smoke cones may be effective if used regularly, especially in large groupings of plants in a greenhouse. Alternatively, spray cactus with several drops of dish soap diluted in a cup of water. For a biological control, introduce a mealybug predator such as Cryptolaemus montrouzieri. Be aware that the effectiveness of biological controls for mealybugs in home settings can be low, as maintaining a balance of predators and pray can be difficult. Manage an ant problem to deter mealybug farming.

Chemical Remedies
Systemic insecticides poison bugs that ingest the cactus’ sap. Human skin, however, may also absorb these poisons. Imidacloprid is effective against mealybugs and is lower in toxicity to animals than some other chemical treatments. Water plants with imidacloprid once every several months during active growth. To deal with a root infestation, immerse the cactus’s pot in a bucket containing insecticide and a few drops of dish soap. Let the plant dry completely after this treatment. Be sure that no mealybugs survive a chemical treatment to help deter the bugs from becoming resistant to insecticide.

Preventative Care
Isolate a newly acquired cactus for two to three weeks to observe whether it contains mealybugs. Inspect all of your cactus plants regularly to intercept a mealybug infestation while it is small, before it spreads to nearby plants. Notice any dramatic changes in your cactus’s condition, such as discoloration or sudden limpness, as these may be signs of a mealybug problem that is not readily visible. Keep the area around your cactus clean and free of dried leaves and dropped flowers, as rotting organic matter provides an ideal home for a wide range of pests and diseases.
0
0
文章
Dummer. ゛☀
2017年09月15日

Fruit flies are a common kitchen nuisance especially active in late fall and summer when the produce they love is in abundance. Also known as vinegar flies, they are attracted by orange rinds left on the counter, tomatoes ripening on a windowsill, bananas turning brown in the fruit bowl and lettuce left in the sink. The pin-head sized creatures do not bite but are an unsettling sight circling lazily around your produce.
The flies are so tiny, ranging in size from less than 1/16th of an inch up to 3/16th of an inch, that they disappear to all but those with the sharpest vision as they fly from bright light to shadow. The head and thorax are yellow and tan while the abdomen can be dark, even black. Many types have red eyes.
Due to their particularly small size, fruit flies can enter a house from the outside through common window screen. They’re also brought into the kitchen on the produce you bring home from the market.
Fruit flies will breed anywhere there is damp, decaying organic matter. This includes in sink drains (dark, slightly larger flies specific to drains are known as drain or filter flies), garbage pails and compost buckets, tile grout, even wash cloths. Because they will breed in so many different places, these pesky insects can be difficult to eradicate once they are established.
Don’t be so frustrated by the persistence of the short-lived fruit fly that you resort to anything other than safe, organic methods of control. If you don’t deny the flies a place to breed by employing thorough sanitation methods, you can spray pesticides all you want. The pest will come back. And even those who recommend using pesticides on flies of all kinds don’t recommend spraying in places where food is stored and prepared.
Life Cycle
The female fruit fly will lay between 500 and 2,000 eggs, one at a time, usually on or near fermenting fruits or other decaying organic material. The eggs, contained in a moist secretion, are left on rinds, fruit meat and other, usually damp sources.
The larvae hatch out in about a day, then feed for five or more days on the yeasts produced in the fermenting vegetable matter (or drain slime) before moving to a drier location to pupate. They take two days to become sexually mature. Flies live no more than one or two weeks and mate twice during their short lives. (Hat tip to the University of New Hampshire Cooperative Extension (PDF) from which much of this life cycle information was sourced.)
Damage
Fruit flies are mainly thought of as a nuisance pest, known to buzz around un-refrigerated produce and kitchen sinks. But the flies are labeled “filth” flies because of the bacterial contamination they can spread as they lay their eggs on fruits and vegetables. As the fruit fly moves from surface to surface, it transfers harmful pathogens around your kitchen and to the foods prepared there. Drain flies can potentially carry more harmful contamination.
Control
Sanitation is job number one. Denying flies access to the decaying organic matter they seek prevents their multiplying. This isn’t as easy as it sounds. Besides what’s in your fruit bowls and on your kitchen counters, flies will breed in drains and around sinks, on mops, on damp wood under sinks and behind walls, and at the lips of cans and bottles.
Don’t store produce on your counter. Refrigerate all fruits and vegetables, even (especially) the bananas. This is good practice to prevent the introduction and spread of this household invader and is absolutely necessary when fighting established infestations.
As you cook, clean up kitchen peelings and other vegetable scraps immediately. Take all compostable material out to the compost heap as soon as you’ve produced it. Or keep a compost crock with a tight sealing lid next to your prep area to keep cores and peelings before sending them outdoors.
If your kitchen scraps, including citrus rinds and banana peels, will ultimately end up going out with the garbage, start a scraps bag that you keep in the freezer until it can be put out for pickup with the trash. Banana peels, left overnight in the trash, are especially attractive to the flies. Instead, freeze them.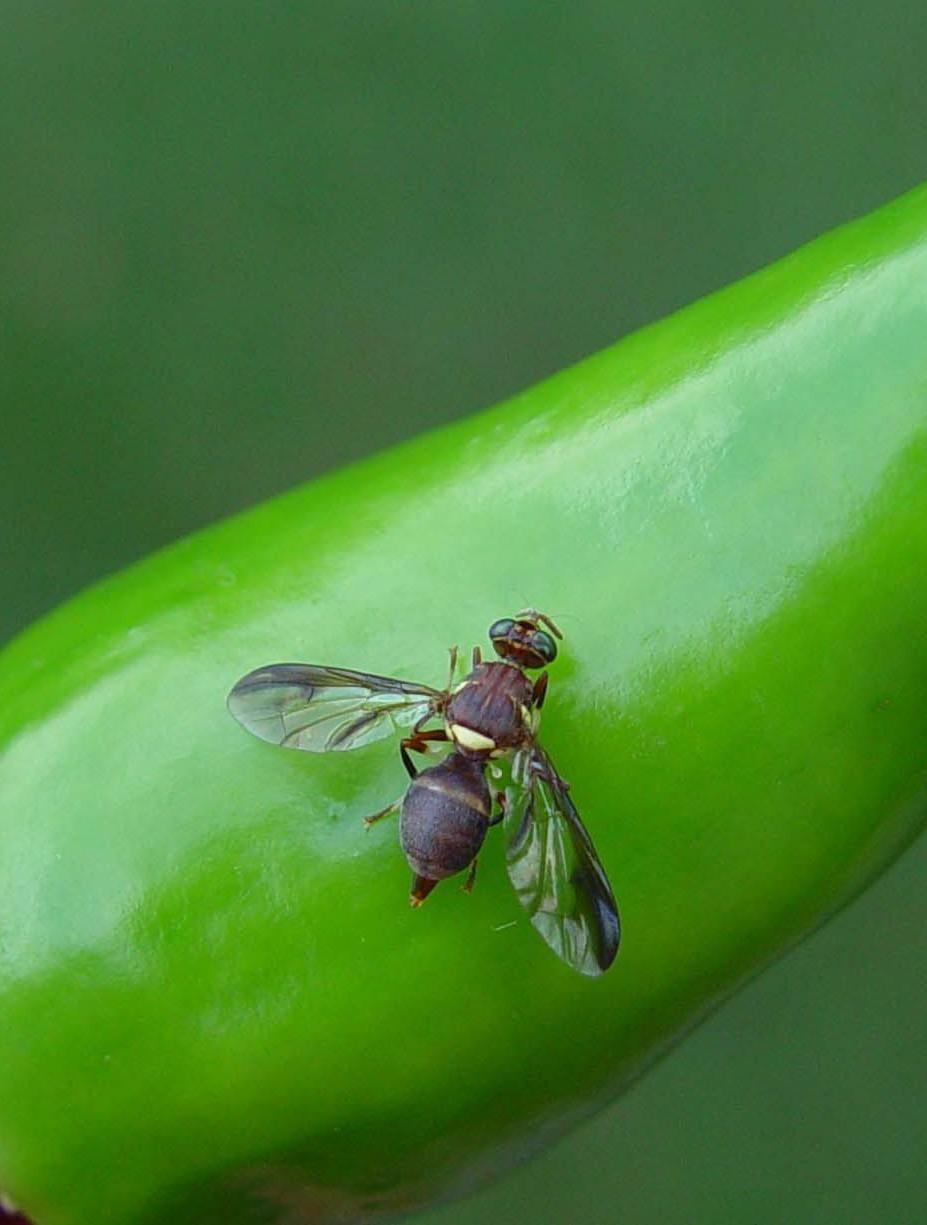
Thoroughly clean and dry all food prep areas, including under counters and around stoves; anywhere stray matter might build.
Make sure all garbage cans have tight fitting lids. Keep them covered. Keep you cans clean inside and out, including edges around the top.
Thoroughly wash all containers headed for your recycling bins, especially fruit juice bottles and soda cans.
Think flies are coming out of a sink drain? Cover it with plastic wrap overnight and check for flies underneath come morning. Keep drains clean and free of organic material with natural drain cleaners. Run garbage disposals frequently. Pouring equal parts baking soda and salt, then topping with an equal amount of white vinegar The Department of Entomology at Iowa State University reports that pouring bleach or ammonia down a drain to kill flies has no benefit.
Wooden cutting boards can harbor eggs and larvae. Wash them in hot water frequently and allow to completely dry.
Check under and around sinks for leakage. Fruit flies will lay eggs on any organic surface that is moist, especially underneath sinks. Reseal fixtures and and re-grout tiles around sinks to stop leakage. Allow wood and other surfaces under sinks to dry completely after you do.
Use traps to lure and capture adult pests. Some traps are specifically designed for indoor use.
Making one or two homemade traps and placing them around food storage and prep areas can be highly effective. Here’s how: Make a cone from a large file card or half sheet of paper leaving a small opening at the bottom and insert it into a jar containing a half-inch of apple cider vinegar. The flies go down the cone towards the vinegar, but once inside can’t find their way out, circling the lip of the jar wondering how they got there in the first place. Make sure the cone seals at the edge of the jar (we rub the lip with oil which seems to capture the flies trying to squeeze through). Humane types can take the jar outside, remove the cone and let the surviving flies free.
A piece of plastic wrap over a custard cup or other small bowl with a small hole approximately the size of a pencil poked in the plastic near the center is also a quick and effective way to trap circling flies. The traps also work with beer and wine. Yeast traps attract flies with fermentation.
If pests persist despite your best efforts, look for hidden breeding spots, like a bruised potato in the back of a cupboard or a juice spill that’s run under a cabinet or the refrigerator.
Flies can breed in water trays set under house plants. Clean them after dumping runoff from watering.
Replacing window screen with very small-mesh screen can help keep flies from entering your home from the outdoors.
Lavender has been shown to discourage fruit flies. Basil, mint and thyme, on the other hand, have been shown to be more attractive to the flies than slices of banana. (Thanks to University of Southern California Science Fair project summaries (PDF) and the grade school experimenter who conducted the tests).
Clove will repel this household nuisance. Stick as many cloves as you can (at least 25) into a fresh lemon and add to your fruit bowl.
Final word from a friend: I’m an organic vegetable (and fruit!) gardener and an active cook. My kitchen is always full of the kind of stuff this flying fuss is looking for. I use a lidded compost bucket, keep a couple of vinegar traps out all the time, and do my best to keep a clean food-prep cooking area. But I’ve resigned myself to the fact that, in season, I’ll never eradicate the little buggers completely. Instead, I’ve come to see them as a symbol of abundance, most active when I’m most active in the kitchen, canning peaches and apple sauce, pickling beets and letting a slurry of berries ferment in a wine crock. The flies will die down when the weather gets really cold. Until then, I keep things sealed, covered and refrigerated the best I can. I wash all produce just before using. And I swat at the few flies who make the mistake of swimming right up in front of my face.

The flies are so tiny, ranging in size from less than 1/16th of an inch up to 3/16th of an inch, that they disappear to all but those with the sharpest vision as they fly from bright light to shadow. The head and thorax are yellow and tan while the abdomen can be dark, even black. Many types have red eyes.
Due to their particularly small size, fruit flies can enter a house from the outside through common window screen. They’re also brought into the kitchen on the produce you bring home from the market.

Fruit flies will breed anywhere there is damp, decaying organic matter. This includes in sink drains (dark, slightly larger flies specific to drains are known as drain or filter flies), garbage pails and compost buckets, tile grout, even wash cloths. Because they will breed in so many different places, these pesky insects can be difficult to eradicate once they are established.
Don’t be so frustrated by the persistence of the short-lived fruit fly that you resort to anything other than safe, organic methods of control. If you don’t deny the flies a place to breed by employing thorough sanitation methods, you can spray pesticides all you want. The pest will come back. And even those who recommend using pesticides on flies of all kinds don’t recommend spraying in places where food is stored and prepared.

Life Cycle
The female fruit fly will lay between 500 and 2,000 eggs, one at a time, usually on or near fermenting fruits or other decaying organic material. The eggs, contained in a moist secretion, are left on rinds, fruit meat and other, usually damp sources.
The larvae hatch out in about a day, then feed for five or more days on the yeasts produced in the fermenting vegetable matter (or drain slime) before moving to a drier location to pupate. They take two days to become sexually mature. Flies live no more than one or two weeks and mate twice during their short lives. (Hat tip to the University of New Hampshire Cooperative Extension (PDF) from which much of this life cycle information was sourced.)

Damage
Fruit flies are mainly thought of as a nuisance pest, known to buzz around un-refrigerated produce and kitchen sinks. But the flies are labeled “filth” flies because of the bacterial contamination they can spread as they lay their eggs on fruits and vegetables. As the fruit fly moves from surface to surface, it transfers harmful pathogens around your kitchen and to the foods prepared there. Drain flies can potentially carry more harmful contamination.
Control
Sanitation is job number one. Denying flies access to the decaying organic matter they seek prevents their multiplying. This isn’t as easy as it sounds. Besides what’s in your fruit bowls and on your kitchen counters, flies will breed in drains and around sinks, on mops, on damp wood under sinks and behind walls, and at the lips of cans and bottles.

Don’t store produce on your counter. Refrigerate all fruits and vegetables, even (especially) the bananas. This is good practice to prevent the introduction and spread of this household invader and is absolutely necessary when fighting established infestations.
As you cook, clean up kitchen peelings and other vegetable scraps immediately. Take all compostable material out to the compost heap as soon as you’ve produced it. Or keep a compost crock with a tight sealing lid next to your prep area to keep cores and peelings before sending them outdoors.
If your kitchen scraps, including citrus rinds and banana peels, will ultimately end up going out with the garbage, start a scraps bag that you keep in the freezer until it can be put out for pickup with the trash. Banana peels, left overnight in the trash, are especially attractive to the flies. Instead, freeze them.

Thoroughly clean and dry all food prep areas, including under counters and around stoves; anywhere stray matter might build.
Make sure all garbage cans have tight fitting lids. Keep them covered. Keep you cans clean inside and out, including edges around the top.
Thoroughly wash all containers headed for your recycling bins, especially fruit juice bottles and soda cans.
Think flies are coming out of a sink drain? Cover it with plastic wrap overnight and check for flies underneath come morning. Keep drains clean and free of organic material with natural drain cleaners. Run garbage disposals frequently. Pouring equal parts baking soda and salt, then topping with an equal amount of white vinegar The Department of Entomology at Iowa State University reports that pouring bleach or ammonia down a drain to kill flies has no benefit.
Wooden cutting boards can harbor eggs and larvae. Wash them in hot water frequently and allow to completely dry.
Check under and around sinks for leakage. Fruit flies will lay eggs on any organic surface that is moist, especially underneath sinks. Reseal fixtures and and re-grout tiles around sinks to stop leakage. Allow wood and other surfaces under sinks to dry completely after you do.

Use traps to lure and capture adult pests. Some traps are specifically designed for indoor use.
Making one or two homemade traps and placing them around food storage and prep areas can be highly effective. Here’s how: Make a cone from a large file card or half sheet of paper leaving a small opening at the bottom and insert it into a jar containing a half-inch of apple cider vinegar. The flies go down the cone towards the vinegar, but once inside can’t find their way out, circling the lip of the jar wondering how they got there in the first place. Make sure the cone seals at the edge of the jar (we rub the lip with oil which seems to capture the flies trying to squeeze through). Humane types can take the jar outside, remove the cone and let the surviving flies free.

A piece of plastic wrap over a custard cup or other small bowl with a small hole approximately the size of a pencil poked in the plastic near the center is also a quick and effective way to trap circling flies. The traps also work with beer and wine. Yeast traps attract flies with fermentation.
If pests persist despite your best efforts, look for hidden breeding spots, like a bruised potato in the back of a cupboard or a juice spill that’s run under a cabinet or the refrigerator.
Flies can breed in water trays set under house plants. Clean them after dumping runoff from watering.
Replacing window screen with very small-mesh screen can help keep flies from entering your home from the outdoors.
Lavender has been shown to discourage fruit flies. Basil, mint and thyme, on the other hand, have been shown to be more attractive to the flies than slices of banana. (Thanks to University of Southern California Science Fair project summaries (PDF) and the grade school experimenter who conducted the tests).
Clove will repel this household nuisance. Stick as many cloves as you can (at least 25) into a fresh lemon and add to your fruit bowl.

Final word from a friend: I’m an organic vegetable (and fruit!) gardener and an active cook. My kitchen is always full of the kind of stuff this flying fuss is looking for. I use a lidded compost bucket, keep a couple of vinegar traps out all the time, and do my best to keep a clean food-prep cooking area. But I’ve resigned myself to the fact that, in season, I’ll never eradicate the little buggers completely. Instead, I’ve come to see them as a symbol of abundance, most active when I’m most active in the kitchen, canning peaches and apple sauce, pickling beets and letting a slurry of berries ferment in a wine crock. The flies will die down when the weather gets really cold. Until then, I keep things sealed, covered and refrigerated the best I can. I wash all produce just before using. And I swat at the few flies who make the mistake of swimming right up in front of my face.
0
0
文章
Dummer. ゛☀
2017年08月26日

Growing parsley indoors on a sunny windowsill is ornamental as well as practical. Curly types have lacy, frilly foliage that looks great in any setting and flat-leaf varieties are prized for their flavor. Learning how to grow parsley indoors is not at all complicated and neither is indoor parsley care.
Parsley Container Gardening
Parsley herbs (Petroselinum crispum) grow best in a sunny, preferably south-facing window where they will receive six to eight hours of direct sunlight every day. If your window doesn’t provide that much light, you’ll have to supplement it with fluorescent lighting. Turn the pot every three or four days so that the plant doesn’t lean into the sun.
Parsley container gardening is no different than growing any other potted herbs. Choose a container that fits snuggly on the window sill. It should have several drainage holes and a saucer underneath to catch water as it drains through. Fill the pot with a good quality potting soil and add a handful of clean sand to improve the drainage. Humidity isn’t usually a problem when you grow parsley in the kitchen where steam from cooking and the frequent use of water helps keep the air moist. In other locations, you may need to mist the plants from time to time. If the leaves look dry and brittle, set the plant on top of a tray of pebbles and add water to the tray, leaving the tops of the pebbles exposed. As the water evaporates, it increases the humidity of the air around the plant.
How to Grow Parsley Indoors
When you’re ready for growing parsley indoors, it’s best to start parsley from seeds sown directly in the container because parsley has a long tap root that doesn’t transplant well. Sprinkle a few seeds on the surface of the soil and cover them with an additional 1/4 inch of soil. Water the pot regularly to keep the soil moist to the touch but not soggy, and expect seedlings to emerge in three weeks or so. If you get too many seedlings, you’ll have to thin them out. Clip out the excess with scissors or pinch them out between your fingernail and thumb. Pulling them out may damage the tap roots of the surrounding plants.
Indoor Parsley Care
Indoor parsley care is easy. Keep the soil lightly moist, and empty the saucer under the pot after every watering so that the roots don’t sit in water. Feed the plants every two weeks with fish emulsion or half-strength liquid fertilizer. You can grow other herbs in the container with parsley, if desired. Herbs that combine well in a mixed container with parsley include chives, thyme, basil, oregano and mint. When planting thyme with parsley herbs, stick them around the edges of a container or hanging basket where it can tumble over the edges.

Parsley Container Gardening
Parsley herbs (Petroselinum crispum) grow best in a sunny, preferably south-facing window where they will receive six to eight hours of direct sunlight every day. If your window doesn’t provide that much light, you’ll have to supplement it with fluorescent lighting. Turn the pot every three or four days so that the plant doesn’t lean into the sun.
Parsley container gardening is no different than growing any other potted herbs. Choose a container that fits snuggly on the window sill. It should have several drainage holes and a saucer underneath to catch water as it drains through. Fill the pot with a good quality potting soil and add a handful of clean sand to improve the drainage. Humidity isn’t usually a problem when you grow parsley in the kitchen where steam from cooking and the frequent use of water helps keep the air moist. In other locations, you may need to mist the plants from time to time. If the leaves look dry and brittle, set the plant on top of a tray of pebbles and add water to the tray, leaving the tops of the pebbles exposed. As the water evaporates, it increases the humidity of the air around the plant.

How to Grow Parsley Indoors
When you’re ready for growing parsley indoors, it’s best to start parsley from seeds sown directly in the container because parsley has a long tap root that doesn’t transplant well. Sprinkle a few seeds on the surface of the soil and cover them with an additional 1/4 inch of soil. Water the pot regularly to keep the soil moist to the touch but not soggy, and expect seedlings to emerge in three weeks or so. If you get too many seedlings, you’ll have to thin them out. Clip out the excess with scissors or pinch them out between your fingernail and thumb. Pulling them out may damage the tap roots of the surrounding plants.

Indoor Parsley Care
Indoor parsley care is easy. Keep the soil lightly moist, and empty the saucer under the pot after every watering so that the roots don’t sit in water. Feed the plants every two weeks with fish emulsion or half-strength liquid fertilizer. You can grow other herbs in the container with parsley, if desired. Herbs that combine well in a mixed container with parsley include chives, thyme, basil, oregano and mint. When planting thyme with parsley herbs, stick them around the edges of a container or hanging basket where it can tumble over the edges.
0
0
文章
Dummer. ゛☀
2017年08月19日

A pitcher plant isn’t for gardeners who like to take home an interesting plant, set it on the windowsill, and hope they remember to water it now and then. It’s a plant with specific needs, and it lets you know with alarming clarity when those needs aren’t being met. This article explains what to do when you find your pitcher plant’s leaves turning black.
Why are Pitcher Plants Turning Black?
When pitcher plant (Nepenthes) leaves are turning black, it is usually the result of shock or a sign that the plant is going into dormancy. Something as simple as a change in conditions the plant experiences when you bring it home from the nursery can cause shock. A pitcher plant can also go into shock when any of its needs aren’t being met. Here are some things to check:
Is it getting the right amount of light? Pitcher plants need at least 8 hours of direct sunlight every day. It will thrive outdoors in hot, humid climates. Does it have enough water? Pitcher plants like to be thoroughly wet. Set the pot in a shallow dish and keep an inch or two of water in the dish at all times. Not just any water will do. Pitcher plants need filtered or purified water. Are you feeding your plant? If you set it outside, it will attract its own food. Indoors, you’ll have to drop a cricket or mealworm down the pitcher from time to time. You can buy crickets and mealworms at a bait shop or a pet store.
Here’s another tip to help you avoid shock (and black pitcher plant leaves): leave it in the pot it came in. It will be fine for a few years. Transplanting a pitcher plant into a new pot is an advanced skill, and you should take lots of time to get to get to know your plant first. If the pot is unattractive, set it inside another pot.
Dormant Pitcher Plant with Black Leaves
You may occasionally see dormant pitcher plants with black leaves, but it’s even more likely that the plant is dead. Pitcher plants go dormant in fall. First, the pitcher turns brown and may die back to the ground. You may also lose some leaves. It’s hard for beginners to tell the difference between dormancy and death, but remember that tinkering with the plant and sticking your finger into the soil to feel the roots can kill it. It’s best to just wait it out and see if the plant comes back.
You can help your plant survive dormancy by keeping it cool and giving it lots of sunlight. You can leave it outdoors if your winters are mild—just remember to bring it in if a frost threatens. Providing cool, well-lit conditions in cold climates is more of a challenge, but if all goes well, you’ll be rewarded with flowers in the spring.

Why are Pitcher Plants Turning Black?
When pitcher plant (Nepenthes) leaves are turning black, it is usually the result of shock or a sign that the plant is going into dormancy. Something as simple as a change in conditions the plant experiences when you bring it home from the nursery can cause shock. A pitcher plant can also go into shock when any of its needs aren’t being met. Here are some things to check:
Is it getting the right amount of light? Pitcher plants need at least 8 hours of direct sunlight every day. It will thrive outdoors in hot, humid climates. Does it have enough water? Pitcher plants like to be thoroughly wet. Set the pot in a shallow dish and keep an inch or two of water in the dish at all times. Not just any water will do. Pitcher plants need filtered or purified water. Are you feeding your plant? If you set it outside, it will attract its own food. Indoors, you’ll have to drop a cricket or mealworm down the pitcher from time to time. You can buy crickets and mealworms at a bait shop or a pet store.

Here’s another tip to help you avoid shock (and black pitcher plant leaves): leave it in the pot it came in. It will be fine for a few years. Transplanting a pitcher plant into a new pot is an advanced skill, and you should take lots of time to get to get to know your plant first. If the pot is unattractive, set it inside another pot.
Dormant Pitcher Plant with Black Leaves
You may occasionally see dormant pitcher plants with black leaves, but it’s even more likely that the plant is dead. Pitcher plants go dormant in fall. First, the pitcher turns brown and may die back to the ground. You may also lose some leaves. It’s hard for beginners to tell the difference between dormancy and death, but remember that tinkering with the plant and sticking your finger into the soil to feel the roots can kill it. It’s best to just wait it out and see if the plant comes back.

You can help your plant survive dormancy by keeping it cool and giving it lots of sunlight. You can leave it outdoors if your winters are mild—just remember to bring it in if a frost threatens. Providing cool, well-lit conditions in cold climates is more of a challenge, but if all goes well, you’ll be rewarded with flowers in the spring.
0
0
成长记
Lucky Coyote
2017年08月18日

My tiny spiny succulents are doing great not that they're in the terrarium and not with my windowsill babies
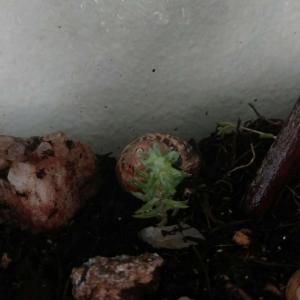
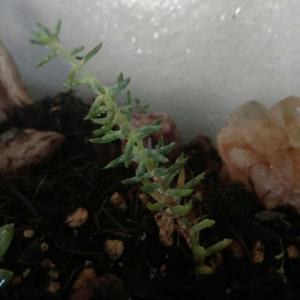


2
0
Lucky Coyote:@Lucky Coyote
Lucky Coyote:@Ueca
Lucky Coyote:@Ueca I shall find a ruler cx
Ueca:If you hold a ruler next to it I might be able to take a stab at the species.
文章
小马奥
2017年05月23日

Want to grow FRESH & ORGANIC vegetables but short of space? No problem, you can even do this near your kitchen window. Just learn about the Windowsill Vegetable Gardening and 11 best vegetables you can grow there!
So what if you don’t have a big outdoor space to grow your own food, you can also grow your own fresh and organic vegetables in a small space– on your windowsill. Improvise and act, get some window boxes, hanging baskets or make some cool DIY containers.
Also Read: Windowsill Herb Garden
It’s fun and exciting and you’ll be successful if you care about a few things: Your window must receive minimum 4-5 hours of sunlight, you should fertilize your plants correctly and the balance in watering must be maintained (avoiding both overwatering and underwatering).
Also Read: How to Water Container Plants
1. Green Onions

Fresh green onions can be a wonderful and delicious addition to your salad bowls and sandwiches. In a small space like a windowsill, you can get enough harvest. You can even grow green onions in water. See the tutorial! If you want, you can try to grow onions, too. Also, vertically in plastic bottles. Check out this post.
A Tip: If you’re growing green onions in water, replace the water every day.
2. Loose Leaf Lettuce

After green onions growing lettuce is one of the easiest things in the windowsill gardening! It doesn’t require a sunny window, a few hours of sunlight is enough, if not, you can also use artificial light. And the best part is you can make decorative arrangements, combining red or green leaf lettuces in the same pot or choosing variegated ones.
A Tip: Wide-shallow containers are sufficient and provide you small crop. Learn how to grow lettuce in a pot here.
3. Tomatoes

Growing tomatoes on a windowsill is easy if it is sunny. A great way to grow and enjoy fresh, organic, juicy tomatoes indoors. For best results, choose dwarf varieties (cherry tomatoes, are perfect). Also, some varieties that grow well on windowsill includes Early Salad, Red Cushion, Pretty Patio and Tiny Tim.
Also Read: How to Grow So Many Tomatoes in So Little Space
A Tip: Cherry tomatoes don’t require a big deep pot, you can use a small to medium sized container. If you like to grow them in hanging baskets near your windows, it is possible too. Learn how to do this here.
4. Spinach

You can have your own spinach and you don’t need a big yard for this. You can grow it on a windowsill if it receives only a few hours of sun. Here’s the helpful guide on growing spinach in containers.
A Tip: Keep the soil slightly moist and provide shallow but wide planter, a 6 inches deep pot would be sufficient.
5. Chillies

Exotic, hot, spicy, and colorful– You can grow chilies on your kitchen windowsill. But only if it is sunny and warm. Also, the pot you use should be at least 8-10 inches deep. It’s fun and you’ll love your plants once they’ll start to flower and fruit. You can make your curry recipes spicier this way.
Also Read: How to Grow Banana Peppers
A Tip: Provide as much sun as possible and keep your eyes on pests.
6. Carrots
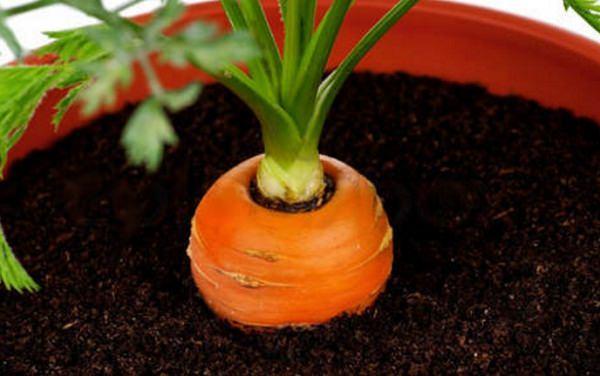
Growing carrot on a windowsill is possible and you can expect a decent homegrown harvest in small pots or window boxes. Carrot plants need regular watering, otherwise, the roots (carrots) will dry out and crack. Growing this root vegetable in containers is easy and it doesn’t take much space too. Read this to learn how to grow carrots in containers.
A Tip: Choose smaller varieties.
7. Sprouts

The healthiest stuff you can grow– Almost anywhere in your home, also on the windowsill. It is such a rewarding experience as they grow easily and quickly. All you need is a quart jar, a few tablespoons of sprouting seeds and water. In a week, you’ll have a jar full of healthy delicate sprouts that you can sprinkle on salads, add to sandwiches or toss into soups for a delicious and healthful twist on your favorite recipes.
A Tip: Just read these two articles– here and here.
8. Garlic

No need to teach you about the GARLIC glories! Let’s come to the point– Garlic will grow happily on your windowsill. To grow it, buy some fresh garlic from a grocery store. Plant a large, unpeeled clove with the pointed side up, in well-draining soil. Keep the soil moist and in a few days, you should see a green shoot. You can use its leaves in many recipes in place of garlic, will taste delicious. To harvest the leaves, cut them off with a sharp scissor, only a few inches at a time. When the leaves dry, dig up the soil to harvest the garlic bulbs.
A Tip: Choose at least 6 inches deep pot.
9. Microgreens

A big bowl of green leaves can be a prime source of vitamins A, C, K and folic acid. And microgreens (aka seedlings of herbs and vegetables) maybe even more nutrient-rich and tasty than the mature ones. Here is everything about growing microgreens.
A Tip: To grow microgreens you will need seeds of various greens and a wide but shallow tray.
10. Radishes

Radishes grow so fast and require little care and don’t mind the small pots. Plus, there leaves are also edible and you can prepare delicious exotic recipes from them. They need sunny windowsill and a moist soil.
A Tip: Ensure the pots you use have sufficient drainage holes and the potting soil must be well-drained and rich in organic matter.
11. Beans and Peas

Both the beans and peas can be grown on windowsills if there is space. Pole beans if planted in window boxes can be trained and supported by tying a string or wire from the planter to the window frame.
A Tip: Dwarf and bushier bean varieties and peas don’t require any special support, thus more suitable for windowsill gardening.
So what if you don’t have a big outdoor space to grow your own food, you can also grow your own fresh and organic vegetables in a small space– on your windowsill. Improvise and act, get some window boxes, hanging baskets or make some cool DIY containers.
Also Read: Windowsill Herb Garden
It’s fun and exciting and you’ll be successful if you care about a few things: Your window must receive minimum 4-5 hours of sunlight, you should fertilize your plants correctly and the balance in watering must be maintained (avoiding both overwatering and underwatering).
Also Read: How to Water Container Plants
1. Green Onions

Fresh green onions can be a wonderful and delicious addition to your salad bowls and sandwiches. In a small space like a windowsill, you can get enough harvest. You can even grow green onions in water. See the tutorial! If you want, you can try to grow onions, too. Also, vertically in plastic bottles. Check out this post.
A Tip: If you’re growing green onions in water, replace the water every day.
2. Loose Leaf Lettuce

After green onions growing lettuce is one of the easiest things in the windowsill gardening! It doesn’t require a sunny window, a few hours of sunlight is enough, if not, you can also use artificial light. And the best part is you can make decorative arrangements, combining red or green leaf lettuces in the same pot or choosing variegated ones.
A Tip: Wide-shallow containers are sufficient and provide you small crop. Learn how to grow lettuce in a pot here.
3. Tomatoes

Growing tomatoes on a windowsill is easy if it is sunny. A great way to grow and enjoy fresh, organic, juicy tomatoes indoors. For best results, choose dwarf varieties (cherry tomatoes, are perfect). Also, some varieties that grow well on windowsill includes Early Salad, Red Cushion, Pretty Patio and Tiny Tim.
Also Read: How to Grow So Many Tomatoes in So Little Space
A Tip: Cherry tomatoes don’t require a big deep pot, you can use a small to medium sized container. If you like to grow them in hanging baskets near your windows, it is possible too. Learn how to do this here.
4. Spinach

You can have your own spinach and you don’t need a big yard for this. You can grow it on a windowsill if it receives only a few hours of sun. Here’s the helpful guide on growing spinach in containers.
A Tip: Keep the soil slightly moist and provide shallow but wide planter, a 6 inches deep pot would be sufficient.
5. Chillies

Exotic, hot, spicy, and colorful– You can grow chilies on your kitchen windowsill. But only if it is sunny and warm. Also, the pot you use should be at least 8-10 inches deep. It’s fun and you’ll love your plants once they’ll start to flower and fruit. You can make your curry recipes spicier this way.
Also Read: How to Grow Banana Peppers
A Tip: Provide as much sun as possible and keep your eyes on pests.
6. Carrots

Growing carrot on a windowsill is possible and you can expect a decent homegrown harvest in small pots or window boxes. Carrot plants need regular watering, otherwise, the roots (carrots) will dry out and crack. Growing this root vegetable in containers is easy and it doesn’t take much space too. Read this to learn how to grow carrots in containers.
A Tip: Choose smaller varieties.
7. Sprouts

The healthiest stuff you can grow– Almost anywhere in your home, also on the windowsill. It is such a rewarding experience as they grow easily and quickly. All you need is a quart jar, a few tablespoons of sprouting seeds and water. In a week, you’ll have a jar full of healthy delicate sprouts that you can sprinkle on salads, add to sandwiches or toss into soups for a delicious and healthful twist on your favorite recipes.
A Tip: Just read these two articles– here and here.
8. Garlic

No need to teach you about the GARLIC glories! Let’s come to the point– Garlic will grow happily on your windowsill. To grow it, buy some fresh garlic from a grocery store. Plant a large, unpeeled clove with the pointed side up, in well-draining soil. Keep the soil moist and in a few days, you should see a green shoot. You can use its leaves in many recipes in place of garlic, will taste delicious. To harvest the leaves, cut them off with a sharp scissor, only a few inches at a time. When the leaves dry, dig up the soil to harvest the garlic bulbs.
A Tip: Choose at least 6 inches deep pot.
9. Microgreens

A big bowl of green leaves can be a prime source of vitamins A, C, K and folic acid. And microgreens (aka seedlings of herbs and vegetables) maybe even more nutrient-rich and tasty than the mature ones. Here is everything about growing microgreens.
A Tip: To grow microgreens you will need seeds of various greens and a wide but shallow tray.
10. Radishes

Radishes grow so fast and require little care and don’t mind the small pots. Plus, there leaves are also edible and you can prepare delicious exotic recipes from them. They need sunny windowsill and a moist soil.
A Tip: Ensure the pots you use have sufficient drainage holes and the potting soil must be well-drained and rich in organic matter.
11. Beans and Peas

Both the beans and peas can be grown on windowsills if there is space. Pole beans if planted in window boxes can be trained and supported by tying a string or wire from the planter to the window frame.
A Tip: Dwarf and bushier bean varieties and peas don’t require any special support, thus more suitable for windowsill gardening.
3
1


