文章
Miss Chen
2018年08月20日

Ferns are one of the oldest forms of plant life. There are over 10,000 known species of fern, some of which are deciduous and some that are evergreen. Fern leaves are called fronds, and they house the reproductive spores that ferns produce instead of seeds. Deciduous ferns lose their leaves in winter and tend to look ratty over the season when some of them die back but don't fall off. Evergreen ferns are vibrant year-round but they can benefit from cleanups to remove damage and dead fronds. Timing is important when pruning ferns so new fiddleheads (immature ferns) are not disturbed and spores are able to disperse.
Timing is Everything
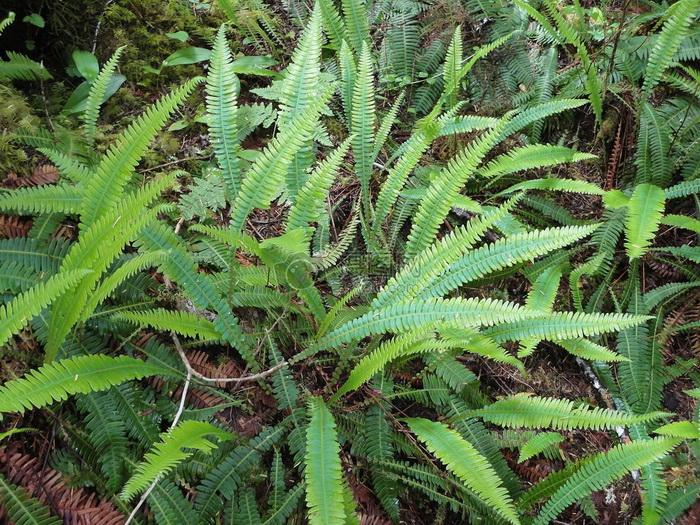
Pruning of ferns needs to occur after the spores on fruiting fronds have matured and released. Trim them when they are dormant, which is during winter. They can also be pruned in very early spring. Many ferns do not object to pruning at any time of the year. The hardy ferns such as sword fern can be pruned once a year if necessary, just about any time, since they are continuously growing.
Evergreen Ferns
As a rule, ferns don't really need pruning. Ferns in nature are generally self-cleaning and will release old fronds as they die. In the garden, occasional removal of dead fronds will improve the appearance of the plant, but it is strictly cosmetic. Where the plants are large and very old, severe pruning can take place to the crown. All the fronds can be removed in late winter or before the first new fiddleheads appear. Prune the stems away from the crown in a circular pattern so you are left with a little dome. This is not only attractive, but it prevents accidental damage to the newest growth which appears at the center of the plant.
Deciduous Ferns
Deciduous ferns don't necessarily drop all their fronds when temperatures plummet. They do experience dieback and many of the fronds will fall off or turn brown. From a cosmetic standpoint, it is best to get these dead fronds out of the plant. You will also increase light and room for new leaflets. Many people prune the deciduous ferns in fall so they are ready for the spring, but the old fronds provide protection for the crown. It is best to leave them, unattractive though they may be, until spring.
Pruning Indoor Ferns
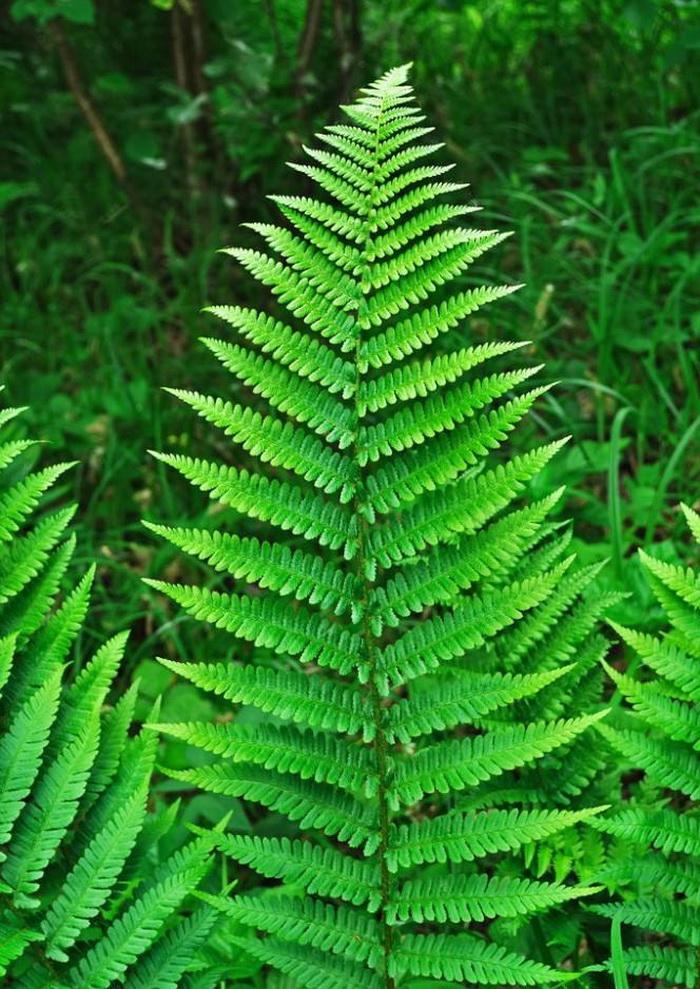
Boston, staghorn and maidenhair are some of the common ferns used as houseplants. These plants do not need pruning but they do need cleaning. The difference is that pruning increases the health of a plant and is done for many reasons, while cleaning is just routine maintenance. As with outdoor ferns you may choose to remove dead fronds. These should be cut with very sharp scissors or pruning shears and taken back 1/4 to 1/2 inch above the crown. The only time you would ever need to prune out all the fronds is when you are faced with a monumental pest problem. In this case, fertilize one week before the big haircut and then remove all the fronds.

Timing is Everything
Pruning of ferns needs to occur after the spores on fruiting fronds have matured and released. Trim them when they are dormant, which is during winter. They can also be pruned in very early spring. Many ferns do not object to pruning at any time of the year. The hardy ferns such as sword fern can be pruned once a year if necessary, just about any time, since they are continuously growing.
Evergreen Ferns
As a rule, ferns don't really need pruning. Ferns in nature are generally self-cleaning and will release old fronds as they die. In the garden, occasional removal of dead fronds will improve the appearance of the plant, but it is strictly cosmetic. Where the plants are large and very old, severe pruning can take place to the crown. All the fronds can be removed in late winter or before the first new fiddleheads appear. Prune the stems away from the crown in a circular pattern so you are left with a little dome. This is not only attractive, but it prevents accidental damage to the newest growth which appears at the center of the plant.
Deciduous Ferns
Deciduous ferns don't necessarily drop all their fronds when temperatures plummet. They do experience dieback and many of the fronds will fall off or turn brown. From a cosmetic standpoint, it is best to get these dead fronds out of the plant. You will also increase light and room for new leaflets. Many people prune the deciduous ferns in fall so they are ready for the spring, but the old fronds provide protection for the crown. It is best to leave them, unattractive though they may be, until spring.

Pruning Indoor Ferns
Boston, staghorn and maidenhair are some of the common ferns used as houseplants. These plants do not need pruning but they do need cleaning. The difference is that pruning increases the health of a plant and is done for many reasons, while cleaning is just routine maintenance. As with outdoor ferns you may choose to remove dead fronds. These should be cut with very sharp scissors or pruning shears and taken back 1/4 to 1/2 inch above the crown. The only time you would ever need to prune out all the fronds is when you are faced with a monumental pest problem. In this case, fertilize one week before the big haircut and then remove all the fronds.
0
0
文章
Miss Chen
2018年08月02日

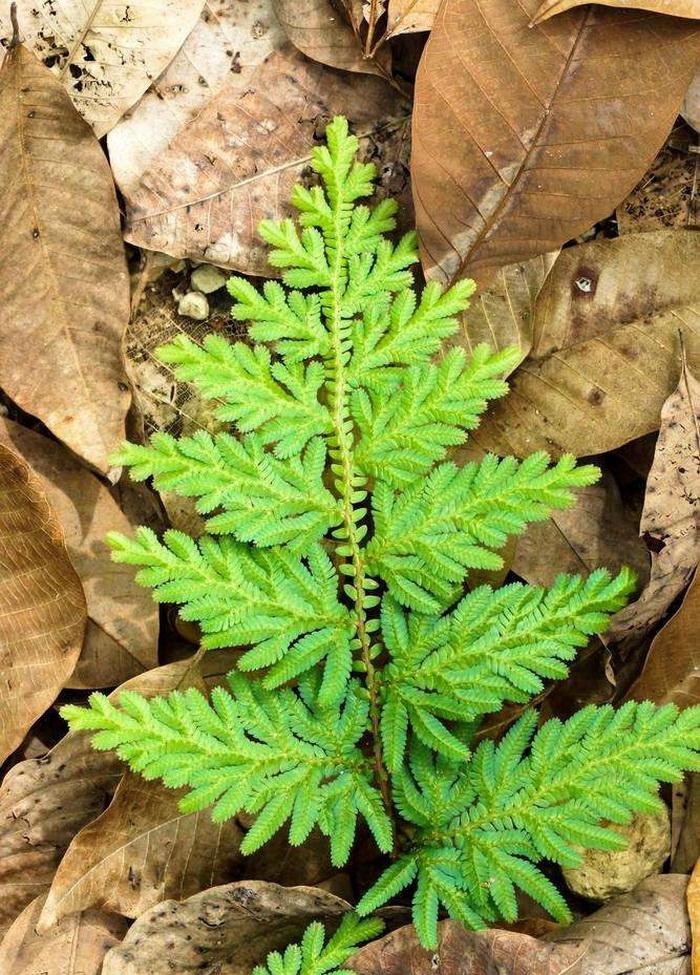
The name golden moss fern is deceptive as this plant is neither a moss nor a fern, but it does share characteristics of both. Like ferns and moss, this plant is non-flowering and produces spores as a primary means of reproduction. It grows just 6 inches tall with a spreading growth pattern that resembles a moss. Golden moss fern grows well as a ground cover in shady damp areas. It is also known by its scientific name, Selaginella kraussiana 'aurea,' or the common name gold clubmoss.

Step 1
Plant golden moss fern in peat or humus-rich soil. A shady spot that naturally stays slightly damp most of the year is ideal. Avoid planting it in areas that experience periods of standing water or perpetually muddy conditions.
Step 2
Dig a planting hole the same depth and 3 to 4 inches wider than the root mass. Slide the golden moss fern out of the nursery container and place it upright in the hole. Backfill the hole and smooth the soil under the golden moss fern.
Step 3
Space multiple plants 6 to 12 inches apart. Individual golden moss fern plants reach a diameter of up to 2 feet when mature, but you may plant them closer together to get a ground cover started and then divide the plant later if they get too crowded.
Step 4
Fertilize the plants twice a month. Use an all-purpose balanced fertilizer but dilute it to one-quarter the strength recommended on the package. Select a water-soluble or a slow-release formula. Discontinue fertilizing in the fall and resume in the spring.
Step 5
Water the soil around golden moss ferns when it starts to feel dry on top. Soak the area around each plant down to 1 to 2 inches deep.
Step 6
Divide golden moss fern in the spring. Dig up the entire root ball and pull it into sections of about 4 to 6 inches across. Replant the divisions in the garden or pot them for use as indoor plants. Replant the main root mass in the original spot.

Step 1
Plant golden moss fern in peat or humus-rich soil. A shady spot that naturally stays slightly damp most of the year is ideal. Avoid planting it in areas that experience periods of standing water or perpetually muddy conditions.
Step 2
Dig a planting hole the same depth and 3 to 4 inches wider than the root mass. Slide the golden moss fern out of the nursery container and place it upright in the hole. Backfill the hole and smooth the soil under the golden moss fern.
Step 3
Space multiple plants 6 to 12 inches apart. Individual golden moss fern plants reach a diameter of up to 2 feet when mature, but you may plant them closer together to get a ground cover started and then divide the plant later if they get too crowded.
Step 4
Fertilize the plants twice a month. Use an all-purpose balanced fertilizer but dilute it to one-quarter the strength recommended on the package. Select a water-soluble or a slow-release formula. Discontinue fertilizing in the fall and resume in the spring.
Step 5
Water the soil around golden moss ferns when it starts to feel dry on top. Soak the area around each plant down to 1 to 2 inches deep.

Step 6
Divide golden moss fern in the spring. Dig up the entire root ball and pull it into sections of about 4 to 6 inches across. Replant the divisions in the garden or pot them for use as indoor plants. Replant the main root mass in the original spot.
0
0
文章
Miss Chen
2018年01月31日

Oyster mushrooms are found in clusters sprouting from dead, and sometimes fallen, trees. They can be spotted from late fall to spring, almost all over the world. The spores of oyster mushrooms are collected for cultivating. Oyster mushrooms are typically eaten in soups and stews because of their subtle, nutty flavor. Growing oyster mushrooms from the spores includes swabbing the spore print with a cotton swab and wiping the spores onto a petri dish for cultivation.

Step 1
Cut off the stem of the oyster mushroom at the base of the fan-shaped cap. Cut below the white bottom of the cap.
Step 2
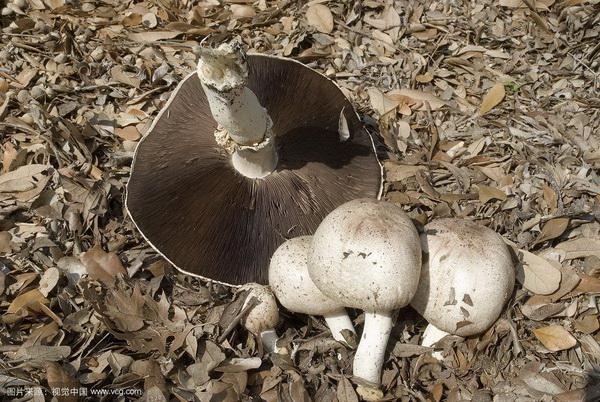
Place the oyster mushroom cap on the dark colored paper with the underside down on the paper. This side has the gills that hold the spores.
Step 3
Place the glass cup or bowl over the mushroom cap and place the setup in a cool and dry place for 48 hours.
Step 4
Remove the glass cup or bowl and the mushroom to find a white spore print where the spores have collected on the paper.

Step 1
Cut off the stem of the oyster mushroom at the base of the fan-shaped cap. Cut below the white bottom of the cap.
Step 2
Place the oyster mushroom cap on the dark colored paper with the underside down on the paper. This side has the gills that hold the spores.
Step 3
Place the glass cup or bowl over the mushroom cap and place the setup in a cool and dry place for 48 hours.

Step 4
Remove the glass cup or bowl and the mushroom to find a white spore print where the spores have collected on the paper.
3
1
文章
Miss Chen
2017年12月10日

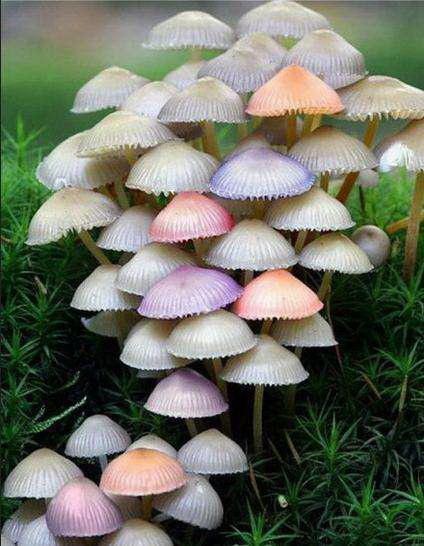
Truffles are small, lumpy, white mushrooms that grow on the roots of hazelnut, pine and oak trees. A tree with roots containing truffle spores may take up to a year to produce truffles; they are rare because of this. It is possible to grow truffles by planting seeds fallen from a tree with truffles on its roots, but a more reliable method is to buy a sapling inoculated with truffle spores. Although it takes time for the first truffle crop to form, after the first crop, a tree can produce truffles for many years.
Step 1
Place a terra-cotta pot on top of a drainage plate near a sunny window in a room that maintains a temperature of between 70 and 75 degrees, as truffles need a very temperate climate. Fill the pot about halfway with soil mixed with small gravel or sand. Truffles need soil with very good drainage; otherwise, they may rot.
Step 2
Gently unwrap the root ball of a sapling that has been inoculated with truffle spores, untangling the roots slightly with your fingers. Put the sapling in the center of the pot, and scoop soil over the roots until they are completely covered.
Step 3
Water the tree every other day. Empty the drainage plate when you notice water pooling and not being absorbed or evaporated.
Step 4
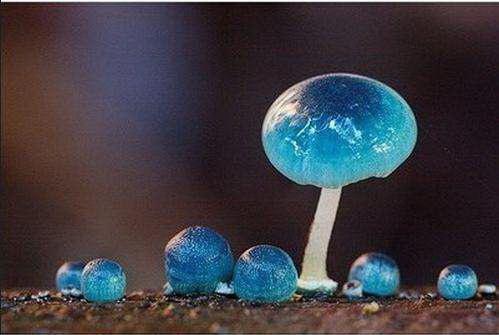
Wait about a year and check the soil. Look for small, rounded lumps around the roots. Gently probe the soil with your fingers to find any truffles.

Step 1
Place a terra-cotta pot on top of a drainage plate near a sunny window in a room that maintains a temperature of between 70 and 75 degrees, as truffles need a very temperate climate. Fill the pot about halfway with soil mixed with small gravel or sand. Truffles need soil with very good drainage; otherwise, they may rot.
Step 2
Gently unwrap the root ball of a sapling that has been inoculated with truffle spores, untangling the roots slightly with your fingers. Put the sapling in the center of the pot, and scoop soil over the roots until they are completely covered.
Step 3
Water the tree every other day. Empty the drainage plate when you notice water pooling and not being absorbed or evaporated.

Step 4
Wait about a year and check the soil. Look for small, rounded lumps around the roots. Gently probe the soil with your fingers to find any truffles.
1
3
文章
Miss Chen
2017年12月10日

The simplest method to harvest mushroom spores is to create a spore print. These prints are composed of thousands of microscopic fungal spores. They can last for years if properly stored, and can be used to grow the next generation of fruiting mushrooms.
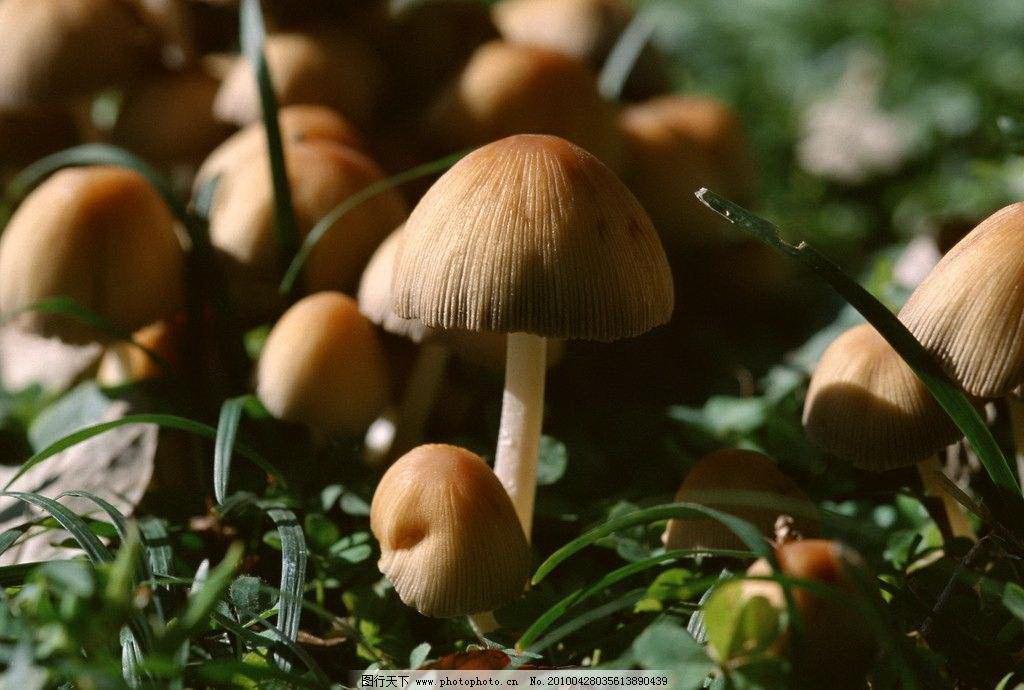
Begin the process of spore harvest only when the mushroom is ready. For most mushrooms, this is shortly after the edges of the cap have separated from the body of the stalk--a process called "veiling." Be sure your work station is completely clean before beginning.
Step 2
Place the laminated card in the center of your work area. You can laminate an index card yourself by smoothly covering one or both sides with packing tape. The goal is to create a smooth, non-porous surface on which the mushroom cap will lie.
Step 3
Put on the disposable gloves.
Step 4
Wipe down the laminated card with the alcohol using the cotton balls. Wait five minutes before proceeding for the alcohol to evaporate.
Step 5
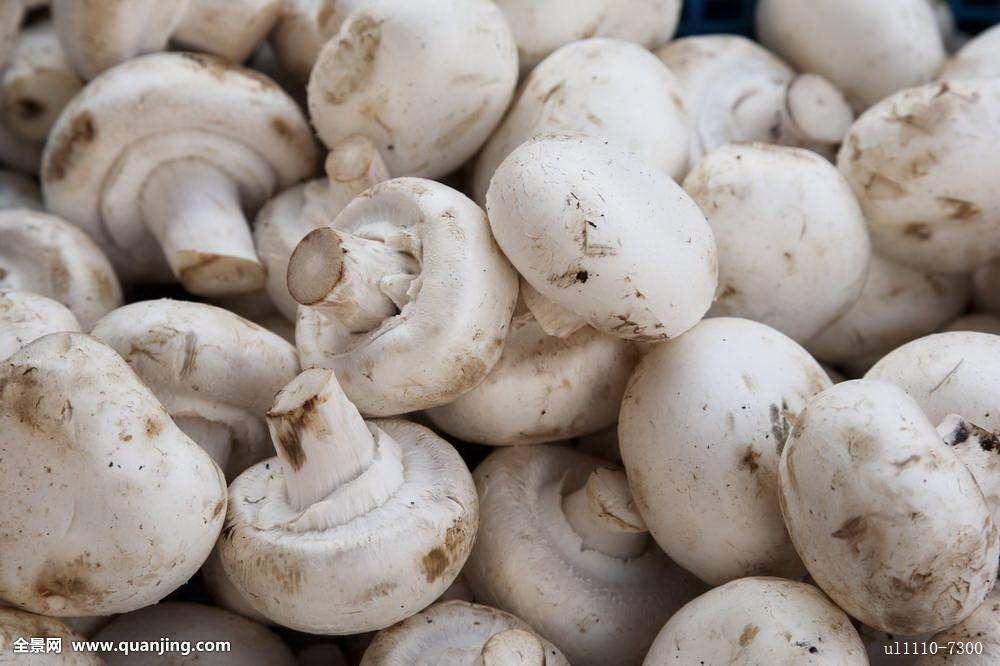
Remove the mushroom cap from the stalk. In most mushrooms you can gently twist the cap off. If necessary, you can use a sharp knife to cut the stalk close to where it meets the cap.
Step 6
Place the mushroom cap right-side up on the sterilized index card.
Step 7
Quickly cover the card and cap with a clean cup or glass placed upside-down. Make sure that the rim of the cup is flush with the work surface and that no air can enter.
Step 8
Leave the cup, mushroom cap and card for 12 hours. In this time, many thousands of spores will fall from the "gills" at the underside of the cap. Though each spore is too small to see, they will pile up to form visible mounds.
Step 9
Lift away the covering cup and the mushroom cap. Carefully slide the laminated card, now bearing the mushroom spores, into the plastic bag. Take care not to scrape the spore location against the sides of the bag as you store it.
Step 10
Seal the bag.

Begin the process of spore harvest only when the mushroom is ready. For most mushrooms, this is shortly after the edges of the cap have separated from the body of the stalk--a process called "veiling." Be sure your work station is completely clean before beginning.
Step 2
Place the laminated card in the center of your work area. You can laminate an index card yourself by smoothly covering one or both sides with packing tape. The goal is to create a smooth, non-porous surface on which the mushroom cap will lie.
Step 3
Put on the disposable gloves.
Step 4
Wipe down the laminated card with the alcohol using the cotton balls. Wait five minutes before proceeding for the alcohol to evaporate.

Step 5
Remove the mushroom cap from the stalk. In most mushrooms you can gently twist the cap off. If necessary, you can use a sharp knife to cut the stalk close to where it meets the cap.
Step 6
Place the mushroom cap right-side up on the sterilized index card.
Step 7
Quickly cover the card and cap with a clean cup or glass placed upside-down. Make sure that the rim of the cup is flush with the work surface and that no air can enter.
Step 8
Leave the cup, mushroom cap and card for 12 hours. In this time, many thousands of spores will fall from the "gills" at the underside of the cap. Though each spore is too small to see, they will pile up to form visible mounds.
Step 9
Lift away the covering cup and the mushroom cap. Carefully slide the laminated card, now bearing the mushroom spores, into the plastic bag. Take care not to scrape the spore location against the sides of the bag as you store it.
Step 10
Seal the bag.
0
0
文章
Miss Chen
2017年12月02日

Mushroom growing is a unique type of gardening. Mushrooms are really the fruit of a fungus that is grown from spores, or "mycelium," a mat of developing spores. Mycelium is also called mushroom "spawn." Ordinary soil does not provide the right kind of nutrients for growing mushrooms. Instead, other materials such as straw, sawdust, wood chips and compost are used as growing medium, called a "substrate." Different types of mushrooms require different kinds of substrate.
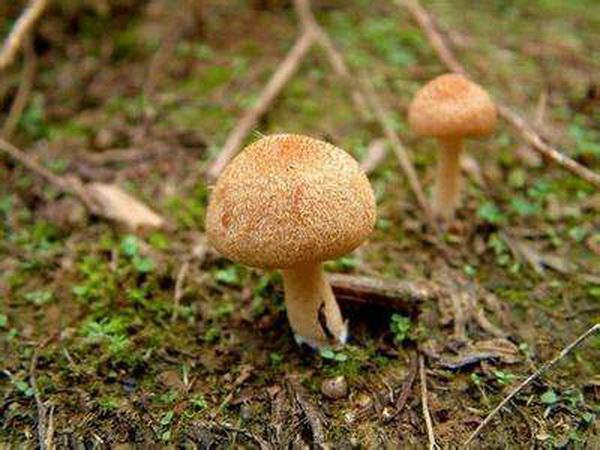
Wood Chips
According to the University of California at Davis, wood chips can be used as the soil medium for those mushrooms that grow well on wood substrates. Mushrooms that grow in woody materials include oyster, shiitake, reishi, maitake and lion's mane mushrooms. You can purchase pre-sterilized wood chips ready for culturing the mushroom spawn.
Compost
Compost is a substrate that requires the most time to prepare, but it makes an effective soil-substitute for growing mushrooms. Compost is a mixture of yard waste, like leaves, grass clippings, weeds and branches, with kitchen waste like coffee grounds, vegetable scraps, eggshells and shells. This matter is kept moist and warm until it deteriorates into a rich, loamy soil-like material. You can make your own compost in a small enclosure in your yard in two to four months, according to the Pennsylvania Department of Environmental Protection. White button mushrooms prefer compost as substrate.
Straw
Straw can also be use as the substrate soil-substitute for growing mushrooms. According to Shroomery, cut wheat or barley straw into 2 to 4 inch pieces and pasteurized by putting it into 150-degree F water for 1 hour, then removed and allowed to drain. It is then cooled to room temperature. It is then placed in a bag with the mushroom mycelium, punctured several times and allowed to grow. Once the mycelium spreads on the surface, the bag is opened and the mushrooms are exposed to the air.
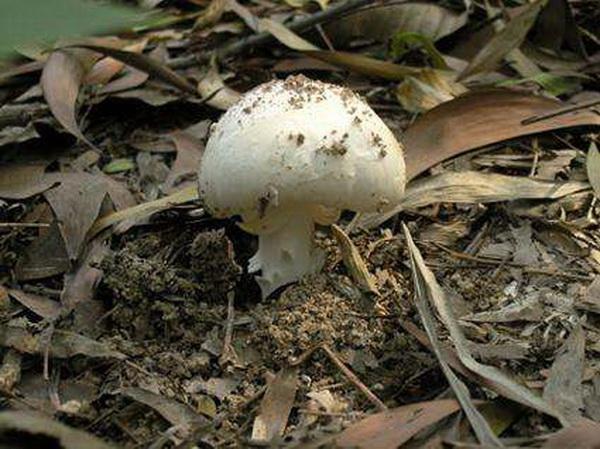
Horse Manure
Horse manure grows mushrooms easily if composted well and mixed with straw. You can then place the mushroom spawn on the surface of the manure compost and rub it into the surface. A bit of lime will help the mushrooms grow. Do not water the manure compost for four weeks, as there is sufficient moisture in the compost, according to CountryFarm Lifestyle. You can purchase sterilized and composted horse manure for your mushroom substrate.
Potting Soil
You can also use ordinary potting soil to grow mushrooms, but you must add additional organic material for the mushroom spawn to eat. Coffee beans, cut in half and soaked in water for five minutes, then placed on the soil gives the potting soil more structure and nutrients for growing mushrooms. Adding vermiculite will give the soil additional body to hold the spawn.

Wood Chips
According to the University of California at Davis, wood chips can be used as the soil medium for those mushrooms that grow well on wood substrates. Mushrooms that grow in woody materials include oyster, shiitake, reishi, maitake and lion's mane mushrooms. You can purchase pre-sterilized wood chips ready for culturing the mushroom spawn.
Compost
Compost is a substrate that requires the most time to prepare, but it makes an effective soil-substitute for growing mushrooms. Compost is a mixture of yard waste, like leaves, grass clippings, weeds and branches, with kitchen waste like coffee grounds, vegetable scraps, eggshells and shells. This matter is kept moist and warm until it deteriorates into a rich, loamy soil-like material. You can make your own compost in a small enclosure in your yard in two to four months, according to the Pennsylvania Department of Environmental Protection. White button mushrooms prefer compost as substrate.
Straw
Straw can also be use as the substrate soil-substitute for growing mushrooms. According to Shroomery, cut wheat or barley straw into 2 to 4 inch pieces and pasteurized by putting it into 150-degree F water for 1 hour, then removed and allowed to drain. It is then cooled to room temperature. It is then placed in a bag with the mushroom mycelium, punctured several times and allowed to grow. Once the mycelium spreads on the surface, the bag is opened and the mushrooms are exposed to the air.

Horse Manure
Horse manure grows mushrooms easily if composted well and mixed with straw. You can then place the mushroom spawn on the surface of the manure compost and rub it into the surface. A bit of lime will help the mushrooms grow. Do not water the manure compost for four weeks, as there is sufficient moisture in the compost, according to CountryFarm Lifestyle. You can purchase sterilized and composted horse manure for your mushroom substrate.
Potting Soil
You can also use ordinary potting soil to grow mushrooms, but you must add additional organic material for the mushroom spawn to eat. Coffee beans, cut in half and soaked in water for five minutes, then placed on the soil gives the potting soil more structure and nutrients for growing mushrooms. Adding vermiculite will give the soil additional body to hold the spawn.
0
0
文章
Miss Chen
2017年11月29日

Mushrooms are fungal fruiting bodies. Most mushrooms have an umbrella-like appearance; they have a broad stalk topped by a flattened or cup-like cap. They produce fungal spores on the underside of the cap. The spores disperse on the wind and create new fungal bodies. Mushrooms grow on a number of different materials such as trees, mulch and compost. Edible mushrooms can be expensive in stores, but you can grow your own button mushrooms in boxes at home with only a few basic supplies.
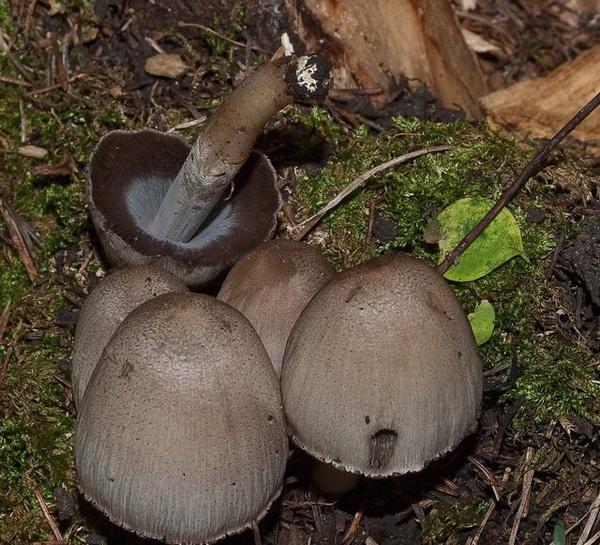
Growing Mushrooms at Home
Step 1
Pile compost into the wooden tray or trays and mix mushroom flake spawn into the compost. Use approximately 1 or 2 cups of mushroom flakes for each 2-by-3-foot tray. Allow the compost and mushroom flake mixture to sit overnight. The next day, press the mixture into the trays using a piece of wood or some heavy bricks. Leave around 2 inches of space at the top of the tray.
Step 2
Place the trays in a cool, dark area such as in a shed, under a table or in a closet. Keep your growing temperature between 65 and 70 degrees Fahrenheit. In about two or three weeks, the top of the compost should be covered in a thin white webbing of fungal mycelium. Mist the mixture with water several times a day. Do not pour water directly on the compost, because this can damage the developing fungal growth.
Step 3
Apply peat moss to the top of the compost mixture when the mycelial webbing begins to form. Moisten the peat moss until it holds together easily when you squeeze it in your hand. Add around 1.5 inches to the top of the compost and moisten it again so that it is thoroughly dampened but not soggy. Lower the temperature to around 55 degrees F. Cover the moistened peat moss with a layer of damp newspapers. Spray the newspapers twice a day to maintain the moisture level.

Step 4
Remove the newspapers after around 10 days. Small white pinheads should be apparent within several days after removing the newspaper. They will ripen into fresh mushrooms in around a week. Your mushrooms will grow faster if you increase the temperature in the room to around 65 or 70 degrees F, but you may end up with too many at once, so it's usually better to keep the temperature between 50 and 55 degrees so that the mushrooms grow more slowly.
Step 5
Your compost and peat moss mixture will continue to produce mushrooms approximately every two weeks for between three and six months. Dispose of the compost when it stops yielding mushrooms and start the process over.

Growing Mushrooms at Home
Step 1
Pile compost into the wooden tray or trays and mix mushroom flake spawn into the compost. Use approximately 1 or 2 cups of mushroom flakes for each 2-by-3-foot tray. Allow the compost and mushroom flake mixture to sit overnight. The next day, press the mixture into the trays using a piece of wood or some heavy bricks. Leave around 2 inches of space at the top of the tray.
Step 2
Place the trays in a cool, dark area such as in a shed, under a table or in a closet. Keep your growing temperature between 65 and 70 degrees Fahrenheit. In about two or three weeks, the top of the compost should be covered in a thin white webbing of fungal mycelium. Mist the mixture with water several times a day. Do not pour water directly on the compost, because this can damage the developing fungal growth.
Step 3
Apply peat moss to the top of the compost mixture when the mycelial webbing begins to form. Moisten the peat moss until it holds together easily when you squeeze it in your hand. Add around 1.5 inches to the top of the compost and moisten it again so that it is thoroughly dampened but not soggy. Lower the temperature to around 55 degrees F. Cover the moistened peat moss with a layer of damp newspapers. Spray the newspapers twice a day to maintain the moisture level.

Step 4
Remove the newspapers after around 10 days. Small white pinheads should be apparent within several days after removing the newspaper. They will ripen into fresh mushrooms in around a week. Your mushrooms will grow faster if you increase the temperature in the room to around 65 or 70 degrees F, but you may end up with too many at once, so it's usually better to keep the temperature between 50 and 55 degrees so that the mushrooms grow more slowly.
Step 5
Your compost and peat moss mixture will continue to produce mushrooms approximately every two weeks for between three and six months. Dispose of the compost when it stops yielding mushrooms and start the process over.
1
1
文章
Miss Chen
2017年11月26日

Oyster mushrooms are found in clusters sprouting from dead, and sometimes fallen, trees. They can be spotted from late fall to spring, almost all over the world. The spores of oyster mushrooms are collected for cultivating. Oyster mushrooms are typically eaten in soups and stews because of their subtle, nutty flavor. Growing oyster mushrooms from the spores includes swabbing the spore print with a cotton swab and wiping the spores onto a petri dish for cultivation.

Step 1
Cut off the stem of the oyster mushroom at the base of the fan-shaped cap. Cut below the white bottom of the cap.
Step 2
Place the oyster mushroom cap on the dark colored paper with the underside down on the paper. This side has the gills that hold the spores.
Step 3
Place the glass cup or bowl over the mushroom cap and place the setup in a cool and dry place for 48 hours.

Step 4
Remove the glass cup or bowl and the mushroom to find a white spore print where the spores have collected on the paper.

Step 1
Cut off the stem of the oyster mushroom at the base of the fan-shaped cap. Cut below the white bottom of the cap.
Step 2
Place the oyster mushroom cap on the dark colored paper with the underside down on the paper. This side has the gills that hold the spores.
Step 3
Place the glass cup or bowl over the mushroom cap and place the setup in a cool and dry place for 48 hours.

Step 4
Remove the glass cup or bowl and the mushroom to find a white spore print where the spores have collected on the paper.
0
0
Lucky Coyote
2017年11月02日

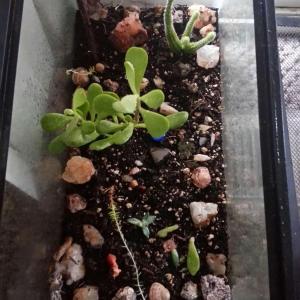
I'm going to get some moss spores and make the bottom of my tank a lush carpet

1
0
文章
Dummer. ゛☀
2017年09月24日

A range of fungal and bacterial diseases affect succulent plants, some of which can collapse and die very rapidly, once the disease has taken a hold. The world abounds with fungal spores, which are opportunists, waiting for the correct conditions for germination. Generally, fungi do not affect cactus and succulent plant collections because of the relatively dry conditions used by most growers. Damp conditions are a universal requirement for activation of fungal spores, and many of the problems with fungal infection of succulent plants arise from failure of excessive watering or condensation to evaporate, because of unexpected or seasonal cold weather. Damage from insect pests, which penetrate the plant's epidermis to feed on sap, may provide a route for entry of fungi into the nutrient-rich inner tissues. Hence, unexpected collapse of a plant is often the final symptom of a mealy bug infestation which has gone unnoticed. On the other hand, some fungi provide their own mechanisms for penetrating the epidermis.
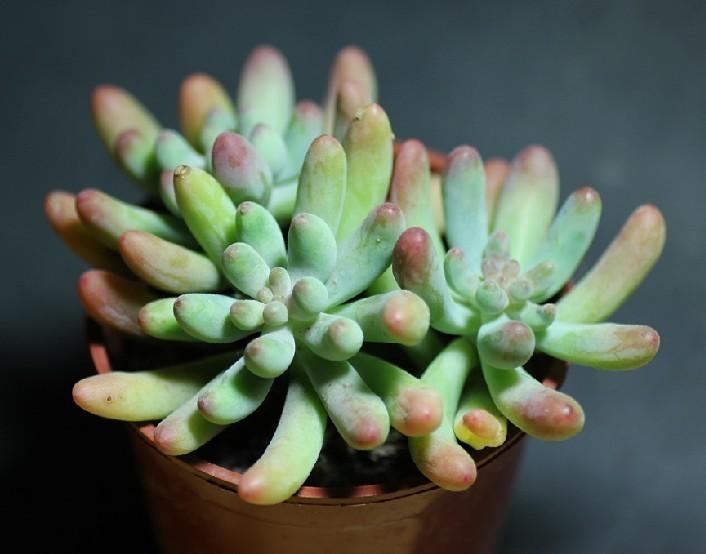
Seedlings are especially susceptible to fungal attack of the lower stem which causes damping off. Once the seedling has wilted, it is usually too late to save it and preventative measure are a better option.
Aloe rust
is a fungus that causes round brown or black spots on leaves of Aloes and Gasterias. It is of some importance in commercial cultivation of Aloe vera. The black colour is caused by oxidation of phenolic substances in the sap which seals of the affected area. Once formed, the black spots are permanent and can be unsightly, but do not usually spread. Fungi can be discouraged by spraying with a systemic fungicide, but prevention is the best option. Do not allow water to lie on the leaves for long and avoid excess damp in cool weather. Arrange for plenty of air circulation and sunlight.

Black or Sooty Mold
A ubiquitous fungus which is often seen on plants covered with honeydew from whitefly, mealy bugs etc or on plants with nectar-producing glands such as certain Ferocacti. Generally, sooty mould is more unsightly than harmful on otherwise healthy plants. However, it will attack seedlings following mechanical damage or excessively wet conditions and other weak or damaged plants.
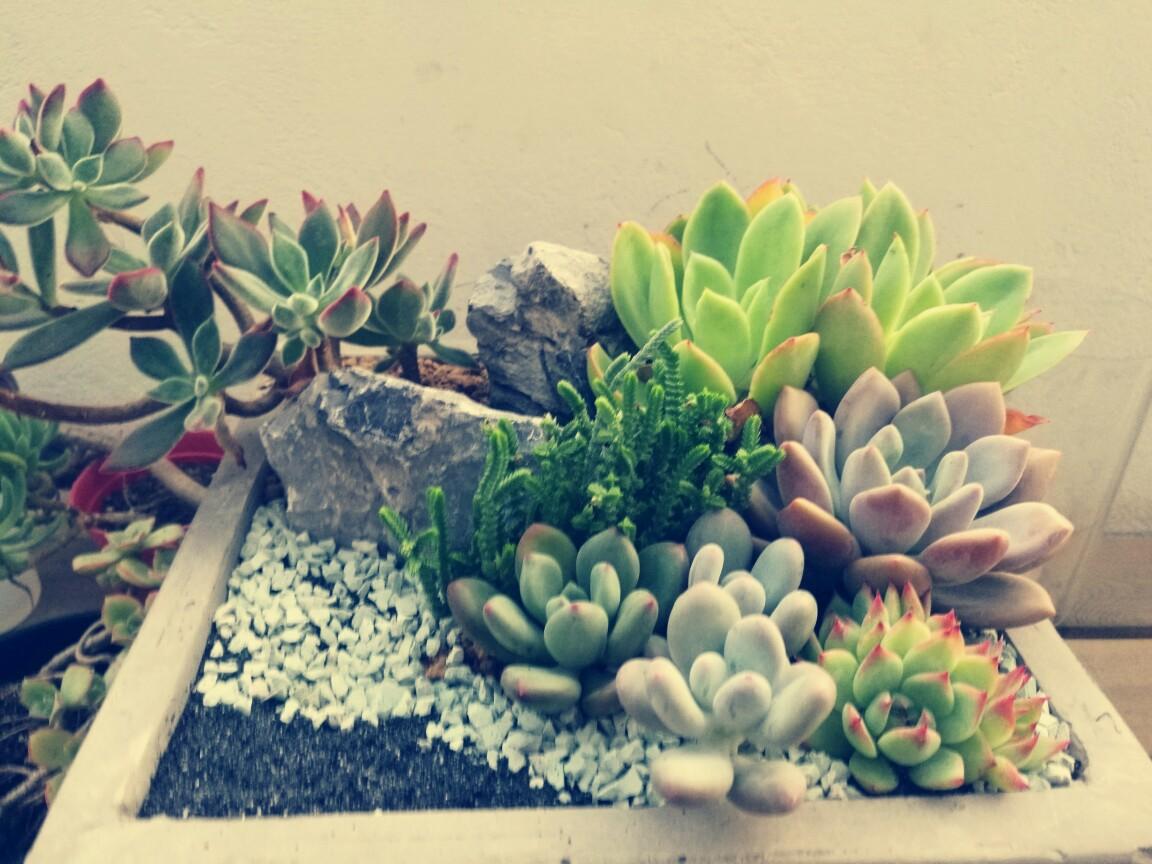
Basal Stem Rot
Cold or damp conditions may lead to rotting of stems, often just around the soil level where damp soil may be in prolonged contact with the plants stem. The rotten tissues may go black or reddish brown depending on the plant and organism attacking it. If the stem is cut well above the rotten part, it may be possible to re-root or graft the healthy tissues and save the plant. Many people support the basal stems of difficult plants with a layer of grit above the potting medium, so that there will be little water retention against the stem in this critical region.
A range of brown or gray spots spots on leaves and corky brown marks on stems of are undoubtably due to fungal attack following damage or prolonged contact with drops of water. Others may reflect poor cultural conditions or the natural development of corky or woody stems as the plant matures. In many cases, fungal attack and poor culture are linked. Improving ventilation, temperature control, watering and application of fertiliser may help to prevent all sorts of problems.
Growers of Asclepiads will be familiar with black spots developing on the stem which spread and develop into sunken patches of dead tissues. This fungal infection can spread to the whole plant unless the affected part is removed promptly or treated with fungicide. Usually this happens after overal-liberal water, perhaps where water droplets fail to evaporate because of unexpectedly cold conditions.
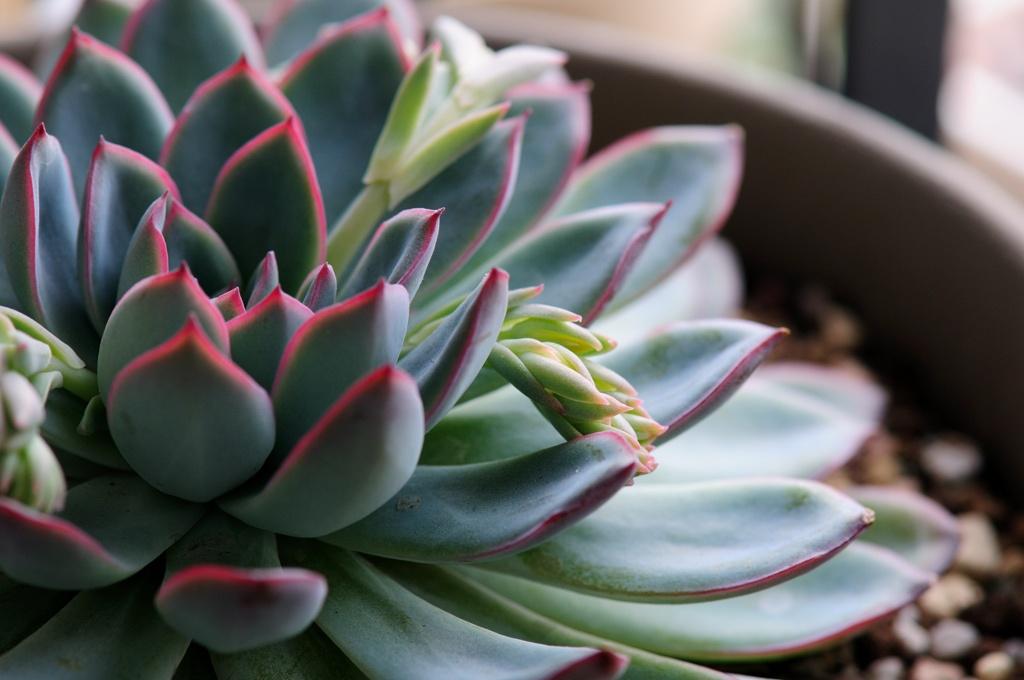
Control of Fungal Diseases
Once a plant has collapsed or the stems have started to become soft and rotten it is often too late to save it. However, an attempt may be made to save part of a valuable plant by cutting away the infected tissues with a clean knife, sterilised with methylated spirits. A wide margin of apparently sound tissue should be removed as the infection will almost certainly have spread further than is apparent. The remainder can be painted or dipped in a systemic fungicide such as Nimrod T or dusted with sulphur and rooted as a cutting or grafted onto a compatible stock.

Botrytis or damping off
This common cause of early loss of seedlings can be avoided by lightly spraying the potting mix with a systemic fungicide such as Benlate or Nimrod T. Spraying with a copper sulfate solution is a traditional remedy, but copper fungicides may accumulate in the soil with potential copper toxicity to plants. Any seedlings that become infected should be removed promptly before more spores are produced, the remaining seedlings sprayed with fungicide and surface moisture alllowed to evaporate.

Seedlings are especially susceptible to fungal attack of the lower stem which causes damping off. Once the seedling has wilted, it is usually too late to save it and preventative measure are a better option.
Aloe rust
is a fungus that causes round brown or black spots on leaves of Aloes and Gasterias. It is of some importance in commercial cultivation of Aloe vera. The black colour is caused by oxidation of phenolic substances in the sap which seals of the affected area. Once formed, the black spots are permanent and can be unsightly, but do not usually spread. Fungi can be discouraged by spraying with a systemic fungicide, but prevention is the best option. Do not allow water to lie on the leaves for long and avoid excess damp in cool weather. Arrange for plenty of air circulation and sunlight.

Black or Sooty Mold
A ubiquitous fungus which is often seen on plants covered with honeydew from whitefly, mealy bugs etc or on plants with nectar-producing glands such as certain Ferocacti. Generally, sooty mould is more unsightly than harmful on otherwise healthy plants. However, it will attack seedlings following mechanical damage or excessively wet conditions and other weak or damaged plants.

Basal Stem Rot
Cold or damp conditions may lead to rotting of stems, often just around the soil level where damp soil may be in prolonged contact with the plants stem. The rotten tissues may go black or reddish brown depending on the plant and organism attacking it. If the stem is cut well above the rotten part, it may be possible to re-root or graft the healthy tissues and save the plant. Many people support the basal stems of difficult plants with a layer of grit above the potting medium, so that there will be little water retention against the stem in this critical region.
A range of brown or gray spots spots on leaves and corky brown marks on stems of are undoubtably due to fungal attack following damage or prolonged contact with drops of water. Others may reflect poor cultural conditions or the natural development of corky or woody stems as the plant matures. In many cases, fungal attack and poor culture are linked. Improving ventilation, temperature control, watering and application of fertiliser may help to prevent all sorts of problems.
Growers of Asclepiads will be familiar with black spots developing on the stem which spread and develop into sunken patches of dead tissues. This fungal infection can spread to the whole plant unless the affected part is removed promptly or treated with fungicide. Usually this happens after overal-liberal water, perhaps where water droplets fail to evaporate because of unexpectedly cold conditions.

Control of Fungal Diseases
Once a plant has collapsed or the stems have started to become soft and rotten it is often too late to save it. However, an attempt may be made to save part of a valuable plant by cutting away the infected tissues with a clean knife, sterilised with methylated spirits. A wide margin of apparently sound tissue should be removed as the infection will almost certainly have spread further than is apparent. The remainder can be painted or dipped in a systemic fungicide such as Nimrod T or dusted with sulphur and rooted as a cutting or grafted onto a compatible stock.

Botrytis or damping off
This common cause of early loss of seedlings can be avoided by lightly spraying the potting mix with a systemic fungicide such as Benlate or Nimrod T. Spraying with a copper sulfate solution is a traditional remedy, but copper fungicides may accumulate in the soil with potential copper toxicity to plants. Any seedlings that become infected should be removed promptly before more spores are produced, the remaining seedlings sprayed with fungicide and surface moisture alllowed to evaporate.
2
1
文章
Dummer. ゛☀
2017年09月15日

Cedar apple rust (Gymnosporangium juniperi-virginianae) is a fungal disease that requires juniper plants to complete its complicated two year life-cycle. Spores overwinter as a reddish-brown gall on young twigs of various juniper species. In early spring, during wet weather, these galls swell and bright orange masses of spores are blown by the wind where they infect susceptible apple and crab-apple trees. The spores that develop on these trees will only infect junipers the following year. From year to year, the disease must pass from junipers to apples to junipers again; it cannot spread between apple trees.
On apple and crab-apple trees, look for pale yellow pinhead sized spots on the upper surface of the leaves shortly after bloom. These gradually enlarge to bright orange-yellow spots which make the disease easy to identify. Orange spots may develop on the fruit as well. Heavily infected leaves may drop prematurely.
Treatment
Choose resistant cultivars when available.
Rake up and dispose of fallen leaves and other debris from under trees.
Remove galls from infected junipers. In some cases, juniper plants should be removed entirely.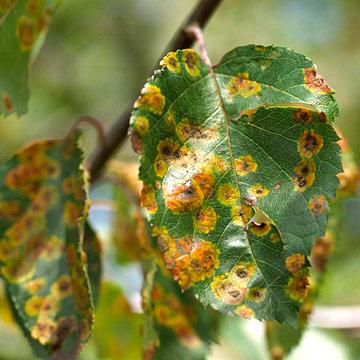
Apply preventative, disease-fighting fungicides labeled for use on apples weekly, starting with bud break, to protect trees from spores being released by the juniper host. This occurs only once per year, so additional applications after this springtime spread are not necessary.
On juniper, rust can be controlled by spraying plants with a copper solution (0.5 to 2.0 oz/ gallon of water) at least four times between late August and late October.
Safely treat most fungal and bacterial diseases with SERENADE Garden. This broad spectrum bio-fungicide uses a patented strain of Bacillus subtilis that is registered for organic use. Best of all, SERENADE is completely non-toxic to honey bees and beneficial insects.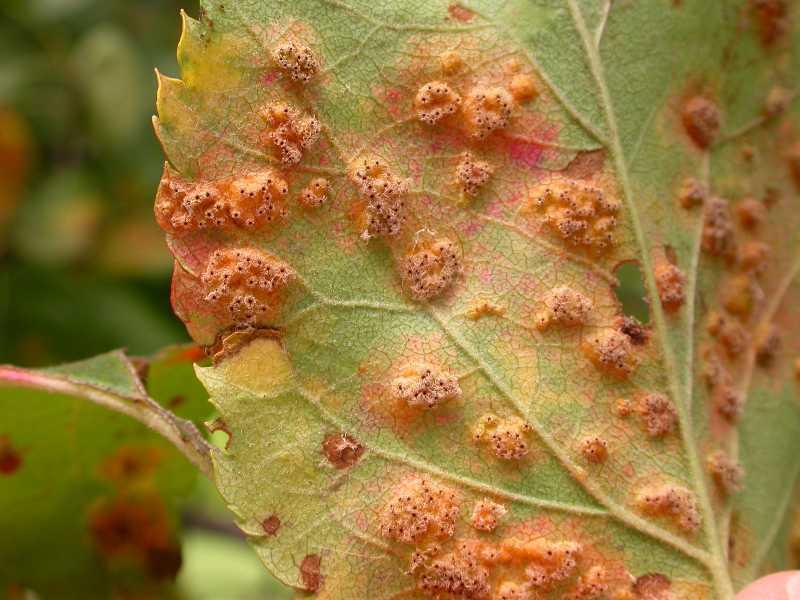
Containing sulfur and pyrethrins, Bonide® Orchard Spray is a safe, one-hit concentrate for insect attacks and fungal problems. For best results, apply as a protective spray (2.5 oz/ gallon) early in the season. If disease, insects or wet weather are present, mix 5 oz in one gallon of water. Thoroughly spray all parts of the plant, especially new shoots.
Contact your local Agricultural Extension office for other possible solutions in your area.

On apple and crab-apple trees, look for pale yellow pinhead sized spots on the upper surface of the leaves shortly after bloom. These gradually enlarge to bright orange-yellow spots which make the disease easy to identify. Orange spots may develop on the fruit as well. Heavily infected leaves may drop prematurely.
Treatment
Choose resistant cultivars when available.
Rake up and dispose of fallen leaves and other debris from under trees.
Remove galls from infected junipers. In some cases, juniper plants should be removed entirely.

Apply preventative, disease-fighting fungicides labeled for use on apples weekly, starting with bud break, to protect trees from spores being released by the juniper host. This occurs only once per year, so additional applications after this springtime spread are not necessary.
On juniper, rust can be controlled by spraying plants with a copper solution (0.5 to 2.0 oz/ gallon of water) at least four times between late August and late October.
Safely treat most fungal and bacterial diseases with SERENADE Garden. This broad spectrum bio-fungicide uses a patented strain of Bacillus subtilis that is registered for organic use. Best of all, SERENADE is completely non-toxic to honey bees and beneficial insects.

Containing sulfur and pyrethrins, Bonide® Orchard Spray is a safe, one-hit concentrate for insect attacks and fungal problems. For best results, apply as a protective spray (2.5 oz/ gallon) early in the season. If disease, insects or wet weather are present, mix 5 oz in one gallon of water. Thoroughly spray all parts of the plant, especially new shoots.
Contact your local Agricultural Extension office for other possible solutions in your area.
0
0
文章
Dummer. ゛☀
2017年09月14日

Now that you have Basil Downy Mildew, what do you do next? It is a highly contagious disease, with little warning. Because it is transmitted through spores that are nearly invisible to the naked eye, it can be blown in on the wind, carried in on clothing, hands or tools. Here are some things you can do after you find Basil Downy Mildew in your garden.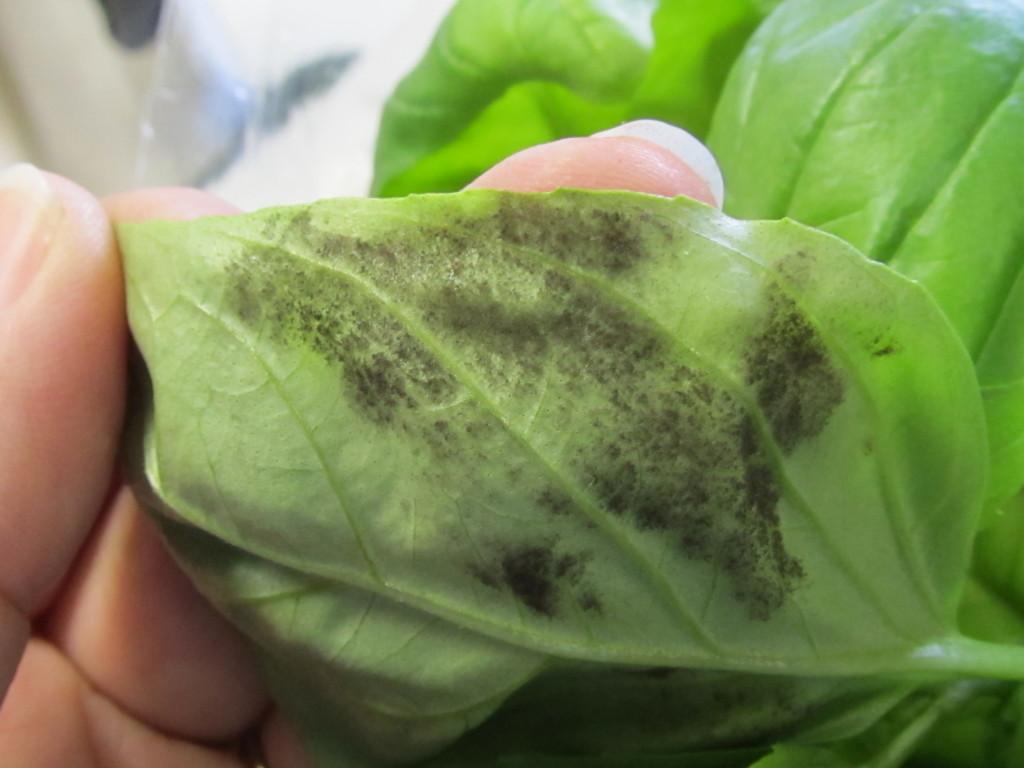
Remove Infected Plants
Basil that has become infected with Downy Mildew may have a yellowish appearance, similar to a nutritional problem.
The leaves turn yellow and fall off, while the stems wither, and the plant eventually dies. The most common symptom is the dusty spots, actually spores, that are located on the bottoms of the leaves. If you want a definitive diagnosis, you can bring an affected leaf to your local County Extension office for identification. Carefully pinch off a leaf and place it in a ziploc baggie for transport.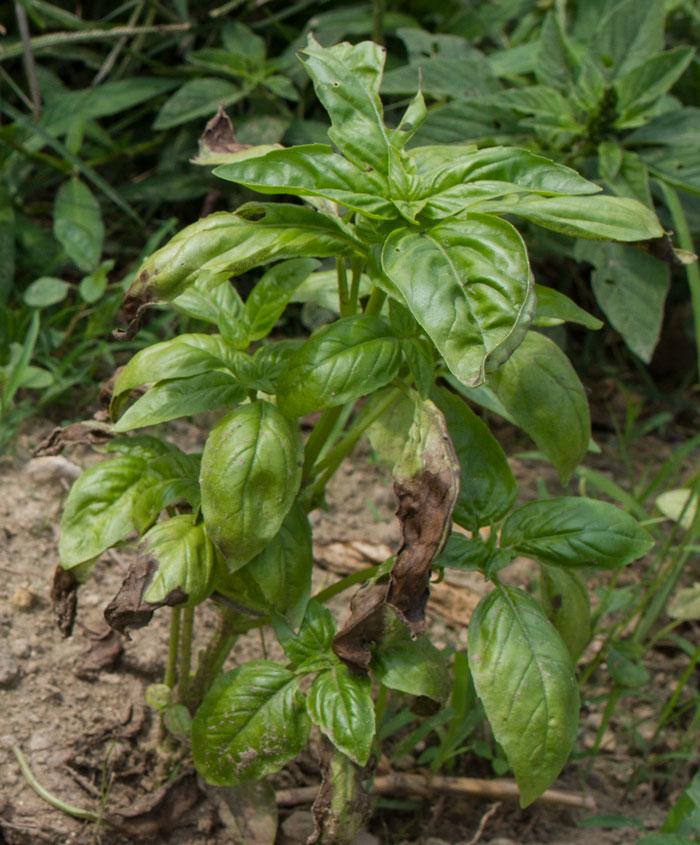
Once you are certain that it is Downy Mildew, cover the entire plant with a bag to prevent as much of the spores from being shaken off as possible. Pull up the entire plant and remove from garden area. Do not try to compost or try to remove only the visibly affected leaves. Both of these techniques can result in the spread of the spores. Do not save your basil seeds from any part of that year's crop. The spores can infect the seeds and affect the following year's plants.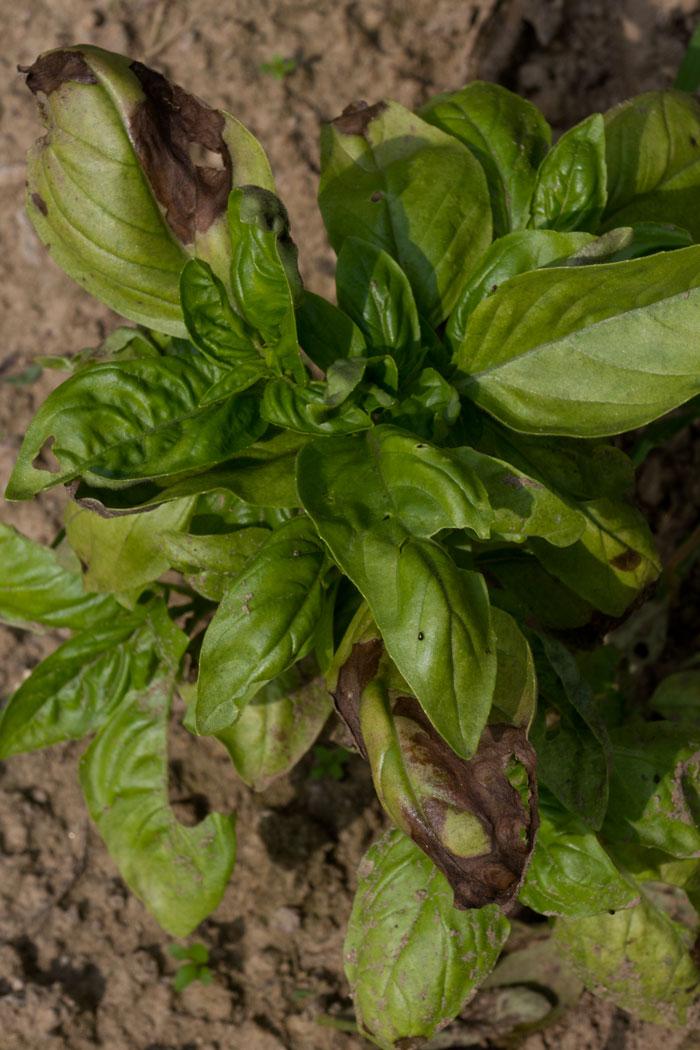
Will It Stay In My Soil?
Yes.
The disease can stay viable for many years in the soil. Some experts say that the spores can stay viable for 8 years or more. If nothing else, rotate your crop of basil and plant in an entirely new location for the next season.
Is Basil Poisonous That Has Downy Mildew?
In a word, no. However, it is not advisable to eat leaves that are clearly affected.
When you first notice signs of BDM, it is best to remove the entire plant and make pesto out of all the healthy leaves. Because basil grows so fast, quick removal and starting new plants in a new location is the best way to prevent spreading spores.

Remove Infected Plants
Basil that has become infected with Downy Mildew may have a yellowish appearance, similar to a nutritional problem.
The leaves turn yellow and fall off, while the stems wither, and the plant eventually dies. The most common symptom is the dusty spots, actually spores, that are located on the bottoms of the leaves. If you want a definitive diagnosis, you can bring an affected leaf to your local County Extension office for identification. Carefully pinch off a leaf and place it in a ziploc baggie for transport.

Once you are certain that it is Downy Mildew, cover the entire plant with a bag to prevent as much of the spores from being shaken off as possible. Pull up the entire plant and remove from garden area. Do not try to compost or try to remove only the visibly affected leaves. Both of these techniques can result in the spread of the spores. Do not save your basil seeds from any part of that year's crop. The spores can infect the seeds and affect the following year's plants.

Will It Stay In My Soil?
Yes.
The disease can stay viable for many years in the soil. Some experts say that the spores can stay viable for 8 years or more. If nothing else, rotate your crop of basil and plant in an entirely new location for the next season.

Is Basil Poisonous That Has Downy Mildew?
In a word, no. However, it is not advisable to eat leaves that are clearly affected.
When you first notice signs of BDM, it is best to remove the entire plant and make pesto out of all the healthy leaves. Because basil grows so fast, quick removal and starting new plants in a new location is the best way to prevent spreading spores.
0
0
文章
Dummer. ゛☀
2017年08月27日

Cactus are tough plants with many useful adaptations but even they can be laid low by tiny fungal spores. Phyllosticta pad spot is one of the fungal diseases that affects cactus in the Opuntia family. Phyllosticta symptoms in prickly pears are most prevalent and plants with the disease are at risk of cosmetic and vigor damage. Certain times of the year are the worst, but fortunately, once conditions dry out, the damaged areas abort the fungus and heal to a certain degree.
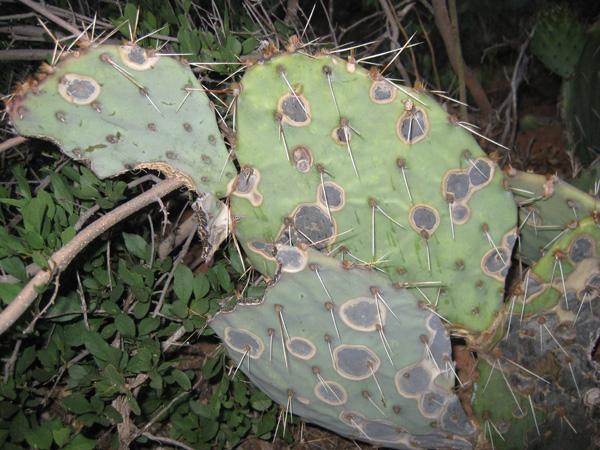
Phyllosticta Symptoms in Prickly Pears
Prickly pear leaf spot is a disease of that plant and others in the Opuntia family. The disease is brought about by tiny spores from the Phyllostica fungus. These colonize on the tissues, primarily the pads, of the cactus and eat into it causing lesions. There is no recommended treatment for Phyllosticta fungus, but it can spread to other ornamental plants and removal of infected pads and plant material is suggested to prevent the disease from reaching other species.
In the cactus family, prickly pears are most affected by Phyllosticta concava. The disease is also called dry rot because it leaves lesions on the plant, which eventually callus and do not weep fluid like other fungal diseases. The disease starts out with dark, almost black, irregularly circular lesions which that in size from 1 to 2 inches in diameter. Tiny reproductive structures, called pycnidia, produce the dark color. These produce and release the spores which can infect other plants. As conditions change, the spots will fall out of the cactus and the area will callus over, leaving scars on the pads. No serious damage is done, provided the weather conditions transition to warm and dry.
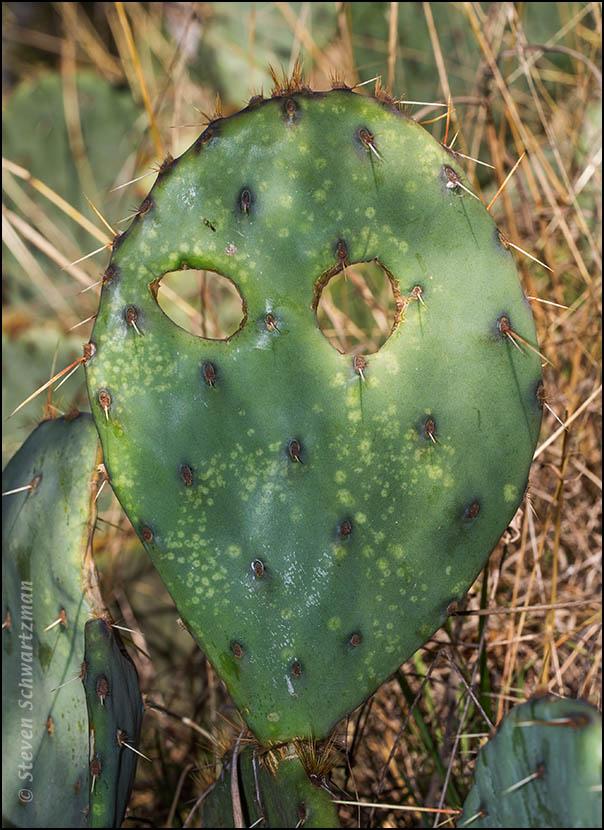
Phyllostica Control in Cactus
For the most part, prickly pear leaf spot does not harm the plants but it is contagious and it does damage young pads the most. Lower pads are the most severely affected, as these are close to the ground. The spores spread through wind or splashing activity. The disease is active during the rainy season and where humidity is high. Once the weather changes to dry conditions, the fungus becomes inactive and falls out of the plant tissue. Severely affected tissue can develop many lesions, making way for the introduction of other pathogens and insects which can cause more damage than prickly pear leaf spot. Experts do not recommend fungicide or any other treatment for Phyllosticta fungus. This is probably due to the fact that the fungus is short acting and weather conditions usually improve, deactivating the disease. Additionally, the fungus doesn’t appear to impair the plant in most cases.
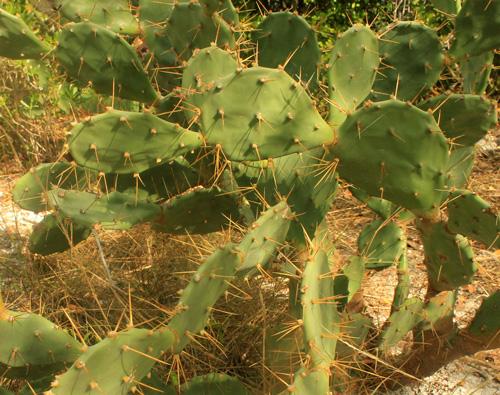
Suggested Phyllosticta control in cactus is removal of infected parts. This is the case where pads have been invaded by numerous lesions and the numerous fruiting bodies pose an infection potential to the rest of the plant and surrounding species. Composting the infected plant material may not kill the spores. Therefore, bagging and discarding the pads is advised.

Phyllosticta Symptoms in Prickly Pears
Prickly pear leaf spot is a disease of that plant and others in the Opuntia family. The disease is brought about by tiny spores from the Phyllostica fungus. These colonize on the tissues, primarily the pads, of the cactus and eat into it causing lesions. There is no recommended treatment for Phyllosticta fungus, but it can spread to other ornamental plants and removal of infected pads and plant material is suggested to prevent the disease from reaching other species.
In the cactus family, prickly pears are most affected by Phyllosticta concava. The disease is also called dry rot because it leaves lesions on the plant, which eventually callus and do not weep fluid like other fungal diseases. The disease starts out with dark, almost black, irregularly circular lesions which that in size from 1 to 2 inches in diameter. Tiny reproductive structures, called pycnidia, produce the dark color. These produce and release the spores which can infect other plants. As conditions change, the spots will fall out of the cactus and the area will callus over, leaving scars on the pads. No serious damage is done, provided the weather conditions transition to warm and dry.

Phyllostica Control in Cactus
For the most part, prickly pear leaf spot does not harm the plants but it is contagious and it does damage young pads the most. Lower pads are the most severely affected, as these are close to the ground. The spores spread through wind or splashing activity. The disease is active during the rainy season and where humidity is high. Once the weather changes to dry conditions, the fungus becomes inactive and falls out of the plant tissue. Severely affected tissue can develop many lesions, making way for the introduction of other pathogens and insects which can cause more damage than prickly pear leaf spot. Experts do not recommend fungicide or any other treatment for Phyllosticta fungus. This is probably due to the fact that the fungus is short acting and weather conditions usually improve, deactivating the disease. Additionally, the fungus doesn’t appear to impair the plant in most cases.

Suggested Phyllosticta control in cactus is removal of infected parts. This is the case where pads have been invaded by numerous lesions and the numerous fruiting bodies pose an infection potential to the rest of the plant and surrounding species. Composting the infected plant material may not kill the spores. Therefore, bagging and discarding the pads is advised.
0
0
文章
Miss Chen
2017年08月10日

Rose plants exhibiting stem discoloration or blackening may have contracted a fungal disease that causes stem cankers. Stem cankers are caused by several different fungi, according to Ohio State University. These fungal spores enter through the wounds made in stems by improper pruning or weather damage. It is important for rose gardeners to recognize the signs of stem cankers and employ proper disease management practices.

Stem Cankers
Disease-causing fungal spores overwinter in debris left underneath rose plants, according to the University of Georgia. In the spring when temperatures rise, these fungal spores germinate and spread through the wind. Often, rose plants are infected during hot humid weather. Improper pruning practices, rainwater, irrigation water, open wounds and infected pruning tools spread fungal spores to different areas of your plant. Gardeners must employ proper management practices and monitor their plant for symptoms during hot humid weather.
Symptoms
Infected stems display lesions that grow in size and become discolored. Lesions may start off turning yellow or purple, according to the University of Georgia. Over time, lesions sink into the stems, take on a wrinkly appearance and crack. Furthermore, infected areas turn black. You may see the black fruiting bodies of the fungal spores growing from these infected areas. The result is stem girdling, which prevents both water and nutrients from getting past the cankers.
Treatment
Spray your infected rose plant with the same type of fungicide that you would use to treat blackspot disease. Your fungicide may contain active ingredients such as chlorothalonil, maneb and benomyl, according to Mississippi State University. Avoid spraying a rose plant that is suffering from water stress with fungicide to prevent causing damage. Continue to spray during the growing season to treat stem cankers.
Pruning
Remove diseased portions of your rose plant. Dip your bypass shears in a mixture of 70 percent denatured alcohol and 30 percent water. Make 45-degree angled cuts 5 to 6 inches below the stem canker, as suggested by the University of Georgia. Apply a small amount of glue to the wound to keep fungal spores from entering the plant. Clean up all debris underneath your rose plants. Burn or throw away debris, but do not place the diseased portions of the plant in your compost.

Stem Cankers
Disease-causing fungal spores overwinter in debris left underneath rose plants, according to the University of Georgia. In the spring when temperatures rise, these fungal spores germinate and spread through the wind. Often, rose plants are infected during hot humid weather. Improper pruning practices, rainwater, irrigation water, open wounds and infected pruning tools spread fungal spores to different areas of your plant. Gardeners must employ proper management practices and monitor their plant for symptoms during hot humid weather.
Symptoms
Infected stems display lesions that grow in size and become discolored. Lesions may start off turning yellow or purple, according to the University of Georgia. Over time, lesions sink into the stems, take on a wrinkly appearance and crack. Furthermore, infected areas turn black. You may see the black fruiting bodies of the fungal spores growing from these infected areas. The result is stem girdling, which prevents both water and nutrients from getting past the cankers.
Treatment
Spray your infected rose plant with the same type of fungicide that you would use to treat blackspot disease. Your fungicide may contain active ingredients such as chlorothalonil, maneb and benomyl, according to Mississippi State University. Avoid spraying a rose plant that is suffering from water stress with fungicide to prevent causing damage. Continue to spray during the growing season to treat stem cankers.

Pruning
Remove diseased portions of your rose plant. Dip your bypass shears in a mixture of 70 percent denatured alcohol and 30 percent water. Make 45-degree angled cuts 5 to 6 inches below the stem canker, as suggested by the University of Georgia. Apply a small amount of glue to the wound to keep fungal spores from entering the plant. Clean up all debris underneath your rose plants. Burn or throw away debris, but do not place the diseased portions of the plant in your compost.
0
1
文章
Dummer. ゛☀
2017年08月08日

When black spores appear on your lawn or garden plants, it’s understandably frustrating -after all, you’ve given those plants lots of tender care and they’re sick despite your efforts. Try not to panic, we’ve got lots of information about treating black smut fungus, a common cause of black spores on turfgrass, small grains and ornamentals. What is Black Smut Fungus? Fungal diseases can be the most frustrating to deal with and they seem to spring up out of nowhere and disappear with the same level of mystery. Although black smut is a minor disease in most parts of the country, it’s important to know how to handle it when your lawn or garden suddenly develops a load of black spores.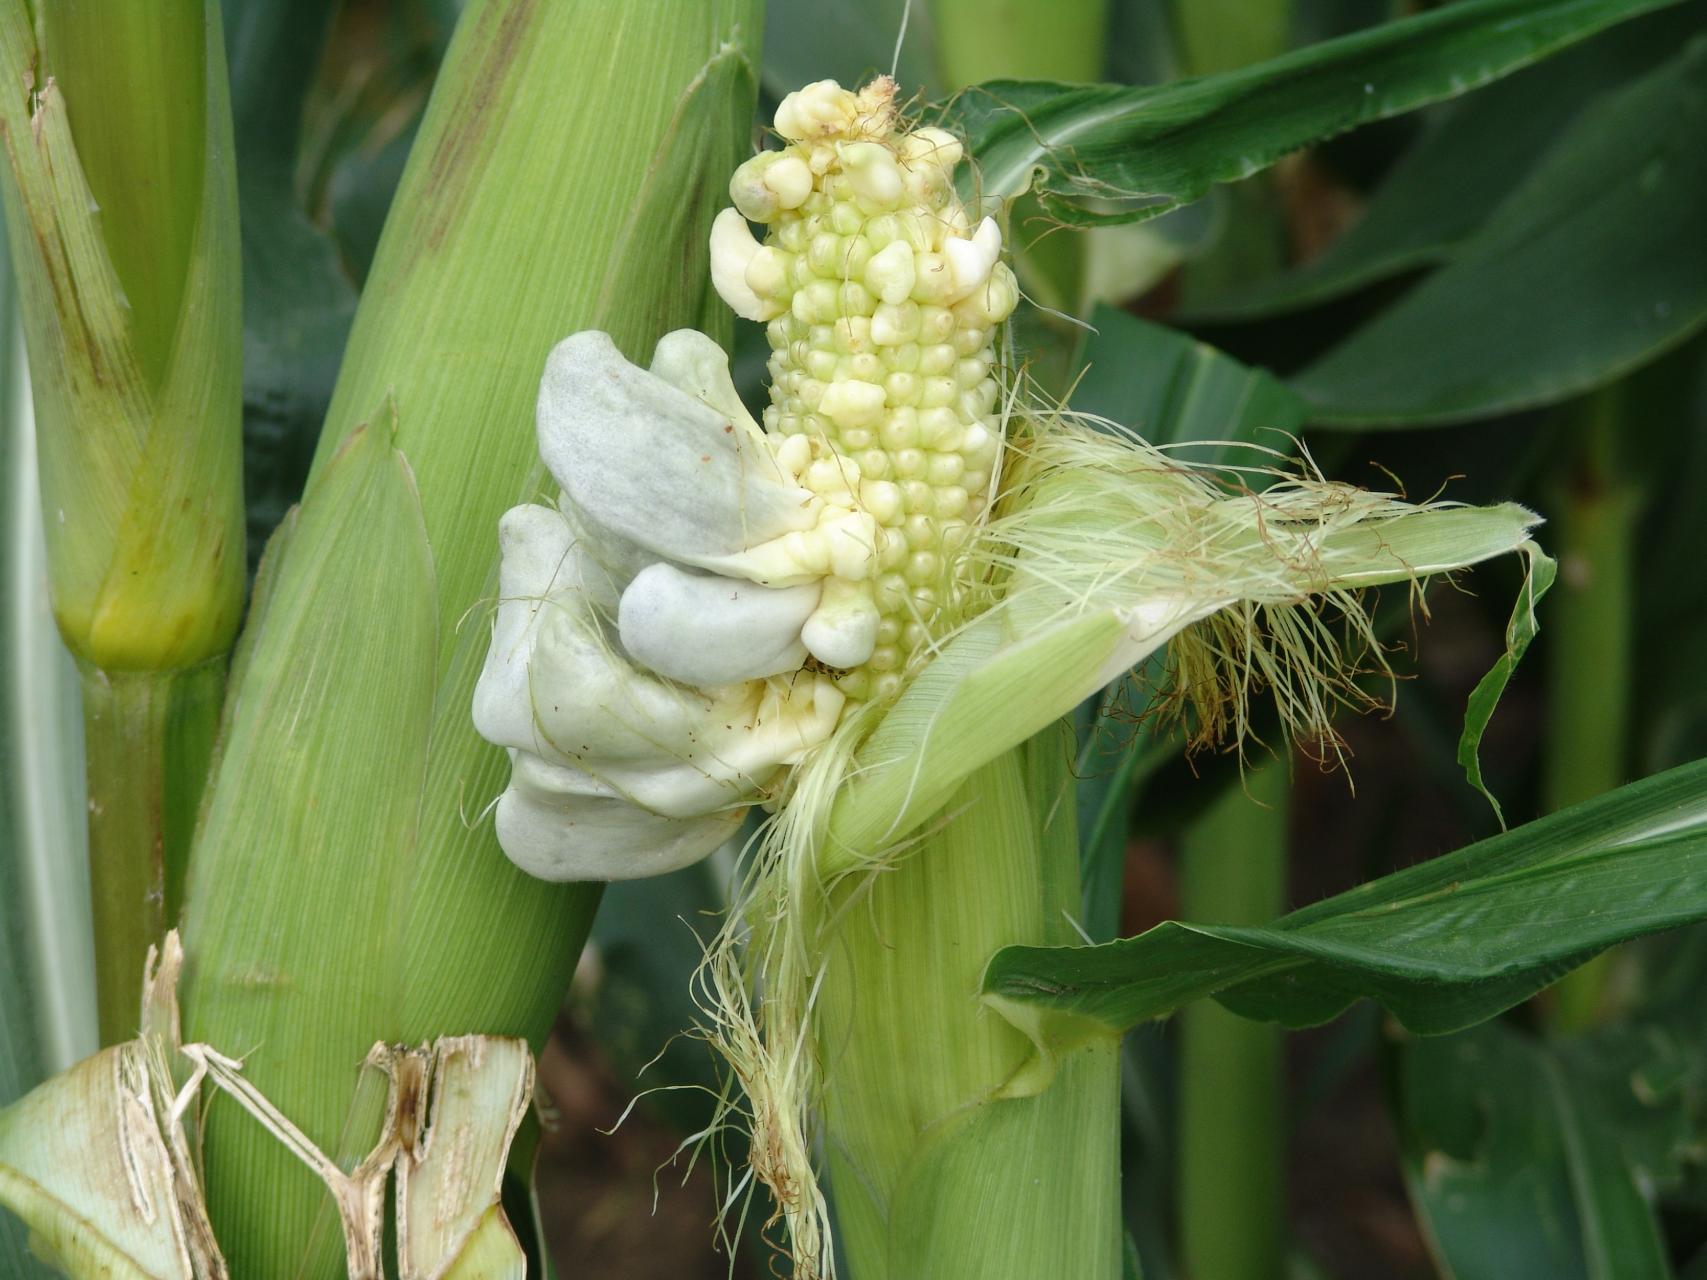
Black smut is a fungal disease that appears on small grains, grasses, onions and even herbaceous ornamentals under the right conditions. Unlike many fungal diseases, though, plants affected by smut may live many years before they begin to show signs of the disease. Turf grasses, for example, often don’t look sick until three or four years after their initial infection. Although signs of smut will vary based on the species of smut and the host, common smut fungus symptoms include galls or boils that enlarge any above-ground plant tissues, yellow striping on leaves or a powdery brown or black material on plant parts. The black or brown powder is actually a fine covering of reproductive spores and will occur late in the disease process.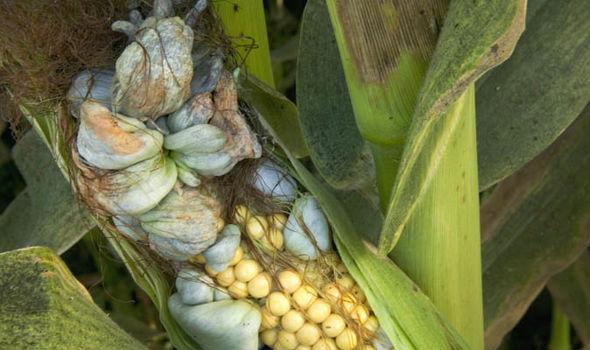
Smut Fungus Control Because smut spores are spread by wind and splashing water, it can be difficult to stop the problem at the source. Instead, treating black smut fungus has to focus on creating an unfriendly environment for the spores. When the outdoor temperatures rise above 60 degrees Fahrenheit (15 C.), it may seem like your smut problem is defeated, but it’s hard to kill the disease completely since the fungus resides in the growing points of the plant. On a lawn, an infection of smut can be tolerated provided that you’re overseeding with a more resistant grass species, such as the Kentucky bluegrass. Most importantly, you’ll have to carefully monitor your fertilization practices, as smut thrives in a high nitrogen environment.
Switch to a balanced fertilizer, such as a 10-10-10, and only apply it in the fall, after the smut pathogen is dormant. Keeping your plants healthy will help them resist a smut infection, but if the disease is very severe in valuable plants, you may consider applying a fungicide. Demethylase inhibitors are very effective when applied in the spring at the label rates. Remember, fungicides are always a last resort option, as most fungal issues can be corrected by modifying the environment.

Black smut is a fungal disease that appears on small grains, grasses, onions and even herbaceous ornamentals under the right conditions. Unlike many fungal diseases, though, plants affected by smut may live many years before they begin to show signs of the disease. Turf grasses, for example, often don’t look sick until three or four years after their initial infection. Although signs of smut will vary based on the species of smut and the host, common smut fungus symptoms include galls or boils that enlarge any above-ground plant tissues, yellow striping on leaves or a powdery brown or black material on plant parts. The black or brown powder is actually a fine covering of reproductive spores and will occur late in the disease process.

Smut Fungus Control Because smut spores are spread by wind and splashing water, it can be difficult to stop the problem at the source. Instead, treating black smut fungus has to focus on creating an unfriendly environment for the spores. When the outdoor temperatures rise above 60 degrees Fahrenheit (15 C.), it may seem like your smut problem is defeated, but it’s hard to kill the disease completely since the fungus resides in the growing points of the plant. On a lawn, an infection of smut can be tolerated provided that you’re overseeding with a more resistant grass species, such as the Kentucky bluegrass. Most importantly, you’ll have to carefully monitor your fertilization practices, as smut thrives in a high nitrogen environment.

Switch to a balanced fertilizer, such as a 10-10-10, and only apply it in the fall, after the smut pathogen is dormant. Keeping your plants healthy will help them resist a smut infection, but if the disease is very severe in valuable plants, you may consider applying a fungicide. Demethylase inhibitors are very effective when applied in the spring at the label rates. Remember, fungicides are always a last resort option, as most fungal issues can be corrected by modifying the environment.
0
0


