文章
Miss Chen
2021年12月29日

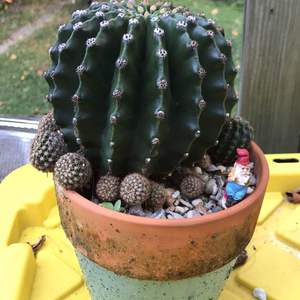
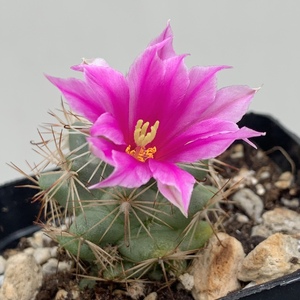
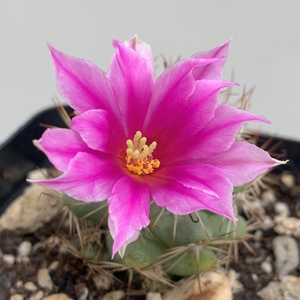
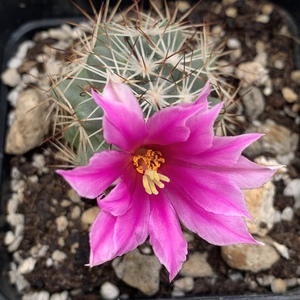
All cactus plants are members of the Cactaceae family, and there are thousands of species in all. There are two large groups of cacti grown as houseplants: desert cacti and forest cacti. Both are popular and familiar, and both can thrive indoors with relatively little maintenance. Cactus plants come in many sizes, but most indoor varieties are small to moderate,
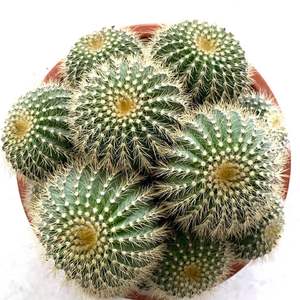
Desert cacti are the more "traditional" cacti, usually covered with spines or hair and often growing in paddles, balls, or obelisks. Forest cacti grow in wooded areas, ranging from temperate forests to subtropical and tropical regions. The most well-known forest cacti may be the Christmas cactus, which is native to Brazil, and blooms in red, pink, purple, and even yellow. Both desert and forest cacti are slow-growing and boast beautiful blooms, but they have very different growing habits.
Botanical Name Cactaceae
Common Name Cactus, desert cactus, forest cactus
Plant Type Succulents (with some exceptions)
Mature Size Varies depending on variety
Sun Exposure Some direct sun; quantity varies depending on variety
Soil Type Well-draining, sandy soil
Soil pH 5.5-7
Bloom Time Varies
Flower Color Varies
Hardiness Zones 9-11 (USDA)
Native Area Deserts and rainforests around the world
Indoor Cactus Care
Desert cacti have a unique, stark beauty, and some of them feature the most beautiful flowers. Growing desert cacti is not difficult. These are among the toughest of all houseplants. There are dozens of kinds of desert cacti on the market and some species will bloom after three or four years in cultivation; others will take longer or never bloom indoors.
Forest cacti grow in tropical and subtropical regions throughout the world. They are often climbing or epiphytic plants that cling to trees and can make excellent hanging plants.
Light
Strong light is essential for healthy desert cacti, especially in the winter. Some species may scorch in direct summer sun if they haven't been hardened off first.
Forest cacti like bright, but not direct, sunlight. Move them outside during the summer.

Soil
Pot desert cactus into a fast-draining cacti mix. If one is not available, amend the regular potting soil with inorganic agents like sand or perlite to increase drainage and aeration. Cacti are slow-growing plants and will rarely need repotting. Also, remember that many species of cacti will bloom better when they are slightly under-potted.
For forest cactus, use a regular potting mix. Repot at the beginning of the growing season.
Water
In the spring and summer, when your desert cactus is actively growing and blooming or both, water whenever the compost begins to dry. During these waterings, make sure the plant is thoroughly watered. During the winter rest period, nearly cease watering. Only water if the plant begins to shrivel. The most common mistake with desert cacti is overwatering in the winter, which will cause rot either at the base of the plant or the tips of the growing areas. If the rot is advanced, it might be necessary to start new plants from cuttings or discard the whole plant.
Water your forest cactus as a normal houseplant during the summer months and when the buds begin to show. During the resting period, only water when the soil is dry to the touch. As with succulents and desert cacti, forest cactus should not be watered heavily during the rest period. Root rot will result. Advanced root rot can only be treated by taking new cuttings and starting over.
Temperature and Humidity
During the active growth period, desert cacti prefer hot, dry temperatures, ranging from 70-80 F In the winter, the plants prefer a cooler period, down to 55 F. In their desert habitats, many cacti are accustomed to very chilly nights. You must protect them from very cold winter drafts.
Forest cacti are somewhat less picky about temperature; during the growing season, they have a wide range, from 55-70 F. During the rest period, a colder spell of 50 F is essential.
Fertilizer
For desert cactus, use a cacti fertilizer during the growing season. Some growers have poor results with standard fertilizers, so it's probably worth it to seek out a specialized cacti fertilizer.
For forest cactus, fertilize during the growing season with a standard fertilizer. Reduce fertilizer during the growing season.
Indoor Cactus Varieties
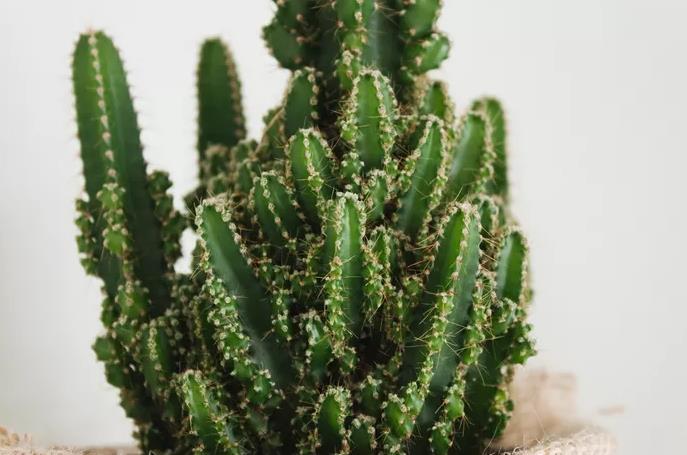
'Bunny ear' has "bunny" shaped ears and white flowers. Bunny ear is a desert cactus.
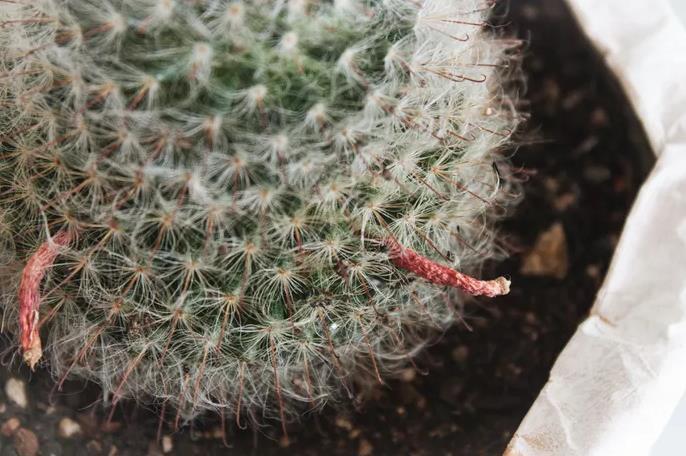
'Old lady' has hair and plenty of spines, and looks like a pincushion. It's a desert cactus.
'Easter' offers bright, colorful blooms. Easter is a forest cactus.
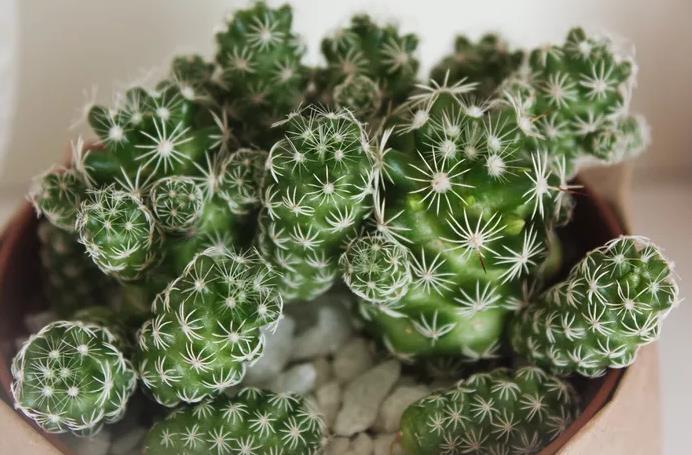
'Star' features a star-shaped mound and yellow flowers. Star is a desert cactus.
Pruning
Most cacti don't need pruning, just the removal of dead or damaged growth with clean, sharp garden shears. We strongly suggest wearing protective gardening gloves while you perform this task.
Propagating Indoor Cactus Plants
If your cacti produce offshoots, you can propagate them. First, make sure you a have clean, sharp, sterile knife. Next, put on protective gloves to protect yourself: You do not want to get pierced by a cactus spine.
Slice off the offshoot as close to the base as possible. Let it sit in a dry place for a few days, giving it time to callus over the cut. Then, dip the cut end in rooting hormone, and lay it flat on top of a good growing medium, we suggest potting mix for cacti and succulents, and mist often. Once it develops strong roots, it can be planted in its own pot.
How to Grow Indoor Cacti From Seed
Growing both desert and forest cactus plants from seed takes patience: these are very slow-growing plants. But if you insist, you can either collect seeds from a cactus that's bloomed or buy packaged seeds. The seeds may need to be stratified before planting.
Prepare a potting mix for cacti and succulents, filled with perlite and sand. Plant seeds as deep as they are wide, and cover with a thin later of either sand or the cacti potting mix. Water lightly, cover with plastic, and sit in a bright location (but not direct sun). Most cacti will germinate in about three weeks, and once they do you can remove the plastic covering during the day. In about six months, seedlings should be ready for their own pots.
Potting and Repotting Indoor Cactus Plants
Cacti should be repotted when they need fresh soil (most are fine being pot-bound). To repot both forest and desert cacti, start by putting on a pair of protective gloves. Remove your plant from its current pot, and use a clean trowel to loosen the roots. Fill the bottom of a terra-cotta pot with fast-draining cacti potting mix (for desert cacti), or regular potting mix (for forest cacti). Add your plant, spoon in the potting mix around the sides, and use a stick-shaped tool—a chopstick works—to push the soil down. Water lightly.
Common Pests and Diseases
All types of cactus can be prone to pests including mealybugs, scales, fungus gnats, and spider mites.1 In most cases, it's possible to carefully wash these pests off of plants using cotton swabs and water.
Desert cacti are the more "traditional" cacti, usually covered with spines or hair and often growing in paddles, balls, or obelisks. Forest cacti grow in wooded areas, ranging from temperate forests to subtropical and tropical regions. The most well-known forest cacti may be the Christmas cactus, which is native to Brazil, and blooms in red, pink, purple, and even yellow. Both desert and forest cacti are slow-growing and boast beautiful blooms, but they have very different growing habits.
Botanical Name Cactaceae
Common Name Cactus, desert cactus, forest cactus
Plant Type Succulents (with some exceptions)
Mature Size Varies depending on variety
Sun Exposure Some direct sun; quantity varies depending on variety
Soil Type Well-draining, sandy soil
Soil pH 5.5-7
Bloom Time Varies
Flower Color Varies
Hardiness Zones 9-11 (USDA)
Native Area Deserts and rainforests around the world
Indoor Cactus Care
Desert cacti have a unique, stark beauty, and some of them feature the most beautiful flowers. Growing desert cacti is not difficult. These are among the toughest of all houseplants. There are dozens of kinds of desert cacti on the market and some species will bloom after three or four years in cultivation; others will take longer or never bloom indoors.
Forest cacti grow in tropical and subtropical regions throughout the world. They are often climbing or epiphytic plants that cling to trees and can make excellent hanging plants.
Light
Strong light is essential for healthy desert cacti, especially in the winter. Some species may scorch in direct summer sun if they haven't been hardened off first.
Forest cacti like bright, but not direct, sunlight. Move them outside during the summer.

Soil
Pot desert cactus into a fast-draining cacti mix. If one is not available, amend the regular potting soil with inorganic agents like sand or perlite to increase drainage and aeration. Cacti are slow-growing plants and will rarely need repotting. Also, remember that many species of cacti will bloom better when they are slightly under-potted.
For forest cactus, use a regular potting mix. Repot at the beginning of the growing season.
Water
In the spring and summer, when your desert cactus is actively growing and blooming or both, water whenever the compost begins to dry. During these waterings, make sure the plant is thoroughly watered. During the winter rest period, nearly cease watering. Only water if the plant begins to shrivel. The most common mistake with desert cacti is overwatering in the winter, which will cause rot either at the base of the plant or the tips of the growing areas. If the rot is advanced, it might be necessary to start new plants from cuttings or discard the whole plant.
Water your forest cactus as a normal houseplant during the summer months and when the buds begin to show. During the resting period, only water when the soil is dry to the touch. As with succulents and desert cacti, forest cactus should not be watered heavily during the rest period. Root rot will result. Advanced root rot can only be treated by taking new cuttings and starting over.
Temperature and Humidity
During the active growth period, desert cacti prefer hot, dry temperatures, ranging from 70-80 F In the winter, the plants prefer a cooler period, down to 55 F. In their desert habitats, many cacti are accustomed to very chilly nights. You must protect them from very cold winter drafts.
Forest cacti are somewhat less picky about temperature; during the growing season, they have a wide range, from 55-70 F. During the rest period, a colder spell of 50 F is essential.

Fertilizer
For desert cactus, use a cacti fertilizer during the growing season. Some growers have poor results with standard fertilizers, so it's probably worth it to seek out a specialized cacti fertilizer.
For forest cactus, fertilize during the growing season with a standard fertilizer. Reduce fertilizer during the growing season.
Indoor Cactus Varieties
'Bunny ear' has "bunny" shaped ears and white flowers. Bunny ear is a desert cactus.
'Old lady' has hair and plenty of spines, and looks like a pincushion. It's a desert cactus.
'Easter' offers bright, colorful blooms. Easter is a forest cactus.
'Star' features a star-shaped mound and yellow flowers. Star is a desert cactus.
Pruning
Most cacti don't need pruning, just the removal of dead or damaged growth with clean, sharp garden shears. We strongly suggest wearing protective gardening gloves while you perform this task.
Propagating Indoor Cactus Plants
If your cacti produce offshoots, you can propagate them. First, make sure you a have clean, sharp, sterile knife. Next, put on protective gloves to protect yourself: You do not want to get pierced by a cactus spine.
Slice off the offshoot as close to the base as possible. Let it sit in a dry place for a few days, giving it time to callus over the cut. Then, dip the cut end in rooting hormone, and lay it flat on top of a good growing medium, we suggest potting mix for cacti and succulents, and mist often. Once it develops strong roots, it can be planted in its own pot.

How to Grow Indoor Cacti From Seed
Growing both desert and forest cactus plants from seed takes patience: these are very slow-growing plants. But if you insist, you can either collect seeds from a cactus that's bloomed or buy packaged seeds. The seeds may need to be stratified before planting.
Prepare a potting mix for cacti and succulents, filled with perlite and sand. Plant seeds as deep as they are wide, and cover with a thin later of either sand or the cacti potting mix. Water lightly, cover with plastic, and sit in a bright location (but not direct sun). Most cacti will germinate in about three weeks, and once they do you can remove the plastic covering during the day. In about six months, seedlings should be ready for their own pots.
Potting and Repotting Indoor Cactus Plants
Cacti should be repotted when they need fresh soil (most are fine being pot-bound). To repot both forest and desert cacti, start by putting on a pair of protective gloves. Remove your plant from its current pot, and use a clean trowel to loosen the roots. Fill the bottom of a terra-cotta pot with fast-draining cacti potting mix (for desert cacti), or regular potting mix (for forest cacti). Add your plant, spoon in the potting mix around the sides, and use a stick-shaped tool—a chopstick works—to push the soil down. Water lightly.

Common Pests and Diseases
All types of cactus can be prone to pests including mealybugs, scales, fungus gnats, and spider mites.1 In most cases, it's possible to carefully wash these pests off of plants using cotton swabs and water.
0
0
文章
Miss Chen
2021年12月11日

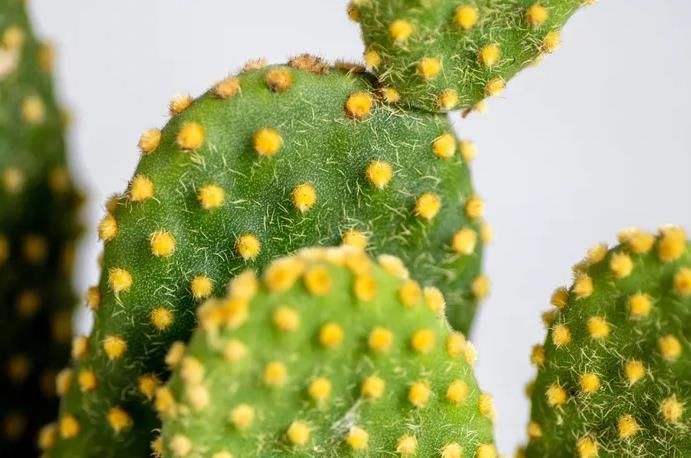
The bunny ear cactus (Opuntia microdasys) is a popular houseplant that is not only attractive but is also low-maintenance. Native to Mexico, Opuntia microdasys is known by several common names including bunny ear cactus, angel’s wings cactus, and polka dot cactus. But don’t be fooled by these cute nicknames, while the bunny ear cactus might look less threatening than other cacti varieties with large and intimidating spikes, this cactus is just as prickly. Each white “dot” on the surface of the bunny ear cactus is actually a glochid, which are patches of hundreds of small spines that can easily dislodge in the skin. Thus, take care when handling a bunny ear cactus, and use protective gloves if necessary.
However, before you get your heart set on obtaining one, we hate to be the bearer of bad news: it's nearly impossible to find an actual plant for purchase.
Botanical Name Opuntia microdasys
Common Name Bunny ear cactus, angel's wings cactus, polka dot cactus
Plant Type Cactus
Mature Size 2-3 ft. tall, 4-5 ft. spread
Sun Exposure Full sun
Soil Type Sandy, well-draining
Soil pH Acidic, neutral
Bloom Time Summer
Flower Color Yellow, white
Hardiness Zones 9a, 9b, 10a, 10b, 11a, 11b
Native Area Mexico
Bunny Ear Cactus Care
This cactus is easy to care for and thrives on neglect. The most important factor in keeping the bunny ear cactus happy and thriving is ensuring that it has enough sunlight and does not get overwatered.

Light
The bunny ear cactus requires consistent bright, direct sunlight and when grown as a houseplant, it should be placed in the sunniest spot in your home. Ideally, this cactus should receive between six to eight hours of direct sunlight each day. When grown indoors, this usually means that it should be placed in a south or west-facing window, or you can use a grow light to provide supplemental light. When grown outdoors, ensure that the cactus is not planted in a location that is not shaded.
Soil
Like most cacti, the bunny ear cactus prefers dry, sandy, well-draining soils. A standard cactus or succulent potting mix is sufficient and can be easily found at most nurseries or garden centers. Alternatively, you can make your own potting mix at home by mixing equal parts potting soil, coarse sand, and perlite.
Water
This desert dweller is drought-tolerant and does not require frequent watering in order to survive. In fact, the bunny ear cactus is actually extremely sensitive to overwatering and prone to root rot if it is exposed to too much moisture. Allow the soil to dry out thoroughly between watering, and when in doubt, wait a bit longer before you water again. Remember that in the desert, cacti can survive weeks, sometimes even months, without water.
Temperature and Humidity
The bunny ear cactus requires warm, dry conditions and does not tolerate frost or excess humidity. Keep temperatures between 70 to 100 degrees Fahrenheit (21 to 37 degrees Celsius) and avoid excess moisture by ensuring that the potting mix is well-draining and the potting container has drainage holes. This cactus can be grown outdoors year-round in USDA zones 9a to 11b, but otherwise should be overwintered indoors to avoid damage from cold temperatures.
Fertilizer
This cactus grows well in poor quality soils and does not require regular fertilization. However, it can benefit from a yearly application of a cactus or succulent fertilizer in the early spring to help boost growth during the active growing period.
Propagating the Bunny Ear Cactus
Like most cacti, the bunny ear cactus can be readily propagated by cuttings. Simply remove one of the pads from the cactus and set it aside for 24 hours so that the base of the pad can callous over. Then, pot the pad in a container filled with a well-draining potting mix and place it in a location that receives a couple hours of direct sunlight each day. Wait to water the new plant until a few weeks have passed to ensure that roots have begun to sprout.
Potting and Repotting the Bunny Ear Cactus
The bunny ears cactus should be repotted every two to three years. To repot this cactus safely, ensure that you have access to a pair of thick gardening or work gloves to protect yourself from the sharp bristles. You can also use tongs to ensure that you don’t touch the cactus yourself.
Using the gloves or tongs to hold the cactus in place, gently wiggle the root ball out of the old pot and remove as much of the old soil from around the roots as you can. Then, transfer the cactus into the new pot, adding the fresh soil around the roots and patting it firmly into place.
Common Pests and Diseases
The bunny ear cactus can be occasionally bothered by common pests such as mealybugs or scale, but are otherwise fairly pest-free. Both of these sap-sucking pests can be treated with regular applications of rubbing alcohol with a Q-tip or cotton swab to the affected areas.
The most common disease to watch out for is root rot which results from overwatering or excess moisture and can be identified by brown mushy stems or roots. Unfortunately, once root rot is found it is usually too late to do anything about it. However, you can remove the unaffected pads and propagate them to save the remaining portions of the plant.
However, before you get your heart set on obtaining one, we hate to be the bearer of bad news: it's nearly impossible to find an actual plant for purchase.
Botanical Name Opuntia microdasys
Common Name Bunny ear cactus, angel's wings cactus, polka dot cactus
Plant Type Cactus
Mature Size 2-3 ft. tall, 4-5 ft. spread
Sun Exposure Full sun
Soil Type Sandy, well-draining
Soil pH Acidic, neutral
Bloom Time Summer
Flower Color Yellow, white
Hardiness Zones 9a, 9b, 10a, 10b, 11a, 11b
Native Area Mexico
Bunny Ear Cactus Care
This cactus is easy to care for and thrives on neglect. The most important factor in keeping the bunny ear cactus happy and thriving is ensuring that it has enough sunlight and does not get overwatered.

Light
The bunny ear cactus requires consistent bright, direct sunlight and when grown as a houseplant, it should be placed in the sunniest spot in your home. Ideally, this cactus should receive between six to eight hours of direct sunlight each day. When grown indoors, this usually means that it should be placed in a south or west-facing window, or you can use a grow light to provide supplemental light. When grown outdoors, ensure that the cactus is not planted in a location that is not shaded.
Soil
Like most cacti, the bunny ear cactus prefers dry, sandy, well-draining soils. A standard cactus or succulent potting mix is sufficient and can be easily found at most nurseries or garden centers. Alternatively, you can make your own potting mix at home by mixing equal parts potting soil, coarse sand, and perlite.
Water
This desert dweller is drought-tolerant and does not require frequent watering in order to survive. In fact, the bunny ear cactus is actually extremely sensitive to overwatering and prone to root rot if it is exposed to too much moisture. Allow the soil to dry out thoroughly between watering, and when in doubt, wait a bit longer before you water again. Remember that in the desert, cacti can survive weeks, sometimes even months, without water.
Temperature and Humidity
The bunny ear cactus requires warm, dry conditions and does not tolerate frost or excess humidity. Keep temperatures between 70 to 100 degrees Fahrenheit (21 to 37 degrees Celsius) and avoid excess moisture by ensuring that the potting mix is well-draining and the potting container has drainage holes. This cactus can be grown outdoors year-round in USDA zones 9a to 11b, but otherwise should be overwintered indoors to avoid damage from cold temperatures.

Fertilizer
This cactus grows well in poor quality soils and does not require regular fertilization. However, it can benefit from a yearly application of a cactus or succulent fertilizer in the early spring to help boost growth during the active growing period.
Propagating the Bunny Ear Cactus
Like most cacti, the bunny ear cactus can be readily propagated by cuttings. Simply remove one of the pads from the cactus and set it aside for 24 hours so that the base of the pad can callous over. Then, pot the pad in a container filled with a well-draining potting mix and place it in a location that receives a couple hours of direct sunlight each day. Wait to water the new plant until a few weeks have passed to ensure that roots have begun to sprout.
Potting and Repotting the Bunny Ear Cactus
The bunny ears cactus should be repotted every two to three years. To repot this cactus safely, ensure that you have access to a pair of thick gardening or work gloves to protect yourself from the sharp bristles. You can also use tongs to ensure that you don’t touch the cactus yourself.
Using the gloves or tongs to hold the cactus in place, gently wiggle the root ball out of the old pot and remove as much of the old soil from around the roots as you can. Then, transfer the cactus into the new pot, adding the fresh soil around the roots and patting it firmly into place.
Common Pests and Diseases
The bunny ear cactus can be occasionally bothered by common pests such as mealybugs or scale, but are otherwise fairly pest-free. Both of these sap-sucking pests can be treated with regular applications of rubbing alcohol with a Q-tip or cotton swab to the affected areas.
The most common disease to watch out for is root rot which results from overwatering or excess moisture and can be identified by brown mushy stems or roots. Unfortunately, once root rot is found it is usually too late to do anything about it. However, you can remove the unaffected pads and propagate them to save the remaining portions of the plant.
0
0
文章
Miss Chen
2021年11月24日

The brain cactus (Stenocactus multicostatus) features distinctive wavy ribbing on its surface that almost looks like the folds of a brain, hence the plant’s common name. In fact, no two cacti have the same appearance to their ribs or quite the same shape, making each one unique. Overall, the cacti remain quite small with a fairly globular shape. They come in gray-green to deep green colors with brownish spines. In the spring and summer, they bloom with showy flowers that stretch about an inch across. The brain cactus is a slower grower that’s best planted when the weather has warmed in the spring. It can work for gardens in warm climates, as well as for growth as a houseplant.
Botanical Name Stenocactus multicostatus
Common Names Brain cactus, wave cactus
Plant Type Cactus
Mature Size Up to 5 in. tall, 6 in. wide
Sun Exposure Full
Soil Type Sandy, well-drained
Soil pH Acidic, neutral, alkaline
Bloom Time Spring, summer
Flower Color White, pink, purple
Hardiness Zones 9–11 (USDA)
Native Area Central America

Brain Cactus Care
If you can grow other cacti and succulents successfully, you should be able to care for a brain cactus without much trouble. The plant's light, water, and feeding requirements are fairly typical for many cacti species. One of the most important factors in the plant's care is avoiding overwatering. Sitting in soil that remains damp for a long period can quickly rot the sensitive roots of this cactus and ultimately kill the whole plant.
Otherwise, this plant is pretty hardy and doesn’t have any serious issues with pests or diseases. Plan to water and feed your cactus more regularly in the spring through early fall than the late fall and winter months. And repot container plants as needed once they’ve outgrown their containers. When planted outdoors or placed in an outdoor container garden, position your brain cactus in a spot that has some protection from strong winds, which can be damaging to the plant.
Light
Brain cacti thrive in full sun, meaning at least six hours of direct sunlight on most days. They can tolerate a bit of shade, but they won’t grow to their fullest potential and flower at their best in lower-light conditions. Indoors, place your brain cactus by your brightest window. A west-facing window is typically ideal.
Soil
These cacti prefer sandy and rocky soil that has sharp drainage. But they can survive in a variety of soil types as long as there's good drainage. A slightly acidic to slightly alkaline soil pH is fine. For container plants, a fast-draining potting mix made specifically for cacti and succulents is best.
Water
To prevent root rot, it’s best to allow the soil to dry out almost completely in between waterings of your brain cactus. The plant has good drought tolerance. In the spring and summer, watering roughly every two weeks should suffice. Once the weather starts to turn cold in the fall, reduce watering to every three weeks to a month, and carry on this way through the winter. The cactus is not actively growing during the colder months, so it doesn’t need as much water as it does during the warmer parts of the year.
It’s better to water deeply and then wait for the soil to dry out versus watering in little bits more regularly. The latter method makes overwatering more likely. Always empty the drip tray on a container plant after you’ve watered.
Temperature and Humidity
This cactus thrives in warm, dry conditions. It can tolerate temperatures down to 20 degrees Fahrenheit, though prolonged exposure to frost and freezing temperatures can eventually kill it. Ideally, it prefers to be in temperatures of 50 degrees Fahrenheit and above. The cactus is fine in low to moderate humidity levels. But high humidity can cause the soil to retain too much moisture, leading to root rot. So in humid conditions, careful watering and excellent soil drainage are essential.

Fertilizer
The brain cactus is not a heavy feeder, but it does appreciate some fertilizer when it’s actively growing. During the spring and summer months, use a liquid fertilizer on your plant that is made specifically for cacti and succulents. There's no need to fertilize in the fall and winter months when the cactus goes dormant.
Propagating the Brain Cactus
Brain cacti are easy to propagate from seed. Simply press the seeds into a seed starter mix in a shallow tray. Put them in a warm spot, and keep the soil just barely moist. Germination should take a couple weeks.
Potting and Repotting the Brain Cactus
The ideal pot for a brain cactus should have ample drainage holes. An unglazed pot is helpful because it also will allow excess soil moisture to escape through its walls. Plus, the cactus has shallow roots, so it doesn’t need a container with a lot of depth. It also doesn’t mind being a little cramped in its container. But once you see roots growing out of the pot and the cactus has become top-heavy, it’s time for repotting. Because the cactus is a slow grower, it likely will only need repotting every two to three years or so. Gently remove it from its old pot, and place it in just one container size up with fresh potting mix. Wait about a week before watering, so the roots can get adjusted.
Brain Cactus Varieties
There are several other species in the Stenocactus genus that also use the common name of brain cactus, including:
Stenocactus crispatus: This species features dark green ribbing, long spines, and pale violet flowers.
Stenocactus phyllacanthus: This plant produces small yellow flowers and has stiff, tan spines.
Stenocactus coptonogonus: This species has straight (not wavy) ribbing and blooms with white flowers that have lavender stripes.
Botanical Name Stenocactus multicostatus
Common Names Brain cactus, wave cactus
Plant Type Cactus
Mature Size Up to 5 in. tall, 6 in. wide
Sun Exposure Full
Soil Type Sandy, well-drained
Soil pH Acidic, neutral, alkaline
Bloom Time Spring, summer
Flower Color White, pink, purple
Hardiness Zones 9–11 (USDA)
Native Area Central America

Brain Cactus Care
If you can grow other cacti and succulents successfully, you should be able to care for a brain cactus without much trouble. The plant's light, water, and feeding requirements are fairly typical for many cacti species. One of the most important factors in the plant's care is avoiding overwatering. Sitting in soil that remains damp for a long period can quickly rot the sensitive roots of this cactus and ultimately kill the whole plant.
Otherwise, this plant is pretty hardy and doesn’t have any serious issues with pests or diseases. Plan to water and feed your cactus more regularly in the spring through early fall than the late fall and winter months. And repot container plants as needed once they’ve outgrown their containers. When planted outdoors or placed in an outdoor container garden, position your brain cactus in a spot that has some protection from strong winds, which can be damaging to the plant.
Light
Brain cacti thrive in full sun, meaning at least six hours of direct sunlight on most days. They can tolerate a bit of shade, but they won’t grow to their fullest potential and flower at their best in lower-light conditions. Indoors, place your brain cactus by your brightest window. A west-facing window is typically ideal.
Soil
These cacti prefer sandy and rocky soil that has sharp drainage. But they can survive in a variety of soil types as long as there's good drainage. A slightly acidic to slightly alkaline soil pH is fine. For container plants, a fast-draining potting mix made specifically for cacti and succulents is best.
Water
To prevent root rot, it’s best to allow the soil to dry out almost completely in between waterings of your brain cactus. The plant has good drought tolerance. In the spring and summer, watering roughly every two weeks should suffice. Once the weather starts to turn cold in the fall, reduce watering to every three weeks to a month, and carry on this way through the winter. The cactus is not actively growing during the colder months, so it doesn’t need as much water as it does during the warmer parts of the year.
It’s better to water deeply and then wait for the soil to dry out versus watering in little bits more regularly. The latter method makes overwatering more likely. Always empty the drip tray on a container plant after you’ve watered.
Temperature and Humidity
This cactus thrives in warm, dry conditions. It can tolerate temperatures down to 20 degrees Fahrenheit, though prolonged exposure to frost and freezing temperatures can eventually kill it. Ideally, it prefers to be in temperatures of 50 degrees Fahrenheit and above. The cactus is fine in low to moderate humidity levels. But high humidity can cause the soil to retain too much moisture, leading to root rot. So in humid conditions, careful watering and excellent soil drainage are essential.

Fertilizer
The brain cactus is not a heavy feeder, but it does appreciate some fertilizer when it’s actively growing. During the spring and summer months, use a liquid fertilizer on your plant that is made specifically for cacti and succulents. There's no need to fertilize in the fall and winter months when the cactus goes dormant.
Propagating the Brain Cactus
Brain cacti are easy to propagate from seed. Simply press the seeds into a seed starter mix in a shallow tray. Put them in a warm spot, and keep the soil just barely moist. Germination should take a couple weeks.
Potting and Repotting the Brain Cactus
The ideal pot for a brain cactus should have ample drainage holes. An unglazed pot is helpful because it also will allow excess soil moisture to escape through its walls. Plus, the cactus has shallow roots, so it doesn’t need a container with a lot of depth. It also doesn’t mind being a little cramped in its container. But once you see roots growing out of the pot and the cactus has become top-heavy, it’s time for repotting. Because the cactus is a slow grower, it likely will only need repotting every two to three years or so. Gently remove it from its old pot, and place it in just one container size up with fresh potting mix. Wait about a week before watering, so the roots can get adjusted.
Brain Cactus Varieties
There are several other species in the Stenocactus genus that also use the common name of brain cactus, including:
Stenocactus crispatus: This species features dark green ribbing, long spines, and pale violet flowers.
Stenocactus phyllacanthus: This plant produces small yellow flowers and has stiff, tan spines.
Stenocactus coptonogonus: This species has straight (not wavy) ribbing and blooms with white flowers that have lavender stripes.
0
0
文章
Miss Chen
2021年06月26日

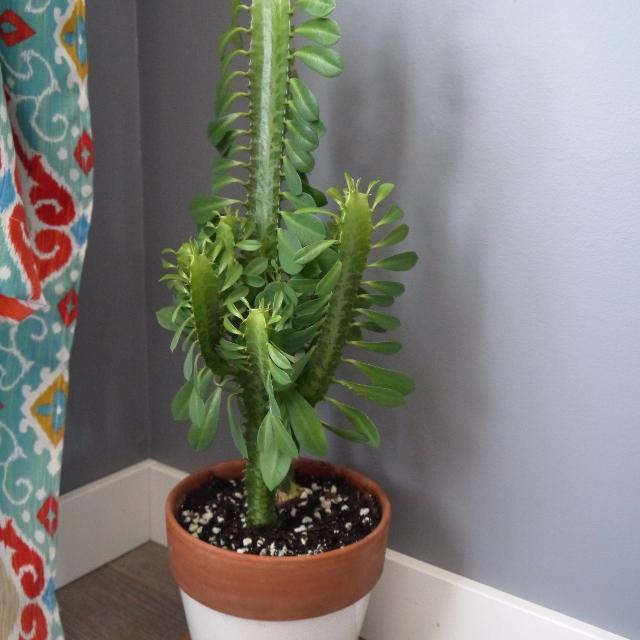
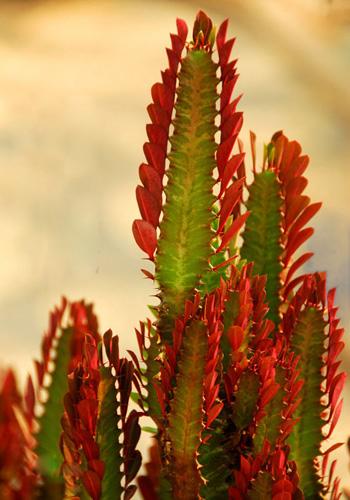
The African milk tree (Euphorbia trigona) is native to Central Africa. It is often grown as a hedge there, useful for its rapid and enthusiastic growth, though its roots are not invasive. Though it looks a lot like a cactus, it is actually a succulent plant. It has many folk names, including candelabra cactus, cathedral cactus, friendship cactus, good luck plant. or good luck cactus (the good luck attribution is probably due to how quickly it grows, and how easily it propagates). It stays lush and green throughout its growing season, and new growth has a lighter green color than the base plant. The Rubra or Royal Red cultivar is very popular for its dramatic coloring: it takes on bright red accents later in the season.
Botanical Name Euphorbia trigona
Common Name African Milk Tree, African Milk Bush
Plant Type Succulent
Mature Size 6 to 8 ft.
Sun Exposure Indirect sun to partial shade
Soil Type Medium rich, well-drained
Soil pH 6.1 to 7.8 (mildly acidic to mildly alkaline)
Bloom Time Spring, Summer
Flower Color White (outdoors only)
Hardiness Zones 9b to 11 (USDA)
Native Areas Central Africa
Toxicity Sap toxic
African Milk Tree Care
The African milk tree is long-lived and can grow very vigorously, up to two feet a year in height, to a total of eight feet tall. It is fairly easy to propagate also, similar to a cactus, where one simply breaks off one of the "arms" and roots in potting medium. They're grown by many gardeners in states with arid climates where the temperatures at night don't go below 50 degrees Fahrenheit, such as parts of Texas, Arkansas, and Arizona. It's hardy in Zones 9b through 11 in the United States, and can probably survive to Zone 8 with winter protection.
The African milk tree is also popular as a decorative landscape or container plant throughout South America, and in the Mediterranean regions of Europe. Its dramatic size makes it a sought after plant for plant enthusiasts, and they may require training through pruning and staking. The African milk tree is also very drought-tolerant and useful for xeriscaping. Because they grow so tall, but have a comparatively small root system, they can topple over, so be sure to keep them pruned and use staking when needed.
Light
This succulent likes indirect but bright sunlight. A southern-facing window will work well for it indoors or an outdoor spot with partial sun. Full sun is suitable as long as the summers are not too consistently hot. Extra watering may be needed to offset too much bright sunlight.
Soil
This plant is not too fussy about soil but good drainage is essential. Heavy clay soils may hamper growth, and impede drainage. Since this plant is a good choice for xeriscaping, sandy soils are a good fit, and sandy loam probably works best of all.
Water
Being a succulent, the African milk tree doesn't need much water. If there is a very bad drought, consider supplemental watering at the roots. But otherwise normal rainfall should be sufficient. Indoor specimens should be watered moderately once a week. Let the soil dry out between each watering to mimic its natural habitat.
Temperature and Humidity
This drought-tolerant plant enjoys a dry or arid climate, and can tolerate fairly hot temperatures. If grown in a place with very hot summers, the plant should be located in a spot with indirect sunlight or partial shade, to avoid overheating. This plant doesn't need any extra humidity, and growing it in an environment that is too humid may cause issues such as fungus or pests.
Fertilizer
During the plant's growing season in the spring and summer, treat it to water-soluble fertilizer once a month.
Is African Milk Tree Toxic?
The milky white sap responsible for this plant's common name is also a skin irritant, as well as an oral toxin, so handle the plant carefully and wear gloves. All parts of this plant are toxic to humans and animals if ingested. Wear protective gloves and wash hands when handling this plant.
Symptoms of Poisoning
If humans or animals ingest any part of the plant or sap, skin and/or eyes may experience burning, redness, blisters, and swelling. Sap in the eyes can cause conjunctivitis. Ingestion of the sap irritates lips, tongue, and throat. Wash skin and rinse eyes of the sap immediately. If symptoms are severe, immediately seek medical assistance.
Pruning
African milk trees don't always require pruning. But because they grow so tall, but have a comparatively small, shallow root system, it's not unusual for them to become top-heavy or to even topple over, so pruning may be necessary. Use a sharp and sterilized knife to prune stems. The cut will dry over and create a callus on its own. Make sure the plant is balanced on both sides because a shallow root system can't always hold down a plant that's too heavy on one side.
Propagating African Milk Tree
The African milk tree propagates easily. You only need a pair of scissors or hand pruners, and a container with potting medium. Use proper protective gear when propagating, like heavy gloves, and wash immediately if you get any of the milky sap on your skin. Here are the easy steps:
Cut one of the "arms" off with sharp shears or scissors at its base.
Rinse the arm with running cold water until it stops oozing.
Let the arm sit in a dry spot on a paper towel and out of direct sun for five to seven days so the cut tip can callus over (this prevents rotting). (Note: Many growers bypass the callus stage and put the cutting directly into soil as soon as it is cut. Growth should occur within three weeks with this method.)
Once the callus has formed, then you can plant it in a small pot (about 4-inches wide).
Plant the cutting so it sits about an inch below the soil.
Add a layer of course gravel on top of the soil to help keep the cutting stay upright.
Place the pot in a warm area with a temperature of between 65 and 75 degrees Fahrenheit. It should be well-lit but out of the direct sun.
The cutting should root within two months.
As soon as you see growth, transplant the plant into a slightly larger, 6-inch pot.
How to Grow African Milk Tree From Seed
Though you can grow the plant from seeds, it's not typically recommended. The seeds can be difficult to find and they are even more difficult and slow to germinate. It's better to propagate the plant using cuttings. If you do find seeds, plant them in well-draining soil.
Potting and Repotting African Milk Tree
Good drainage and reducing the risk of overwatering this plant are important considerations when potting and repotting. The African milk tree will do best in a porous clay pot that absorbs water. Avoid glazed pots that don't absorb water very well, which adds to the risk of overwatering the plant. A sandy soil or potting mix formulated for succulents allows for better water drainage. Add pumice or perlite to the potting soil, as well, to aid drainage.
Repotting the plant every year or two into a larger pot as it continues to grow taller will ensure that there's enough room for the roots to hold the plant in place, though potentially with a little staking help. It may take two people to repot a very large African milk tree so that the plant is not damaged in the process. Wear protective gear and gloves when working with this plant.
Overwintering
African milk trees won't survive the cold. They typically won't flourish if temperatures go below 50 or 55 degrees Fahrenheit.
If the tree is potted, bring it indoors. Place it in a room with good air circulation to cut down on humidity. Set it near a brightly lit window, but one with indirect sunlight.
Common Pests & Diseases
The African milk tree is usually not problematic with pests or diseases. However, watch for cotton-like threads made by mealybugs on African milk trees. To remove them, mix a solution of water and a few drops of mild dish detergent. Wipe the bugs off with a cloth dipped in the solution. You can also use a paper towel and rubbing alcohol to remove the bugs. Outdoors, spray bugs off the plant with the garden hose.
Overwatering can cause fungal problems, such as cork disease. The stems will develop cork-like patches. Try saving the plant by cutting off the stems with these patches. Yellowing or browning of the plant may also indicate root rot from overwatering. You will likely need to dispose of the plant.

Botanical Name Euphorbia trigona
Common Name African Milk Tree, African Milk Bush
Plant Type Succulent
Mature Size 6 to 8 ft.
Sun Exposure Indirect sun to partial shade
Soil Type Medium rich, well-drained
Soil pH 6.1 to 7.8 (mildly acidic to mildly alkaline)
Bloom Time Spring, Summer
Flower Color White (outdoors only)
Hardiness Zones 9b to 11 (USDA)
Native Areas Central Africa
Toxicity Sap toxic
African Milk Tree Care
The African milk tree is long-lived and can grow very vigorously, up to two feet a year in height, to a total of eight feet tall. It is fairly easy to propagate also, similar to a cactus, where one simply breaks off one of the "arms" and roots in potting medium. They're grown by many gardeners in states with arid climates where the temperatures at night don't go below 50 degrees Fahrenheit, such as parts of Texas, Arkansas, and Arizona. It's hardy in Zones 9b through 11 in the United States, and can probably survive to Zone 8 with winter protection.
The African milk tree is also popular as a decorative landscape or container plant throughout South America, and in the Mediterranean regions of Europe. Its dramatic size makes it a sought after plant for plant enthusiasts, and they may require training through pruning and staking. The African milk tree is also very drought-tolerant and useful for xeriscaping. Because they grow so tall, but have a comparatively small root system, they can topple over, so be sure to keep them pruned and use staking when needed.
Light
This succulent likes indirect but bright sunlight. A southern-facing window will work well for it indoors or an outdoor spot with partial sun. Full sun is suitable as long as the summers are not too consistently hot. Extra watering may be needed to offset too much bright sunlight.
Soil
This plant is not too fussy about soil but good drainage is essential. Heavy clay soils may hamper growth, and impede drainage. Since this plant is a good choice for xeriscaping, sandy soils are a good fit, and sandy loam probably works best of all.
Water
Being a succulent, the African milk tree doesn't need much water. If there is a very bad drought, consider supplemental watering at the roots. But otherwise normal rainfall should be sufficient. Indoor specimens should be watered moderately once a week. Let the soil dry out between each watering to mimic its natural habitat.
Temperature and Humidity
This drought-tolerant plant enjoys a dry or arid climate, and can tolerate fairly hot temperatures. If grown in a place with very hot summers, the plant should be located in a spot with indirect sunlight or partial shade, to avoid overheating. This plant doesn't need any extra humidity, and growing it in an environment that is too humid may cause issues such as fungus or pests.
Fertilizer
During the plant's growing season in the spring and summer, treat it to water-soluble fertilizer once a month.
Is African Milk Tree Toxic?
The milky white sap responsible for this plant's common name is also a skin irritant, as well as an oral toxin, so handle the plant carefully and wear gloves. All parts of this plant are toxic to humans and animals if ingested. Wear protective gloves and wash hands when handling this plant.
Symptoms of Poisoning
If humans or animals ingest any part of the plant or sap, skin and/or eyes may experience burning, redness, blisters, and swelling. Sap in the eyes can cause conjunctivitis. Ingestion of the sap irritates lips, tongue, and throat. Wash skin and rinse eyes of the sap immediately. If symptoms are severe, immediately seek medical assistance.
Pruning
African milk trees don't always require pruning. But because they grow so tall, but have a comparatively small, shallow root system, it's not unusual for them to become top-heavy or to even topple over, so pruning may be necessary. Use a sharp and sterilized knife to prune stems. The cut will dry over and create a callus on its own. Make sure the plant is balanced on both sides because a shallow root system can't always hold down a plant that's too heavy on one side.
Propagating African Milk Tree
The African milk tree propagates easily. You only need a pair of scissors or hand pruners, and a container with potting medium. Use proper protective gear when propagating, like heavy gloves, and wash immediately if you get any of the milky sap on your skin. Here are the easy steps:
Cut one of the "arms" off with sharp shears or scissors at its base.
Rinse the arm with running cold water until it stops oozing.
Let the arm sit in a dry spot on a paper towel and out of direct sun for five to seven days so the cut tip can callus over (this prevents rotting). (Note: Many growers bypass the callus stage and put the cutting directly into soil as soon as it is cut. Growth should occur within three weeks with this method.)
Once the callus has formed, then you can plant it in a small pot (about 4-inches wide).
Plant the cutting so it sits about an inch below the soil.
Add a layer of course gravel on top of the soil to help keep the cutting stay upright.
Place the pot in a warm area with a temperature of between 65 and 75 degrees Fahrenheit. It should be well-lit but out of the direct sun.
The cutting should root within two months.
As soon as you see growth, transplant the plant into a slightly larger, 6-inch pot.
How to Grow African Milk Tree From Seed
Though you can grow the plant from seeds, it's not typically recommended. The seeds can be difficult to find and they are even more difficult and slow to germinate. It's better to propagate the plant using cuttings. If you do find seeds, plant them in well-draining soil.
Potting and Repotting African Milk Tree
Good drainage and reducing the risk of overwatering this plant are important considerations when potting and repotting. The African milk tree will do best in a porous clay pot that absorbs water. Avoid glazed pots that don't absorb water very well, which adds to the risk of overwatering the plant. A sandy soil or potting mix formulated for succulents allows for better water drainage. Add pumice or perlite to the potting soil, as well, to aid drainage.

Repotting the plant every year or two into a larger pot as it continues to grow taller will ensure that there's enough room for the roots to hold the plant in place, though potentially with a little staking help. It may take two people to repot a very large African milk tree so that the plant is not damaged in the process. Wear protective gear and gloves when working with this plant.
Overwintering
African milk trees won't survive the cold. They typically won't flourish if temperatures go below 50 or 55 degrees Fahrenheit.
If the tree is potted, bring it indoors. Place it in a room with good air circulation to cut down on humidity. Set it near a brightly lit window, but one with indirect sunlight.
Common Pests & Diseases
The African milk tree is usually not problematic with pests or diseases. However, watch for cotton-like threads made by mealybugs on African milk trees. To remove them, mix a solution of water and a few drops of mild dish detergent. Wipe the bugs off with a cloth dipped in the solution. You can also use a paper towel and rubbing alcohol to remove the bugs. Outdoors, spray bugs off the plant with the garden hose.
Overwatering can cause fungal problems, such as cork disease. The stems will develop cork-like patches. Try saving the plant by cutting off the stems with these patches. Yellowing or browning of the plant may also indicate root rot from overwatering. You will likely need to dispose of the plant.
0
0
文章
莹723
2020年09月25日

Cactus plants, or cacti, make excellent indoor plants. Like succulents, they’re used to the hot, sunny, dry conditions of desert. Their leafless stems are designed to store water, so they can cope with drought. As such they need very little watering and can even rot if given too much. Cacti can be grown in pots or terrariums for years. They have different shapes and sizes and if you’re lucky, they bear delightful, colored flowers in summer.
1.How to plant cacti
Always plant cacti with care. The spines can prick and hurt your skin. It’s a good idea to use common kitchen items such as a thick tea towel, spoon and fork to help you.
Mulch with a layer of horticultural grit or pebbles to complete the look of the pot display. This also prevents water splashing back on the cactus.

2.How to propagate cacti
Cactus can be grown from seed although it can take several years for plants to reach a decent size. You can buy mixed cactus seed cheaply, and it’s fun to see which cactus varieties you end up with.
To grow cactus from seed, fill a pot with a moist, gritty, free-draining compost, firm down and level. Scatter cactus seeds over the surface, taking care not to sow them too thickly. Then, gently sprinkle a thin layer of vermiculite or fine grit over the seeds. Cover the pot with a clear plastic bag to preserve soil moisture, and leave the in a greenhouse or on a warm windowsill. You may need to find an alternative spot for them in winter if the windowsill becomes too cold.
Some cacti can be propagated from cuttings. Others bear offsets, which can simply be snipped off the plant and potted on.

3.Caring for cactus plants
In summer, water cacti no more than once a week. A good watering less often is better than a little-and-often approach. You shouldn’t need to water cacti at all in the coldest months.
Repot cacti every couple of years, to give them fresh compost – you won’t necessarily need to pot them into a larger pot.

4.Growing cactus plants: problem solving
Cactus plants are usually trouble free. If overwatered or not given enough light they can rot at the base. This is usually fatal for the plants.
Cactus plants can develop spindly growth but it’s easy to rectify.
5.Cactus varieties to grow
Echinocactus grusonii – golden barrel cactus is globe-shaped but eventually grows tall. Native to Mexico, it bears bright green stems with spiked ribs. Bright yellow flowers appear in summer.
Gymnocalycium paraguayense – a variable cactus with flattened spines. It produces creamy white flowers in spring and summer.
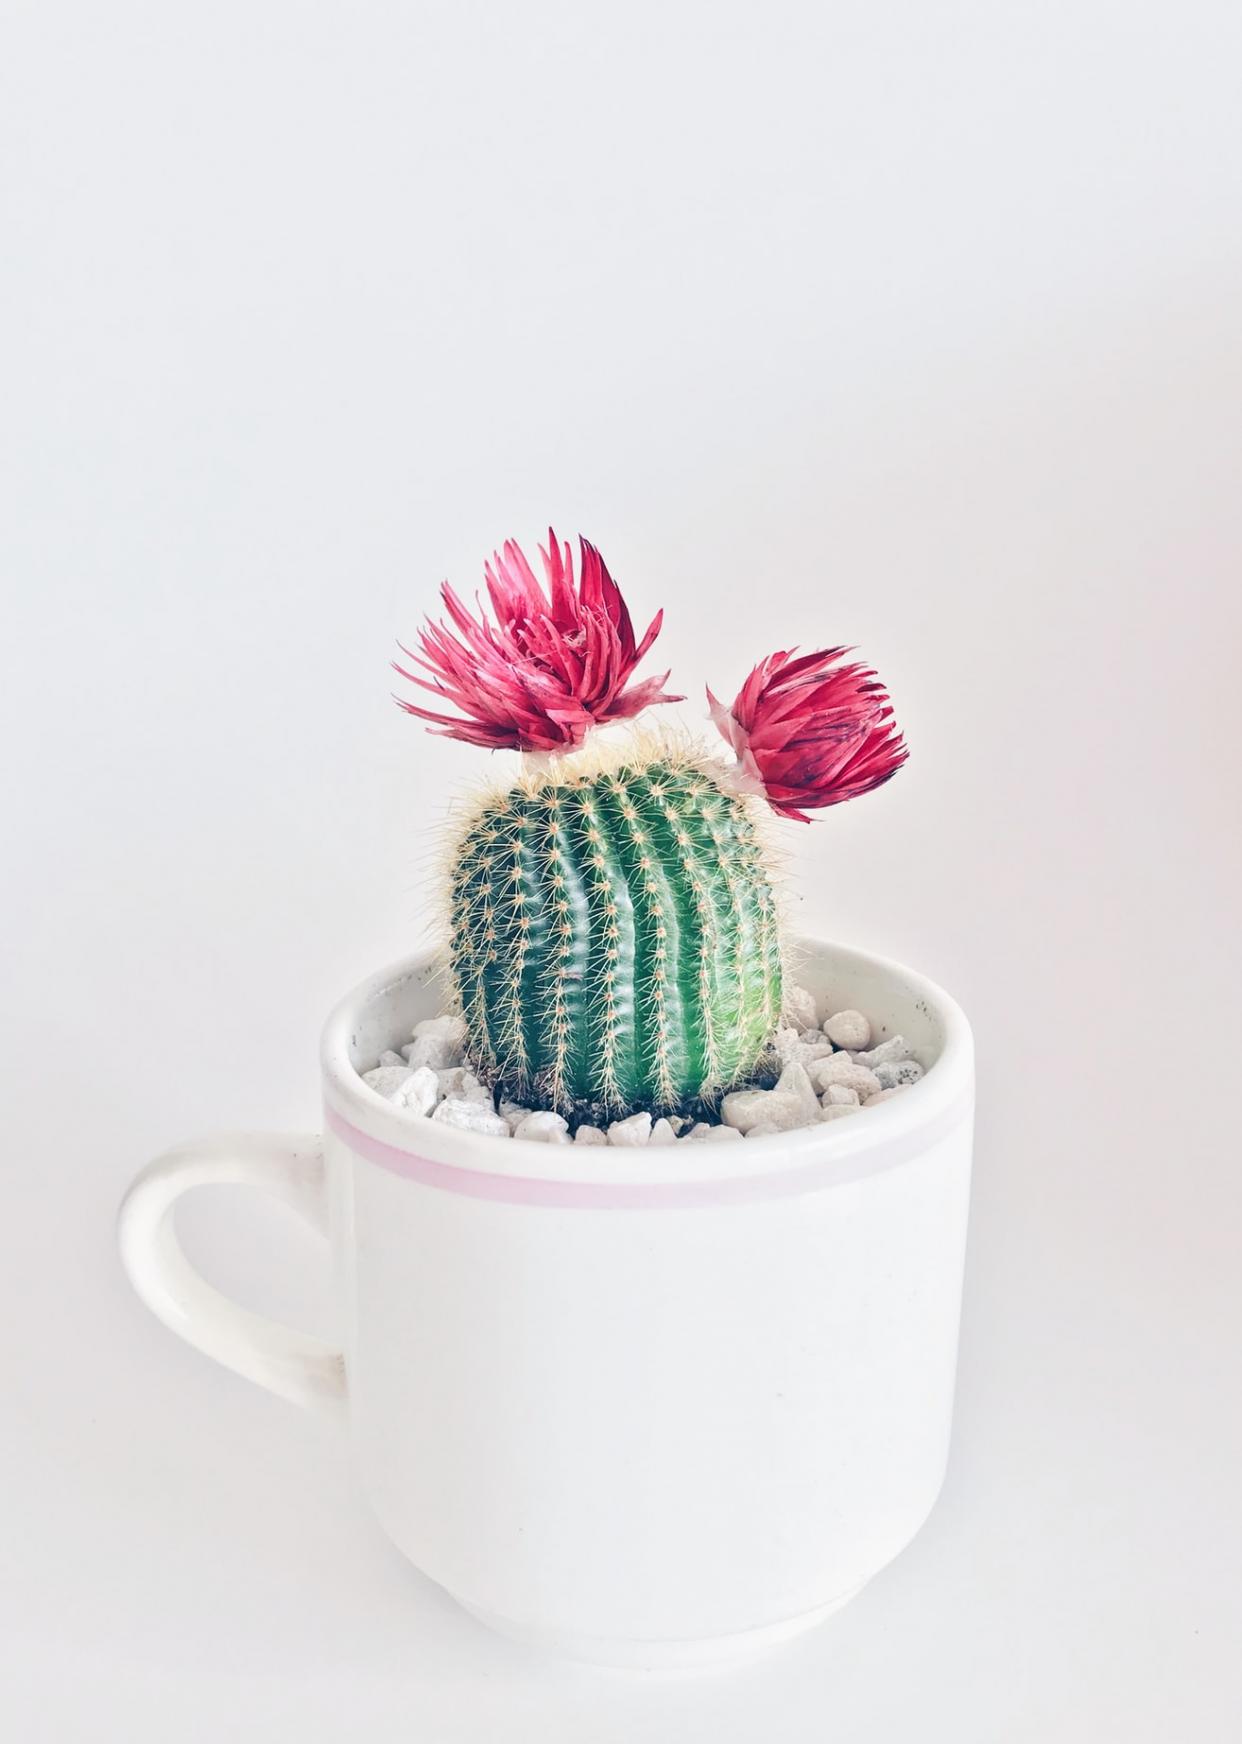
Mammillaria spinosissima – a globe-shaped cactus with bright pink, funnel-shaped flowers. Its central spines are a reddish-brown or yellow.
Rebutia krainziana – a clump-forming barrel cactus, forming dark green stems up to 7cm in diameter, with contrasting small, white areoles and spines. In late spring large, yellow or red flowers develop around the main stem, forming a tight clump.
1.How to plant cacti
Always plant cacti with care. The spines can prick and hurt your skin. It’s a good idea to use common kitchen items such as a thick tea towel, spoon and fork to help you.
Mulch with a layer of horticultural grit or pebbles to complete the look of the pot display. This also prevents water splashing back on the cactus.

2.How to propagate cacti
Cactus can be grown from seed although it can take several years for plants to reach a decent size. You can buy mixed cactus seed cheaply, and it’s fun to see which cactus varieties you end up with.
To grow cactus from seed, fill a pot with a moist, gritty, free-draining compost, firm down and level. Scatter cactus seeds over the surface, taking care not to sow them too thickly. Then, gently sprinkle a thin layer of vermiculite or fine grit over the seeds. Cover the pot with a clear plastic bag to preserve soil moisture, and leave the in a greenhouse or on a warm windowsill. You may need to find an alternative spot for them in winter if the windowsill becomes too cold.
Some cacti can be propagated from cuttings. Others bear offsets, which can simply be snipped off the plant and potted on.

3.Caring for cactus plants
In summer, water cacti no more than once a week. A good watering less often is better than a little-and-often approach. You shouldn’t need to water cacti at all in the coldest months.
Repot cacti every couple of years, to give them fresh compost – you won’t necessarily need to pot them into a larger pot.

4.Growing cactus plants: problem solving
Cactus plants are usually trouble free. If overwatered or not given enough light they can rot at the base. This is usually fatal for the plants.
Cactus plants can develop spindly growth but it’s easy to rectify.
5.Cactus varieties to grow
Echinocactus grusonii – golden barrel cactus is globe-shaped but eventually grows tall. Native to Mexico, it bears bright green stems with spiked ribs. Bright yellow flowers appear in summer.
Gymnocalycium paraguayense – a variable cactus with flattened spines. It produces creamy white flowers in spring and summer.
Mammillaria spinosissima – a globe-shaped cactus with bright pink, funnel-shaped flowers. Its central spines are a reddish-brown or yellow.
Rebutia krainziana – a clump-forming barrel cactus, forming dark green stems up to 7cm in diameter, with contrasting small, white areoles and spines. In late spring large, yellow or red flowers develop around the main stem, forming a tight clump.

0
0
文章
ritau
2020年05月14日

A pitaya is the fruit of several different cactus species indigenous to the Americas. Pitaya usually refers to fruit of the genus Stenocereus,while pitahaya or dragon fruit refers to fruit of the genus Hylocereus, both in the family Cactaceae. Dragon fruit is cultivated in Southeast Asia, Florida in the United States, the Caribbean, Australia, and throughout tropical and subtropical regions of the world.
These fruits are commonly known in English as "dragon fruit", a name used since around 1963, apparently resulting from the leather-like skin and prominent scaly spikes on the fruit exterior. The names pitahaya and pitaya derive from Mexico, and pitaya roja in Central America and northern South America, possibly relating to pitahaya for names of tall cacti species with flowering fruit.The fruit may also be known as a strawberry pear.
After a thorough cleaning of the seeds from the pulp of the fruit, the seeds may be stored when dried. The ideal fruit is unblemished and overripe.
Seeds grow well in a compost or potting soil mix – even as a potted indoor plant. Pitaya cacti usually germinate after between 11 and 14 days after shallow planting. As they are cacti, overwatering is a concern for home growers. As their growth continues, these climbing plants will find something to climb on, which can involve putting aerial roots down from the branches in addition to the basal roots. Once the plant reaches a mature 10 pounds in weight, the plant may flower.
Commercial plantings can be done at high density with between 1100 and 1350 plants per hectare. Plants can take up to five years to come into full commercial production, at which stage yields of 20 to 30 tons per hectare can be expected.

Pitaya flowers bloom overnight and usually wilt by the evening.They rely on nocturnal pollinators such as bats or moths for fertilization. Self-fertilization will not produce fruit in some species, and while cross-breeding has resulted in several "self-fertile" varieties, cross-pollinating with a second plant species generally increases fruit set and quality. This limits the capability of home growers to produce the fruit. However, the plants can flower between three and six times in a year depending on growing conditions. Like other cacti, if a healthy piece of the stem is broken off, it may take root in soil and become its own plant.
The plants can endure temperatures up to 40 °C (104 °F) and very short periods of frost, but will not survive long exposure to freezing temperatures. The cacti thrive most in USDA zones 10–11, but may survive outdoors in zone 9a or 9b.
Hylocereus has adapted to live in dry tropical climates with a moderate amount of rain. The dragon fruit sets on the cactus-like trees 30–50 days after flowering and can sometimes have 5-6 cycles of harvests per year. In numerous regions, it has escaped cultivation to become a weed and is classified as an invasive weed in some countries.
As the nutrient content of raw pitaya has not been thoroughly analyzed or published as of 2019, the USDA FoodData Central database reports one limited product label entry from a manufacturer of a branded product, showing that a 100 gram amount of pitaya contains 60 calories, 82% carbohydrates, 4% protein, and 11% of the Daily Value each for vitamin C and calcium.
These fruits are commonly known in English as "dragon fruit", a name used since around 1963, apparently resulting from the leather-like skin and prominent scaly spikes on the fruit exterior. The names pitahaya and pitaya derive from Mexico, and pitaya roja in Central America and northern South America, possibly relating to pitahaya for names of tall cacti species with flowering fruit.The fruit may also be known as a strawberry pear.
After a thorough cleaning of the seeds from the pulp of the fruit, the seeds may be stored when dried. The ideal fruit is unblemished and overripe.
Seeds grow well in a compost or potting soil mix – even as a potted indoor plant. Pitaya cacti usually germinate after between 11 and 14 days after shallow planting. As they are cacti, overwatering is a concern for home growers. As their growth continues, these climbing plants will find something to climb on, which can involve putting aerial roots down from the branches in addition to the basal roots. Once the plant reaches a mature 10 pounds in weight, the plant may flower.
Commercial plantings can be done at high density with between 1100 and 1350 plants per hectare. Plants can take up to five years to come into full commercial production, at which stage yields of 20 to 30 tons per hectare can be expected.

Pitaya flowers bloom overnight and usually wilt by the evening.They rely on nocturnal pollinators such as bats or moths for fertilization. Self-fertilization will not produce fruit in some species, and while cross-breeding has resulted in several "self-fertile" varieties, cross-pollinating with a second plant species generally increases fruit set and quality. This limits the capability of home growers to produce the fruit. However, the plants can flower between three and six times in a year depending on growing conditions. Like other cacti, if a healthy piece of the stem is broken off, it may take root in soil and become its own plant.
The plants can endure temperatures up to 40 °C (104 °F) and very short periods of frost, but will not survive long exposure to freezing temperatures. The cacti thrive most in USDA zones 10–11, but may survive outdoors in zone 9a or 9b.
Hylocereus has adapted to live in dry tropical climates with a moderate amount of rain. The dragon fruit sets on the cactus-like trees 30–50 days after flowering and can sometimes have 5-6 cycles of harvests per year. In numerous regions, it has escaped cultivation to become a weed and is classified as an invasive weed in some countries.
As the nutrient content of raw pitaya has not been thoroughly analyzed or published as of 2019, the USDA FoodData Central database reports one limited product label entry from a manufacturer of a branded product, showing that a 100 gram amount of pitaya contains 60 calories, 82% carbohydrates, 4% protein, and 11% of the Daily Value each for vitamin C and calcium.
0
0
成长记
kensong
2019年09月14日

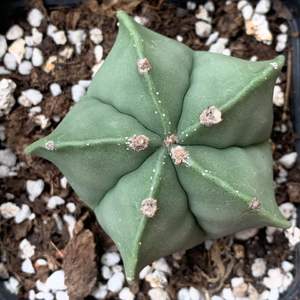
I now added "Astrophytum Myriostigma var. Nudum (Bishop's Cap Cactus)" in my "garden"

0
0
成长记
kensong
2019年09月14日

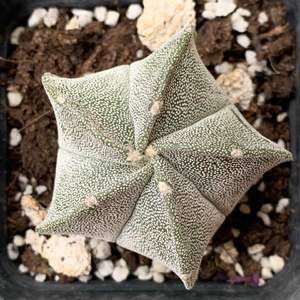
I now added "Astrophytum Myriostigma (Bishop's Cap Cactus)" in my "garden"

0
0


