文章
Miss Chen
2021年09月24日

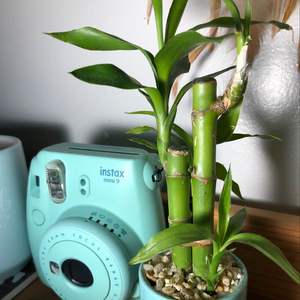
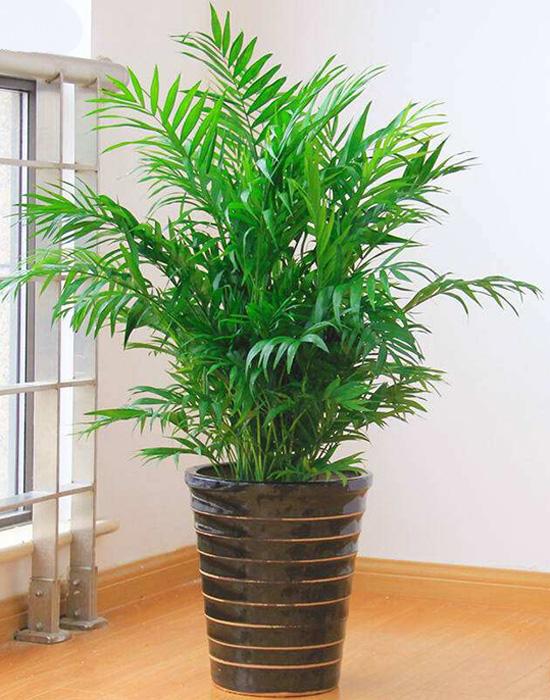
Despite its name, bamboo palms (Chamaedorea seifrizii) are not bamboo at all but are a type of palm in the Araceae family. These tropical plants are native to Mexico and Central America and grow naturally as forest understory plants. They are ideal houseplants that can add a tropical feel to any room. Plus, they are listed on NASA's clean air varieties list
8 Palms Plants to Grow Indoors
Botanical Name Chamaedorea seifrizii
Common Name Bamboo palm
Plant Type Perennial, clustered parlour palm, reed palm, cane palm
Mature Size 4-12 ft. tall, 3-5 ft. wide
Sun Exposure Partial, shade
Soil Type Moist but well-drained
Soil pH Acidic, neutral
Bloom Time Spring, summer
Flower Color Yellow, orange
Hardiness Zones 10-11, USA
Native Area Central America

Bamboo Palm Care
Bamboo palms are popular houseplants because they are low-maintenance and they do well in a variety of lighting conditions. They do require consistent moisture, so if you tend to under-water your plants you may want to skip this palm.
Light
Bamboo palms are the perfect tropical plant for medium to low-light conditions. Unlike other palms, they do not require bright light in order to thrive. They do well in a variety of light conditions ranging from low light to bright light, and can even tolerate being placed in north-facing windows. Avoid hot, direct sunlight as it will burn their delicate leaves.
Soil
Moist but well-draining soil is best for bamboo palms. Soil that is porous but humus-rich is ideal. Amending standard potting soil with peat moss, orchid bark, and perlite is a great DIY soil mix for bamboo palms.
Water
The soil of bamboo palms should be kept evenly moist, but never waterlogged. Bamboo palms are sensitive to both overwatering and under-watering, but it is always best to under-water rather than overwater. Allow the top of the soil to dry slightly between waterings.
Temperature and Humidity
These tropical palms enjoy warm temperatures and humid environments and are hardy in USDA zones 10-11. They are not frost-tolerant. Bamboo palms do well in typical household temperature and humidity levels but appreciate extra humidity where possible. Placing your palm near a humidifier or on a pebble tray will help to increase the humidity around the plant.
Fertilizer
Bamboo palms should be fertilized during the growing season to help encourage healthy growth. Granular, time-release fertilizers work best. Spread the fertilizer on top of the potting medium and ensure that you water it in. Avoid fertilizing during the fall and winter when the plant is in dormancy.
Pruning Bamboo Palms
These palms are low-maintenance and rarely need pruning. Consistently tidying up any dried, brown leaves or leaf tips will help keep the plant looking healthy and attractive.
Propagating Bamboo Palms
Bamboo palms are sensitive to trauma and can be tricky to propagate. Mature bamboo palms produce offshoots that can be separated and established as new plants.
Use a clean, sharp knife to separate offshoots from the mother plant. If the offshoots have their own root systems (which they should), ensure that you separate those as well. Pot the offshoots in loamy, well-draining soil and keep them in a consistently humid environment until established (approximately 2-3 months).
Potting and Repotting Bamboo Palms
Bamboo palms should be repotted once they have outgrown their previous container. They tend to be slow-growing so you should not need to repot them too often. Keep in mind that the plant will grow as large as the pot you give it—so if you want to keep your bamboo palm small, don’t increase the pot size very much when you repot. This will help to control the size of the palm.
Common Pests/Diseases
Bamboo palms are susceptible to a range of common houseplant pests such as mealybugs, aphids, whiteflies, fungus gnats, and scale. These pests can be mitigated with insecticide treatments if necessary. Be sure to regularly check over your bamboo palm for pests to help catch any infestations early.
8 Palms Plants to Grow Indoors
Botanical Name Chamaedorea seifrizii
Common Name Bamboo palm
Plant Type Perennial, clustered parlour palm, reed palm, cane palm
Mature Size 4-12 ft. tall, 3-5 ft. wide
Sun Exposure Partial, shade
Soil Type Moist but well-drained
Soil pH Acidic, neutral
Bloom Time Spring, summer
Flower Color Yellow, orange
Hardiness Zones 10-11, USA
Native Area Central America

Bamboo Palm Care
Bamboo palms are popular houseplants because they are low-maintenance and they do well in a variety of lighting conditions. They do require consistent moisture, so if you tend to under-water your plants you may want to skip this palm.
Light
Bamboo palms are the perfect tropical plant for medium to low-light conditions. Unlike other palms, they do not require bright light in order to thrive. They do well in a variety of light conditions ranging from low light to bright light, and can even tolerate being placed in north-facing windows. Avoid hot, direct sunlight as it will burn their delicate leaves.
Soil
Moist but well-draining soil is best for bamboo palms. Soil that is porous but humus-rich is ideal. Amending standard potting soil with peat moss, orchid bark, and perlite is a great DIY soil mix for bamboo palms.
Water
The soil of bamboo palms should be kept evenly moist, but never waterlogged. Bamboo palms are sensitive to both overwatering and under-watering, but it is always best to under-water rather than overwater. Allow the top of the soil to dry slightly between waterings.
Temperature and Humidity
These tropical palms enjoy warm temperatures and humid environments and are hardy in USDA zones 10-11. They are not frost-tolerant. Bamboo palms do well in typical household temperature and humidity levels but appreciate extra humidity where possible. Placing your palm near a humidifier or on a pebble tray will help to increase the humidity around the plant.
Fertilizer
Bamboo palms should be fertilized during the growing season to help encourage healthy growth. Granular, time-release fertilizers work best. Spread the fertilizer on top of the potting medium and ensure that you water it in. Avoid fertilizing during the fall and winter when the plant is in dormancy.
Pruning Bamboo Palms
These palms are low-maintenance and rarely need pruning. Consistently tidying up any dried, brown leaves or leaf tips will help keep the plant looking healthy and attractive.

Propagating Bamboo Palms
Bamboo palms are sensitive to trauma and can be tricky to propagate. Mature bamboo palms produce offshoots that can be separated and established as new plants.
Use a clean, sharp knife to separate offshoots from the mother plant. If the offshoots have their own root systems (which they should), ensure that you separate those as well. Pot the offshoots in loamy, well-draining soil and keep them in a consistently humid environment until established (approximately 2-3 months).
Potting and Repotting Bamboo Palms
Bamboo palms should be repotted once they have outgrown their previous container. They tend to be slow-growing so you should not need to repot them too often. Keep in mind that the plant will grow as large as the pot you give it—so if you want to keep your bamboo palm small, don’t increase the pot size very much when you repot. This will help to control the size of the palm.
Common Pests/Diseases
Bamboo palms are susceptible to a range of common houseplant pests such as mealybugs, aphids, whiteflies, fungus gnats, and scale. These pests can be mitigated with insecticide treatments if necessary. Be sure to regularly check over your bamboo palm for pests to help catch any infestations early.
0
0
文章
Miss Chen
2021年09月22日

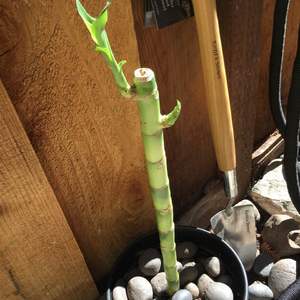
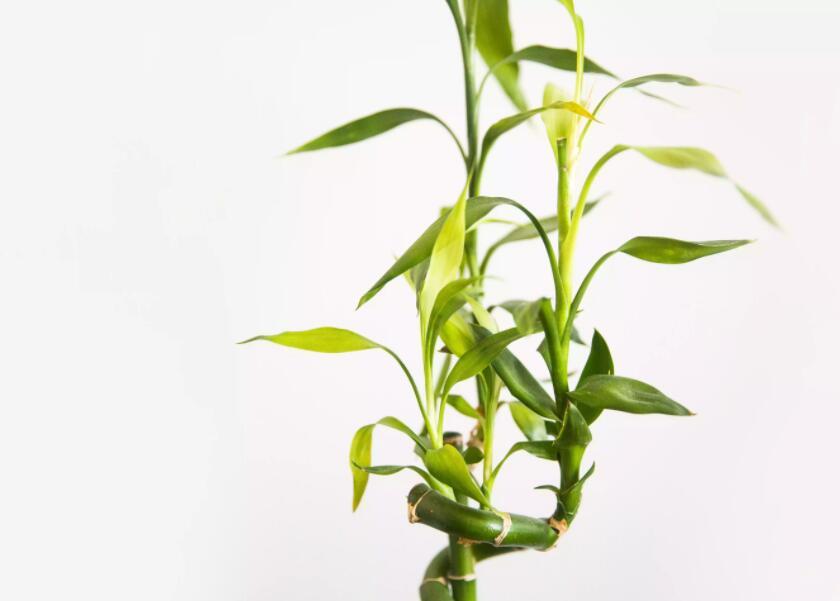
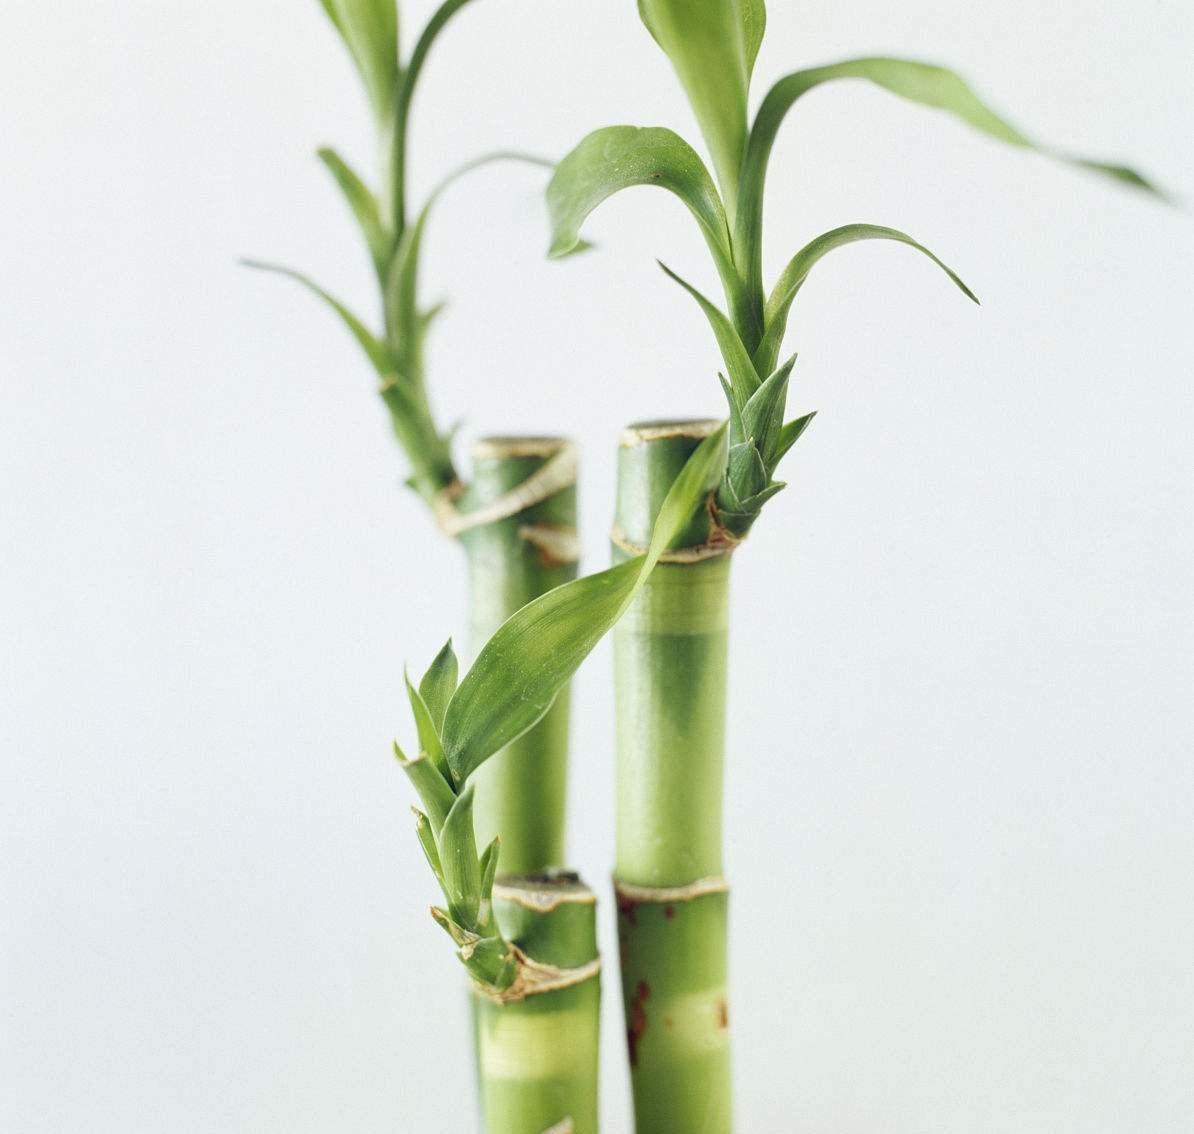
The common name bamboo is applied to over a thousand plant species. In the wild, several of these species can grow to towering heights of 50 feet or more. However, it is possible to grow certain types of bamboo in containers—even indoors. Golden bamboo (Phyllostachys aurea) is one of those species. This bamboo features bright green upright canes that turn to a golden color with age and sunlight exposure. Its narrow, lance-shaped leaves grow in clusters on short stems off of the canes. The plant grows quickly and can easily spread throughout a garden if you let it. Thus, planting it in a pot is ideal to keep it contained. It won’t grow as large, but that means it will be much more manageable. It’s best planted in the spring or early fall, though indoors you generally can plant it any time of year.
Botanical Name Phyllostachys aurea
Common Names Bamboo, golden bamboo, fishpole bamboo, monk’s belly bamboo, fairyland bamboo
Plant Type Perennial, shrub
Mature Size 15–30 ft. tall, 8–15 ft. wide (outdoors), 5–8 ft. tall, 2–4 ft. wide (indoors)
Sun Exposure Full, partial
Soil Type Loamy, moist, well-drained
Soil pH Acidic
Bloom Time Nonflowering
Flower Color Nonflowering
Hardiness Zones 6–10 (USDA)
Native Area China
Bamboo Care
Bamboo is usually a low-maintenance, hardy plant. It rarely has issues with pests or diseases, and it typically doesn’t require pruning. You can remove old canes at their base if they begin to look unsightly. And you also can remove new shoots as they pop up from the soil if you want to limit your plant’s growth.
Regular watering and feeding will make up the bulk of your plant maintenance. To maintain the soil moisture bamboo likes, you might have to water your container plant more than once a week. But especially for an indoor plant where the climate doesn’t change drastically, you should be able to establish a predictable care routine fairly easily.
Light
Bamboo prefers a spot that gets full sun to partial shade. Too much shade can result in a weak plant that does not grow to its fullest potential or develop its brilliant color. Indoors, keep your bamboo by your brightest window, and rotate the pot every week or so to be sure all sides of the plant get light.
Soil
This plant can tolerate a variety of soil types, but it prefers organically rich soil with good drainage. A quality commercial potting mix should be fine for container plants.
Water
Bamboo has some drought tolerance once it’s established, and it can handle soggy soil for a short time. However, sitting in pooled water can ultimately rot the roots and kill the plant. The plant ideally should have evenly moist soil. Test the soil by sticking your finger an inch or two in it and watering whenever it feels dry. Never let the soil dry out completely. But during the winter months, slightly cut back on watering.
Temperature and Humidity
This species of bamboo is known for its cold tolerance. It can survive temperatures even around 5 degrees Fahrenheit for short amounts of time. However, cold weather can cause the plant to drop foliage and might eventually kill it. The plant will thrive in typical indoor temperatures between 60 and 80 degrees Fahrenheit. Keep it away from cold drafts, such as those from an air conditioner, as well as from drying heat vents. These plants prefer fairly humid air but can tolerate some indoor dryness as long as you keep them well watered.
Fertilizer
To maintain an optimal amount of nutrients in your container plant’s soil, feed your bamboo with a balanced liquid fertilizer once a month, following label instructions. It also can be helpful to mix some organic compost into the soil, especially in the spring, to promote healthy plant growth.
Potting and Repotting Bamboo
When starting with a small nursery bamboo plant, choose a container that is at least 12 inches wide and deep. Pick a pot made from a heavy material to anchor the weight of the bamboo canes. You can even add some rocks or gravel to the bottom if you feel the container isn’t sturdy enough to anchor the plant’s weight. Also, make sure the container has ample drainage holes.
Place the root ball in the pot, and fill in around it with a loose, nutrient-rich potting mix. If you wish, mix in some compost at this time to encourage growth. Then, water the bamboo well.
You likely will have to move your bamboo to a larger pot every year or two once the roots have spread through the entire pot and you see them coming out the holes in the bottom or poking up out of the soil on top. Don’t allow your plant to remain in a pot that’s too small for it for very long, as it won’t be able to get enough nutrients to remain healthy. An indoor plant typically will do fine being repotted at any time of year, but at the start of the growing season in the spring when the plant is revving up its growth is generally the best time for repotting.
Bamboo Varieties
There are several varieties of Phyllostachys aurea, including:
Phyllostachys aurea ‘Flavescens Inversa’: Some lower sections of the canes of this variety can have a yellow stripe.
Phyllostachys aurea ‘Holochrysa’: The canes of this variety often turn golden faster than others of the species.
Phyllostachys aurea ‘Koi’: This variety has canes that turn yellow with green stripes.
Phyllostachys aurea ‘Takemurai’: This variety tends to grow larger than other plants of the species.
Botanical Name Phyllostachys aurea
Common Names Bamboo, golden bamboo, fishpole bamboo, monk’s belly bamboo, fairyland bamboo
Plant Type Perennial, shrub
Mature Size 15–30 ft. tall, 8–15 ft. wide (outdoors), 5–8 ft. tall, 2–4 ft. wide (indoors)
Sun Exposure Full, partial
Soil Type Loamy, moist, well-drained
Soil pH Acidic
Bloom Time Nonflowering
Flower Color Nonflowering
Hardiness Zones 6–10 (USDA)
Native Area China

Bamboo Care
Bamboo is usually a low-maintenance, hardy plant. It rarely has issues with pests or diseases, and it typically doesn’t require pruning. You can remove old canes at their base if they begin to look unsightly. And you also can remove new shoots as they pop up from the soil if you want to limit your plant’s growth.
Regular watering and feeding will make up the bulk of your plant maintenance. To maintain the soil moisture bamboo likes, you might have to water your container plant more than once a week. But especially for an indoor plant where the climate doesn’t change drastically, you should be able to establish a predictable care routine fairly easily.
Light
Bamboo prefers a spot that gets full sun to partial shade. Too much shade can result in a weak plant that does not grow to its fullest potential or develop its brilliant color. Indoors, keep your bamboo by your brightest window, and rotate the pot every week or so to be sure all sides of the plant get light.
Soil
This plant can tolerate a variety of soil types, but it prefers organically rich soil with good drainage. A quality commercial potting mix should be fine for container plants.
Water
Bamboo has some drought tolerance once it’s established, and it can handle soggy soil for a short time. However, sitting in pooled water can ultimately rot the roots and kill the plant. The plant ideally should have evenly moist soil. Test the soil by sticking your finger an inch or two in it and watering whenever it feels dry. Never let the soil dry out completely. But during the winter months, slightly cut back on watering.
Temperature and Humidity
This species of bamboo is known for its cold tolerance. It can survive temperatures even around 5 degrees Fahrenheit for short amounts of time. However, cold weather can cause the plant to drop foliage and might eventually kill it. The plant will thrive in typical indoor temperatures between 60 and 80 degrees Fahrenheit. Keep it away from cold drafts, such as those from an air conditioner, as well as from drying heat vents. These plants prefer fairly humid air but can tolerate some indoor dryness as long as you keep them well watered.
Fertilizer
To maintain an optimal amount of nutrients in your container plant’s soil, feed your bamboo with a balanced liquid fertilizer once a month, following label instructions. It also can be helpful to mix some organic compost into the soil, especially in the spring, to promote healthy plant growth.
Potting and Repotting Bamboo
When starting with a small nursery bamboo plant, choose a container that is at least 12 inches wide and deep. Pick a pot made from a heavy material to anchor the weight of the bamboo canes. You can even add some rocks or gravel to the bottom if you feel the container isn’t sturdy enough to anchor the plant’s weight. Also, make sure the container has ample drainage holes.
Place the root ball in the pot, and fill in around it with a loose, nutrient-rich potting mix. If you wish, mix in some compost at this time to encourage growth. Then, water the bamboo well.

You likely will have to move your bamboo to a larger pot every year or two once the roots have spread through the entire pot and you see them coming out the holes in the bottom or poking up out of the soil on top. Don’t allow your plant to remain in a pot that’s too small for it for very long, as it won’t be able to get enough nutrients to remain healthy. An indoor plant typically will do fine being repotted at any time of year, but at the start of the growing season in the spring when the plant is revving up its growth is generally the best time for repotting.
Bamboo Varieties
There are several varieties of Phyllostachys aurea, including:
Phyllostachys aurea ‘Flavescens Inversa’: Some lower sections of the canes of this variety can have a yellow stripe.
Phyllostachys aurea ‘Holochrysa’: The canes of this variety often turn golden faster than others of the species.
Phyllostachys aurea ‘Koi’: This variety has canes that turn yellow with green stripes.
Phyllostachys aurea ‘Takemurai’: This variety tends to grow larger than other plants of the species.
0
0
文章
Miss Chen
2021年08月12日

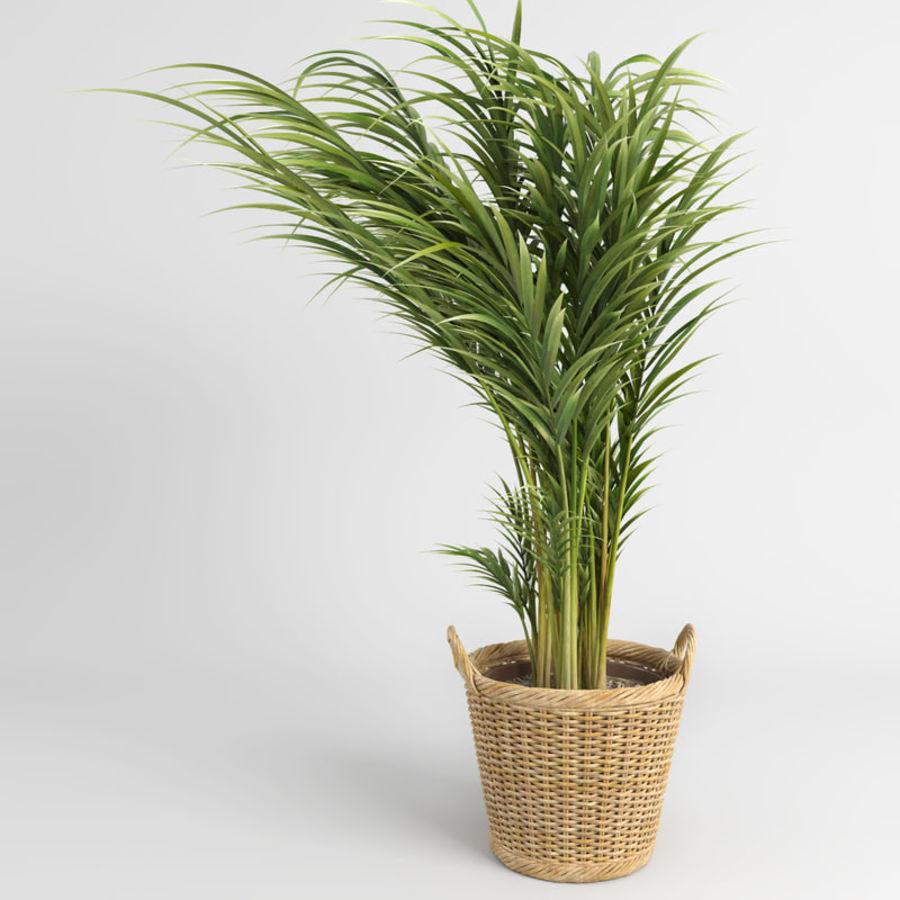
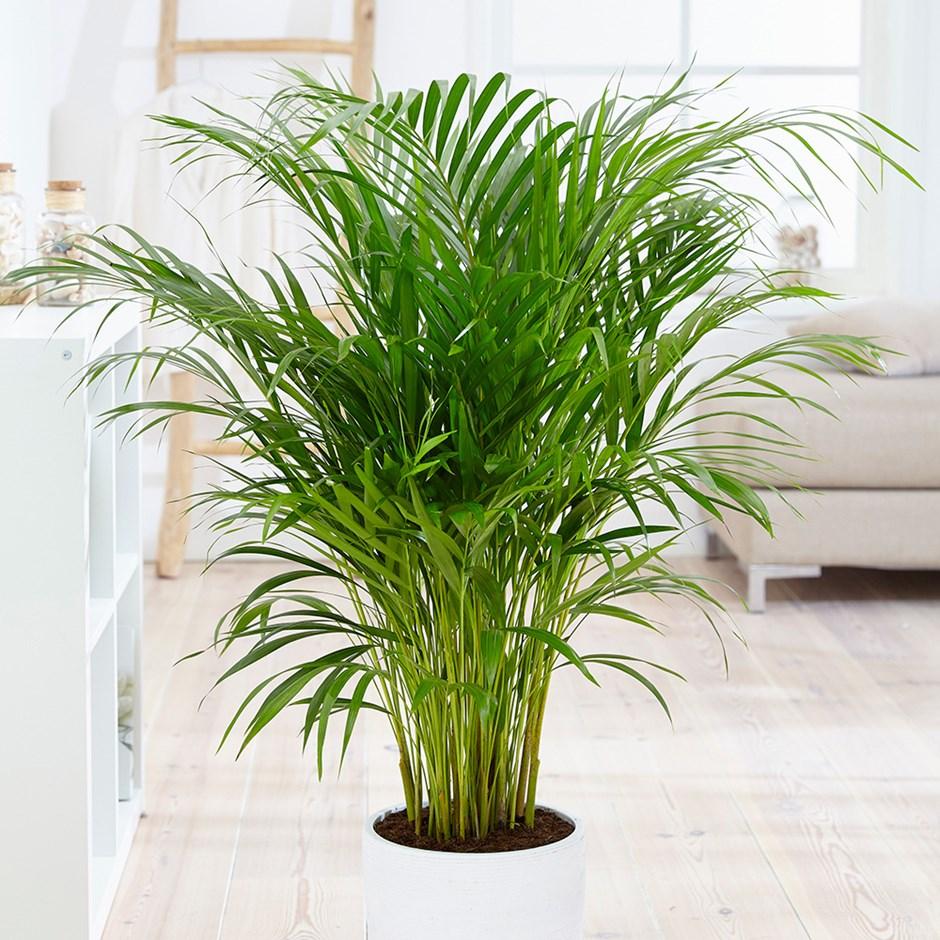
It is hard to believe that the areca palm (Dypsis lutescens) was once an endangered species. Drive down almost any street in a warm climate, and you are likely to see dozens of these tall, attractive, clumping palms that look a lot like bamboo. The palms have smooth, sometimes golden trunks that are reminiscent of bamboo clumps. Their fronds are narrow and full, almost like bamboo leaves. When grown outdoors, they are often used as a privacy screen. They also are commonly grown as houseplants. These palms are best planted in the spring, and they have a slow to moderate growth rate.
Common Names Areca palm, bamboo palm, butterfly palm, golden cane palm, yellow palm
Botanical Name Dypsis lutescens (formerly Chrysalidocarpus lutescens)
Family Arecaceae
Plant Type Perennial
Mature Size 10–30 ft. tall, 8–15 ft. wide
Sun Exposure Full, partial
Soil Type Moist, well-drained
Soil pH Acidic, neutral
Bloom Time Summer
Flower Color Pale yellow
Hardiness Zones 10–11 (USDA)
Native Area Madagascar
Areca Palm Care
When grown outdoors, it is important to start an areca palm off right in a planting site that has good drainage. Soggy soil can easily cause root rot on a palm. As a houseplant, a well-draining container is essential.
In terms of regular care, plan to water your areca palm whenever the soil starts to dry out. This is especially important for outdoor palms in hot weather to keep them healthy. Moreover, indoor palms often don’t get enough light unless you have a very bright window. So it can benefit your palm to bring it outdoors in warm weather to be exposed to diffused sunlight. Feed both indoor and outdoor palms throughout the growing season. These palms don't need much in the way of pruning. Wait to remove any dying fronds until they are mostly brown, as they still can play a role in photosynthesis.
Light
Outdoors, these plants like bright, filtered sunlight, but they also can tolerate full sun. Ideally, they should have protection from strong afternoon sun, as too severe of light can scorch the foliage. Indoors, areca palms do best with bright light exposure from a south- or west-facing window.
Soil
For potted indoor plants, a well-draining, peat-based potting mix is perfect. Outdoor specimens do best with a rich, slightly acidic soil that has very good drainage. Amending with sand and peat moss might be necessary to improve porousness and lower the pH of the soil.
Water
Like many palms, areca palms like moist soil, but they are sensitive to overwatering and cannot tolerate being waterlogged or sitting in a water-saturated potting mix. So let the soil or potting mix dry out slightly between waterings. Areca palms also are sensitive to fluoridated water, so use distilled water or collected rainwater.1
Temperature and Humidity
Indoors or outdoors, this plant does best in average temperatures of 65 to 75 degrees Fahrenheit. It will do fine planted in the garden in regions where outdoor temperatures don't dip below about 50 degrees Fahrenheit. When grown as an indoor plant, keep the leaves away from cold windows, air conditioners, and heat sources. And if you place potted plants outside during the summer, be sure to bring them in before temperatures dip below 50 degrees. Sudden cold bursts can cause dark spots on the leaves. Furthermore, high humidity is essential to keeping an areca palm looking its best. The plant will acclimate to normal indoor humidity. But if the air is too dry, it is common for the leaf tips to turn brown.
Fertilizer
The areca palm is a heavy feeder and requires fertilizing from spring to early fall with a liquid fertilizer, following label instructions. Do not feed during the late fall and winter when the plant is dormant.
Propagating Areca Palm
You can propagate areca palm by root division, which will give you a lush plant faster than from seed, but you will not be successful doing so with cuttings. Root division can be done at any time during the year, but the plant will be its strongest in the spring. To divide by root division from a potted areca palm:
Choose a mature plant with multiple stems.
Water well the day before dividing to loosen up the roots from the soil.
Remove the palm from its pot by patting the sides of the container to loosen the root ball.
Shake soil from the roots. Rinse soil from roots so you can see which roots go to which stems.
Choose four to five stems and, with a sharp knife, cut them away from the parent.
Gently place divided stems together in a pot with a 2-to-1 mixture of regular potting soil and coarse sand.
Place the pot in bright and indirect light (not direct sun) and water normally.
How to Grow Areca Palm From Seed
Areca palms can also be planted from seeds. It is unusual to find areca palm seeds at garden centers; however, you can harvest seeds from the fruits that appear after the palm's yellow flowers bloom.
If you propagate with seeds, germinate them at home by planting them slightly covered in a seed-starting mix. The older, orange-colored seeds generally have a better germination rate than the newer, greener seeds. Germination takes about six weeks with soil over 80 degrees Fahrenheit and relatively high humidity. Keep the seed-starting mix moist but not soggy as you wait for germination, and then continue to keep the seedlings moist as well. When the seedlings grow a few leaves, plant them outdoors 3 to 6 feet apart, or plant three to four seedlings to a 12-inch pot to create a bushy look.
Potting and Repotting Areca Palms
Areca palms like a somewhat cramped container with ample drainage holes, and crowded roots will aid in keeping the palm's size in check for growth as a houseplant. However, it's still ideal to repot every other year or so to refresh the potting mix and remove fertilizer salt deposits that have built up in the container. You may use the same pot if the palm's root ball still comfortably fits it. Otherwise, use just one container size up. Replant the palm at the same depth as it was previously.
Common Pests & Plant Diseases
Areca palms don’t have serious issues with pests or diseases. Occasionally a palm will come down with lethal yellowing, an insect-transmitted bacterial disease that causes fronds and ultimately the whole palm to die. Outdoor palms are generally the ones afflicted with this, and because treatment usually isn’t effective it’s typically best to remove the palm before the disease can spread. Indoor areca palms are vulnerable to common houseplant pests, including mites, aphids, mealybugs, scale, and whiteflies, which can cause foliage damage and discoloration. Treat any infestation as soon as possible.
Common Problems With Areca Palm
Although the plant can be easy to care for, it's prone to one particular issue that happens to both indoor and outdoor areca palms: Keep an eye out for leaf tip burn.
Leaf Tip Burn
Leaf tip burn means the tips and leaves have turned yellow or brown. This can happen from:
Chilled air
Overwatering
Underwatering
Poor soil conditions
Compacted roots
The areca palm is self-cleaning, which means it typically will shed its brown fronds on its own. For an indoor areca palm, it may be best to first amend the soil to make sure it's draining and the roots are not sitting in water. Or, move the pot to a spot with less light and higher humidity before thinking about the last resort of repotting the plant. You can also manually sheer off brown spots to tidy up your indoor or outdoor plant.

Common Names Areca palm, bamboo palm, butterfly palm, golden cane palm, yellow palm
Botanical Name Dypsis lutescens (formerly Chrysalidocarpus lutescens)
Family Arecaceae
Plant Type Perennial
Mature Size 10–30 ft. tall, 8–15 ft. wide
Sun Exposure Full, partial
Soil Type Moist, well-drained
Soil pH Acidic, neutral
Bloom Time Summer
Flower Color Pale yellow
Hardiness Zones 10–11 (USDA)
Native Area Madagascar
Areca Palm Care
When grown outdoors, it is important to start an areca palm off right in a planting site that has good drainage. Soggy soil can easily cause root rot on a palm. As a houseplant, a well-draining container is essential.
In terms of regular care, plan to water your areca palm whenever the soil starts to dry out. This is especially important for outdoor palms in hot weather to keep them healthy. Moreover, indoor palms often don’t get enough light unless you have a very bright window. So it can benefit your palm to bring it outdoors in warm weather to be exposed to diffused sunlight. Feed both indoor and outdoor palms throughout the growing season. These palms don't need much in the way of pruning. Wait to remove any dying fronds until they are mostly brown, as they still can play a role in photosynthesis.
Light
Outdoors, these plants like bright, filtered sunlight, but they also can tolerate full sun. Ideally, they should have protection from strong afternoon sun, as too severe of light can scorch the foliage. Indoors, areca palms do best with bright light exposure from a south- or west-facing window.
Soil
For potted indoor plants, a well-draining, peat-based potting mix is perfect. Outdoor specimens do best with a rich, slightly acidic soil that has very good drainage. Amending with sand and peat moss might be necessary to improve porousness and lower the pH of the soil.
Water
Like many palms, areca palms like moist soil, but they are sensitive to overwatering and cannot tolerate being waterlogged or sitting in a water-saturated potting mix. So let the soil or potting mix dry out slightly between waterings. Areca palms also are sensitive to fluoridated water, so use distilled water or collected rainwater.1
Temperature and Humidity
Indoors or outdoors, this plant does best in average temperatures of 65 to 75 degrees Fahrenheit. It will do fine planted in the garden in regions where outdoor temperatures don't dip below about 50 degrees Fahrenheit. When grown as an indoor plant, keep the leaves away from cold windows, air conditioners, and heat sources. And if you place potted plants outside during the summer, be sure to bring them in before temperatures dip below 50 degrees. Sudden cold bursts can cause dark spots on the leaves. Furthermore, high humidity is essential to keeping an areca palm looking its best. The plant will acclimate to normal indoor humidity. But if the air is too dry, it is common for the leaf tips to turn brown.
Fertilizer
The areca palm is a heavy feeder and requires fertilizing from spring to early fall with a liquid fertilizer, following label instructions. Do not feed during the late fall and winter when the plant is dormant.
Propagating Areca Palm
You can propagate areca palm by root division, which will give you a lush plant faster than from seed, but you will not be successful doing so with cuttings. Root division can be done at any time during the year, but the plant will be its strongest in the spring. To divide by root division from a potted areca palm:
Choose a mature plant with multiple stems.
Water well the day before dividing to loosen up the roots from the soil.
Remove the palm from its pot by patting the sides of the container to loosen the root ball.
Shake soil from the roots. Rinse soil from roots so you can see which roots go to which stems.
Choose four to five stems and, with a sharp knife, cut them away from the parent.
Gently place divided stems together in a pot with a 2-to-1 mixture of regular potting soil and coarse sand.
Place the pot in bright and indirect light (not direct sun) and water normally.
How to Grow Areca Palm From Seed
Areca palms can also be planted from seeds. It is unusual to find areca palm seeds at garden centers; however, you can harvest seeds from the fruits that appear after the palm's yellow flowers bloom.
If you propagate with seeds, germinate them at home by planting them slightly covered in a seed-starting mix. The older, orange-colored seeds generally have a better germination rate than the newer, greener seeds. Germination takes about six weeks with soil over 80 degrees Fahrenheit and relatively high humidity. Keep the seed-starting mix moist but not soggy as you wait for germination, and then continue to keep the seedlings moist as well. When the seedlings grow a few leaves, plant them outdoors 3 to 6 feet apart, or plant three to four seedlings to a 12-inch pot to create a bushy look.
Potting and Repotting Areca Palms
Areca palms like a somewhat cramped container with ample drainage holes, and crowded roots will aid in keeping the palm's size in check for growth as a houseplant. However, it's still ideal to repot every other year or so to refresh the potting mix and remove fertilizer salt deposits that have built up in the container. You may use the same pot if the palm's root ball still comfortably fits it. Otherwise, use just one container size up. Replant the palm at the same depth as it was previously.
Common Pests & Plant Diseases
Areca palms don’t have serious issues with pests or diseases. Occasionally a palm will come down with lethal yellowing, an insect-transmitted bacterial disease that causes fronds and ultimately the whole palm to die. Outdoor palms are generally the ones afflicted with this, and because treatment usually isn’t effective it’s typically best to remove the palm before the disease can spread. Indoor areca palms are vulnerable to common houseplant pests, including mites, aphids, mealybugs, scale, and whiteflies, which can cause foliage damage and discoloration. Treat any infestation as soon as possible.

Common Problems With Areca Palm
Although the plant can be easy to care for, it's prone to one particular issue that happens to both indoor and outdoor areca palms: Keep an eye out for leaf tip burn.
Leaf Tip Burn
Leaf tip burn means the tips and leaves have turned yellow or brown. This can happen from:
Chilled air
Overwatering
Underwatering
Poor soil conditions
Compacted roots
The areca palm is self-cleaning, which means it typically will shed its brown fronds on its own. For an indoor areca palm, it may be best to first amend the soil to make sure it's draining and the roots are not sitting in water. Or, move the pot to a spot with less light and higher humidity before thinking about the last resort of repotting the plant. You can also manually sheer off brown spots to tidy up your indoor or outdoor plant.
0
0
文章
Miss Chen
2021年05月08日

Distribution and habitat: Phyllostachys aurea is a running type of bamboo native to China which was introduced in Taiwan and in Japan long ago. These cold hardy bamboo was naturalised in Indonesia, New Zealand, southern USA, Australia and Hawaii.
Description: Phyllostachys aurea are easily identified by their characteristic compressed internodes in the lower part of the canes which have a tortoiseshell-like appearance. This internodal compression result in shorter heights and thicker cane diameters (relative to height) than many other Phyllostachys species. The canes are typically green, but will turn yellow in full or partial sun, and deepen into a gold-orange colour as the plant matures. Branching and foliage tend to start lower to the ground than many other Phyllostachys, but some prefer to cut off lower branches to show off the interesting ‘tortoise shell’ lower part of the canes.
The leaves are clustered and produced on short shoots which grow from the joints on the branches. They consist of a leaf sheath 25-35mm long, which surrounds the stem and a spreading leaf blade. The base of the leaf blade is very narrow and stalk-like in appearance. Leaf sheaths are mostly hairless, except near their margins and where the sheath meets the leaf blade there is a tiny membranous structure about 1mm long topped with long hairs. On either side of this structure there are sometimes also 1-3 larger bristles. The leaf blades, 5-15cm (2-6 inch) long and 5-22mm wide are elongated in shape, may be either hairless or softly hairy and have rough but entire margins.
Flowers and seeds are very rarely produced, if ever. When produced, flowers occur in spikelets up to 5cm (2 inch) long with 8 to 12 flowers. Most reports indicate that Phyllostachys aurea produces masses of flowers sporadically and synchronously, but reported intervals between mass flowering events range from 7 to 30 years. When they do come into flower most of the plants energies are directed into producing seed and consequently the plant is severely weakened. They sometimes die after flowering, but if left alone they will usually recover though they will look very poorly for a few years.
Phyllostachys aurea is a long-lived bamboo with upright stems usually growing 2-8m (6-26 feet) tall, but occasionally reaching up to 12m (40 feet) in height. Plants form dense or loose clumps and spread rapidly via creeping underground stems, with the upright stems being produced from their joints. They will grow in large thickets or groves if left alone.
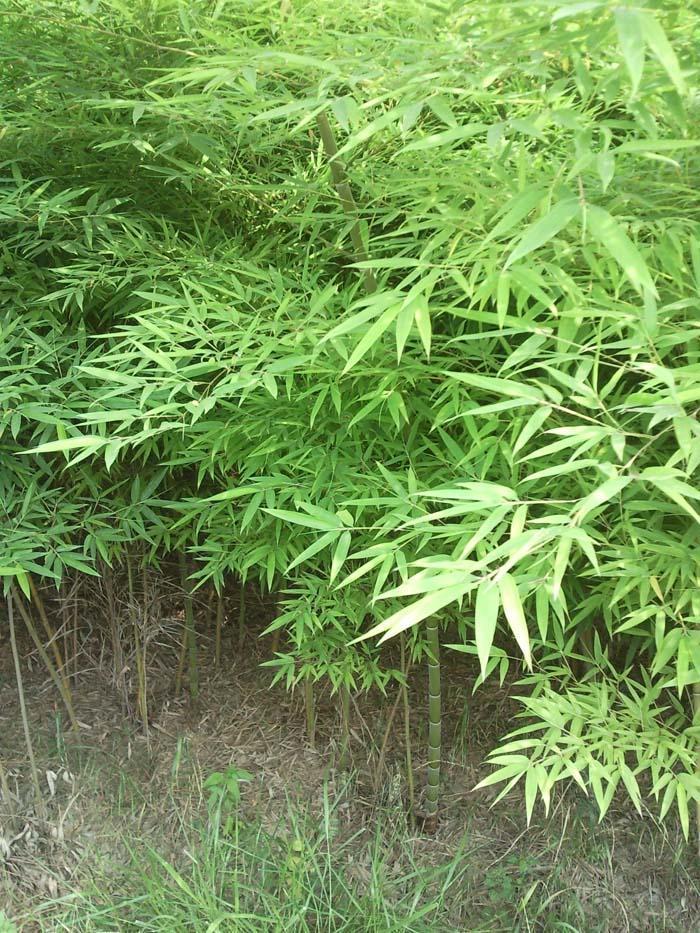
Gardening: Phyllostachys aurea is cultivated as an ornamental plant for gardens. It is the most commonly cultivated bamboo in the United States. Growing rigidly upright, this bamboo is one of the best for hedges and for planting next to driveways and walkways. Phyllostachys aurea can be an aggressive spreader in hot climates, where care must be used in its placement.
It is a fast grower in warm climate zones, but less aggressive in colder climates. Provides a thick impenetrable grove when untrimmed.
In some micro climates of zone 6, this species does not remain evergreen. This beautiful bamboo will drop foliage when temps drop to around 15°C bellow 0 (5°F). Canes will most likely be killed when temps drop to 20°C below 0 (-5°F). Unless temps drop to 34°C bellow 0 (-30°F) the root system of established well mulched groves will put up new canes each spring. But, these plants will need a frost-free period of at least 26 weeks to survive.
Of course, growth rate depends a lot on soil, climate, food and water. Small plants are slow to get going, so starting off with a bigger plant will grow much faster.
Location: Phyllostachys aurea will grow in sparsely wooded secondary forests and does best in full sun or part shade. It is best to protect these plants from cold drying winds.
Soil: Phyllostachys aurea growth is considered best in rich, deep, well-drained sands or in moist, deep loams with a pH between 5 and 7,5. These plants need a soil depth of at least 36cm (14 inch) for good growth. Although, it may persist on a variety of soils, stem diameter and height are likely reduced in fine textured and/or poorly drained soils. These plants should be planted where they can be monitored and contained. The use of barriers, sunk to a depth of 60cm (24 inch) may contain their spread.
Irrigation: Give to this bamboo species plenty of water in warmer months. These plants will be less likely to suffer from overwatering.
Phyllostachys aurea prefers moist soil and established plants can tolerate drought.
Fertilising: Fertilise Phyllostachys aurea in spring with decayed animal manure.
Container plants: Phyllostachys aurea can be grown in containers. When grown in containers these plants will not exceed 2m (6 feet) in height. The containers should be at least 30cm (12 inch) diameter and filled with good moisture retaining compost based on peat, leaf mould and charcoal. They need to be kept well watered. Spray the foliage when grown indoors. Fertilise monthly with liquid fertiliser if used in a container.
Propagation: Phyllostachys aurea by division in spring as new growth commences. Divisions from the open ground do not transplant well, so will need careful treatment and nurturing under cover in pots until at least late spring. Division is best carried out in wet weather and small divisions will establish better than large clumps.
Alternatively, take large divisions from established clumps and transfer them straight to their permanent positions, misting or drenching them frequently until they are established.
Also, Phyllostachys aurea can be propagated by basal cane cuttings in spring. Plant pieces of runners in early spring, just as new shoots are bursting into life. Keep them continuously moist and these soon root in the pot and continue growing.
Problems: Bamboo is a strong and resilient plant and is more likely to die from lack or too much water. The most common pests are most likely biological and come in forms of insects such as aphids, scales, mealybugs and mites.
Treatment: Use adequate pesticide to combat these insects. It is essential that the pesticide to be applied to both leaf surfaces. When chemical application is not feasible, infested plants can be cut down and infested debris destroyed to avoid reinfestation.
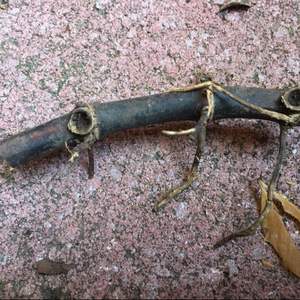
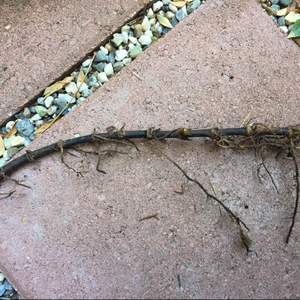
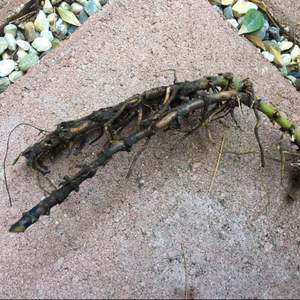
Note: In sub-tropical and warmer temperate regions, Phyllostachys aurea is problematic in untended areas, near gardens, along roadsides and waterways and in urban bushland. Rhizome growth by these bamboo clones can result in the development of dense thickets and colonies. A single Phyllostachys aurea clump can produce up to 15 km (9.3 miles) of stems in its lifetime. This bamboo once established, is very aggressive in both its rate of growth as well as the sprouting of new stems. Spread is often rapid in all directions from the point of establishment.

Management and control:
This bamboo is fast growing and will quickly spread via underground rhizomes. Despite containment efforts, the rhizomes of Phyllostachys aurea will often find their way out of confinement to infest nearby areas. The first step in preventative control of Phyllostachys aurea is to limit planting and removal of existing plants within the landscape. Care must be exercised to prevent seed spread and dispersal during the removal process.
Cutting and mowing can be used on small infestations or where herbicides cannot be used. Cut plants as close to the ground as possible. Repeat several times throughout the growing season as plants resprout. Monitoring and re-treatment will be necessary for several growing seasons until the energy reserves in the rhizomes are exhausted.
Foliar applications are most effective if canes are cut and herbicides applied to newly expanded leaves. Air temperature should be above 18°C (65°F) to ensure absorption of herbicides.
Uses and display: Phyllostachys aurea is cultivated for its edible shoots in China; it has the sweetest taste of the genus.
It has been widely planted as an ornamental in the Mediterranean and seems to be naturalizing there. This is a good companion species to grow in a woodland because the plants have shallow root systems that do not compete with deep tree roots. Grown for its screening abilities, Phyllostachys aurea provides visual as well as noise barriers. It is a prime choice for privacy screening or a bamboo fence. Also, this bamboo is suitable for planting in tubs or planter boxes: balconies, patios or indoor displays of bamboo create an exotic atmosphere.
Container Plants Height: 2m (6 feet)
Ground Planting Height: 8-12 (26-40 feet)
Hardiness zone: 6a-11
Description: Phyllostachys aurea are easily identified by their characteristic compressed internodes in the lower part of the canes which have a tortoiseshell-like appearance. This internodal compression result in shorter heights and thicker cane diameters (relative to height) than many other Phyllostachys species. The canes are typically green, but will turn yellow in full or partial sun, and deepen into a gold-orange colour as the plant matures. Branching and foliage tend to start lower to the ground than many other Phyllostachys, but some prefer to cut off lower branches to show off the interesting ‘tortoise shell’ lower part of the canes.
The leaves are clustered and produced on short shoots which grow from the joints on the branches. They consist of a leaf sheath 25-35mm long, which surrounds the stem and a spreading leaf blade. The base of the leaf blade is very narrow and stalk-like in appearance. Leaf sheaths are mostly hairless, except near their margins and where the sheath meets the leaf blade there is a tiny membranous structure about 1mm long topped with long hairs. On either side of this structure there are sometimes also 1-3 larger bristles. The leaf blades, 5-15cm (2-6 inch) long and 5-22mm wide are elongated in shape, may be either hairless or softly hairy and have rough but entire margins.
Flowers and seeds are very rarely produced, if ever. When produced, flowers occur in spikelets up to 5cm (2 inch) long with 8 to 12 flowers. Most reports indicate that Phyllostachys aurea produces masses of flowers sporadically and synchronously, but reported intervals between mass flowering events range from 7 to 30 years. When they do come into flower most of the plants energies are directed into producing seed and consequently the plant is severely weakened. They sometimes die after flowering, but if left alone they will usually recover though they will look very poorly for a few years.
Phyllostachys aurea is a long-lived bamboo with upright stems usually growing 2-8m (6-26 feet) tall, but occasionally reaching up to 12m (40 feet) in height. Plants form dense or loose clumps and spread rapidly via creeping underground stems, with the upright stems being produced from their joints. They will grow in large thickets or groves if left alone.

Gardening: Phyllostachys aurea is cultivated as an ornamental plant for gardens. It is the most commonly cultivated bamboo in the United States. Growing rigidly upright, this bamboo is one of the best for hedges and for planting next to driveways and walkways. Phyllostachys aurea can be an aggressive spreader in hot climates, where care must be used in its placement.
It is a fast grower in warm climate zones, but less aggressive in colder climates. Provides a thick impenetrable grove when untrimmed.
In some micro climates of zone 6, this species does not remain evergreen. This beautiful bamboo will drop foliage when temps drop to around 15°C bellow 0 (5°F). Canes will most likely be killed when temps drop to 20°C below 0 (-5°F). Unless temps drop to 34°C bellow 0 (-30°F) the root system of established well mulched groves will put up new canes each spring. But, these plants will need a frost-free period of at least 26 weeks to survive.
Of course, growth rate depends a lot on soil, climate, food and water. Small plants are slow to get going, so starting off with a bigger plant will grow much faster.
Location: Phyllostachys aurea will grow in sparsely wooded secondary forests and does best in full sun or part shade. It is best to protect these plants from cold drying winds.
Soil: Phyllostachys aurea growth is considered best in rich, deep, well-drained sands or in moist, deep loams with a pH between 5 and 7,5. These plants need a soil depth of at least 36cm (14 inch) for good growth. Although, it may persist on a variety of soils, stem diameter and height are likely reduced in fine textured and/or poorly drained soils. These plants should be planted where they can be monitored and contained. The use of barriers, sunk to a depth of 60cm (24 inch) may contain their spread.
Irrigation: Give to this bamboo species plenty of water in warmer months. These plants will be less likely to suffer from overwatering.
Phyllostachys aurea prefers moist soil and established plants can tolerate drought.
Fertilising: Fertilise Phyllostachys aurea in spring with decayed animal manure.
Container plants: Phyllostachys aurea can be grown in containers. When grown in containers these plants will not exceed 2m (6 feet) in height. The containers should be at least 30cm (12 inch) diameter and filled with good moisture retaining compost based on peat, leaf mould and charcoal. They need to be kept well watered. Spray the foliage when grown indoors. Fertilise monthly with liquid fertiliser if used in a container.
Propagation: Phyllostachys aurea by division in spring as new growth commences. Divisions from the open ground do not transplant well, so will need careful treatment and nurturing under cover in pots until at least late spring. Division is best carried out in wet weather and small divisions will establish better than large clumps.
Alternatively, take large divisions from established clumps and transfer them straight to their permanent positions, misting or drenching them frequently until they are established.
Also, Phyllostachys aurea can be propagated by basal cane cuttings in spring. Plant pieces of runners in early spring, just as new shoots are bursting into life. Keep them continuously moist and these soon root in the pot and continue growing.
Problems: Bamboo is a strong and resilient plant and is more likely to die from lack or too much water. The most common pests are most likely biological and come in forms of insects such as aphids, scales, mealybugs and mites.
Treatment: Use adequate pesticide to combat these insects. It is essential that the pesticide to be applied to both leaf surfaces. When chemical application is not feasible, infested plants can be cut down and infested debris destroyed to avoid reinfestation.
Note: In sub-tropical and warmer temperate regions, Phyllostachys aurea is problematic in untended areas, near gardens, along roadsides and waterways and in urban bushland. Rhizome growth by these bamboo clones can result in the development of dense thickets and colonies. A single Phyllostachys aurea clump can produce up to 15 km (9.3 miles) of stems in its lifetime. This bamboo once established, is very aggressive in both its rate of growth as well as the sprouting of new stems. Spread is often rapid in all directions from the point of establishment.

Management and control:
This bamboo is fast growing and will quickly spread via underground rhizomes. Despite containment efforts, the rhizomes of Phyllostachys aurea will often find their way out of confinement to infest nearby areas. The first step in preventative control of Phyllostachys aurea is to limit planting and removal of existing plants within the landscape. Care must be exercised to prevent seed spread and dispersal during the removal process.
Cutting and mowing can be used on small infestations or where herbicides cannot be used. Cut plants as close to the ground as possible. Repeat several times throughout the growing season as plants resprout. Monitoring and re-treatment will be necessary for several growing seasons until the energy reserves in the rhizomes are exhausted.
Foliar applications are most effective if canes are cut and herbicides applied to newly expanded leaves. Air temperature should be above 18°C (65°F) to ensure absorption of herbicides.
Uses and display: Phyllostachys aurea is cultivated for its edible shoots in China; it has the sweetest taste of the genus.
It has been widely planted as an ornamental in the Mediterranean and seems to be naturalizing there. This is a good companion species to grow in a woodland because the plants have shallow root systems that do not compete with deep tree roots. Grown for its screening abilities, Phyllostachys aurea provides visual as well as noise barriers. It is a prime choice for privacy screening or a bamboo fence. Also, this bamboo is suitable for planting in tubs or planter boxes: balconies, patios or indoor displays of bamboo create an exotic atmosphere.
Container Plants Height: 2m (6 feet)
Ground Planting Height: 8-12 (26-40 feet)
Hardiness zone: 6a-11
0
0
文章
Miss Chen
2018年09月06日

A plant for pond edges, bog gardens and other wet sites, horsetail (Equisetum hyemale) grows in stands of bamboo-like, dark green stems. Also called scouring rush, horsetail is hardy in U.S. Department of Agriculture plant hardiness zones 3 through 11, and is a member of an ancient plant family that dates back 350 million years, notes the Missouri Botanical Garden. One reason for this perennial's long survival is its extremely aggressive spreading habit, but growing horsetail in containers gives you some control.
Containing Horsetail

Horsetail spreads outward through underground stems called rhizomes, and containers provide a barrier to these rhizomes. Plant horsetail in a container, with drainage holes, that's just large enough to accommodate the plant's root ball. Place a sheet of fine mesh, such as screen mesh, over the drainage holes to prevent horsetail rhizomes from growing through them, and spread a layer of general purpose potting soil over the mesh. Place the horsetail in the container. The top of the root ball should be 1 inch below the container rim. Fill in gaps around the root ball with more potting soil, and apply water until it runs though the drainage holes.
Planting in Water

Horsetail thrives in water gardens and on stream banks. Providing year-round color and structure in wet, full-sun and partial-shade sites, horsetail tolerates water to a depth of 4 inches over its roots. To add horsetail to your water garden or pond site, spread a 1-inch layer of gravel over the potting soil in the horsetail container to protect it. Place bricks on the bottom of the planting site to provide a firm, level base. Sink the horsetail container into the water slowly until it's submerged and resting firmly on the bricks.
Planting in Soil

Horsetail provides strong, vertical lines in Japanese gardens and can grow where few other plants survive. Dig a hole 2 or 3 inches wider than the horsetail container and 1 inch less deep. Place the container in the hole, and check that it's level. Twisting the container and pushing down gently helps level the container and firm the soil beneath it. Check that the container rim is protruding from the soil by 1 inch, and fill in the gaps around it with dug soil. Water the ground around the container to settle the soil, and fill in any hollows with more soil.
Controlling Horsetail
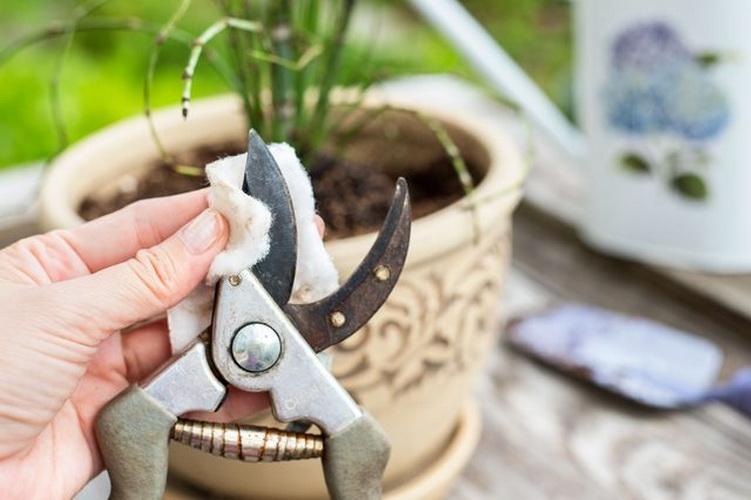
Prune regularly to control horsetail's spreading habit. Horsetail grows 2 to 4 feet tall and spreads indefinitely in favorable conditions. Check the horsetail monthly, at least, for rhizomes climbing over the container rim and stems with cone-like, spore-producing heads, which usually appear in spring. Clean pruning shear blades with rubbing alcohol, and prune escaping rhizomes and fruiting stems at ground level. Wipe the pruning shear blades with rubbing alcohol again after use. Place pruned horsetail debris in a sealed plastic bag in the trash. Don't grow horsetail in areas accessible to pets or livestock. Horsetail can be deadly to animals when eaten.
Containing Horsetail

Horsetail spreads outward through underground stems called rhizomes, and containers provide a barrier to these rhizomes. Plant horsetail in a container, with drainage holes, that's just large enough to accommodate the plant's root ball. Place a sheet of fine mesh, such as screen mesh, over the drainage holes to prevent horsetail rhizomes from growing through them, and spread a layer of general purpose potting soil over the mesh. Place the horsetail in the container. The top of the root ball should be 1 inch below the container rim. Fill in gaps around the root ball with more potting soil, and apply water until it runs though the drainage holes.
Planting in Water

Horsetail thrives in water gardens and on stream banks. Providing year-round color and structure in wet, full-sun and partial-shade sites, horsetail tolerates water to a depth of 4 inches over its roots. To add horsetail to your water garden or pond site, spread a 1-inch layer of gravel over the potting soil in the horsetail container to protect it. Place bricks on the bottom of the planting site to provide a firm, level base. Sink the horsetail container into the water slowly until it's submerged and resting firmly on the bricks.
Planting in Soil

Horsetail provides strong, vertical lines in Japanese gardens and can grow where few other plants survive. Dig a hole 2 or 3 inches wider than the horsetail container and 1 inch less deep. Place the container in the hole, and check that it's level. Twisting the container and pushing down gently helps level the container and firm the soil beneath it. Check that the container rim is protruding from the soil by 1 inch, and fill in the gaps around it with dug soil. Water the ground around the container to settle the soil, and fill in any hollows with more soil.
Controlling Horsetail

Prune regularly to control horsetail's spreading habit. Horsetail grows 2 to 4 feet tall and spreads indefinitely in favorable conditions. Check the horsetail monthly, at least, for rhizomes climbing over the container rim and stems with cone-like, spore-producing heads, which usually appear in spring. Clean pruning shear blades with rubbing alcohol, and prune escaping rhizomes and fruiting stems at ground level. Wipe the pruning shear blades with rubbing alcohol again after use. Place pruned horsetail debris in a sealed plastic bag in the trash. Don't grow horsetail in areas accessible to pets or livestock. Horsetail can be deadly to animals when eaten.
0
0


