成长记
嘉多宝
2022年10月28日

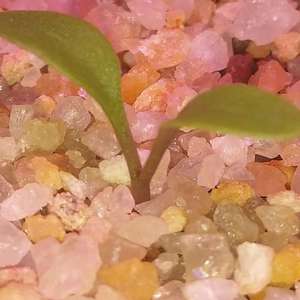
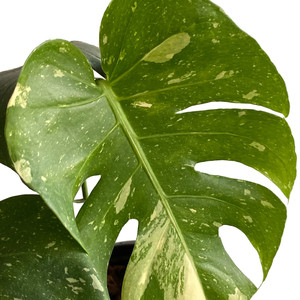
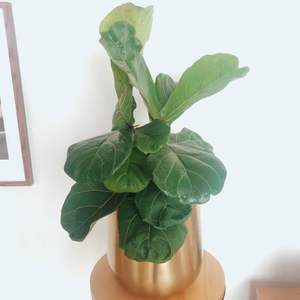
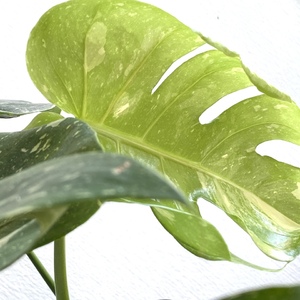
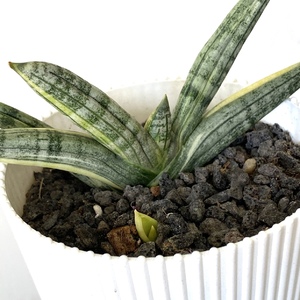
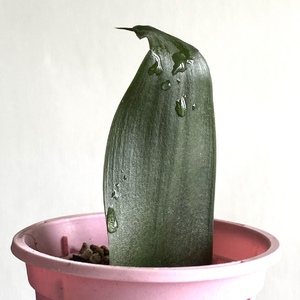
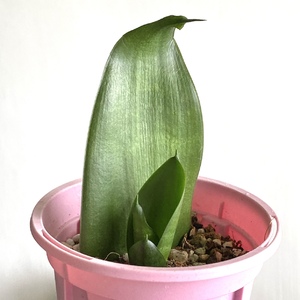
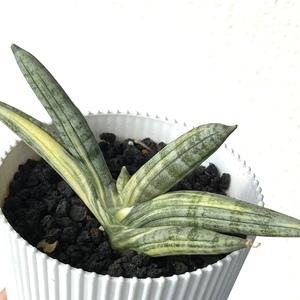
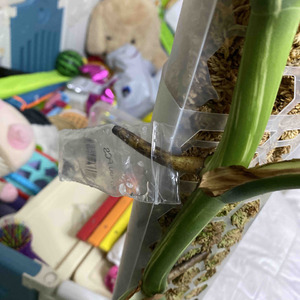
Welcome leaf No 15!!! 可惜一条气根黑腐了,另一条粗壮的气根断了(整盆倒了,碰断了,水苔住太高了头重脚轻),正在补救中……不知道新叶会不会因此缩叶,目前目测已经有点了😭


0
0
文章
Miss Chen
2022年06月03日

The Cornelian cherry dogwood (Cornus mas) is a large multi-stemed deciduous shrub that is sometimes trained as a small tree. The growth habit is usually round or oval in shape. The green foliage is 2 to 4 inches long, presenting in an opposite leaf arrangement. As with other dogwoods, there is also opposite branching.
A winner of the Award of Garden Merit from the Royal Horticultural Society, this shrub features clusters of yellow flowers appearing at the end of winter or early spring, which then lead to edible red fruits. This is one of the earliest shrubs to bloom, with blossoms that unfurl before the leaves. The clusters of yellow flowers are similar in appearance to forsythia, and the red stone fruits (drupes) that ripen in July resemble olives in size and shape. They are used in European cuisine for drinks, syrups, preserves, jams, and sauces. They can be eaten fresh or dried, though they need to be fully ripe in order to lose some of their bitterness.
The leaves of cornelian cherry dogwood may develop some shades of reddish-purple in fall, though the display is not notable. The peeling, exfoliating brown bark adds some four-season interest to the plant. Cornelian cherry dogwood is a fairly slow-growing species that will take up to 10 years to achieve 15 feet in height. It is normally planted in the spring.
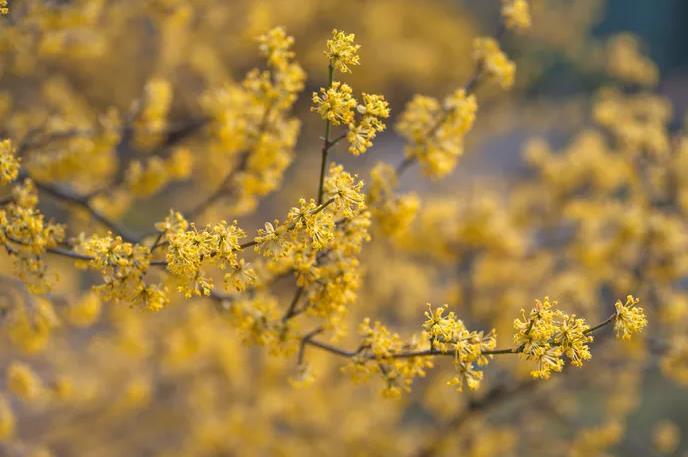
Botanical Name Cornus mas
Common Names Cornelian cherry dogwood, cornelian cherry, European cornel
Plant Type Deciduous shrub/ tree
Mature Size 15 to 25 feet tall; 15- to 20-foot spread
Sun Exposure Full sun to part shade
Soil Type Medium moisture, well-drained soil
Soil pH 5.0 to 8.0 (acidic to slightly alkaline)
Bloom Time March
Flower Color Yellow
Hardiness Zones 4 to 8 (USDA)
Native Area Southwestern Asia, Southern Europe
How to Grow Cornelian Cherry Dogwood
This shrub will grow suitably in almost any well-drained soil in a location that gets at least 4 hours of sunlight daily. Once established, it has a good tolerance for drought or occasional flooding, but will not survive constant soaking in dense soils.
The fruit, while tasty, has a large pit that makes it somewhat laborious to harvest and use in cooking. If you do grow this plant for the fruit, it's best to plant at least two shrubs. Cornelian cherry dogwood is somewhat self-fertile, but the results will be better if there are at least two shrubs to cross-pollinate.
The cornelian cherry dogwood can spread by suckers, so keep the plant in check by removing them promptly.
Light
This shrub prefers a location that offers full sun to part shade. It requires a bit more sun than most dogwoods—less than 4 hours of sun daily will lead to reduced flowering and fruit production.
Soil
Cornelian cherry dogwood is most happy with a well-drained rich soil that has a good amount of humus in it. It will fail to thrive in dense soils that remain constantly wet. While most dogwoods prefer slightly acidic soil, cornelian cherry dogwood can do fine even in slightly alkaline conditions.
Water
This plant has average water needs—it will thrive with about 1 inch of water per week in the form of rainfall and/or irrigation. Make sure the moisture penetrates the soil to a depth of about 6 inches. Once established, this type of dogwood is fairly resilient, bouncing back from being flooded during wet spells or parched during drought.
Temperature and Humidity
Rated for USDA zones 4 to 8, cornelian cherry dogwood will survive temperatures down to minus-25 or minus-30 degrees Fahrenheit.
Fertilizer
Like most dogwoods, cornelian cherry dogwood is best fertilized once in the early spring, then once about three months later. Use a balanced slow-release granular fertilizer mixed into the soil around the roots. If you have extremely alkaline soil, using an acidifying fertilizer may help.
Pruning Cornelian Cherry Dogwood
This shrub tends to form multiple leader stems, and to control the size you'll need to prune away suckers that appear. To train the plant as a small tree, select a main leader as a trunk, then systematically prune away competing shoots. This species also can be readily pruned to maintain as a hedge plant.
The best timing for hard pruning is immediately after the flowers have faded in spring, but be aware that you'll lose the fruits for that season.
Propagating Cornelian Cherry Dogwood
As with most dogwoods, cornelian cherry dogwood is most often propagated by taking stem cuttings and rooting them.
Snip 3- to 5-inch cuttings from the tips of green stems, then remove the bottom set of leaves. Cut the other leaves in half, but leave them on the cuttings. Dip the cut ends in a rooting compound, then plant the cuttings in small containers filled with a commercial seed-starter mix or a mixture of perlite and sand.
Place the planted cutting inside a large plastic bag, and place the pot in a bright, warm location. Check the cutting weekly to see if roots have developed (you will feel resistance when tugging on the cutting). When a good network of roots has developed (about 6 weeks), remove the plastic bag, and continue growing the new plant in a sunny window. Keep the potting mix moist. At the point where the cutting outgrows its first pot, you can repot it in a container filled with ordinary potting mix. When it outgrows this second pot, it is ready to plant in the landscape. This process may involve growing the rooted cutting indoors over the winter, then transplanting it outdoors the following spring.
Common Pests/ Diseases
When properly grown in the right conditions, this shrub has few disease or pest issues. While it is not immune to the dogwood anthracnose disease that plagues many types of dogwood, this species is decidedly more resistant to that disease.
The easy-care reputation is lost, though, if a cornelian cherry dogwood becomes unhealthy. Stressed plants can be susceptible to borers; and leaf miner, gall midge, and scale may also become more than just cosmetic problems.
Potential disease problems include leaf spot, crown canker, root rot, powdery mildew, and leaf blight. Here, too, it is stressed trees or those planted in less than ideal circumstances that are most vulnerable.
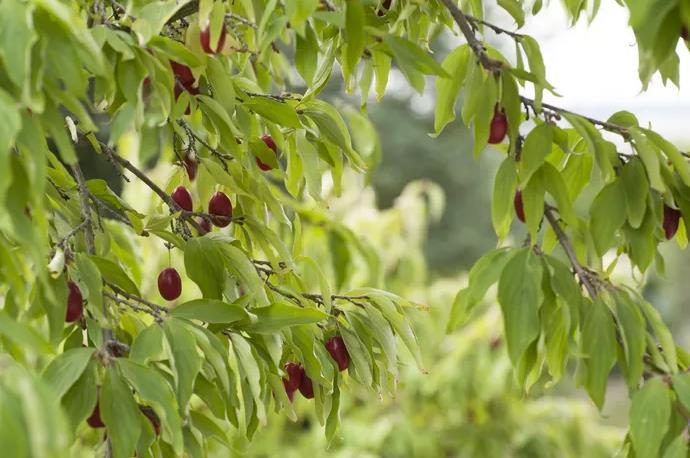
Varieties of Cornelian Cherry Dogwood
For a shrub with variegated leaves, choose the 'Variegata' or `Elegantissima' cultivars.
If you prefer golden leaves, look for 'Aurea'.
Try 'Nana' if you want a plant that only reaches about 3 feet tall.
For yellow fruit rather than red, plant 'Xanthocarpa' or 'Flava'
'Fructu Violaceo' produces purple fruits.
'Alba' has white fruits.
If you live in the Southern United States, 'Spring Glow' is an excellent choice to handle the conditions found there.
‘Golden Glory’ has extra-large flowers and large fruit, with a more upright branching growth habit.
Landscape Uses
Cornelian cherry dogwood is highly prized for its very early spring blooms. It works well as a hedge, screen, or foundation plant, or can be grouped with other shrubs species in a mixed border. It can also be trained as a small specimen tree. Juxtaposed against a dark green woodland background, the yellow blossoms pop with color.
This form of dogwood is a good choice if you want to lure birds, squirrels, and other animals to your garden, as they love the fruit.
A winner of the Award of Garden Merit from the Royal Horticultural Society, this shrub features clusters of yellow flowers appearing at the end of winter or early spring, which then lead to edible red fruits. This is one of the earliest shrubs to bloom, with blossoms that unfurl before the leaves. The clusters of yellow flowers are similar in appearance to forsythia, and the red stone fruits (drupes) that ripen in July resemble olives in size and shape. They are used in European cuisine for drinks, syrups, preserves, jams, and sauces. They can be eaten fresh or dried, though they need to be fully ripe in order to lose some of their bitterness.
The leaves of cornelian cherry dogwood may develop some shades of reddish-purple in fall, though the display is not notable. The peeling, exfoliating brown bark adds some four-season interest to the plant. Cornelian cherry dogwood is a fairly slow-growing species that will take up to 10 years to achieve 15 feet in height. It is normally planted in the spring.

Botanical Name Cornus mas
Common Names Cornelian cherry dogwood, cornelian cherry, European cornel
Plant Type Deciduous shrub/ tree
Mature Size 15 to 25 feet tall; 15- to 20-foot spread
Sun Exposure Full sun to part shade
Soil Type Medium moisture, well-drained soil
Soil pH 5.0 to 8.0 (acidic to slightly alkaline)
Bloom Time March
Flower Color Yellow
Hardiness Zones 4 to 8 (USDA)
Native Area Southwestern Asia, Southern Europe
How to Grow Cornelian Cherry Dogwood
This shrub will grow suitably in almost any well-drained soil in a location that gets at least 4 hours of sunlight daily. Once established, it has a good tolerance for drought or occasional flooding, but will not survive constant soaking in dense soils.
The fruit, while tasty, has a large pit that makes it somewhat laborious to harvest and use in cooking. If you do grow this plant for the fruit, it's best to plant at least two shrubs. Cornelian cherry dogwood is somewhat self-fertile, but the results will be better if there are at least two shrubs to cross-pollinate.
The cornelian cherry dogwood can spread by suckers, so keep the plant in check by removing them promptly.
Light
This shrub prefers a location that offers full sun to part shade. It requires a bit more sun than most dogwoods—less than 4 hours of sun daily will lead to reduced flowering and fruit production.
Soil
Cornelian cherry dogwood is most happy with a well-drained rich soil that has a good amount of humus in it. It will fail to thrive in dense soils that remain constantly wet. While most dogwoods prefer slightly acidic soil, cornelian cherry dogwood can do fine even in slightly alkaline conditions.
Water
This plant has average water needs—it will thrive with about 1 inch of water per week in the form of rainfall and/or irrigation. Make sure the moisture penetrates the soil to a depth of about 6 inches. Once established, this type of dogwood is fairly resilient, bouncing back from being flooded during wet spells or parched during drought.
Temperature and Humidity
Rated for USDA zones 4 to 8, cornelian cherry dogwood will survive temperatures down to minus-25 or minus-30 degrees Fahrenheit.
Fertilizer
Like most dogwoods, cornelian cherry dogwood is best fertilized once in the early spring, then once about three months later. Use a balanced slow-release granular fertilizer mixed into the soil around the roots. If you have extremely alkaline soil, using an acidifying fertilizer may help.
Pruning Cornelian Cherry Dogwood
This shrub tends to form multiple leader stems, and to control the size you'll need to prune away suckers that appear. To train the plant as a small tree, select a main leader as a trunk, then systematically prune away competing shoots. This species also can be readily pruned to maintain as a hedge plant.
The best timing for hard pruning is immediately after the flowers have faded in spring, but be aware that you'll lose the fruits for that season.
Propagating Cornelian Cherry Dogwood
As with most dogwoods, cornelian cherry dogwood is most often propagated by taking stem cuttings and rooting them.
Snip 3- to 5-inch cuttings from the tips of green stems, then remove the bottom set of leaves. Cut the other leaves in half, but leave them on the cuttings. Dip the cut ends in a rooting compound, then plant the cuttings in small containers filled with a commercial seed-starter mix or a mixture of perlite and sand.
Place the planted cutting inside a large plastic bag, and place the pot in a bright, warm location. Check the cutting weekly to see if roots have developed (you will feel resistance when tugging on the cutting). When a good network of roots has developed (about 6 weeks), remove the plastic bag, and continue growing the new plant in a sunny window. Keep the potting mix moist. At the point where the cutting outgrows its first pot, you can repot it in a container filled with ordinary potting mix. When it outgrows this second pot, it is ready to plant in the landscape. This process may involve growing the rooted cutting indoors over the winter, then transplanting it outdoors the following spring.
Common Pests/ Diseases
When properly grown in the right conditions, this shrub has few disease or pest issues. While it is not immune to the dogwood anthracnose disease that plagues many types of dogwood, this species is decidedly more resistant to that disease.
The easy-care reputation is lost, though, if a cornelian cherry dogwood becomes unhealthy. Stressed plants can be susceptible to borers; and leaf miner, gall midge, and scale may also become more than just cosmetic problems.
Potential disease problems include leaf spot, crown canker, root rot, powdery mildew, and leaf blight. Here, too, it is stressed trees or those planted in less than ideal circumstances that are most vulnerable.

Varieties of Cornelian Cherry Dogwood
For a shrub with variegated leaves, choose the 'Variegata' or `Elegantissima' cultivars.
If you prefer golden leaves, look for 'Aurea'.
Try 'Nana' if you want a plant that only reaches about 3 feet tall.
For yellow fruit rather than red, plant 'Xanthocarpa' or 'Flava'
'Fructu Violaceo' produces purple fruits.
'Alba' has white fruits.
If you live in the Southern United States, 'Spring Glow' is an excellent choice to handle the conditions found there.
‘Golden Glory’ has extra-large flowers and large fruit, with a more upright branching growth habit.
Landscape Uses
Cornelian cherry dogwood is highly prized for its very early spring blooms. It works well as a hedge, screen, or foundation plant, or can be grouped with other shrubs species in a mixed border. It can also be trained as a small specimen tree. Juxtaposed against a dark green woodland background, the yellow blossoms pop with color.
This form of dogwood is a good choice if you want to lure birds, squirrels, and other animals to your garden, as they love the fruit.
0
0
文章
Miss Chen
2022年02月04日

Despite its common name, the cardboard palm (Zamia furfuracea) is not a palm tree. Its name comes from its growth habit, which is similar to that of palms. Cardboard palms grow pinnate leaves (a leaf composed of many small leaflets on either side of a stem) much like a palm frond that you'd find on a lipstick palm. The leaflets are bright green and oval, and they have a slightly fuzzy feel similar to cardboard. The plant is generally shorter than it is wide, with a thick, partially subterranean trunk. It has a slow growth rate and is best planted in the spring. Outside of its tropical growing zones, it’s commonly kept as a houseplant.
Botanical Name Zamia furfuracea
Common Names Cardboard palm, cardboard plant, cardboard sago, cardboard cycad, Jamaican sago, Mexican cycad
Plant Type Perennial
Mature Size 3–5 ft. tall, 4–6 ft. wide
Sun Exposure Full
Soil Type Sandy, well-drained
Soil pH Acidic
Bloom Time None
Flower Color None
Hardiness Zones 9–11 (USDA)
Native Area Central America
Toxicity Toxic to people and pets
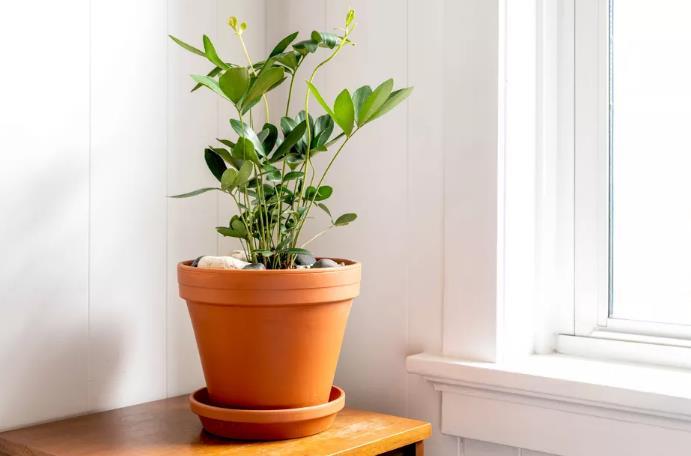
Cardboard Palm Care
Cardboard palms are hardy plants, and they generally don’t require a great deal of care. The key to growing them successfully is to provide them with well-drained soil and give them lots of sunlight, especially during the growing season (spring to fall) and when the plant is young. Other than that, you’ll have to water whenever the soil dries out and feed your cardboard palm twice a year.
These plants don’t have major problems with pests or diseases. However, overwatering and allowing water to collect on the plant foliage can cause fungal diseases. So be sure only to water the soil around the base of the plant. Regular pruning is not necessary, but you can prune off dead, diseased, or damaged leaves as they arise.
Light
Cardboard palms grow best in full sun, meaning at least six hours of direct sunlight on most days. Indoors, place your plant by your brightest window, and be sure to rotate the pot regularly so all parts of the plant get an even amount of light. Otherwise the cardboard palm will start to grow lopsided.
Soil
These plants can tolerate a variety of soil types as long as they have good drainage. A loose, sandy soil with a slightly acidic soil pH is best. Cardboard palms in containers will grow well in a potting mix made for cacti and palms.
Water
Only a moderate amount of water is required for cardboard palms. And overwatering can cause the roots to rot. From the spring to fall, water whenever the top inch of soil feels dry. But over the winter, reduce watering by about half of what you watered during the growing season.
Temperature and Humidity
Cardboard palms are fairly hardy plants. They can tolerate heat, but cold temperatures and frost can damage or kill them. They thrive in temperatures ranging from 60 to 75 degrees Fahrenheit, and they prefer low to average humidity levels.
Fertilizer
Feed your plant twice a year with a slow-release palm fertilizer. One application should be at the beginning of the spring and the other at the start of autumn.

Potting and Repotting Cardboard Palms
Growing cardboard palms from seed is especially difficult, so it’s recommended to select a nursery plant to pot. Pick a sturdy pot with ample drainage holes that’s slightly larger than your plant’s root ball, and plant the cardboard palm in quality potting mix.
This plant doesn’t like to have its roots disturbed, so only repot once the roots have outgrown the container and are poking out of it. This will typically occur every two to three years until the plant has reached its maximum size. Select one pot size up, gently remove the cardboard palm from its old container, and replant it in the new one with fresh potting mix at the same depth it was planted before.
Zamia Varieties
The cardboard palm is only one of more than 50 species within the Zamia genus. Most of these species grow in tropical environments, and many have palm-like features. Some Zamia species include:
Zamia integrifolia: This species can be found in the Southeastern United States and features dark green leaves that extend around 4 feet from the trunk.
Zamia pseudoparasitica: This species is epiphytic, meaning it generally grows on the surface of other plants.
Zamia splendens: This species is known for its glossy reddish-brown leaves and has good shade tolerance.
Zamia decumbens: This unusual species has trunks that run horizontally along the ground, rather than growing vertically.
Botanical Name Zamia furfuracea
Common Names Cardboard palm, cardboard plant, cardboard sago, cardboard cycad, Jamaican sago, Mexican cycad
Plant Type Perennial
Mature Size 3–5 ft. tall, 4–6 ft. wide
Sun Exposure Full
Soil Type Sandy, well-drained
Soil pH Acidic
Bloom Time None
Flower Color None
Hardiness Zones 9–11 (USDA)
Native Area Central America
Toxicity Toxic to people and pets

Cardboard Palm Care
Cardboard palms are hardy plants, and they generally don’t require a great deal of care. The key to growing them successfully is to provide them with well-drained soil and give them lots of sunlight, especially during the growing season (spring to fall) and when the plant is young. Other than that, you’ll have to water whenever the soil dries out and feed your cardboard palm twice a year.
These plants don’t have major problems with pests or diseases. However, overwatering and allowing water to collect on the plant foliage can cause fungal diseases. So be sure only to water the soil around the base of the plant. Regular pruning is not necessary, but you can prune off dead, diseased, or damaged leaves as they arise.
Light
Cardboard palms grow best in full sun, meaning at least six hours of direct sunlight on most days. Indoors, place your plant by your brightest window, and be sure to rotate the pot regularly so all parts of the plant get an even amount of light. Otherwise the cardboard palm will start to grow lopsided.
Soil
These plants can tolerate a variety of soil types as long as they have good drainage. A loose, sandy soil with a slightly acidic soil pH is best. Cardboard palms in containers will grow well in a potting mix made for cacti and palms.
Water
Only a moderate amount of water is required for cardboard palms. And overwatering can cause the roots to rot. From the spring to fall, water whenever the top inch of soil feels dry. But over the winter, reduce watering by about half of what you watered during the growing season.
Temperature and Humidity
Cardboard palms are fairly hardy plants. They can tolerate heat, but cold temperatures and frost can damage or kill them. They thrive in temperatures ranging from 60 to 75 degrees Fahrenheit, and they prefer low to average humidity levels.
Fertilizer
Feed your plant twice a year with a slow-release palm fertilizer. One application should be at the beginning of the spring and the other at the start of autumn.

Potting and Repotting Cardboard Palms
Growing cardboard palms from seed is especially difficult, so it’s recommended to select a nursery plant to pot. Pick a sturdy pot with ample drainage holes that’s slightly larger than your plant’s root ball, and plant the cardboard palm in quality potting mix.
This plant doesn’t like to have its roots disturbed, so only repot once the roots have outgrown the container and are poking out of it. This will typically occur every two to three years until the plant has reached its maximum size. Select one pot size up, gently remove the cardboard palm from its old container, and replant it in the new one with fresh potting mix at the same depth it was planted before.
Zamia Varieties
The cardboard palm is only one of more than 50 species within the Zamia genus. Most of these species grow in tropical environments, and many have palm-like features. Some Zamia species include:
Zamia integrifolia: This species can be found in the Southeastern United States and features dark green leaves that extend around 4 feet from the trunk.
Zamia pseudoparasitica: This species is epiphytic, meaning it generally grows on the surface of other plants.
Zamia splendens: This species is known for its glossy reddish-brown leaves and has good shade tolerance.
Zamia decumbens: This unusual species has trunks that run horizontally along the ground, rather than growing vertically.
0
0
文章
Miss Chen
2021年12月17日

Although the names "butterhead" and "buttercrunch" are sometimes used interchangeably, 'buttercrunch' is actually one variety that fits in the larger category known as butterhead lettuces. These lettuces feature small, loosely formed leaf heads and a notably smooth flavor. In most ways, butterhead and buttercrunch are identical plants, though the buttercrunch variety is known to be somewhat more tolerant of heat.
As far as leaf lettuce varieties go, these lettuces set the standard for melt-in-your-mouth flavor and texture. Seeds are quick to germinate, plants are slow to bolt, and the taste is sweet, mild, and complex. Gardeners looking to get into vegetable gardening for the first time couldn't choose an easier or more productive plant to get into the hobby, as butterhead lettuce tolerates a wide variety of growing conditions, and continue to grow new leaves as you harvest.
How to Grow and Care for Violas
Butterhead lettuce (Lactuca sativa var. capitata), including the buttercrunch variety, form loose but distinct heads. Both Boston lettuce and Bibb lettuce are also considered forms of butterhead. Boston lettuce has a small, round, looser head, while Bibb lettuce has as a tighter, smaller, fist-sized head.
Butterhead lettuce takes about 45 days to mature from seed. It is normally planted in the spring, and sometimes again in the early fall for harvest in late fall or early winter.
Botanical Name Lactuca sativa var. capitata
Common Name Butterhead lettuce, buttercrunch lettuce
Plant Type Annual vegetable
Mature Size 9–15 in. tall
Sun Exposure Full sun to part shade
Soil Type Average to rich
Soil pH Slightly acidic to neutral ( 6.0–7.0)
Hardiness Zones 2–11 (USDA); grown as annual in all zones
Native Area Mediterranean basin
Butterhead Lettuce Care
Butterhead lettuce is a low-maintenance vegetable that rewards gardeners with mature plants in two months' time. It's a good space filler in the garden while you wait for the weather to warm up for summer staples such as tomatoes and peppers. You can also grow a row of attractive butterhead lettuce plants at the front of the spring border, in front of your flowering bulbs and pansies. When the spring flowers are done, you can harvest the lettuce and free up the flowerbed for something summery.
Sow seeds about a week before the last frost. Cover seeds with about 1/4 inch of soil. Keep moist, and expect germination to occur in about a week. Thin seedlings to 8 inches apart in the garden. For frequent use or heavy harvesting, make a new sowing every two weeks.
Light
Butterhead lettuce grows best in full sun. Plants will tolerate part shade, and in hot climates, some afternoon shade will help delay bolting.
Soil
Like all lettuces, butterhead lettuce does well in an average to rich, somewhat sandy soil. Lettuce can succumb to rot in heavy clay soils, so if this describes your soil, consider container culture. A slightly acidic to neutral soil (6.0 to 7.0) is best.
Water
Keep your butterhead lettuce plants consistently moist from planting until harvest. The ideal moisture will have your soil feeling like a wrung-out sponge.
Temperature and Humidity
Butterhead lettuce grows best in cool to moderate temperatures between 45 and 80 degrees Fahrenheit. Temperatures above 80 degrees Fahrenheit signal plants to form flowers (bolt), which decreases eating quality. When summer temps get the best of your lettuce crop, take a break and plan on planting a second crop of lettuce when fall arrives.
Fertilizer
Nitrogen-rich fertilizer promotes the leafy growth of butterhead lettuce. You can choose a single ingredient simple fertilizer such as blood meal, or feed by adding generous amounts of compost or manure to the soil. For a quick nutrient boost for successive plantings, use a liquid fertilizer formulated for vegetable gardens.
Butterhead Lettuce Varieties
‘Buttercrunch’ is very tender and does better than other varieties in warmer climates.
‘Boston’ has a medium-large head of loosely arranged broad light-green leaves.
‘Bibb’ is a traditional butterhead with a smaller, compact head of short dark-green leaves with dark-red edges.
‘Four Seasons’ (‘Merveille Des Quatres Saisons’) has red outer leaves and inner leaves with a pink and cream color.
Butterhead Lettuce vs. Leaf Lettuce
While butterhead or buttercrunch lettuce forms a loose head shaped like a rosette at maturity, leaf lettuce does not form a head, and it is slightly more crisp. Leaf lettuce has a mild flavor but is somewhat more astringent than butterhead lettuce. Combine the two in a container to add variety to your salad garden.
Harvesting
Unlike many vegetables, it’s almost impossible to harvest butterhead lettuce too early. The smallest leaves are tender and delicious as baby lettuce in salads. Make use of these leaves when thinning young plants in the garden. As the plants grow, you can harvest the outer leaves only, leaving the inner leaves to grow. Or, you can remove the entire plant if you desire a head of lettuce. By cutting the plant at the base and leaving the roots to grow, new leaves will sprout, giving butterhead lettuce a cut-and-come-again quality.
It’s important to harvest butterhead lettuce before the plants bolt (produce flower stalks). The leaves of bolting plants become bitter and unpalatable.
Butterhead lettuce is delicate and wilts quickly after harvest. Pick the leaves in the late morning when the dew has dried, or in the evening. Store the leaves dry in the crisper drawer of your refrigerator, set on high humidity if your drawer has controls. Store the lettuce away from ethylene-producing produce such apples and other fruit, which will hasten the wilt and decay of the leaves.
How to Grow Butterhead Lettuce in Pots
Butterhead lettuce is compact and has a shallow root system, making it an ideal container specimen. Container growing can also help you thwart ground-dwelling slugs and snails. Butterhead lettuce is surprisingly attractive in a mixed container garden—grow it with edible cool-season blooms such as nasturtiums, pansies, and calendula flowers to yield a spring mix that you can harvest for weeks
If you purchase butterhead lettuce transplants, pot them up with about 4 inches between plants. The plants can tolerate this closer spacing in pots, where they won't have any competition from weeds. Use a lightweight potting mix rather than garden soil or topsoil to ensure good drainage. Plants should not need repotting; if they begin to get crowded, harvest and start over with a new planting.
Common Pests and Diseases
Slugs and aphids are the worst pests for the succulent, rapid-growing butterhead lettuce leaves. Practice cultural controls, such as handpicking and traps for slugs, or blasts of water for aphids.
0
0
文章
Miss Chen
2021年12月03日

The Brunnera macrophylla plant goes by several common names, including Siberian bugloss, false forget-me-not, brunnera, large-leaf brunnera, and heartleaf. The common name "bugloss" is derived from the Greek words for "ox" and "tongue," as the leaves are thought to resemble an ox tongue. The bright blue flowers may have you doing a double-take with their resemblance to the blooms of the real forget-me-not. Whatever you call it, this long-lasting and low-maintenance species has always been a popular shade plant.
This clumping perennial spreads from rhizomatous roots and has dark-green heart-shaped leaves. Small blue flowers with white centers rise on stems in spring; the bloom period lasts for about four weeks. Although Siberian bugloss is a slow grower, the species will eventually spread out and make a nice ground cover. The flashier variegated varieties are a bit slower to fill out, but provide interest and color all season. Siberian bugloss is generally planted from potted nursery plants in early spring, as soon as the ground can be worked. It grows rather slowly, which is an advantage since it doesn't demand frequent division and rarely becomes invasive.
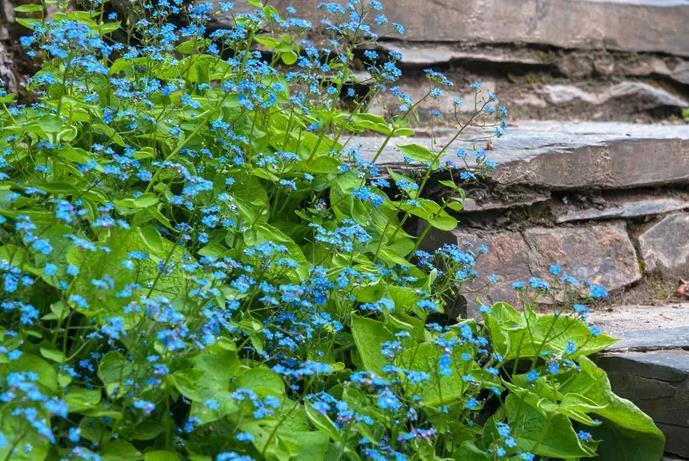
Botanical Name Brunnera macrophylla
Common Names Siberian bugloss, brunnera, large-leaf brunnera, heartleaf, false forget-me-not
Plant Type Herbaceous, perennial
Mature Size 12–18 in. tall; 18–30 in. spread
Sun Exposure Full, partial, shade
Soil Type Medium moisture, well-drained
Soil pH Acidic, neutral to acidic, alkaline
Bloom Time Spring
Flower Color Blue
Hardiness Zones 3–8 (USDA)
Native Area Asia, Europe
Siberian Bugloss Care
Siberian bugloss is best planted in a part-shade to a full-shade location in a rich soil that has excellent drainage. In a good environment, this is a largely care-free plant that requires little more than division every three or four years.
Siberian bugloss is often planted in shade gardens, woodland settings, and near ponds. It can make a great ground cover and looks beautiful lining a path or border, although it can take a while to fill in.
Since deer do not often bother this plant, it makes a nice alternative to hostas. Companions with different textures and leaf shapes include hellebores, iris, hostas, bleeding heart, geraniums, and even late-blooming daffodils. Since Siberian bugloss prefers cool, moist shade, slugs may become a problem, but varieties with thicker leaves are rarely bothered.
Light
Siberian bugloss prefers shady conditions, though it can survive in full sun if it gets more moisture. But the variegated leaves can easily burn in direct sunlight and plants may go dormant in extremely sunny conditions.
Soil
This plant is not too particular about soil pH, but it does like rich, moist soil. Lots of organic matter and organic mulch will help it become established quickly and keep it growing well. Siberian bugloss does not tolerate dry soils.
Water
Keep new plants well watered. While Siberian bugloss plants prefer constant moisture, they will become more drought-tolerant once they are established. Mulching will help maintain the cool, moist soil that Brunnera prefers.
Temperature and Humidity
Though rated for hardiness zones 3 to 8, Siberian bugloss prefers regions with cool summers. You may have trouble with it in zones that have especially hot and humid summer conditions (zones 7 to 8).
Fertilizer
These plants prefer rich soil but do not require supplemental feeding, as long as the soil is not too poor or dry.
Siberian Bugloss Varieties
The species form of Brunnera macrophylla, with solid green leaves, is readily available. It has lovely sprays of blue flowers and is an extremely tough plant. In addition, there are several cultivars available:
'Diane's Gold' has golden-yellow leaves and blue flowers.
'Hadspen Cream' has extra-large leaves with irregular white outer margins.
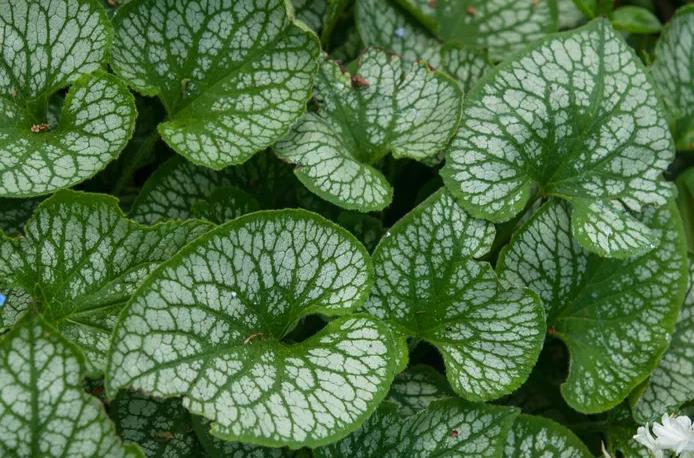
'Jack Frost' has silvery leaves with green veins.
'Langtrees' (aka 'Silver Spot') is a very hardy plant with leaves that are dotted with silver.
'Looking Glass' has silver leaves that look almost metallic.
'Queen of Hearts' is an updated version of 'Jack Frost', this cultivar boasts larger, bolder silvery leaves.
'Alexander's Great' boasts jumbo-sized dark green leaves veined in silvery-white.
Pruning
The older leaves may start to get tattered and can be cut back during the growing season to encourage new leaves to fill in. Don't cut the whole plant back to the ground in the fall—the leaves will help protect the crown during winter and you can easily clean away the old foliage in the spring when the new leaves begin to emerge.
If you do not want your plants to self-seed, deadhead as the flowers start to fade. If you would like to collect the seed to sow, allow the flowers to dry slightly, then cut and let them finish drying in a paper bag. The seeds will fall off as the flowers dry.
Propagating Siberian Bugloss
The best means of propagation is to simply dig up an established clump in early spring, divide it into healthy segments, and replant. Siberian bugloss can be short-lived, and dividing your plants every three to five years will keep them around longer.
Although the named cultivars may self-seed, the volunteers usually do not grow true to the parent plant and are best weeded out if you want to preserve the look of the parent. For example, volunteer seedlings of variegated plants often have solid green leaves.
Growing in Pots
This plant can be a great choice for containers that are placed in partial or full shade. The variegated leaf varieties will make a nice filler throughout the season. Many are hardy enough to remain in containers throughout the winter, with a little extra protection.v
This clumping perennial spreads from rhizomatous roots and has dark-green heart-shaped leaves. Small blue flowers with white centers rise on stems in spring; the bloom period lasts for about four weeks. Although Siberian bugloss is a slow grower, the species will eventually spread out and make a nice ground cover. The flashier variegated varieties are a bit slower to fill out, but provide interest and color all season. Siberian bugloss is generally planted from potted nursery plants in early spring, as soon as the ground can be worked. It grows rather slowly, which is an advantage since it doesn't demand frequent division and rarely becomes invasive.

Botanical Name Brunnera macrophylla
Common Names Siberian bugloss, brunnera, large-leaf brunnera, heartleaf, false forget-me-not
Plant Type Herbaceous, perennial
Mature Size 12–18 in. tall; 18–30 in. spread
Sun Exposure Full, partial, shade
Soil Type Medium moisture, well-drained
Soil pH Acidic, neutral to acidic, alkaline
Bloom Time Spring
Flower Color Blue
Hardiness Zones 3–8 (USDA)
Native Area Asia, Europe
Siberian Bugloss Care
Siberian bugloss is best planted in a part-shade to a full-shade location in a rich soil that has excellent drainage. In a good environment, this is a largely care-free plant that requires little more than division every three or four years.
Siberian bugloss is often planted in shade gardens, woodland settings, and near ponds. It can make a great ground cover and looks beautiful lining a path or border, although it can take a while to fill in.
Since deer do not often bother this plant, it makes a nice alternative to hostas. Companions with different textures and leaf shapes include hellebores, iris, hostas, bleeding heart, geraniums, and even late-blooming daffodils. Since Siberian bugloss prefers cool, moist shade, slugs may become a problem, but varieties with thicker leaves are rarely bothered.
Light
Siberian bugloss prefers shady conditions, though it can survive in full sun if it gets more moisture. But the variegated leaves can easily burn in direct sunlight and plants may go dormant in extremely sunny conditions.
Soil
This plant is not too particular about soil pH, but it does like rich, moist soil. Lots of organic matter and organic mulch will help it become established quickly and keep it growing well. Siberian bugloss does not tolerate dry soils.
Water
Keep new plants well watered. While Siberian bugloss plants prefer constant moisture, they will become more drought-tolerant once they are established. Mulching will help maintain the cool, moist soil that Brunnera prefers.
Temperature and Humidity
Though rated for hardiness zones 3 to 8, Siberian bugloss prefers regions with cool summers. You may have trouble with it in zones that have especially hot and humid summer conditions (zones 7 to 8).
Fertilizer
These plants prefer rich soil but do not require supplemental feeding, as long as the soil is not too poor or dry.
Siberian Bugloss Varieties
The species form of Brunnera macrophylla, with solid green leaves, is readily available. It has lovely sprays of blue flowers and is an extremely tough plant. In addition, there are several cultivars available:
'Diane's Gold' has golden-yellow leaves and blue flowers.
'Hadspen Cream' has extra-large leaves with irregular white outer margins.
'Jack Frost' has silvery leaves with green veins.
'Langtrees' (aka 'Silver Spot') is a very hardy plant with leaves that are dotted with silver.
'Looking Glass' has silver leaves that look almost metallic.
'Queen of Hearts' is an updated version of 'Jack Frost', this cultivar boasts larger, bolder silvery leaves.
'Alexander's Great' boasts jumbo-sized dark green leaves veined in silvery-white.
Pruning
The older leaves may start to get tattered and can be cut back during the growing season to encourage new leaves to fill in. Don't cut the whole plant back to the ground in the fall—the leaves will help protect the crown during winter and you can easily clean away the old foliage in the spring when the new leaves begin to emerge.

If you do not want your plants to self-seed, deadhead as the flowers start to fade. If you would like to collect the seed to sow, allow the flowers to dry slightly, then cut and let them finish drying in a paper bag. The seeds will fall off as the flowers dry.
Propagating Siberian Bugloss
The best means of propagation is to simply dig up an established clump in early spring, divide it into healthy segments, and replant. Siberian bugloss can be short-lived, and dividing your plants every three to five years will keep them around longer.
Although the named cultivars may self-seed, the volunteers usually do not grow true to the parent plant and are best weeded out if you want to preserve the look of the parent. For example, volunteer seedlings of variegated plants often have solid green leaves.
Growing in Pots
This plant can be a great choice for containers that are placed in partial or full shade. The variegated leaf varieties will make a nice filler throughout the season. Many are hardy enough to remain in containers throughout the winter, with a little extra protection.v
0
0
文章
ritau
2020年09月04日

Kale, or leaf cabbage, belongs to a group of cabbage (Brassica oleracea) cultivars grown for their edible leaves, although some are used as ornamentals. Kale plants have green or purple leaves, and the central leaves do not form a head (as with headed cabbage). Kales are considered to be closer to wild cabbage than most of the many domesticated forms of Brassica oleracea.
Kale originated in the eastern Mediterranean and Asia Minor, where it was cultivated for food beginning by 2000 BCE at the latest. Curly-leaved varieties of cabbage already existed along with flat-leaved varieties in Greece in the 4th century BC. These forms, which were referred to by the Romans as Sabellian kale, are considered to be the ancestors of modern kales.
The earliest record of cabbages in western Europe is of hard-heading cabbage in the 13th century. Records in 14th-century England distinguish between hard-heading cabbage and loose-leaf kale.
Russian kale was introduced into Canada, and then into the United States, by Russian traders in the 19th century. USDA botanist David Fairchild is credited with introducing kale (and many other crops) to Americans, having brought it back from Croatia, although Fairchild himself disliked cabbages, including kale.At the time, kale was widely grown in Croatia mostly because it was easy to grow and inexpensive, and could desalinate soil. For most of the twentieth century, kale was primarily used in the United States for decorative purposes; it became more popular as an edible vegetable in the 1990s due to its nutritional value.
During World War II, the cultivation of kale (and other vegetables) in the U.K. was encouraged by the Dig for Victory campaign. The vegetable was easy to grow and provided important nutrients missing from a diet because of rationing.

Many varieties of kale and cabbage are grown mainly for ornamental leaves that are brilliant white, red, pink, lavender, blue or violet in the interior of the rosette. The different types of ornamental kale are peacock kale, coral prince, kamone coral queen, color up kale and chidori kale. Ornamental kale is as edible as any other variety, but potentially not as palatable. Kale leaves are increasingly used as an ingredient for vegetable bouquets and wedding bouquets.
Raw kale is composed of 84% water, 9% carbohydrates, 4% protein, and 1% fat (table). In a 100 g (3 1⁄2 oz) serving, raw kale provides 207 kilojoules (49 kilocalories) of food energy and a large amount of vitamin K at 3.7 times the Daily Value (DV) (table). It is a rich source (20% or more of the DV) of vitamin A, vitamin C, vitamin B6, folate, and manganese. Kale is a good source (10–19% DV) of thiamin, riboflavin, pantothenic acid, vitamin E and several dietary minerals, including iron, calcium, potassium, and phosphorus. Boiling raw kale diminishes most of these nutrients, while values for vitamins A, C, and K, and manganese remain substantial.
Kale is a source of the carotenoids, lutein and zeaxanthin. As with broccoli and other cruciferous vegetables, kale contains glucosinolate compounds, such as glucoraphanin, which contributes to the formation of sulforaphane, a compound under preliminary research for its potential to affect human health.
Boiling kale decreases the level of glucosinate compounds, whereas steaming, microwaving or stir frying does not cause significant loss. Kale is high in oxalic acid, the levels of which can be reduced by cooking.
Kale contains high levels of polyphenols, such as ferulic acid, with levels varying due to environmental and genetic factors.
Kale originated in the eastern Mediterranean and Asia Minor, where it was cultivated for food beginning by 2000 BCE at the latest. Curly-leaved varieties of cabbage already existed along with flat-leaved varieties in Greece in the 4th century BC. These forms, which were referred to by the Romans as Sabellian kale, are considered to be the ancestors of modern kales.
The earliest record of cabbages in western Europe is of hard-heading cabbage in the 13th century. Records in 14th-century England distinguish between hard-heading cabbage and loose-leaf kale.
Russian kale was introduced into Canada, and then into the United States, by Russian traders in the 19th century. USDA botanist David Fairchild is credited with introducing kale (and many other crops) to Americans, having brought it back from Croatia, although Fairchild himself disliked cabbages, including kale.At the time, kale was widely grown in Croatia mostly because it was easy to grow and inexpensive, and could desalinate soil. For most of the twentieth century, kale was primarily used in the United States for decorative purposes; it became more popular as an edible vegetable in the 1990s due to its nutritional value.
During World War II, the cultivation of kale (and other vegetables) in the U.K. was encouraged by the Dig for Victory campaign. The vegetable was easy to grow and provided important nutrients missing from a diet because of rationing.

Many varieties of kale and cabbage are grown mainly for ornamental leaves that are brilliant white, red, pink, lavender, blue or violet in the interior of the rosette. The different types of ornamental kale are peacock kale, coral prince, kamone coral queen, color up kale and chidori kale. Ornamental kale is as edible as any other variety, but potentially not as palatable. Kale leaves are increasingly used as an ingredient for vegetable bouquets and wedding bouquets.
Raw kale is composed of 84% water, 9% carbohydrates, 4% protein, and 1% fat (table). In a 100 g (3 1⁄2 oz) serving, raw kale provides 207 kilojoules (49 kilocalories) of food energy and a large amount of vitamin K at 3.7 times the Daily Value (DV) (table). It is a rich source (20% or more of the DV) of vitamin A, vitamin C, vitamin B6, folate, and manganese. Kale is a good source (10–19% DV) of thiamin, riboflavin, pantothenic acid, vitamin E and several dietary minerals, including iron, calcium, potassium, and phosphorus. Boiling raw kale diminishes most of these nutrients, while values for vitamins A, C, and K, and manganese remain substantial.
Kale is a source of the carotenoids, lutein and zeaxanthin. As with broccoli and other cruciferous vegetables, kale contains glucosinolate compounds, such as glucoraphanin, which contributes to the formation of sulforaphane, a compound under preliminary research for its potential to affect human health.
Boiling kale decreases the level of glucosinate compounds, whereas steaming, microwaving or stir frying does not cause significant loss. Kale is high in oxalic acid, the levels of which can be reduced by cooking.
Kale contains high levels of polyphenols, such as ferulic acid, with levels varying due to environmental and genetic factors.
0
0
文章
ritau
2020年06月28日

*Handling an Infestation*
1. Rinse plants that have a minor infestation. If you only notice a few lace bugs per leaf, you might be able to use a hose to get rid of them. Make sure your hose has a strong stream of water, and spray down the plant to wash the bugs away.
2. Spray insecticides onto the bottom of leaves. Lace bugs and their larva often feed on the bottom of leaves, so you will need to spray the insecticide directly onto the undersides of the leaves. Start in late spring when the eggs first hatch, and reapply every ten to fourteen days.
-You can use an insecticidal soap, but make sure you spray the bugs directly with it. Pesticides, such as pyrethrin or neem oil, also work.
-Insecticides will kill nymphs and adults but not eggs.
3. Apply horticultural oil in the fall to kill eggs. The eggs appear as black spots along the veins of the leaf. These cannot be killed with insecticides, but they can be killed with horticultural oil. Spray it along the underside of each leaf in the fall.
4. Apply neonicotinoids to the soil if other methods haven't worked. Neonicotinoids include imidacloprid and dinotefuran. When added to the soil, the plant may absorb the substances, which can keep the plant bug free for a whole season. These typically come as a granule or as a concentration.
If you have a granule version, sprinkle it around the base of the plant. Water the plant afterwards.
If you have a concentration, follow the instructions on the label to mix it with water. Pour it evenly around the base, and water the plant afterwards.
Keep in mind that neonicotinoids may also kill off beneficial bugs.
*Assessing the Damage*
1. Examine the leaves. You only need to treat plants that are currently infested with lace bugs. Lace bugs cause white spots to appear on the leaf. The larger your infestation, the paler your leaves will become. A few white dots may mean a small infestation while leaves that are almost completely white indicate a much larger problem.
-The underside of the leaf may be covered in dark excrement.
-Do this every two weeks, starting in early spring and ending in late summer.
2. Check the undersides of leaves to look for the bugs. There are three different stages of a lace bug’s life. If you can reduce their numbers in early spring while they are still nymphs, you may be able to prevent an infestation in summer.
-Eggs are small, black, and oval. Three generations of eggs can be laid in one year, beginning in spring and ending in fall. Fall eggs will hatch next spring.
-Nymphs are small. They may have black, spotted markings, and they have not developed wings yet. Nymphs can hatch as early as April and as late as September.
-Adults have large wings with a lacy pattern. They may start appearing in early summer.
3. Monitor for early leaf drop. Severe infestations may cause the plant's leaves to drop early. At this point, you should use heavier pesticides to eliminate the lace bugs. New leaves should grow back as long as the infestation is handled.

1. Rinse plants that have a minor infestation. If you only notice a few lace bugs per leaf, you might be able to use a hose to get rid of them. Make sure your hose has a strong stream of water, and spray down the plant to wash the bugs away.
2. Spray insecticides onto the bottom of leaves. Lace bugs and their larva often feed on the bottom of leaves, so you will need to spray the insecticide directly onto the undersides of the leaves. Start in late spring when the eggs first hatch, and reapply every ten to fourteen days.
-You can use an insecticidal soap, but make sure you spray the bugs directly with it. Pesticides, such as pyrethrin or neem oil, also work.
-Insecticides will kill nymphs and adults but not eggs.
3. Apply horticultural oil in the fall to kill eggs. The eggs appear as black spots along the veins of the leaf. These cannot be killed with insecticides, but they can be killed with horticultural oil. Spray it along the underside of each leaf in the fall.
4. Apply neonicotinoids to the soil if other methods haven't worked. Neonicotinoids include imidacloprid and dinotefuran. When added to the soil, the plant may absorb the substances, which can keep the plant bug free for a whole season. These typically come as a granule or as a concentration.
If you have a granule version, sprinkle it around the base of the plant. Water the plant afterwards.
If you have a concentration, follow the instructions on the label to mix it with water. Pour it evenly around the base, and water the plant afterwards.
Keep in mind that neonicotinoids may also kill off beneficial bugs.

*Assessing the Damage*
1. Examine the leaves. You only need to treat plants that are currently infested with lace bugs. Lace bugs cause white spots to appear on the leaf. The larger your infestation, the paler your leaves will become. A few white dots may mean a small infestation while leaves that are almost completely white indicate a much larger problem.
-The underside of the leaf may be covered in dark excrement.
-Do this every two weeks, starting in early spring and ending in late summer.
2. Check the undersides of leaves to look for the bugs. There are three different stages of a lace bug’s life. If you can reduce their numbers in early spring while they are still nymphs, you may be able to prevent an infestation in summer.
-Eggs are small, black, and oval. Three generations of eggs can be laid in one year, beginning in spring and ending in fall. Fall eggs will hatch next spring.
-Nymphs are small. They may have black, spotted markings, and they have not developed wings yet. Nymphs can hatch as early as April and as late as September.
-Adults have large wings with a lacy pattern. They may start appearing in early summer.
3. Monitor for early leaf drop. Severe infestations may cause the plant's leaves to drop early. At this point, you should use heavier pesticides to eliminate the lace bugs. New leaves should grow back as long as the infestation is handled.

0
0
文章
ritau
2020年05月19日

The Brussels sprout is a member of the Gemmifera Group of cabbages (Brassica oleracea), grown for its edible buds.
The leaf vegetables are typically 1.5–4.0 cm (0.6–1.6 in) in diameter and look like miniature cabbages. The Brussels sprout has long been popular in Brussels, Belgium, and may have gained its name there.
Forerunners to modern Brussels sprouts were probably cultivated in Ancient Rome. Brussels sprouts as they are now known were grown possibly as early as the 13th century in what is now Belgium. The first written reference dates to 1587. During the 16th century, they enjoyed a popularity in the southern Netherlands that eventually spread throughout the cooler parts of Northern Europe.
Brussels sprouts grow in temperature ranges of 7–24 °C (45–75 °F), with highest yields at 15–18 °C (59–64 °F). Fields are ready for harvest 90 to 180 days after planting. The edible sprouts grow like buds in helical patterns along the side of long, thick stalks of about 60 to 120 cm (24 to 47 in) in height, maturing over several weeks from the lower to the upper part of the stalk. Sprouts may be picked by hand into baskets, in which case several harvests are made of five to 15 sprouts at a time, or by cutting the entire stalk at once for processing, or by mechanical harvester, depending on variety. Each stalk can produce 1.1 to 1.4 kg (2.4 to 3.1 lb), although the commercial yield is about 900 g (2 lb) per stalk. Harvest season in temperate zones of the northern latitudes is September to March, making Brussels sprouts a traditional winter-stock vegetable. In the home garden, harvest can be delayed as quality does not suffer from freezing. Sprouts are considered to be sweetest after a frost.
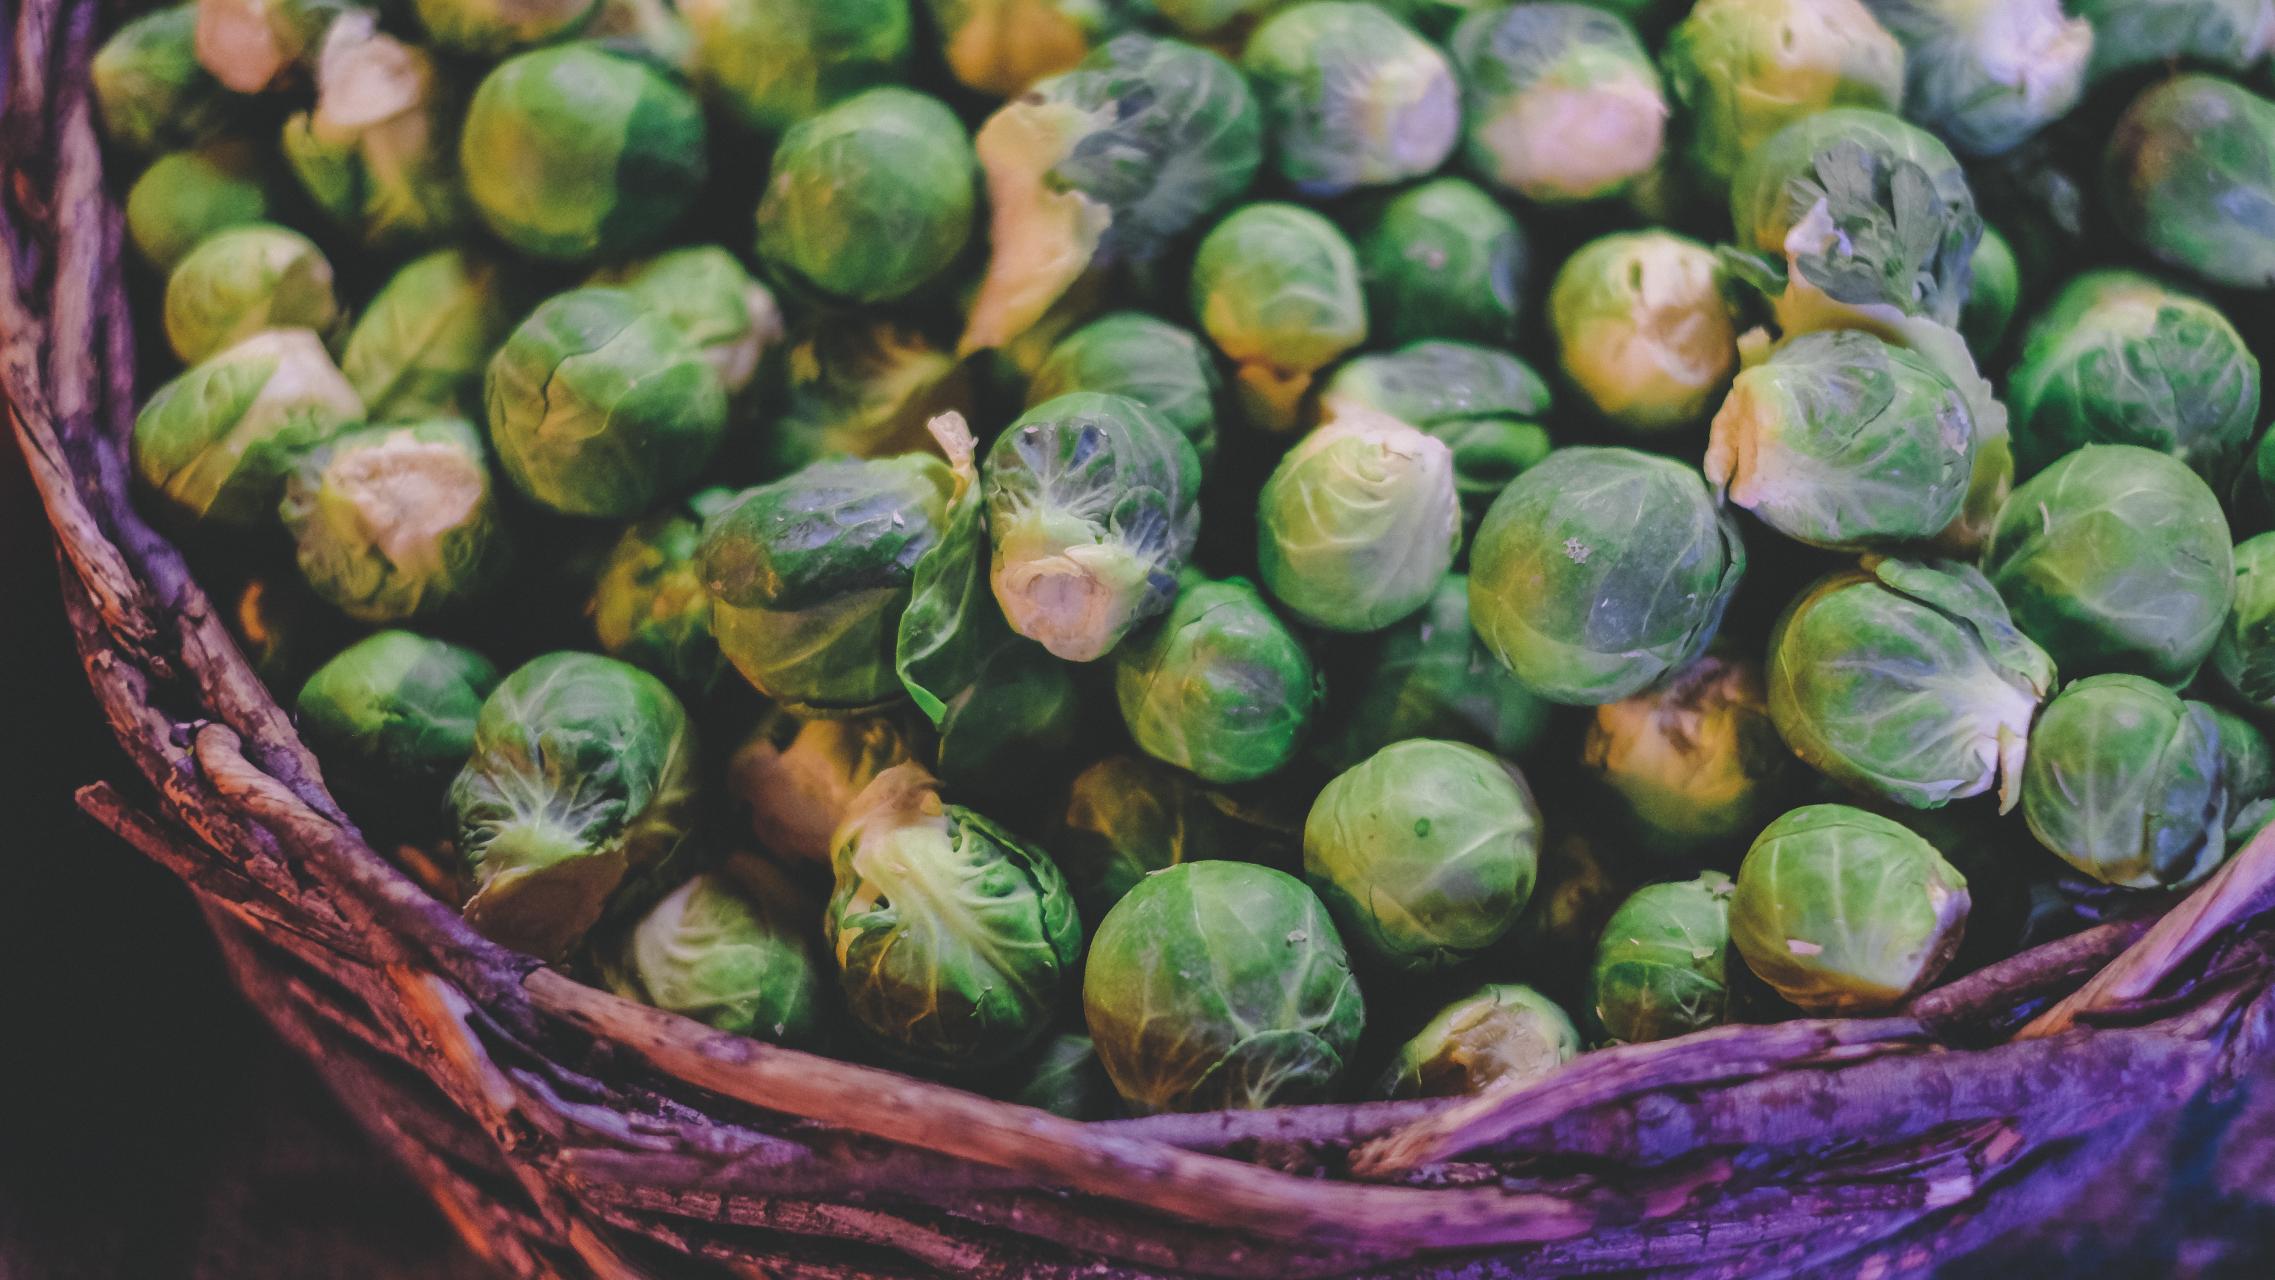
Brussels sprouts are a cultivar group of the same species as broccoli, cabbage, collard greens, kale, and kohlrabi; they are cruciferous (they belong to the family Brassicaceae; old name Cruciferae). Many cultivars are available; some are purple in color, such as 'Ruby Crunch' or 'Red Bull'. The purple varieties are hybrids between purple cabbage and regular green Brussels sprouts developed by a Dutch botanist in the 1940s, yielding a variety with some of the red cabbage's purple colors and greater sweetness. In the 1990s, Dutch scientist Hans van Doorn identified the chemicals that make Brussels sprouts bitter. This enabled Dutch seed companies to cross-breed archived low-bitterness varieties with modern high-yield varieties, over time producing a significant increase in the popularity of the vegetable.
Raw Brussels sprouts are 86% water, 9% carbohydrates, 3% protein, and contain negligible fat. In a 100 gram reference amount, they supply high levels (20% or more of the Daily Value, DV) of vitamin C (102% DV) and vitamin K (169% DV), with more moderate amounts of B vitamins, such as folate and vitamin B6 (USDA nutrient table, right); essential minerals and dietary fiber exist in moderate to low amounts.
Brussels sprouts, as with broccoli and other brassicas, contain sulforaphane, a phytochemical under basic research for its potential biological properties. Although boiling reduces the level of sulforaphane, steaming, microwave cooking, and stir frying do not cause a significant loss.

Consuming Brussels sprouts in excess may not be suitable for people taking anticoagulants, such as warfarin, since they contain vitamin K, a blood-clotting factor. In one incident, eating too many Brussels sprouts led to hospitalization for an individual on blood-thinning therapy.
The leaf vegetables are typically 1.5–4.0 cm (0.6–1.6 in) in diameter and look like miniature cabbages. The Brussels sprout has long been popular in Brussels, Belgium, and may have gained its name there.
Forerunners to modern Brussels sprouts were probably cultivated in Ancient Rome. Brussels sprouts as they are now known were grown possibly as early as the 13th century in what is now Belgium. The first written reference dates to 1587. During the 16th century, they enjoyed a popularity in the southern Netherlands that eventually spread throughout the cooler parts of Northern Europe.
Brussels sprouts grow in temperature ranges of 7–24 °C (45–75 °F), with highest yields at 15–18 °C (59–64 °F). Fields are ready for harvest 90 to 180 days after planting. The edible sprouts grow like buds in helical patterns along the side of long, thick stalks of about 60 to 120 cm (24 to 47 in) in height, maturing over several weeks from the lower to the upper part of the stalk. Sprouts may be picked by hand into baskets, in which case several harvests are made of five to 15 sprouts at a time, or by cutting the entire stalk at once for processing, or by mechanical harvester, depending on variety. Each stalk can produce 1.1 to 1.4 kg (2.4 to 3.1 lb), although the commercial yield is about 900 g (2 lb) per stalk. Harvest season in temperate zones of the northern latitudes is September to March, making Brussels sprouts a traditional winter-stock vegetable. In the home garden, harvest can be delayed as quality does not suffer from freezing. Sprouts are considered to be sweetest after a frost.

Brussels sprouts are a cultivar group of the same species as broccoli, cabbage, collard greens, kale, and kohlrabi; they are cruciferous (they belong to the family Brassicaceae; old name Cruciferae). Many cultivars are available; some are purple in color, such as 'Ruby Crunch' or 'Red Bull'. The purple varieties are hybrids between purple cabbage and regular green Brussels sprouts developed by a Dutch botanist in the 1940s, yielding a variety with some of the red cabbage's purple colors and greater sweetness. In the 1990s, Dutch scientist Hans van Doorn identified the chemicals that make Brussels sprouts bitter. This enabled Dutch seed companies to cross-breed archived low-bitterness varieties with modern high-yield varieties, over time producing a significant increase in the popularity of the vegetable.
Raw Brussels sprouts are 86% water, 9% carbohydrates, 3% protein, and contain negligible fat. In a 100 gram reference amount, they supply high levels (20% or more of the Daily Value, DV) of vitamin C (102% DV) and vitamin K (169% DV), with more moderate amounts of B vitamins, such as folate and vitamin B6 (USDA nutrient table, right); essential minerals and dietary fiber exist in moderate to low amounts.
Brussels sprouts, as with broccoli and other brassicas, contain sulforaphane, a phytochemical under basic research for its potential biological properties. Although boiling reduces the level of sulforaphane, steaming, microwave cooking, and stir frying do not cause a significant loss.

Consuming Brussels sprouts in excess may not be suitable for people taking anticoagulants, such as warfarin, since they contain vitamin K, a blood-clotting factor. In one incident, eating too many Brussels sprouts led to hospitalization for an individual on blood-thinning therapy.
0
0


