文章
Miss Chen
2018年08月30日

Sometimes, divide and conquer is the best way to deal with unruly established hydrangeas (Hydrangea spp.) or those that you planted in too tight a spot. You can use the same technique recommended for dividing most perennials -- digging up the plant at the most auspicious moment and dividing the root clump into two or more plants.

Hefty Hydrangeas
You thought your kids grew fast -- that small hydrangea pot you purchase today at the garden store won't waste any time in expanding, if you provide well-drained soil, partial sun and sufficient irrigation. A clump of hydrangeas 10 feet tall and with an even larger width is not unusual, and these plants grow fast in U.S. Department of Agriculture plant hardiness zones 4 through 11, depending on species. If your established plant outgrows its space, it may be time to split the baby.
Dividing a Hydrangea
The trickiest part about dividing hydrangeas is to figure out the ideal time. Many tout spring as the perfect moment, just after the plant leaves dormancy and fine weather is just around the corner. But according to experts at Perennials.com, the only perennials that should be divided in spring are those that flower after mid-June. Those that flower before mid-June do best when divided in the fall, just before dormancy. With hydrangeas, the time the shrub flowers depends on the species and cultivar.
What Flowers When
Five types of hydrangeas are cultivated in the United States, and the most popular species is the well-known bigleaf (Hydrangea macrophylla) that thrives in USDA zones 5 through 11. Bigleaf, as well as several other hydrangea species, begins blooming in midsummer and carries on through August or September, depending on cultivar and climate. These hydrangeas should be divided in the spring. If your hydrangea blooms before mid-June, you should divide in late fall.
Long Division
If you're dividing your hydrangea in spring, wait until you see an inch or two of new shoots, and then dig up the clump. Using a narrow, long spade -- termed a rabbiting spade -- dig a deep circle around the clump, and then pry the root ball out of the ground and set it on a tarp. Knock or wash off loose soil. Cut the clump into two or more pieces with a clean, sterilized garden knife, trying to find a natural point of separation if possible. Cut each of these pieces into sections again if the size of the clump merits it. Each section should have both green shoots above and roots below.

Replanting the Pieces
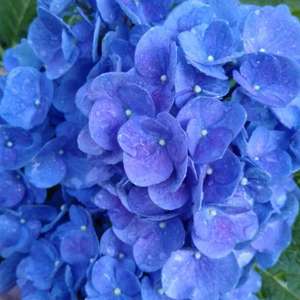
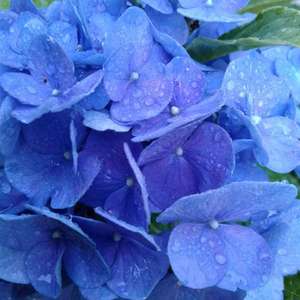
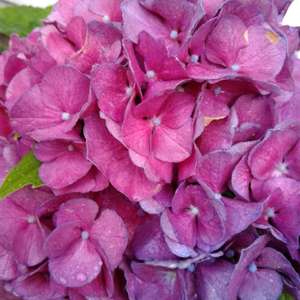
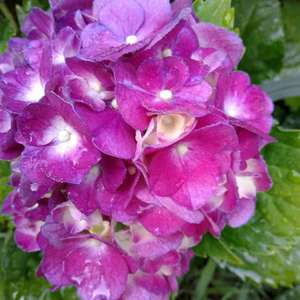
Replant the sections immediately in moist, well-drained soil in a location that gets afternoon sun. If you have a bigleaf hydrangea, remember that the flowers will turn blue in acidic soil and pink in alkaline soil. Plant each piece at about the same depth as it was growing. Water the area well after planting, and add a 2- to 3-inch layer of organic compost over the root area, keeping it a few inches from the hydrangea stem.

Hefty Hydrangeas
You thought your kids grew fast -- that small hydrangea pot you purchase today at the garden store won't waste any time in expanding, if you provide well-drained soil, partial sun and sufficient irrigation. A clump of hydrangeas 10 feet tall and with an even larger width is not unusual, and these plants grow fast in U.S. Department of Agriculture plant hardiness zones 4 through 11, depending on species. If your established plant outgrows its space, it may be time to split the baby.
Dividing a Hydrangea
The trickiest part about dividing hydrangeas is to figure out the ideal time. Many tout spring as the perfect moment, just after the plant leaves dormancy and fine weather is just around the corner. But according to experts at Perennials.com, the only perennials that should be divided in spring are those that flower after mid-June. Those that flower before mid-June do best when divided in the fall, just before dormancy. With hydrangeas, the time the shrub flowers depends on the species and cultivar.
What Flowers When
Five types of hydrangeas are cultivated in the United States, and the most popular species is the well-known bigleaf (Hydrangea macrophylla) that thrives in USDA zones 5 through 11. Bigleaf, as well as several other hydrangea species, begins blooming in midsummer and carries on through August or September, depending on cultivar and climate. These hydrangeas should be divided in the spring. If your hydrangea blooms before mid-June, you should divide in late fall.
Long Division
If you're dividing your hydrangea in spring, wait until you see an inch or two of new shoots, and then dig up the clump. Using a narrow, long spade -- termed a rabbiting spade -- dig a deep circle around the clump, and then pry the root ball out of the ground and set it on a tarp. Knock or wash off loose soil. Cut the clump into two or more pieces with a clean, sterilized garden knife, trying to find a natural point of separation if possible. Cut each of these pieces into sections again if the size of the clump merits it. Each section should have both green shoots above and roots below.

Replanting the Pieces
Replant the sections immediately in moist, well-drained soil in a location that gets afternoon sun. If you have a bigleaf hydrangea, remember that the flowers will turn blue in acidic soil and pink in alkaline soil. Plant each piece at about the same depth as it was growing. Water the area well after planting, and add a 2- to 3-inch layer of organic compost over the root area, keeping it a few inches from the hydrangea stem.
0
0
文章
Miss Chen
2018年08月27日

Fill patio planters and pots with hydrangeas (Hydrangea spp.) in spring for a summer full of flowers. Hydrangeas grow in U.S. Department of Agriculture plant hardiness zones 3 through 9 depending on the species, and they range in size from 3 to 9 feet tall. Two varieties that grow well in containers are big leaf hydrangea (Hydrangea macrophylla), hardy in USDA zones 5 through 9, and mountain hydrangea (Hydrangea serrata), hardy in USDA zones 6 through 9. While spring is the best time to plant, you can pot up hydrangeas anytime through summer.

The Right Planter
When selecting a planter for hydrangeas, consider both aesthetics and functionality. You can choose the material of the planter based on aesthetics, such as wood, colored plastic, terracotta or glazed ceramic, but it must have drainage holes. Terracotta and wood dry out more rapidly, so if watering is an issue in your area, consider plastic or glazed ceramic. Some new pots come with a plug in the bottom covering the drainage hole. Make sure to pop it out before planting hydrangeas.
Look for a planter or pot 2 to 4 inches bigger in diameter than the nursery pot or planter the hydrangea is in.
Disinfecting Pots and Planters
Clean and disinfect both new and old planters before planting.
Dump out old dirt and give the pot a scrub with detergent and water to remove any soil particles.
Fill a bucket or trough -- make sure its large enough to submerge the planter -- with a 9-to-1 water-to-bleach solution.
Soak the old planters for 10 to 15 minutes.
Remove the planter and wash it with soapy water, then rinse.
Allow the pot to air-dry before potting up your new hydrangeas.
Large planters are difficult to soak because it's not always easy to find something large enough for full submersion. An alternative method is to seal the drain holes temporarily -- try duct tape -- then fill the container up to the top with the bleach solution. Allow it to sit in the pot for 10 minutes, then drain, remove the tape, wash, rinse and allow to dry.
Acidic Potting Blend
Hydrangeas like acidic potting soil. Use peat moss to increase the acidity of regular potting soil. Use equal parts of each, and blend them thoroughly before planting. If the peat moss is dry, soak it in a bucket of water overnight, then drain out the excess water before mixing it with potting soil.

Scoop two to three handfuls of potting medium into the bottom of the container to form a base for the root ball.
Potting Up
Gently wiggle the hydrangea out of the nursery pot, handling it by the roots, and set it on top of the peat moss and potting soil blend. Add or take out material from the bottom of the pot until the top of the root ball is 3 inches below the edge of the pot. Fill in around the roots with additional damp peat moss, bringing the level up to the base of the stalks.
Place potted hydrangeas in full morning sun with light afternoon shade. For an indoor plant, set it in a room with bright morning light but no direct afternoon sun.
Water and Fertilizer
Water potted hydrangeas immediately after planting, then each time the potting mix starts to dry out 1 inch deep. Soak the potting mix until a little extra leaks out the drainage hole in the bottom. That way you know the water penetrated through to the bottom.
Fertilize right after planting, then every two weeks, with a complete water-soluble fertilizer. Dilute 3/4 tablespoon in 1 1/2 gallons of water and use it, along with additional water if necessary, to water the potting soil of outdoor plants.
Repot in Spring
Repot hydrangeas in early spring before new growth starts using a blend of equal parts peat moss and potting soil. Gently tease the root ball out of the container and brush of excess dirt to expose the outer roots. Check for rot or mushy spots and pull apart roots that circle the root ball. Repot in the same planter, or go up a pot size if the root ball is crowded in the old planter.

The Right Planter
When selecting a planter for hydrangeas, consider both aesthetics and functionality. You can choose the material of the planter based on aesthetics, such as wood, colored plastic, terracotta or glazed ceramic, but it must have drainage holes. Terracotta and wood dry out more rapidly, so if watering is an issue in your area, consider plastic or glazed ceramic. Some new pots come with a plug in the bottom covering the drainage hole. Make sure to pop it out before planting hydrangeas.
Look for a planter or pot 2 to 4 inches bigger in diameter than the nursery pot or planter the hydrangea is in.
Disinfecting Pots and Planters
Clean and disinfect both new and old planters before planting.
Dump out old dirt and give the pot a scrub with detergent and water to remove any soil particles.
Fill a bucket or trough -- make sure its large enough to submerge the planter -- with a 9-to-1 water-to-bleach solution.
Soak the old planters for 10 to 15 minutes.
Remove the planter and wash it with soapy water, then rinse.
Allow the pot to air-dry before potting up your new hydrangeas.
Large planters are difficult to soak because it's not always easy to find something large enough for full submersion. An alternative method is to seal the drain holes temporarily -- try duct tape -- then fill the container up to the top with the bleach solution. Allow it to sit in the pot for 10 minutes, then drain, remove the tape, wash, rinse and allow to dry.
Acidic Potting Blend
Hydrangeas like acidic potting soil. Use peat moss to increase the acidity of regular potting soil. Use equal parts of each, and blend them thoroughly before planting. If the peat moss is dry, soak it in a bucket of water overnight, then drain out the excess water before mixing it with potting soil.

Scoop two to three handfuls of potting medium into the bottom of the container to form a base for the root ball.
Potting Up
Gently wiggle the hydrangea out of the nursery pot, handling it by the roots, and set it on top of the peat moss and potting soil blend. Add or take out material from the bottom of the pot until the top of the root ball is 3 inches below the edge of the pot. Fill in around the roots with additional damp peat moss, bringing the level up to the base of the stalks.
Place potted hydrangeas in full morning sun with light afternoon shade. For an indoor plant, set it in a room with bright morning light but no direct afternoon sun.
Water and Fertilizer
Water potted hydrangeas immediately after planting, then each time the potting mix starts to dry out 1 inch deep. Soak the potting mix until a little extra leaks out the drainage hole in the bottom. That way you know the water penetrated through to the bottom.
Fertilize right after planting, then every two weeks, with a complete water-soluble fertilizer. Dilute 3/4 tablespoon in 1 1/2 gallons of water and use it, along with additional water if necessary, to water the potting soil of outdoor plants.
Repot in Spring
Repot hydrangeas in early spring before new growth starts using a blend of equal parts peat moss and potting soil. Gently tease the root ball out of the container and brush of excess dirt to expose the outer roots. Check for rot or mushy spots and pull apart roots that circle the root ball. Repot in the same planter, or go up a pot size if the root ball is crowded in the old planter.
0
0
成长记
Pommy Mommy
2018年07月21日

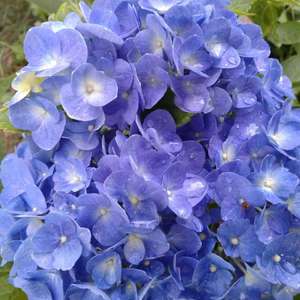
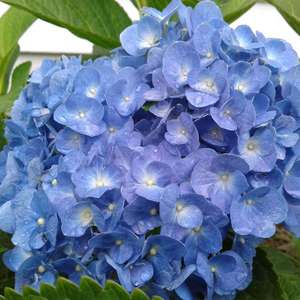
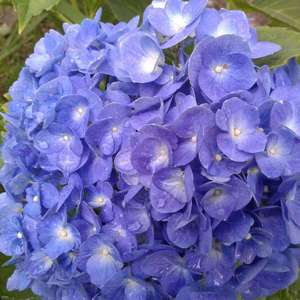
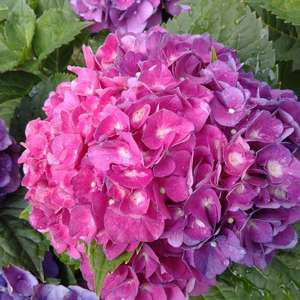
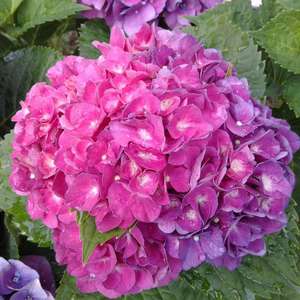
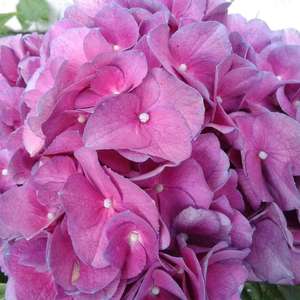
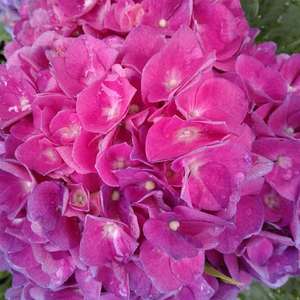
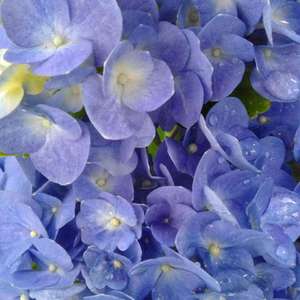
I LOVE Hydrangeas! just look how beautiful the colors are and how long flower is in bloom


2
0
采元气少女✨:So beautiful.
成长记
Pommy Mommy
2018年06月11日

Hydrangeas are my very favorite flower! Unfortunately their color is fading, though I can't complain because they've been in bloom for nearly two months! the center flower was potted & purchased this year, and the two outside plants were purchased & planted last year.
p.s. This is a little memorial for first Pomeranian, Foxy Loo, who loved gardening with me.
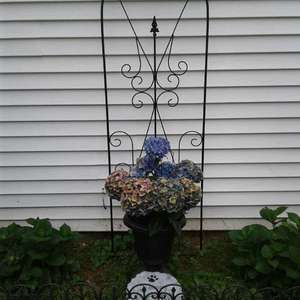
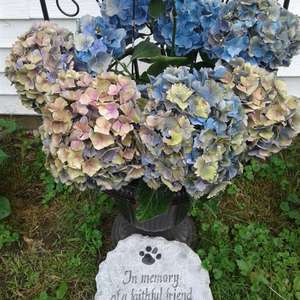
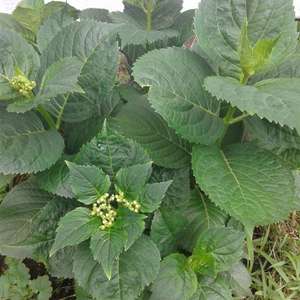
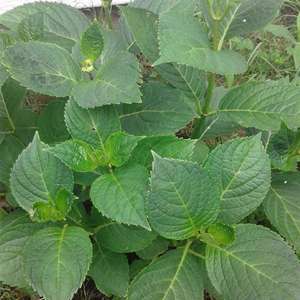
p.s. This is a little memorial for first Pomeranian, Foxy Loo, who loved gardening with me.


0
0
文章
Dummer. ゛☀
2017年09月24日

You may have heard that you can change the color of a hydrangea's flowers by adjusting soil pH. But there's a little more to it than that.
First of all, not all hydrangeas produce blue flowers. Hydrangeas with white or cream flowers, such as Annabelle hydrangeas, oakleaf hydrangeas and members of the PeeGee family, can only produce white or cream flowers. Sometimes their blooms take on a pink tinge at the end of the season, but that's about as colorful as they get.
Hydrangeas with bloom colors that range from pink through blue and purple usually belong to the hydrangea cultivars known as mopheads and lacecaps. These types of hydrangeas have the interesting ability to change the color of their blooms based on the chemistry of the soil. When grown in alkaline soil, the bloom colors are pinker. When grown in acidic soil, the bloom colors are bluer.
Because it's the soil chemistry that determines the bloom color, the variety names given to these types of hydrangeas means very little when it comes to bloom color. For instance, Nikko Blue, Pretty in Pink, Forever Pink and Blue Deckle, all have an almost equal chance of blooming pink or blue, depending on the soil they are planted in.
So remember that even if you purchase a hydrangea in bloom, you cannot be sure the plant will produce the same color flowers once it's growing in your garden.
To manipulate the color of a hydrangea's blooms, you need to manipulate your soil's pH level and mineral content. This is not something you do just once. In order to maintain growing conditions that result in a specific bloom color, you may need to apply special soil amendments several times during the growing season (see Adjusting the pH of Your Soil, below, ).
To really experiment with the color of a hydrangea's blooms, consider growing the plant in a large pot. Because you will be working with a much smaller amount of soil, it will be much easier to maintain the desired soil chemistry.
Start by testing the pH of your soil. This will give you an idea how much of an uphill battle you'll be waging. Be mindful that the health of the plant should be your first priority. It's quite difficult to make a dramatic change in soil pH, and doing so can adversely affect the overall health of the plant.
To encourage blue hydrangea flowers, grow the plant in soil that has a pH of 5.2-5.5. If your soil is more alkaline, you can lower the pH by applying Soil Acidifier at the rate specified on the package. Soil pH can also be lowered (more gradually) by applying an acidic organic mulch, such as pine needles or pine bark.
If the pH of your soil is naturally quite high (alkaline) it will be very difficult to get blue flowers — even if there's plenty of aluminum in the soil. Alkaline soil tends to "lock up" the aluminum, making it unavailable to the plant. (However, you can grow fabulous pink hydrangeas!)
If you prefer pink blooms, your hydrangea should be deprived of aluminum by growing it in an alkaline soil with a pH of 6.0-6.2. You can apply a high-phosphorus fertilizer to further discourage the uptake of aluminum. To raise the pH of a naturally acidic soil, apply Garden Lime at the rate specified on the package.
First of all, not all hydrangeas produce blue flowers. Hydrangeas with white or cream flowers, such as Annabelle hydrangeas, oakleaf hydrangeas and members of the PeeGee family, can only produce white or cream flowers. Sometimes their blooms take on a pink tinge at the end of the season, but that's about as colorful as they get.

Hydrangeas with bloom colors that range from pink through blue and purple usually belong to the hydrangea cultivars known as mopheads and lacecaps. These types of hydrangeas have the interesting ability to change the color of their blooms based on the chemistry of the soil. When grown in alkaline soil, the bloom colors are pinker. When grown in acidic soil, the bloom colors are bluer.
Because it's the soil chemistry that determines the bloom color, the variety names given to these types of hydrangeas means very little when it comes to bloom color. For instance, Nikko Blue, Pretty in Pink, Forever Pink and Blue Deckle, all have an almost equal chance of blooming pink or blue, depending on the soil they are planted in.
So remember that even if you purchase a hydrangea in bloom, you cannot be sure the plant will produce the same color flowers once it's growing in your garden.

To manipulate the color of a hydrangea's blooms, you need to manipulate your soil's pH level and mineral content. This is not something you do just once. In order to maintain growing conditions that result in a specific bloom color, you may need to apply special soil amendments several times during the growing season (see Adjusting the pH of Your Soil, below, ).
To really experiment with the color of a hydrangea's blooms, consider growing the plant in a large pot. Because you will be working with a much smaller amount of soil, it will be much easier to maintain the desired soil chemistry.
Start by testing the pH of your soil. This will give you an idea how much of an uphill battle you'll be waging. Be mindful that the health of the plant should be your first priority. It's quite difficult to make a dramatic change in soil pH, and doing so can adversely affect the overall health of the plant.
To encourage blue hydrangea flowers, grow the plant in soil that has a pH of 5.2-5.5. If your soil is more alkaline, you can lower the pH by applying Soil Acidifier at the rate specified on the package. Soil pH can also be lowered (more gradually) by applying an acidic organic mulch, such as pine needles or pine bark.

If the pH of your soil is naturally quite high (alkaline) it will be very difficult to get blue flowers — even if there's plenty of aluminum in the soil. Alkaline soil tends to "lock up" the aluminum, making it unavailable to the plant. (However, you can grow fabulous pink hydrangeas!)
If you prefer pink blooms, your hydrangea should be deprived of aluminum by growing it in an alkaline soil with a pH of 6.0-6.2. You can apply a high-phosphorus fertilizer to further discourage the uptake of aluminum. To raise the pH of a naturally acidic soil, apply Garden Lime at the rate specified on the package.
0
1
文章
Dummer. ゛☀
2017年08月04日

How to Choose Hydrangeas
There are several types of hydrangea plants. Most grow as shrubs, although there is one vine, called climbing hydrangea. Mophead and lacecap types, perhaps the most common hydrangeas in zones 6 through 9, can fill many roles in the landscape. To grow hydrangeas as a hedge, choose panicle, smooth, or oakleaf hydrangea, which also offers good fall leaf color. If you are planning to grow hydrangeas in full shade, choose oakleaf hydrangea or the climbing type. If you’re planting hydrangeas in colder regions, panicle hydrangea (the type that can be grown as a tree) is the one you want, as it is the most winter-hardy.
Where to Plant Hydrangeas
The most important factors when choosing where to plant hydrangeas are light and moisture. In the South, plant them where they will receive morning sunlight and afternoon shade. With these conditions, you can grow the extremely popular French (also called bigleaf) hydrangea or panicle hydrangea. In northern regions, these same types of hydrangeas will grow in all-day sun.
The name hydrangea contains the root word “hydra” (like in hydration), which gives a clue about how much water these plants need. Make sure the spot you select is close to a water source. Know, too, that French hydrangeas tend to need the most water to thrive.

What Kind of Soil to Use for Hydrangeas
To grow hydrangeas in planting beds, focus on improving the native soil. One simple way to do that is to combine equal parts existing soil and Miracle-Gro® Garden Soil for Trees and Shrubs. In warmer regions (zones 7 and warmer), where winter tends to be mild, you can also grow hydrangeas in containers. Create just the right environment for them by filling pots with Miracle-Gro® Moisture Control® Potting Mix.
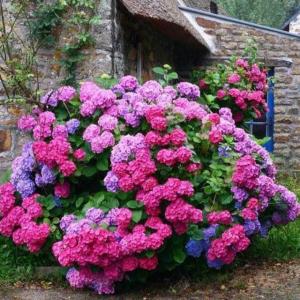
It is worth noting that mophead and lacecap hydrangeas both change flower color based on soil pH, which is a measure of how alkaline or acidic the soil is. Flowers turn pink to red in alkaline soil, and lavender to blue in acidic soil.
When to Plant Hydrangeas
When you see hydrangea plants for sale at local garden centers, that’s usually the right time for planting. This timing will vary by region. For instance, in areas with winter freezing and snow, hydrangeas should be planted in early spring or early fall (as soon as summer heat breaks). In warmer regions with mild winters, the window for planting hydrangeas is longer, from fall all the way through to early spring.

How to Plant Hydrangeas
How far apart to space plants depends on what type of hydrangea you’re growing. It’s best to check the plant tag. Note that hydrangeas planted in the shade tend to grow a little larger and spread a little more. When planting hydrangeas, dig a hole that is twice as wide as the width of the container the hydrangea came in. Place the plant in the hole so that the root ball is at the same depth as it was in the original pot, then fill in the hole with the 50-50 soil mixture described above. Water well after planting.
How to Plant Hydrangeas in Containers
To plant hydrangeas in containers, again check that plants are at the same depth as they were growing previously. How large a container to use depends on how large your hydrangea will grow. Typically, it’s safe to start with a pot 2 inches larger than the container the plant is currently in.How to Water Hydrangeas
Water deeply after planting, making sure to soak the root ball and surrounding soil. If the hydrangeas are dormant (without leaves), you may not need to water again until growth resumes.
Hydrangeas thrive in consistently moist soil. Check the soil at least once a week. When the top inch of soil is dry, it’s time to water. Once hydrangeas are established, they typically survive on rainfall, except during times of drought.How to Mulch Hydrangeas
After planting hydrangeas, apply a 2- to 3-inch-thick mulch layer around (but not on) the plants. Mulch helps keep soil moist and weeds at bay by blocking the weeds’ growth and access to sunlight. Choose whichever mulch looks best in your landscape: Scotts® bagged mulch, shredded leaves, pine straw, or some other locally available material.
How to Feed Hydrangeas
Fertilize hydrangeas in early spring as new growth appears and again just before summer. Avoid feeding hydrangeas after August, especially in regions with cold winters. A slow-release plant food works well. For best results, try Miracle-Gro® Shake ’n Feed® Flowering Trees & Shrubs Plant Food, which feeds for up to 3 months.
How to Prune Hydrangeas
When to prune hydrangeas hinges on the type of hydrangea you’re growing. Both French and oakleaf hydrangeas flower on old wood (last year’s stems), so you should prune plants right after flowering is finished. Smooth and panicle hydrangeas flower on new growth, which means you can prune stems in late winter to early spring. In general, as long as you give hydrangeas enough elbow room to spread and reach their mature size, you shouldn’t have to do too much pruning beyond cutting out dead or damaged wood.

How to Protect Hydrangeas in Winter
In colder areas, many gardeners erect a burlap screen around oakleaf and French hydrangeas in an effort to help protect flower buds that have already formed for the next year. The most important aspect of winter protection, however, is making sure the hydrangea you’re growing is hardy in your gardening zone.
How to Use Hydrangeas
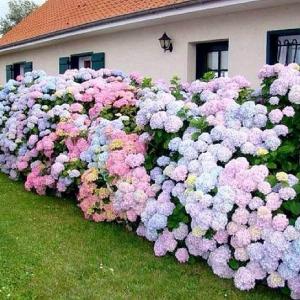
Hydrangeas can fill multiple roles in the garden. Plant a hydrangea privacy hedge, or use them as a foundation planting around a home. A single hydrangea can be the focal point of a garden, and potted hydrangeas can bring beauty to a deck or entry garden. Hydrangeas also integrate well into mixed borders of shrubs and perennials, and make a natural-looking addition to a woodland setting.
Fresh hydrangea flowers are a favorite for filling vases and adorning wedding bouquets. If you want to dry hydrangea blooms, most experts suggest waiting to let flowers age and dry naturally on the plant. Harvest at the color stage you prefer.
There are several types of hydrangea plants. Most grow as shrubs, although there is one vine, called climbing hydrangea. Mophead and lacecap types, perhaps the most common hydrangeas in zones 6 through 9, can fill many roles in the landscape. To grow hydrangeas as a hedge, choose panicle, smooth, or oakleaf hydrangea, which also offers good fall leaf color. If you are planning to grow hydrangeas in full shade, choose oakleaf hydrangea or the climbing type. If you’re planting hydrangeas in colder regions, panicle hydrangea (the type that can be grown as a tree) is the one you want, as it is the most winter-hardy.
Where to Plant Hydrangeas
The most important factors when choosing where to plant hydrangeas are light and moisture. In the South, plant them where they will receive morning sunlight and afternoon shade. With these conditions, you can grow the extremely popular French (also called bigleaf) hydrangea or panicle hydrangea. In northern regions, these same types of hydrangeas will grow in all-day sun.
The name hydrangea contains the root word “hydra” (like in hydration), which gives a clue about how much water these plants need. Make sure the spot you select is close to a water source. Know, too, that French hydrangeas tend to need the most water to thrive.

What Kind of Soil to Use for Hydrangeas
To grow hydrangeas in planting beds, focus on improving the native soil. One simple way to do that is to combine equal parts existing soil and Miracle-Gro® Garden Soil for Trees and Shrubs. In warmer regions (zones 7 and warmer), where winter tends to be mild, you can also grow hydrangeas in containers. Create just the right environment for them by filling pots with Miracle-Gro® Moisture Control® Potting Mix.
It is worth noting that mophead and lacecap hydrangeas both change flower color based on soil pH, which is a measure of how alkaline or acidic the soil is. Flowers turn pink to red in alkaline soil, and lavender to blue in acidic soil.
When to Plant Hydrangeas
When you see hydrangea plants for sale at local garden centers, that’s usually the right time for planting. This timing will vary by region. For instance, in areas with winter freezing and snow, hydrangeas should be planted in early spring or early fall (as soon as summer heat breaks). In warmer regions with mild winters, the window for planting hydrangeas is longer, from fall all the way through to early spring.

How to Plant Hydrangeas
How far apart to space plants depends on what type of hydrangea you’re growing. It’s best to check the plant tag. Note that hydrangeas planted in the shade tend to grow a little larger and spread a little more. When planting hydrangeas, dig a hole that is twice as wide as the width of the container the hydrangea came in. Place the plant in the hole so that the root ball is at the same depth as it was in the original pot, then fill in the hole with the 50-50 soil mixture described above. Water well after planting.
How to Plant Hydrangeas in Containers
To plant hydrangeas in containers, again check that plants are at the same depth as they were growing previously. How large a container to use depends on how large your hydrangea will grow. Typically, it’s safe to start with a pot 2 inches larger than the container the plant is currently in.How to Water Hydrangeas
Water deeply after planting, making sure to soak the root ball and surrounding soil. If the hydrangeas are dormant (without leaves), you may not need to water again until growth resumes.
Hydrangeas thrive in consistently moist soil. Check the soil at least once a week. When the top inch of soil is dry, it’s time to water. Once hydrangeas are established, they typically survive on rainfall, except during times of drought.How to Mulch Hydrangeas
After planting hydrangeas, apply a 2- to 3-inch-thick mulch layer around (but not on) the plants. Mulch helps keep soil moist and weeds at bay by blocking the weeds’ growth and access to sunlight. Choose whichever mulch looks best in your landscape: Scotts® bagged mulch, shredded leaves, pine straw, or some other locally available material.
How to Feed Hydrangeas
Fertilize hydrangeas in early spring as new growth appears and again just before summer. Avoid feeding hydrangeas after August, especially in regions with cold winters. A slow-release plant food works well. For best results, try Miracle-Gro® Shake ’n Feed® Flowering Trees & Shrubs Plant Food, which feeds for up to 3 months.
How to Prune Hydrangeas
When to prune hydrangeas hinges on the type of hydrangea you’re growing. Both French and oakleaf hydrangeas flower on old wood (last year’s stems), so you should prune plants right after flowering is finished. Smooth and panicle hydrangeas flower on new growth, which means you can prune stems in late winter to early spring. In general, as long as you give hydrangeas enough elbow room to spread and reach their mature size, you shouldn’t have to do too much pruning beyond cutting out dead or damaged wood.

How to Protect Hydrangeas in Winter
In colder areas, many gardeners erect a burlap screen around oakleaf and French hydrangeas in an effort to help protect flower buds that have already formed for the next year. The most important aspect of winter protection, however, is making sure the hydrangea you’re growing is hardy in your gardening zone.
How to Use Hydrangeas
Hydrangeas can fill multiple roles in the garden. Plant a hydrangea privacy hedge, or use them as a foundation planting around a home. A single hydrangea can be the focal point of a garden, and potted hydrangeas can bring beauty to a deck or entry garden. Hydrangeas also integrate well into mixed borders of shrubs and perennials, and make a natural-looking addition to a woodland setting.
Fresh hydrangea flowers are a favorite for filling vases and adorning wedding bouquets. If you want to dry hydrangea blooms, most experts suggest waiting to let flowers age and dry naturally on the plant. Harvest at the color stage you prefer.
1
2


