文章
Miss Chen
2018年07月22日

Pumpkins take up a large space in the home garden. To grow them successfully, you need to know how to prepare the soil, when to start the seeds, how far apart to space them and when to harvest the pumpkins.

Step 1
Check the back of the seed packet for the number of days until maturity. If you are growing pumpkins for Halloween, add a week or two and then count backwards to arrive at the best planting date. It will most likely be in late spring or early summer. Pumpkin seedlings do not tolerate frost, but the pumpkins will rot before Halloween if you plant them too soon in a warm climate.
Step 2
Prepare the soil for the pumpkin bed in an area that receives sun. Because pumpkins are heavy feeders, dig a hole 2 feet across and 1 foot deep. Fill it with a mix of compost and soil to which you've added a handful of slow-release fertilizer. Form a mound over the hole about 4 inches high in the center.
Step 3
Make additional mounds. Space them 10 feet apart. Pumpkins like to sprawl and require plenty of room.
Step 4
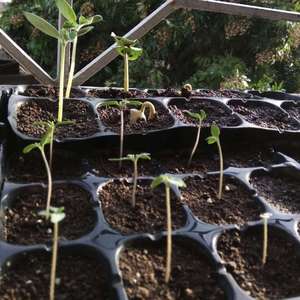
Sow six seeds in a circle in each mound. Push them about one inch deep into the soil and spaced four to six inches apart. After the seeds sprout, remove all but the strongest two seedlings. If you don't, you'll have all foliage and no pumpkins.

Step 5
Weed the bed regularly. Pumpkins can tolerate short periods of hot, dry weather, but if you have extended periods of heat, water them. As the pumpkins grow, slip a shingle or tile under each one to lift it slightly from the soil. This foils some insects and improves the appearance of the pumpkin on that side.
Step 6
Harvest all the pumpkins when they turn orange and before a heavy frost hits. To harvest pumpkins, cut the stem about three inches from the pumpkin. Pumpkins broken from their stems do not keep well.

Step 1
Check the back of the seed packet for the number of days until maturity. If you are growing pumpkins for Halloween, add a week or two and then count backwards to arrive at the best planting date. It will most likely be in late spring or early summer. Pumpkin seedlings do not tolerate frost, but the pumpkins will rot before Halloween if you plant them too soon in a warm climate.
Step 2
Prepare the soil for the pumpkin bed in an area that receives sun. Because pumpkins are heavy feeders, dig a hole 2 feet across and 1 foot deep. Fill it with a mix of compost and soil to which you've added a handful of slow-release fertilizer. Form a mound over the hole about 4 inches high in the center.
Step 3
Make additional mounds. Space them 10 feet apart. Pumpkins like to sprawl and require plenty of room.
Step 4
Sow six seeds in a circle in each mound. Push them about one inch deep into the soil and spaced four to six inches apart. After the seeds sprout, remove all but the strongest two seedlings. If you don't, you'll have all foliage and no pumpkins.

Step 5
Weed the bed regularly. Pumpkins can tolerate short periods of hot, dry weather, but if you have extended periods of heat, water them. As the pumpkins grow, slip a shingle or tile under each one to lift it slightly from the soil. This foils some insects and improves the appearance of the pumpkin on that side.
Step 6
Harvest all the pumpkins when they turn orange and before a heavy frost hits. To harvest pumpkins, cut the stem about three inches from the pumpkin. Pumpkins broken from their stems do not keep well.
1
0
文章
Miss Chen
2018年07月21日

Nothing spices up cooking like fresh jalapeno peppers. Buying them at the store can be costly and inconvenient. Since jalapeno pepper plants are fairly easy to grow, why not add a few plants to your kitchen and enjoy fresh peppers year round?
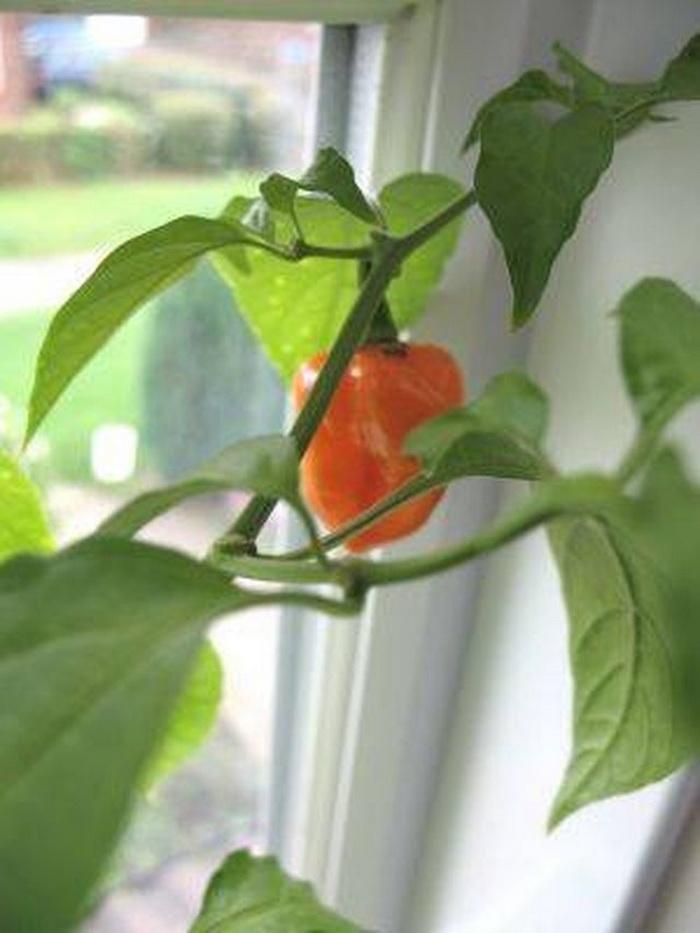
Step 1
Buy healthy looking jalapeno plants at your home and garden store. Look for leaves that are a rich green in color, and that when pinched gently tend to spring back to life. Avoid plants that seem overly dry or that smell moldy. Be prepared to re-pot your plant once you bring it home.
Step 2
Line the bottom of the plant pot with small rocks or stones. This provides ample drainage for your jalapeno plant. Too much moisture will cause your plant to rot and won't yield any peppers.

Use good soil in your jalapeno plant. Rich soils are made specifically for plant and flower growth. Nutrients in rich soil fall into two categories; non-mineral nutrients and mineral nutrients. Non-mineral nutrient include hydrogen, carbon and oxygen. Mineral nutrients include nitrogen, phosphorus, calcium, magnesium, sulfur, boron, copper, iron, chloride, manganese, molybdenum, and zinc. Re-pot your jalapeno plant using a dark, nutrient-rich soil.
Step 4
Place your jalapeno plant in a window that receives at least a couple of hours of direct sunlight each day. Water your plant two to three times per week.
Step 5
Transfer your jalapeno plant into a larger pot when it reaches about one foot in height. Full grown plants may grow up to two feet high, so plan accordingly for that kind of growth.
Step 6
Pluck off any dried or dead leaves as needed. Allow the peppers to ripen on the plant for optimal taste.

Step 1
Buy healthy looking jalapeno plants at your home and garden store. Look for leaves that are a rich green in color, and that when pinched gently tend to spring back to life. Avoid plants that seem overly dry or that smell moldy. Be prepared to re-pot your plant once you bring it home.
Step 2
Line the bottom of the plant pot with small rocks or stones. This provides ample drainage for your jalapeno plant. Too much moisture will cause your plant to rot and won't yield any peppers.

Use good soil in your jalapeno plant. Rich soils are made specifically for plant and flower growth. Nutrients in rich soil fall into two categories; non-mineral nutrients and mineral nutrients. Non-mineral nutrient include hydrogen, carbon and oxygen. Mineral nutrients include nitrogen, phosphorus, calcium, magnesium, sulfur, boron, copper, iron, chloride, manganese, molybdenum, and zinc. Re-pot your jalapeno plant using a dark, nutrient-rich soil.
Step 4
Place your jalapeno plant in a window that receives at least a couple of hours of direct sunlight each day. Water your plant two to three times per week.
Step 5
Transfer your jalapeno plant into a larger pot when it reaches about one foot in height. Full grown plants may grow up to two feet high, so plan accordingly for that kind of growth.
Step 6
Pluck off any dried or dead leaves as needed. Allow the peppers to ripen on the plant for optimal taste.
0
0
文章
Miss Chen
2018年07月20日

Potatoes (Solanum tuberosum) do well as an annual food crop in Department of Agriculture plant hardiness zones 1 through 7. While they are commonly grown in-ground by home gardeners, they can be easily and successfully grown in containers. Container-grown potatoes can be grown year-round, since they can be moved indoors so long as light requirements are met. To successfully grow potatoes in a bucket, choose your potato variety carefully. You also need to meet the growing requirements for potatoes.

The most important requirement for your bucket is that it be made of material suitable for growing food. Food-safe plastic or garden-safe wood are the ideal materials for your bucket. Avoid metal as it can corrode over time and affect soil nutrition. Your bucket must also have good drainage, as sodden soil is extremely harmful to plants. Drill drainage holes in your bucket if it does not already have them. The size of your container is also important. Potatoes do well in large containers, so plan on 2 1/2 gallons of growing space per potato plant. Ensure that the container is at least 1 foot deep.
Preparing the Soil and Growing Conditions
Potatoes enjoy sandy, acidic soil that is nutrient-rich. Use a mix of compost and nutrient-rich potting or garden soil to fill your container. Place a layer of gravel or broken pieces of Styrofoam at the bottom of your bucket. This will help your container garden drain better. Fill your bucket almost to the top -- 1 inch below the rim -- with the compost and soil mix. Potato plants enjoy full sun and moist, but not sodden soil. Container gardens are more susceptible to dehydration during summer months. Keep your soil evenly moist, neither soaked nor dry to touch. Place a large dish under the bucket, keeping it filled with water. The plants and soil will absorb water as needed. This method also helps reduce the level of nutrients washed away during watering.
Planting Potatoes
To plant potatoes, you must start by chitting potatoes. This is especially important if you are planting potatoes in the late winter and early spring for a late spring harvest. Chit potatoes by laying your seed potatoes out in a cool, frost-free and sunny environment. Egg boxes or old seed trays work well. The eyes of the potatoes will produce shoots. Position these upward toward the sunlight for optimal results. When the shoots are 1 inch long, the seed potato can be planted. Prior to planting, evenly spread a small handful of a high-phosphorous fertilizer, such as bonemeal, 7 inches below the surface of the soil. Cover with 2 inches of soil and compost mixture. Then push a chitted seed potato below the surface of the dirt, with the shoots pointing upward. Push the chitted potato down no more than 5 inches deep, and cover with soil. The seed potato should not touch the fertilizer directly as it will burn the sensitive new shoots and roots of the plant.

Varieties and Spacing
Potatoes are categorized as earlies, second earlies and maincrop potatoes. Earlies are planted in the late winter and are harvested in early summer. Second earlies are planted in early spring and harvested midsummer. Maincrop potatoes are harvested in the fall, after an early spring planting. You can also plant potatoes in the late summer for a fall harvest. First and second early varieties work best for container potatoes. Salad potatoes, such as the "Charlotte" (Solanum tuberosum "Charlotte") and the "Lady Christi (Solanum tuberosum "Lady Christl), grow well in the restricted space of a container. But you can grow any size of white, red, yellow or russet potatoes successfully in containers, assuming there is enough space for the potato to mature. Unless you have a very large container, plant no more than three potato plants per container, spacing them evenly apart. The closer your plants are, the smaller your spuds will be.

The most important requirement for your bucket is that it be made of material suitable for growing food. Food-safe plastic or garden-safe wood are the ideal materials for your bucket. Avoid metal as it can corrode over time and affect soil nutrition. Your bucket must also have good drainage, as sodden soil is extremely harmful to plants. Drill drainage holes in your bucket if it does not already have them. The size of your container is also important. Potatoes do well in large containers, so plan on 2 1/2 gallons of growing space per potato plant. Ensure that the container is at least 1 foot deep.
Preparing the Soil and Growing Conditions
Potatoes enjoy sandy, acidic soil that is nutrient-rich. Use a mix of compost and nutrient-rich potting or garden soil to fill your container. Place a layer of gravel or broken pieces of Styrofoam at the bottom of your bucket. This will help your container garden drain better. Fill your bucket almost to the top -- 1 inch below the rim -- with the compost and soil mix. Potato plants enjoy full sun and moist, but not sodden soil. Container gardens are more susceptible to dehydration during summer months. Keep your soil evenly moist, neither soaked nor dry to touch. Place a large dish under the bucket, keeping it filled with water. The plants and soil will absorb water as needed. This method also helps reduce the level of nutrients washed away during watering.
Planting Potatoes
To plant potatoes, you must start by chitting potatoes. This is especially important if you are planting potatoes in the late winter and early spring for a late spring harvest. Chit potatoes by laying your seed potatoes out in a cool, frost-free and sunny environment. Egg boxes or old seed trays work well. The eyes of the potatoes will produce shoots. Position these upward toward the sunlight for optimal results. When the shoots are 1 inch long, the seed potato can be planted. Prior to planting, evenly spread a small handful of a high-phosphorous fertilizer, such as bonemeal, 7 inches below the surface of the soil. Cover with 2 inches of soil and compost mixture. Then push a chitted seed potato below the surface of the dirt, with the shoots pointing upward. Push the chitted potato down no more than 5 inches deep, and cover with soil. The seed potato should not touch the fertilizer directly as it will burn the sensitive new shoots and roots of the plant.

Varieties and Spacing
Potatoes are categorized as earlies, second earlies and maincrop potatoes. Earlies are planted in the late winter and are harvested in early summer. Second earlies are planted in early spring and harvested midsummer. Maincrop potatoes are harvested in the fall, after an early spring planting. You can also plant potatoes in the late summer for a fall harvest. First and second early varieties work best for container potatoes. Salad potatoes, such as the "Charlotte" (Solanum tuberosum "Charlotte") and the "Lady Christi (Solanum tuberosum "Lady Christl), grow well in the restricted space of a container. But you can grow any size of white, red, yellow or russet potatoes successfully in containers, assuming there is enough space for the potato to mature. Unless you have a very large container, plant no more than three potato plants per container, spacing them evenly apart. The closer your plants are, the smaller your spuds will be.
0
0
文章
Miss Chen
2018年07月20日

Baby red potatoes are a thin-skinned variety with a creamy texture and mild flesh. They are also called new potatoes and can be steamed, boiled or roasted. While small--about 1 to 3 inches long--they contain the same nutrients as a full-sized potato. All potatoes need loose (to a depth of 3 or 4 feet), well-drained soil with a pH of 5.2 to 6.8 for proper tuber development. Potatoes are plagued with a host of insect pests and bacterial diseases. Keeping your soil healthy by adding compost and rotating crops will minimize damage to your potato plants.

Step 1
Choose a spot with full sun in an area of the garden you have not used to grow potatoes, tomatoes, peppers or eggplants in three years. Do this the fall before planting potatoes.
Step 2
Cover the area you've chosen with compost, and work the compost into the soil to a depth of 6 inches. Baby red potatoes are planted in early spring as soon as the soil warms up to a daytime temperature of 51 degrees.
Step 3
In the spring, when you're ready to plant, cut the certified red seed potatoes into chunks, making sure each chunk has two to three "eyes".
Step 4
Plant your potato chunks in hills with two to three pieces per hill. Cluster your potato pieces together, and cover them with 3 to 4 inches of soil. The centers of the hills should be 1 foot apart. As an alternative, you can make a furrow 3 inches deep. Drop your eyes into the furrow 10 to 12 inches apart. Space the rows 24 inches apart.

Step 5
When the potato plant sprouts, begin "hilling" soil or compost around the plant. When the plant reaches 3 to 4 inches high, cover half of the plant with soil. When the plant grows another 3 to 4 inches, cover half of the new growth with soil. Continue to do that until the plant is growing out of a mound of soil 4 to 6 inches high. Hilling the soil prevents tubers from being exposed to the sun. Once tubers are exposed to the sun, they turn green and develop a toxin. Green tubers need to be disposed of.
Step 6
Mulch between rows and hills. The mulch reduces weed growth and retains moisture.
Step 7
When your red potatoes have developed their first set of true leaves, spray them with a foliar spray made of fish emulsion or seaweed. The foliar spray provides the nutrients your potato plants need to produce tubers and stay healthy through insect attacks and disease. Spray once a week until all the red potato plant flowers are in full bloom.
Step 8
When your red potato plants have sprouted, cover them with a floating row cover. The floating row cover allows sunlight and water to reach the potato plants but keeps insect pests from reaching the plants. You may remove the floating row covers when the plants begin to flower.
Step 9
Water your plants every other day. The soil should be moist, but you need to avoid leaving standing water.
Step 10
Start checking potato growth in late spring. Harvest new potatoes when they are between 1 and 2 inches long by digging gently around the potato plants and using a sharp knife to cut the potatoes cleanly away from the roots. Allow smaller potatoes to continue to grow before harvesting to extend the harvesting season.
Step 11
When you have harvested all the tubers on a potato plant, pull the plant up and add it to your compost pile.

Step 1
Choose a spot with full sun in an area of the garden you have not used to grow potatoes, tomatoes, peppers or eggplants in three years. Do this the fall before planting potatoes.
Step 2
Cover the area you've chosen with compost, and work the compost into the soil to a depth of 6 inches. Baby red potatoes are planted in early spring as soon as the soil warms up to a daytime temperature of 51 degrees.
Step 3
In the spring, when you're ready to plant, cut the certified red seed potatoes into chunks, making sure each chunk has two to three "eyes".
Step 4
Plant your potato chunks in hills with two to three pieces per hill. Cluster your potato pieces together, and cover them with 3 to 4 inches of soil. The centers of the hills should be 1 foot apart. As an alternative, you can make a furrow 3 inches deep. Drop your eyes into the furrow 10 to 12 inches apart. Space the rows 24 inches apart.

Step 5
When the potato plant sprouts, begin "hilling" soil or compost around the plant. When the plant reaches 3 to 4 inches high, cover half of the plant with soil. When the plant grows another 3 to 4 inches, cover half of the new growth with soil. Continue to do that until the plant is growing out of a mound of soil 4 to 6 inches high. Hilling the soil prevents tubers from being exposed to the sun. Once tubers are exposed to the sun, they turn green and develop a toxin. Green tubers need to be disposed of.
Step 6
Mulch between rows and hills. The mulch reduces weed growth and retains moisture.
Step 7
When your red potatoes have developed their first set of true leaves, spray them with a foliar spray made of fish emulsion or seaweed. The foliar spray provides the nutrients your potato plants need to produce tubers and stay healthy through insect attacks and disease. Spray once a week until all the red potato plant flowers are in full bloom.
Step 8
When your red potato plants have sprouted, cover them with a floating row cover. The floating row cover allows sunlight and water to reach the potato plants but keeps insect pests from reaching the plants. You may remove the floating row covers when the plants begin to flower.
Step 9
Water your plants every other day. The soil should be moist, but you need to avoid leaving standing water.
Step 10
Start checking potato growth in late spring. Harvest new potatoes when they are between 1 and 2 inches long by digging gently around the potato plants and using a sharp knife to cut the potatoes cleanly away from the roots. Allow smaller potatoes to continue to grow before harvesting to extend the harvesting season.
Step 11
When you have harvested all the tubers on a potato plant, pull the plant up and add it to your compost pile.
0
0


