文章
Dummer. ゛☀
2017年09月19日

Succulents are hardy plants that add a striking appearance to any garden or home. Performing best in U.S. Department of Agriculture hardiness zones 3 through 9, succulents are good plants for the novice and expert gardener alike, as they require little attention. Because succulents are desert plants, they should be watered sparingly. Succulents are typically not susceptible to insect or pest infestation, but overwatering can lead to root or stem rot, a preventable and easily fixable disease. Succulents with signs of root or stem rot should be treated immediately.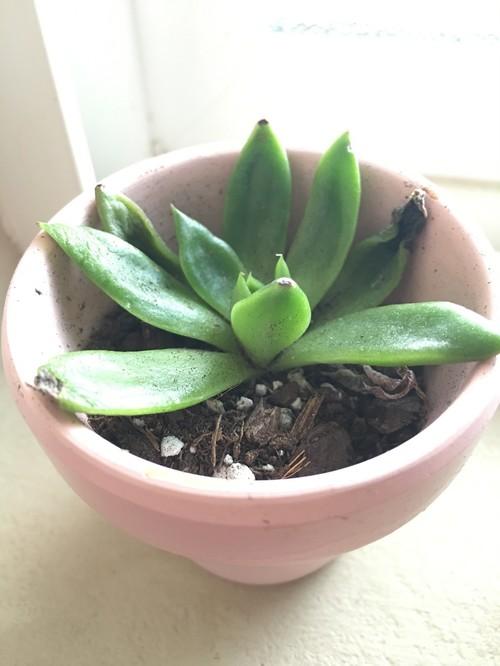
1. Check the plant for infected areas. These typically appear as dark brown to black spots or areas on the low part of the plant. Other signs of root or stem rot include puckered flesh with a dark tint around the infected area.
2. Stop watering a plant with rot. Remove the plant from its pot. Remove the soil mixture and clean out the pot thoroughly to ensure no remnants of the fungus are left.
3. Cut the infected black stem from the plant with a garden knife. Let the healthy portion of the plant dry naturally for several hours, keeping the succulent out of direct sunlight during this process. If other areas of the plant are showing minimal signs of rot, keep an eye on the plant. Succulents can recover from stem rot if properly watered and placed in a warm, dry location.
4. Using the cleaned out pot or a fresh one, combine equal parts soil, coarse sand and peat moss. Don’t reuse any of the materials used with the infected plant.
5. Pour roughly 2 inches (5 cm) of the mixture into the pot. Place the newly doctored succulent into the pot with the roots lying on top of the soil. Fill the pot with the soil mixture until it reaches the base of the stems. Firmly pat the soil around the plant.
6. Place the succulent in a brightly lit spot with warm temperatures. Succulents prefer dry climates, so don’t place the plant in a humid location.
7. Water the plant with just enough water to moisten the soil one week after repotting. After the soil has completely dried out, you can water more thoroughly.
Succulents grow best in well-drained soils that provide a high water-holding capacity. Planting succulents in a clay pot with a drainage hole ensures there is no sitting water and that the soil dries out between waterings. Succulents are dormant during the winter and should only be watered lightly at this time.

1. Check the plant for infected areas. These typically appear as dark brown to black spots or areas on the low part of the plant. Other signs of root or stem rot include puckered flesh with a dark tint around the infected area.
2. Stop watering a plant with rot. Remove the plant from its pot. Remove the soil mixture and clean out the pot thoroughly to ensure no remnants of the fungus are left.

3. Cut the infected black stem from the plant with a garden knife. Let the healthy portion of the plant dry naturally for several hours, keeping the succulent out of direct sunlight during this process. If other areas of the plant are showing minimal signs of rot, keep an eye on the plant. Succulents can recover from stem rot if properly watered and placed in a warm, dry location.
4. Using the cleaned out pot or a fresh one, combine equal parts soil, coarse sand and peat moss. Don’t reuse any of the materials used with the infected plant.

5. Pour roughly 2 inches (5 cm) of the mixture into the pot. Place the newly doctored succulent into the pot with the roots lying on top of the soil. Fill the pot with the soil mixture until it reaches the base of the stems. Firmly pat the soil around the plant.
6. Place the succulent in a brightly lit spot with warm temperatures. Succulents prefer dry climates, so don’t place the plant in a humid location.
7. Water the plant with just enough water to moisten the soil one week after repotting. After the soil has completely dried out, you can water more thoroughly.

Succulents grow best in well-drained soils that provide a high water-holding capacity. Planting succulents in a clay pot with a drainage hole ensures there is no sitting water and that the soil dries out between waterings. Succulents are dormant during the winter and should only be watered lightly at this time.
0
1
文章
Dummer. ゛☀
2017年09月19日

Large, ragged holes in the leaves of cabbage, broccoli, Brussels sprouts, collards, kale, or cauliflower plants are a sign that cabbageworms may have invaded your garden. The green caterpillars may also bore into the heads of these crops, leaving behind their dark green frass (droppings). Cabbage loopers cause similar damage. Plants can tolerate a moderate amount of damage without reduction in yield.
The cabbageworm is the larval form of a small white butterfly (Pieris rapae) that has three to four black spots on its wings. The butterfly lays white eggs on the underside of leaves; eggs hatch within a week and the larvae feed for approximately two weeks. The larvae pupate in silken cocoons attached to the lower leaves. There are several generations per year, and they are found throughout North America.
Prevention and control
Cover susceptible crops with garden fabric in early spring as a barrier to the egg-laying moths.
If plants are not covered, inspect them frequently. Crush the eggs; handpick the cabbageworms and drop them into a pail of soapy water.
Encourage native beneficial insects, such as parasitic wasps, that prey on caterpillars.
Remove plant debris from the garden in fall to minimize opportunities for the pest to overwinter.

The cabbageworm is the larval form of a small white butterfly (Pieris rapae) that has three to four black spots on its wings. The butterfly lays white eggs on the underside of leaves; eggs hatch within a week and the larvae feed for approximately two weeks. The larvae pupate in silken cocoons attached to the lower leaves. There are several generations per year, and they are found throughout North America.

Prevention and control
Cover susceptible crops with garden fabric in early spring as a barrier to the egg-laying moths.
If plants are not covered, inspect them frequently. Crush the eggs; handpick the cabbageworms and drop them into a pail of soapy water.
Encourage native beneficial insects, such as parasitic wasps, that prey on caterpillars.
Remove plant debris from the garden in fall to minimize opportunities for the pest to overwinter.

0
0
文章
Dummer. ゛☀
2017年09月19日

The presence of white butterflies fluttering around the garden signals the start of a possible infestation of imported cabbageworm. The adult cabbage butterfly, Pieris rapae, is white with black tips and one or two black spots on the forewings. The larva (the cabbageworm) is a bright green caterpillar clothed in fine, short hairs that give it a velvety appearance. The imported cabbageworm will attack all growth stages in cole crops.
Symptoms and Diagnosis
When the adult butterflies are observed fluttering around the garden, the larvae and the damage they do will soon be obvious. All stages of growth in cole crops can be attacked by the larvae, but they are often observed on the underside of developing leaves. The outer leaves may become riddled with large ragged holes from the larvae's feeding. If leaves are parted, masses of greenish-brown excrement can be found at the base of the leaves. The larval feces often contaminate edible portions of the plant.
Life Cycle
The imported cabbageworm overwinters as a pupa attached to plant debris. The adult butterfly emerges the following spring and flies about the garden area during daylight hours. The elongated, yellow, ribbed eggs (shaped somewhat like a football) are laid on the underside of the foliage. The eggs hatch in 7 days. The emerging caterpillars are velvety green. Theyfeed on all cole crops for about 15 days. After this, they pupate, and new adults emerge in about 10 days. There are 2 or 3 generations of imported cabbageworm each year.
Integrated Pest Management Strategies
1. Handpick the cabbageworms off of the underside of the leaves while plants are young. This procedure is effective when plants are young or if only a few larvae are present.
2. Use row covers. Position row covers or netting over plants to prevent egg laying by the butterflies. Start controls before the white cabbage butterflies are seen fluttering around the yard.
3. Fall sanitation. Clean up and remove infested plant material after harvest to eliminate overwintering sites of the pupae.
4. Use Btk spray or dust. Dust plants with Bacillus thuringiensis kurstaki (Btk). Begin treating the plants when white butterflies are first noticed and the cabbageworms are still small. It may take several days before the insects die after feeding on Btk, but feeding will usually stop shortly after the plants are treated.
5. Chemical controls. Spray with insecticidal soap, carbaryl (Sevin), malathion, cyfluthrin, or permethrin when plants and larvae are young and damage is increasing. The larvae are more easily killed when young and this will minimize the amount of insecticide needed for control. Carbaryl (Sevin), the active ingredient in Sevin, is very toxic to honey bees; do not use near flowering plants.

Symptoms and Diagnosis
When the adult butterflies are observed fluttering around the garden, the larvae and the damage they do will soon be obvious. All stages of growth in cole crops can be attacked by the larvae, but they are often observed on the underside of developing leaves. The outer leaves may become riddled with large ragged holes from the larvae's feeding. If leaves are parted, masses of greenish-brown excrement can be found at the base of the leaves. The larval feces often contaminate edible portions of the plant.

Life Cycle
The imported cabbageworm overwinters as a pupa attached to plant debris. The adult butterfly emerges the following spring and flies about the garden area during daylight hours. The elongated, yellow, ribbed eggs (shaped somewhat like a football) are laid on the underside of the foliage. The eggs hatch in 7 days. The emerging caterpillars are velvety green. Theyfeed on all cole crops for about 15 days. After this, they pupate, and new adults emerge in about 10 days. There are 2 or 3 generations of imported cabbageworm each year.

Integrated Pest Management Strategies
1. Handpick the cabbageworms off of the underside of the leaves while plants are young. This procedure is effective when plants are young or if only a few larvae are present.
2. Use row covers. Position row covers or netting over plants to prevent egg laying by the butterflies. Start controls before the white cabbage butterflies are seen fluttering around the yard.
3. Fall sanitation. Clean up and remove infested plant material after harvest to eliminate overwintering sites of the pupae.

4. Use Btk spray or dust. Dust plants with Bacillus thuringiensis kurstaki (Btk). Begin treating the plants when white butterflies are first noticed and the cabbageworms are still small. It may take several days before the insects die after feeding on Btk, but feeding will usually stop shortly after the plants are treated.
5. Chemical controls. Spray with insecticidal soap, carbaryl (Sevin), malathion, cyfluthrin, or permethrin when plants and larvae are young and damage is increasing. The larvae are more easily killed when young and this will minimize the amount of insecticide needed for control. Carbaryl (Sevin), the active ingredient in Sevin, is very toxic to honey bees; do not use near flowering plants.
0
0
文章
Dummer. ゛☀
2017年09月19日

Most plants growing in average garden soil in the St. Louis area receive sufficient nutrients from the soil that deficiencies are not a problem. The most notable exception is iron chlorosis of trees and shrubs, which is more likely to result from a high soil pH than a lack of iron in the soil. See below for more information on this deficiency. Also, because of the higher nitrogen requirement of turf grasses and leafy vegetables in the vegetable garden they may benefit from some additional nitrogen fertilizer. Also, nutrient deficiencies are likely to occur in plants growing in containers that are not fertilized regularly because of the reduced soil volume and the lower nutrient holding capacity of soil-less mixes used for container plants.
Following is some brief information on the symptoms of common nutrient deficiencies:
Macronutrients
Nitrogen
Lack of nitrogen shows up as overall yellow-green leaves instead of a dark green, yellowing and dropping of lower leaves (can be caused by many factors), and overall reduced plant size and slow growth. Although most garden plants receive adequate nitrogen from the soil and dissolved in rainwater, applying nitrogen in a complete, balanced fertilizer such as 20-20-20 once a year around perennials and shrubs is usually sufficient to provide adequate growth. Leafy vegetables can benefit from additional nitrogen. Most trees do not suffer from lack of sufficient nitrogen. Although lawns respond quickly and dramatically to the application of nitrogen, becoming green and lush, its use should be tempered, as this lush growth is also more susceptible to attack by insects and disease. Nitrogen in best applied to cool-season grasses in fall and on warm season grasses as they begin to grow in early summer. Nitrogen should be applied to container plants in a complete fertilizer, such as 20-20-20.
Phosphorus
Lack of phosphorus typically results in reduced growth and in some plants purplish foliage, especially older leaves. Although it may be observed on container grown plants most soils in Missouri contain ample phosphorus so more rarely would deficiencies be noticed in a garden situation. If you suspect your plants are showing symptoms of lack of phosphorus, have your soil tested. Then add phosphorus as required by the test results. Container grown plants require regular fertilizing with a complete fertilizer such as 20-20-20.
Potash
Again, lack of potash is rare in Missouri soils but deficiency symptoms typically result in stunted growth. Older leaves may yellow and leaf edges may roll up. If a deficiency is suspected have your soil tested and follow the recommendations provided with your soil test results. Container grown plants require regular fertilizing with a complete fertilizer such as 20-20-20.
Calcium, Magnesium and Sulfur
These three elements complete the macronutrients. They are frequently available in adequate amounts in St. Louis soils.
Micronutrients
Several micronutrients are required for good plant growth. These include: iron, manganese, copper, zinc, boron, chlorine, molybdenum, and nickel. Symptoms are almost entirely crop specific, hence, listing general symptoms of little use. Also, their identification can be difficult from symptoms alone. Some are well known and a plant disease reference of well-studied crops may show pictures of the classic symptoms of a particular nutrient deficiency on a crop. Frequently, however, short of sending leaf tissue off to a lab for analysis the gardener is left questioning whether the symptoms they are seeing are caused by a nutrient deficiency or not. If in doubt, treat the plant with a micronutrient fertilizer or a complete fertilizer containing micronutrients. Since most micronutrients are used in very small amounts the fertilizer will provide the plant what it needs if the soil is indeed lacking in a micronutrient. Follow the product’s label directions. In the St. Louis area the most commonly encountered micronutrient problem is with iron.
Iron
Lack of iron most notably causes what is referred to as iron chlorosis or yellowing leaves where the veins remain green. New growth is most affected. Lack of iron in the soil, a high soil pH (over 7) that restricts availability of iron in the soil, and environmental conditions can all result in iron chlorosis. For detailed information on iron chlorosis see the IPM page “Iron Chlorosis of Trees and Shrubs” herein. Potted plants showing iron chlorosis can be watered with a fertilizer containing iron or a specific iron fertilizer such as chelated iron.

Following is some brief information on the symptoms of common nutrient deficiencies:
Macronutrients
Nitrogen
Lack of nitrogen shows up as overall yellow-green leaves instead of a dark green, yellowing and dropping of lower leaves (can be caused by many factors), and overall reduced plant size and slow growth. Although most garden plants receive adequate nitrogen from the soil and dissolved in rainwater, applying nitrogen in a complete, balanced fertilizer such as 20-20-20 once a year around perennials and shrubs is usually sufficient to provide adequate growth. Leafy vegetables can benefit from additional nitrogen. Most trees do not suffer from lack of sufficient nitrogen. Although lawns respond quickly and dramatically to the application of nitrogen, becoming green and lush, its use should be tempered, as this lush growth is also more susceptible to attack by insects and disease. Nitrogen in best applied to cool-season grasses in fall and on warm season grasses as they begin to grow in early summer. Nitrogen should be applied to container plants in a complete fertilizer, such as 20-20-20.

Phosphorus
Lack of phosphorus typically results in reduced growth and in some plants purplish foliage, especially older leaves. Although it may be observed on container grown plants most soils in Missouri contain ample phosphorus so more rarely would deficiencies be noticed in a garden situation. If you suspect your plants are showing symptoms of lack of phosphorus, have your soil tested. Then add phosphorus as required by the test results. Container grown plants require regular fertilizing with a complete fertilizer such as 20-20-20.

Potash
Again, lack of potash is rare in Missouri soils but deficiency symptoms typically result in stunted growth. Older leaves may yellow and leaf edges may roll up. If a deficiency is suspected have your soil tested and follow the recommendations provided with your soil test results. Container grown plants require regular fertilizing with a complete fertilizer such as 20-20-20.
Calcium, Magnesium and Sulfur
These three elements complete the macronutrients. They are frequently available in adequate amounts in St. Louis soils.

Micronutrients
Several micronutrients are required for good plant growth. These include: iron, manganese, copper, zinc, boron, chlorine, molybdenum, and nickel. Symptoms are almost entirely crop specific, hence, listing general symptoms of little use. Also, their identification can be difficult from symptoms alone. Some are well known and a plant disease reference of well-studied crops may show pictures of the classic symptoms of a particular nutrient deficiency on a crop. Frequently, however, short of sending leaf tissue off to a lab for analysis the gardener is left questioning whether the symptoms they are seeing are caused by a nutrient deficiency or not. If in doubt, treat the plant with a micronutrient fertilizer or a complete fertilizer containing micronutrients. Since most micronutrients are used in very small amounts the fertilizer will provide the plant what it needs if the soil is indeed lacking in a micronutrient. Follow the product’s label directions. In the St. Louis area the most commonly encountered micronutrient problem is with iron.

Iron
Lack of iron most notably causes what is referred to as iron chlorosis or yellowing leaves where the veins remain green. New growth is most affected. Lack of iron in the soil, a high soil pH (over 7) that restricts availability of iron in the soil, and environmental conditions can all result in iron chlorosis. For detailed information on iron chlorosis see the IPM page “Iron Chlorosis of Trees and Shrubs” herein. Potted plants showing iron chlorosis can be watered with a fertilizer containing iron or a specific iron fertilizer such as chelated iron.
0
0
成长记
Wendy F. Samonte
2017年09月19日

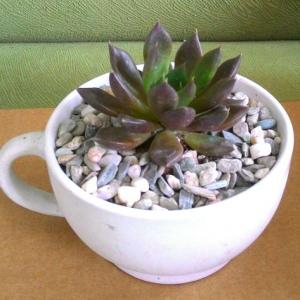
I new added a "Black Prince" in my "garden"

3
0
Fancy Loo:要常晒太阳喔
Summer:cool
成长记
Wendy F. Samonte
2017年09月19日

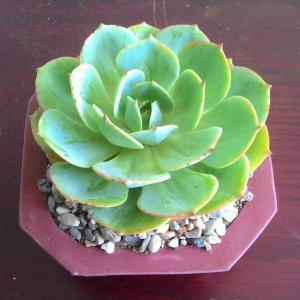
I new added a "Echeveria Imbricata Rose Cabbage" in my "garden"

4
0
成长记
Succulentplant101
2017年09月18日

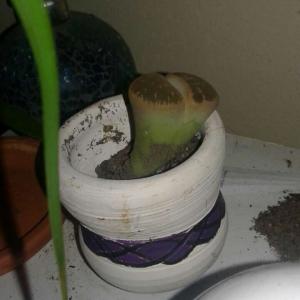
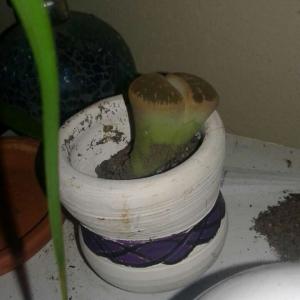
I new added a "Lithops" in my "garden"

1
0
cclecombe:I love these guys, I call them little booties whenever we see them 😂


