文章
Miss Chen
2018年09月10日

Himalayan blue poppies are one of the few flowers that produce an intense sky-blue blossom. In their native location in China, they can grow to more than 6 feet tall; in other locations, they average 20 to 28 inches tall. These poppies look best planted in mass displays or threaded throughout a border. These flowers are not a good choice for the impatient gardener; in some locations they may not bloom the first season. The foliage will die down for the winter and you should expect to see blooms the second year. If it is prevented from blooming the first time the bud sets, the poppy is more likely to become a perennial. These flowers are suitable for USDA zones 3 to 8.

Step 1
Select a site for the Himalayan blue poppies. These plants need partial, dappled shade and protection from strong, drying winds. The soil needs to be rich and well-drained and, in colder climates, it needs to be acidic. Several weeks before planting, dig up the soil, remove rocks and other garden debris and test the pH level. If the soil is too alkaline, amend it with sulfur. Add plenty of organic matter to enrich the soil.
Step 2
Plant the poppies in early spring. Dig a hole that is larger than the poppy's container. Remove it from the container and gently loosen the roots with your fingers. Place the poppy in the hole, add soil to fill in the hole and tamp down gently to remove air bubbles. Water gently to settle the soil. Space the poppies 18 to 24 inches apart.
Step 3
Water the poppies regularly, but do not over water; waterlogged plants can suffer from crown rot. However, do not let the soil dry out between waterings. Give them a light application of general fertilizer in the spring. Downy mildew can be a problem, especially in locations with high humidity. Spray with a fungicide at the first sign of mildew.
Step 4
Watch for the Himalayan blue poppies to bloom beginning in early summer and continuing through to early fall. Unless you want the seed to ripen, remove spent flower stems. After all growth dies down, cut the poppies to ground level. Use a plant marker to indicate the location of the poppies.

Step 5
Propagate the poppies from fresh ripe seed in the fall or spring. After the seeds have sprouted, thin the seedlings to 18 to 24 inches apart. Water well initially, but back off so as not to over water.

Step 1
Select a site for the Himalayan blue poppies. These plants need partial, dappled shade and protection from strong, drying winds. The soil needs to be rich and well-drained and, in colder climates, it needs to be acidic. Several weeks before planting, dig up the soil, remove rocks and other garden debris and test the pH level. If the soil is too alkaline, amend it with sulfur. Add plenty of organic matter to enrich the soil.
Step 2
Plant the poppies in early spring. Dig a hole that is larger than the poppy's container. Remove it from the container and gently loosen the roots with your fingers. Place the poppy in the hole, add soil to fill in the hole and tamp down gently to remove air bubbles. Water gently to settle the soil. Space the poppies 18 to 24 inches apart.
Step 3
Water the poppies regularly, but do not over water; waterlogged plants can suffer from crown rot. However, do not let the soil dry out between waterings. Give them a light application of general fertilizer in the spring. Downy mildew can be a problem, especially in locations with high humidity. Spray with a fungicide at the first sign of mildew.
Step 4
Watch for the Himalayan blue poppies to bloom beginning in early summer and continuing through to early fall. Unless you want the seed to ripen, remove spent flower stems. After all growth dies down, cut the poppies to ground level. Use a plant marker to indicate the location of the poppies.

Step 5
Propagate the poppies from fresh ripe seed in the fall or spring. After the seeds have sprouted, thin the seedlings to 18 to 24 inches apart. Water well initially, but back off so as not to over water.
0
0
成长记
DaniH
2018年09月09日
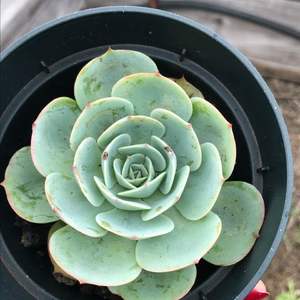
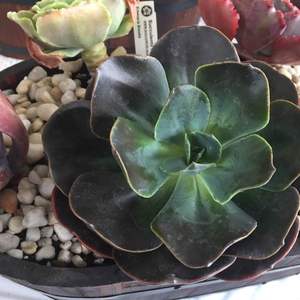
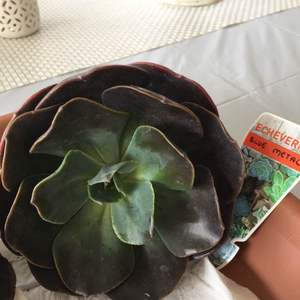
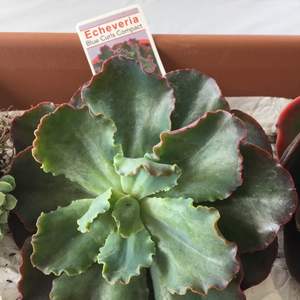
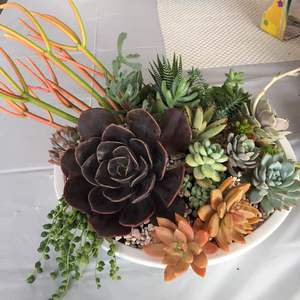
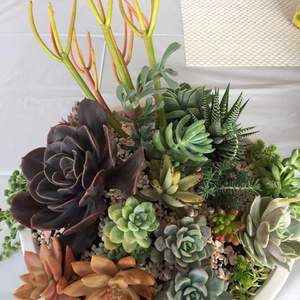
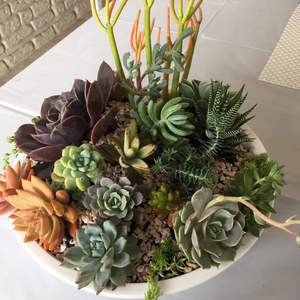
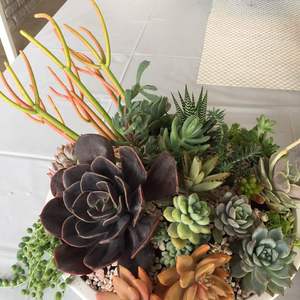
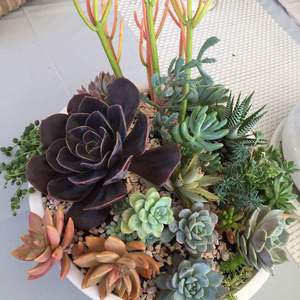
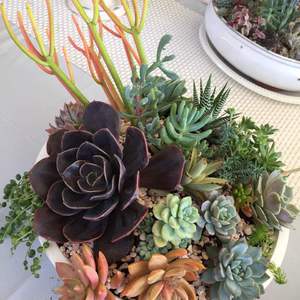
Ech Blue MEtal, Blue Bird, Lola, Pat’s Pink, Subcorymbrosa Lau, Sedum Clavatum, Haworthia Attentuata, Sedum Blue Feather, Sedum Pachyphyllum (blue jelly beans), Sedeveria Maialen, Kalanchoe Tomentosa Panda Plant, Oscularia Deltoids, Crassula Lanugin Pachystemon and Fire Sticks



2
0
文章
Miss Chen
2018年09月07日

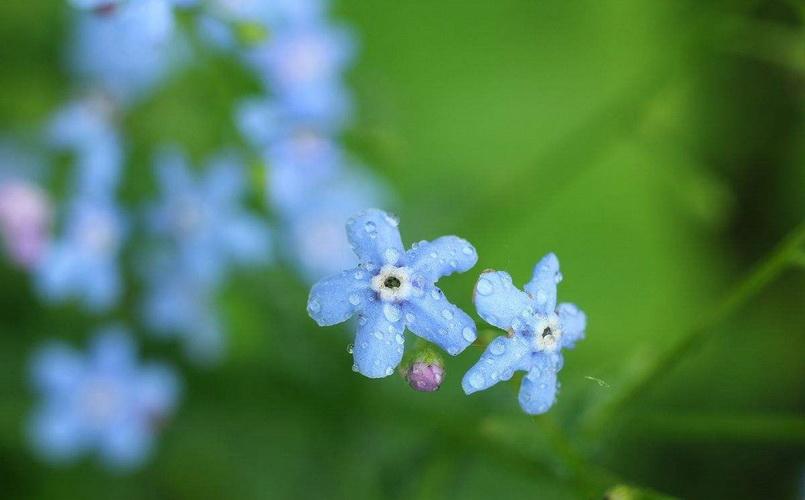
Delicate pale blue, or sometimes white and pink, forget-me-nots are a welcome sight after a long, snowy winter. Establishing forget-me-knots in your garden or yard is an easy task with great rewards. Forget-me-nots produce fantasy-like clouds of light blue that can provide quite a show-stopping display. They are a hardy perennial that will spread throughout your garden with very little effort on your part.

Step 1
Place potting soil in pots or six-pack inserts. Gently press the soil into the pot, but do not pack it too hard.
Step 2
Gently pour seeds from a packet into your hand. Forget-me-not seeds are very small; provided they are fresh, more than 90-percent of the seeds should germinate. Pinch a small amount of seeds and sprinkle them on top of the potting soil.
Step 3
Sprinkle more potting soil on top of the seeds so that there is about 1/8 inch of soil over the seeds. Press down to make sure the seeds have good contact with the soil, but do not pack the soil too hard.
Step 4
Water the soil. If your pots are in a cool location, cover them with plastic wrap to trap in heat, which aids in germination. The seeds should germinate within ten days. Let them grow for two weeks before transplanting them outdoors.
Step 5
Dig holes in the soil where you wish to transplant your forget-me-nots. Gently remove the plants from the six-pack plant pots and set them into the holes. Add soil around the stems and press lightly around the plants. Water only when your plants droop.
Step 6
Spread established forget-me-nots. Walk through the flowers as they begin to die off (in mid-June), and gently kick the plants to loosen and spread the seeds. You can also pull up a clump of flowers and shake them over areas where you would like to grow forget-me-nots the following year.

Step 1
Place potting soil in pots or six-pack inserts. Gently press the soil into the pot, but do not pack it too hard.
Step 2
Gently pour seeds from a packet into your hand. Forget-me-not seeds are very small; provided they are fresh, more than 90-percent of the seeds should germinate. Pinch a small amount of seeds and sprinkle them on top of the potting soil.
Step 3
Sprinkle more potting soil on top of the seeds so that there is about 1/8 inch of soil over the seeds. Press down to make sure the seeds have good contact with the soil, but do not pack the soil too hard.
Step 4
Water the soil. If your pots are in a cool location, cover them with plastic wrap to trap in heat, which aids in germination. The seeds should germinate within ten days. Let them grow for two weeks before transplanting them outdoors.
Step 5
Dig holes in the soil where you wish to transplant your forget-me-nots. Gently remove the plants from the six-pack plant pots and set them into the holes. Add soil around the stems and press lightly around the plants. Water only when your plants droop.

Step 6
Spread established forget-me-nots. Walk through the flowers as they begin to die off (in mid-June), and gently kick the plants to loosen and spread the seeds. You can also pull up a clump of flowers and shake them over areas where you would like to grow forget-me-nots the following year.
2
1
成长记
DaniH
2018年09月07日

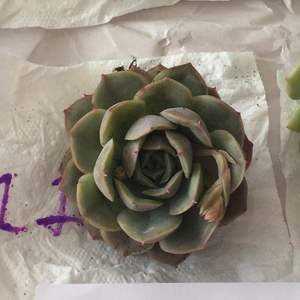
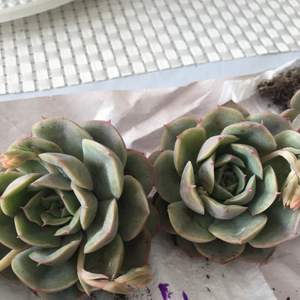
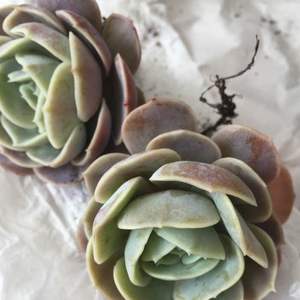
I now added "Echeveria Blue Surprise (Ech Lilacina Hybrid)" in my "garden"

0
0
文章
Miss Chen
2018年09月01日

Russian sage is a 3 to 5-foot tall perennial with purplish blue flowers and silver foliage. It has fragrant leaves and it blooms from mid-summer season to the fall. It is a good plant for fall color in the garden, to use for dried or cut flowers, or to attract butterflies. Russian sage can be propagated by division every three years in the spring season or fall.

Step 1
Make sure the plant isn't in active bloom and that the buds are dry. Russian sage is not in active bloom when the buds are dry, even though it may still look active.
Step 2
Cut down the stems to approximately 6 to 8 inches high with garden trimmers. After cutting, dig up the plant with a shovel, creating a wide circle around it to get as much rootball as can be salvaged.
Step 3
Remove soil around the roots and divide them into thirds if the plant is big enough, (in half if it is small). Pull the roots apart with your hands.
Step 4
Keep the roots in water while you are transplanting.
Step 5
Dig a new hole as deep as the length of the roots for divided plants with shovel, adding in manure and compost to add nutrients to the soil.

Step 6
Set the plant's crown at the surface of the dirt, pulling dirt around the plant's roots as you continue.
Step 7
Water Russian sage after the rootball has completely been covered in amended soil (soil with the added nutrients in step 5) and patted down (to ensure stability).
Step 8
Mulch around the plant when the ground is about to freeze, sometime before the first "hard freeze" in your area. Mulching prior to ground freeze will keep the plant insulated and ensure it survives the winter.

Step 1
Make sure the plant isn't in active bloom and that the buds are dry. Russian sage is not in active bloom when the buds are dry, even though it may still look active.
Step 2
Cut down the stems to approximately 6 to 8 inches high with garden trimmers. After cutting, dig up the plant with a shovel, creating a wide circle around it to get as much rootball as can be salvaged.
Step 3
Remove soil around the roots and divide them into thirds if the plant is big enough, (in half if it is small). Pull the roots apart with your hands.
Step 4
Keep the roots in water while you are transplanting.
Step 5
Dig a new hole as deep as the length of the roots for divided plants with shovel, adding in manure and compost to add nutrients to the soil.

Step 6
Set the plant's crown at the surface of the dirt, pulling dirt around the plant's roots as you continue.
Step 7
Water Russian sage after the rootball has completely been covered in amended soil (soil with the added nutrients in step 5) and patted down (to ensure stability).
Step 8
Mulch around the plant when the ground is about to freeze, sometime before the first "hard freeze" in your area. Mulching prior to ground freeze will keep the plant insulated and ensure it survives the winter.
0
0
文章
Miss Chen
2018年08月31日

Blue flowers are hard to find in the garden -- most lean toward purple hues. However, Evolvulus glomeratus "Blue Daze" is aptly named: The low-growing, herbaceous perennial features true-blue flowers that stand out against the attractive, olive-green leaves. Perfect for borders or containers, "Blue Daze" blooms all summer long when cared for properly.

Climate and Temperatures
"Blue Daze" is a warmth-loving plant. It is hardy in U.S. Department of Agriculture plant hardiness zones 8 through 11. In cooler climates, it is often grown as an annual or in a container that is brought indoors for the winter. Situate this plant where it will stay nice and warm. In fact, if you have a hot spot in your garden where other plants wilt, replace those plants with this flower -- "Blue Daze" likes it hot. It can even tolerate salty conditions, so if you're near the coast, plant this flower in a hanging container and watch it withstand the salty air. Most outdoor plants die at the first hint of freezing temperatures, so bring container plants indoors well before cool fall temperatures arise. Some "Blue Daze" plants can tolerate a light frost if they are surrounded by a thick layer of mulch.
Light and Location
For "Blue Daze" to bloom properly, it needs full sunlight. Each flower opens for only one day, but it is replaced by a new flower the next day. If the day is cloudy or the plant is shaded, the flower won't open and its brief life is wasted. Locate these plants -- including those grown in containers -- where they will get as much hot, direct sunlight as possible. As far as soil goes, "Blue Daze" tolerates a range of soils, including poor or sandy soil, as long as it is well drained. If you bring a container indoors for the winter, locate it in bright but indirect sunlight and in a cool location.
Food and Water
Because "Blue Daze" is such a prolific bloomer, it benefits from monthly applications of fertilizer during the growing season. Use a bloom-boosting 15-30-15 formulation, water-soluble fertilizer once a month, following the instructions for application on the package. These instructions vary depending on the brand, but in general, dilute 1 tablespoon of the fertilizer in 1 gallon of water and use this solution to water your plants. Because "Blue Daze" thrives in full, hot sunlight, it needs frequent watering. Water when the surface of the soil feels dry to the touch and frequently enough so that the soil is almost continually but barely moist. In the winter, they need little watering.

Pests and Problems
"Blue Daze" is a hardy plant. It does not suffer from serious pest or disease problems. The one thing it cannot tolerate is soggy soil. Extended periods of rain cause fungal problems to develop in the soil, which quickly destroy the shallow roots of the plant. Overwatering leads to the same result, as does poorly drained soils. Plants grown in containers should have drainage holes in the base to prevent this problem, and home gardeners should avoid planting "Blue Daze" in depressions or other locations that tend to collect water.

Climate and Temperatures
"Blue Daze" is a warmth-loving plant. It is hardy in U.S. Department of Agriculture plant hardiness zones 8 through 11. In cooler climates, it is often grown as an annual or in a container that is brought indoors for the winter. Situate this plant where it will stay nice and warm. In fact, if you have a hot spot in your garden where other plants wilt, replace those plants with this flower -- "Blue Daze" likes it hot. It can even tolerate salty conditions, so if you're near the coast, plant this flower in a hanging container and watch it withstand the salty air. Most outdoor plants die at the first hint of freezing temperatures, so bring container plants indoors well before cool fall temperatures arise. Some "Blue Daze" plants can tolerate a light frost if they are surrounded by a thick layer of mulch.
Light and Location
For "Blue Daze" to bloom properly, it needs full sunlight. Each flower opens for only one day, but it is replaced by a new flower the next day. If the day is cloudy or the plant is shaded, the flower won't open and its brief life is wasted. Locate these plants -- including those grown in containers -- where they will get as much hot, direct sunlight as possible. As far as soil goes, "Blue Daze" tolerates a range of soils, including poor or sandy soil, as long as it is well drained. If you bring a container indoors for the winter, locate it in bright but indirect sunlight and in a cool location.
Food and Water
Because "Blue Daze" is such a prolific bloomer, it benefits from monthly applications of fertilizer during the growing season. Use a bloom-boosting 15-30-15 formulation, water-soluble fertilizer once a month, following the instructions for application on the package. These instructions vary depending on the brand, but in general, dilute 1 tablespoon of the fertilizer in 1 gallon of water and use this solution to water your plants. Because "Blue Daze" thrives in full, hot sunlight, it needs frequent watering. Water when the surface of the soil feels dry to the touch and frequently enough so that the soil is almost continually but barely moist. In the winter, they need little watering.

Pests and Problems
"Blue Daze" is a hardy plant. It does not suffer from serious pest or disease problems. The one thing it cannot tolerate is soggy soil. Extended periods of rain cause fungal problems to develop in the soil, which quickly destroy the shallow roots of the plant. Overwatering leads to the same result, as does poorly drained soils. Plants grown in containers should have drainage holes in the base to prevent this problem, and home gardeners should avoid planting "Blue Daze" in depressions or other locations that tend to collect water.
0
0
文章
Miss Chen
2018年08月28日

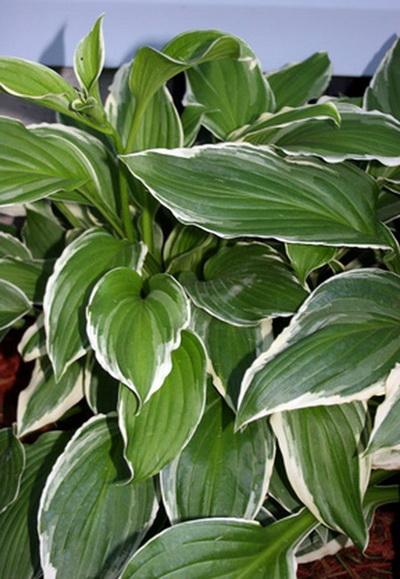
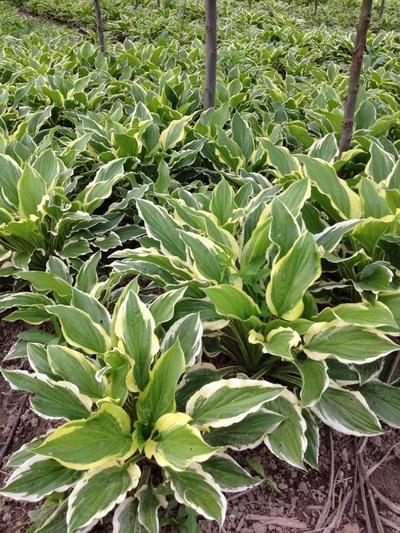
Hostas--also called plaintain lilies--are low-growing foliage plants with large, showy leaves that can range in color from deep green through chartreuse into deep blue, with white, lavender or purple blooms in August. There are also variegated cultivars featuring cream, white or yellow centers or borders. Hostas excel as ground cover and add texture and interest to shaded sections of landscapes. Hostas can perform well in Texas as long as they are of the proper cultivar and don't get too much scorching summer sun.
Step 1
Choose vigorous, healthy hostas cultivars with the best chances for growing well in Texas. According to the Texas A and M University Extension, good hostas varieties for Texas gardeners include the green-leafed lancifolia and royal standard cultivars, the blue-leafed blue cadet and blue angel types and the variegated sugar and cream and so sweet varieties. Examine the plant before purchase to make sure it is free of pests and diseases.
Step 2
Choose a planting site in shade or partial sun with afternoon shade and make sure it has rich, moist soil. For more specific recommendations on sunlight, check the cultivar; blue-leaf hostas require more shade than green-leaf varieties, and too much bright sun will bleach out the leaf coloration of the yellow cultivars.
Step 3
Prepare the garden bed in the spring by using a pitchfork to loosen soil to a depth of 12 to 15 inches, then mixing in a 2 to 4-inch layer of compost.
Step 4
Dig a planting hole twice the size of the container the hosta was sold in, and place the hosta in the hole so the top of the root ball is level with the soil surface. Backfill with garden soil and firmly tamp the soil into place but don't press so hard that the soil becomes compacted. Space hostas 36 inches apart if planting more than one. Water your hostas well after planting, and continue to water regularly to keep the soil moist.
Step 5
Apply a 2 1/2-inch layer of mulch to protect the roots, conserve moisture and provide a physical barrier against disease.
Step 6
Fertilize hostas in early spring with a balanced slow-release granular fertilizer in a 10-10-10 NPK formulation. According to the University of Georgia Cooperative Extension, the fertilizer should be applied at a rate of 1/2 pound per 100 square feet.
Step 7
Watch your hostas closely for damage from slugs, to which they are very susceptible. At the first sign of damage use slug bait or make a beer trap by leaving a saucer of beer by the hostas at night; slugs will crawl in and drown.

Step 1
Choose vigorous, healthy hostas cultivars with the best chances for growing well in Texas. According to the Texas A and M University Extension, good hostas varieties for Texas gardeners include the green-leafed lancifolia and royal standard cultivars, the blue-leafed blue cadet and blue angel types and the variegated sugar and cream and so sweet varieties. Examine the plant before purchase to make sure it is free of pests and diseases.
Step 2
Choose a planting site in shade or partial sun with afternoon shade and make sure it has rich, moist soil. For more specific recommendations on sunlight, check the cultivar; blue-leaf hostas require more shade than green-leaf varieties, and too much bright sun will bleach out the leaf coloration of the yellow cultivars.
Step 3
Prepare the garden bed in the spring by using a pitchfork to loosen soil to a depth of 12 to 15 inches, then mixing in a 2 to 4-inch layer of compost.
Step 4
Dig a planting hole twice the size of the container the hosta was sold in, and place the hosta in the hole so the top of the root ball is level with the soil surface. Backfill with garden soil and firmly tamp the soil into place but don't press so hard that the soil becomes compacted. Space hostas 36 inches apart if planting more than one. Water your hostas well after planting, and continue to water regularly to keep the soil moist.

Step 5
Apply a 2 1/2-inch layer of mulch to protect the roots, conserve moisture and provide a physical barrier against disease.
Step 6
Fertilize hostas in early spring with a balanced slow-release granular fertilizer in a 10-10-10 NPK formulation. According to the University of Georgia Cooperative Extension, the fertilizer should be applied at a rate of 1/2 pound per 100 square feet.
Step 7
Watch your hostas closely for damage from slugs, to which they are very susceptible. At the first sign of damage use slug bait or make a beer trap by leaving a saucer of beer by the hostas at night; slugs will crawl in and drown.
0
0
文章
Miss Chen
2018年08月27日

Featuring clouds of tiny light blue flowers on spikes and finely dissected, fragrant, gray-green leaves, Russian sage (Perovskia atriplicifolia) works well for perennial borders, mixed borders, wildlife gardens and other landscape areas. This drought-tolerant, woody-based perennial is hardy in U.S. Department of Agriculture plant hardiness zones 5 through 9, and grows 3 to 5 feet tall and 2 to 4 feet wide. Its two-lipped, tubular flowers appear in summer through fall.

Perennial and Mixed Borders
Russian sage works well as a perennial border and in mixed borders that include perennials, bulbs, shrubs, evergreens and other plants When paired with evergreens, the plant's blue flowers create an interesting color contrast. When summer's blue flowers fade, Russian sage continues to stand tall in warm climates and add vertical interest to garden beds. Standing tall is sometimes a problem for Russian sage, however, as it tends to flop over when it gets tall. To prevent this, plant supportive plants around it and make sure the sage gets full sun.
Plant Russian sage toward the back of the border, where it adds height and doesn't screen smaller plants. This low-maintenance perennial tolerates dry, rocky, chalky and alkaline soil, and its salt tolerance means it grows well in coastal gardens. Prune the plants to 6 inches above the soil surface in spring, as new growth provides the best flowering. Before and after pruning Russian sage, sterilize pruning shear blades by wiping them with a cloth dipped in rubbing alcohol.
Wildlife Gardens
Russian sage works beautifully in informal wildlife gardens, providing a hazy background of blooms that last all summer long and well into September. This fragrant plant attracts butterflies and hummingbirds while resisting more destructive garden visitors like deer and rabbits. The fine, crowded stems of the plant offer shelter to beneficial insects as well. For a natural look, plant your Russian sage in odd-numbered groups of three, five or seven plants. If you want to add an extra burst of color, consider pairing pink flowers with the sage for an attractive contrast.
Household Uses of Sage
The Russian sage is a distant relative of the mint family but is not the same as the sage commonly used as a spice. There are, however, still many Russian sage uses. Though the leaves of the Russian sage plant are slightly toxic and you should not eat them, the plant's flowers are edible and have a peppery flavor. You can use the leaves for garnish or steep them in a tea that many claim eases digestive discomfort. While you can't east Russian sage leaves, you can dry them to make a fragrant potpourri. You can also dry complete stalks of the Russian sage plant for use in dried flower arrangements.

Russian Sage Varieties
Cultivars of Russian sage have a range of uses in gardens too. Russian sage "Little Spire" (Perovskia atriplicifolia "Little Spire") grows 1 1/2 to 2 feet tall and wide, and provides informal hedging and edging for paths. This compact plant also grows well in containers. Russian sage "Filigran" (Perovskia "Filigran") grows 2 to 4 feet tall and 2 to 3 feet wide, featuring lacy silvery foliage, which looks decorative in an ornamental border. Russian sage "Longin" (Perovskia "Longin") grows 3 to 4 feet tall and 2 to 3 feet wide, and has an upright habit, making it a useful vertical contrast to rounded, bushy plants. "Little Spire," "Filigran" and "Longin" are hardy in USDA zones 5 through 9.

Perennial and Mixed Borders
Russian sage works well as a perennial border and in mixed borders that include perennials, bulbs, shrubs, evergreens and other plants When paired with evergreens, the plant's blue flowers create an interesting color contrast. When summer's blue flowers fade, Russian sage continues to stand tall in warm climates and add vertical interest to garden beds. Standing tall is sometimes a problem for Russian sage, however, as it tends to flop over when it gets tall. To prevent this, plant supportive plants around it and make sure the sage gets full sun.
Plant Russian sage toward the back of the border, where it adds height and doesn't screen smaller plants. This low-maintenance perennial tolerates dry, rocky, chalky and alkaline soil, and its salt tolerance means it grows well in coastal gardens. Prune the plants to 6 inches above the soil surface in spring, as new growth provides the best flowering. Before and after pruning Russian sage, sterilize pruning shear blades by wiping them with a cloth dipped in rubbing alcohol.
Wildlife Gardens
Russian sage works beautifully in informal wildlife gardens, providing a hazy background of blooms that last all summer long and well into September. This fragrant plant attracts butterflies and hummingbirds while resisting more destructive garden visitors like deer and rabbits. The fine, crowded stems of the plant offer shelter to beneficial insects as well. For a natural look, plant your Russian sage in odd-numbered groups of three, five or seven plants. If you want to add an extra burst of color, consider pairing pink flowers with the sage for an attractive contrast.
Household Uses of Sage
The Russian sage is a distant relative of the mint family but is not the same as the sage commonly used as a spice. There are, however, still many Russian sage uses. Though the leaves of the Russian sage plant are slightly toxic and you should not eat them, the plant's flowers are edible and have a peppery flavor. You can use the leaves for garnish or steep them in a tea that many claim eases digestive discomfort. While you can't east Russian sage leaves, you can dry them to make a fragrant potpourri. You can also dry complete stalks of the Russian sage plant for use in dried flower arrangements.

Russian Sage Varieties
Cultivars of Russian sage have a range of uses in gardens too. Russian sage "Little Spire" (Perovskia atriplicifolia "Little Spire") grows 1 1/2 to 2 feet tall and wide, and provides informal hedging and edging for paths. This compact plant also grows well in containers. Russian sage "Filigran" (Perovskia "Filigran") grows 2 to 4 feet tall and 2 to 3 feet wide, featuring lacy silvery foliage, which looks decorative in an ornamental border. Russian sage "Longin" (Perovskia "Longin") grows 3 to 4 feet tall and 2 to 3 feet wide, and has an upright habit, making it a useful vertical contrast to rounded, bushy plants. "Little Spire," "Filigran" and "Longin" are hardy in USDA zones 5 through 9.
0
0


