文章
Miss Chen
2022年05月14日

Rue is a short-lived perennial herb with a small, shrub-like growth habit. It features aromatic, blue-green foliage with a fern-like appearance. And in the summertime, it sports clusters of small yellow flowers that attract butterflies and other pollinators to the garden, as well as parasitic wasps. The ornamental herb has a moderate growth rate and should be planted in the spring after danger of frost has passed. Be aware that despite their past as a traditional use as a medicinal herb, rue leaves are toxic both to people1 and pets2.
Common Name Rue, common rue, garden rue, herb of grace
Botanical Name Ruta graveolens
Family Rutaceae
Plant Type Perennial, herb
Size 2–3 feet tall and wide
Sun Exposure Full sun
Soil Type Well-drained
Soil pH Acidic, neutral, alkaline (6.5 to 8.5)
Bloom Time Summer
Hardiness Zones 4–10 (USDA)
Native Area Europe
Toxicity Toxic to people, toxic to pets
How to Plant Rue
When to Plant
Rue is normally planted from potted nursery starts or from seeds in the garden once spring soil temperatures reach around 70 degrees Fahrenheit. Seeds will germinate in one to four weeks.

Selecting a Planting Site
If you choose a sunny site with good drainage for your rue plants, they almost certainly will thrive with virtually no care. Rue flowers are good candidates for tough sites and will even grow in gravel. If your garden has heavy or wet soil, consider container culture. Avoid putting the plants near walkways or other areas where you might come in contact with them, as the sap can cause skin irritation.3
Spacing, Depth, and Support
Smooth the soil of your garden site prior to planting, and break up any soil clumps. Then, simply scatter the seeds over the moist soil surface and slightly press them in, as they need light to germinate. Space plants around 1 to 2 feet apart. Do not allow seedlings to dry out. A support structure typically won’t be necessary, as rue naturally has an upright growth habit.
Rue Plant Care
Light
Rue grows best in full sun, meaning at least six hours of direct sunlight on most days. But partial shade is also tolerated. However, plants will produce fewer flowers in the shade.
Soil
Sharp drainage is important for healthy rue plants. Add sand, perlite, or vermiculite to the soil to help drainage. Or use raised beds with prepared soil in gardens where heavy clay dominates. Rue likes a moderately rich soil but can tolerate poor soils. And it can grow in a slightly acidic to slightly alkaline soil pH.
Water
Once established, common rue is very drought tolerant and is a good candidate for a xeriscape or rock garden. You won't need to water except for periods of extensive dry weather. Avoid overwatering, which can cause root rot.
Temperature and Humidity
Rue plants thrive in hot weather and low humidity, similar to their native habitat of Greece, Turkey, and Italy. However, the plants are tolerant of humidity as long as they have good soil drainage and air circulation around them.
Fertilizer
Do not fertilize rue plants. Excess nutrients will cause the plants to produce more foliage at the expense of the flowers.
Pollination
Garden pollinators, including bees and butterflies, are highly attracted to rue and assist it in its pollination.
Types of Rue
There are several varieties of rue, including:
‘Blue Beauty’: This plant has especially vivid blue-green leaves.
‘Jackman’s Blue’: This variety features a strong blue color and a potent aroma.
‘Variegata’: The leaves on this variety have some white in them.
Rue vs. Fenugreek
As another bitter herb that bears small yellow flowers, it's easy to confuse fenugreek (Trigonella foenum-graecum) with rue. Fenugreek, however, is an annual legume and does not have some of the toxic properties that rue flowers do. You can grow fenugreek in the sunny garden after all danger of frost has passed and use the ground seeds in curries or the leaves in salads.
Harvesting Rue
Rue is often harvested to use as dried flowers. And some people make sachets out of rue and use them to deter pests, including fleas and ants. Wear gloves and long sleeves when working with rue to protect your skin. Cut a mature plant at ground level with pruners. Then, hang it in a dark, dry place to dry until the leaves become brittle. Keep the fully dried rue in an airtight container until you’re ready to use it for sachets or other purposes.
How to Grow Rue in Pots
If you don’t have garden space or have heavy soil, container growth is a good option for rue. Choose a pot that’s around 12 to 16 inches wide and deep, and make sure it has drainage holes. An unglazed clay container is ideal because it will allow excess soil moisture to escape through its walls.
Pruning
Rue is a semi-woody perennial that flowers on new growth. To keep the plant vigorous and looking its best, cut stems back to around 6 inches in the early spring. Don’t wait too long, or you’ll end up pruning off some flower buds. You also can prune in the fall after flowering is finished.
Propagating Rue
It's easy to make new rue plants via stem cuttings. This is a quick and inexpensive way to replace mature plants that are nearing the end of their life cycle, as rue plants only live around five years. The best time to take cuttings is in the late summer from new growth, but be sure to wear protective clothing during the process. Here's how:
Cut roughly a 6-inch piece of stem from new growth.
Remove any foliage on the lower half of the cutting.
Plant the cutting in a container of moistened soilless potting mix.
Place in a clear bag to maintain moisture.
Keep the mix moist but not soggy. Once you feel resistance when you gently tug on the stem, you'll know roots have developed.
How to Grow Rue From Seed
Rue is easy to start from seeds in the garden or in trays. The soil must be at least 68 degrees Fahrenheit for germination, and some light must reach the seeds. When the seedlings develop at least two sets of true leaves, they can be transplanted into larger pots. Harden off seedlings before planting in the garden.
Rue plants will self-seed, sometimes aggressively, in warm regions. You can collect the brown seed capsules in late summer after flowering to plant elsewhere.
Potting and Repotting Rue
You can use any well-draining potting mix for rue in containers. Repotting is necessary when you see roots coming out of the drainage holes of the pot. Remember to wear protective clothing when repotting.
The bluish foliage of rue plants marries well with plants that have golden foliage, such as the gold cultivars of oregano, sage, or thyme. These herbs all like the same sunny, dry conditions and well-drained soil that rue thrives in, so they blend well in mixed containers.
Overwintering
In the northern portion of rue’s growing zones, add a layer of mulch around the plants to protect them over the winter. Aim to do this before frost hits in the fall.
Common Pests and Plant Diseases
Rue doesn’t have any major pest or disease issues. In fact, if you see caterpillars feeding on your rue plants, don't spray them. It's likely they are swallowtail butterfly caterpillars, which use rue as a host plant and benefit your entire garden. The primary disease issue that can affect rue is root rot from wet soils. So ensure that your plants are never waterlogged.

FAQ
Is rue easy to grow?
Rue requires very little maintenance as long as it has a sunny spot with well-draining soil.
How long does it take to grow rue?
Rue has a moderate growth rate and will germinate in one to four weeks.
Does rue come back every year?
Rue is a perennial, coming back every year, but it doesn't tend to be long-lived. However, it will self-seed to produce new plants in the garden.
Common Name Rue, common rue, garden rue, herb of grace
Botanical Name Ruta graveolens
Family Rutaceae
Plant Type Perennial, herb
Size 2–3 feet tall and wide
Sun Exposure Full sun
Soil Type Well-drained
Soil pH Acidic, neutral, alkaline (6.5 to 8.5)
Bloom Time Summer
Hardiness Zones 4–10 (USDA)
Native Area Europe
Toxicity Toxic to people, toxic to pets
How to Plant Rue
When to Plant
Rue is normally planted from potted nursery starts or from seeds in the garden once spring soil temperatures reach around 70 degrees Fahrenheit. Seeds will germinate in one to four weeks.

Selecting a Planting Site
If you choose a sunny site with good drainage for your rue plants, they almost certainly will thrive with virtually no care. Rue flowers are good candidates for tough sites and will even grow in gravel. If your garden has heavy or wet soil, consider container culture. Avoid putting the plants near walkways or other areas where you might come in contact with them, as the sap can cause skin irritation.3
Spacing, Depth, and Support
Smooth the soil of your garden site prior to planting, and break up any soil clumps. Then, simply scatter the seeds over the moist soil surface and slightly press them in, as they need light to germinate. Space plants around 1 to 2 feet apart. Do not allow seedlings to dry out. A support structure typically won’t be necessary, as rue naturally has an upright growth habit.
Rue Plant Care
Light
Rue grows best in full sun, meaning at least six hours of direct sunlight on most days. But partial shade is also tolerated. However, plants will produce fewer flowers in the shade.
Soil
Sharp drainage is important for healthy rue plants. Add sand, perlite, or vermiculite to the soil to help drainage. Or use raised beds with prepared soil in gardens where heavy clay dominates. Rue likes a moderately rich soil but can tolerate poor soils. And it can grow in a slightly acidic to slightly alkaline soil pH.
Water
Once established, common rue is very drought tolerant and is a good candidate for a xeriscape or rock garden. You won't need to water except for periods of extensive dry weather. Avoid overwatering, which can cause root rot.
Temperature and Humidity
Rue plants thrive in hot weather and low humidity, similar to their native habitat of Greece, Turkey, and Italy. However, the plants are tolerant of humidity as long as they have good soil drainage and air circulation around them.
Fertilizer
Do not fertilize rue plants. Excess nutrients will cause the plants to produce more foliage at the expense of the flowers.
Pollination
Garden pollinators, including bees and butterflies, are highly attracted to rue and assist it in its pollination.
Types of Rue
There are several varieties of rue, including:
‘Blue Beauty’: This plant has especially vivid blue-green leaves.
‘Jackman’s Blue’: This variety features a strong blue color and a potent aroma.
‘Variegata’: The leaves on this variety have some white in them.
Rue vs. Fenugreek
As another bitter herb that bears small yellow flowers, it's easy to confuse fenugreek (Trigonella foenum-graecum) with rue. Fenugreek, however, is an annual legume and does not have some of the toxic properties that rue flowers do. You can grow fenugreek in the sunny garden after all danger of frost has passed and use the ground seeds in curries or the leaves in salads.
Harvesting Rue
Rue is often harvested to use as dried flowers. And some people make sachets out of rue and use them to deter pests, including fleas and ants. Wear gloves and long sleeves when working with rue to protect your skin. Cut a mature plant at ground level with pruners. Then, hang it in a dark, dry place to dry until the leaves become brittle. Keep the fully dried rue in an airtight container until you’re ready to use it for sachets or other purposes.
How to Grow Rue in Pots
If you don’t have garden space or have heavy soil, container growth is a good option for rue. Choose a pot that’s around 12 to 16 inches wide and deep, and make sure it has drainage holes. An unglazed clay container is ideal because it will allow excess soil moisture to escape through its walls.
Pruning
Rue is a semi-woody perennial that flowers on new growth. To keep the plant vigorous and looking its best, cut stems back to around 6 inches in the early spring. Don’t wait too long, or you’ll end up pruning off some flower buds. You also can prune in the fall after flowering is finished.
Propagating Rue
It's easy to make new rue plants via stem cuttings. This is a quick and inexpensive way to replace mature plants that are nearing the end of their life cycle, as rue plants only live around five years. The best time to take cuttings is in the late summer from new growth, but be sure to wear protective clothing during the process. Here's how:
Cut roughly a 6-inch piece of stem from new growth.
Remove any foliage on the lower half of the cutting.
Plant the cutting in a container of moistened soilless potting mix.
Place in a clear bag to maintain moisture.
Keep the mix moist but not soggy. Once you feel resistance when you gently tug on the stem, you'll know roots have developed.
How to Grow Rue From Seed
Rue is easy to start from seeds in the garden or in trays. The soil must be at least 68 degrees Fahrenheit for germination, and some light must reach the seeds. When the seedlings develop at least two sets of true leaves, they can be transplanted into larger pots. Harden off seedlings before planting in the garden.
Rue plants will self-seed, sometimes aggressively, in warm regions. You can collect the brown seed capsules in late summer after flowering to plant elsewhere.
Potting and Repotting Rue
You can use any well-draining potting mix for rue in containers. Repotting is necessary when you see roots coming out of the drainage holes of the pot. Remember to wear protective clothing when repotting.
The bluish foliage of rue plants marries well with plants that have golden foliage, such as the gold cultivars of oregano, sage, or thyme. These herbs all like the same sunny, dry conditions and well-drained soil that rue thrives in, so they blend well in mixed containers.
Overwintering
In the northern portion of rue’s growing zones, add a layer of mulch around the plants to protect them over the winter. Aim to do this before frost hits in the fall.
Common Pests and Plant Diseases
Rue doesn’t have any major pest or disease issues. In fact, if you see caterpillars feeding on your rue plants, don't spray them. It's likely they are swallowtail butterfly caterpillars, which use rue as a host plant and benefit your entire garden. The primary disease issue that can affect rue is root rot from wet soils. So ensure that your plants are never waterlogged.

FAQ
Is rue easy to grow?
Rue requires very little maintenance as long as it has a sunny spot with well-draining soil.
How long does it take to grow rue?
Rue has a moderate growth rate and will germinate in one to four weeks.
Does rue come back every year?
Rue is a perennial, coming back every year, but it doesn't tend to be long-lived. However, it will self-seed to produce new plants in the garden.
0
0
文章
Miss Chen
2022年03月18日

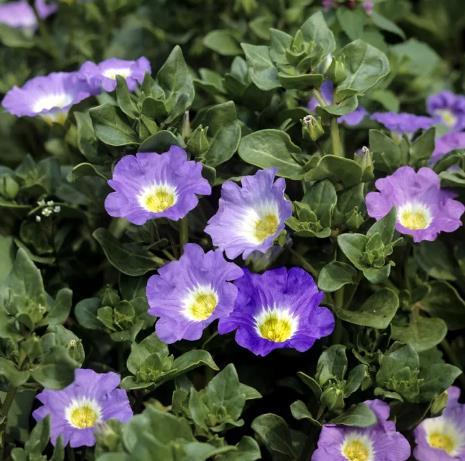
You might mistake nolana for a morning glory at first glance, but this flowering plant is actually a separate species, sometimes referred to as the Chilean bellflower. With blue or violet blooms and a tendency to creep, this plant makes a great groundcover plant or a flowering spiller in a container. It’s an annual in cool-weather climates and a perennial in warmer areas (hardiness zones 10 and 11).
It’s interesting to note that this plant is actually a member of the nightshade family. You might know nightshades by their edible types, like tomatoes, potatoes, and peppers. This type of nightshade, however, gains its fame for its beautiful blooms all summer long.
Botanical Name Nolana
Common Name Chilean bellflower
Plant Type Annual or perennial
Mature Size 6 to 12 inches tall and wide
Sun Exposure Full to part sun
Soil Type Well-drained
Soil pH Slightly acidic
Bloom Time Summer
Flower Color Blue, blue-violet, pink
Hardiness Zones 10, 11
Native Area Chile and Peru
How to Grow Nolana
Growing nolana is not complicated but does require understanding what these plants need to thrive--which isn't much! First, ensure that you have a location with plenty of sunlight—8 hours of direct sun is preferable. Second, make sure that the soil drains well. Third, don't worry about watering unless conditions become extremely hot and dry for an extended period of time.
If you understand these basic growing requirements, along with the more detailed information on growing conditions, you'll have a happy, healthy plant to reward you with beautiful blue blooms all summer long.
Light
Nolana is a sun-loving plant and thrives when planted in full sun. This plant requires 8 hours of sunlight a day for best blooming. It might survive, but won't thrive, if planted in partial shade.
Soil
While nolana is tolerant of a variety of soil types (including sandy or rocky conditions), one condition it cannot tolerate is too much water. Be sure that you plant it in very well-drained soil, otherwise it might be subject to rot.
Drought tolerance makes nolana a great option for raised garden beds, container gardens, and rock walls, if sufficient drainage is in place. Use a layer of gravel to enhance drainage and ensure that its roots don’t become waterlogged.
Water
Nolana plants are moisture management masters and they don’t require much in the way of regular watering. The foliage of these plants excretes salt and features hairy filaments on the underside of the leaves, which serves to attract moisture.
Do not water nolana on a regular basis unless there is a period of intense heat with little or no rainfall. If you notice that the blooms begin to wilt, you can lightly water the plant.
Temperature and Humidity
Native to Chile and Peru, nolana does best in hot, dry climates. The plant is well-suited to making the most of very little water and dry soil is preferred to overly damp conditions.
In an ideal climate (typically hardiness zones 10 and 11), this plant is a hardy perennial. However, it also grows well across a variety of climates as a lovely annual. If you’re willing to replant nolana each year, you can grow this plant in hardiness zones 2 through 9 as well.
Fertilizer
There’s no real need to fertilize nolana. This plant does a lot with a little, is happiest to grow in well-drained soil, and isn’t particular about nutrient levels. If it's receiving sufficient sun, you can expect to enjoy beautiful blooms all summer long without any fertilizer.
Propagating Nolana
Nolana is notoriously difficult to propagate by cuttings or division; it is generally best grown from seed.
Varieties of Nolana
Nolana paradoxa: The most popular variety of nolana, this plant features blue, trumpet-shaped blooms and grows best in hot weather.
Nolana humifusa ‘Little Bells’: Like other types of nolanas, this plant is known for its trailing nature. What makes it stand out, however, is its light blue blooms with distinctive purple veining in the flower throat.
Growing in Containers
The cascading nature of nolana plants makes this plant a good option in a container garden These plants will share space with other varieties while adding greenery and blooms that spill over the edge of the container, hanging planter, or rock wall. Because nolana requires very little water, be sure to plant it in combination with plants that have the same water and sunlight requirements
There is not much you need to do differently to grow nolana in containers—other than ensure that there is plenty of drainage. As mentioned earlier, these plants can easily suffer from rot if they’re in damp, soggy conditions. Use a layer of pebbles or gravel at the bottom of the container, or add compost to the soil mixture to improve drainage.
Starting From Seeds
If you want to grow nolana in your garden, you’ll likely be starting from seeds because nolana transplants are not often available at nurseries. Fortunately, nolana is not overly difficult to start from seed.
To start nolana plants from seed, sow seeds in the spring—about 4 to 6 weeks before the last expected frost. Place the seeds in starter trays and cover them with a thin layer of soil or sand. Keep the medium moist until germination occurs.
When the plants have achieved a few inches of growth, thin seedlings 4 to 8 inches apart to give the root systems room to grow. Provide as much light as possible to avoid the seedlings becoming leggy. After the last frost, transplant to your desired outdoor location.
Landscape Uses
The easy-growing nature of nolana makes it a good choice for a variety of landscaping uses. It especially shines as a flowering plant for use in water-wise landscapes, called xeriscaping. Because nolana doesn’t require much attention or water, it's a great addition to a low-maintenance garden.
Because it has a creeping nature and grows where other plants won’t, nolana is also a popular choice as a groundcover. Even if your landscape environment has rocky or sandy soil, nolana does exceptionally well.
It’s interesting to note that this plant is actually a member of the nightshade family. You might know nightshades by their edible types, like tomatoes, potatoes, and peppers. This type of nightshade, however, gains its fame for its beautiful blooms all summer long.
Botanical Name Nolana
Common Name Chilean bellflower
Plant Type Annual or perennial
Mature Size 6 to 12 inches tall and wide
Sun Exposure Full to part sun
Soil Type Well-drained
Soil pH Slightly acidic
Bloom Time Summer
Flower Color Blue, blue-violet, pink
Hardiness Zones 10, 11
Native Area Chile and Peru
How to Grow Nolana
Growing nolana is not complicated but does require understanding what these plants need to thrive--which isn't much! First, ensure that you have a location with plenty of sunlight—8 hours of direct sun is preferable. Second, make sure that the soil drains well. Third, don't worry about watering unless conditions become extremely hot and dry for an extended period of time.
If you understand these basic growing requirements, along with the more detailed information on growing conditions, you'll have a happy, healthy plant to reward you with beautiful blue blooms all summer long.
Light
Nolana is a sun-loving plant and thrives when planted in full sun. This plant requires 8 hours of sunlight a day for best blooming. It might survive, but won't thrive, if planted in partial shade.
Soil
While nolana is tolerant of a variety of soil types (including sandy or rocky conditions), one condition it cannot tolerate is too much water. Be sure that you plant it in very well-drained soil, otherwise it might be subject to rot.
Drought tolerance makes nolana a great option for raised garden beds, container gardens, and rock walls, if sufficient drainage is in place. Use a layer of gravel to enhance drainage and ensure that its roots don’t become waterlogged.
Water
Nolana plants are moisture management masters and they don’t require much in the way of regular watering. The foliage of these plants excretes salt and features hairy filaments on the underside of the leaves, which serves to attract moisture.
Do not water nolana on a regular basis unless there is a period of intense heat with little or no rainfall. If you notice that the blooms begin to wilt, you can lightly water the plant.
Temperature and Humidity
Native to Chile and Peru, nolana does best in hot, dry climates. The plant is well-suited to making the most of very little water and dry soil is preferred to overly damp conditions.
In an ideal climate (typically hardiness zones 10 and 11), this plant is a hardy perennial. However, it also grows well across a variety of climates as a lovely annual. If you’re willing to replant nolana each year, you can grow this plant in hardiness zones 2 through 9 as well.
Fertilizer
There’s no real need to fertilize nolana. This plant does a lot with a little, is happiest to grow in well-drained soil, and isn’t particular about nutrient levels. If it's receiving sufficient sun, you can expect to enjoy beautiful blooms all summer long without any fertilizer.
Propagating Nolana
Nolana is notoriously difficult to propagate by cuttings or division; it is generally best grown from seed.
Varieties of Nolana
Nolana paradoxa: The most popular variety of nolana, this plant features blue, trumpet-shaped blooms and grows best in hot weather.
Nolana humifusa ‘Little Bells’: Like other types of nolanas, this plant is known for its trailing nature. What makes it stand out, however, is its light blue blooms with distinctive purple veining in the flower throat.
Growing in Containers
The cascading nature of nolana plants makes this plant a good option in a container garden These plants will share space with other varieties while adding greenery and blooms that spill over the edge of the container, hanging planter, or rock wall. Because nolana requires very little water, be sure to plant it in combination with plants that have the same water and sunlight requirements
There is not much you need to do differently to grow nolana in containers—other than ensure that there is plenty of drainage. As mentioned earlier, these plants can easily suffer from rot if they’re in damp, soggy conditions. Use a layer of pebbles or gravel at the bottom of the container, or add compost to the soil mixture to improve drainage.

Starting From Seeds
If you want to grow nolana in your garden, you’ll likely be starting from seeds because nolana transplants are not often available at nurseries. Fortunately, nolana is not overly difficult to start from seed.
To start nolana plants from seed, sow seeds in the spring—about 4 to 6 weeks before the last expected frost. Place the seeds in starter trays and cover them with a thin layer of soil or sand. Keep the medium moist until germination occurs.
When the plants have achieved a few inches of growth, thin seedlings 4 to 8 inches apart to give the root systems room to grow. Provide as much light as possible to avoid the seedlings becoming leggy. After the last frost, transplant to your desired outdoor location.
Landscape Uses
The easy-growing nature of nolana makes it a good choice for a variety of landscaping uses. It especially shines as a flowering plant for use in water-wise landscapes, called xeriscaping. Because nolana doesn’t require much attention or water, it's a great addition to a low-maintenance garden.
Because it has a creeping nature and grows where other plants won’t, nolana is also a popular choice as a groundcover. Even if your landscape environment has rocky or sandy soil, nolana does exceptionally well.
0
0
文章
Miss Chen
2022年03月05日

Native to the Cebu island in the Philippines, the Cebu blue pothos (Epipremnum pinnatum 'Cebu Blue') is a unique variety of pothos that is highly sought after due to its stunning foliage. Characterized by thin and silvery green-blue leaves, this Instagram-worthy pothos is delightfully easy to keep happy indoors. Unfortunately, as a part of the Epipremnum genus, this pothos is considered toxic to both cats and dogs, so be sure to keep it out of reach if you have pets at home1.
Pothos vs. Philodendron: What's the Difference?
Common Name Cebu blue pothos, blue pothos
Botanical Name Epipremnum pinnatum 'Cebu Blue'
Family Araceae
Plant Type Evergreen, vine
Mature Size 8 ft. long indoors, 40 ft. long outdoors
Sun Exposure Partial
Soil Type Moist but well-drained
Soil pH Acidic, neutral, alkaline
Hardiness Zones 9-11, USA
Native Area Asia
Cebu Blue Pothos Care
As with most of its relatives in the pothos family, the Cebu blue pothos is easy to grow and care for. While it grows naturally outdoors in the Philippines, this pothos is most commonly grown indoors as a houseplant in the United States.
There are two unique growth phases of the Cebu blue pothos: juvenile and mature. The juvenile phase is the most recognizable and is characterized by the familiar small, elongated oval leaves that are silvery blue-green in color. The mature phase is usually only observed in plants that are grown outdoors and is characterized by larger green leaves that develop fenestrations over time.
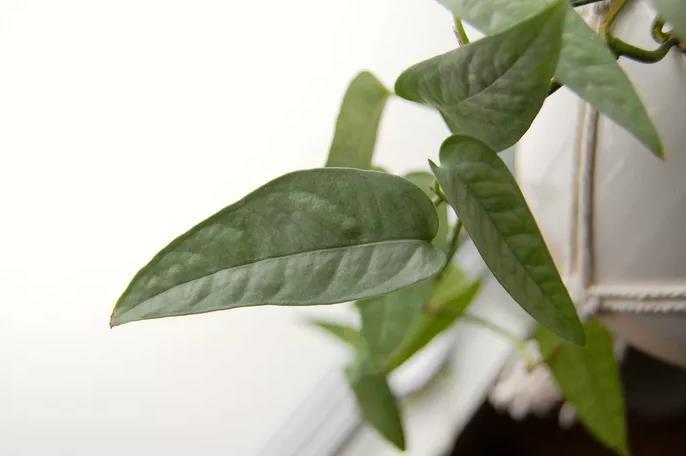
When it comes to care, the biggest difference between these two phases is the growth habit—while all Cebu blue pothos can be trained to grow up a moss pole or trellis, mature Cebu blue pothos are vigorous climbers and do not grow well without support. Otherwise, both juvenile and mature Cebu blue pothos are relatively easy to grow.
Light
To encourage strong, healthy growth, choose a location for your Cebu blue pothos that receives medium to bright indirect light. Unlike other varieties of pothos such as golden pothos or jade pothos, Cebu blue pothos do not do well in low light for extended periods of time. It is also best to avoid direct sunlight as their leaves burn easily.
Soil
Like all pothos plants, the Cebu blue pothos requires moist but well-draining soil. A mixture of one part potting soil, one part orchid bark, and one part perlite provides the perfect amount of drainage.
Water
Allow the top 1 to 2 inches of soil to dry between waterings and then water thoroughly, allowing the excess water to drain from the bottom of the pot. The Cebu blue pothos can handle some extended periods between watering if needed but it will grow best with regular watering. Keep in mind that in the winter months, you should cut back on watering slightly to avoid overwatering while the plant is dormant.
Temperature and Humidity
While the Cebu blue pothos is native to the tropical climate of the Philippines, it does surprisingly well growing indoors. If possible, provide your Cebu blue pothos with extra humidity which will encourage vigorous growth. Placing a humidifier nearby is one of the best ways to increase humidity around a plant, or you can choose a naturally humid location such as a bathroom, laundry room, or kitchen to display your plant. This pothos does not tolerate cold temperatures, so avoid drafty windows in the winter.
Fertilizer
During the spring and summer, apply a balanced liquid fertilizer once a month. Stop fertilizing in the early fall months as the pothos begins to enter dormancy.
Propagating Cebu Blue Pothos
Cebu blue pothos are easy and fun to propagate. Propagating is a great way to repurpose stem cuttings from pruning, or encourage a fuller growth habit. Since these plants can be difficult to come by, propagating is also a great way to create new plants to share with friends or fellow plant lovers.
There are two ways to propagate Cebu blue pothos: in water and in sphagnum moss. To propagate this pothos in water, follow these steps:
Take cuttings from your plant using a pair of sharp pruning shears or scissors. Ensure there are at least 5 to 6 leaves on each stem cutting.
Remove the lower 2 to 3 leaves from the fresh cuttings to expose the nodes along the stem.
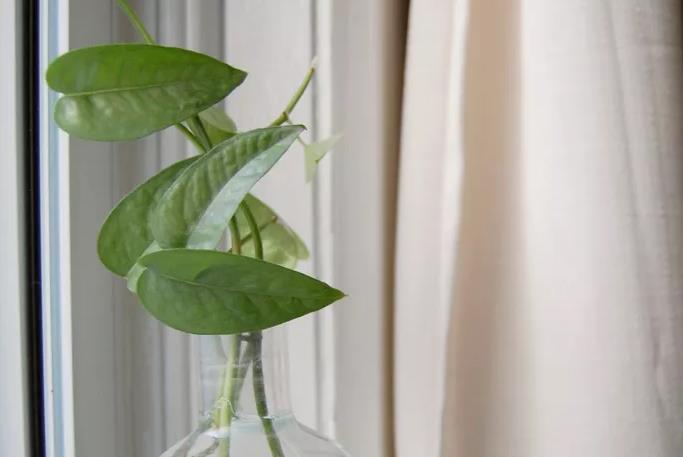
Place the stem cuttings in water, submerging the exposed nodes while leaving the remaining leaves above water.
Change the water every week to keep it fresh. Roots should begin growing within 2-3 weeks.
Once the roots are at least 1 to 2 inches long, the cuttings can be transferred to soil.
Fill a small pot with a well-draining potting mixture and moisten the soil slightly.
Transfer the rooted cuttings into the pot and place it in a location that receives medium to bright indirect light. Keep the soil evenly moist for the first 1 to 2 weeks to help the roots acclimate, and then resume a regular watering schedule.
To propagate a Cebu blue pothos in sphagnum moss, follow these steps:
Before you start, place your sphagnum moss in a bowl of water to soak for 10 to 15 minutes.
While the moss is soaking, take cuttings from your plant using a pair of sharp pruning shears or scissors. Ensure there are at least 5 to 6 leaves on each stem cutting.
Remove the lower 2 to 3 leaves from the fresh cuttings to expose the nodes along the stem.
Drain the water from the sphagnum moss and squeeze the leftover water from the moss—then place the moss in a small pot or container (clear plastic pots are great for this).
Place the fresh cuttings in the sphagnum moss—ensuring that the exposed nodes are fully covered by moss while the leaves of the cuttings are exposed to air.
To help increase humidity around the moss, cover the pot or container with a plastic resealable bag, ensuring that the leaves are left out of the bag.
Keep the moss evenly moist (but not soaking) by misting it every week. Roots should begin to form within 2 to 3 weeks. Resist the urge to check in on the roots too early to avoid damaging them.
Once the roots are at least 1 to 2 inches long, you can begin transferring the cuttings to soil. Gently remove the cuttings from the sphagnum moss. Don’t worry too much about picking any moss off that is stuck to the roots as they are delicate. Any leftover moss will get mixed in with the new soil mixture.
Fill a small pot with a well-draining potting mixture and moisten the soil slightly.
Transfer the rooted cuttings into the pot and place it in a location that receives medium to bright indirect light. Keep the soil evenly moist for the first 1 to 2 weeks to help the roots acclimate, and then resume a regular watering schedule.
Common Pests
This pothos is susceptible to some common houseplant pests that you should keep an eye out for. Mealybugs and scale are sap-sucking pests that damage the leaves of the plant over time. They both leave a sticky residue on the leaves and stem of a plant which is one of the first indications that you are dealing with an infestation. Fungus gnats are another common houseplant pest that are attracted to pothos plants thanks to their moist soil. These flying pests lay their eggs in the soil, and their larvae feed on the plant’s root system.
Common Problems With Cebu Blue Pothos
The most common problems with Cebu blue pothos arise from improper watering or light conditions. For the most part however, these pothos are relatively problem-free.
Leaves Turning Yellow
One of the most common problems with Cebu blue pothos is yellowing leaves. Unfortunately, yellow leaves can be the result of a number of different problems—from too much light, underwatering, and to lack of humidity. It is best to assess your plant’s unique growing situation to figure out what the root cause of the yellowing leaves may be.
Wilting or Curled Leaves
If your Cebu blue pothos is exhibiting wilting or curled leaves, it most likely needs a good watering. The leaves should return to normal a few hours after being watered. If the leaves don’t perk back up, it may mean that the roots of the plant have dried up due to underwatering, and you should check the root system to be sure. If the roots are dried and shriveled, you can propagate the healthy stems of the plant to bring your pothos back to life.
Slow Growth
The most common cause of delayed growth for Cebu blue pothos is lack of light. Try moving your plant to a location that receives bright, indirect light to encourage more vigorous growth.
FAQ
Do Cebu blue pothos grow fast?
Cebu blue pothos are considered fast growers under the right conditions. If you feel that your pothos is growing slowly, ensure that it is receiving enough light and water to support healthy growth.
Why does my Cebu blue pothos have yellow leaves?
Unfortunately, yellow leaves can be the result of a number of different problems—from too much light to underwatering, to lack of humidity. It is best to assess your plant’s unique growing situation to figure out what the root cause of the yellowing leaves may be.
Learn More: Why Are My Pothos Leaves Turning Yellow?
Do Cebu blue pothos climb?
Cebu blue pothos, like all types of pothos, are vining epiphytes that naturally climb trees and large plants in their native environment. Juvenile Cebu blue pothos can also be successfully grown in hanging planters, but mature plants are vigorous climbers that require a pole or trellis in order to thrive.
Learn More: How to Create a Moss Pole for Your Indoor Plants
Pothos vs. Philodendron: What's the Difference?
Common Name Cebu blue pothos, blue pothos
Botanical Name Epipremnum pinnatum 'Cebu Blue'
Family Araceae
Plant Type Evergreen, vine
Mature Size 8 ft. long indoors, 40 ft. long outdoors
Sun Exposure Partial
Soil Type Moist but well-drained
Soil pH Acidic, neutral, alkaline
Hardiness Zones 9-11, USA
Native Area Asia
Cebu Blue Pothos Care
As with most of its relatives in the pothos family, the Cebu blue pothos is easy to grow and care for. While it grows naturally outdoors in the Philippines, this pothos is most commonly grown indoors as a houseplant in the United States.
There are two unique growth phases of the Cebu blue pothos: juvenile and mature. The juvenile phase is the most recognizable and is characterized by the familiar small, elongated oval leaves that are silvery blue-green in color. The mature phase is usually only observed in plants that are grown outdoors and is characterized by larger green leaves that develop fenestrations over time.

When it comes to care, the biggest difference between these two phases is the growth habit—while all Cebu blue pothos can be trained to grow up a moss pole or trellis, mature Cebu blue pothos are vigorous climbers and do not grow well without support. Otherwise, both juvenile and mature Cebu blue pothos are relatively easy to grow.
Light
To encourage strong, healthy growth, choose a location for your Cebu blue pothos that receives medium to bright indirect light. Unlike other varieties of pothos such as golden pothos or jade pothos, Cebu blue pothos do not do well in low light for extended periods of time. It is also best to avoid direct sunlight as their leaves burn easily.
Soil
Like all pothos plants, the Cebu blue pothos requires moist but well-draining soil. A mixture of one part potting soil, one part orchid bark, and one part perlite provides the perfect amount of drainage.
Water
Allow the top 1 to 2 inches of soil to dry between waterings and then water thoroughly, allowing the excess water to drain from the bottom of the pot. The Cebu blue pothos can handle some extended periods between watering if needed but it will grow best with regular watering. Keep in mind that in the winter months, you should cut back on watering slightly to avoid overwatering while the plant is dormant.
Temperature and Humidity
While the Cebu blue pothos is native to the tropical climate of the Philippines, it does surprisingly well growing indoors. If possible, provide your Cebu blue pothos with extra humidity which will encourage vigorous growth. Placing a humidifier nearby is one of the best ways to increase humidity around a plant, or you can choose a naturally humid location such as a bathroom, laundry room, or kitchen to display your plant. This pothos does not tolerate cold temperatures, so avoid drafty windows in the winter.
Fertilizer
During the spring and summer, apply a balanced liquid fertilizer once a month. Stop fertilizing in the early fall months as the pothos begins to enter dormancy.
Propagating Cebu Blue Pothos
Cebu blue pothos are easy and fun to propagate. Propagating is a great way to repurpose stem cuttings from pruning, or encourage a fuller growth habit. Since these plants can be difficult to come by, propagating is also a great way to create new plants to share with friends or fellow plant lovers.
There are two ways to propagate Cebu blue pothos: in water and in sphagnum moss. To propagate this pothos in water, follow these steps:
Take cuttings from your plant using a pair of sharp pruning shears or scissors. Ensure there are at least 5 to 6 leaves on each stem cutting.
Remove the lower 2 to 3 leaves from the fresh cuttings to expose the nodes along the stem.
Place the stem cuttings in water, submerging the exposed nodes while leaving the remaining leaves above water.
Change the water every week to keep it fresh. Roots should begin growing within 2-3 weeks.
Once the roots are at least 1 to 2 inches long, the cuttings can be transferred to soil.
Fill a small pot with a well-draining potting mixture and moisten the soil slightly.
Transfer the rooted cuttings into the pot and place it in a location that receives medium to bright indirect light. Keep the soil evenly moist for the first 1 to 2 weeks to help the roots acclimate, and then resume a regular watering schedule.
To propagate a Cebu blue pothos in sphagnum moss, follow these steps:
Before you start, place your sphagnum moss in a bowl of water to soak for 10 to 15 minutes.
While the moss is soaking, take cuttings from your plant using a pair of sharp pruning shears or scissors. Ensure there are at least 5 to 6 leaves on each stem cutting.
Remove the lower 2 to 3 leaves from the fresh cuttings to expose the nodes along the stem.
Drain the water from the sphagnum moss and squeeze the leftover water from the moss—then place the moss in a small pot or container (clear plastic pots are great for this).
Place the fresh cuttings in the sphagnum moss—ensuring that the exposed nodes are fully covered by moss while the leaves of the cuttings are exposed to air.
To help increase humidity around the moss, cover the pot or container with a plastic resealable bag, ensuring that the leaves are left out of the bag.
Keep the moss evenly moist (but not soaking) by misting it every week. Roots should begin to form within 2 to 3 weeks. Resist the urge to check in on the roots too early to avoid damaging them.
Once the roots are at least 1 to 2 inches long, you can begin transferring the cuttings to soil. Gently remove the cuttings from the sphagnum moss. Don’t worry too much about picking any moss off that is stuck to the roots as they are delicate. Any leftover moss will get mixed in with the new soil mixture.
Fill a small pot with a well-draining potting mixture and moisten the soil slightly.
Transfer the rooted cuttings into the pot and place it in a location that receives medium to bright indirect light. Keep the soil evenly moist for the first 1 to 2 weeks to help the roots acclimate, and then resume a regular watering schedule.
Common Pests
This pothos is susceptible to some common houseplant pests that you should keep an eye out for. Mealybugs and scale are sap-sucking pests that damage the leaves of the plant over time. They both leave a sticky residue on the leaves and stem of a plant which is one of the first indications that you are dealing with an infestation. Fungus gnats are another common houseplant pest that are attracted to pothos plants thanks to their moist soil. These flying pests lay their eggs in the soil, and their larvae feed on the plant’s root system.
Common Problems With Cebu Blue Pothos
The most common problems with Cebu blue pothos arise from improper watering or light conditions. For the most part however, these pothos are relatively problem-free.
Leaves Turning Yellow
One of the most common problems with Cebu blue pothos is yellowing leaves. Unfortunately, yellow leaves can be the result of a number of different problems—from too much light, underwatering, and to lack of humidity. It is best to assess your plant’s unique growing situation to figure out what the root cause of the yellowing leaves may be.

Wilting or Curled Leaves
If your Cebu blue pothos is exhibiting wilting or curled leaves, it most likely needs a good watering. The leaves should return to normal a few hours after being watered. If the leaves don’t perk back up, it may mean that the roots of the plant have dried up due to underwatering, and you should check the root system to be sure. If the roots are dried and shriveled, you can propagate the healthy stems of the plant to bring your pothos back to life.
Slow Growth
The most common cause of delayed growth for Cebu blue pothos is lack of light. Try moving your plant to a location that receives bright, indirect light to encourage more vigorous growth.
FAQ
Do Cebu blue pothos grow fast?
Cebu blue pothos are considered fast growers under the right conditions. If you feel that your pothos is growing slowly, ensure that it is receiving enough light and water to support healthy growth.
Why does my Cebu blue pothos have yellow leaves?
Unfortunately, yellow leaves can be the result of a number of different problems—from too much light to underwatering, to lack of humidity. It is best to assess your plant’s unique growing situation to figure out what the root cause of the yellowing leaves may be.
Learn More: Why Are My Pothos Leaves Turning Yellow?
Do Cebu blue pothos climb?
Cebu blue pothos, like all types of pothos, are vining epiphytes that naturally climb trees and large plants in their native environment. Juvenile Cebu blue pothos can also be successfully grown in hanging planters, but mature plants are vigorous climbers that require a pole or trellis in order to thrive.
Learn More: How to Create a Moss Pole for Your Indoor Plants
0
0
文章
Miss Chen
2022年01月15日

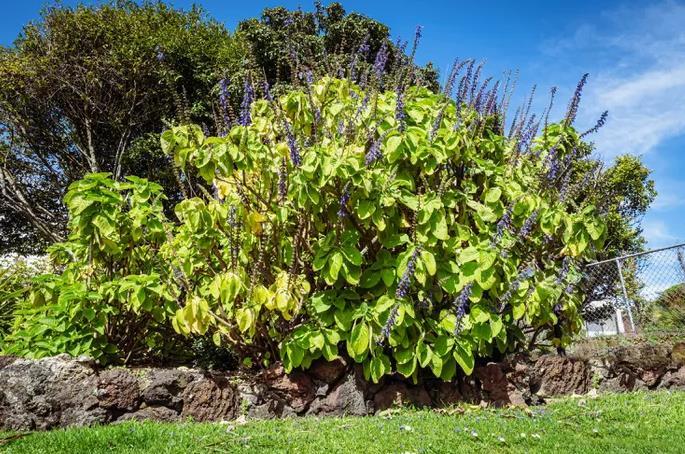
The Plectranthus genus is large, with more than 350 species of annuals, perennials, semi-succulents, and shrubs from Africa, Madagascar, Asia, Australia, and Pacific Islands. Members of the genus come in a variety of colors and sizes. But the blue spur flower (Plectranthus barbatus) stands out for its large, upright bushy structure. Also known by the botanical name Coleus barbatus, this plant is native to Africa but has spread abundantly.
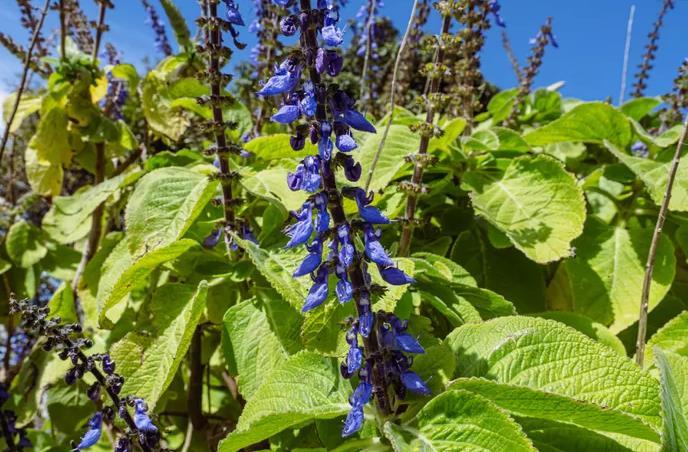
These plants can grow up to five feet in size and have aggressive runners that can choke out native plants if not kept in check. However, this same destructive behavior makes them wonderful plants for creating dense garden beds. The blue spur flower features deep green foliage and sends up stalks with six to eight deep blue-to-purple flowers.
Before planting, be sure to check your area to ensure it is not an invasive pest concern. One way to avoid unwanted spreading is by planting them in containers. The Plectranthus genus does well grown in pots and can even be kept indoors.
Botanical Name Plectranthus barbatus, Coleus barbatus
Common Name Blue Spur Flower, Candlestick Plant, Speckled Spur Flower, Zulu Wonder
Plant Type Perennial
Mature Size 5 feet tall
Sun Exposure Sun to partial shade
Soil Type Rich, well-draining
Soil pH Neutral to acidic
Bloom Time Late summer to early fall
Flower Color Lavender
Hardiness Zones 9 to 11
Native Area Africa
Blue Spur Flower Care
Though it has vibrant blooms and a commanding presence, the blue spur flower is an easy-to-care-for addition to your garden. These plants thrive in dappled sunlight and well-draining soil. Try to mimic the environment of the rich forest floor and your Plectranthus barbatus will be very happy.
Because blue spur flowers are such prolific spreaders, occasional pruning is needed to help maintain a bushier, fuller plant. They are quite hardy and can withstand a wide range of temperatures. However, a deep freeze will kill these flowers, so be sure to protect them from very cold temperatures.
Light
Most blue spur flowers can tolerate full sun, but they prefer partial shade to really thrive. They are naturally found in forests or river banks with filtered light, so imitating this type of lighting will create the healthiest specimens.
For indoor lighting, place in an area with bright, indirect lighting for best results.
Soil
These vibrant flowers need rich soil like those found in the forest. Adding some organic matter or compost to your soil before planting will mimic this fertile environment. This will also help the soil to drain well and prevent problems with overwatering.
Water
The Plectranthus genus is drought resistant and, therefore, not very picky when it comes to watering. A regular watering schedule is still beneficial but resist the urge to water it constantly.
If you live in a hot, dry climate, more watering may be needed to keep it healthy. However, be sure not to overwater, as this can quickly kill your plant. Water when the top inch of soil feels dry.
Temperature and Humidity
Consistent with its hardy nature, the blue spur flower can withstand a wide range of temperatures. It does well with heat and can also survive a frost.
As a tropical plant, a deep freeze will kill this plant though, so be sure to protect it if you have any harsh weather heading your way. One way to do this would be to bring your blue spur flower inside for the winter.
Fertilizer
The Plectranthus family is quite hardy and does not require frequent fertilizing to maintain a full and healthy plant. Adding organic material and compost to the soil before planting will provide its nutrition needs. If you would like to encourage growth and flowering, a general fertilizer will do the job nicely.
Potting and Repotting
The blue spur flower does quite well in pots and can even be brought inside during harsh winters to be kept as a houseplant. If you would like to keep this plant in a pot, make sure you choose one with good drainage.
Since these plants are drought-tolerant, they do not like to sit in water. Too much water can quickly kill them. This makes drainage holes a must.
Propagating Blue Spur Flower
The blue spur flower is an aggressive spreader. It does this by sending out offshoots under the soil. To propagate, you can simply dig up some of these offshoots and move the divided plant to its new area.
Another option for propagation is by using stem cuttings. The cuttings root easily in soil and can be grown without much hassle. Here’s how:
1. Using sharp garden snips or scissors, cut a section from your plant that is a few inches in length.
2. Remove the bottom leaves.
3. Place your cutting in damp soil. Keep moist while rooting.
Your new Plectranthus should take root rather quickly, and, before you know it, you will have another thriving plant.
These plants can grow up to five feet in size and have aggressive runners that can choke out native plants if not kept in check. However, this same destructive behavior makes them wonderful plants for creating dense garden beds. The blue spur flower features deep green foliage and sends up stalks with six to eight deep blue-to-purple flowers.
Before planting, be sure to check your area to ensure it is not an invasive pest concern. One way to avoid unwanted spreading is by planting them in containers. The Plectranthus genus does well grown in pots and can even be kept indoors.
Botanical Name Plectranthus barbatus, Coleus barbatus
Common Name Blue Spur Flower, Candlestick Plant, Speckled Spur Flower, Zulu Wonder
Plant Type Perennial
Mature Size 5 feet tall
Sun Exposure Sun to partial shade
Soil Type Rich, well-draining
Soil pH Neutral to acidic
Bloom Time Late summer to early fall
Flower Color Lavender
Hardiness Zones 9 to 11
Native Area Africa

Blue Spur Flower Care
Though it has vibrant blooms and a commanding presence, the blue spur flower is an easy-to-care-for addition to your garden. These plants thrive in dappled sunlight and well-draining soil. Try to mimic the environment of the rich forest floor and your Plectranthus barbatus will be very happy.
Because blue spur flowers are such prolific spreaders, occasional pruning is needed to help maintain a bushier, fuller plant. They are quite hardy and can withstand a wide range of temperatures. However, a deep freeze will kill these flowers, so be sure to protect them from very cold temperatures.
Light
Most blue spur flowers can tolerate full sun, but they prefer partial shade to really thrive. They are naturally found in forests or river banks with filtered light, so imitating this type of lighting will create the healthiest specimens.
For indoor lighting, place in an area with bright, indirect lighting for best results.
Soil
These vibrant flowers need rich soil like those found in the forest. Adding some organic matter or compost to your soil before planting will mimic this fertile environment. This will also help the soil to drain well and prevent problems with overwatering.
Water
The Plectranthus genus is drought resistant and, therefore, not very picky when it comes to watering. A regular watering schedule is still beneficial but resist the urge to water it constantly.
If you live in a hot, dry climate, more watering may be needed to keep it healthy. However, be sure not to overwater, as this can quickly kill your plant. Water when the top inch of soil feels dry.
Temperature and Humidity
Consistent with its hardy nature, the blue spur flower can withstand a wide range of temperatures. It does well with heat and can also survive a frost.
As a tropical plant, a deep freeze will kill this plant though, so be sure to protect it if you have any harsh weather heading your way. One way to do this would be to bring your blue spur flower inside for the winter.
Fertilizer
The Plectranthus family is quite hardy and does not require frequent fertilizing to maintain a full and healthy plant. Adding organic material and compost to the soil before planting will provide its nutrition needs. If you would like to encourage growth and flowering, a general fertilizer will do the job nicely.
Potting and Repotting
The blue spur flower does quite well in pots and can even be brought inside during harsh winters to be kept as a houseplant. If you would like to keep this plant in a pot, make sure you choose one with good drainage.
Since these plants are drought-tolerant, they do not like to sit in water. Too much water can quickly kill them. This makes drainage holes a must.
Propagating Blue Spur Flower
The blue spur flower is an aggressive spreader. It does this by sending out offshoots under the soil. To propagate, you can simply dig up some of these offshoots and move the divided plant to its new area.

Another option for propagation is by using stem cuttings. The cuttings root easily in soil and can be grown without much hassle. Here’s how:
1. Using sharp garden snips or scissors, cut a section from your plant that is a few inches in length.
2. Remove the bottom leaves.
3. Place your cutting in damp soil. Keep moist while rooting.
Your new Plectranthus should take root rather quickly, and, before you know it, you will have another thriving plant.
0
0
文章
Miss Chen
2021年11月08日

Whether you know it as blue beard or blue mist, Caryopteris x clandonensis is one of the few plants that produce genuinely blue flowers. This plant originated as an accidental hybrid of C. incana and C. mongholica and has since been bred to produce several popular cultivars. The compact size and soft gray foliage make blue beard plants a good choice in any size garden.
Depending on the climate, these plants are grown either as deciduous shrubs or woody perennials that die back to the ground each winter. Growing from neat low mounds, the narrow silvery-gray leaves resemble those of willow. Ideally, the plant should be planted in the spring or fall, provided that your area doesn't get too cold. Clandonensis hybrids typically grow between 18 and 30 inches annually.
FEATURED VIDEO
How to Pick the Perfect Front Door Color
Fun Fact
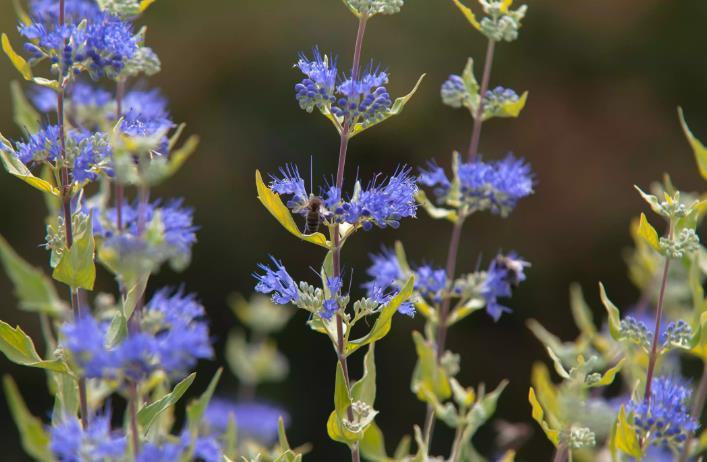
The plant's common names come from the hue of the flowers. The blue or purplish blooms, appearing are mid-to-late summer, are clustered in panicles above the foliage in small feathery puffs.
Botanical Name Caryopteris × clandonensis
Common Names Blue beard, blue mist
Plant Type Deciduous shrub or woody perennial
Mature Size 2 to 4 feet tall with a similar spread
Sun Exposure Full sun
Soil Type Medium moisture, well-drained soil
Soil pH 6.5 to 7.5 (slightly acidic to slightly alkaline)
Bloom Time Mid-to-late summer
Flower Color Blue, purple; pink cultivars available
Hardiness Zones 5 to 9 (USDA)
Native Area Parent species are native to East Asia
Blue Beard Care
The compact size and soft gray foliage make blue beard plants a good choice in any size garden. This is a versatile plant, equally at home in perennial borders, shrub borders, or as a small hedge plant. It is very effective planted in mass and is highly valued for its late summer flowers when few other shrubs are blooming.
Blue beard plants are low-maintenance—they tolerate both drought and shade, and they don't need much fertilizer, if any. However, like all other plants, blue beards have their preferences, so you should plant them in full sun and with medium-moisture soil if you want them to thrive.
Light
Caryopteris plants should be sited in full sun for best blooms. They will tolerate some shade, although flowering will be somewhat reduced. Blue beard may bloom later in the season when they are planted in a shady location.
Soil
Caryopteris prefers a medium-moisture, well-draining soil, though it tolerates fairly moist soil. It does not tolerate wet, poorly drained soils. They thrive best with a neutral soil pH, but will accept slightly acidic or slightly alkaline conditions.
Water
Blue bears are drought-tolerant, but water the plants regularly when young. Once established, they don’t require any supplemental watering unless you are having a particularly dry season.
Temperature and Humidity
Blue beard is reliably hardy in USDA zones 5 to 9; however, in the northern part of the range (zones 5 and 6), it may die back to ground level in winter. This is not a problem, though, because this is a fast-growing shrub that blooms on new growth from the current year.
Fertilizer
These plants are not heavy feeders, so some organic matter mixed into the planting hole should be all the food they need. Side dressing with compost is preferred over fertilizing Caryopteris plants. Too much fertilizer makes for a leafy plant with fewer blooms.
Varieties of Blue Beard
Caryopteris x clandonensis : The original hybrid is one of the hardiest forms available and still one of the most popular.
'Dark Knight': This variety has the darkest blue flowers, but it is a bit more temperamental to grow.
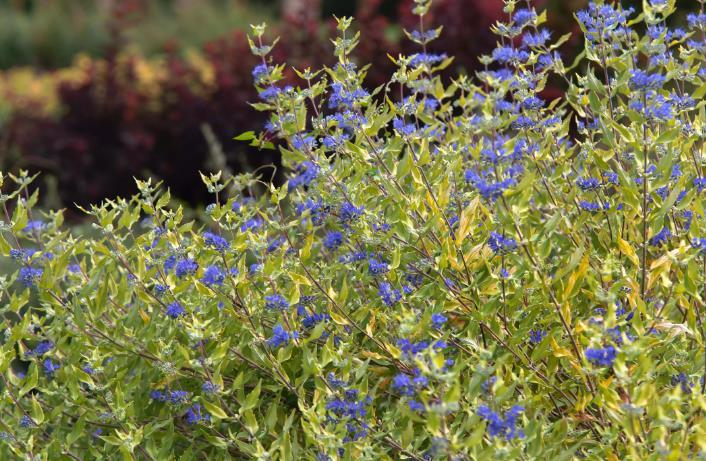
'Sunshine Blue': This cultivar has deep blue flowers offset by yellow foliage.
‘Pink Chablis’: This Proven Winners introduction has pink flowers.
‘Longwood Blue’: This variety has sky-blue fragrant blooms and has a taller stature that's about 4 feet high.
‘Worchester Gold’: This cultivar has golden foliage and lavender flowers.
Pruning
To keep the plant shaped and flowering, Caryopteris plants should be cut down by at least half in the early spring. You can cut them back to 12 to 18 inches without harm. As the plants age, you will get some dead wood in the center. Prune this out as needed. If the plants die back in winter, remove the dead stalks in spring as new growth is beginning.
Tip
Blue beard is slow to leaf out in the spring, so don’t panic if yours looks like a dead twig. Be patient.
Propagating Blue Beard Plants
Blue beard may self seed, and the volunteers can be transplanted as you wish. You can also propagate by soft-wood cuttings in late spring. Cut 6-inch segments off new-growth stems, then remove the lower pairs of leaves. Dip the ends of the cuttings in rooting hormone, then plant them in potting mix. Keep the cuttings in bright indirect light and make sure they are well-watered until they have developed good root systems.
Common Pests/Diseases
Caryopteris can be bothered by the four-line plant bug in June. The foliage will get mottled, but it doesn’t harm the plant and the bug moves on quickly enough. If the bugs disturb you, insecticidal soap, horticultural oil, or neem oil will control them.
Depending on the climate, these plants are grown either as deciduous shrubs or woody perennials that die back to the ground each winter. Growing from neat low mounds, the narrow silvery-gray leaves resemble those of willow. Ideally, the plant should be planted in the spring or fall, provided that your area doesn't get too cold. Clandonensis hybrids typically grow between 18 and 30 inches annually.
FEATURED VIDEO
How to Pick the Perfect Front Door Color
Fun Fact
The plant's common names come from the hue of the flowers. The blue or purplish blooms, appearing are mid-to-late summer, are clustered in panicles above the foliage in small feathery puffs.

Botanical Name Caryopteris × clandonensis
Common Names Blue beard, blue mist
Plant Type Deciduous shrub or woody perennial
Mature Size 2 to 4 feet tall with a similar spread
Sun Exposure Full sun
Soil Type Medium moisture, well-drained soil
Soil pH 6.5 to 7.5 (slightly acidic to slightly alkaline)
Bloom Time Mid-to-late summer
Flower Color Blue, purple; pink cultivars available
Hardiness Zones 5 to 9 (USDA)
Native Area Parent species are native to East Asia
Blue Beard Care
The compact size and soft gray foliage make blue beard plants a good choice in any size garden. This is a versatile plant, equally at home in perennial borders, shrub borders, or as a small hedge plant. It is very effective planted in mass and is highly valued for its late summer flowers when few other shrubs are blooming.
Blue beard plants are low-maintenance—they tolerate both drought and shade, and they don't need much fertilizer, if any. However, like all other plants, blue beards have their preferences, so you should plant them in full sun and with medium-moisture soil if you want them to thrive.
Light
Caryopteris plants should be sited in full sun for best blooms. They will tolerate some shade, although flowering will be somewhat reduced. Blue beard may bloom later in the season when they are planted in a shady location.
Soil
Caryopteris prefers a medium-moisture, well-draining soil, though it tolerates fairly moist soil. It does not tolerate wet, poorly drained soils. They thrive best with a neutral soil pH, but will accept slightly acidic or slightly alkaline conditions.
Water
Blue bears are drought-tolerant, but water the plants regularly when young. Once established, they don’t require any supplemental watering unless you are having a particularly dry season.
Temperature and Humidity
Blue beard is reliably hardy in USDA zones 5 to 9; however, in the northern part of the range (zones 5 and 6), it may die back to ground level in winter. This is not a problem, though, because this is a fast-growing shrub that blooms on new growth from the current year.
Fertilizer
These plants are not heavy feeders, so some organic matter mixed into the planting hole should be all the food they need. Side dressing with compost is preferred over fertilizing Caryopteris plants. Too much fertilizer makes for a leafy plant with fewer blooms.

Varieties of Blue Beard
Caryopteris x clandonensis : The original hybrid is one of the hardiest forms available and still one of the most popular.
'Dark Knight': This variety has the darkest blue flowers, but it is a bit more temperamental to grow.
'Sunshine Blue': This cultivar has deep blue flowers offset by yellow foliage.
‘Pink Chablis’: This Proven Winners introduction has pink flowers.
‘Longwood Blue’: This variety has sky-blue fragrant blooms and has a taller stature that's about 4 feet high.
‘Worchester Gold’: This cultivar has golden foliage and lavender flowers.
Pruning
To keep the plant shaped and flowering, Caryopteris plants should be cut down by at least half in the early spring. You can cut them back to 12 to 18 inches without harm. As the plants age, you will get some dead wood in the center. Prune this out as needed. If the plants die back in winter, remove the dead stalks in spring as new growth is beginning.
Tip
Blue beard is slow to leaf out in the spring, so don’t panic if yours looks like a dead twig. Be patient.
Propagating Blue Beard Plants
Blue beard may self seed, and the volunteers can be transplanted as you wish. You can also propagate by soft-wood cuttings in late spring. Cut 6-inch segments off new-growth stems, then remove the lower pairs of leaves. Dip the ends of the cuttings in rooting hormone, then plant them in potting mix. Keep the cuttings in bright indirect light and make sure they are well-watered until they have developed good root systems.
Common Pests/Diseases
Caryopteris can be bothered by the four-line plant bug in June. The foliage will get mottled, but it doesn’t harm the plant and the bug moves on quickly enough. If the bugs disturb you, insecticidal soap, horticultural oil, or neem oil will control them.
0
0
文章
Miss Chen
2021年07月31日

Wisteria is known for its enchanting cascades of purple-blue blooms. Chinese wisteria is often seen sprawling over archways or pergolas, but this variety can be invasive and aggressive. However, there is another non-invasive and less aggressive variety: American wisteria.
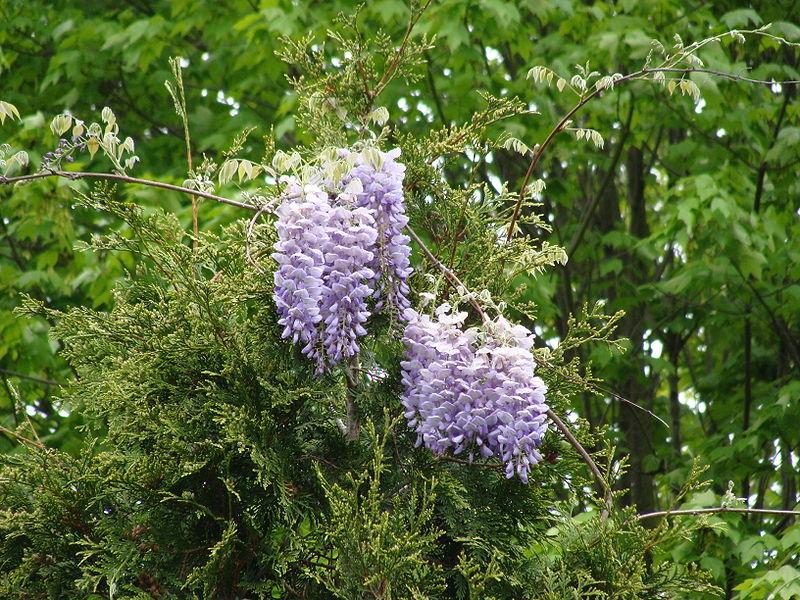
Native to North America, this variety (Wisteria frutescens) can still reach up to 30 feet in height and width, showering any nearby structure in clusters of mesmerizing blue flowers. However, you may have to wait five or six years for the vine to mature and produce flowers. It has pinnate, shiny, dark leaves and pea-like flowers that hang in clusters about 5 to 6 inches long. After flowering, American wisteria creates smooth, bean-like seed pods.
With a more controlled manner of growing, American wisteria offers the perfect solution for many who long for this plant's stunning flowers in their own garden.
Botanical Name Wisteria frutescens
Common Name American wisteria
Plant Type Vine
Mature Size 20 to 30 ft. long
Sun Exposure Full, partial
Soil Type Moist but well-drained
Soil pH Acidic, neutral
Bloom Time Spring, summer
Flower Color Blue, purple, white
Hardiness Zones 5 to 9, USA
Native Area North America
Toxicity Toxic to humans and pets
American Wisteria Care
The beauty of this vine is in its abundant foliage and rapid growth. However, since it can grow to huge proportions, a strong structure is needed to offer support. Archways, arbors, fences, or trellises make perfect options. Although it may be tempting to let the vine crawl up the side of your home, it can become very heavy and eventually cause damage.
While not considered invasive, this plant's fast-growing nature means it may be better if grown in an isolated area. Otherwise, it may choke out neighboring plants.
Regular pruning can encourage more flowering, which may easily stretch from spring into the summer. This is another advantage of American wisteria, as its Chinese cousin only blooms once in the spring. American wisteria is deer-resistant and flood-resistant.
Light
American wisteria loves the sunshine and grows best in full sun. It can be grown in partial shade, but these conditions may not allow the plant to bloom as profusely. Plenty of sunlight is essential for healthy flowering.
Soil
Rich, moist, well-draining soil is ideal for this vine. Acidic to neutral pH levels are best. Soil that is too alkaline can cause these plants to become chlorotic, which means the leaves do not produce enough chlorophyll. The leaves will lose their green color and turn a dull shade of yellow.
Water
American wisteria is naturally found in moist areas by rivers, swamps, or flood plains. Therefore, this vine thrives on consistent moisture. Maintain a regular watering schedule, especially during hot summers when soil may dry out more quickly.
Temperature and Humidity
American wisteria plants prefer moderate moisture levels but can tolerate high levels of moisture and humidity. It does best in moderate climates, as indicated by its suitability for USDA hardiness zones 5 to 9.
Fertilizer
Adding fertilizer will encourage blooming, which may take up to five or more years to occur. Be sure that your fertilizer contains a good amount of phosphorus, as this will help encourage blooming. Beware of fertilizer that is high in nitrogen.
American Wisteria Varieties
'Nivea': This variety produces short clusters of white flowers. Its main bloom appears in the summer, but this vine is known to sporadically bloom afterward.
'Amethyst Falls': As suggested by the name, Amethyst Falls produces beautiful purple flowers with a light fragrance. This variety blooms at a younger age, making it a good choice if you're in a hurry for a flowering wisteria plant.
'Alba': Another variety with white blooms, Alba produces large white flowers in short, full clusters.
Pruning American Wisteria
This plant only flowers on wood that was produced the previous growing season (one-year-old wood). It's thinner, lighter in color, and more flexible than older wood. Be careful not to remove all the flowering wood when pruning. Regular pruning is key to keeping your large vine full of blooms. Prune the vine twice each year: once before the plant leafs out in the spring, and again just after flowers fade.
After blooming in the summer, cut back that year’s growth to around 6 inches. This will help control the vine’s growth, as well as encourage thick blooming.
Propagating American Wisteria
Using cuttings is the best way to propagate wisteria. Seeds can also be used, but these take years to mature and flower which makes cuttings the quickest and most ideal way.
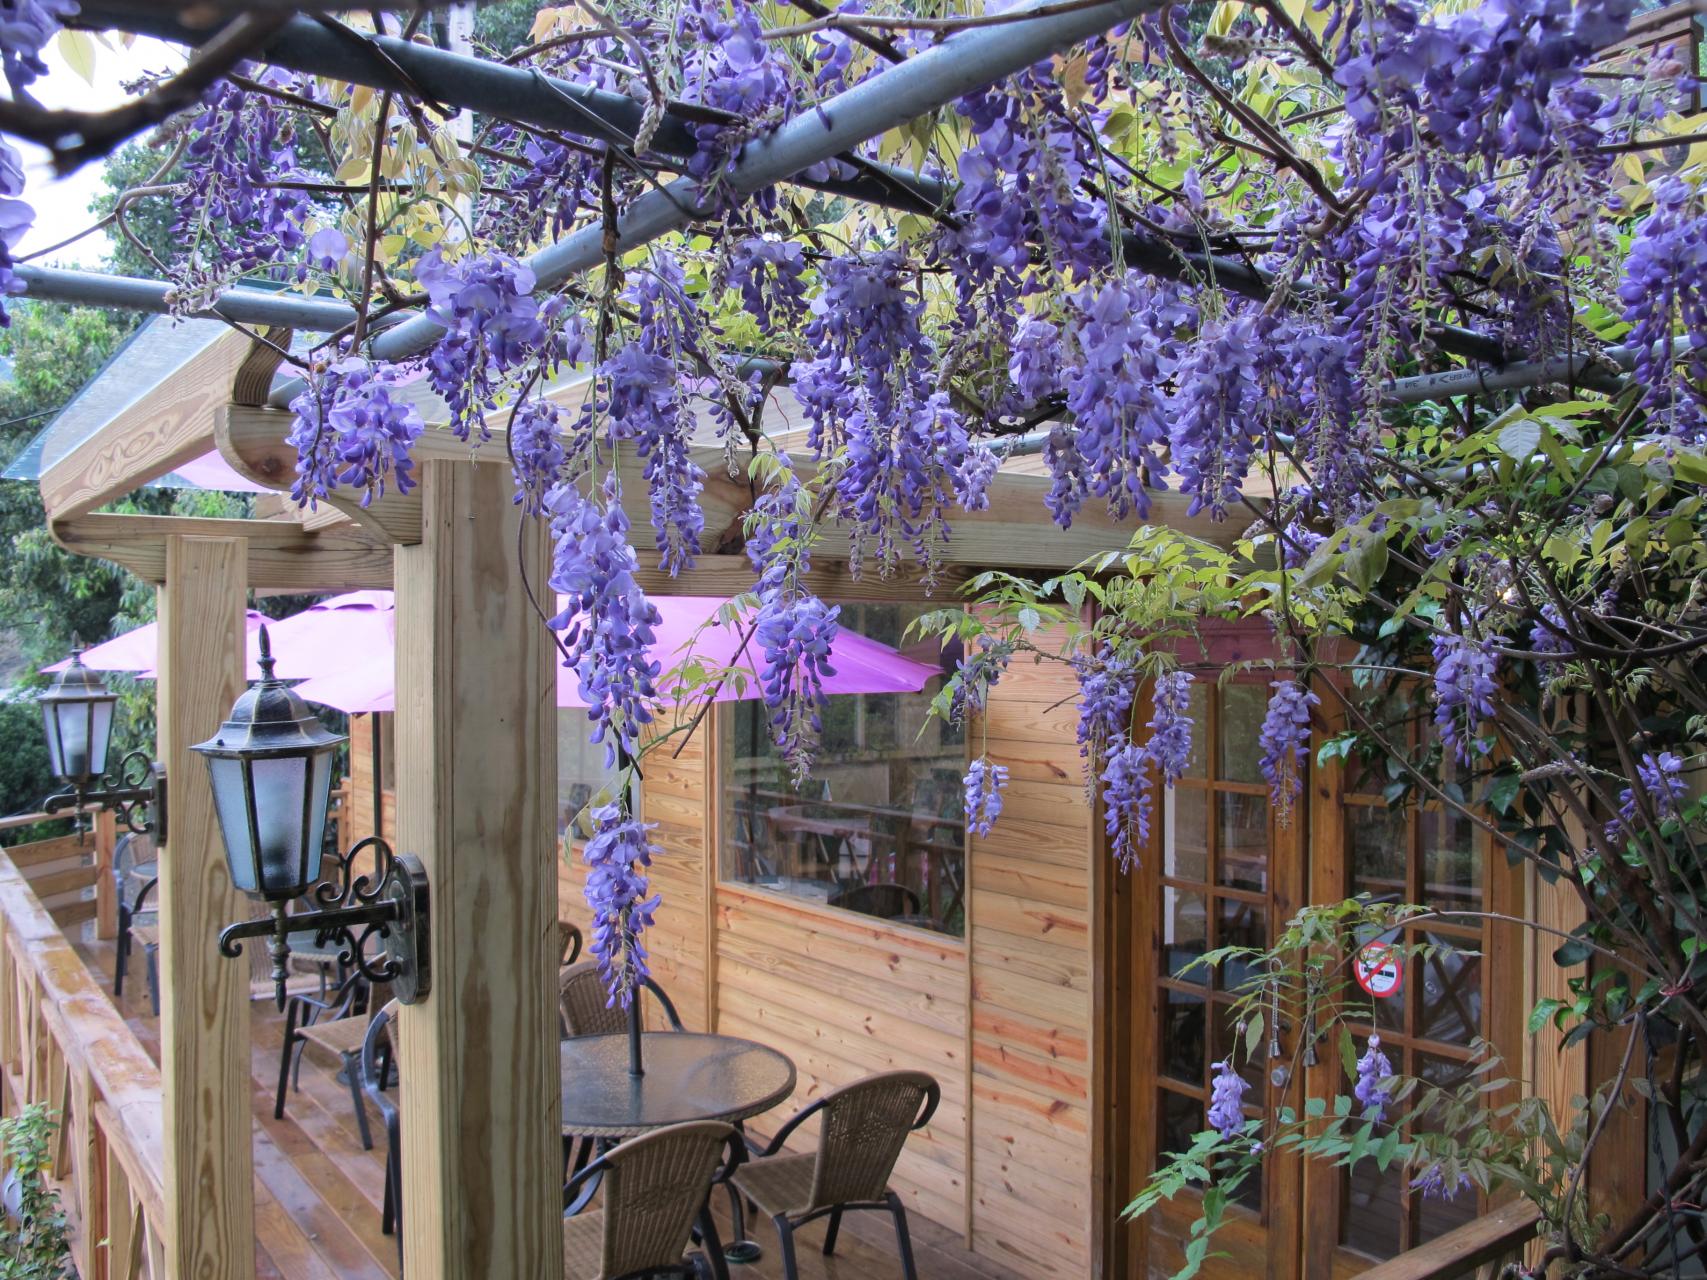
Be sure to take cuttings from softwood, which is wood that is still green and has not developed woody bark. Annual pruning is a perfect time to propagate. Instead of tossing pruned stems, you can propagate a new plant with them.
Using a sharp pair of garden snips, trim a softwood cutting about 3 to 6 inches long with healthy leaves.
Remove any leaves on the lower half of the cutting. Remove any flower buds.
Dip the cut end in rooting hormone and bury it in moist potting soil.
To hold in moisture, place a plastic bag over the cutting, propping it up with stakes or sticks.
Place in bright, indirect light. Water when the soil feels dry to the touch.
Roots should form in about a month. Remove the bag and keep your cutting in a sunny area before transitioning it to a new planting location.
Native to North America, this variety (Wisteria frutescens) can still reach up to 30 feet in height and width, showering any nearby structure in clusters of mesmerizing blue flowers. However, you may have to wait five or six years for the vine to mature and produce flowers. It has pinnate, shiny, dark leaves and pea-like flowers that hang in clusters about 5 to 6 inches long. After flowering, American wisteria creates smooth, bean-like seed pods.

With a more controlled manner of growing, American wisteria offers the perfect solution for many who long for this plant's stunning flowers in their own garden.
Botanical Name Wisteria frutescens
Common Name American wisteria
Plant Type Vine
Mature Size 20 to 30 ft. long
Sun Exposure Full, partial
Soil Type Moist but well-drained
Soil pH Acidic, neutral
Bloom Time Spring, summer
Flower Color Blue, purple, white
Hardiness Zones 5 to 9, USA
Native Area North America
Toxicity Toxic to humans and pets
American Wisteria Care
The beauty of this vine is in its abundant foliage and rapid growth. However, since it can grow to huge proportions, a strong structure is needed to offer support. Archways, arbors, fences, or trellises make perfect options. Although it may be tempting to let the vine crawl up the side of your home, it can become very heavy and eventually cause damage.
While not considered invasive, this plant's fast-growing nature means it may be better if grown in an isolated area. Otherwise, it may choke out neighboring plants.
Regular pruning can encourage more flowering, which may easily stretch from spring into the summer. This is another advantage of American wisteria, as its Chinese cousin only blooms once in the spring. American wisteria is deer-resistant and flood-resistant.
Light
American wisteria loves the sunshine and grows best in full sun. It can be grown in partial shade, but these conditions may not allow the plant to bloom as profusely. Plenty of sunlight is essential for healthy flowering.
Soil
Rich, moist, well-draining soil is ideal for this vine. Acidic to neutral pH levels are best. Soil that is too alkaline can cause these plants to become chlorotic, which means the leaves do not produce enough chlorophyll. The leaves will lose their green color and turn a dull shade of yellow.
Water
American wisteria is naturally found in moist areas by rivers, swamps, or flood plains. Therefore, this vine thrives on consistent moisture. Maintain a regular watering schedule, especially during hot summers when soil may dry out more quickly.
Temperature and Humidity
American wisteria plants prefer moderate moisture levels but can tolerate high levels of moisture and humidity. It does best in moderate climates, as indicated by its suitability for USDA hardiness zones 5 to 9.
Fertilizer
Adding fertilizer will encourage blooming, which may take up to five or more years to occur. Be sure that your fertilizer contains a good amount of phosphorus, as this will help encourage blooming. Beware of fertilizer that is high in nitrogen.
American Wisteria Varieties
'Nivea': This variety produces short clusters of white flowers. Its main bloom appears in the summer, but this vine is known to sporadically bloom afterward.
'Amethyst Falls': As suggested by the name, Amethyst Falls produces beautiful purple flowers with a light fragrance. This variety blooms at a younger age, making it a good choice if you're in a hurry for a flowering wisteria plant.
'Alba': Another variety with white blooms, Alba produces large white flowers in short, full clusters.
Pruning American Wisteria
This plant only flowers on wood that was produced the previous growing season (one-year-old wood). It's thinner, lighter in color, and more flexible than older wood. Be careful not to remove all the flowering wood when pruning. Regular pruning is key to keeping your large vine full of blooms. Prune the vine twice each year: once before the plant leafs out in the spring, and again just after flowers fade.
After blooming in the summer, cut back that year’s growth to around 6 inches. This will help control the vine’s growth, as well as encourage thick blooming.
Propagating American Wisteria
Using cuttings is the best way to propagate wisteria. Seeds can also be used, but these take years to mature and flower which makes cuttings the quickest and most ideal way.

Be sure to take cuttings from softwood, which is wood that is still green and has not developed woody bark. Annual pruning is a perfect time to propagate. Instead of tossing pruned stems, you can propagate a new plant with them.
Using a sharp pair of garden snips, trim a softwood cutting about 3 to 6 inches long with healthy leaves.
Remove any leaves on the lower half of the cutting. Remove any flower buds.
Dip the cut end in rooting hormone and bury it in moist potting soil.
To hold in moisture, place a plastic bag over the cutting, propping it up with stakes or sticks.
Place in bright, indirect light. Water when the soil feels dry to the touch.
Roots should form in about a month. Remove the bag and keep your cutting in a sunny area before transitioning it to a new planting location.
0
0
文章
ritau
2020年05月08日

Blueberries are perennial flowering plants with blue or purple berries. They are classified in the section Cyanococcus within the genus Vaccinium. Vaccinium also includes cranberries, bilberries, huckleberries and Madeira blueberries.[1] Commercial blueberries—both wild (lowbush) and cultivated (highbush)—are all native to North America. The highbush varieties were introduced into Europe during the 1930s.
Blueberries are usually prostrate shrubs that can vary in size from 10 centimeters (3.9 in) to 4 meters (13 ft) in height. In commercial production of blueberries, the species with small, pea-size berries growing on low-level bushes are known as "lowbush blueberries" (synonymous with "wild"), while the species with larger berries growing on taller cultivated bushes are known as "highbush blueberries". Canada is the leading producer of lowbush blueberries, while the United States produces some 40% of the world supply of highbush blueberries.

The genus Vaccinium has a mostly circumpolar distribution, with species mainly present in North America, Europe, and Asia. Many commercially sold species with English common names including "blueberry" are from North America, particularly Atlantic Canada and Northeastern United States for wild (lowbush) blueberries, and several US states and British Columbia for cultivated (highbush) blueberries. Canada's First Nations people consumed wild blueberries for centuries before North America was colonized. Highbush blueberries were first cultivated in New Jersey around the beginning of the 20th century.
North American native species of blueberries are grown commercially in the Southern Hemisphere in Australia, New Zealand and South American nations. Several other wild shrubs of the genus Vaccinium also produce commonly eaten blue berries, such as the predominantly European Vaccinium myrtillus and other bilberries, which in many languages have a name that translates to "blueberry" in English.
*Nutrients
Blueberries consist of 14% carbohydrates, 0.7% protein, 0.3% fat and 84% water (table). They contain only negligible amounts of micronutrients, with moderate levels (relative to respective Daily Values) (DV) of the essential dietary mineral manganese, vitamin C, vitamin K and dietary fiber (table). Generally, nutrient contents of blueberries are a low percentage of the DV (table). One serving provides a relatively low caloric value of 57 kcal with a glycemic load of 6.

*Phytochemicals and research
Blueberries contain anthocyanins, other polyphenols and various phytochemicals under preliminary research for their potential role in the human body. Most polyphenol studies have been conducted using the highbush cultivar of blueberries (V. corymbosum), while content of polyphenols and anthocyanins in lowbush (wild) blueberries (V. angustifolium) exceeds values found in highbush cultivars.
Blueberries are usually prostrate shrubs that can vary in size from 10 centimeters (3.9 in) to 4 meters (13 ft) in height. In commercial production of blueberries, the species with small, pea-size berries growing on low-level bushes are known as "lowbush blueberries" (synonymous with "wild"), while the species with larger berries growing on taller cultivated bushes are known as "highbush blueberries". Canada is the leading producer of lowbush blueberries, while the United States produces some 40% of the world supply of highbush blueberries.

The genus Vaccinium has a mostly circumpolar distribution, with species mainly present in North America, Europe, and Asia. Many commercially sold species with English common names including "blueberry" are from North America, particularly Atlantic Canada and Northeastern United States for wild (lowbush) blueberries, and several US states and British Columbia for cultivated (highbush) blueberries. Canada's First Nations people consumed wild blueberries for centuries before North America was colonized. Highbush blueberries were first cultivated in New Jersey around the beginning of the 20th century.
North American native species of blueberries are grown commercially in the Southern Hemisphere in Australia, New Zealand and South American nations. Several other wild shrubs of the genus Vaccinium also produce commonly eaten blue berries, such as the predominantly European Vaccinium myrtillus and other bilberries, which in many languages have a name that translates to "blueberry" in English.
*Nutrients
Blueberries consist of 14% carbohydrates, 0.7% protein, 0.3% fat and 84% water (table). They contain only negligible amounts of micronutrients, with moderate levels (relative to respective Daily Values) (DV) of the essential dietary mineral manganese, vitamin C, vitamin K and dietary fiber (table). Generally, nutrient contents of blueberries are a low percentage of the DV (table). One serving provides a relatively low caloric value of 57 kcal with a glycemic load of 6.

*Phytochemicals and research
Blueberries contain anthocyanins, other polyphenols and various phytochemicals under preliminary research for their potential role in the human body. Most polyphenol studies have been conducted using the highbush cultivar of blueberries (V. corymbosum), while content of polyphenols and anthocyanins in lowbush (wild) blueberries (V. angustifolium) exceeds values found in highbush cultivars.
0
0
文章
想见你了
2019年12月24日

Platycodonis flower is also called bell flower, petals are single or a few sparse, platycodonis flower purple with blue, blue see purple to give people quiet, quiet and elegant comfort. Many flower friends will also potted some, then share the breeding methods and precautions of platycodon flower.
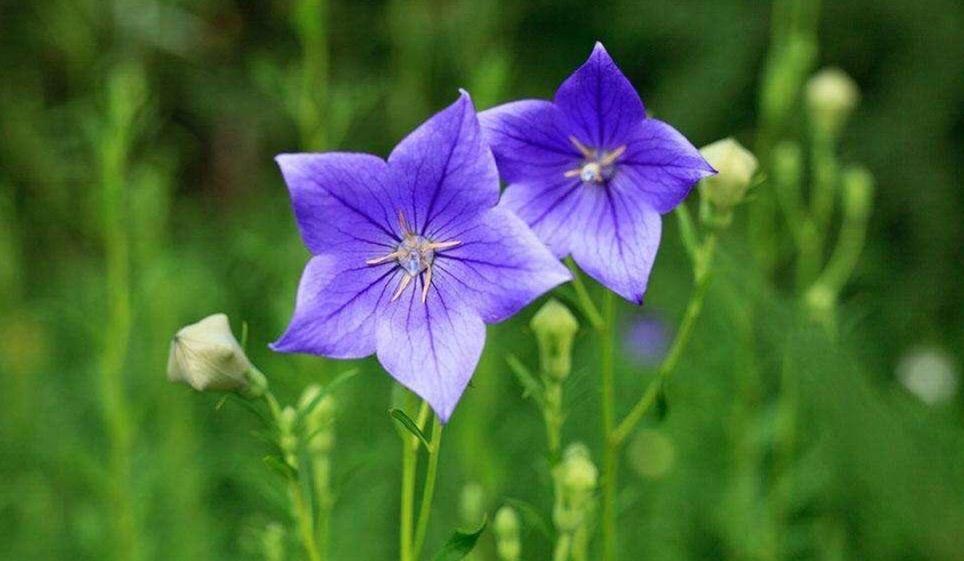
1. Soil: platycodon grandiflorum prefers a warm and moist growth environment with sufficient sunshine and abundant rainfall. Platycodon grandiflorum does not have high requirements for climate environment. Platycodon grandiflorum likes a cool and humid environment. Wild platycodon flowers mostly grow on sunny slopes and grasses. Therefore, it is not suitable to plant platycodon grandiflorum in low-lying and flooded areas.
2. Water and fertilizer: June is the peak season for the growth of platycodon grandiflorum. Timely top dressing should be conducted in late June and July according to the growth conditions of platycodon grandiflorum. The fertilizer is mainly human and animal manure, with a small amount of phosphate fertilizer and urea. Water when the drought, when the rain is abundant, pay attention to drainage, platycodon is easy to rot roots, to prevent soil water. The flowering period of radix platycodonis is up to 4 months.
3. Diseases and insects: common diseases and pests of platycodon grandiflorum include root rot, aphids, starscream, etc. When root rot disease of platycodon grandiflorum comes on, the disease leaves are covered with ash powder, serious cause whole plant wither, control method is in the beginning of the disease with pomme 0.3 degree stone sulfur mixture or white powder net 500 times liquid spray or with 20% of the powder rust ning powder 1800 times liquid spray. If platycodon grandiflorum is invaded by aphids and starscream, it can be sprayed once every 10 days with 40% dichlorvos emulsion 1500-2000 times liquid or 80% dichlorvos emulsion 1500-times liquid.
0
0
文章
A🎌王木木💮
2019年12月02日

Last week we introduced peonies.Today we’re going to introduce the second kind of flower fo Scorpio--Morning Glory
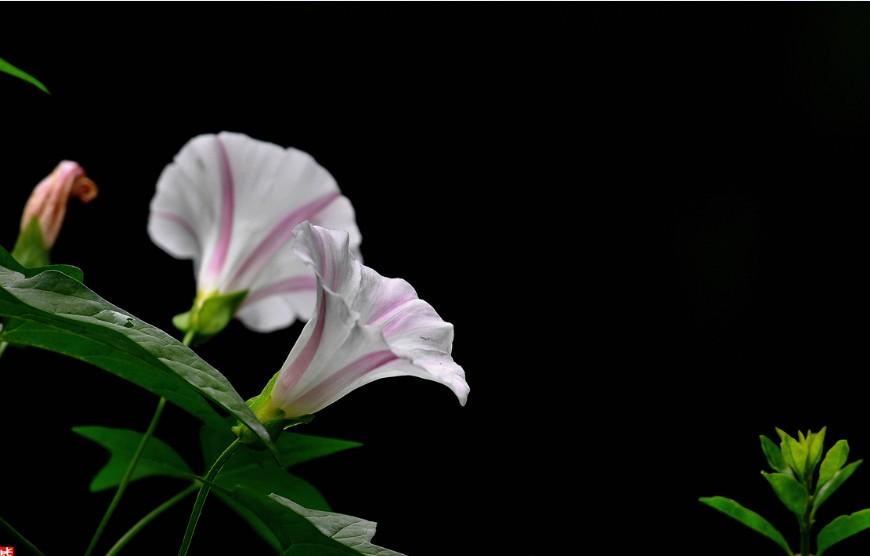
Other common names:morning glory 'Heavenly Blue'
Family:Convolvulaceae
Genus:Ipomoea can be annuals or perennials, often twining, or evergreen shrubs, with simple, lobed or dissected leaves and tubular or funnel-shaped flowers which may be solitary or borne in racemes or panicles
Details:'Heavenly Blue' is a twining annual with heart-shaped leaves and funnel-shaped, deep sky-blue flowers to 8cm across, with white throats
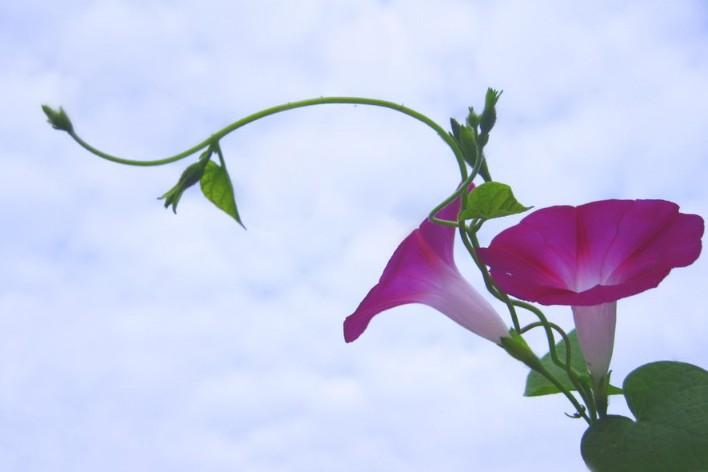
How to grow
Cultivation Best grown as an annual climber, full sun and shelter from cold winds is essential in any moist but well-drained soil
PropagationPropagate by seed
Suggested planting locations and garden types Flower borders and beds Wall-side Borders City & Courtyard Gardens Cottage & Informal Garden

How to care
Pruning No pruning required
Pests Can get glasshouse red spider mite
Diseases Generally disease free

Other common names:morning glory 'Heavenly Blue'
Family:Convolvulaceae
Genus:Ipomoea can be annuals or perennials, often twining, or evergreen shrubs, with simple, lobed or dissected leaves and tubular or funnel-shaped flowers which may be solitary or borne in racemes or panicles
Details:'Heavenly Blue' is a twining annual with heart-shaped leaves and funnel-shaped, deep sky-blue flowers to 8cm across, with white throats

How to grow
Cultivation Best grown as an annual climber, full sun and shelter from cold winds is essential in any moist but well-drained soil
PropagationPropagate by seed
Suggested planting locations and garden types Flower borders and beds Wall-side Borders City & Courtyard Gardens Cottage & Informal Garden

How to care
Pruning No pruning required
Pests Can get glasshouse red spider mite
Diseases Generally disease free
1
0
文章
绿手指客服
2019年10月28日

Just when you think winter is never going end, the cheery blue and yellow flowers of Iris reticulata ‘Harmony’ burst into bloom. This flowers from this easy-care bulb may be short, but they're big on bold color, especially when planted in large groupings in a rock or woodland garden. Like other bulbs, Iris reticulata ‘Harmony’ requires full sun (at least six hours a day) and well-drained soil.

Plant the spring-blooming bulbs in autumn, placing them 4 inches deep in the soil. Over time, Iris reticulata ‘Harmony’ will spread, slowly carpeting your garden with color. After the flowers fade, leave the foliage alone until it dries and disappears on its own.
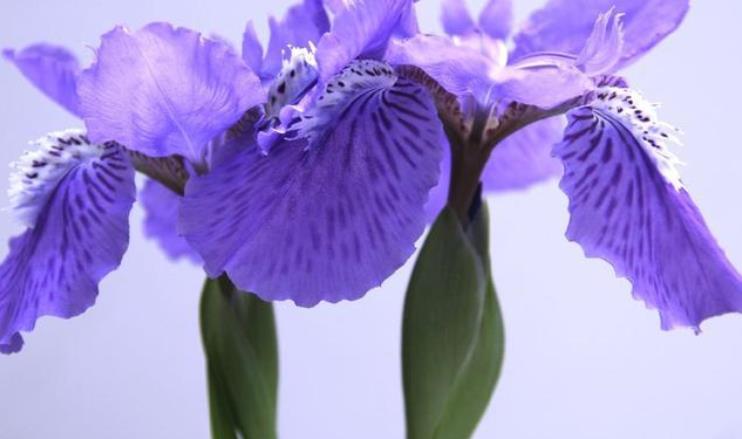
How to grow
Cultivation Grow in well-drained, fertile, neutral to slightly acid loam in full sun
Propagation Propagate by division of rhizomes from midsummer to early autumn
Suggested planting locations and garden types Flower borders and beds Wall-side Borders City & Courtyard Gardens Coastal Cottage & Informal Garden
How to care
Pruning Remove any dying foliage in autumn, old flower stems can be cut down after flowering
Pests May be attacked by slugs, snails and thrips
Diseases May be subject to iris rhizome rot, a leaf spot and a virus

Plant the spring-blooming bulbs in autumn, placing them 4 inches deep in the soil. Over time, Iris reticulata ‘Harmony’ will spread, slowly carpeting your garden with color. After the flowers fade, leave the foliage alone until it dries and disappears on its own.

How to grow
Cultivation Grow in well-drained, fertile, neutral to slightly acid loam in full sun
Propagation Propagate by division of rhizomes from midsummer to early autumn
Suggested planting locations and garden types Flower borders and beds Wall-side Borders City & Courtyard Gardens Coastal Cottage & Informal Garden
How to care
Pruning Remove any dying foliage in autumn, old flower stems can be cut down after flowering
Pests May be attacked by slugs, snails and thrips
Diseases May be subject to iris rhizome rot, a leaf spot and a virus
0
0


