文章
Miss Chen
2018年07月20日

Potatoes (Solanum tuberosum) do well as an annual food crop in Department of Agriculture plant hardiness zones 1 through 7. While they are commonly grown in-ground by home gardeners, they can be easily and successfully grown in containers. Container-grown potatoes can be grown year-round, since they can be moved indoors so long as light requirements are met. To successfully grow potatoes in a bucket, choose your potato variety carefully. You also need to meet the growing requirements for potatoes.

The most important requirement for your bucket is that it be made of material suitable for growing food. Food-safe plastic or garden-safe wood are the ideal materials for your bucket. Avoid metal as it can corrode over time and affect soil nutrition. Your bucket must also have good drainage, as sodden soil is extremely harmful to plants. Drill drainage holes in your bucket if it does not already have them. The size of your container is also important. Potatoes do well in large containers, so plan on 2 1/2 gallons of growing space per potato plant. Ensure that the container is at least 1 foot deep.
Preparing the Soil and Growing Conditions
Potatoes enjoy sandy, acidic soil that is nutrient-rich. Use a mix of compost and nutrient-rich potting or garden soil to fill your container. Place a layer of gravel or broken pieces of Styrofoam at the bottom of your bucket. This will help your container garden drain better. Fill your bucket almost to the top -- 1 inch below the rim -- with the compost and soil mix. Potato plants enjoy full sun and moist, but not sodden soil. Container gardens are more susceptible to dehydration during summer months. Keep your soil evenly moist, neither soaked nor dry to touch. Place a large dish under the bucket, keeping it filled with water. The plants and soil will absorb water as needed. This method also helps reduce the level of nutrients washed away during watering.
Planting Potatoes
To plant potatoes, you must start by chitting potatoes. This is especially important if you are planting potatoes in the late winter and early spring for a late spring harvest. Chit potatoes by laying your seed potatoes out in a cool, frost-free and sunny environment. Egg boxes or old seed trays work well. The eyes of the potatoes will produce shoots. Position these upward toward the sunlight for optimal results. When the shoots are 1 inch long, the seed potato can be planted. Prior to planting, evenly spread a small handful of a high-phosphorous fertilizer, such as bonemeal, 7 inches below the surface of the soil. Cover with 2 inches of soil and compost mixture. Then push a chitted seed potato below the surface of the dirt, with the shoots pointing upward. Push the chitted potato down no more than 5 inches deep, and cover with soil. The seed potato should not touch the fertilizer directly as it will burn the sensitive new shoots and roots of the plant.

Varieties and Spacing
Potatoes are categorized as earlies, second earlies and maincrop potatoes. Earlies are planted in the late winter and are harvested in early summer. Second earlies are planted in early spring and harvested midsummer. Maincrop potatoes are harvested in the fall, after an early spring planting. You can also plant potatoes in the late summer for a fall harvest. First and second early varieties work best for container potatoes. Salad potatoes, such as the "Charlotte" (Solanum tuberosum "Charlotte") and the "Lady Christi (Solanum tuberosum "Lady Christl), grow well in the restricted space of a container. But you can grow any size of white, red, yellow or russet potatoes successfully in containers, assuming there is enough space for the potato to mature. Unless you have a very large container, plant no more than three potato plants per container, spacing them evenly apart. The closer your plants are, the smaller your spuds will be.

The most important requirement for your bucket is that it be made of material suitable for growing food. Food-safe plastic or garden-safe wood are the ideal materials for your bucket. Avoid metal as it can corrode over time and affect soil nutrition. Your bucket must also have good drainage, as sodden soil is extremely harmful to plants. Drill drainage holes in your bucket if it does not already have them. The size of your container is also important. Potatoes do well in large containers, so plan on 2 1/2 gallons of growing space per potato plant. Ensure that the container is at least 1 foot deep.
Preparing the Soil and Growing Conditions
Potatoes enjoy sandy, acidic soil that is nutrient-rich. Use a mix of compost and nutrient-rich potting or garden soil to fill your container. Place a layer of gravel or broken pieces of Styrofoam at the bottom of your bucket. This will help your container garden drain better. Fill your bucket almost to the top -- 1 inch below the rim -- with the compost and soil mix. Potato plants enjoy full sun and moist, but not sodden soil. Container gardens are more susceptible to dehydration during summer months. Keep your soil evenly moist, neither soaked nor dry to touch. Place a large dish under the bucket, keeping it filled with water. The plants and soil will absorb water as needed. This method also helps reduce the level of nutrients washed away during watering.
Planting Potatoes
To plant potatoes, you must start by chitting potatoes. This is especially important if you are planting potatoes in the late winter and early spring for a late spring harvest. Chit potatoes by laying your seed potatoes out in a cool, frost-free and sunny environment. Egg boxes or old seed trays work well. The eyes of the potatoes will produce shoots. Position these upward toward the sunlight for optimal results. When the shoots are 1 inch long, the seed potato can be planted. Prior to planting, evenly spread a small handful of a high-phosphorous fertilizer, such as bonemeal, 7 inches below the surface of the soil. Cover with 2 inches of soil and compost mixture. Then push a chitted seed potato below the surface of the dirt, with the shoots pointing upward. Push the chitted potato down no more than 5 inches deep, and cover with soil. The seed potato should not touch the fertilizer directly as it will burn the sensitive new shoots and roots of the plant.

Varieties and Spacing
Potatoes are categorized as earlies, second earlies and maincrop potatoes. Earlies are planted in the late winter and are harvested in early summer. Second earlies are planted in early spring and harvested midsummer. Maincrop potatoes are harvested in the fall, after an early spring planting. You can also plant potatoes in the late summer for a fall harvest. First and second early varieties work best for container potatoes. Salad potatoes, such as the "Charlotte" (Solanum tuberosum "Charlotte") and the "Lady Christi (Solanum tuberosum "Lady Christl), grow well in the restricted space of a container. But you can grow any size of white, red, yellow or russet potatoes successfully in containers, assuming there is enough space for the potato to mature. Unless you have a very large container, plant no more than three potato plants per container, spacing them evenly apart. The closer your plants are, the smaller your spuds will be.
0
0
文章
Miss Chen
2018年07月20日

Zucchini is a prolific vegetable that grows well in most soil as long as it gets plenty of sunlight. The leaves of the zucchini plant are substantial in size and offer shade for the vegetables beneath. Zucchini vegetables themselves do not require direct sunlight. Direct sunlight on the zucchini vegetable can cause the skin to harden and mature too quickly. Pruning zucchini can be beneficial when garden space is an issue, to promote new growth, and for safety purposes when harvesting zucchini.

Step 1
Using a sharp knife, cut away a few oversize leaves of the zucchini plant after it has started bearing zucchini.
Step 2
Cut the leaves at the base of the zucchini plant.
Step 3
Avoid pruning near flowering blossoms or new growth as it could reduce vegetable production.

Step 4
Discard pruned leaves away from the zucchini plant to avoid squash aphids and other insects that could pose problems.

Step 1
Using a sharp knife, cut away a few oversize leaves of the zucchini plant after it has started bearing zucchini.
Step 2
Cut the leaves at the base of the zucchini plant.
Step 3
Avoid pruning near flowering blossoms or new growth as it could reduce vegetable production.

Step 4
Discard pruned leaves away from the zucchini plant to avoid squash aphids and other insects that could pose problems.
1
0
文章
Miss Chen
2018年07月19日

Zucchini is one of the most popular varieties of summer squash because it grows quickly and easily in many climates. Although they're traditionally dark green, zucchini can also be yellow, striped, speckled or even nearly white. Gardeners plant zucchini seeds in full sun, one-inch deep directly in well-drained, fertile soil once after the danger of frost has passed. Single seeds should be planted 24 to 36 inches apart or four to five seeds to a hill, with hills spaced 48 inches apart. Seed packets provide spacing instructions for specific zucchini varieties. Seeds can be planted from early spring to mid-summer to produce zucchinis from late summer to fall.

Planting
Growth
The plants will take four to nine days to emerge from seed, depending on the soil temperature. Vines will develop rapidly and spread across a wide area. The plant will sprout blossoms, male and female, after about six weeks. Only female blossoms bear fruit, but male blossoms are necessary for pollination. Bees carry pollen from the male flowers to the female flowers. If small fruit forms but withers and falls off the vine, pollination has not occurred. Planting flowers near the squash plants encourages bee to pollinate the plants.

Harvest
Once blossoms appear and pollination takes place, zucchini will grow quickly in the warm weather and may be ready to pick in as few as four days or up to a week. Harvest zucchini when it is about 2 inches in diameter and about 6 to 8 inches long. Don't allow the squash to get too big or overripe, or it will be tough and seedy. For more delicate texture, zucchini can be harvested when it is even smaller. The blossoms can also be used in gourmet dishes. Zucchini should be ready to pick about two months after it is planted. Once you've started harvesting, continuing to pick the squash encourages the plant to produce more. Cutting the zucchini off with a knife prevents damage to the plant. Zucchini can be stored for up to two weeks. By late summer, many gardeners find they have so much zucchini they can't give it away fast enough. There's even a national day in celebration of the phenomenon: August 8 is National Sneak Some Zucchini Onto Your Neighbor's Porch Night.

Planting
Growth
The plants will take four to nine days to emerge from seed, depending on the soil temperature. Vines will develop rapidly and spread across a wide area. The plant will sprout blossoms, male and female, after about six weeks. Only female blossoms bear fruit, but male blossoms are necessary for pollination. Bees carry pollen from the male flowers to the female flowers. If small fruit forms but withers and falls off the vine, pollination has not occurred. Planting flowers near the squash plants encourages bee to pollinate the plants.

Harvest
Once blossoms appear and pollination takes place, zucchini will grow quickly in the warm weather and may be ready to pick in as few as four days or up to a week. Harvest zucchini when it is about 2 inches in diameter and about 6 to 8 inches long. Don't allow the squash to get too big or overripe, or it will be tough and seedy. For more delicate texture, zucchini can be harvested when it is even smaller. The blossoms can also be used in gourmet dishes. Zucchini should be ready to pick about two months after it is planted. Once you've started harvesting, continuing to pick the squash encourages the plant to produce more. Cutting the zucchini off with a knife prevents damage to the plant. Zucchini can be stored for up to two weeks. By late summer, many gardeners find they have so much zucchini they can't give it away fast enough. There's even a national day in celebration of the phenomenon: August 8 is National Sneak Some Zucchini Onto Your Neighbor's Porch Night.
0
0
文章
Miss Chen
2018年07月18日

How often a vegetable garden needs water depends on the weather, soil type, growth stage of the vegetables and other factors. Underwatering causes stringy, strongly flavored vegetables, but overwatering increases the risk of plant diseases and reduces vegetables' flavor. When in very wet soil, plants' roots drown, causing the plants to die. Signs of underwatering and overwatering in plants include pale, wilted leaves and poor growth. Regularly checking the soil moisture level gives the best indication of how often to water a vegetable garden.

Checking the Soil
Different kinds of soil hold water better than other kinds. Clay soils hold onto moisture, but sandy soils drain freely. A vegetable garden in any kind of soil needs water when the soil is dry to a depth of 2 inches, which is usually about once every four days during hot weather. A garden with clay soil may need water less frequently, and a garden in sandy soil may need water more often.
You can test soil's moisture level by pushing your fingers into the soil. Dry soil feels dry to the touch. Another test method is to insert a screwdriver or stick into the soil. Moist soil clings to a screwdriver or stick and looks darker than dry soil. Houseplant soil moisture meters are also useful for measuring soil moisture but are sometimes inaccurate.
If the soil is moist just below the soil surface, then usually it also is moist at vegetable plants' root zones, 6 to 8 inches deep. If you want to check deep soil's moisture level, then dig a hole 8 inches deep, and feel the soil at the hole's bottom.
Knowing Plants' Water Needs
Besides vegetable plants' growth stages, the kinds of vegetables in the garden also affect how often the garden needs water. For example, the annual vegetables corn (Zea mays) and bush beans (Phaseolus vulgaris) need more water when silking and flowering than during their other growth stages. Low soil moisture from those stages until harvest reduces crop yields in corn, beans and other summer vegetables.
Apply water to the garden when its soil surface is dry after sowing vegetables and until the seedlings are 4 to 5 inches tall. The soil for growing young vegetable plants should stay consistently moist to a depth of 3 to 4 inches. During hot dry weather, the garden may need watering every day.

Watering the Garden
Equipment for watering a vegetable garden includes garden hoses, watering cans, drip-irrigation systems, soaker hoses and sprinklers. Sprinklers are usually a poor choice because some of their water evaporates, and their water falls over the whole garden bed, which encourages leaf diseases and weeds. Applying water at the plant bases is the best method for watering a vegetable garden.
Connect a fine-spray rose device to a watering can or a soft-spray attachment to a garden hose for watering vegetable seeds and seedlings as well as other delicate plants. Apply water to the soil until it begins to puddle on the soil surface.
Drip-irrigation systems and soaker hoses supply water at plant bases through emitters or perforated hoses, which are connected to a water supply. These devices take time to install but reduce the time spent watering over the long term.
Saving Water
Mulches and weed control help save water in a vegetable garden. Water-permeable landscape fabric, paper and organic mulches such as straw, compost, wood shavings, rice hulls and bark placed on the soil surface reduce water evaporation from the surface. Weight landscape fabric and paper with stones to prevent wind from lifting them. Spread a layer of an organic mulch 3 or 4 inches thick around vegetable plants. Don't allow mulches to touch vegetable stems, or else the stems may rot.
Weeds compete with vegetable plants for water. Remove weeds growing near your vegetables by pulling them upward out of the soil, and shallowly hoe the rest of the vegetable garden once per week.

Checking the Soil
Different kinds of soil hold water better than other kinds. Clay soils hold onto moisture, but sandy soils drain freely. A vegetable garden in any kind of soil needs water when the soil is dry to a depth of 2 inches, which is usually about once every four days during hot weather. A garden with clay soil may need water less frequently, and a garden in sandy soil may need water more often.
You can test soil's moisture level by pushing your fingers into the soil. Dry soil feels dry to the touch. Another test method is to insert a screwdriver or stick into the soil. Moist soil clings to a screwdriver or stick and looks darker than dry soil. Houseplant soil moisture meters are also useful for measuring soil moisture but are sometimes inaccurate.
If the soil is moist just below the soil surface, then usually it also is moist at vegetable plants' root zones, 6 to 8 inches deep. If you want to check deep soil's moisture level, then dig a hole 8 inches deep, and feel the soil at the hole's bottom.
Knowing Plants' Water Needs
Besides vegetable plants' growth stages, the kinds of vegetables in the garden also affect how often the garden needs water. For example, the annual vegetables corn (Zea mays) and bush beans (Phaseolus vulgaris) need more water when silking and flowering than during their other growth stages. Low soil moisture from those stages until harvest reduces crop yields in corn, beans and other summer vegetables.
Apply water to the garden when its soil surface is dry after sowing vegetables and until the seedlings are 4 to 5 inches tall. The soil for growing young vegetable plants should stay consistently moist to a depth of 3 to 4 inches. During hot dry weather, the garden may need watering every day.

Watering the Garden
Equipment for watering a vegetable garden includes garden hoses, watering cans, drip-irrigation systems, soaker hoses and sprinklers. Sprinklers are usually a poor choice because some of their water evaporates, and their water falls over the whole garden bed, which encourages leaf diseases and weeds. Applying water at the plant bases is the best method for watering a vegetable garden.
Connect a fine-spray rose device to a watering can or a soft-spray attachment to a garden hose for watering vegetable seeds and seedlings as well as other delicate plants. Apply water to the soil until it begins to puddle on the soil surface.
Drip-irrigation systems and soaker hoses supply water at plant bases through emitters or perforated hoses, which are connected to a water supply. These devices take time to install but reduce the time spent watering over the long term.
Saving Water
Mulches and weed control help save water in a vegetable garden. Water-permeable landscape fabric, paper and organic mulches such as straw, compost, wood shavings, rice hulls and bark placed on the soil surface reduce water evaporation from the surface. Weight landscape fabric and paper with stones to prevent wind from lifting them. Spread a layer of an organic mulch 3 or 4 inches thick around vegetable plants. Don't allow mulches to touch vegetable stems, or else the stems may rot.
Weeds compete with vegetable plants for water. Remove weeds growing near your vegetables by pulling them upward out of the soil, and shallowly hoe the rest of the vegetable garden once per week.
0
0
文章
Miss Chen
2018年07月17日

Knowing when to plant your vegetable garden ensures a healthy growth cycle and harvest no matter where you live. Different areas have much different planting times. Michigan gardeners, for example, have cold winters and sometimes late springs, depending on which part of the state they live in. Timing for warm-season, cool-season and tender crops varies greatly and relies heavily on soil temperature and frost dates.
Warm- Vs Cool-Season Crops

Not all vegetable crops require the same season or temperatures to grow vigorously, nor are they all equally tolerant of frost, shade, heat or snow. Warm-season crops are those that grow best during the warmer parts of the season. These include sweet corn (Zea mays var. saccharata), cucumbers (Cucumis sativa), tomatoes (Solanum lycopersicum), peppers (Capsicum spp.) and melons (Cucumis melo); all of these are tender crops that are susceptible to frost damage or even death by frost. Cool-season vegetables, on the other hand, prefer the cooler temperatures of fall and spring. Many are frost-tolerant, some to temperatures as low as 20 degrees Fahrenheit. Onions (Allium sepa), peas (Pisum sativum), spinach (Spinacia oleracea), leafy lettuces (Lactuca sativa) and cole crops (Brassica oleracea) are all cool-season vegetables. Cole crops include kale, broccoli, cauliflower, kohlrabi and cabbage. Cool-season vegetables tend to bolt, become tough or woody or have otherwise adverse flavors or textures when grown in summer.
Frost Dates

Many cool-season vegetables can handle planting times as early as the soil thaws and is workable, usually late March through early April in southern Michigan and three weeks later in the most northern parts. Tender, warm-season crops, however, require much warmer soil temperatures and must wait until the danger of frost has passed. Planting on Memorial Day is a good rule of thumb, but frost dangers occur frequently throughout much of Michigan in spring. If you plant around mid- to late May, keep an eye on the weather forecast and cover your seedlings or transplants if temperatures will fall below 40 degrees F.
Checking Soil Temperature

Checking the soil temperature helps ensure your ground is ready for various types of seeds. Different crops grow best at different soil temperatures. Purchase a soil thermometer from your local hardware store or garden center; you can also use any thermometer that has the capability of reading temperatures at different depths. Many tender warm-season crops require a soil temperature of between 64 and 75 degrees F, while tomatoes and corn grow well when planted at around 55 degrees F. Cold-tolerant crops will germinate and grow at a soil temperature of around 45 degrees F.
Days to Harvest

For fall planting, knowing the days to harvest, sometimes called days to maturity, of each crop will help you determine when to plant the seeds. The days to harvest is listed on each seed packet and determines how many days a seed takes to mature and produce harvest-ready fruit. For warm-season crops with short growing times, you can often plant twice during the summer. Subtract the days to harvest from your last average fall frost date to give you a planting date for frost-tender vegetables.
Warm- Vs Cool-Season Crops

Not all vegetable crops require the same season or temperatures to grow vigorously, nor are they all equally tolerant of frost, shade, heat or snow. Warm-season crops are those that grow best during the warmer parts of the season. These include sweet corn (Zea mays var. saccharata), cucumbers (Cucumis sativa), tomatoes (Solanum lycopersicum), peppers (Capsicum spp.) and melons (Cucumis melo); all of these are tender crops that are susceptible to frost damage or even death by frost. Cool-season vegetables, on the other hand, prefer the cooler temperatures of fall and spring. Many are frost-tolerant, some to temperatures as low as 20 degrees Fahrenheit. Onions (Allium sepa), peas (Pisum sativum), spinach (Spinacia oleracea), leafy lettuces (Lactuca sativa) and cole crops (Brassica oleracea) are all cool-season vegetables. Cole crops include kale, broccoli, cauliflower, kohlrabi and cabbage. Cool-season vegetables tend to bolt, become tough or woody or have otherwise adverse flavors or textures when grown in summer.
Frost Dates

Many cool-season vegetables can handle planting times as early as the soil thaws and is workable, usually late March through early April in southern Michigan and three weeks later in the most northern parts. Tender, warm-season crops, however, require much warmer soil temperatures and must wait until the danger of frost has passed. Planting on Memorial Day is a good rule of thumb, but frost dangers occur frequently throughout much of Michigan in spring. If you plant around mid- to late May, keep an eye on the weather forecast and cover your seedlings or transplants if temperatures will fall below 40 degrees F.
Checking Soil Temperature

Checking the soil temperature helps ensure your ground is ready for various types of seeds. Different crops grow best at different soil temperatures. Purchase a soil thermometer from your local hardware store or garden center; you can also use any thermometer that has the capability of reading temperatures at different depths. Many tender warm-season crops require a soil temperature of between 64 and 75 degrees F, while tomatoes and corn grow well when planted at around 55 degrees F. Cold-tolerant crops will germinate and grow at a soil temperature of around 45 degrees F.
Days to Harvest

For fall planting, knowing the days to harvest, sometimes called days to maturity, of each crop will help you determine when to plant the seeds. The days to harvest is listed on each seed packet and determines how many days a seed takes to mature and produce harvest-ready fruit. For warm-season crops with short growing times, you can often plant twice during the summer. Subtract the days to harvest from your last average fall frost date to give you a planting date for frost-tender vegetables.
0
0
文章
Miss Chen
2018年07月16日

When planning your vegetable garden, timing is crucial to getting the most from your hard work. Ohio gardeners can plant during three of the four seasons to get a bigger bounty at harvest times. Summers are long and hot, and winters can be brutal, but the spring and fall seasons bring additional planting times often overlooked.
Ohio's Climate
Most of the Ohio falls within U.S. Department of Agriculture plant hardiness zone 6a, although certain areas are in USDA zones 5b and 6b. In USDA zone 6a, the average annual extreme low temperature is minus 10 to minus 15 degrees Fahrenheit. The ground freezes in winter; wait until the soil is workable to plant your early-spring crops.
Frost Dates

Having a basic understanding and knowledge of the weather and average annual frost dates can help you plan your vegetable garden. Certain crops require a long growing season, some are considered tender and others grow best in cool temperatures. Knowing the average annual first and lost frost dates will help you get a good idea of when to plant your spring and fall vegetables. For much of Ohio, the dates of the average last spring frost -- at 32 degrees Fahrenheit -- range from the end of April to late May; the first frost dates in fall range from mid-September to mid-October.
Summer Vegetable Garden
The summer vegetable garden often takes first place among gardeners. In Ohio, planting dates for summer vegetables are after the last frost but early enough to ensure a long growing season. Many tender crops such as corn (Zea mays), tomatoes (Solanum lycopersicum), peppers (Capsicum spp.) and beans (Phaseolus spp.) need long summer days and a long growing season to produce the best crops. Tender crops are particularly frost-sensitive and may become irreparably damaged if exposed to frost or cold temperatures. Plant in the middle to end of May to help ensure a bountiful harvest.
Fall Vegetable Garden

Certain vegetable crops do best when they mature after the hottest part of summer. For example, summer's heat can make lettuces (Lactuca sativa) bolt and produce bitter leaves. Cole crops, including broccoli and cauliflower (both Brassica oleracea var. botrytis), cabbage (Brassica oleracea var. capitata), Brussels sprouts (Brassica oleracea var. gemmifera) and kale (Brassica oleracea var. viridis) also do best when planted late. Many of these crops are cold-tolerant and able to withstand frosts and temperatures down to about 20 degrees Fahrenheit.
Planting times for these cool-season crops are midsummer, allowing the plants to grow into fall. Plant them between late June and September.
Early-Spring Planting
You have the option of planting cool-season crops as soon as the soil is workable. Lettuces, root vegetables and cole crops can often go in the ground in March or April, as soon as the temperatures start rising and the ground thaws. This timing allows the plants to grow before summer's heat makes them bolt or turn bitter. Early-spring planting also reduces the amount of pests on seedlings.
Help protect young plants' tender leaves and stems from unexpected frosts by draping a protective sheet over stakes in the ground around them or by placing plastic bottles or milk jugs around individual plants.
Ohio's Climate
Most of the Ohio falls within U.S. Department of Agriculture plant hardiness zone 6a, although certain areas are in USDA zones 5b and 6b. In USDA zone 6a, the average annual extreme low temperature is minus 10 to minus 15 degrees Fahrenheit. The ground freezes in winter; wait until the soil is workable to plant your early-spring crops.
Frost Dates

Having a basic understanding and knowledge of the weather and average annual frost dates can help you plan your vegetable garden. Certain crops require a long growing season, some are considered tender and others grow best in cool temperatures. Knowing the average annual first and lost frost dates will help you get a good idea of when to plant your spring and fall vegetables. For much of Ohio, the dates of the average last spring frost -- at 32 degrees Fahrenheit -- range from the end of April to late May; the first frost dates in fall range from mid-September to mid-October.
Summer Vegetable Garden
The summer vegetable garden often takes first place among gardeners. In Ohio, planting dates for summer vegetables are after the last frost but early enough to ensure a long growing season. Many tender crops such as corn (Zea mays), tomatoes (Solanum lycopersicum), peppers (Capsicum spp.) and beans (Phaseolus spp.) need long summer days and a long growing season to produce the best crops. Tender crops are particularly frost-sensitive and may become irreparably damaged if exposed to frost or cold temperatures. Plant in the middle to end of May to help ensure a bountiful harvest.
Fall Vegetable Garden

Certain vegetable crops do best when they mature after the hottest part of summer. For example, summer's heat can make lettuces (Lactuca sativa) bolt and produce bitter leaves. Cole crops, including broccoli and cauliflower (both Brassica oleracea var. botrytis), cabbage (Brassica oleracea var. capitata), Brussels sprouts (Brassica oleracea var. gemmifera) and kale (Brassica oleracea var. viridis) also do best when planted late. Many of these crops are cold-tolerant and able to withstand frosts and temperatures down to about 20 degrees Fahrenheit.
Planting times for these cool-season crops are midsummer, allowing the plants to grow into fall. Plant them between late June and September.
Early-Spring Planting
You have the option of planting cool-season crops as soon as the soil is workable. Lettuces, root vegetables and cole crops can often go in the ground in March or April, as soon as the temperatures start rising and the ground thaws. This timing allows the plants to grow before summer's heat makes them bolt or turn bitter. Early-spring planting also reduces the amount of pests on seedlings.
Help protect young plants' tender leaves and stems from unexpected frosts by draping a protective sheet over stakes in the ground around them or by placing plastic bottles or milk jugs around individual plants.
0
0
求助
Khim_ali
2018年07月16日

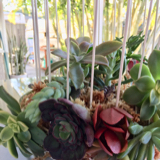
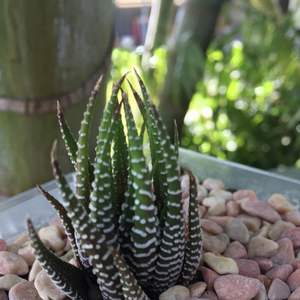
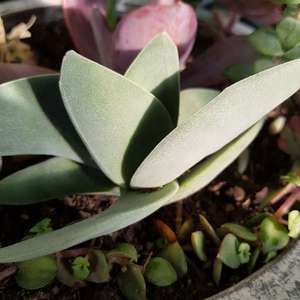
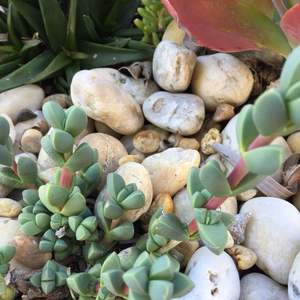
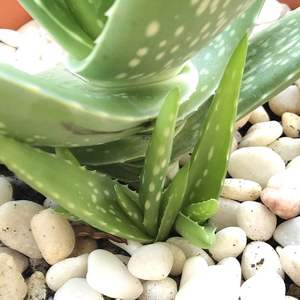
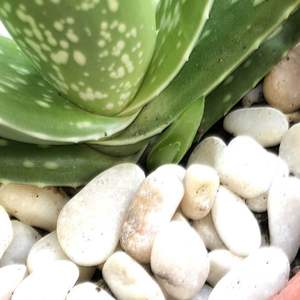
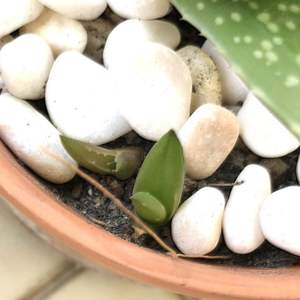
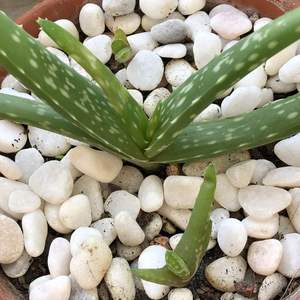
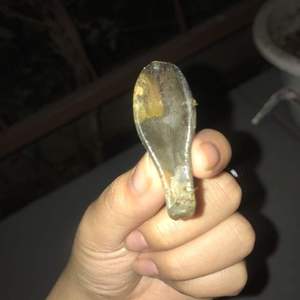
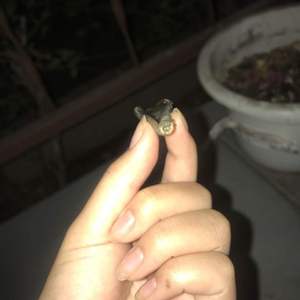
Im new to propagating succulents and its day 5 but the plant didnt go well. I wait till a pedal falls off or I take the bottom ones and twist it to get them off. I tried drying it in my house for 2-3 days on top of soil with some sunlight by the window but the plant began to rot and get all soft/mushy so I tried doing it outside drying them for 2-3 days then misting them with water but my plant has turned black can someone gove me tips on propagating ive been trying but its not going well. Also when propagating is it norml for the plant to get soft and mushy?


0
0
Khim_ali:@Liz Lynch okay I’ll give t a few more days , thank you!!
Liz Lynch:Give it a few more days.... but when you say soft - how soft? Softness usually means to much water 😊
Liz Lynch:I reckon this still may have potential to go


