文章
Miss Chen
2017年11月03日

Highbush blueberries are the most commonly planted type of blueberries. The name actually represents the Northern Highbush (Vaccinium corymbosum) and the Southern Highbush blueberries. Southern Highbush are a hybrid of Northern Highbush and the native Southern species, making it more suitable for the warmer climates of the Southern United States. Lowbush Blueberries (Vaccinium angustifolium) often are referred to as wild blueberries because they grow naturally in Maine, Quebec and Atlantic Canada. Large stands of naturally growing Lowbush varieties are harvested commercially each year, but they are not planted commercially.

Range and Chilling Requirements
All blueberry varieties require "chilling, " that is time spent dormant at temperatures between 45 and 32 degrees Fahrenheit. Lowbush Blueberries, suitable for U.S. Department of Agriculture (USDA) plant hardiness zones 3 to 7, are high chill varieties requiring 1,000 to 1,200 chill hours each winter. Northern Highbush varieties, also suitable for USDA hardiness zones 3 to 7, need slightly less, between 800 and 1,000 chill hours annually. Southern Highbush varieties, suitable for USDA hardiness zones 5 to 10, need the least chilling, between 150 and 800 chill hours.
Growth Patterns
Highbush blueberry varieties grow in defined bush shapes. Some are short and compact, others tall and open, depending on the variety. In contrast, the Lowbush varieties form a dense ground cover that spreads by rhizomes underground. Lowbush varieties tend to be low growing plants, limited to 2 to 3 feet in height. In contrast, Highbush blueberries commonly grow up to 10 feet tall and can reach up to 23 feet in height.
Pollination
All varieties of Northern Highbush and most Southern Highbush blueberries are self-pollinating, but will produce better crops if two varieties are planted together. Not all Lowbush varieties are self-fertile. All blueberries require insect pollination, usually accomplished by native bees. Commercial growers often bring in additional bee hives to ensure adequate pollination.
Management
Lowbush varieties can be a challenge for home gardeners because they require attention to soil pH and extra weeding to establish. They need an acidic soil, preferably between 4.3 and 5.0. Because the plants spread in a dense mat, controlling them also may be an issue. Once established, Lowbush varieties need less maintenance than Highbush varieties. In contrast, Highbush varieties are easier to establish, but need regular pruning to keep them at a manageable height, while Lowbush varieties only need cutting back every 2 to 3 years to rejuvenate the plants.

Fruit
With good care, all varieties yield a good crop of highly nutritious berries. They are highly valued for their antioxidant content and overall nutrition. Wild Lowbush varieties produce smaller berries with a distinctive "wild" flavor that many people prefer.

Range and Chilling Requirements
All blueberry varieties require "chilling, " that is time spent dormant at temperatures between 45 and 32 degrees Fahrenheit. Lowbush Blueberries, suitable for U.S. Department of Agriculture (USDA) plant hardiness zones 3 to 7, are high chill varieties requiring 1,000 to 1,200 chill hours each winter. Northern Highbush varieties, also suitable for USDA hardiness zones 3 to 7, need slightly less, between 800 and 1,000 chill hours annually. Southern Highbush varieties, suitable for USDA hardiness zones 5 to 10, need the least chilling, between 150 and 800 chill hours.
Growth Patterns
Highbush blueberry varieties grow in defined bush shapes. Some are short and compact, others tall and open, depending on the variety. In contrast, the Lowbush varieties form a dense ground cover that spreads by rhizomes underground. Lowbush varieties tend to be low growing plants, limited to 2 to 3 feet in height. In contrast, Highbush blueberries commonly grow up to 10 feet tall and can reach up to 23 feet in height.
Pollination
All varieties of Northern Highbush and most Southern Highbush blueberries are self-pollinating, but will produce better crops if two varieties are planted together. Not all Lowbush varieties are self-fertile. All blueberries require insect pollination, usually accomplished by native bees. Commercial growers often bring in additional bee hives to ensure adequate pollination.
Management
Lowbush varieties can be a challenge for home gardeners because they require attention to soil pH and extra weeding to establish. They need an acidic soil, preferably between 4.3 and 5.0. Because the plants spread in a dense mat, controlling them also may be an issue. Once established, Lowbush varieties need less maintenance than Highbush varieties. In contrast, Highbush varieties are easier to establish, but need regular pruning to keep them at a manageable height, while Lowbush varieties only need cutting back every 2 to 3 years to rejuvenate the plants.

Fruit
With good care, all varieties yield a good crop of highly nutritious berries. They are highly valued for their antioxidant content and overall nutrition. Wild Lowbush varieties produce smaller berries with a distinctive "wild" flavor that many people prefer.
0
0
成长记
safetysurf21
2017年10月19日

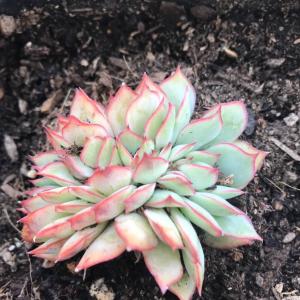
I now added "Hybrid not sure of name" in my "garden"

2
0
Infinte Blossom:Echeveria 'Moon Gad Varnish'
文章
Dummer. ゛☀
2017年10月01日

Scientific Name
Sedum rubrotinctum R.T.Clausen
It has also been classified as a hybrid plant of Sedum pachyphyllum and Sedum stahlii, named Sedum × rubrotinctum.
Common Names
Jelly Bean Plant, Jelly Bean, Pork and Beans, Brown Beans, Christmas Cheer, Banana Cactus
Scientific Classification
Family: Crassulaceae
Subfamily: Sedoideae
Tribe: Sedeae
Subtribe: Sedinae
Genus: Sedum
Description
Sedum rubrotinctum is an evergreen, succulent perennial with sprawling, leaning stems, up to 8 inches (20 cm) tall. The leaves are jelly bean shaped, 0.75 inch (1.9 cm) long, green with red-brown tips which turn to bronze in the summer months. The flowers are small, star-shaped and yellow in color.
How to Grow and Care
When growing Sedum, keep in mind that Sedum plants need very little attention or care. They will thrive in conditions that many other plants thrive in, but will do just as well in less hospitable areas. They are ideal for that part of your yard that gets too much sun or too little water to grow anything else. A common name for Sedum is Stonecrop, due to the fact that many gardeners joke that only stones need less care and live longer.
Sedum is easily planted. For shorter varieties, simply laying the Sedum on the ground where you want it to grow is normally enough to get the Sedum plant started there. They will send out roots from wherever the stem is touching the ground and root itself. If you would like to further ensure that the plant will start there, you can add a very thin covering of soil over the plant.
For taller Sedum varieties, you can break off one of the stems and push it into the ground where you would like to grow it.
Sedum rubrotinctum R.T.Clausen
It has also been classified as a hybrid plant of Sedum pachyphyllum and Sedum stahlii, named Sedum × rubrotinctum.

Common Names
Jelly Bean Plant, Jelly Bean, Pork and Beans, Brown Beans, Christmas Cheer, Banana Cactus
Scientific Classification
Family: Crassulaceae
Subfamily: Sedoideae
Tribe: Sedeae
Subtribe: Sedinae
Genus: Sedum

Description
Sedum rubrotinctum is an evergreen, succulent perennial with sprawling, leaning stems, up to 8 inches (20 cm) tall. The leaves are jelly bean shaped, 0.75 inch (1.9 cm) long, green with red-brown tips which turn to bronze in the summer months. The flowers are small, star-shaped and yellow in color.

How to Grow and Care
When growing Sedum, keep in mind that Sedum plants need very little attention or care. They will thrive in conditions that many other plants thrive in, but will do just as well in less hospitable areas. They are ideal for that part of your yard that gets too much sun or too little water to grow anything else. A common name for Sedum is Stonecrop, due to the fact that many gardeners joke that only stones need less care and live longer.

Sedum is easily planted. For shorter varieties, simply laying the Sedum on the ground where you want it to grow is normally enough to get the Sedum plant started there. They will send out roots from wherever the stem is touching the ground and root itself. If you would like to further ensure that the plant will start there, you can add a very thin covering of soil over the plant.
For taller Sedum varieties, you can break off one of the stems and push it into the ground where you would like to grow it.
0
2
文章
Miss Chen
2017年09月29日

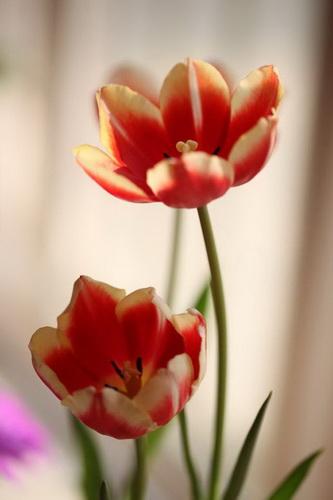
Blue tulips are not a natural phenomenon. To create blue tulips, white tulips may be dyed to achieve the right color. Hybrid tulip species in shades of violet and lilac may also be created to make blue blossoms. Tulip flowers. which are often associated with Holland, grow naturally in a wide variety of shades. Deep violet tulips are often commonly called blue tulips.
Features
Blue tulips, like other tulip flowers, grow in an upright, bell-like shape. Tulips grow eight to 28 inches in height, with leaves that grow in a gray-blue shade. Blue tulips are short, the flowers blue-violet or lilac in color. Many types of violet and deep purple tulips are available to gardeners. Breeder, Darwin, Parrot, Cottage, Lily-flowered and Early tulips are the most popular varieties of blue-purple tulips. Blue tulips are also called pasque flower, wild crocus, lion's beard and prairie anemone.
Origins
Tulips originate from Persia and Turkey. In Turkey, tulip flowers were used as an adornment on turbans. Because of the fashion trend, Europeans named the flowers after the Persian word for turban. Popularity for the flower spread into the Netherlands, giving cultivated varieties of the plant the nickname "Dutch tulips." Available in a wide range of colors, tulips today are a popular choice among brides, gardeners and florists.
Meaning of Flowers
The Language of Flowers was invented during the Victorian Era, when it became fashionable to exchange messages by giving flowers. Each flower has its own meaning, with different flower colors often representing new shades of meaning. Through flowers, it's possible to express love, desire, sorrow, friendship and many other emotions.

Meaning of Blue Flowers
The color blue is symbolic of tranquility, sleep and calm. Dark blue is said to stand for truth. Blue flowers often grow with shades of purple, creating indigo, violent and lilac blooms. Blue flowers were used as the main symbol of Romanticism, a school of philosophy that flourished during the latter half of the Victorian Age. The blue flower conveys love and desire.
Meaning of Blue Tulips
Blue tulips are thought to symbolize tranquility and peace because of the blue color. When given to someone else, the flowers convey a message of trust and loyalty. In general, tulips are thought to send a message of perfect love, though red tulips are most strongly associated with the emotion.

Features
Blue tulips, like other tulip flowers, grow in an upright, bell-like shape. Tulips grow eight to 28 inches in height, with leaves that grow in a gray-blue shade. Blue tulips are short, the flowers blue-violet or lilac in color. Many types of violet and deep purple tulips are available to gardeners. Breeder, Darwin, Parrot, Cottage, Lily-flowered and Early tulips are the most popular varieties of blue-purple tulips. Blue tulips are also called pasque flower, wild crocus, lion's beard and prairie anemone.
Origins
Tulips originate from Persia and Turkey. In Turkey, tulip flowers were used as an adornment on turbans. Because of the fashion trend, Europeans named the flowers after the Persian word for turban. Popularity for the flower spread into the Netherlands, giving cultivated varieties of the plant the nickname "Dutch tulips." Available in a wide range of colors, tulips today are a popular choice among brides, gardeners and florists.
Meaning of Flowers
The Language of Flowers was invented during the Victorian Era, when it became fashionable to exchange messages by giving flowers. Each flower has its own meaning, with different flower colors often representing new shades of meaning. Through flowers, it's possible to express love, desire, sorrow, friendship and many other emotions.

Meaning of Blue Flowers
The color blue is symbolic of tranquility, sleep and calm. Dark blue is said to stand for truth. Blue flowers often grow with shades of purple, creating indigo, violent and lilac blooms. Blue flowers were used as the main symbol of Romanticism, a school of philosophy that flourished during the latter half of the Victorian Age. The blue flower conveys love and desire.
Meaning of Blue Tulips
Blue tulips are thought to symbolize tranquility and peace because of the blue color. When given to someone else, the flowers convey a message of trust and loyalty. In general, tulips are thought to send a message of perfect love, though red tulips are most strongly associated with the emotion.
0
0
成长记
Deanna Dubbs
2017年09月26日

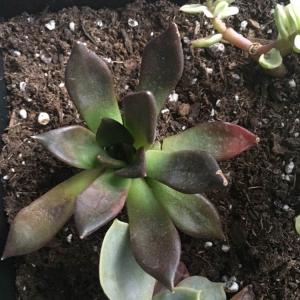
I new added a "Echiveria Hybrid Blank Prince “Gannon”" in my "garden"

0
0
文章
Dummer. ゛☀
2017年09月23日

A genus of plants native to the Canary Islands, Aeoniums have leaf rosettes at branch ends that look like large flowers. Most Aeoniums form a small shrub or small tree-like plant, but some don’t branch. There are about 35 species as well as hybrid cultivars.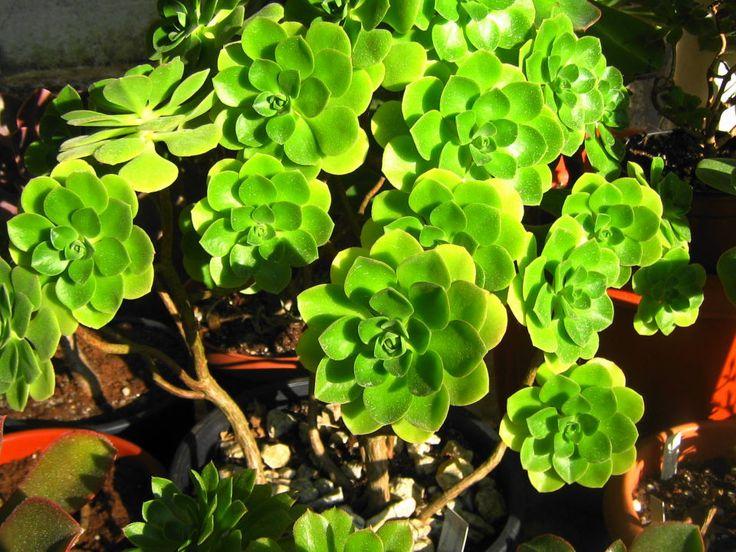
Propagate Aeoniums by stem cuttings, except for unbranched species such as Dinner Plate Plant (Aeonium tabuliforme), which die after flowering and are propagated from seed. Aeoniums are hardy in U.S. Department of Agriculture plant hardiness zones 9 through 11.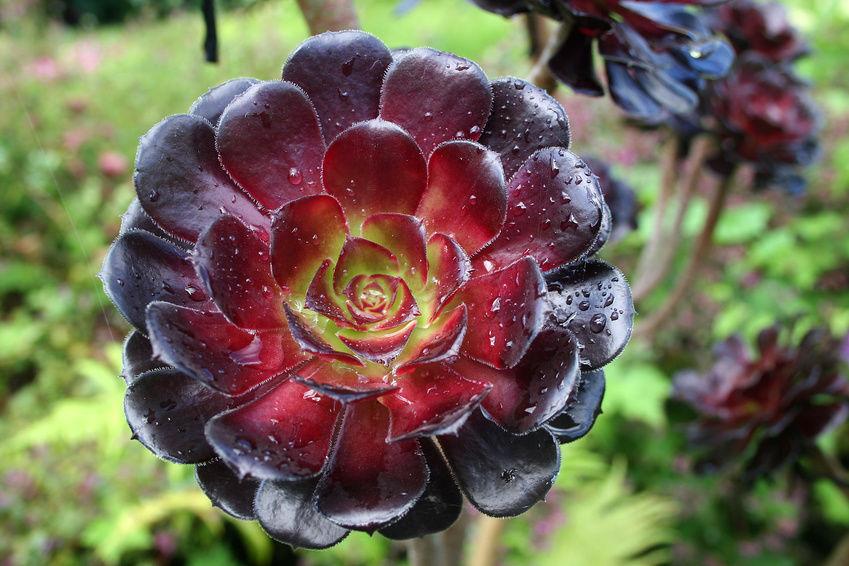
Stem Cuttings
Clean a sharp pruning shears by dipping it in rubbing alcohol.
Decide how long a stem cutting to take; for tree-like forms with bare stems it may be 5 to 6 inches (12.5 to 15 cm) long, and for small shrub-like forms it could be 0.5 inch (1.3 cm) or shorter. Cut off the piece of stem containing the leaf rosette with the pruning shears.
Allow the end of the cutting to heal in a shaded place for at least three days, longer if the stem is thick and succulent.
Fill a clean nursery container that has drainage holes with a mixture of half cactus and succulent potting mix and half perlite, well mixed and slightly moistened. Use a pot just big enough to contain the cutting.
Put the cutting into the rooting medium, burying just enough of it to hold the cutting upright. Put the cutting in bright indirect light, watering it lightly once a week.
Resume regular watering when the Aeonium develops roots. Water thoroughly, then let the top 2 inches of soil dry out before watering again.
Seeds
Collect seeds after the Aeonium has finished blooming. Put them in a paper bag and allow them to dry.
Fill a shallow clean nursery flat with the same mixture you used for rooting the cuttings.
Sow the seeds on top of the mix, scattering them evenly. Cover them with twice their thickness of the potting mix. Water the flat well.
Put the flat in bright indirect light and cover it with plastic wrap. Keep the potting mix moist until germination occurs. Remove the plastic wrap when germination starts.
Prick out individual seedlings when they have reached 0.5 inch (1.3 cm) in diameter. Give each seedling its own 2-inch (5 cm) nursery pot, transferring it to just the next bigger pot size as the plant grows. Keep the soil level the same so the flat plant isn’t buried.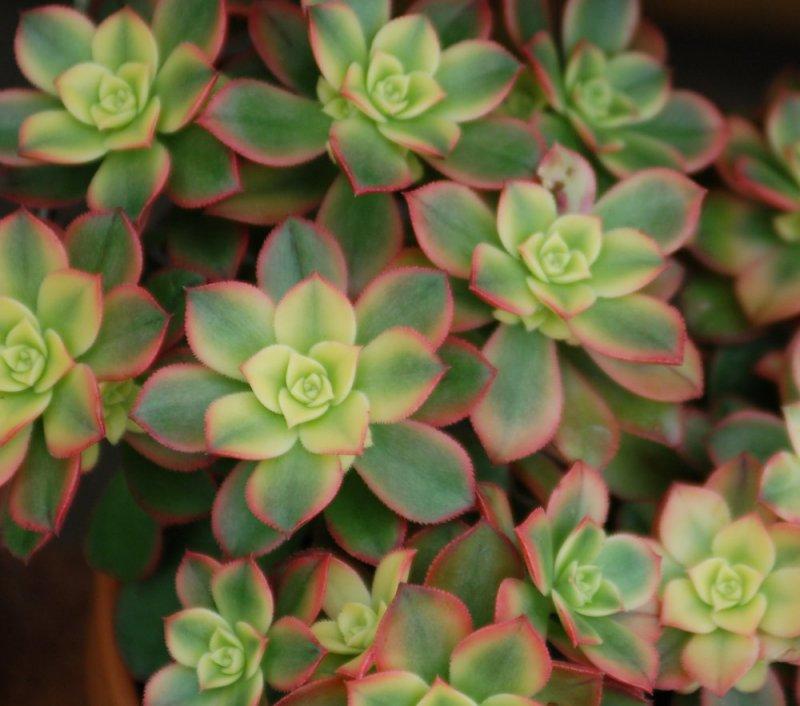
Things You Will Need
Pruning shears
Rubbing alcohol
Nursery containers
Cactus and succulent potting mix
Perlite
Nursery flat
Plastic wrap
Tip
Take cuttings when the plant is actively growing, usually fall in USDA zones 9 through 11. Aeoniums go dormant in summer; cuttings taken while plants are dormant don’t root. Each leaf rosette dies after it blooms.

Propagate Aeoniums by stem cuttings, except for unbranched species such as Dinner Plate Plant (Aeonium tabuliforme), which die after flowering and are propagated from seed. Aeoniums are hardy in U.S. Department of Agriculture plant hardiness zones 9 through 11.

Stem Cuttings
Clean a sharp pruning shears by dipping it in rubbing alcohol.
Decide how long a stem cutting to take; for tree-like forms with bare stems it may be 5 to 6 inches (12.5 to 15 cm) long, and for small shrub-like forms it could be 0.5 inch (1.3 cm) or shorter. Cut off the piece of stem containing the leaf rosette with the pruning shears.

Allow the end of the cutting to heal in a shaded place for at least three days, longer if the stem is thick and succulent.
Fill a clean nursery container that has drainage holes with a mixture of half cactus and succulent potting mix and half perlite, well mixed and slightly moistened. Use a pot just big enough to contain the cutting.
Put the cutting into the rooting medium, burying just enough of it to hold the cutting upright. Put the cutting in bright indirect light, watering it lightly once a week.

Resume regular watering when the Aeonium develops roots. Water thoroughly, then let the top 2 inches of soil dry out before watering again.
Seeds
Collect seeds after the Aeonium has finished blooming. Put them in a paper bag and allow them to dry.
Fill a shallow clean nursery flat with the same mixture you used for rooting the cuttings.

Sow the seeds on top of the mix, scattering them evenly. Cover them with twice their thickness of the potting mix. Water the flat well.
Put the flat in bright indirect light and cover it with plastic wrap. Keep the potting mix moist until germination occurs. Remove the plastic wrap when germination starts.

Prick out individual seedlings when they have reached 0.5 inch (1.3 cm) in diameter. Give each seedling its own 2-inch (5 cm) nursery pot, transferring it to just the next bigger pot size as the plant grows. Keep the soil level the same so the flat plant isn’t buried.

Things You Will Need
Pruning shears
Rubbing alcohol
Nursery containers
Cactus and succulent potting mix
Perlite
Nursery flat
Plastic wrap

Tip
Take cuttings when the plant is actively growing, usually fall in USDA zones 9 through 11. Aeoniums go dormant in summer; cuttings taken while plants are dormant don’t root. Each leaf rosette dies after it blooms.
0
1
Marie Walker
2017年09月18日

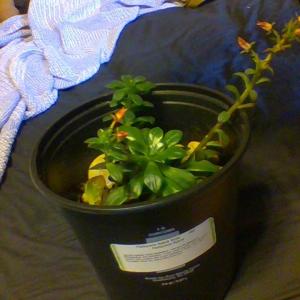
Have had this hybrid for months now and I'm still no closer to identifying the exact type. even though it came with a label. it provided no answers. just more questions. all i know is it is a pachyveria hybrid. it forms small shrubby stems of rosettes. it blooms bright red small flowers on long stalks. its drought tolerant. good in rock gardens and mixed containers.it has to be watered thoroughly when dry, and protected from frost. it sometimes gets a purple or red hue on the leaves. but mostly dark green. so any help would be appriciated

2
0
meriunkat:Can you tell me what those two first lines on the description of the pot say? I'm trying to find your plant. I have a feeling your plant was wrongly named..
文章
Miss Chen
2017年08月29日

Roses (Rosa spp.) are hardy in U.S. Department of Agriculture plant hardiness zones 4 through 9, depending on the variety. Varieties include climbing or rambling, bush, hybrid and miniature. Some roses bloom on canes produced the previous year and others on the current year's growth. Pruning at the wrong time can lead to poor blossom production or make the plants susceptible to pests diseases and weather damage. Hard-prune hybrid, bush and miniature roses in spring just before they produce leaves, and hard-prune climbing roses right after their blooms fade in summer. About one-third of a rose bush remains after a hard prune. Trimming instead of hard-pruning, however, removes only enough growth to shape the bushes and to encourage new blooms. Trim all kinds of roses throughout the growing season for size control, additional flowering or to remove faded blooms and damaged branches.

Step 1
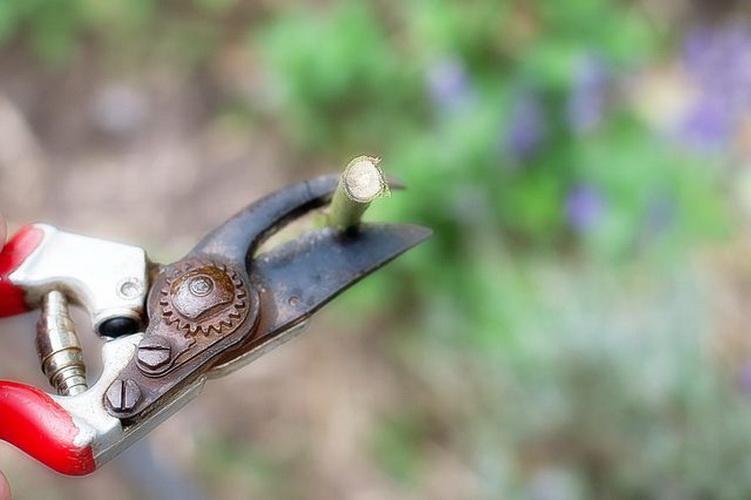
Remove rose bushes' dead canes any time you notice them. Cut back each dead portion of a cane to the green part of the cane, using pruning shears. Check whether or not the pith -- the center of the cane -- is white. If the pith is brown, prune back the cane to its part that has a white pith.
Step 2
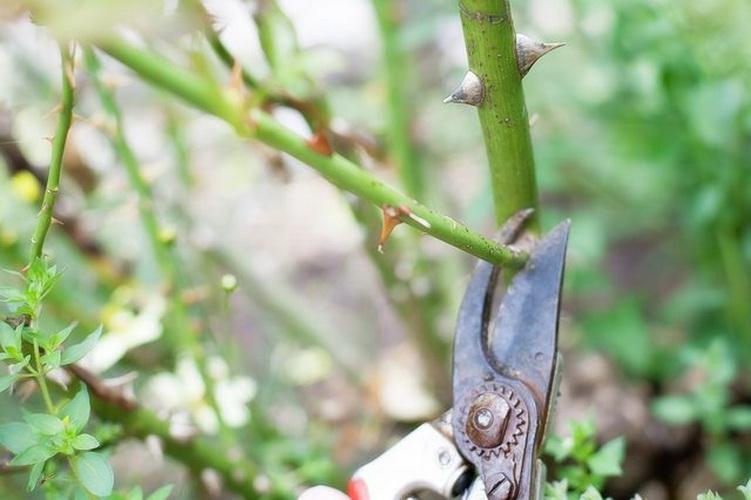
Cut away branches that are smaller in diameter than a pencil throughout the growing season. Make each cut at a 45-degree angle away from an outward-facing stem bud.

Step 3
Trim back stems that cross each other or may grow into each other when you notice the problem. Cut such a stem back to the main cane, leaving about 1/4 inch of the stem remaining. Use loppers or pruning shears.
Step 4
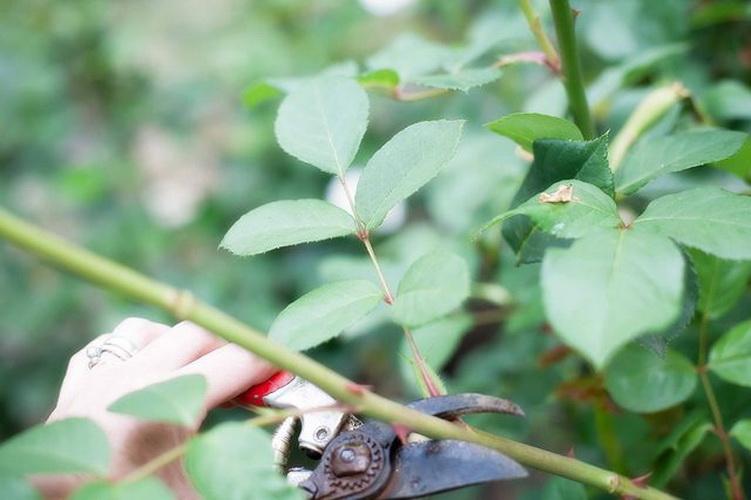
Cut the stem of each spent flower just below the first set of a five-leaf leaflet. Cut just below a seven-leaf leaflet if you want to reduce a rose bush's height. Removing spent flowers is called deadheading.
Step 5
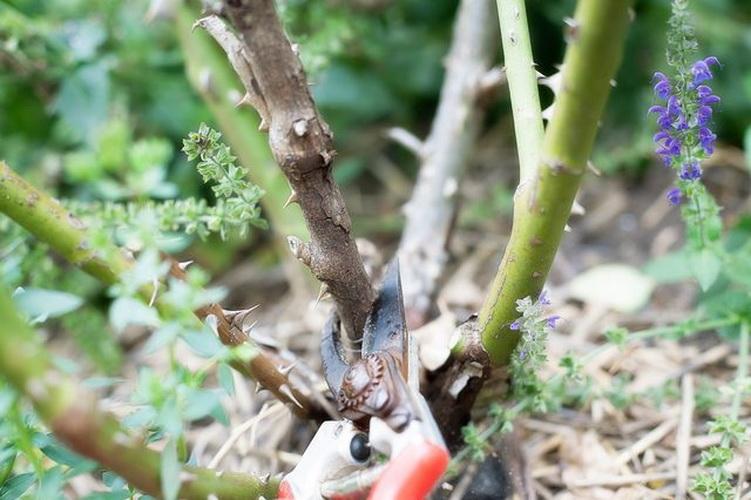
Remove two or three center, old canes at the base of a crowded or overgrown rose bush by using loppers. This technique opens the bush's center, providing it better air circulation during the growing season.


Step 1
Remove rose bushes' dead canes any time you notice them. Cut back each dead portion of a cane to the green part of the cane, using pruning shears. Check whether or not the pith -- the center of the cane -- is white. If the pith is brown, prune back the cane to its part that has a white pith.

Step 2
Cut away branches that are smaller in diameter than a pencil throughout the growing season. Make each cut at a 45-degree angle away from an outward-facing stem bud.

Step 3
Trim back stems that cross each other or may grow into each other when you notice the problem. Cut such a stem back to the main cane, leaving about 1/4 inch of the stem remaining. Use loppers or pruning shears.

Step 4
Cut the stem of each spent flower just below the first set of a five-leaf leaflet. Cut just below a seven-leaf leaflet if you want to reduce a rose bush's height. Removing spent flowers is called deadheading.

Step 5
Remove two or three center, old canes at the base of a crowded or overgrown rose bush by using loppers. This technique opens the bush's center, providing it better air circulation during the growing season.
1
1
文章
Miss Chen
2017年08月29日

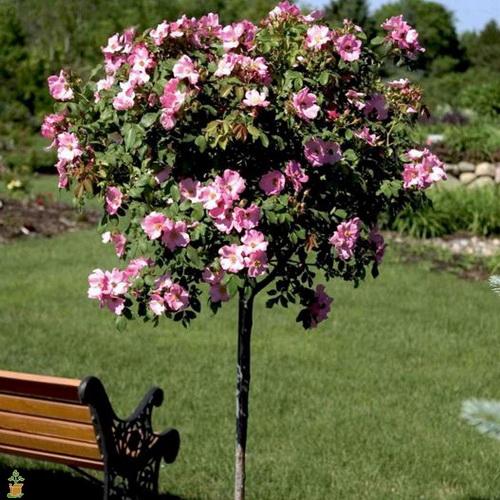
Rose trees are hybrid roses that have been grown to look like a tree. They range in size from 3 feet to 6 feet tall and come in many colors; there are even weeping rose trees. Rose trees require most of the same care of a regular rose bush. Due to their unique shape, however, they also have some unique requirements of their own.

Step 1
Prepare the site for the rose tree. They need full sunlight and rich soil that retains moisture. Dig up the site, remove weeds, rocks and other garden debris and add generous amounts of compost or decayed manure several weeks before planting.
Step 2
Plant the rose tree. Dig a hole that is 2 feet deep and 2 feet wide; put the garden soil in a wheelbarrow or on a tarp. Mix the garden soil with equal amounts of mulch, peat moss and potting soil. Fill the hole half full with this soil mixture. Fill the hole with water and stir with the shovel, creating a slurry with the soil mixture. Place the rose in the hole and have someone hold it in place while add soil mixture until the hole is completely filled and the slurry is firm. Rose trees are susceptible to wind damage and should be staked using tree stakes.
Step 3
Water a newly planted rose tree every day until it is established and new growth appears. Water regularly and deeply; roses need about 1 to 2 inches of water each week. This causes the roots to grow deep and protects the plant during periods of drought.
Step 4
Feed the rose tree once new growth has appeared. You can use a complete plant food. Doug Green at Simple Gift Farms recommends using compost to feed the roses; spread two to three shovel-full of compost around the rose tree's base in early spring and in mid summer.
Step 5
Watch for rose diseases, such as black spot or mildew and treat promptly. Remove the infected leaves and treat with a fungicide. Roses attract aphids, spider mites and Japanese beetles; treat with a pesticide to control these problems. Bayer Advanced All-in-One Rose and Flower Care is a systemic pesticide, fungicide and plant food that is used once a month.
Step 6
Deadhead spent flowers on the rose tree. Remove the faded flower by locating the next leaf set below the bud; you will cut approximately ¼ inch above this leaf set. Hold the pruning shears at a 45 degree angle, so that the angle faces away from the center of the bush. Clean up all fallen rose leaves and petals beneath the rose tree and throw them away; do not add to the compost as it will encourage disease and pests.
Step 7
Prepare the rose tree in late fall for the coming winter. You can build a cage of mesh wire around the 'trunk' of the rose tree and fill the cage with mulch. Doug Green at Simple Gifts Farm offers an alternate method. Wrap a sheet of flexible Styrofoam around the trunk of the rose and cover that with burlap. Secure the burlap with duct tape and mound mulch around the base of the rose tree.
Step 8
Prune the rose tree in the spring. Remove any dead part of the canes; healthy canes have a green ting to the bark and white pith inside. Cut off the dead part until you see the healthy pith; if there is no healthy pith, remove the entire cane. Remove about 1/3 of the length of the healthy canes, shaping the rose tree for balance, both for appearance and to prevent uneven weight on one side.

Step 1
Prepare the site for the rose tree. They need full sunlight and rich soil that retains moisture. Dig up the site, remove weeds, rocks and other garden debris and add generous amounts of compost or decayed manure several weeks before planting.
Step 2
Plant the rose tree. Dig a hole that is 2 feet deep and 2 feet wide; put the garden soil in a wheelbarrow or on a tarp. Mix the garden soil with equal amounts of mulch, peat moss and potting soil. Fill the hole half full with this soil mixture. Fill the hole with water and stir with the shovel, creating a slurry with the soil mixture. Place the rose in the hole and have someone hold it in place while add soil mixture until the hole is completely filled and the slurry is firm. Rose trees are susceptible to wind damage and should be staked using tree stakes.
Step 3
Water a newly planted rose tree every day until it is established and new growth appears. Water regularly and deeply; roses need about 1 to 2 inches of water each week. This causes the roots to grow deep and protects the plant during periods of drought.
Step 4
Feed the rose tree once new growth has appeared. You can use a complete plant food. Doug Green at Simple Gift Farms recommends using compost to feed the roses; spread two to three shovel-full of compost around the rose tree's base in early spring and in mid summer.

Step 5
Watch for rose diseases, such as black spot or mildew and treat promptly. Remove the infected leaves and treat with a fungicide. Roses attract aphids, spider mites and Japanese beetles; treat with a pesticide to control these problems. Bayer Advanced All-in-One Rose and Flower Care is a systemic pesticide, fungicide and plant food that is used once a month.
Step 6
Deadhead spent flowers on the rose tree. Remove the faded flower by locating the next leaf set below the bud; you will cut approximately ¼ inch above this leaf set. Hold the pruning shears at a 45 degree angle, so that the angle faces away from the center of the bush. Clean up all fallen rose leaves and petals beneath the rose tree and throw them away; do not add to the compost as it will encourage disease and pests.
Step 7
Prepare the rose tree in late fall for the coming winter. You can build a cage of mesh wire around the 'trunk' of the rose tree and fill the cage with mulch. Doug Green at Simple Gifts Farm offers an alternate method. Wrap a sheet of flexible Styrofoam around the trunk of the rose and cover that with burlap. Secure the burlap with duct tape and mound mulch around the base of the rose tree.
Step 8
Prune the rose tree in the spring. Remove any dead part of the canes; healthy canes have a green ting to the bark and white pith inside. Cut off the dead part until you see the healthy pith; if there is no healthy pith, remove the entire cane. Remove about 1/3 of the length of the healthy canes, shaping the rose tree for balance, both for appearance and to prevent uneven weight on one side.
0
1
文章
Miss Chen
2017年08月29日

Rose trees are hybrid roses that have been grafted on rootstock to look like a tree. Rose trees need the same care-planting, watering, feeding, protection from pests and diseases-as regular rose bushes. Like regular rose bushes, they also need to be pruned in early spring. Due to their unusual shape, rose trees need to be pruned differently from their bush counterparts.


Step 1
Use clean and sharp tools when pruning a rose tree. Using a dull shear to prune a rose will tear the cane instead of cut it, which damages the cane. Pruning tools can be cleaned using an old toothbrush and water and sterilized in a solution of 1 part household bleach and 10 parts water; allow the sterilized tools to air dry. Clean and sterilize the pruning tools after each use.The Weekend Gardener has extra tips for sharpening and cleaning pruning tools.
Step 2
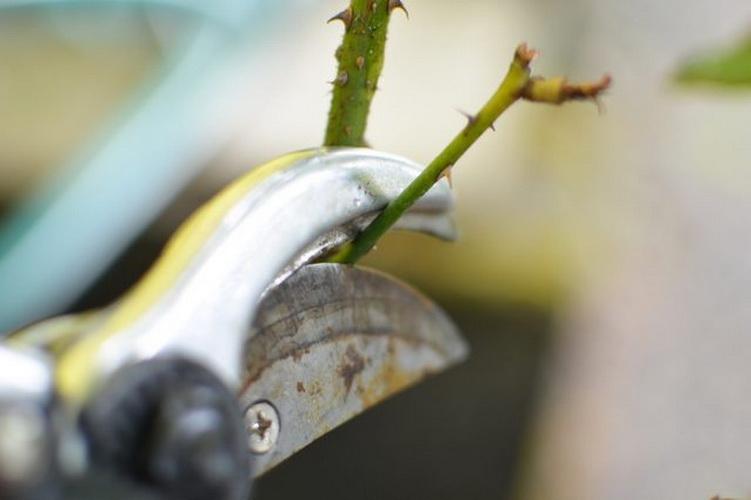
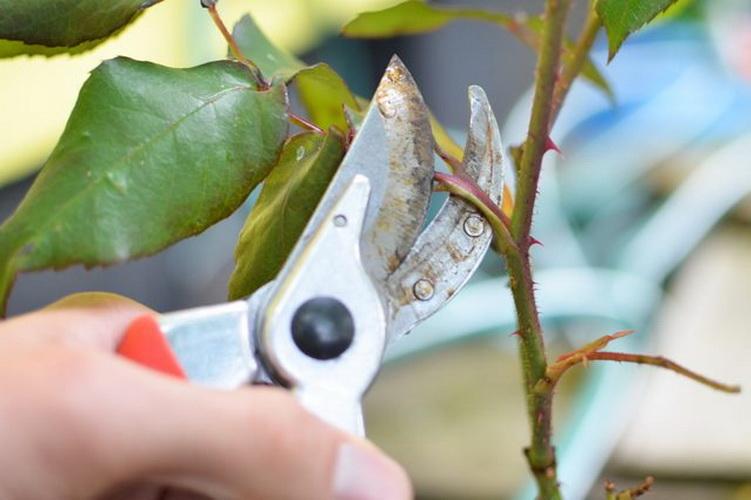
Hold the pruning tools properly for pruning roses and rose trees. Hold the shears at a 45 degree angle; direct the angle so that it faces away from the center of the rose. This will cause new growth to grow away from the center of the rose, allowing air flow, which reduces the chance for diseases.
Step 3
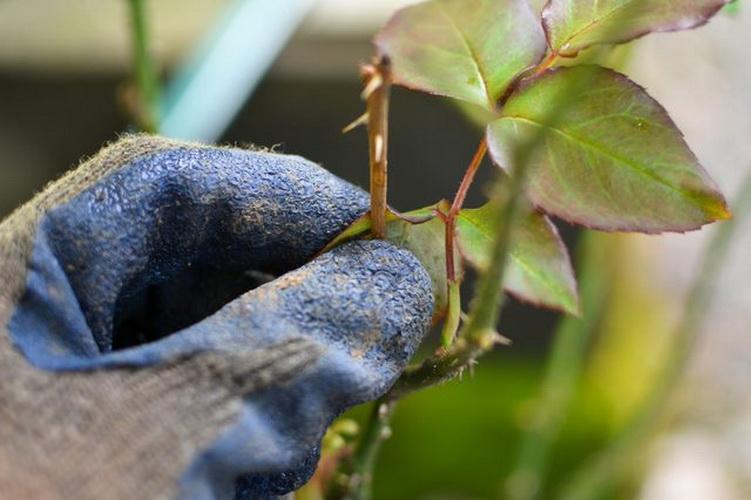
Remove any canes that look dead. A healthy cane will have a greenish cast to the bark and white pith on the inside. Cut away the dead part of the cane until you come to healthy white pith.

Step 4
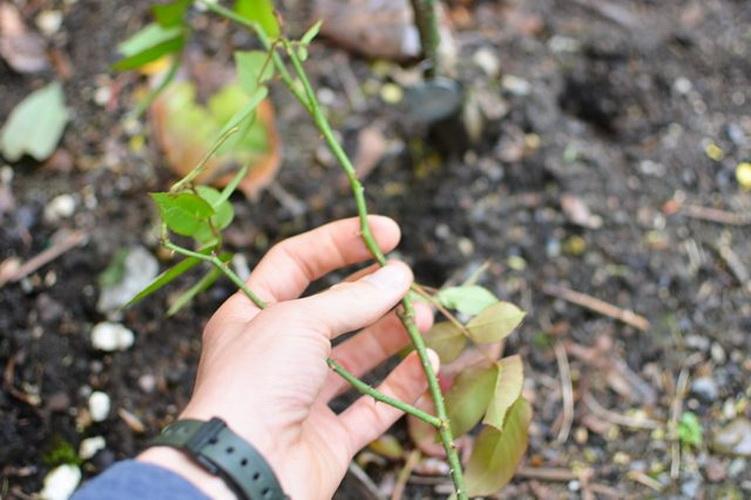
Remove any canes that are not a pencil width thick. These canes are not strong enough to support the blooms when they open. Remove woody old canes; saw them off as close to the rose tree trunk as possible. Remove any 'sucker' canes, that grow from the roots below the bud union.
Step 5
Shape the healthy canes on the rose tree. Prune 1/3 of the length from the canes. Work towards a balance when pruning a rose tree; not only does it look prettier, uneven pruning will cause an uneven weight distribution on the rose.

Step 6
Seal the pruned canes by smearing household glue on the cuts. This acts as a bandage on the cane and will keep insects and disease from entering through the cut.
Step 7
Clean up all rose cuttings, fallen leaves and petals from around the base of the rose tree. Throw these in the trash. Do not add them to the compost as they will encourage pests and diseases.


Step 1
Use clean and sharp tools when pruning a rose tree. Using a dull shear to prune a rose will tear the cane instead of cut it, which damages the cane. Pruning tools can be cleaned using an old toothbrush and water and sterilized in a solution of 1 part household bleach and 10 parts water; allow the sterilized tools to air dry. Clean and sterilize the pruning tools after each use.The Weekend Gardener has extra tips for sharpening and cleaning pruning tools.

Step 2
Hold the pruning tools properly for pruning roses and rose trees. Hold the shears at a 45 degree angle; direct the angle so that it faces away from the center of the rose. This will cause new growth to grow away from the center of the rose, allowing air flow, which reduces the chance for diseases.

Step 3
Remove any canes that look dead. A healthy cane will have a greenish cast to the bark and white pith on the inside. Cut away the dead part of the cane until you come to healthy white pith.

Step 4
Remove any canes that are not a pencil width thick. These canes are not strong enough to support the blooms when they open. Remove woody old canes; saw them off as close to the rose tree trunk as possible. Remove any 'sucker' canes, that grow from the roots below the bud union.

Step 5
Shape the healthy canes on the rose tree. Prune 1/3 of the length from the canes. Work towards a balance when pruning a rose tree; not only does it look prettier, uneven pruning will cause an uneven weight distribution on the rose.

Step 6
Seal the pruned canes by smearing household glue on the cuts. This acts as a bandage on the cane and will keep insects and disease from entering through the cut.

Step 7
Clean up all rose cuttings, fallen leaves and petals from around the base of the rose tree. Throw these in the trash. Do not add them to the compost as they will encourage pests and diseases.
0
1
求助
lensucc
2017年08月26日

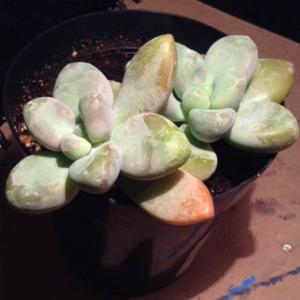
I saw some different colors of Pachyphytum oviferum (moonstone) I would like to have a pink color moonstone just like in the picture (picture not mine) is there any way to like, make it? you know hybrid of plants? how?


4
3
rebeccamee:Enough sunlight and difference in temperature between day and night
Ueca:Many succulents do turn red from lots of sun.
lensucc:@Ueca so pachyphytum oviferum is naturally pink color?
Ueca:There's a species in another genus that has a similar appearance and is naturally purple - Graptopetalum amethystinum.
Otherwise, as far as I know, this pink colour depends on having enough sunlight.
文章
Dummer. ゛☀
2017年08月26日

A member of the family Lamiaceae, red raripila mint plants (Mentha x smithiana) are hybrid plants composed of the corn mint (Mentha arvensis), watermint (Mentha aquatica), and spearmint (Mentha spicata). More commonly used in Northern and Central Europe, acquiring red raripila plants may require a bit more research, as other mint varieties are more popular in the United States and Canada, but well worth the effort for its lovely green/red leaves with red stems.
Red Raripila Mint Information
Pollinated and extremely popular to bees and butterflies makes the red raripila mint extremely susceptible to cross hybridization. Growing red raripila mint plants are, however, not attractive to deer, making them a nice addition to rural landscapes. Red raripila mint is also a great companion plant to vegetable crops such as cabbages and tomatoes as they act as a deterrent to troublesome insect pests.
As mentioned, it may be a bit more of a challenge to obtain these plants in North America, but if one does obtain seed, be aware that this little hybrid is generally sterile and thus, the seed will usually not breed true. If, however, seed is acquired, it may be sown in the spring in a cold frame and has a relatively quick germination. Once the red raripila plants attain some size, transplant them to pots or other restrictive growing area. Red raripila mint is easily divisible and should be done in spring or fall, although the plant is fairly tolerant of division most any time of the year. Any portion of the root is capable of creating a new plant and will establish rapidly with a limited amount of fuss.
Care of Red Raripila Mint
Care of red raripila plants, as for all mint varieties, is fairly simple. Like all mint plants, red raripila plants are aggressive spreaders once established and should be planted either in pots or a confined area. Easy to grow, this little perennial succeeds in most any type of soil as long as it is not too arid, including heavily clay laden soils. Care of red raripila mint includes a slightly acidic soil. Growing red raripila mint plants may be sown in areas of sun to partial shade, although to boost the production of essential oils, full sun exposure is most advantageous.
How to Use Red Raripila Mints
Like most mint varieties, red raripila mint is excellent brewed as a tea and can be used fresh or dried. The flavor of red raripila mint is reminiscent of spearmint and has the resulting refreshing taste and similarity of use. The essential oils derived from red raripila mint plants are used in everything from ice cream to beverages and are extremely popular in Northern and Central Europe and down under in Australia to flavor fresh peas or mint jelly for the lamb and mutton dishes popular in those countries. These essential oils are also offensive to rats and mice, so it has also been spread in granaries and other areas of grain storage to discourage the rodent population. Medicinal uses have been associated with this plant as well. The oils from red raripila mint are thought to aid in digestive distress and are often used for their antiseptic properties. As with many mint species, red raripila has been used in the treatment of headaches, fevers, digestive distress and other minor medical issues. Chewing on the leaves will also, like spearmint, freshen one’s breath.
Like all other members of the mint family, red raripila mint plants’ essential oils should be limited or avoided by pregnant women as the ingestion has been known to trigger miscarriages.

Red Raripila Mint Information
Pollinated and extremely popular to bees and butterflies makes the red raripila mint extremely susceptible to cross hybridization. Growing red raripila mint plants are, however, not attractive to deer, making them a nice addition to rural landscapes. Red raripila mint is also a great companion plant to vegetable crops such as cabbages and tomatoes as they act as a deterrent to troublesome insect pests.
As mentioned, it may be a bit more of a challenge to obtain these plants in North America, but if one does obtain seed, be aware that this little hybrid is generally sterile and thus, the seed will usually not breed true. If, however, seed is acquired, it may be sown in the spring in a cold frame and has a relatively quick germination. Once the red raripila plants attain some size, transplant them to pots or other restrictive growing area. Red raripila mint is easily divisible and should be done in spring or fall, although the plant is fairly tolerant of division most any time of the year. Any portion of the root is capable of creating a new plant and will establish rapidly with a limited amount of fuss.

Care of Red Raripila Mint
Care of red raripila plants, as for all mint varieties, is fairly simple. Like all mint plants, red raripila plants are aggressive spreaders once established and should be planted either in pots or a confined area. Easy to grow, this little perennial succeeds in most any type of soil as long as it is not too arid, including heavily clay laden soils. Care of red raripila mint includes a slightly acidic soil. Growing red raripila mint plants may be sown in areas of sun to partial shade, although to boost the production of essential oils, full sun exposure is most advantageous.

How to Use Red Raripila Mints
Like most mint varieties, red raripila mint is excellent brewed as a tea and can be used fresh or dried. The flavor of red raripila mint is reminiscent of spearmint and has the resulting refreshing taste and similarity of use. The essential oils derived from red raripila mint plants are used in everything from ice cream to beverages and are extremely popular in Northern and Central Europe and down under in Australia to flavor fresh peas or mint jelly for the lamb and mutton dishes popular in those countries. These essential oils are also offensive to rats and mice, so it has also been spread in granaries and other areas of grain storage to discourage the rodent population. Medicinal uses have been associated with this plant as well. The oils from red raripila mint are thought to aid in digestive distress and are often used for their antiseptic properties. As with many mint species, red raripila has been used in the treatment of headaches, fevers, digestive distress and other minor medical issues. Chewing on the leaves will also, like spearmint, freshen one’s breath.

Like all other members of the mint family, red raripila mint plants’ essential oils should be limited or avoided by pregnant women as the ingestion has been known to trigger miscarriages.
1
0
文章
Dummer. ゛☀
2017年08月26日

Orange mint (Mentha piperita citrata) is a mint hybrid known for its strong, pleasant citrus flavor and aroma. It’s prized for its culinary uses both for cooking and beverages. On top of being useful in the kitchen, its fragrance makes it a great choice for garden borders where its tendrils can be easily bruised by foot traffic, releasing its scent into the air. Keep reading to learn more about growing orange mint and uses for orange mint plants.
Growing Orange Mint Herbs
Orange mint herbs, like all mint varieties, are vigorous growers and can overwhelm a garden if they’re allowed to. To keep your orange mint in check, it’s best either to grow it in pots or in containers sunk in the ground. Sunken containers will give the appearance of a regular garden bed while preventing the roots from spreading out beyond their limits. That being said, if you have a space that you’d like to fill out quickly, orange mint is a good choice.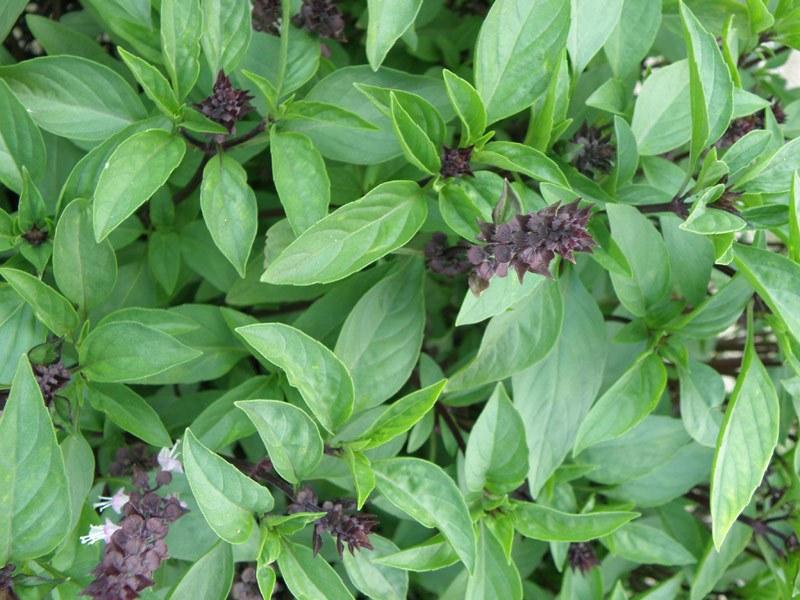
Caring For Orange Mint Plants
Caring for orange mint is very easy. It prefers rich, moist, clay-like soils that are a little acidic, which means it can fill in damp, dense areas of your yard or garden where nothing else will take hold. It grows best in full sun, but it also does very well in partial shade. It can handle quite a bit of neglect. In mid to late summer, it will produce spiked flowers in pink and white that are very good for attracting butterflies. You can use the leaves in salads, jellies, desserts, pestos, lemonades, cocktails, and a wide variety of other dishes. The leaves are edible and very fragrant both raw and cooked.

Growing Orange Mint Herbs
Orange mint herbs, like all mint varieties, are vigorous growers and can overwhelm a garden if they’re allowed to. To keep your orange mint in check, it’s best either to grow it in pots or in containers sunk in the ground. Sunken containers will give the appearance of a regular garden bed while preventing the roots from spreading out beyond their limits. That being said, if you have a space that you’d like to fill out quickly, orange mint is a good choice.

Caring For Orange Mint Plants
Caring for orange mint is very easy. It prefers rich, moist, clay-like soils that are a little acidic, which means it can fill in damp, dense areas of your yard or garden where nothing else will take hold. It grows best in full sun, but it also does very well in partial shade. It can handle quite a bit of neglect. In mid to late summer, it will produce spiked flowers in pink and white that are very good for attracting butterflies. You can use the leaves in salads, jellies, desserts, pestos, lemonades, cocktails, and a wide variety of other dishes. The leaves are edible and very fragrant both raw and cooked.
0
0


