文章
ritau
2020年07月27日

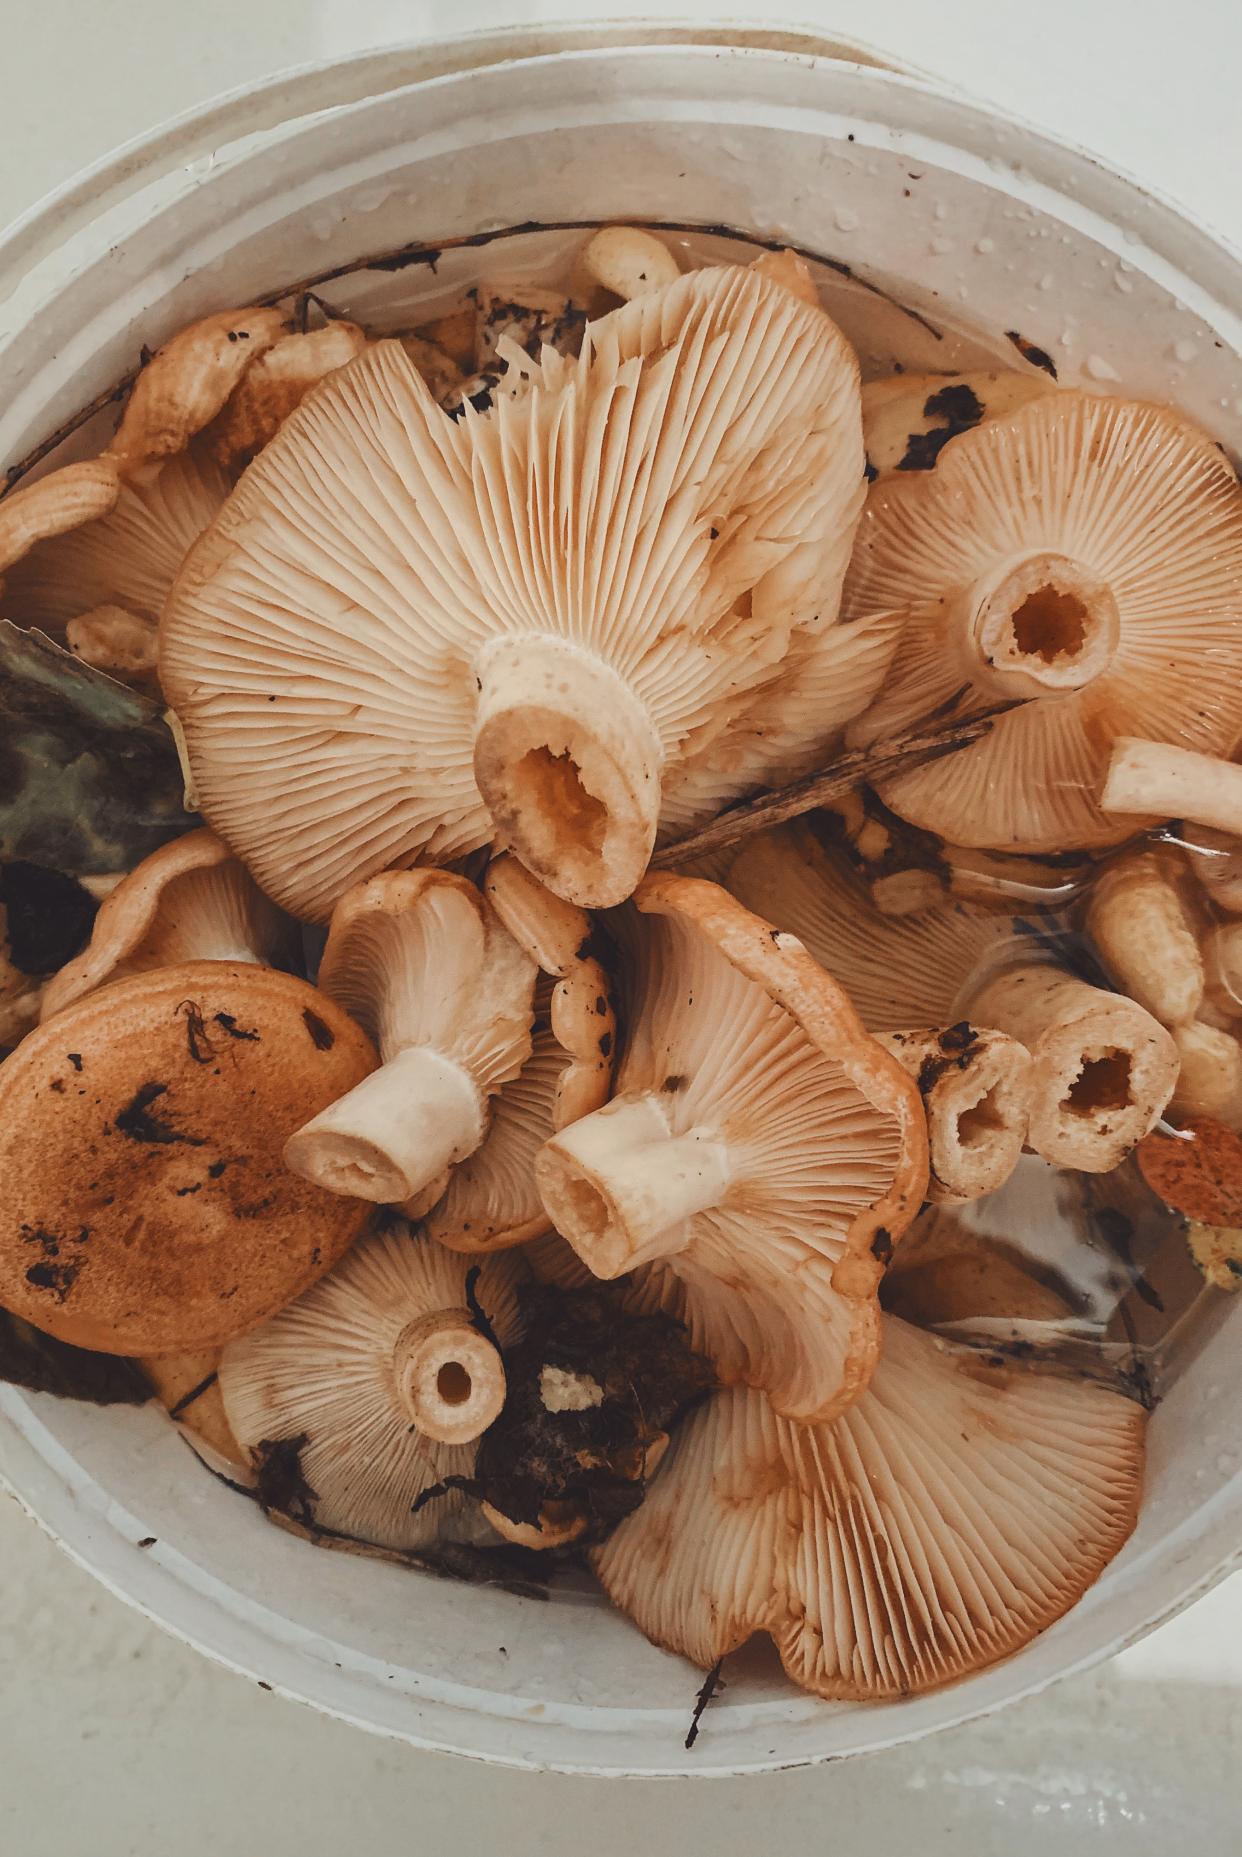
1. Obtain coffee grounds. Growing mushrooms from coffee grounds is a fun project which helps to use up coffee grounds that would otherwise go to waste. Coffee grounds are a fantastic growing medium for mushrooms (oyster mushrooms in particular) as they are already sterilized thanks to the coffee brewing process and are full of nutrients.
For 500 g (17.6 oz) of mushroom spawn, you will need 2.5 kg (88 oz) of fresh coffee grounds. The best way to get this amount of fresh coffee grounds (brewed that day) is to go to a cafe and ask nicely. They're usually more than happy to give it away.
2. Find a container for the mushrooms. The best thing to use is a filter patch grow bag, which can usually be purchased along with the mushroom spawn. Otherwise you can use a large, sealable freezer bag or a sterilized milk carton or ice cream tub, with four small holes poked into the sides.
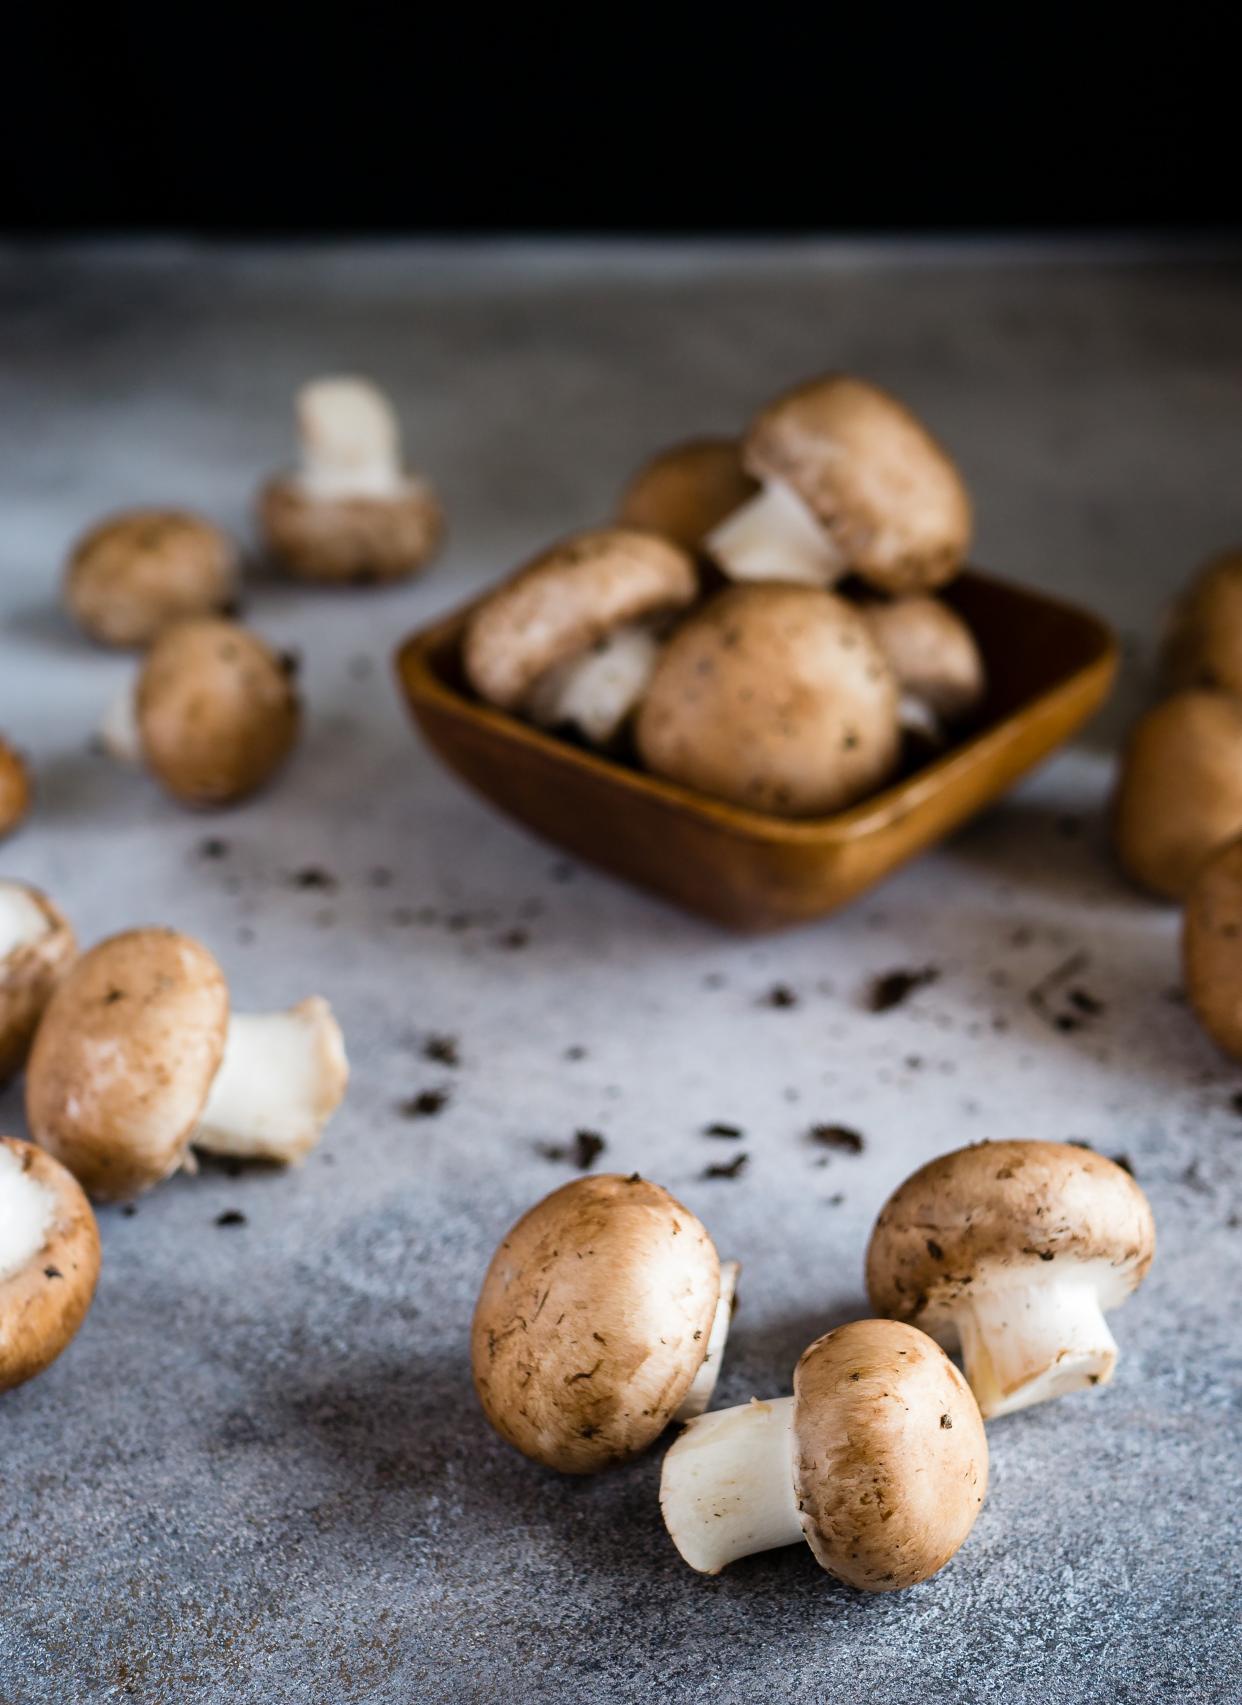
3. Transfer the spawn into the container. Wash your hands thoroughly with anti-bacterial soap, then mix the mushroom spawn into the coffee grounds, breaking them up with your hands to ensure that they are evenly distributed. Place the inoculated coffee grinds into the plastic bag or container and seal tightly.
4. Put the mushrooms in the right environment. Place the bag or container in a warm, dark location, somewhere between 64 and 77°F (18 to 25°C), like in an airing cupboard or under the sink. Leave it here for two to four weeks or until it turns entirely white — this due to the mycelia colonizing the coffee grinds.
-Again, cut out any dark spots of green or brown that develop on the colonizing substrate, as this can make you sick.
5. Relocate the mushrooms. Once the bag or container's contents have turned completely white, move it to a bright area (but not into direct sunlight) and cut a 2" by 2" hole at the top. Mist the contents of the container with water twice daily to prevent it from drying out — the mushrooms won't grow in too-dry conditions.
6. Harvest the mushrooms. Over the next five to seven days, tiny mushrooms will begin to sprout. Continue to mist them with water and they should double in size each day. When the cups of the mushrooms have started to turn slightly upwards, they are ready to harvest.
When the mushrooms have stopped sprouting, plant the coffee grinds outdoors under bark mulch or compost and new mushrooms may develop, depending on the weather.
For 500 g (17.6 oz) of mushroom spawn, you will need 2.5 kg (88 oz) of fresh coffee grounds. The best way to get this amount of fresh coffee grounds (brewed that day) is to go to a cafe and ask nicely. They're usually more than happy to give it away.
2. Find a container for the mushrooms. The best thing to use is a filter patch grow bag, which can usually be purchased along with the mushroom spawn. Otherwise you can use a large, sealable freezer bag or a sterilized milk carton or ice cream tub, with four small holes poked into the sides.

3. Transfer the spawn into the container. Wash your hands thoroughly with anti-bacterial soap, then mix the mushroom spawn into the coffee grounds, breaking them up with your hands to ensure that they are evenly distributed. Place the inoculated coffee grinds into the plastic bag or container and seal tightly.
4. Put the mushrooms in the right environment. Place the bag or container in a warm, dark location, somewhere between 64 and 77°F (18 to 25°C), like in an airing cupboard or under the sink. Leave it here for two to four weeks or until it turns entirely white — this due to the mycelia colonizing the coffee grinds.
-Again, cut out any dark spots of green or brown that develop on the colonizing substrate, as this can make you sick.
5. Relocate the mushrooms. Once the bag or container's contents have turned completely white, move it to a bright area (but not into direct sunlight) and cut a 2" by 2" hole at the top. Mist the contents of the container with water twice daily to prevent it from drying out — the mushrooms won't grow in too-dry conditions.
6. Harvest the mushrooms. Over the next five to seven days, tiny mushrooms will begin to sprout. Continue to mist them with water and they should double in size each day. When the cups of the mushrooms have started to turn slightly upwards, they are ready to harvest.
When the mushrooms have stopped sprouting, plant the coffee grinds outdoors under bark mulch or compost and new mushrooms may develop, depending on the weather.

0
0
文章
Miss Chen
2018年07月17日

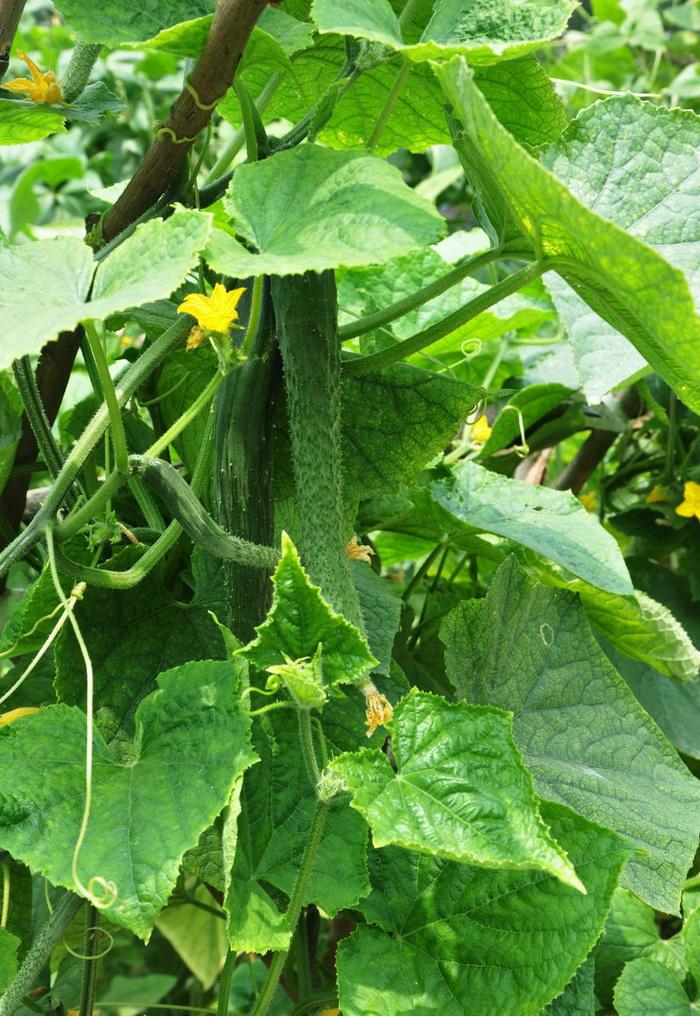
Fresh-picked cucumbers from your garden are not only healthier for you, but they taste better too. Growing cucumbers is an easy project whether it's for slicing in your salad or for pickling. There are two types of cucumbers you can grow, bush or vine. The vine type is the cucumber that will grow on the trellis, and they grow straighter and are cleaner than cucumbers that grow on the ground. Growing your cucumbers from seed will take from a month to two months depending on the size cucumber or pickle you want.
Step 1
Prepare the soil for the cucumber seeds. Place the cucumbers to the north end of the garden to avoid shading your other plants. Cultivate the soil to remove all weeds, and amend the soil for the seeds by adding compost to it and mixing it throughout. Mound the soil to two inches high and a foot apart for each plant. Do not plant the seeds until the soil temperature has reached 70 degrees.
Step 2
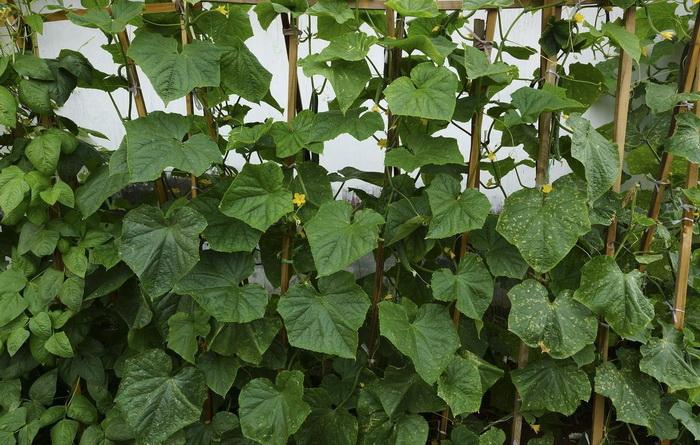
Set up the trellis to the north of the mounds. Use a side of your fence if your garden is fenced in. Other types of trellises can be used too, such as vegetable cages, A-frames or fashion your own out of bamboo poles and chicken wire. Make sure the poles are pushed well into the ground because the plants will pull on it and become heavy.
Step 3
Plant the seeds in the mounds. You can plant 3 or 4 seeds per mound, and weed out the weaker of the plants when they start to sprout, leaving only one plant per mound.
Step 4
Place the cucumber's tendrils on the trellis when they first start to show. Helping the cucumber onto the trellis is important as it will attach to anything including other plants. Once it is attached to the trellis it will continue to climb without any more help.
Step 5
Keep the soil moist as the cucumbers are growing. Try to water the ground, and keep the foliage as dry as possible to avoid moisture diseases. Fertilize with a liquid vegetable fertilizer attached to your garden hose every two weeks.
Step 6
Harvest the cucumbers when they are the size you desire. Do not let them get too large, or they will be bitter and very seedy. Cut the cucumbers from the vine; do not pull them or you will damage the vine.

Step 1
Prepare the soil for the cucumber seeds. Place the cucumbers to the north end of the garden to avoid shading your other plants. Cultivate the soil to remove all weeds, and amend the soil for the seeds by adding compost to it and mixing it throughout. Mound the soil to two inches high and a foot apart for each plant. Do not plant the seeds until the soil temperature has reached 70 degrees.
Step 2
Set up the trellis to the north of the mounds. Use a side of your fence if your garden is fenced in. Other types of trellises can be used too, such as vegetable cages, A-frames or fashion your own out of bamboo poles and chicken wire. Make sure the poles are pushed well into the ground because the plants will pull on it and become heavy.
Step 3
Plant the seeds in the mounds. You can plant 3 or 4 seeds per mound, and weed out the weaker of the plants when they start to sprout, leaving only one plant per mound.
Step 4
Place the cucumber's tendrils on the trellis when they first start to show. Helping the cucumber onto the trellis is important as it will attach to anything including other plants. Once it is attached to the trellis it will continue to climb without any more help.

Step 5
Keep the soil moist as the cucumbers are growing. Try to water the ground, and keep the foliage as dry as possible to avoid moisture diseases. Fertilize with a liquid vegetable fertilizer attached to your garden hose every two weeks.
Step 6
Harvest the cucumbers when they are the size you desire. Do not let them get too large, or they will be bitter and very seedy. Cut the cucumbers from the vine; do not pull them or you will damage the vine.
0
0
hsfarmgirl
2017年11月05日

Cam anyone help me identify the correct succulent?! My grandma passed away a year ago and i got these from her place in June so havent seen them flower yet. Doing a college project on it and trying to figure out which succulent it is.


0
0
Jabandit:I’m pretty sure they don’t “flower” but I️ could be wrong
Ueca:Most likely Sempervivum tectorum, but it could just as likely be a cultivar like "Sunset" or "Red Rum".
文章
Dummer. ゛☀
2017年09月22日

You may have seem some brilliant book planters for succulents and marveled at how such a simple project can yield such beautiful results. It’s a fun, easy project that anyone can do with just a few simple tools and some supplies from a local hardware store or garden center.
If you have some old hardcover books lying around that are just aching to be filled with flora, here is a step by step lesson on how to create book planters yourself.
Supplies
– 1 Vintage book.
– 2-3 small succulents. Any more than that will get really heavy. Home Depot sells them for like $2 each. Be wary of “top-heavy” succulents as they are hard to keep leverage in such a relatively shallow pot. Even little miniature cactuses are nearly impossible to keep erect. “Wide and flatter” work MUCH better than “tall.”
– Little bit of potting soil
– 1 exacto knife
– Parchment paper or plastic bag
– White glue
– Dry moss or ground cover
Instructions
1. The night before, rub a very thin layer of white glue against the loose paper binding, just enough to make some of the pages stick. It doesn’t need to be precise. It just helps when starting to cut into the book that the pages stay in one place.
2. Cutting the square in the book is the most time-consuming part. Decide how big a square you want to have for planting. I find that the smaller patches tend to look better. I like to leave some of the text of the book visible. Using your metal ruler you will measure out your square and cut through a few pages at a time, pull them out (you will need to break the glued seal you made to get them out), and then do a few more pages, pull them out, and work your way down the book. You will need a hole that is at least 1 1/2 inches deep.
The hole does not need to be clean or pretty because the only page that will be visible is the top page, so don’t worry if it tears badly, or seems jagged. You wont be able to see any of it and its going to be filled with dirt. I also recommend you start with the page under the Title Page and save the Title Page for last. By the time the rest of the hole is made, you will have a better sense of how to make the cutout for the Title Page the most centered and clean. Remember this is the only page where the look of the cut out matters.
3. Line the hole with parchment paper or plastic. This just prevents any watering from damaging the rest of the book.
4. If your book is very, very deep, you can put a layer of gravel at the bottom of the hole. This will provide some drainage that your succulents would appreciate. Succulents don’t need much water but they do prefer to not have their roots sitting in water so the gravel provides a place for the water to drain that the roots wont touch. In a regular sized booked you wont have room for gravel. Don’t worry: the succulents will still live even without the drainage.
5. Start with the main succulent and separate it from the soil its packed in. Place it in the hole where you like. Then repack the soil around it so it can stand on its own. For the larger plants, you will need to wedge them into the corners so they stand up until they start to grow on their own. You will need to pack the soil tightly around the roots to make them stand. A little water in the soil will also help.
6. Once you have the succulents where you want, cover the soil in dry moss. You can leave the soil exposed if you like, but I think it looks nicer with the moss because that will cover the hole in the book, and the moss will also help support the plants.
7. Cut the parchment paper just below the surface of the moss so that its adequately hidden. Seeing the parchment totally ruins the illusion. Blow off any dirt that you’ve gotten in the book. There will be dirt everywhere.
8. About once a week I spray a little bit of water into the roots with a squirt bottle. Like I said, succulents need very little water but they do need a lot of sunlight so if you are keeping them inside, make sure they are by a window or put them outside as much as possible. When you water them, try to avoid getting water on the Title Page.

If you have some old hardcover books lying around that are just aching to be filled with flora, here is a step by step lesson on how to create book planters yourself.

Supplies
– 1 Vintage book.
– 2-3 small succulents. Any more than that will get really heavy. Home Depot sells them for like $2 each. Be wary of “top-heavy” succulents as they are hard to keep leverage in such a relatively shallow pot. Even little miniature cactuses are nearly impossible to keep erect. “Wide and flatter” work MUCH better than “tall.”
– Little bit of potting soil
– 1 exacto knife
– Parchment paper or plastic bag
– White glue
– Dry moss or ground cover

Instructions
1. The night before, rub a very thin layer of white glue against the loose paper binding, just enough to make some of the pages stick. It doesn’t need to be precise. It just helps when starting to cut into the book that the pages stay in one place.

2. Cutting the square in the book is the most time-consuming part. Decide how big a square you want to have for planting. I find that the smaller patches tend to look better. I like to leave some of the text of the book visible. Using your metal ruler you will measure out your square and cut through a few pages at a time, pull them out (you will need to break the glued seal you made to get them out), and then do a few more pages, pull them out, and work your way down the book. You will need a hole that is at least 1 1/2 inches deep.

The hole does not need to be clean or pretty because the only page that will be visible is the top page, so don’t worry if it tears badly, or seems jagged. You wont be able to see any of it and its going to be filled with dirt. I also recommend you start with the page under the Title Page and save the Title Page for last. By the time the rest of the hole is made, you will have a better sense of how to make the cutout for the Title Page the most centered and clean. Remember this is the only page where the look of the cut out matters.

3. Line the hole with parchment paper or plastic. This just prevents any watering from damaging the rest of the book.
4. If your book is very, very deep, you can put a layer of gravel at the bottom of the hole. This will provide some drainage that your succulents would appreciate. Succulents don’t need much water but they do prefer to not have their roots sitting in water so the gravel provides a place for the water to drain that the roots wont touch. In a regular sized booked you wont have room for gravel. Don’t worry: the succulents will still live even without the drainage.

5. Start with the main succulent and separate it from the soil its packed in. Place it in the hole where you like. Then repack the soil around it so it can stand on its own. For the larger plants, you will need to wedge them into the corners so they stand up until they start to grow on their own. You will need to pack the soil tightly around the roots to make them stand. A little water in the soil will also help.

6. Once you have the succulents where you want, cover the soil in dry moss. You can leave the soil exposed if you like, but I think it looks nicer with the moss because that will cover the hole in the book, and the moss will also help support the plants.

7. Cut the parchment paper just below the surface of the moss so that its adequately hidden. Seeing the parchment totally ruins the illusion. Blow off any dirt that you’ve gotten in the book. There will be dirt everywhere.

8. About once a week I spray a little bit of water into the roots with a squirt bottle. Like I said, succulents need very little water but they do need a lot of sunlight so if you are keeping them inside, make sure they are by a window or put them outside as much as possible. When you water them, try to avoid getting water on the Title Page.
0
0
文章
Dummer. ゛☀
2017年08月27日

Growing pincushion cactus is an easy gardening project for the novice gardener. The plants are drought tolerant and native to the arid upper Sonoran desert. They are small cacti that make excellent additions to succulent displays. Pincushion cactus plant is a perennial that is most often found in heavily grazed pastureland and woody scrub.
Pincushion Cactus Plant Varieties
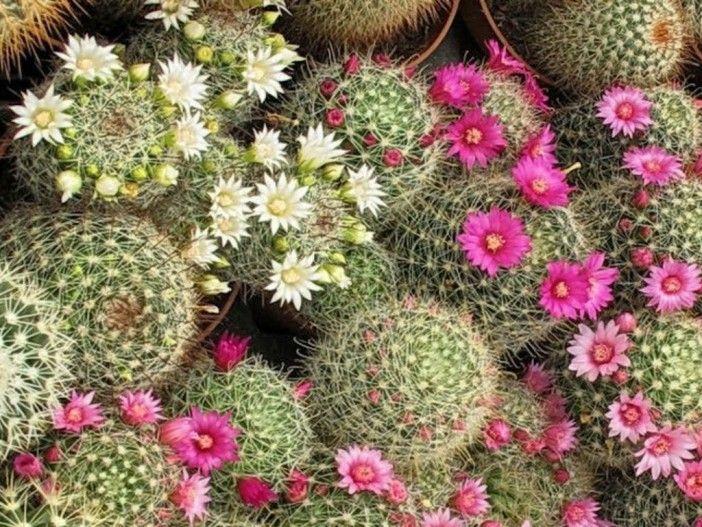
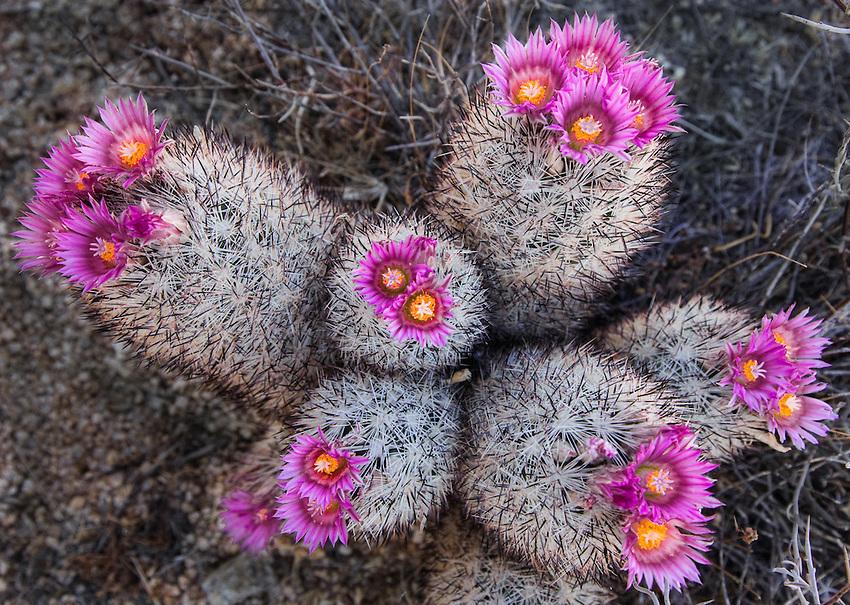
Pincushion cactus is a member of a family called Mammillaria, which includes 250 species of cactus. Some of the species of pincushion have colorful names. The Giant Snake or Crawling Log cactus (Mammillaria matudae) produce long stems. Snowball cushion cactus (Mammillaria candida) is a ball-shaped plant with white felt or fuzz on the skin of the plant. Old Lady cactus (Mammillaria hahniana) is a solitary cactus with white fuzzy hair-like spines and purplish red flowers. There are also Powder puff (Mammillaria bocasa-na) and Rose (Mammillaria zeilmanniana) among many others. Cactus and succulent stores can provide you with more pincushion cactus information.
Pincushion Cactus Information
Pincushion cacti are small, squat plants that usually don’t grow more than 6 inches in height. They can be ball or barrel shaped, and are native to the warmer regions of the United States. The pincushion cactus plant is most commonly grown indoors but it can tolerate some chilling temperatures if grown outside. Pincushion cactus is so called because it is covered in white spines over the entire surface of the plant. It is a very prickly little specimen that is best handled with thick gloves.
Growing Pincushion Cactus
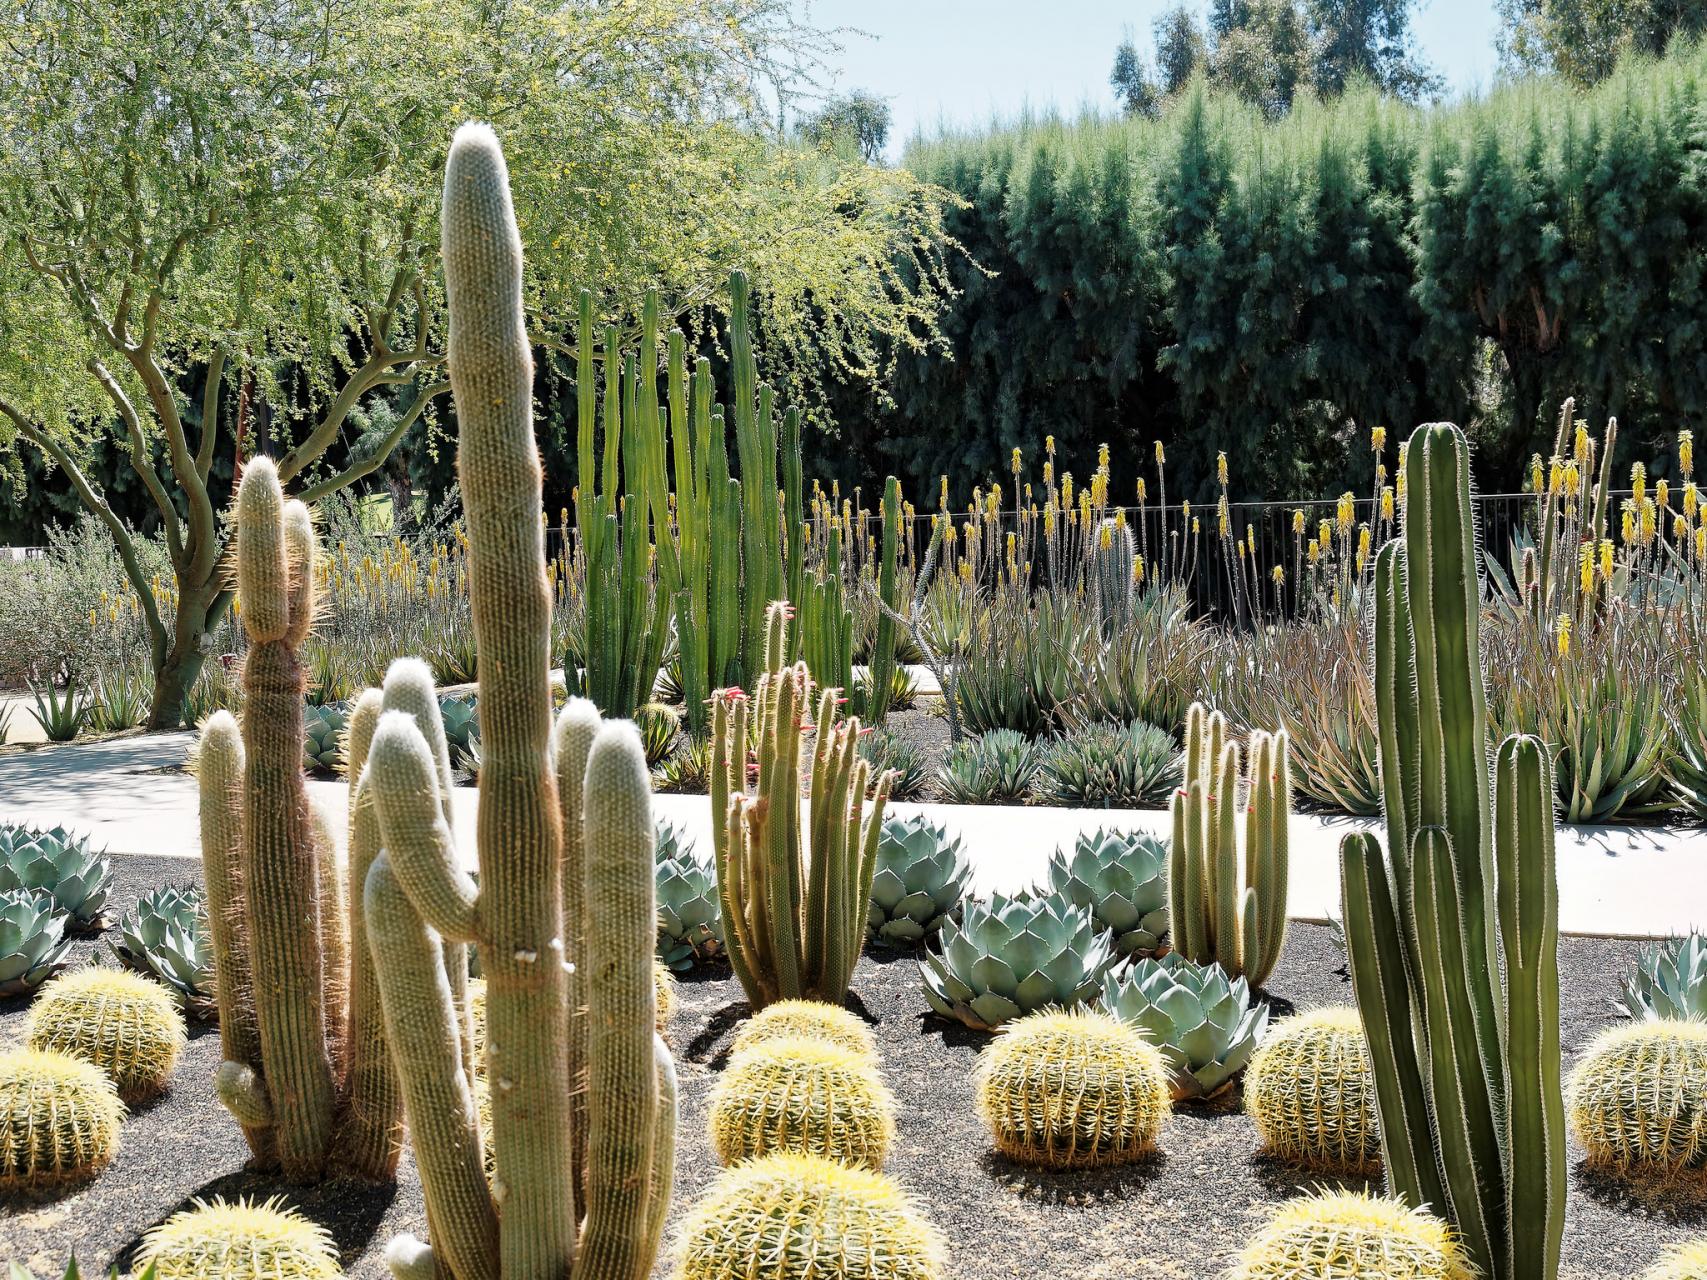
Pincushion cactus care is very simple and suitable for the beginning gardener. Cactus plants are used to dry conditions and limited fertility. The soil for a pincushion needs to be well drained and gritty. The soil needs to dry out between watering, which is best accomplished with a sandy topsoil. The cactus goes dormant in winter and needs no additional irrigation until spring. Potted plants do well in unglazed clay pots, which allow any extra moisture to evaporate. Temperatures should be between 50 and 75 F. (10-24 C.). Small gravel spread around the base of the plant out to the root zone will act as a mulch to deter stem rot. The cactus produces offsets when it is mature. These can be divided from the mother plant and potted in a sandy soil mixture. You can also start the plants from seed in spring. Plant seed in a flat filled with cactus mix. Surface sow and then sprinkle sand lightly over the top and moisten the soil evenly. Place the flat in a warm location of at least 70 F. (21 C.). Keep seeds wet when growing pincushion cactus. Seedlings are transplanted when they can easily be moved.
Flowering Pincushion Cactus
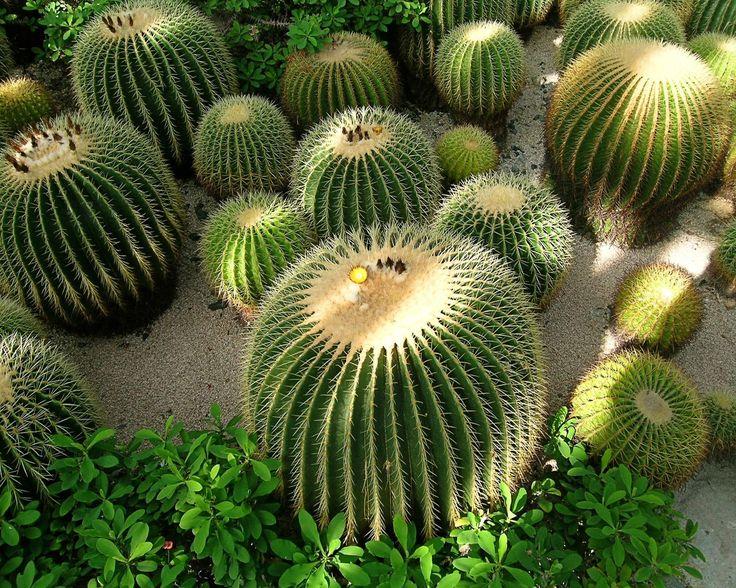
If optimum heat and watering conditions are met, the pincushion cactus may reward you with flowers in spring. Enhance the chance of blooming by holding off watering until several weeks into spring. You can also apply a cactus food in early spring to give the plant the nutrients it needs to produce blooms.

Pincushion Cactus Plant Varieties
Pincushion cactus is a member of a family called Mammillaria, which includes 250 species of cactus. Some of the species of pincushion have colorful names. The Giant Snake or Crawling Log cactus (Mammillaria matudae) produce long stems. Snowball cushion cactus (Mammillaria candida) is a ball-shaped plant with white felt or fuzz on the skin of the plant. Old Lady cactus (Mammillaria hahniana) is a solitary cactus with white fuzzy hair-like spines and purplish red flowers. There are also Powder puff (Mammillaria bocasa-na) and Rose (Mammillaria zeilmanniana) among many others. Cactus and succulent stores can provide you with more pincushion cactus information.

Pincushion Cactus Information
Pincushion cacti are small, squat plants that usually don’t grow more than 6 inches in height. They can be ball or barrel shaped, and are native to the warmer regions of the United States. The pincushion cactus plant is most commonly grown indoors but it can tolerate some chilling temperatures if grown outside. Pincushion cactus is so called because it is covered in white spines over the entire surface of the plant. It is a very prickly little specimen that is best handled with thick gloves.

Growing Pincushion Cactus
Pincushion cactus care is very simple and suitable for the beginning gardener. Cactus plants are used to dry conditions and limited fertility. The soil for a pincushion needs to be well drained and gritty. The soil needs to dry out between watering, which is best accomplished with a sandy topsoil. The cactus goes dormant in winter and needs no additional irrigation until spring. Potted plants do well in unglazed clay pots, which allow any extra moisture to evaporate. Temperatures should be between 50 and 75 F. (10-24 C.). Small gravel spread around the base of the plant out to the root zone will act as a mulch to deter stem rot. The cactus produces offsets when it is mature. These can be divided from the mother plant and potted in a sandy soil mixture. You can also start the plants from seed in spring. Plant seed in a flat filled with cactus mix. Surface sow and then sprinkle sand lightly over the top and moisten the soil evenly. Place the flat in a warm location of at least 70 F. (21 C.). Keep seeds wet when growing pincushion cactus. Seedlings are transplanted when they can easily be moved.

Flowering Pincushion Cactus
If optimum heat and watering conditions are met, the pincushion cactus may reward you with flowers in spring. Enhance the chance of blooming by holding off watering until several weeks into spring. You can also apply a cactus food in early spring to give the plant the nutrients it needs to produce blooms.
1
1
文章
Dummer. ゛☀
2017年08月26日

A simple, quick and fun project that will add not only a decorative touch but doubles as a useful culinary staple is a Mason jar herb garden. Most herbs are extremely easy to grow and growing them in a jar is a straightforward endeavor as long as you provide plenty of light and proper drainage. A couple of herb garden Mason jars tucked into a bookshelf or resting in a sunny windowsill add a splash of outdoor color to the kitchen. Plus, the added benefit is you can easily snip off a sprig from your jar of herbs for your latest culinary masterpiece. Suitable plants for herb jars include:
Basil
Parsley
Cilantro
Chives
Thyme
Rosemary
How to Grow Herbs in a Mason Jar
The first step to creating a Mason jar herb garden is obtaining the jars. Used for canning foods since 1858, Mason jars are still available today. However, searching for them at flea markets, thrift stores or Grandma’s basement or attic is a fun, inexpensive way of getting your jars and you can pat yourself on the back for recycling and repurposing! You may even use recycled pasta or pickle jars with the labels soaked and the jars thoroughly washed. Starting your jar of herbs from seeds in the Mason jar is not a recommended course of action. Using transplants is a surer recipe for success when planting herbs in canning jars, such as the plants for herb jars listed above. Herbs have roots that are a little larger than their top growth so be sure to use a jar that allows for the root growth. It is helpful to select drought friendly herbs in case of missed watering, and trailing herbs like some thyme look lovely in the glass jar.
Adequate drainage is essential for your herbs in canning jars, so the next step is to drill a few holes in the Mason jar. This step can be dangerous, so be sure to wear safety glasses and gloves. Use a diamond cutting drill bit and cover the jar with cutting oil. Use even pressure and drill slowly to prevent breakage. Make several 1/8 to ¼ inch holes in the Mason jar. Fill the bottom of the jar with broken pottery shards, colored stones or the like to improve drainage and add visual interest to your Mason jar herb garden. Conversely, if you do not have a drill or are timid about using it on glass, you may simply fill the bottom with an inch or so of stones, marbles, pottery bit, etc. to keep the roots from becoming too wet and rotting. Fill the jar with a bagged potting mix or your own mix of equal part sphagnum peat, compost and sand to about 1 inch below the jar’s edge. Fertilizer can be added into the soil medium at this point or use a soluble fertilizer after planting.
Plant the transplanted herbs so the root ball is level or slightly below the surface of the potting media. Moisten the potting media first with a bit of warm water, then add the mix, covering the tallest transplant root ball so it sits with its top surface ¾ inch below the rim of the jar. Water the Mason jar herb garden thoroughly. Allow any excess water to drain in the sink or in a shallow tray and then place the herbs in canning jars in a sunny area where they get at least six hours of sun per day. Keep the jar of herbs moist but not sodden. As the plants outgrow the jars, replace them with new transplants and move the bigger herbs into larger pots.
Basil
Parsley
Cilantro
Chives
Thyme
Rosemary

How to Grow Herbs in a Mason Jar
The first step to creating a Mason jar herb garden is obtaining the jars. Used for canning foods since 1858, Mason jars are still available today. However, searching for them at flea markets, thrift stores or Grandma’s basement or attic is a fun, inexpensive way of getting your jars and you can pat yourself on the back for recycling and repurposing! You may even use recycled pasta or pickle jars with the labels soaked and the jars thoroughly washed. Starting your jar of herbs from seeds in the Mason jar is not a recommended course of action. Using transplants is a surer recipe for success when planting herbs in canning jars, such as the plants for herb jars listed above. Herbs have roots that are a little larger than their top growth so be sure to use a jar that allows for the root growth. It is helpful to select drought friendly herbs in case of missed watering, and trailing herbs like some thyme look lovely in the glass jar.

Adequate drainage is essential for your herbs in canning jars, so the next step is to drill a few holes in the Mason jar. This step can be dangerous, so be sure to wear safety glasses and gloves. Use a diamond cutting drill bit and cover the jar with cutting oil. Use even pressure and drill slowly to prevent breakage. Make several 1/8 to ¼ inch holes in the Mason jar. Fill the bottom of the jar with broken pottery shards, colored stones or the like to improve drainage and add visual interest to your Mason jar herb garden. Conversely, if you do not have a drill or are timid about using it on glass, you may simply fill the bottom with an inch or so of stones, marbles, pottery bit, etc. to keep the roots from becoming too wet and rotting. Fill the jar with a bagged potting mix or your own mix of equal part sphagnum peat, compost and sand to about 1 inch below the jar’s edge. Fertilizer can be added into the soil medium at this point or use a soluble fertilizer after planting.

Plant the transplanted herbs so the root ball is level or slightly below the surface of the potting media. Moisten the potting media first with a bit of warm water, then add the mix, covering the tallest transplant root ball so it sits with its top surface ¾ inch below the rim of the jar. Water the Mason jar herb garden thoroughly. Allow any excess water to drain in the sink or in a shallow tray and then place the herbs in canning jars in a sunny area where they get at least six hours of sun per day. Keep the jar of herbs moist but not sodden. As the plants outgrow the jars, replace them with new transplants and move the bigger herbs into larger pots.
0
1
文章
Dummer. ゛☀
2017年08月25日

Cotton growing with kids is easy and most will find this to be a fun project in addition to an educational one, especially once the finished product is harvested. Let’s learn more about how to grow cotton both indoors and out.
Cotton Plant Info
While cotton (Gossypium) has been around for a long time and grown mainly for its fibers, cotton growing with kids can be a fun learning experience. Not only will they get a chance to learn some cotton plant info, but they will love the fluffy, white product of all their labor. You can take the lesson further by exploring how your harvested cotton gets processed to make the clothes we wear. Cotton is a warm climate plant. It cannot tolerate temperatures cooler than 60°F. (15 C.). If you live in a cooler climate, it is better to start the plant indoors and then transplant it out once the temps have warmed up. Cotton is also self-pollinating, so you don’t need a lot of plants.
How to Grow Cotton Outdoors
Cotton is planted outdoors in spring once the threat of frost has passed. Check the soil temperature with a soil thermometer to ensure that it is at least 60 degrees F. six inches down. Keep checking this for a three-day period every morning. Once the soil maintains this temperature, you can work the soil, adding an inch or so of compost to it. Compost is a great source of nitrogen, potassium, and trace minerals necessary for strong plant growth. Help your child create a furrow with a garden hoe. Moisten the soil. Plant your cotton seeds in groups of three, one inch deep and four inches apart. Cover and firm the soil. Within a couple weeks, the seeds should begin to sprout. Under optimal conditions, they will sprout within a week but temps under 60 degrees F. will prevent or delay germination.
Growing Cotton Plants Indoors
Planting cotton seeds indoors is also possible, keeping temperatures over 60 degrees F. (which shouldn’t be difficult in the house). Pre-moisten potting soil and mix this with healthy soil from the garden. Cut the top from a ½ gallon milk jug and add some drainage holes in the bottom (You can also use any 4-6 inch pot of your choosing). Fill this container with the potting mix, leaving a space of about two inches or so from the top. Place about three cotton seeds on top of the soil and then cover with another inch or so of potting mix. Place in sunlight and keep moist, adding water as needed so the upper portion of soil does not get too dry. You should begin to see sprouts within 7-10 days. Once the seedlings have sprouted, you can thoroughly water the plants each week as part of your cotton plant care. Also, rotate the pot so the cotton seedlings grow uniformly. Transplant the strongest seedling to a larger container or outdoors, making sure to provide at least 4-5 hours of sunlight.
Cotton Plant Care
You will need to keep the plants watered throughout the summer months as part of optimal cotton plant care. At around four to five weeks, the plants will begin branching. By eight weeks you should start to notice the first squares, after which blooming soon follows. Once the creamy, white flowers have been pollinated, they will turn pink. At this point the plants will begin producing a boll (which becomes the ‘cotton ball.’). It is crucial that water be given during this entire process to ensure adequate growth and production. Cotton is ready for harvesting once all of the bolls have cracked open and looks like a fluffy ball. This normally occurs within four months of planting. The growing cotton plants will naturally dry up and shed their leaves just prior to the bolls cracking. Be sure to wear some glove when harvesting cotton from your plants to protect your little one’s hands from getting cut. Your harvested cotton can be dried and the seeds saved for planting again next year.
Cotton Plant Info
While cotton (Gossypium) has been around for a long time and grown mainly for its fibers, cotton growing with kids can be a fun learning experience. Not only will they get a chance to learn some cotton plant info, but they will love the fluffy, white product of all their labor. You can take the lesson further by exploring how your harvested cotton gets processed to make the clothes we wear. Cotton is a warm climate plant. It cannot tolerate temperatures cooler than 60°F. (15 C.). If you live in a cooler climate, it is better to start the plant indoors and then transplant it out once the temps have warmed up. Cotton is also self-pollinating, so you don’t need a lot of plants.

How to Grow Cotton Outdoors
Cotton is planted outdoors in spring once the threat of frost has passed. Check the soil temperature with a soil thermometer to ensure that it is at least 60 degrees F. six inches down. Keep checking this for a three-day period every morning. Once the soil maintains this temperature, you can work the soil, adding an inch or so of compost to it. Compost is a great source of nitrogen, potassium, and trace minerals necessary for strong plant growth. Help your child create a furrow with a garden hoe. Moisten the soil. Plant your cotton seeds in groups of three, one inch deep and four inches apart. Cover and firm the soil. Within a couple weeks, the seeds should begin to sprout. Under optimal conditions, they will sprout within a week but temps under 60 degrees F. will prevent or delay germination.

Growing Cotton Plants Indoors
Planting cotton seeds indoors is also possible, keeping temperatures over 60 degrees F. (which shouldn’t be difficult in the house). Pre-moisten potting soil and mix this with healthy soil from the garden. Cut the top from a ½ gallon milk jug and add some drainage holes in the bottom (You can also use any 4-6 inch pot of your choosing). Fill this container with the potting mix, leaving a space of about two inches or so from the top. Place about three cotton seeds on top of the soil and then cover with another inch or so of potting mix. Place in sunlight and keep moist, adding water as needed so the upper portion of soil does not get too dry. You should begin to see sprouts within 7-10 days. Once the seedlings have sprouted, you can thoroughly water the plants each week as part of your cotton plant care. Also, rotate the pot so the cotton seedlings grow uniformly. Transplant the strongest seedling to a larger container or outdoors, making sure to provide at least 4-5 hours of sunlight.

Cotton Plant Care
You will need to keep the plants watered throughout the summer months as part of optimal cotton plant care. At around four to five weeks, the plants will begin branching. By eight weeks you should start to notice the first squares, after which blooming soon follows. Once the creamy, white flowers have been pollinated, they will turn pink. At this point the plants will begin producing a boll (which becomes the ‘cotton ball.’). It is crucial that water be given during this entire process to ensure adequate growth and production. Cotton is ready for harvesting once all of the bolls have cracked open and looks like a fluffy ball. This normally occurs within four months of planting. The growing cotton plants will naturally dry up and shed their leaves just prior to the bolls cracking. Be sure to wear some glove when harvesting cotton from your plants to protect your little one’s hands from getting cut. Your harvested cotton can be dried and the seeds saved for planting again next year.
0
0
文章
Dummer. ゛☀
2017年08月24日

Can you ever have too many lavender plants? This article explains how to propagate lavender from cuttings. The project doesn’t require any special equipment, and it’s easy enough for a beginner. Read on to learn more.
Propagating Lavender Plants
You can start lavender from hardwood or softwood cuttings. Softwood cuttings are taken from the soft, pliable tips of new growth. Hardwood is thicker than softwood and resists bending. It may snap if you force it to bend.
The best type of cutting to use depends on the type of lavender and the time of year. Softwood cuttings are plentiful in spring, and you can gather more of them without destroying the parent plant. They root quickly but aren’t as reliable as hardwood cuttings. While softwood cuttings are only available in spring, you can take hardwood cuttings in spring or fall. Some types of lavender bloom freely, making it hard to get a blossom-free stem when the wood is soft. Blossoms drain the plant of energy, and it’s unlikely that a stem will have the resources to form good roots if it is trying to bloom. These free-blooming plants are best rooted from hardwood cuttings.
Taking Cuttings from Lavender
Regardless of the type of cutting, you should always cut healthy, straight, vigorous stems for rooting. Choose stems with good color and no buds. Use a sharp knife to take a hardwood or softwood cutting measuring 3 to 4 inches long. Cut hardwood stems just below a bump that indicates a leaf node. Remove all of the leaves from the lower 2 inches of the stem and then gently scrape the skin off the bottom portion of the stem on one side with a knife. Set the cutting aside while you prepare the container. Fill a small pot with commercial starting medium or a homemade mix of half vermiculite or perlite and half peat moss, with a little bark added to facilitate drainage. Dip the stripped tip of the cutting in rooting hormone, if desired. Rooting hormone helps prevent the tip from rotting and encourages quick, strong root development, but lavender roots well without it. Stick the lower end of the cutting about 2 inches into the soil and firm the soil so that the cutting stands up straight. Cover with plastic to form a greenhouse-like environment for the cuttings.
Lavender Cuttings Care
Softwood cuttings from lavender root in two to four weeks, and hardwood cuttings take a little longer. Check to see if the stems have roots by giving them a gentle tug. If you feel resistance, the stem has roots holding it in place. Wait several days between tugs as you can damage tender, young roots by tugging on them too often. Remove the plastic bag when the cutting has roots. Set the new plant in a sunny location and water it when the soil is dry an inch or so below the surface. Feed the plant with one-quarter strength liquid plant fertilizer once a week. If you plan to keep the plant in a pot for more than two or three weeks, transplant it into a larger pot with regular potting soil that drains freely. Commercial potting soils have plenty of nutrients to maintain the plants without supplemental feedings. Propagation of lavender from cuttings is easy and more likely to be successful than growing the plants from seeds. With cuttings, you can rest assured that your new plants will be exactly like the parent plants.

Propagating Lavender Plants
You can start lavender from hardwood or softwood cuttings. Softwood cuttings are taken from the soft, pliable tips of new growth. Hardwood is thicker than softwood and resists bending. It may snap if you force it to bend.
The best type of cutting to use depends on the type of lavender and the time of year. Softwood cuttings are plentiful in spring, and you can gather more of them without destroying the parent plant. They root quickly but aren’t as reliable as hardwood cuttings. While softwood cuttings are only available in spring, you can take hardwood cuttings in spring or fall. Some types of lavender bloom freely, making it hard to get a blossom-free stem when the wood is soft. Blossoms drain the plant of energy, and it’s unlikely that a stem will have the resources to form good roots if it is trying to bloom. These free-blooming plants are best rooted from hardwood cuttings.

Taking Cuttings from Lavender
Regardless of the type of cutting, you should always cut healthy, straight, vigorous stems for rooting. Choose stems with good color and no buds. Use a sharp knife to take a hardwood or softwood cutting measuring 3 to 4 inches long. Cut hardwood stems just below a bump that indicates a leaf node. Remove all of the leaves from the lower 2 inches of the stem and then gently scrape the skin off the bottom portion of the stem on one side with a knife. Set the cutting aside while you prepare the container. Fill a small pot with commercial starting medium or a homemade mix of half vermiculite or perlite and half peat moss, with a little bark added to facilitate drainage. Dip the stripped tip of the cutting in rooting hormone, if desired. Rooting hormone helps prevent the tip from rotting and encourages quick, strong root development, but lavender roots well without it. Stick the lower end of the cutting about 2 inches into the soil and firm the soil so that the cutting stands up straight. Cover with plastic to form a greenhouse-like environment for the cuttings.

Lavender Cuttings Care
Softwood cuttings from lavender root in two to four weeks, and hardwood cuttings take a little longer. Check to see if the stems have roots by giving them a gentle tug. If you feel resistance, the stem has roots holding it in place. Wait several days between tugs as you can damage tender, young roots by tugging on them too often. Remove the plastic bag when the cutting has roots. Set the new plant in a sunny location and water it when the soil is dry an inch or so below the surface. Feed the plant with one-quarter strength liquid plant fertilizer once a week. If you plan to keep the plant in a pot for more than two or three weeks, transplant it into a larger pot with regular potting soil that drains freely. Commercial potting soils have plenty of nutrients to maintain the plants without supplemental feedings. Propagation of lavender from cuttings is easy and more likely to be successful than growing the plants from seeds. With cuttings, you can rest assured that your new plants will be exactly like the parent plants.
0
0
文章
Dummer. ゛☀
2017年08月17日

A terrarium is a rather old-fashioned but charming way to make a mini garden in a glass container. The effect produced is rather like a tiny forest residing in your home. It is also a fun project that is great for kids and adults. Growing succulent plants in terrariums provides the plants with an easy care situation in which they will thrive. Because succulents do not like wet environments, a few tips and adjustments to the traditional terrarium are required. Read on to find out how to make a succulent terrarium that will keep the little plants happy and healthy.

Succulent Terrarium Instructions
Terrariums and dish gardens have been a part of indoor growing for centuries. Succulent plants seem to like arid conditions and a desert or beach themed terrarium will provide the right conditions while adding some unexpected appeal in the home.
Creating succulent terrariums doesn’t take a lot of time or money. You can literally make one in an old food jar or search a thrift market for an unusual dish or clear container. Then it’s time to plant and add any touches to the diorama. You can make the terrarium as ornate or simple as you wish. The original terrariums were made in elegant Wardian cases, so named for the originator of the idea, Dr. N.B. Ward. Succulents will do well in almost any container. The only trick is to make an open rather than closed system to prevent excess moisture from building up and killing the plant.

Creating Succulent Terrariums
The planting medium for succulents is crucial. Succulents are perfect for terrariums because they grow relatively slowly but the condensation that may build up can kill the little plants if the right medium isn’t used. Line the bottom of the container with fine gravel or rocks. On top of this layer an inch or so of charcoal. This absorbs odors and toxins that may be in the water. Next, place sphagnum moss and top it with cactus soil that has been lightly pre-moistened. Plant the little plants in the cactus mix and firm soil around them. A dowel or stick is helpful in digging the holes and filling around plants. Space plants at least an inch apart (2.5 cm.) so there is adequate air flow. Plants may need a Popsicle stick or small stake for the first few weeks to keep them upright. Now the really fun part happens – designing the terrarium. If you want a beach theme, add some seashells or for a desert look, install some rocks to complement the succulents. There is an almost endless supply of items that will enhance the natural look of the terrarium. Some growers even add ceramic figures to add to the sense of whimsy. Just make sure that anything you are putting into the terrarium has been well washed to avoid bringing in disease.

Succulent Terrarium Care
Place the terrarium in a brightly lit location but avoid direct sun which can scorch the plants inside. An area near a fan or blower is ideal, as this will increase circulation and help prevent damping off. Succulents can’t stand to be overwatered and if they are in standing water they will surely die. Your succulent garden won’t need to be watered very often. Wait until the soil is nearly completely dry before you water. Use tap water that has been off gassed or purchase purified water. Succulent terrarium care is pretty much the same as care of succulents in a pot. These plants thrive on neglect and don’t need supplemental fertilizer but once per year. Over time the succulents should fill in a bit and the whole terrarium will attain a natural appealing appearance.

Succulent Terrarium Instructions
Terrariums and dish gardens have been a part of indoor growing for centuries. Succulent plants seem to like arid conditions and a desert or beach themed terrarium will provide the right conditions while adding some unexpected appeal in the home.
Creating succulent terrariums doesn’t take a lot of time or money. You can literally make one in an old food jar or search a thrift market for an unusual dish or clear container. Then it’s time to plant and add any touches to the diorama. You can make the terrarium as ornate or simple as you wish. The original terrariums were made in elegant Wardian cases, so named for the originator of the idea, Dr. N.B. Ward. Succulents will do well in almost any container. The only trick is to make an open rather than closed system to prevent excess moisture from building up and killing the plant.

Creating Succulent Terrariums
The planting medium for succulents is crucial. Succulents are perfect for terrariums because they grow relatively slowly but the condensation that may build up can kill the little plants if the right medium isn’t used. Line the bottom of the container with fine gravel or rocks. On top of this layer an inch or so of charcoal. This absorbs odors and toxins that may be in the water. Next, place sphagnum moss and top it with cactus soil that has been lightly pre-moistened. Plant the little plants in the cactus mix and firm soil around them. A dowel or stick is helpful in digging the holes and filling around plants. Space plants at least an inch apart (2.5 cm.) so there is adequate air flow. Plants may need a Popsicle stick or small stake for the first few weeks to keep them upright. Now the really fun part happens – designing the terrarium. If you want a beach theme, add some seashells or for a desert look, install some rocks to complement the succulents. There is an almost endless supply of items that will enhance the natural look of the terrarium. Some growers even add ceramic figures to add to the sense of whimsy. Just make sure that anything you are putting into the terrarium has been well washed to avoid bringing in disease.

Succulent Terrarium Care
Place the terrarium in a brightly lit location but avoid direct sun which can scorch the plants inside. An area near a fan or blower is ideal, as this will increase circulation and help prevent damping off. Succulents can’t stand to be overwatered and if they are in standing water they will surely die. Your succulent garden won’t need to be watered very often. Wait until the soil is nearly completely dry before you water. Use tap water that has been off gassed or purchase purified water. Succulent terrarium care is pretty much the same as care of succulents in a pot. These plants thrive on neglect and don’t need supplemental fertilizer but once per year. Over time the succulents should fill in a bit and the whole terrarium will attain a natural appealing appearance.
1
2
文章
Gina
2017年05月27日

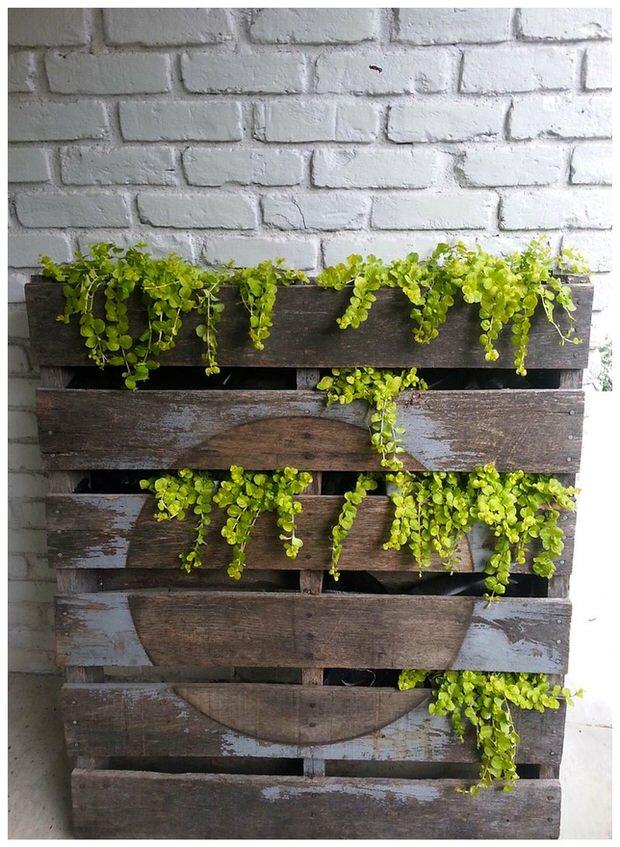
We’ve seen pallets turned into about every DIY project possible, and it’s good… they are cheap or free, we recycle when we create a pallet project, and I just love the organic feel to such a simple thing. My favorite use of pallets however, is pallet planters. They just fit in a garden, ya know?
So here are TGG’s fav five of the week, Pallet Planters!
This living wall was created by Dremel Weekends.
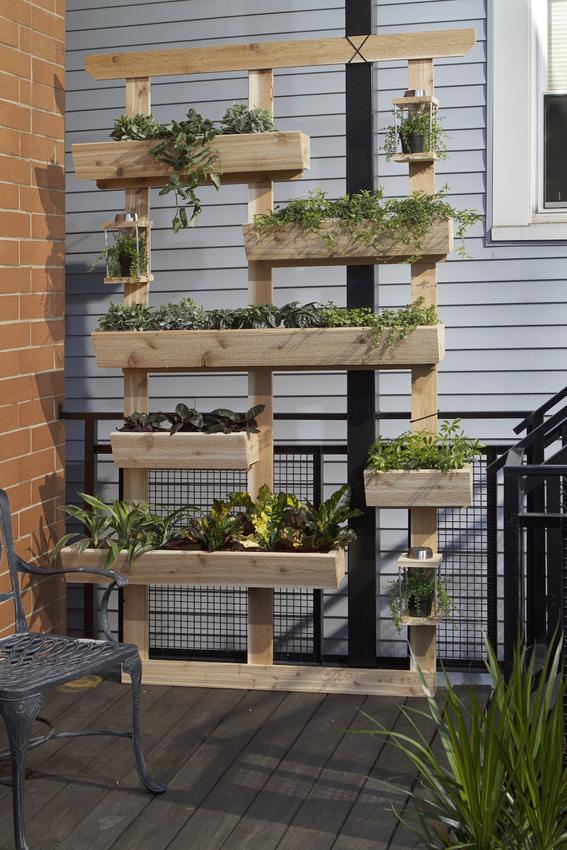
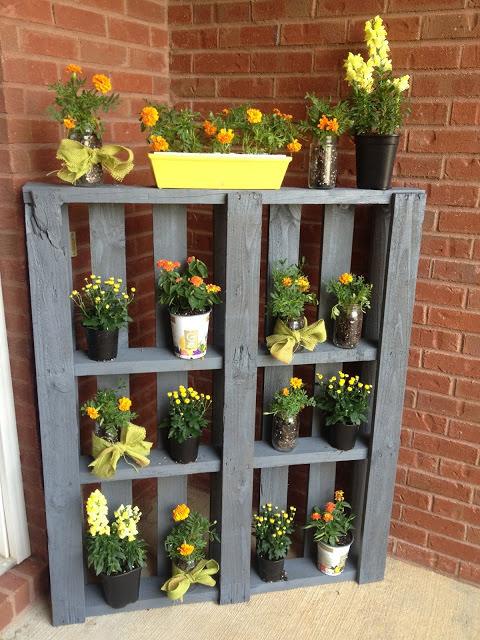
Love this plant stand created with a pallet from At Home with Kelsey.
I love the more modern, fresh look of this pallet planter from A Storied Style.

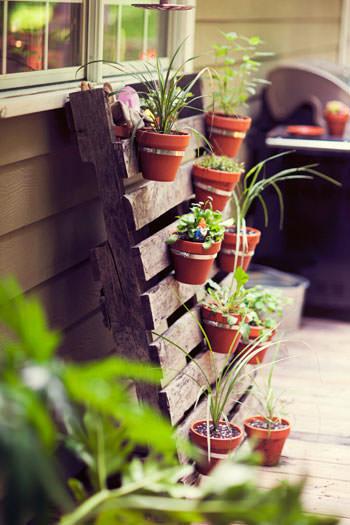
For those of you who don’t want to use hammer and nails to switch up a pallets configuration, this is a great example from Young House Love on attaching pots to the pallet! Love this look!
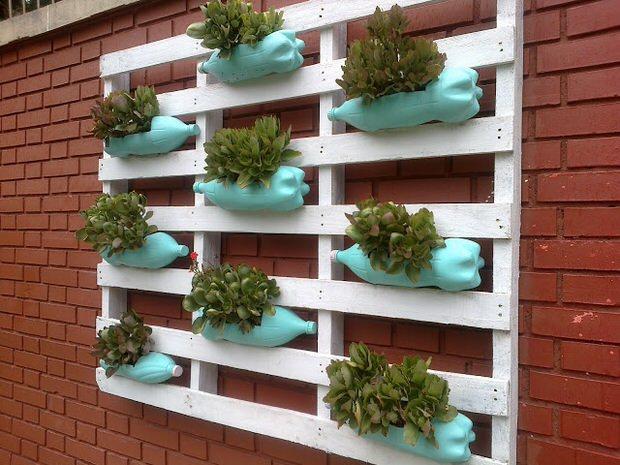
Lastly, this example perfects Reduce, Reuse, Recycle! Love it!
1
0
文章
Gina
2017年05月23日


Forcing bulbs for the holidays, or for holiday gifts is a great idea to start now, when fall bulbs are available. You have a variety of healthy stock to choose from this time of year, and it really is an easy project! All is takes is some basic materials, fall bulbs, and a little room to store them until they bloom. Here is how to force bulbs for the holidays.
The most popular bulbs to force for the holidays are Paperwhite Narcissus and Amaryllis. The Paperwhites are fragrant, delicate and smaller. Amaryllis is a large bulb and a larger plant, with large flowers in a variety of colors. Red is an obvious holiday choice, but try white for a fresh option that can take you through the New Year.
How to Force Paperwhites

Paperwhites are easy to force in a tall glass container, with some decorative gravel. The tall container helps to support the plants as they grow. I like to add a little charcoal from the indoor plant section to keep the water smelling sweet.
Purchase firm, full, blemish free bulbs. When forcing in particular, quality counts.
Pour in two inches of pebbles that have been rinsed. Add a tablespoon or two of rinsed charcoal then more pebbles. Place bulbs, root-side down and almost touching one another, on top. Add enough tepid water to reach just below the bottoms of the bulbs. Replenish when the level falls by a quarter inch.
Paperwhites will bloom in four to six weeks, so if you are planting as gifts, count backwards in the calendar from the proposed gift giving time.
How to Force Amaryllis
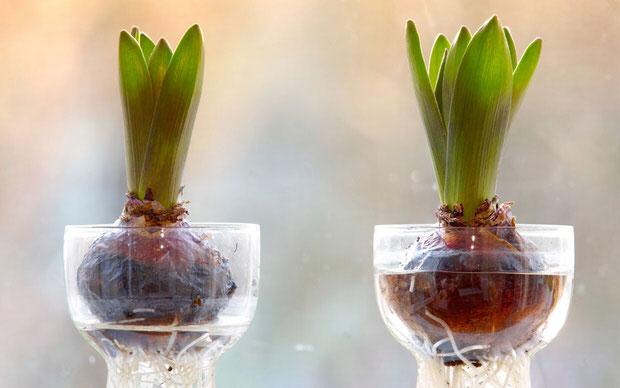
Force Amaryllis in a watertight, shallow container. Fill the container until two thirds full, add charcoal bits as desired. Fill with slightly warm water until they just barely cover the pebbles. Lay one Amaryllis bulb on top of the pebbles, root side down. Try to purchase a bulb with fleshy, healthy looking roots. Add more pebbles until you reach the neck of the bulb, to give it support as it grows. Add water as needed so that the water level touches the bottom of the bulb. It’s ok to reach a finger down into the pebbles to check the level every couple of days.
If you have a container that fits the bulb snugly, you can force Amaryllis without any gravel at all.
Amaryllis bloom in six to eight weeks.
Neither Paperwhite nor Amaryllis will re-bloom after forcing, so it’s best to just discard the bulbs.
That’s it! Stock up at fall bulb sales and plant extra for gifts, for holiday decor, or plant some every two weeks to keep bulbs flowering right through to spring!
0
1
文章
Micky
2017年05月23日


This may be one of our most fun summer garden fun ideas yet! Build a backyard movie theater! Ok, it wasn’t our idea. But we’re running with it. Sound like an impossible DIY project? Not! We have tutorials for every skill level, and remember, even an old sheet and a projector still make a great movie night. But for those of you who want a little more in your outdoor movie viewing experience, try these ideas. Most of the tutorials require simple materials including pvc pipe, buckets and sheets. You could also consider investing in a higher quality screen for a more upscale experience. And don’t think this idea is just for the kids! We know lots of couples who host outdoor movie/wine tasting parties that don’t include the little ones. Ready to roll? Don’t miss all the great tips these bloggers post on their tutorial pages as well. Our featured project, above, Pottery Barn has gotten in the “picture” with a simple version of a backyard movie screen. Simple and quick tutorial. Cozy!
This project is by Wholesome Mommy, and she has an incredible step by step on how to build an outdoor movie screen. Packed with easy instructions, step by step photos, and tons of tips, this is a good basic primer on how to do it right.

Digital Trends has tons of great info. If you are building an outdoor theater… then you should read this, as it covers everything from logistics to social etiquette.

AmberLee of Givers Log has some great tips as well, including projector placement and even food! Best of all, she has ideas for alternatives to homemade screens in her Backyard Movie: How-To!

Sunset magazine created their backyard movie theater with the same idea as the projects above with a frame, concrete in buckets (or pots) and a screen. They offer another alternative to a sheet, and also some good resources online for projectors.

Lots and lots of tips from Cracker Jack Theater including sound systems and storage ideas, but also a new idea for using your outdoor theater.

We found this great photo floating out in internet space, but it’s so inspirational we wanted to share it. This is the life, folks!

And lastly, a couple more inspirational photos to get you motivated!


0
0
文章
Hande Salcan
2017年05月23日


Making a DIY terrarium is a stylish and trendy garden project that is easy. Here is a simple tutorial on making and maintaining a terrarium garden in your home!
Supplies:
Glass container with open top
Activated charcoal chips (in bags in the indoor potting mix department)
Potting Soil
Plants
Sheet moss or decorative stones
Planting tool (I like a long handled spoon)
Choosing Plants to Fit the Container (Or vice-versa!)
First, choose your plants for the terrarium. Most plants can adapt to terrarium living, but keep in mind the plants water needs. Plants that need less moisture such as cacti, sedums and succulents need a very open container, so that the moisture has a chance to escape. Tropical houseplants, or my fav, a variety of mosses love moisture, so the container can have more narrow opening, as they will thrive on the humidity. Choose small specimens that will fit easily in your container, and don’t overcrowd. You want to leave a little space between plants.

Start your Terrarium
Start building your terrarium by adding a 1-2 inch layer of charcoal chips on the bottom. Now add your potting soil on top of the chips, packing gently as you go. Fill the container one third full. Pack down gently with your planting tool.
Add Plants
Now add your plants on top of the soil. Use your planting tool to add soil around the plant roots and gently pack down until the roots are covered.
Add Decorative Stones or Moss
Add small pieces of sheet moss between the plants, and/or decorative gravel or stones. Water until you see moisture at the bottom of the container.

Care of Your Terrarium
You can water your terrarium with a container with a spout, or you can use a mister for moisture loving plants. Be sure to water only as often as needed. If you use plants that prefer dried conditions, make sure the soil dries out between watering. Use scissors to prune plants as necessary. Place in a bright spot, but never where the terrarium gets direct sun.

That’s it! Easy, inexpensive and you can personalize your DIY terrarium to your own tastes. Try making several different kinds of terrariums. Here at TGG we are planning an all succulent terrarium, one with several varieties of moss, and a miniature garden. Watch for pics as the projects finish! Have you seen some cool terrariums at shops near you? Share any unique ideas with us!
2
0


