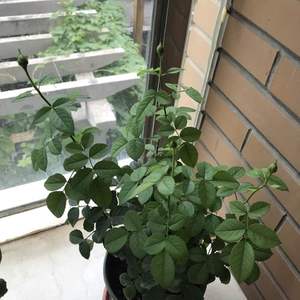
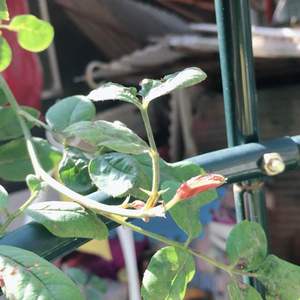
求助
七夜雪殇
2018年09月14日

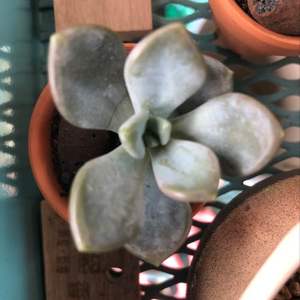
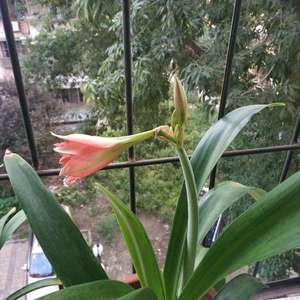
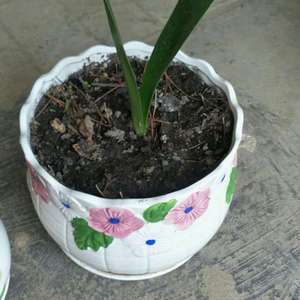
我买来的君子兰6片叶子,栽下去半个月旁边4片叶子全死了,只剩下中心两片叶子健康的活着,麻烦大神告诉我它能健康的活下去吗

0
0
对方正在输入......:这是朱顶红
文章
Miss Chen
2018年09月04日

graf 4
Most people are only familiar with the top heavy doubles which tend to flop in the wind or rain, and explode all over when the blossoms age. For some people this is unsightly and for others the masses of petals dappling the lawn is beauty itself and natural. For those who do not like the bad habits of the heavy peonies, there are singles, beautiful semi-doubles, anemone, Japanese and new doubles bred specifically with strong upright stems, available. It is a matter of searching for the right variety to fit your taste and garden style.

staking grafs 1-2
Each person has their own method for staking peony plants, some work, others not so well. The longer stems of many peonies, especially the heavy doubles, will blow down by the time the flowers are fully open. This habit often keeps people from purchasing and enjoying these beautiful and often lovely scented plants which is a shame.
Peony staking need not be a chore. I stay away from peony rings as I find them often disappointing in their ability to hold up the plant. For me, I use the method suggested by Allan Rogers in his informative book "PEONIES". He advises a single pass of heavy-duty garden twine around the plant, about a foot from the top, after the buds are enlarging in size. This gives sufficient support, tie snuggly but do not cinch in too tight as this affects both the look of the plant form and may damage the stems. Alternatively two lines, one twelve inches from the top and the other twelve inches below that. This method works for me and I find it is quick to apply. The twine is biodegradable so in the fall it is cleaned up and discarded with the foliage.
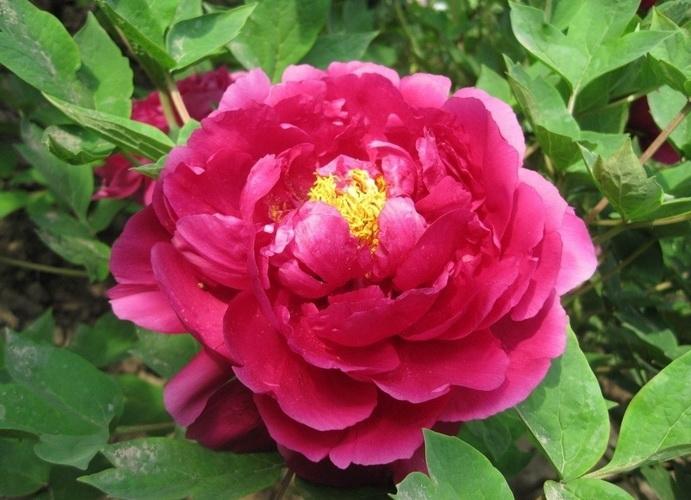
Peonies. Their voluptuous blooms often drag these bushy plants down, especially after rain. The best cure is a peony cage, a sort of grid on stilts that you install over the early shoots in spring. The stems will grow up through the spaces of the grid so it supports the plant when the blooms get heavy.
graf 4
Grow-through grids are invaluable, and if they were made in enough sizes, they would solve most staking problems. For robust, clump-forming plants, like peonies ( Paeonia spp. and cvs., USDA Hardiness Zones 3–8), Siberian irises ( Iris cvs., Zones 3–9), globe thistles ( Echinops spp. and cvs., Zones 3–9), coneflowers ( Rudbeckia spp. and cvs., Zones 3–11), and ornamental grasses, they are the ideal form of support. Their evenly spaced tic-tac-toe pattern of steel rods allows two or three stems to grow through each opening. Grow-through grids come in different shapes—round, square, or rectangular—with legs that are 18 inches to 3 feet tall. Most are made of stout steel wire coated in green plastic, which makes them virtually invisible if properly installed
For the best results, set the grid a few inches above a plant early in the season, before the leaves mature. Attach the legs one at a time—they hook around the rim of the grid—and push them into the ground. Space the legs equidistant from each other if possible. When well placed and installed at the right time of year, the grid will disappear completely beneath the expanding foliage. You will have to revisit the plant periodically during the season and, in some cases, raise the grid and replace the legs with longer ones to keep pace with new growth.
Most people are only familiar with the top heavy doubles which tend to flop in the wind or rain, and explode all over when the blossoms age. For some people this is unsightly and for others the masses of petals dappling the lawn is beauty itself and natural. For those who do not like the bad habits of the heavy peonies, there are singles, beautiful semi-doubles, anemone, Japanese and new doubles bred specifically with strong upright stems, available. It is a matter of searching for the right variety to fit your taste and garden style.

staking grafs 1-2
Each person has their own method for staking peony plants, some work, others not so well. The longer stems of many peonies, especially the heavy doubles, will blow down by the time the flowers are fully open. This habit often keeps people from purchasing and enjoying these beautiful and often lovely scented plants which is a shame.
Peony staking need not be a chore. I stay away from peony rings as I find them often disappointing in their ability to hold up the plant. For me, I use the method suggested by Allan Rogers in his informative book "PEONIES". He advises a single pass of heavy-duty garden twine around the plant, about a foot from the top, after the buds are enlarging in size. This gives sufficient support, tie snuggly but do not cinch in too tight as this affects both the look of the plant form and may damage the stems. Alternatively two lines, one twelve inches from the top and the other twelve inches below that. This method works for me and I find it is quick to apply. The twine is biodegradable so in the fall it is cleaned up and discarded with the foliage.
Peonies. Their voluptuous blooms often drag these bushy plants down, especially after rain. The best cure is a peony cage, a sort of grid on stilts that you install over the early shoots in spring. The stems will grow up through the spaces of the grid so it supports the plant when the blooms get heavy.

graf 4
Grow-through grids are invaluable, and if they were made in enough sizes, they would solve most staking problems. For robust, clump-forming plants, like peonies ( Paeonia spp. and cvs., USDA Hardiness Zones 3–8), Siberian irises ( Iris cvs., Zones 3–9), globe thistles ( Echinops spp. and cvs., Zones 3–9), coneflowers ( Rudbeckia spp. and cvs., Zones 3–11), and ornamental grasses, they are the ideal form of support. Their evenly spaced tic-tac-toe pattern of steel rods allows two or three stems to grow through each opening. Grow-through grids come in different shapes—round, square, or rectangular—with legs that are 18 inches to 3 feet tall. Most are made of stout steel wire coated in green plastic, which makes them virtually invisible if properly installed
For the best results, set the grid a few inches above a plant early in the season, before the leaves mature. Attach the legs one at a time—they hook around the rim of the grid—and push them into the ground. Space the legs equidistant from each other if possible. When well placed and installed at the right time of year, the grid will disappear completely beneath the expanding foliage. You will have to revisit the plant periodically during the season and, in some cases, raise the grid and replace the legs with longer ones to keep pace with new growth.
0
0
文章
Miss Chen
2018年08月29日

Salvia (Salvia spp.), commonly known as sage, is a plant group that ranges from annuals to woody perennials hardy from U.S. Department of Agriculture plant hardiness zones 4 through 11. Many varieties are used for cooking and present fragrant ornamental foliage. Aromatic blooms range from white to shades of pink, red or purple-blue. Sages may flower from spring through fall, or deliver seasonal flushes of color. Perennial sages often develop old, woody stems and require pruning to stay attractive. This cleans up the plant and elicits a second burst of blooms and growth. If your sage looks a little listless, a haircut may be all it needs.

Sterilize your pruning implements with household disinfectant before and after your prune your sage to prevent the spread of disease. Use sharp, bypass pruning shears for clean, healthy cuts on woody stems. Garden scissors shape up soft annual and perennials stems. Wear gloves to protect your hands.

Prune off dead and damaged sage stems any time of year, but leave most stems until spring when the plant begins to grow again and danger of frost has passed. The old stems, though unsightly, protect new growth. When new shoots emerge at the plant's the base and on stems, cut old woody stems back to new growth. Cut dead, soft stems to the ground.

Trim soft-stemmed perennial sages in the summer to encourage re-blooming. Wait until after the first burst of blooms, then remove at least half of the plant. If you have a mass planting of sage, cut plants at different levels to keep a natural look. The plants will reward you by bouncing back quickly with renewed vigor and lots of blossoms.

Deadhead sage to remove old flower spikes throughout the growing season. This helps encourage more blooms, shape the plant and neaten its appearance. Hold the end of a spent flower spike and move down with your other hand until just below the bloom. This method prevents you from chopping off a stalk you don't want to cut.

Pick up all fallen leaves, spent flower heads and pruned stems around your sage. If there is any sign of disease, dispose of the debris instead of composting it. This reduces the chances of fungal infections spreading. Always check for signs of pests, but sages have few problems with insects.

Sterilize your pruning implements with household disinfectant before and after your prune your sage to prevent the spread of disease. Use sharp, bypass pruning shears for clean, healthy cuts on woody stems. Garden scissors shape up soft annual and perennials stems. Wear gloves to protect your hands.

Prune off dead and damaged sage stems any time of year, but leave most stems until spring when the plant begins to grow again and danger of frost has passed. The old stems, though unsightly, protect new growth. When new shoots emerge at the plant's the base and on stems, cut old woody stems back to new growth. Cut dead, soft stems to the ground.

Trim soft-stemmed perennial sages in the summer to encourage re-blooming. Wait until after the first burst of blooms, then remove at least half of the plant. If you have a mass planting of sage, cut plants at different levels to keep a natural look. The plants will reward you by bouncing back quickly with renewed vigor and lots of blossoms.

Deadhead sage to remove old flower spikes throughout the growing season. This helps encourage more blooms, shape the plant and neaten its appearance. Hold the end of a spent flower spike and move down with your other hand until just below the bloom. This method prevents you from chopping off a stalk you don't want to cut.

Pick up all fallen leaves, spent flower heads and pruned stems around your sage. If there is any sign of disease, dispose of the debris instead of composting it. This reduces the chances of fungal infections spreading. Always check for signs of pests, but sages have few problems with insects.
0
0
文章
Miss Chen
2018年08月22日

Plumbago can be rooted from stem or root cuttings. Unless you will be rooting them indoors, make the cuttings in fall or spring so the rootings benefit from mild temperatures while they become established.

Stem Cuttings
Cuttings should be 3 to 4 inches long, taken just below a leaf node, recommends Andromeda Botanic Gardens. Strip the leaves from the bottom half of the plumbago cutting. Dip the stripped half in water, then in rooting hormone, if available. Use a pencil to make a depression in the soil where you will plant your cutting. Place the cutting and firm the soil around it.
Root Cuttings
The University of Florida recommends root cuttings for propagating plumbago. Take cuttings from the mature root (1/4- to 1/2-inch diameter) of a two- to three-year-old plumbago in late winter or early spring, says the University of Florida IFAS Extension. Bury 2- to 6-inch-long cuttings horizontally under 1/2 inch of rooting medium.

Considerations
Keep plumbago cuttings out of direct sunlight but in a bright place until they've rooted. Keep the soil evenly moist. Covering the cuttings with a clear plastic covering helps conserve moisture and prevents wind damage.

Stem Cuttings
Cuttings should be 3 to 4 inches long, taken just below a leaf node, recommends Andromeda Botanic Gardens. Strip the leaves from the bottom half of the plumbago cutting. Dip the stripped half in water, then in rooting hormone, if available. Use a pencil to make a depression in the soil where you will plant your cutting. Place the cutting and firm the soil around it.
Root Cuttings
The University of Florida recommends root cuttings for propagating plumbago. Take cuttings from the mature root (1/4- to 1/2-inch diameter) of a two- to three-year-old plumbago in late winter or early spring, says the University of Florida IFAS Extension. Bury 2- to 6-inch-long cuttings horizontally under 1/2 inch of rooting medium.

Considerations
Keep plumbago cuttings out of direct sunlight but in a bright place until they've rooted. Keep the soil evenly moist. Covering the cuttings with a clear plastic covering helps conserve moisture and prevents wind damage.
0
0


