文章
Miss Chen
2020年09月13日

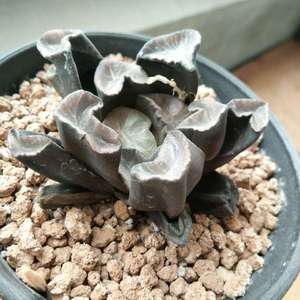
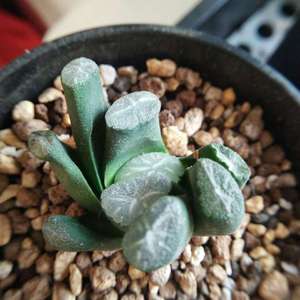
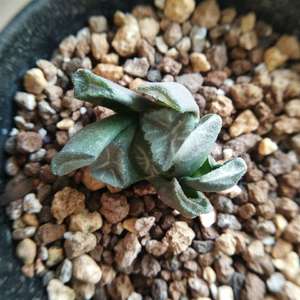
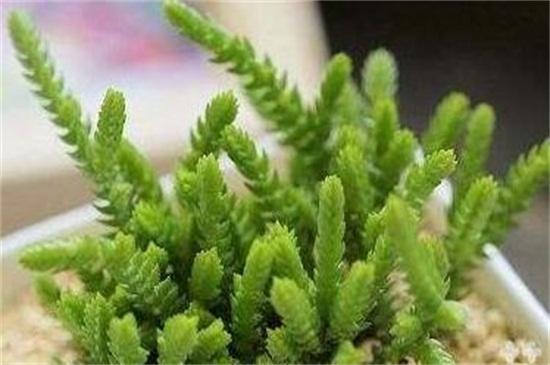
方鳞绿塔在养殖时需用腐叶土、泥炭土、河沙混合做基质,可使其更好的生长,还要给其充足的光照,不过夏季时需给其3~4小时光照,生长期间可每隔7~10天浇一次水,每隔15~20天施一次淡薄磷肥,平时常用分株法繁殖方鳞绿塔。
1、盆土需求
方鳞绿塔对土壤要求不是很高,它需要生长在疏松、肥沃、透气排水性良好的土壤中,一般可用营养土养殖方鳞绿塔,不过最好还是要腐叶土、泥炭土、河沙按照2:2:1的比例混合做基质。
2、光照需求
方鳞绿塔在养殖过程中,如果光照不足很容易使其徒长,在方鳞绿塔的养殖方法和注意事项里,平时最好将方鳞绿塔摆放在阳光处给其充足的光照,夏季时做好遮阴防晒,给其3~4小时散射光照就可以了。
3、水肥管理
当方鳞绿塔生长旺盛时,可每隔7~10天浇一次水,使土壤保持微湿状态就可以了,还要每隔15~20天施一次淡薄磷肥,使其生长的更好,当阴雨天时不仅需要停止浇水,还要做好排水工作,也不要将水分和肥料洒在叶片上,会使其逐渐腐烂。

4、分株繁殖
一般方鳞绿塔每次给其进行翻盆换土时,可从基部摘取健壮的分株,将母株伤口处涂抹草木灰,重新种植到土壤里,分株伤口处需喷洒药剂杀菌,放在阴凉光照处1~2天时间,然后种植到盆土里就可以了。
5、注意事项
方鳞绿塔适合生长在15~26℃的温度下,它是比较耐寒的植物,但不能在温度0℃以下生长,很容易冻伤植株,使其无法在盆土中正常生长,所以冬季时最好将其摆放在室内养护,温度控制在0~5℃最佳。

1、盆土需求
方鳞绿塔对土壤要求不是很高,它需要生长在疏松、肥沃、透气排水性良好的土壤中,一般可用营养土养殖方鳞绿塔,不过最好还是要腐叶土、泥炭土、河沙按照2:2:1的比例混合做基质。
2、光照需求
方鳞绿塔在养殖过程中,如果光照不足很容易使其徒长,在方鳞绿塔的养殖方法和注意事项里,平时最好将方鳞绿塔摆放在阳光处给其充足的光照,夏季时做好遮阴防晒,给其3~4小时散射光照就可以了。
3、水肥管理
当方鳞绿塔生长旺盛时,可每隔7~10天浇一次水,使土壤保持微湿状态就可以了,还要每隔15~20天施一次淡薄磷肥,使其生长的更好,当阴雨天时不仅需要停止浇水,还要做好排水工作,也不要将水分和肥料洒在叶片上,会使其逐渐腐烂。

4、分株繁殖
一般方鳞绿塔每次给其进行翻盆换土时,可从基部摘取健壮的分株,将母株伤口处涂抹草木灰,重新种植到土壤里,分株伤口处需喷洒药剂杀菌,放在阴凉光照处1~2天时间,然后种植到盆土里就可以了。
5、注意事项
方鳞绿塔适合生长在15~26℃的温度下,它是比较耐寒的植物,但不能在温度0℃以下生长,很容易冻伤植株,使其无法在盆土中正常生长,所以冬季时最好将其摆放在室内养护,温度控制在0~5℃最佳。
0
0
文章
ritau
2020年08月02日

1. Purchase a mint seedling. Mint plants are notoriously difficult to begin from seed. Instead, visit your local nursery (or even sometimes your local grocery store) and purchase a mint seedling. Look for a seeding that is already at least 3–4 inches (7.6–10.2 cm) tall.
-Some varieties of mint include sweet mint, chocolate mint, spearmint, lemon mint, apple mint, and peppermint.
-Spearmint and peppermint are the most common. Spearmint is often used in baking and cooking. Peppermint is used more often for drinks, like mojitos and hot chocolate.
2. Propagate a new mint plant from a cutting. Trim a 4 in (10 cm) sprig from an existing mint plant, about 0.5 inches (1.3 cm) above a junction. Place the trimming in a glass of water, and wait about 1 week. Small white roots should begin appearing under water. Wait another 2-7 days to allow the roots to develop.
-Add water to the glass as necessary.
-Change the water every 4-5 days to keeping your trimming healthy.
3. Use a “runner” from an existing outdoor mint plant. If you have a friend with an existing outdoor mint plant, you may be able to use one of their runners. “Runners” are long stems that grow away from a mint plant. Runners set their own roots in the ground, which means they can be carefully removed and transplanted into a new pot. Look for a runner, and use a trowel to gently remove it from the ground.
4. Find a container with a wide surface. Mint plants needs a lot of width to grow effectively, but they don’t need a great deal of depth. For each mint plant, look for a container at least 8–12 inches (20–30 cm) wide.
-Ceramic planters are porous and lose moisture easily. Your mint might be happier in a plastic container.
-You can repurpose a plastic container by drilling a hole in the bottom for drainage.
5. Fill your container with potting soil. You can pick up some potting soil from a local nursery, home improvement store, or big box store. Mint plants enjoy soil that drains well, so don’t pack the soil too tight.
6. Test your soil for a pH of 6-7.5. Mint plants are not super finicky, so they will accept a relatively wide pH range. Use a test kit to make sure your soil falls within this optimal range.
-To lower the pH of your soil, add some compost, composted manure, or acidic mulch.
-To raise the pH of your soil, add pelletized lime or wood ash.

7. Place your mint seedling in the container. Using a small trowel and/or your fingers, make a small opening in the soil. Carefully place your mint seedling into this opening. Move the soil around your seedling so that the roots are no longer exposed, and your seedling can stand up.
-Indoor mint plants do not require fertilizer or mulch.
8. Water your seedling immediately after planting. Once you've gotten your mint plant in the soil, give your seedling a generous watering. For one mint plant, offer around 6–8 fluid ounces (180–240 ml) of water.
Caring for:
1. Place your mint plant so it receives indirect sunlight. Choose an area that receives morning sun and partial afternoon shade. You want the plant to get some light without drying it out completely. Rotate your plant every 3-4 days. Mint plants will grow in the direction of sunlight, and rotating the plant helps to keep it from growing unevenly.
Some good options include:
-A windowsill that faces north.
-A shelf across the room from a south-facing window.
2. Water your mint frequently. Water your mint at least every 2-3 days, or more if you live in a very dry climate or your mint is getting a lot of direct sunlight. Check the soil with a finger each day to ensure that the soil is moist.
-Add around 1–2 cups (240–470 ml) to your mint plant at each watering.
-Humidity can be important to the growing process, so consider misting your plant with water in between waterings.
3. Use water soluble fertilizer if desired. Mint plants do not often require fertilizer, but it can help improve your plant's growth if used occasionally. The best time to use fertilizer is in the spring when plants first start the new growing season.
-Choose a water soluble, time-release fertilizer.
-Too much fertilizer can alter the taste of your mint.

4. Harvest your mint leaves. Give your new mint plant anywhere from 2-6 weeks to get established. Then begin plucking off leaves as you need them. Avoid harvesting more than ⅓ of the plant at one time, as this can prevent proper regrowth.
-Hang mint stems upside down to dry them.
-Save mint leaves in an airtight container, like a jar or a small plastic bag.
5. Remove any flower buds before they open. Although the flowers that appear at the top of your mint plant are pretty, you’ll need to trim them off as soon as they appear. Use a pair of sharp scissors to clip the flowers off at the stem to prevent fewer, blander mint leaves.
This prevents the plant from “going to seed.” When a mint plant starts producing seeds, it puts less energy toward leaf production.
-Some varieties of mint include sweet mint, chocolate mint, spearmint, lemon mint, apple mint, and peppermint.
-Spearmint and peppermint are the most common. Spearmint is often used in baking and cooking. Peppermint is used more often for drinks, like mojitos and hot chocolate.
2. Propagate a new mint plant from a cutting. Trim a 4 in (10 cm) sprig from an existing mint plant, about 0.5 inches (1.3 cm) above a junction. Place the trimming in a glass of water, and wait about 1 week. Small white roots should begin appearing under water. Wait another 2-7 days to allow the roots to develop.
-Add water to the glass as necessary.
-Change the water every 4-5 days to keeping your trimming healthy.
3. Use a “runner” from an existing outdoor mint plant. If you have a friend with an existing outdoor mint plant, you may be able to use one of their runners. “Runners” are long stems that grow away from a mint plant. Runners set their own roots in the ground, which means they can be carefully removed and transplanted into a new pot. Look for a runner, and use a trowel to gently remove it from the ground.
4. Find a container with a wide surface. Mint plants needs a lot of width to grow effectively, but they don’t need a great deal of depth. For each mint plant, look for a container at least 8–12 inches (20–30 cm) wide.
-Ceramic planters are porous and lose moisture easily. Your mint might be happier in a plastic container.
-You can repurpose a plastic container by drilling a hole in the bottom for drainage.
5. Fill your container with potting soil. You can pick up some potting soil from a local nursery, home improvement store, or big box store. Mint plants enjoy soil that drains well, so don’t pack the soil too tight.
6. Test your soil for a pH of 6-7.5. Mint plants are not super finicky, so they will accept a relatively wide pH range. Use a test kit to make sure your soil falls within this optimal range.
-To lower the pH of your soil, add some compost, composted manure, or acidic mulch.
-To raise the pH of your soil, add pelletized lime or wood ash.

7. Place your mint seedling in the container. Using a small trowel and/or your fingers, make a small opening in the soil. Carefully place your mint seedling into this opening. Move the soil around your seedling so that the roots are no longer exposed, and your seedling can stand up.
-Indoor mint plants do not require fertilizer or mulch.
8. Water your seedling immediately after planting. Once you've gotten your mint plant in the soil, give your seedling a generous watering. For one mint plant, offer around 6–8 fluid ounces (180–240 ml) of water.
Caring for:
1. Place your mint plant so it receives indirect sunlight. Choose an area that receives morning sun and partial afternoon shade. You want the plant to get some light without drying it out completely. Rotate your plant every 3-4 days. Mint plants will grow in the direction of sunlight, and rotating the plant helps to keep it from growing unevenly.
Some good options include:
-A windowsill that faces north.
-A shelf across the room from a south-facing window.
2. Water your mint frequently. Water your mint at least every 2-3 days, or more if you live in a very dry climate or your mint is getting a lot of direct sunlight. Check the soil with a finger each day to ensure that the soil is moist.
-Add around 1–2 cups (240–470 ml) to your mint plant at each watering.
-Humidity can be important to the growing process, so consider misting your plant with water in between waterings.
3. Use water soluble fertilizer if desired. Mint plants do not often require fertilizer, but it can help improve your plant's growth if used occasionally. The best time to use fertilizer is in the spring when plants first start the new growing season.
-Choose a water soluble, time-release fertilizer.
-Too much fertilizer can alter the taste of your mint.

4. Harvest your mint leaves. Give your new mint plant anywhere from 2-6 weeks to get established. Then begin plucking off leaves as you need them. Avoid harvesting more than ⅓ of the plant at one time, as this can prevent proper regrowth.
-Hang mint stems upside down to dry them.
-Save mint leaves in an airtight container, like a jar or a small plastic bag.
5. Remove any flower buds before they open. Although the flowers that appear at the top of your mint plant are pretty, you’ll need to trim them off as soon as they appear. Use a pair of sharp scissors to clip the flowers off at the stem to prevent fewer, blander mint leaves.
This prevents the plant from “going to seed.” When a mint plant starts producing seeds, it puts less energy toward leaf production.
0
0


