文章
Miss Chen
2018年09月10日

梅雨时期很多植物都都会或多或少遭受一些病虫害的侵入,而此时也需要我们格外的用心去照顾它们。而杜鹃的花期在5-8月,由于不同的品种可能花期也会存在一定延迟。而作为夏季6-7月份的梅雨季节,恰逢杜鹃盆景花枝招展、竞相开放的季节,虽然在这个时间段更加适合赏花,同时也需要及时做好养护管理工作。否则,如果呵护不到位的话,可能引起花叶焦枯脱落的现象,这对于盆景而言是莫大的损失,对于赏花者而言,也必然让人感到遗憾,毕竟盆景的观赏价值会大打折扣。

从夏季的6月到七月上旬期间恰逢是梅雨季,同时也正是杜鹃开花抽叶、发枝旺盛的时期,所以需要尽可能为其提供光照。只要不是被长时间暴晒,一般不会对开花造成什么影响。但如果在烈日当空的晴天,一般从上午9点到下午4点之间这段时间需要及时采取必要的遮阴措施,以避免烈日灼伤花叶而出现杜鹃出现花叶焦枯脱落的现象。但仅此还不够,以为杜鹃耐寒而不耐热,当气温高于30°C时,往往脱水比较严重,同时也容易出现休眠现象,所以为了确保其在梅雨季开花旺盛,遮阴、降温、保湿等工作一定要做好。
杜鹃盆景在梅雨季出现花叶焦枯脱落的现象,主要是光照过强、气温太高、脱水严重等因素造成的。所以,为了避免这种现象的发生,我们首先需要将杜鹃盆景摆放在相对凉爽、通风顺畅的环境中养护,同时做好遮阴工作,一般为其提供半阴的环境即可。当然,确保杜鹃盆景在梅雨季不会出现花叶焦枯脱落的现象,仅仅靠遮阴通风的条件还不够,我们还需要及时做好补水工作。
杜鹃本身是比较喜欢湿润但不耐高温的生长环境,所以当发现盆土变干时要及时浇水,多在早上9点之前或下午4点之后进行。而为了达到降温保湿的效果,我们还需要结合喷水进行,尤其是在像梅雨季的6-7月这种炎热的夏季环境下,更应该多喷洒叶面水和地面水。喷洒叶面水和地面水除了可以起到保湿降温的作用之外,也可以让杜鹃盆景的叶片更显干净、鲜绿,而实现鲜花配绿叶的效果,提高盆景的观赏价值。不过浇水不宜太多,否则仍然可能引起落花的。

当然一般情况下,处于花期的花卉植物是不宜进行追肥的,尤其是处于梅雨季且不耐高温的杜鹃盆景,更应该在花期停止追肥。除此之外,也需要做好病虫害的管理,因为在湿热通风差的环境下,杜鹃盆景比较容易感染病虫害。相信只要通过大家对杜鹃盆景进行精心的呵护和管理,梅雨季出现花叶焦枯脱落的现象会逐渐消失的,而盆景的观赏效果也能得到保障。

从夏季的6月到七月上旬期间恰逢是梅雨季,同时也正是杜鹃开花抽叶、发枝旺盛的时期,所以需要尽可能为其提供光照。只要不是被长时间暴晒,一般不会对开花造成什么影响。但如果在烈日当空的晴天,一般从上午9点到下午4点之间这段时间需要及时采取必要的遮阴措施,以避免烈日灼伤花叶而出现杜鹃出现花叶焦枯脱落的现象。但仅此还不够,以为杜鹃耐寒而不耐热,当气温高于30°C时,往往脱水比较严重,同时也容易出现休眠现象,所以为了确保其在梅雨季开花旺盛,遮阴、降温、保湿等工作一定要做好。
杜鹃盆景在梅雨季出现花叶焦枯脱落的现象,主要是光照过强、气温太高、脱水严重等因素造成的。所以,为了避免这种现象的发生,我们首先需要将杜鹃盆景摆放在相对凉爽、通风顺畅的环境中养护,同时做好遮阴工作,一般为其提供半阴的环境即可。当然,确保杜鹃盆景在梅雨季不会出现花叶焦枯脱落的现象,仅仅靠遮阴通风的条件还不够,我们还需要及时做好补水工作。
杜鹃本身是比较喜欢湿润但不耐高温的生长环境,所以当发现盆土变干时要及时浇水,多在早上9点之前或下午4点之后进行。而为了达到降温保湿的效果,我们还需要结合喷水进行,尤其是在像梅雨季的6-7月这种炎热的夏季环境下,更应该多喷洒叶面水和地面水。喷洒叶面水和地面水除了可以起到保湿降温的作用之外,也可以让杜鹃盆景的叶片更显干净、鲜绿,而实现鲜花配绿叶的效果,提高盆景的观赏价值。不过浇水不宜太多,否则仍然可能引起落花的。

当然一般情况下,处于花期的花卉植物是不宜进行追肥的,尤其是处于梅雨季且不耐高温的杜鹃盆景,更应该在花期停止追肥。除此之外,也需要做好病虫害的管理,因为在湿热通风差的环境下,杜鹃盆景比较容易感染病虫害。相信只要通过大家对杜鹃盆景进行精心的呵护和管理,梅雨季出现花叶焦枯脱落的现象会逐渐消失的,而盆景的观赏效果也能得到保障。
0
1
文章
Miss Chen
2018年09月07日

Considered one of the top perennials for fall color, "Autumn Joy" sedum (Sedum x "Autumn Joy") grows in U.S. Department of Agriculture plant hardiness zones 5 through 9. Once you have one sedum, it's easy to make more by taking stem and leaf cuttings or dividing the plant. Because "Autumn Joy" is a hybrid, seeds will not produce exact copies of the parent plant.
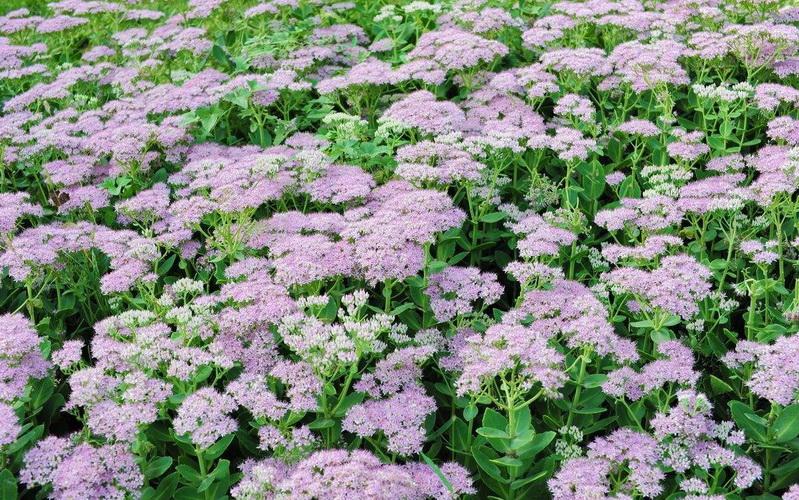
Cut Stems or Leaves
"Autumn Joy" sedum roots easily from stem or leaf cuttings. You can do this any time the plants are actively growing. Cuttings taken from new growth root more easily than cuttings from older stems.
Take cuttings in the early morning or late afternoon, and water the plants one hour before you take the cuttings. Make stem cuttings 2 to 6 inches long, with at least three sets of leaves. Cut the stem just below the node where a leaf joins the stem.
For leaf cuttings, remove the leaf along with the stalk that attaches the leaf to the stem. To keep them from drying out before planting, place stem and leaf cuttings in water or in a plastic bag with a damp paper towel.
Use sharp scissors or pruners to take the cuttings. Disinfect cutting tools by soaking them in a solution of 1 part bleach to 3 parts water for 5 minutes. Rinse them in clean water, and let them air-dry before use.
Plant Cuttings
Cuttings root best in a sterile, soilless potting mix. You can use a purchased seed-starting mix, or make your own for rooting cuttings by mixing equal parts river sand, perlite, and either vermiculite or peat moss. Use this mix to fill pots or planting trays with drainage holes. Water the potting mix so it is damp, and smooth the surface.
To avoid spreading disease, plant in new pots and planting trays or sterilize used pots before filling them with soil. Clean used pots and trays by scrubbing away any loose dirt, then soaking them in a solution of 1 part bleach to 9 parts water for 30 minutes. Wipe them dry before use. Always use pots and containers that have drainage holes.

For stem cuttings, use sterilized scissors or pruners to clip off the lowest set of leaves. If there are any flower buds on the cutting, remove those as well. Use a pencil to poke a hole in the potting mix, then place the cutting in the hole, firming the potting mix around the cutting so the place where you cut the leaves off is covered. For leaf cuttings, cover about 1/4 inch of the stem-end of the leaf with potting mix. There is no need to use a rooting hormone on "Autumn Joy" sedum cuttings.
Keep Them Moist
Cover the cuttings with clear plastic bags to help keep them from drying out. Some planting trays come with clear plastic domes which makes it easy to keep humidity levels high. The cuttings still need air circulation, though, so make sure there is space between the plastic and the pot or tray. Don't let the plastic touch the plant leaves.
Mist the cuttings as needed to keep the soil from drying out. You want the soil to stay moist, but not waterlogged. After two weeks, check if the stem cuttings are rooting by gently lifting the stem. If it comes free of the soil easily, replant it and check again in another week. Keep checking until the cuttings stay rooted in the soil when you gently tug at the stem.
You can tell leaf cuttings have rooted when new leaves start to emerge from the base of the leaf. Once the new stem or leaf cuttings have roots, gradually decrease the humidity by leaving the plastic off for several hours each day.
Move the Sedums Outside
The best time to plant new "Autumn Joy" sedum is in the spring after danger of frost has passed, but this plant is not picky about planting time. If you take cuttings in spring, the resulting plants can still be planted outdoors in the summer or fall. Mature plants reach 12 to 24 inches tall, and they should be spaced 12 to 18 inches apart.
A spot in full-sun is best, and "Autumn Joy" sedum will grow in any soil type as long as it drains well. Sedum is highly drought-tolerant, but water once a week for the first year if there is no rain. This encourages deep rooting.
Divide Established Plants
Once "Autumn Joy" sedum is established, divide the clumps every three to five years. This is an easy way to get new plants and to keep the sedum from becoming crowded. Divide the sedum in the spring, as soon as new growth starts to emerge from the soil. Choose an overcast day, preferably with light rain in the forecast. Water the plants the day before you plan to divide the plant.
Use a sharp spade to dig around the entire sedum clump, about 4 to 6 inches away from the base of the plant. Lift the entire clump, and shake off loose soil so you can see the root system better. Sedums form clumps, and you many need to use a sharp, large knife to divide the clump and cut through the roots. Sterilize this knife before use the same way you sterilized the pruning tools.
Replant the divisions as soon as possible. If you must delay planting, place the sedum in the shade and keep the soil moist. When you plant the new divisions, place them at the same depth they were previously growing. Firm the soil around the plants, and water thoroughly.

Cut Stems or Leaves
"Autumn Joy" sedum roots easily from stem or leaf cuttings. You can do this any time the plants are actively growing. Cuttings taken from new growth root more easily than cuttings from older stems.
Take cuttings in the early morning or late afternoon, and water the plants one hour before you take the cuttings. Make stem cuttings 2 to 6 inches long, with at least three sets of leaves. Cut the stem just below the node where a leaf joins the stem.
For leaf cuttings, remove the leaf along with the stalk that attaches the leaf to the stem. To keep them from drying out before planting, place stem and leaf cuttings in water or in a plastic bag with a damp paper towel.
Use sharp scissors or pruners to take the cuttings. Disinfect cutting tools by soaking them in a solution of 1 part bleach to 3 parts water for 5 minutes. Rinse them in clean water, and let them air-dry before use.
Plant Cuttings
Cuttings root best in a sterile, soilless potting mix. You can use a purchased seed-starting mix, or make your own for rooting cuttings by mixing equal parts river sand, perlite, and either vermiculite or peat moss. Use this mix to fill pots or planting trays with drainage holes. Water the potting mix so it is damp, and smooth the surface.
To avoid spreading disease, plant in new pots and planting trays or sterilize used pots before filling them with soil. Clean used pots and trays by scrubbing away any loose dirt, then soaking them in a solution of 1 part bleach to 9 parts water for 30 minutes. Wipe them dry before use. Always use pots and containers that have drainage holes.

For stem cuttings, use sterilized scissors or pruners to clip off the lowest set of leaves. If there are any flower buds on the cutting, remove those as well. Use a pencil to poke a hole in the potting mix, then place the cutting in the hole, firming the potting mix around the cutting so the place where you cut the leaves off is covered. For leaf cuttings, cover about 1/4 inch of the stem-end of the leaf with potting mix. There is no need to use a rooting hormone on "Autumn Joy" sedum cuttings.
Keep Them Moist
Cover the cuttings with clear plastic bags to help keep them from drying out. Some planting trays come with clear plastic domes which makes it easy to keep humidity levels high. The cuttings still need air circulation, though, so make sure there is space between the plastic and the pot or tray. Don't let the plastic touch the plant leaves.
Mist the cuttings as needed to keep the soil from drying out. You want the soil to stay moist, but not waterlogged. After two weeks, check if the stem cuttings are rooting by gently lifting the stem. If it comes free of the soil easily, replant it and check again in another week. Keep checking until the cuttings stay rooted in the soil when you gently tug at the stem.
You can tell leaf cuttings have rooted when new leaves start to emerge from the base of the leaf. Once the new stem or leaf cuttings have roots, gradually decrease the humidity by leaving the plastic off for several hours each day.
Move the Sedums Outside
The best time to plant new "Autumn Joy" sedum is in the spring after danger of frost has passed, but this plant is not picky about planting time. If you take cuttings in spring, the resulting plants can still be planted outdoors in the summer or fall. Mature plants reach 12 to 24 inches tall, and they should be spaced 12 to 18 inches apart.
A spot in full-sun is best, and "Autumn Joy" sedum will grow in any soil type as long as it drains well. Sedum is highly drought-tolerant, but water once a week for the first year if there is no rain. This encourages deep rooting.
Divide Established Plants
Once "Autumn Joy" sedum is established, divide the clumps every three to five years. This is an easy way to get new plants and to keep the sedum from becoming crowded. Divide the sedum in the spring, as soon as new growth starts to emerge from the soil. Choose an overcast day, preferably with light rain in the forecast. Water the plants the day before you plan to divide the plant.
Use a sharp spade to dig around the entire sedum clump, about 4 to 6 inches away from the base of the plant. Lift the entire clump, and shake off loose soil so you can see the root system better. Sedums form clumps, and you many need to use a sharp, large knife to divide the clump and cut through the roots. Sterilize this knife before use the same way you sterilized the pruning tools.
Replant the divisions as soon as possible. If you must delay planting, place the sedum in the shade and keep the soil moist. When you plant the new divisions, place them at the same depth they were previously growing. Firm the soil around the plants, and water thoroughly.
0
0
文章
Miss Chen
2018年09月06日

With their 2- to 5-feet-tall spikes and their bell-shaped, 2- to 3-inch flowers that have spotted throats and range in color from yellow and white to pink or purple, common foxgloves (Digitalis purpurea) are easily identifiable in the garden. These European natives are deer- and rabbit-resistant and attract hummingbirds. Hardy in U.S. Department of Agriculture plant hardiness zones 4 through 8, foxgloves prefer well-drained soil in a sunny to partially shady area of the garden. With proper care, they grow oblong, light-green foliage in their first year and bloom the next year.
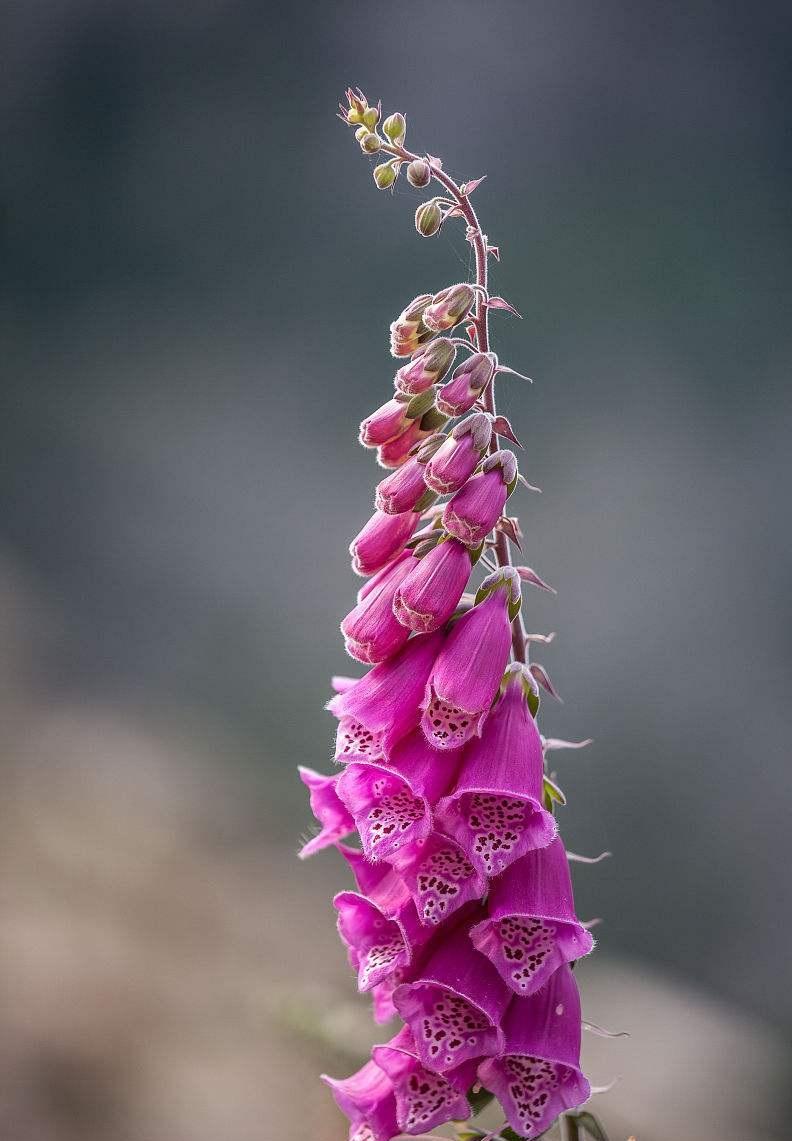
Step 1
Water foxgloves immediately after planting them, thoroughly soaking the soil around the plants. Keep the soil somewhat wet initially, watering about three times during the first week. Provide 1 inch of water each week afterward, maintaining consistently moist, but not wet, soil and adjusting your watering frequency after rainfall. Water foxgloves in early morning, and avoid getting their leaves wet to prevent diseases.
Step 2
Dig a 1-inch-deep trench in a 3-inch diameter around each foxglove plant. Sprinkle one handful of 5-10-5 granular fertilizer in each trench. Fill the trenches with soil, and water the soil. Do this in early spring and again six and 12 weeks afterward. Alternatively, apply a 1- to 2-inch-thick layer of compost around the foxgloves each spring to provide nutrients.
Step 3
Spread a 2-inch-thick layer of organic mulch, such as shredded leaves or bark chips, on the soil around the foxgloves. Keep the mulch about 1 to 2 inches away from the plants. Mulch promotes soil moisture retention and keeps weeds at bay.
Step 4
Treat and prevent powdery mildew outbreaks by properly spacing plants to allow proper air circulation, water from below and not overhead, clean up leaf debris below foxgloves and prune off affected foliage. Spray severe infections with ready-to-use Neem oil or horticultural oil, saturating the plant's foliage and repeating weekly or as needed. Do not use oil-based products when temperatures are above 90 degrees Fahrenheit or the plant is stressed from drought.
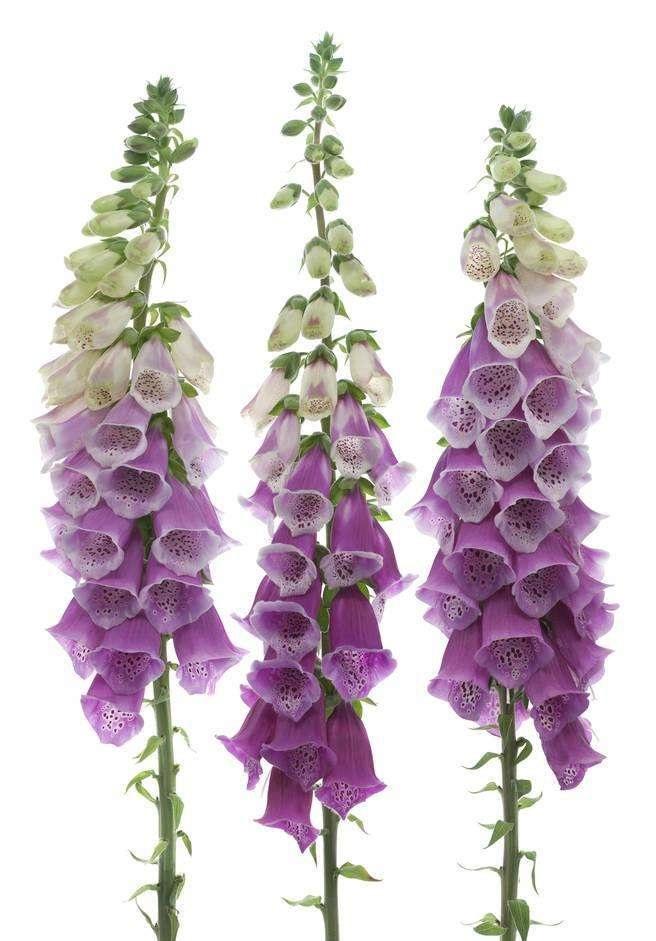
Step 5
Remove slugs or snails from the foxglove's foliage in the early morning when the pests are most active. Wear gloves and pick the pest from the plant, placing them in a small bowl of soapy water. Prune off any foliage damaged by the snails or slugs.
Step 6
Pinch off the foxgloves' wilted or faded flowers. Doing so keeps the plants looking neat and prevents them from spending energy on making seeds. Alternatively, wait until two-thirds of the flowers have faded, and then use pruning shears to cut back each entire stalk at the point where its base meets the bottom leaves.

Step 1
Water foxgloves immediately after planting them, thoroughly soaking the soil around the plants. Keep the soil somewhat wet initially, watering about three times during the first week. Provide 1 inch of water each week afterward, maintaining consistently moist, but not wet, soil and adjusting your watering frequency after rainfall. Water foxgloves in early morning, and avoid getting their leaves wet to prevent diseases.
Step 2
Dig a 1-inch-deep trench in a 3-inch diameter around each foxglove plant. Sprinkle one handful of 5-10-5 granular fertilizer in each trench. Fill the trenches with soil, and water the soil. Do this in early spring and again six and 12 weeks afterward. Alternatively, apply a 1- to 2-inch-thick layer of compost around the foxgloves each spring to provide nutrients.
Step 3
Spread a 2-inch-thick layer of organic mulch, such as shredded leaves or bark chips, on the soil around the foxgloves. Keep the mulch about 1 to 2 inches away from the plants. Mulch promotes soil moisture retention and keeps weeds at bay.
Step 4
Treat and prevent powdery mildew outbreaks by properly spacing plants to allow proper air circulation, water from below and not overhead, clean up leaf debris below foxgloves and prune off affected foliage. Spray severe infections with ready-to-use Neem oil or horticultural oil, saturating the plant's foliage and repeating weekly or as needed. Do not use oil-based products when temperatures are above 90 degrees Fahrenheit or the plant is stressed from drought.

Step 5
Remove slugs or snails from the foxglove's foliage in the early morning when the pests are most active. Wear gloves and pick the pest from the plant, placing them in a small bowl of soapy water. Prune off any foliage damaged by the snails or slugs.
Step 6
Pinch off the foxgloves' wilted or faded flowers. Doing so keeps the plants looking neat and prevents them from spending energy on making seeds. Alternatively, wait until two-thirds of the flowers have faded, and then use pruning shears to cut back each entire stalk at the point where its base meets the bottom leaves.
0
0
文章
Miss Chen
2018年09月01日

Russian sage is a 3 to 5-foot tall perennial with purplish blue flowers and silver foliage. It has fragrant leaves and it blooms from mid-summer season to the fall. It is a good plant for fall color in the garden, to use for dried or cut flowers, or to attract butterflies. Russian sage can be propagated by division every three years in the spring season or fall.

Step 1
Make sure the plant isn't in active bloom and that the buds are dry. Russian sage is not in active bloom when the buds are dry, even though it may still look active.
Step 2
Cut down the stems to approximately 6 to 8 inches high with garden trimmers. After cutting, dig up the plant with a shovel, creating a wide circle around it to get as much rootball as can be salvaged.
Step 3
Remove soil around the roots and divide them into thirds if the plant is big enough, (in half if it is small). Pull the roots apart with your hands.
Step 4
Keep the roots in water while you are transplanting.
Step 5
Dig a new hole as deep as the length of the roots for divided plants with shovel, adding in manure and compost to add nutrients to the soil.

Step 6
Set the plant's crown at the surface of the dirt, pulling dirt around the plant's roots as you continue.
Step 7
Water Russian sage after the rootball has completely been covered in amended soil (soil with the added nutrients in step 5) and patted down (to ensure stability).
Step 8
Mulch around the plant when the ground is about to freeze, sometime before the first "hard freeze" in your area. Mulching prior to ground freeze will keep the plant insulated and ensure it survives the winter.

Step 1
Make sure the plant isn't in active bloom and that the buds are dry. Russian sage is not in active bloom when the buds are dry, even though it may still look active.
Step 2
Cut down the stems to approximately 6 to 8 inches high with garden trimmers. After cutting, dig up the plant with a shovel, creating a wide circle around it to get as much rootball as can be salvaged.
Step 3
Remove soil around the roots and divide them into thirds if the plant is big enough, (in half if it is small). Pull the roots apart with your hands.
Step 4
Keep the roots in water while you are transplanting.
Step 5
Dig a new hole as deep as the length of the roots for divided plants with shovel, adding in manure and compost to add nutrients to the soil.

Step 6
Set the plant's crown at the surface of the dirt, pulling dirt around the plant's roots as you continue.
Step 7
Water Russian sage after the rootball has completely been covered in amended soil (soil with the added nutrients in step 5) and patted down (to ensure stability).
Step 8
Mulch around the plant when the ground is about to freeze, sometime before the first "hard freeze" in your area. Mulching prior to ground freeze will keep the plant insulated and ensure it survives the winter.
0
0
文章
Miss Chen
2018年08月30日

Shasta daisies (Leucanthemum X superbum) are undemanding plants, but pruning encourages more flowers and stronger growth. These perennials grow in U.S. Department of Agriculture plant hardiness zones 5 through 9, and thrive in full sun and well-drained, alkaline soils. They benefit from pruning from mid-summer onward, and dividing plants also encourages healthy growth. Shasta daisies grow 2 to 3 feet tall and 1 1/2 to 2 feet wide, depending on the cultivar.

Fading Flowers
Pruning Shasta daisy blooms as they fade encourages more flowers. Shasta daisies can flower less after they set seed, but removing the flowers before seeds develop prompts the plants to bloom again. Sterilize your pruning shear blades by wiping them with rubbing alcohol, and prune Shasta daisies when their petals droop and turn brown. Hold the flower in one hand and feel down to the base of the flower stem with the other hand. Prune the stem at the base, and remove the other fading blooms in the same way. Sterilize your pruning shears again after use.
Summer Pruning
Shasta daises benefit from pruning when the earliest blooms start to fade. Check your Shasta daisies every week, and prune fading flowers until late summer or the end of blooming. If the soil surface is dry after pruning, water plants until the water begins to puddle on the ground, and feed them with a liquid 15-30-15 fertilizer, which encourages more blooms. Dilute the product at a rate of 1 tablespoon per 1 gallon of water and apply it every 14 days, or dilute and apply the product according to the instructions on the label.
Pruning Clumps
Severely pruning Shasta daisy clumps in early fall can prolong their lives. Shasta daisies are short-lived perennials, but removing their leaves and stems when flowering is over encourages strong growth, which helps plants store energy for winter. Prune Shasta daisies to 8 inches tall, using sterilized pruning shears, and put the trimmings on the compost pile or in the trash. If your plants are too tall and lanky, pinch out the tips of non-flowering stems with your thumb and forefinger in spring to encourage them to grow more compact and bushy.

Lifting and Dividing
Lift and divide Shasta daisies every two or three years to encourage strong, healthy growth and flowering. Dig up a Shasta daisy plant on a cool, cloudy day in winter or early spring by pushing a garden fork into the soil about 6 inches from the plant base and gently levering it up. Do this three or four times around the base until the root ball lifts out of the soil. Divide the plant into three sections by pushing a sharp spade down through the roots, and plant the sections 24 to 36 inches apart at their original growing depths. Water the plants thoroughly and continue to water them regularly so that the soil stays moist.

Fading Flowers
Pruning Shasta daisy blooms as they fade encourages more flowers. Shasta daisies can flower less after they set seed, but removing the flowers before seeds develop prompts the plants to bloom again. Sterilize your pruning shear blades by wiping them with rubbing alcohol, and prune Shasta daisies when their petals droop and turn brown. Hold the flower in one hand and feel down to the base of the flower stem with the other hand. Prune the stem at the base, and remove the other fading blooms in the same way. Sterilize your pruning shears again after use.
Summer Pruning
Shasta daises benefit from pruning when the earliest blooms start to fade. Check your Shasta daisies every week, and prune fading flowers until late summer or the end of blooming. If the soil surface is dry after pruning, water plants until the water begins to puddle on the ground, and feed them with a liquid 15-30-15 fertilizer, which encourages more blooms. Dilute the product at a rate of 1 tablespoon per 1 gallon of water and apply it every 14 days, or dilute and apply the product according to the instructions on the label.
Pruning Clumps
Severely pruning Shasta daisy clumps in early fall can prolong their lives. Shasta daisies are short-lived perennials, but removing their leaves and stems when flowering is over encourages strong growth, which helps plants store energy for winter. Prune Shasta daisies to 8 inches tall, using sterilized pruning shears, and put the trimmings on the compost pile or in the trash. If your plants are too tall and lanky, pinch out the tips of non-flowering stems with your thumb and forefinger in spring to encourage them to grow more compact and bushy.

Lifting and Dividing
Lift and divide Shasta daisies every two or three years to encourage strong, healthy growth and flowering. Dig up a Shasta daisy plant on a cool, cloudy day in winter or early spring by pushing a garden fork into the soil about 6 inches from the plant base and gently levering it up. Do this three or four times around the base until the root ball lifts out of the soil. Divide the plant into three sections by pushing a sharp spade down through the roots, and plant the sections 24 to 36 inches apart at their original growing depths. Water the plants thoroughly and continue to water them regularly so that the soil stays moist.
0
0
文章
Miss Chen
2018年08月29日

Fragrant lavender (Lavandula angustifolia) supplies year-round garden interest, with aromatic flowers in summer and gray-green evergreen foliage. The small shrubs grow in U.S. Department of Agriculture plant hardiness zones 5 through 9, where they thrive with very little maintenance beyond pruning. The right time and method for pruning depends on the age of the plant and the type of trim it needs.
Spring Pruning
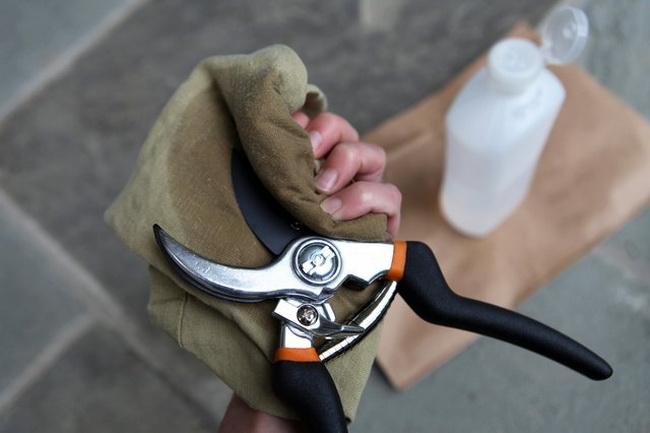
New plants need to be pruned in spring when new green growth has appeared. Spring pruning prevents flowering but encourages branching, allowing the new lavender to develop strong roots and a full framework of branches. Before pruning, wipe the shears with a cloth soaked in isopropyl alcohol to disinfect them, and then disinfect the shears each time you begin pruning a new plant. Cut back the stem tips by 2 to 3 inches, lightly shaping to maintain an even, rounded shape.
Deadheading and Harvest

Lavender may flower a second time if you prune off the old flowers after the first flush of summer blooms. Prune off the flowers a second time in late summer if the plant flowers again. Deadhead after the flowers open and begin to wilt if you want lavender blooms in the garden. For harvesting and drying, cut off the flowers when only two or three buds on the flower spikes have opened. Trim out the spikes with disinfected shears, cutting the stem so the cut end is inside the main bush and not visible. For harvesting, tie the harvested spikes together in bundles and hang them in a dark, dry area until the buds are completely dry.
Summer Shaping
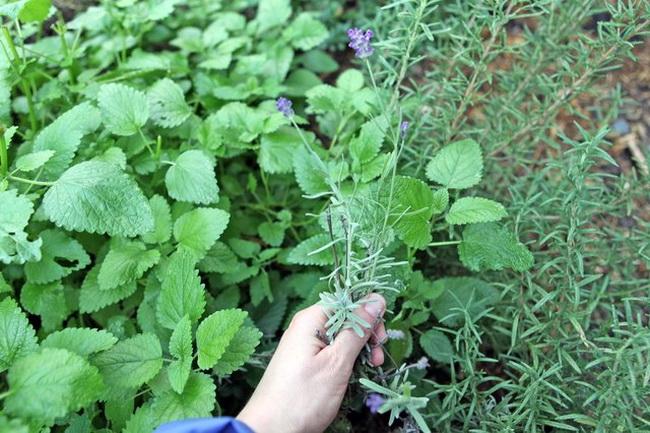
Main pruning occurs in summer, after the flower harvest. Cut back up to one-third of the leafy section of the stems, shaping the lavender into an evenly rounded mound as you prune. Avoid cutting into the woody stem bases. Lavender will not regrow from the lower stem sections, so cutting into wood will leave bare spots in the bush and weaken the lavender. Although summer, after the plant flowers, is the best time to prune, you can prune into late summer or early fall. However, avoid pruning in late fall because frost can damage the new growth encouraged by pruning.
Rejuvenating Woody Plants
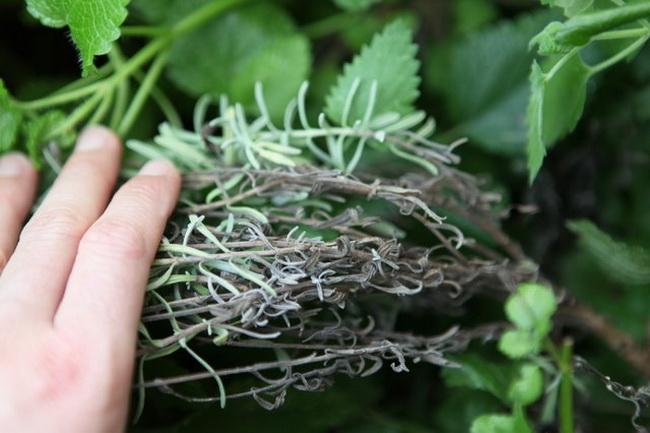
Woody, overgrown lavender plants develop sparse foliage and may fall open, or split. In most cases replacement is the best option, but you may be able to rejuvenate the lavender with careful pruning. Prune for rejuvenation in spring when new growth begins showing on the stems. Cut back all the green stems to within 1 inch of the woody portion at the base, but don't remove the green completely. The lavender may produce fuller growth in response.
Spring Pruning

New plants need to be pruned in spring when new green growth has appeared. Spring pruning prevents flowering but encourages branching, allowing the new lavender to develop strong roots and a full framework of branches. Before pruning, wipe the shears with a cloth soaked in isopropyl alcohol to disinfect them, and then disinfect the shears each time you begin pruning a new plant. Cut back the stem tips by 2 to 3 inches, lightly shaping to maintain an even, rounded shape.
Deadheading and Harvest

Lavender may flower a second time if you prune off the old flowers after the first flush of summer blooms. Prune off the flowers a second time in late summer if the plant flowers again. Deadhead after the flowers open and begin to wilt if you want lavender blooms in the garden. For harvesting and drying, cut off the flowers when only two or three buds on the flower spikes have opened. Trim out the spikes with disinfected shears, cutting the stem so the cut end is inside the main bush and not visible. For harvesting, tie the harvested spikes together in bundles and hang them in a dark, dry area until the buds are completely dry.
Summer Shaping

Main pruning occurs in summer, after the flower harvest. Cut back up to one-third of the leafy section of the stems, shaping the lavender into an evenly rounded mound as you prune. Avoid cutting into the woody stem bases. Lavender will not regrow from the lower stem sections, so cutting into wood will leave bare spots in the bush and weaken the lavender. Although summer, after the plant flowers, is the best time to prune, you can prune into late summer or early fall. However, avoid pruning in late fall because frost can damage the new growth encouraged by pruning.
Rejuvenating Woody Plants

Woody, overgrown lavender plants develop sparse foliage and may fall open, or split. In most cases replacement is the best option, but you may be able to rejuvenate the lavender with careful pruning. Prune for rejuvenation in spring when new growth begins showing on the stems. Cut back all the green stems to within 1 inch of the woody portion at the base, but don't remove the green completely. The lavender may produce fuller growth in response.
0
0
文章
Miss Chen
2018年08月21日

Hibiscus (Hibiscus spp.) plants produce large, often colorful, flowers during the summer. The hardy hibiscus varieties, such as rose of Sharon (Hibiscus syriacus), grow in U.S. Department of Agriculture plant hardiness zones 5 through 9. Tropical varieties, like Chinese hibiscus (Hibiscus rosa-sinensis), grow in USDA zones 9 through 11. Both hardy and tropical hibiscuses can suffer from yellow leaves and overall decline. The symptoms, causes and treatments are similar for both types of hibiscus.

Winter Leaf Drop
Tropical hibiscus varieties grown outdoors in summer but overwintered inside tend to suffer leaf yellowing, drop and dieback in the days following the move. It's difficult to supply a tropical hibiscus with enough light indoors, which causes further yellowing beyond the initial shock of relocation. Remove the leaves as they yellow if you want to try and keep the plant active during the winter. North Dakota State University Extension suggests placing the plant under bright artificial lighting for 13 hours each day, when brought inside during the winter months. You can also allow the plant to go dormant during winter. Place the plant in a dark area at around 40 to 50 degrees Fahrenheit and allow all the leaves to yellow and fall off before cutting the plant back to 6 inches tall. In spring, resume watering and place the plant in a sunny spot to encourage a fresh flush of healthy, green growth.
Cultural Concerns
Wet, poorly drained soil can cause root rots and general leaf yellowing. Grow potted hibiscus in containers with bottom drainage holes so the soil doesn't stay soggy. Plant garden hibiscus in well-draining soil and avoid overwatering and waterlogged soil. Nutrient deficiencies can also cause yellowing foliage, especially a lack of nitrogen in the soil. Water potted hibiscus with a soluble, all-purpose fertilizer every two weeks, such as a 1/2 teaspoon of 24-8-16 all-purpose blend mixed with 1 quart of water. For garden plants, sprinkling 1 tablespoon of a 12-4-8 or similar blend over every 1 square foot of garden at eight-week intervals provides enough nutrients. Fertilize hibiscus plants only when they are actively growing in spring and summer.

Blights
Both tropical and hardy hibiscus varieties can develop yellow leaves from a botrytis blight infection. This fungal disease may also cause spotting and discoloration on flowers or show as gray masses of mold on leaf, bud and stem surfaces. Overly wet soil and poor air circulation are the main causes. Remove affected leaves, stems and flowers with shears, wiping the shears with an isopropyl alcohol-soaked rag after each cut to destroy any fungal spores. Avoid overhead watering and keep the soil moist but not soggy.
Leaf Spot Diseases
Yellow spots on leaf surfaces may indicate a fungal leaf spot diseases. The shape and size of the spots varies, but most leaf spot diseases aren't fatal and they rarely cause long-term damage. Hibiscus plants don't require fungicide treatments for leaf spots. Instead, remove badly affected leaves and clean up fallen leaves and plant debris from around the base of the plant. Watering early in the day and keeping the foliage dry further prevents leaf spot problems.

Winter Leaf Drop
Tropical hibiscus varieties grown outdoors in summer but overwintered inside tend to suffer leaf yellowing, drop and dieback in the days following the move. It's difficult to supply a tropical hibiscus with enough light indoors, which causes further yellowing beyond the initial shock of relocation. Remove the leaves as they yellow if you want to try and keep the plant active during the winter. North Dakota State University Extension suggests placing the plant under bright artificial lighting for 13 hours each day, when brought inside during the winter months. You can also allow the plant to go dormant during winter. Place the plant in a dark area at around 40 to 50 degrees Fahrenheit and allow all the leaves to yellow and fall off before cutting the plant back to 6 inches tall. In spring, resume watering and place the plant in a sunny spot to encourage a fresh flush of healthy, green growth.
Cultural Concerns
Wet, poorly drained soil can cause root rots and general leaf yellowing. Grow potted hibiscus in containers with bottom drainage holes so the soil doesn't stay soggy. Plant garden hibiscus in well-draining soil and avoid overwatering and waterlogged soil. Nutrient deficiencies can also cause yellowing foliage, especially a lack of nitrogen in the soil. Water potted hibiscus with a soluble, all-purpose fertilizer every two weeks, such as a 1/2 teaspoon of 24-8-16 all-purpose blend mixed with 1 quart of water. For garden plants, sprinkling 1 tablespoon of a 12-4-8 or similar blend over every 1 square foot of garden at eight-week intervals provides enough nutrients. Fertilize hibiscus plants only when they are actively growing in spring and summer.

Blights
Both tropical and hardy hibiscus varieties can develop yellow leaves from a botrytis blight infection. This fungal disease may also cause spotting and discoloration on flowers or show as gray masses of mold on leaf, bud and stem surfaces. Overly wet soil and poor air circulation are the main causes. Remove affected leaves, stems and flowers with shears, wiping the shears with an isopropyl alcohol-soaked rag after each cut to destroy any fungal spores. Avoid overhead watering and keep the soil moist but not soggy.
Leaf Spot Diseases
Yellow spots on leaf surfaces may indicate a fungal leaf spot diseases. The shape and size of the spots varies, but most leaf spot diseases aren't fatal and they rarely cause long-term damage. Hibiscus plants don't require fungicide treatments for leaf spots. Instead, remove badly affected leaves and clean up fallen leaves and plant debris from around the base of the plant. Watering early in the day and keeping the foliage dry further prevents leaf spot problems.
0
0


