文章
ritau
2020年04月02日

Today, we are going to introduce 7 ways to make fertilizer that you can easy to handle with at home. Let's take a look!
1.Use water from a freshwater aquarium.
Freshwater aquariums contain nitrogen, which can provide your plants with a healthy boost. Fish naturally release nitrogen into the water, making their "waste" water an important source of nutrients for plants. Instead of dumping it down the toilet, use it to water your plants once a week. Fish waste, as well, contains trace elements important for plant growth.

2.Create a coffee compost.
Mix coffee grounds with leafy yard waste for "quick compost," especially for acid-loving plants. Mix your coffee grounds with an equal amount of dead leaves, pine straw, and other brown yard clippings and sprinkle over the soil once a month. Roses, azaleas, hydrangeas, and many other plants crave a low pH soil and will respond particularly well.
3.Use eggshells.
Spread old eggshells over your garden, or in the bottom of planting holes, for a calcium boost. Plants like tomatoes and peppers particularly love calcium, but your whole garden will enjoy eggshells. Calcium, which is over 90% of an eggshell's makeup, helps a plant develop strong cell walls. To use eggshells, lightly crush up the shells and spread over the garden. You can till them into the soil or leave them right on top -- they decompose very quickly.

4.Brew grass tea.
Make a "nutrient tea" with grass clippings from your yard. Use the bag on your lawnmower to keep the clippings the next time you cut the grass. Use them to fill up a 5-gallon bucket roughly 2/3s of the way to the top, then fill it near the top with water. Stir it quickly, then let it sit for three days, stirring once each morning. When done, strain out the grass clippings and use your "tea" to water your plants, providing essential nitrogen, by mixing it with an equal amount of water and spraying over the plants.
5.Save and spread your fireplace ashes. Wood ash is high in calcium and potassium, making it an excellent supplement to your soil. Simply spread it right over the garden, using your hands to lightly turn it into the top layer of the soil.
*Vegetables, in particular, tend to love ash, as it promotes healthy root growth.
*Warning: Do not use fireplace ashes on plants that love acidic soil like blueberries, roses, or azaleas.

6.Try banana peels. Cut up banana peels and add them to the hole when planting. Banana peels don't do much once the plant is already in the ground, but it can work wonders as you're planting. The peels contain a lot of potassium, which promotes a plant's root development. Cut up half a banana peel and toss it in the bottom of your hole before adding the plant.
7.Make your own compost. Composting at home is easy, so you can turn all of your old food scraps, leaves, and plant clippings into food for your garden. When organic matter decays, it releases nutrients that can enrich your soil. You can build your own compost in your yard, or you can try one of the commercially-available kitchen compost units.
via wikihow
1.Use water from a freshwater aquarium.
Freshwater aquariums contain nitrogen, which can provide your plants with a healthy boost. Fish naturally release nitrogen into the water, making their "waste" water an important source of nutrients for plants. Instead of dumping it down the toilet, use it to water your plants once a week. Fish waste, as well, contains trace elements important for plant growth.

2.Create a coffee compost.
Mix coffee grounds with leafy yard waste for "quick compost," especially for acid-loving plants. Mix your coffee grounds with an equal amount of dead leaves, pine straw, and other brown yard clippings and sprinkle over the soil once a month. Roses, azaleas, hydrangeas, and many other plants crave a low pH soil and will respond particularly well.
3.Use eggshells.
Spread old eggshells over your garden, or in the bottom of planting holes, for a calcium boost. Plants like tomatoes and peppers particularly love calcium, but your whole garden will enjoy eggshells. Calcium, which is over 90% of an eggshell's makeup, helps a plant develop strong cell walls. To use eggshells, lightly crush up the shells and spread over the garden. You can till them into the soil or leave them right on top -- they decompose very quickly.

4.Brew grass tea.
Make a "nutrient tea" with grass clippings from your yard. Use the bag on your lawnmower to keep the clippings the next time you cut the grass. Use them to fill up a 5-gallon bucket roughly 2/3s of the way to the top, then fill it near the top with water. Stir it quickly, then let it sit for three days, stirring once each morning. When done, strain out the grass clippings and use your "tea" to water your plants, providing essential nitrogen, by mixing it with an equal amount of water and spraying over the plants.
5.Save and spread your fireplace ashes. Wood ash is high in calcium and potassium, making it an excellent supplement to your soil. Simply spread it right over the garden, using your hands to lightly turn it into the top layer of the soil.
*Vegetables, in particular, tend to love ash, as it promotes healthy root growth.
*Warning: Do not use fireplace ashes on plants that love acidic soil like blueberries, roses, or azaleas.

6.Try banana peels. Cut up banana peels and add them to the hole when planting. Banana peels don't do much once the plant is already in the ground, but it can work wonders as you're planting. The peels contain a lot of potassium, which promotes a plant's root development. Cut up half a banana peel and toss it in the bottom of your hole before adding the plant.
7.Make your own compost. Composting at home is easy, so you can turn all of your old food scraps, leaves, and plant clippings into food for your garden. When organic matter decays, it releases nutrients that can enrich your soil. You can build your own compost in your yard, or you can try one of the commercially-available kitchen compost units.
via wikihow
0
0
文章
ritau
2020年03月31日

There are many plants that can be regrown indoors, which is very convenient for green hands to try gardening. Today, we are going to introduce 7 kinds of plants to you to regrow in water. Let’s take a look!
1.Carrots Greens

Instead of defaulting to the compost, use carrot tops to grow healthy carrot greens. Place a carrot top or tops in a bowl, cut side down. Fill the bowl with about an inch of water so the top is halfway covered. Place the dish in a sunny windowsill and change the water every day.
The tops will eventually sprout shoots. When they do, plant the tops in soil, careful not to cover the shoots. Harvest the greens to taste. (Some people prefer the baby greens; others prefer them fully grown.)
(Instructions via Gardening Know-How)
2.Green Onion

Instead of tossing the green part of these veggies, use them to grow more. Place the greens in a cup or recycled jar filled with water. Put the cup or jar on a windowsill and change the water every other day. In about a week, you should have a new green onion, leek, and/or scallion to add to your supper. Harvest when fullygrown—just make sure to leave the roots in the water.
(Instructions via Living Green Magazine)
3.Bok Choy

Cut off the base of a bok choy plant and place it in a bowl bottom-down. Add a small amount of water in the bowl. Cover the whole base with water, but do not add more than 1/4 inch above the base. Replace water every few days. In about one week, you should see regrowth around the center of the base.
Once you see regrowth, transfer the plant to a container or garden. Cover everything except the new growth with soil. Your bok choy should be full grown and ready to harvest in approximately five months.
(Instructions via My Heart Beets)
4.Celery

Rinse off the base of a bunch of celery and place it in a small bowl or similar container (any wide-mouthed, glass, or ceramic container should do). Fill the container with warm water, cut stalks facing upright. Place the bowl in a sunny area. Leave the base as-is for about one week and change the water every other day. Use a spray bottle to gently mist the plant every other day. The tiny yellow leaves around the center of the base will grow thicker and turn dark green.
After five to seven days, move the celery base to a planter or garden and cover it with soil, leaving the leaf tips uncovered. Keep the plant well watered. You’ll soon notice celery leaves regenerate from the base, as well as a few small stalks. Harvest when fully grown, then repeat the process.
(Instructions via 17 Apart)
5.Romaine Lettuce

When you chop up hearts of romaine, set aside a few inches from the bottom of the heart. Place in a bowl with about a ½ inch of water. Keep the bowl in a sunny area and change the water every day.
In a few days, you’ll start to notice sprouts. Plant the sprouted hearts directly in the garden. If you like the taste of baby greens, you can pinch off outer leaves as the lettuce grows. Otherwise, harvest romaine when it’s around 6 to 8 inches tall. If you want to continue growing lettuce, cut the romaine heads off right above the soil line with a sharp knife, leaving the base and root system intact. Otherwise, uproot the whole plant.
(Instructions via Lifehacker)
6.Lemongrass
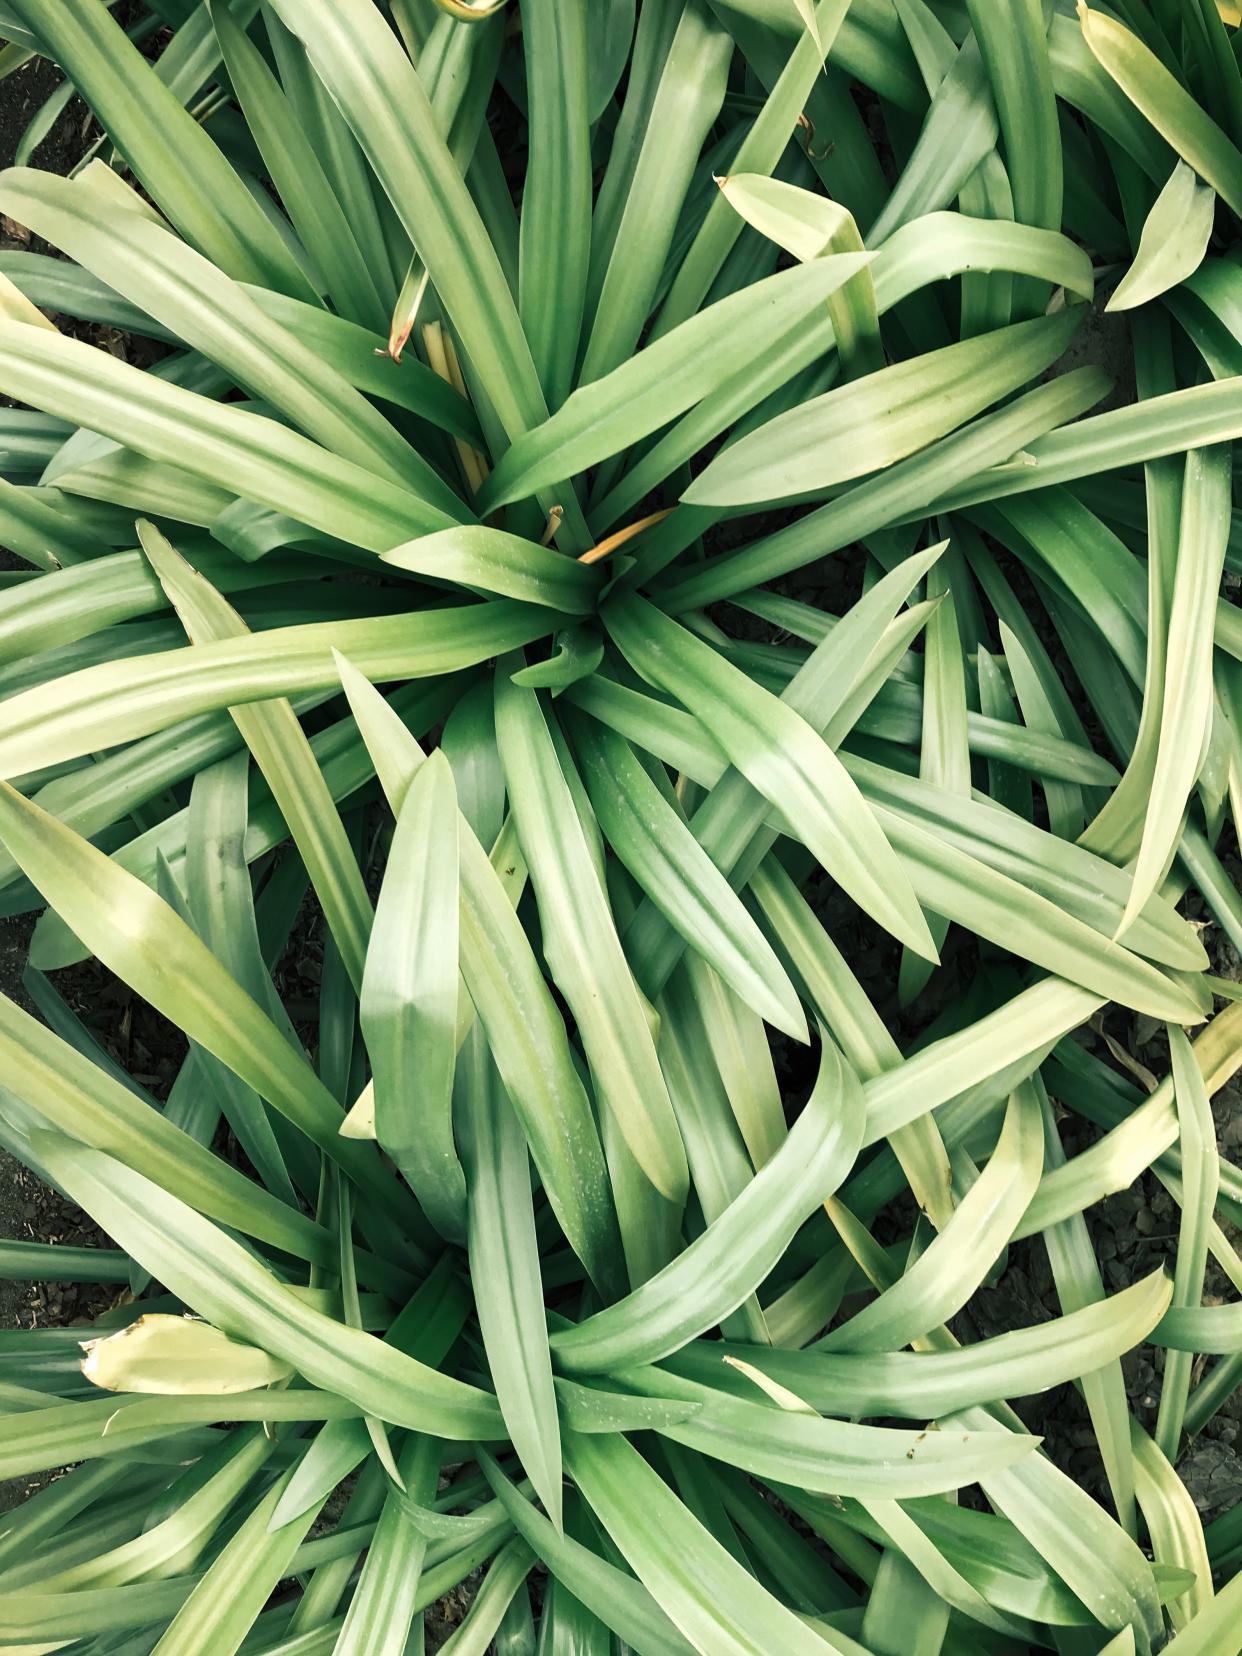
A frequent component of Thai dishes, lemongrass is a great addition to marinades, stir-fries, spice rubs, and curry pastes. To grow your own from scraps, cut off the tops of a bunch of lemongrass and place the stalks in water. Change the water every few days. In approximately two or three weeks, you should see new roots.
When the stems have developed strong root growth, plant the stalks in a pot or garden (preferably in an area that receives lots of sun). Because lemongrass needs to stay warm year round, plant the stalks in a container that can be moved inside during the winter months. Harvest lemongrass once it reaches one foot in height; just cut off the amount you need, being careful not to uproot the plant.
(Instructions via Suited to the Seasons)
7.Garlic Sprout

While you may not be able to grow garlic bulbs, you can grow garlic sprouts—also known as garlic greens—from a clove or bulb. Place a budding clove (or even a whole bulb) in a small cup, bowl, or jar. Add water until it covers the bottom of the container and touches the bottom of the cloves. Be careful not to submerge the cloves in order to avoid rot. Change the water every other day and place in a sunny area.
After a few days, the clove or bulb will start to produce roots. Sprouts may grow as long as 10 inches, but snip off the greens once they’re around 3 inches tall. Just be sure not to remove more than one-third of each sprout at one time. They’re tasty on top of baked potatoes, salads, in dips, or as a simple garnish.
(Instructions via Simple Daily Recipes)
Hope you can enjoy your harvest!
1.Carrots Greens

Instead of defaulting to the compost, use carrot tops to grow healthy carrot greens. Place a carrot top or tops in a bowl, cut side down. Fill the bowl with about an inch of water so the top is halfway covered. Place the dish in a sunny windowsill and change the water every day.
The tops will eventually sprout shoots. When they do, plant the tops in soil, careful not to cover the shoots. Harvest the greens to taste. (Some people prefer the baby greens; others prefer them fully grown.)
(Instructions via Gardening Know-How)
2.Green Onion

Instead of tossing the green part of these veggies, use them to grow more. Place the greens in a cup or recycled jar filled with water. Put the cup or jar on a windowsill and change the water every other day. In about a week, you should have a new green onion, leek, and/or scallion to add to your supper. Harvest when fullygrown—just make sure to leave the roots in the water.
(Instructions via Living Green Magazine)
3.Bok Choy

Cut off the base of a bok choy plant and place it in a bowl bottom-down. Add a small amount of water in the bowl. Cover the whole base with water, but do not add more than 1/4 inch above the base. Replace water every few days. In about one week, you should see regrowth around the center of the base.
Once you see regrowth, transfer the plant to a container or garden. Cover everything except the new growth with soil. Your bok choy should be full grown and ready to harvest in approximately five months.
(Instructions via My Heart Beets)
4.Celery

Rinse off the base of a bunch of celery and place it in a small bowl or similar container (any wide-mouthed, glass, or ceramic container should do). Fill the container with warm water, cut stalks facing upright. Place the bowl in a sunny area. Leave the base as-is for about one week and change the water every other day. Use a spray bottle to gently mist the plant every other day. The tiny yellow leaves around the center of the base will grow thicker and turn dark green.
After five to seven days, move the celery base to a planter or garden and cover it with soil, leaving the leaf tips uncovered. Keep the plant well watered. You’ll soon notice celery leaves regenerate from the base, as well as a few small stalks. Harvest when fully grown, then repeat the process.
(Instructions via 17 Apart)
5.Romaine Lettuce

When you chop up hearts of romaine, set aside a few inches from the bottom of the heart. Place in a bowl with about a ½ inch of water. Keep the bowl in a sunny area and change the water every day.
In a few days, you’ll start to notice sprouts. Plant the sprouted hearts directly in the garden. If you like the taste of baby greens, you can pinch off outer leaves as the lettuce grows. Otherwise, harvest romaine when it’s around 6 to 8 inches tall. If you want to continue growing lettuce, cut the romaine heads off right above the soil line with a sharp knife, leaving the base and root system intact. Otherwise, uproot the whole plant.
(Instructions via Lifehacker)
6.Lemongrass

A frequent component of Thai dishes, lemongrass is a great addition to marinades, stir-fries, spice rubs, and curry pastes. To grow your own from scraps, cut off the tops of a bunch of lemongrass and place the stalks in water. Change the water every few days. In approximately two or three weeks, you should see new roots.
When the stems have developed strong root growth, plant the stalks in a pot or garden (preferably in an area that receives lots of sun). Because lemongrass needs to stay warm year round, plant the stalks in a container that can be moved inside during the winter months. Harvest lemongrass once it reaches one foot in height; just cut off the amount you need, being careful not to uproot the plant.
(Instructions via Suited to the Seasons)
7.Garlic Sprout

While you may not be able to grow garlic bulbs, you can grow garlic sprouts—also known as garlic greens—from a clove or bulb. Place a budding clove (or even a whole bulb) in a small cup, bowl, or jar. Add water until it covers the bottom of the container and touches the bottom of the cloves. Be careful not to submerge the cloves in order to avoid rot. Change the water every other day and place in a sunny area.
After a few days, the clove or bulb will start to produce roots. Sprouts may grow as long as 10 inches, but snip off the greens once they’re around 3 inches tall. Just be sure not to remove more than one-third of each sprout at one time. They’re tasty on top of baked potatoes, salads, in dips, or as a simple garnish.
(Instructions via Simple Daily Recipes)
Hope you can enjoy your harvest!
0
0
文章
Miss Chen
2020年03月11日

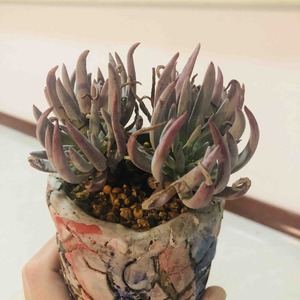
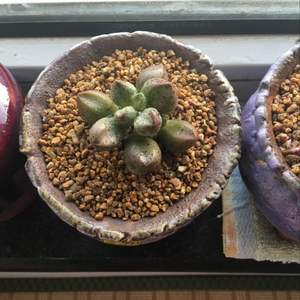
熊童子植株多分枝,茎绿色,肉质叶肥厚,交互对生,卵圆形,绿色,密生白色短毛。叶端具红色爪样齿,二歧聚伞花序,小花黄色,花期7-9月。该种原产于南非开普省。喜温暖干燥,阳光充足,通风良好的环境。夏季温度过高会休眠。忌寒冷和过分潮湿。繁殖方法有扦插。该种叶形叶色较美,花朵玲珑小巧,叶片形似小熊的脚掌,形态奇特,十分可爱,观赏价值很高。
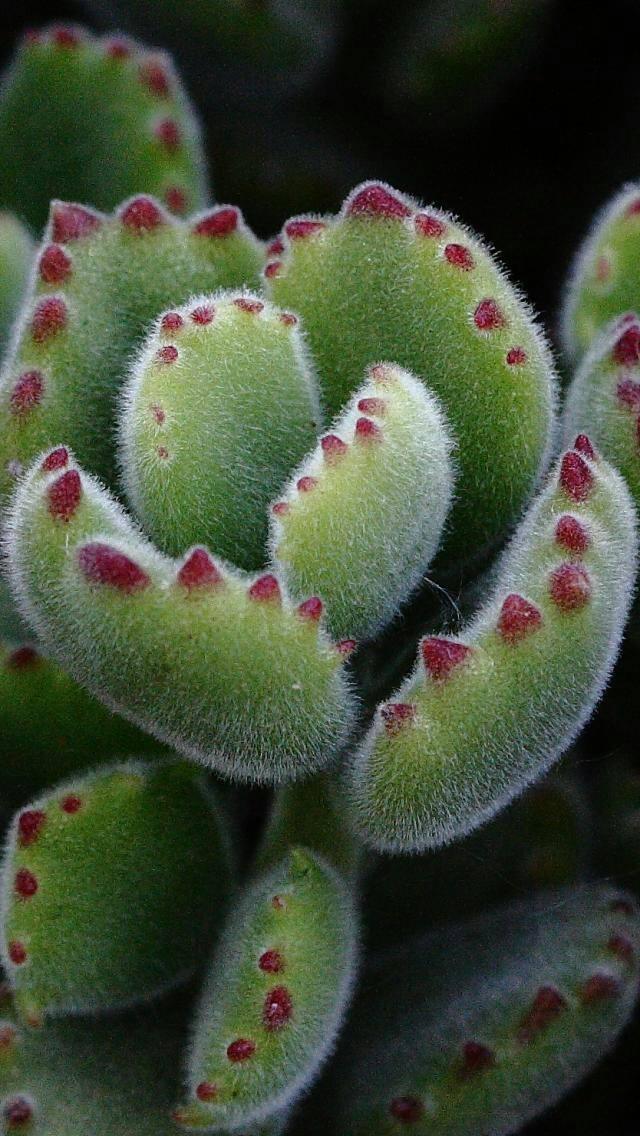
熊童子较为喜欢阳光,宜温暖干燥和阳光充足、通风良好的环境,忌寒冷和过分潮湿。当夏季温度超过35℃时,植株进入休眠期,生长停滞,会自动减少或停止水分吸收。此时应减少浇水,防止因盆土过度潮湿引起根部腐烂,同时应适当遮荫以防止烈日晒伤向阳叶片,防止留下疤痕。其他季节要则求充足的日照时间。冬季熊童子能耐5℃的低温,浇水要根据室温和阳光等情况而定,若阳光不足则盆土不宜过湿。
温度
将熊童子移入新盆后,应随时注意保持其生长环境的干燥,保证有充足的阳光照射。但需要注意熊童子的生长温度不能超过35℃,否则植物会进入休眠期,生长停滞。
光照
熊童子生长期要充分阳光,阳光充足的话,叶片会变得肥厚饱满,如果过于阴暗,会使茎叶纤细柔弱。盛夏高温下恰当遮荫,但过于荫蔽,茎叶纤弱,绒毛缺少光泽。不耐寒,冬季搬室内养护,应放阳光充分的窗前。

水肥
熊童子喜欢干燥的土壤,如果周围的环境较为潮湿,则应减少浇水次数,防止根部过度湿润引发腐烂。浇水时应该注意每次少水,每月两次即可,浇水时间尽量控制在晚上七点左右。春季、夏初和秋季的生长期可充分浇水,以保持盆土湿润,每月施一次腐熟的稀薄液肥或复合肥。冬季需严格控制浇水,保持盆土干燥。
换盆
随着熊童子的生长,过小的盆无法满足其生长需求,一般每一到两年要换盆一次,宜于春季进行。换盆之前应该在新盆中准备好新土,新土的肥力应为中等,土质的排水性能要好,可以将粗砂土、蛭石、园土、腐叶土等混合均匀。由于熊童子耐干旱,不耐水湿,所以换盆初期只需要浇少量的水。

熊童子较为喜欢阳光,宜温暖干燥和阳光充足、通风良好的环境,忌寒冷和过分潮湿。当夏季温度超过35℃时,植株进入休眠期,生长停滞,会自动减少或停止水分吸收。此时应减少浇水,防止因盆土过度潮湿引起根部腐烂,同时应适当遮荫以防止烈日晒伤向阳叶片,防止留下疤痕。其他季节要则求充足的日照时间。冬季熊童子能耐5℃的低温,浇水要根据室温和阳光等情况而定,若阳光不足则盆土不宜过湿。
温度
将熊童子移入新盆后,应随时注意保持其生长环境的干燥,保证有充足的阳光照射。但需要注意熊童子的生长温度不能超过35℃,否则植物会进入休眠期,生长停滞。
光照
熊童子生长期要充分阳光,阳光充足的话,叶片会变得肥厚饱满,如果过于阴暗,会使茎叶纤细柔弱。盛夏高温下恰当遮荫,但过于荫蔽,茎叶纤弱,绒毛缺少光泽。不耐寒,冬季搬室内养护,应放阳光充分的窗前。

水肥
熊童子喜欢干燥的土壤,如果周围的环境较为潮湿,则应减少浇水次数,防止根部过度湿润引发腐烂。浇水时应该注意每次少水,每月两次即可,浇水时间尽量控制在晚上七点左右。春季、夏初和秋季的生长期可充分浇水,以保持盆土湿润,每月施一次腐熟的稀薄液肥或复合肥。冬季需严格控制浇水,保持盆土干燥。
换盆
随着熊童子的生长,过小的盆无法满足其生长需求,一般每一到两年要换盆一次,宜于春季进行。换盆之前应该在新盆中准备好新土,新土的肥力应为中等,土质的排水性能要好,可以将粗砂土、蛭石、园土、腐叶土等混合均匀。由于熊童子耐干旱,不耐水湿,所以换盆初期只需要浇少量的水。
2
4
文章
ritau
2020年01月30日

Hello everybody, welcome back to our channel! Today we are going to teach you how to grow delicious grapes at home. Here are 7 steps to go:
1. Plant your grapevines.
Depending on the species of grapes you are planting, spacing will be different for each plant. For American and European grapes, plant each vine 6–10 feet (1.8–3.0 m) apart. Muscadines require much more space, and should be planted approximately 16 feet (4.9 m) apart. Plant the cuttings in a trench with the basal and center bud covered. The top bud should be just above the soil surface. Press the soil firmly around the newly planted grapevine cuttings.
2. Give your plants a good watering.
Grapevines don’t prefer heavy water or rain, so after the first watering keep the amount of water you give them to a minimum. Keep water near the roots so that the majority of it gets absorbed rather than evaporated by the sun. If your area doesn’t get much rain, set up a drip system directly at the roots so that the grapevines get small amounts of water on a regular basis.

3. Prune your grapevines.
The first year, the grapevine should not be allowed to produce any fully matured fruits as these can damage the young vine with their weight. Cut back all the fruit, as well as all the vines except for the strongest that branch off the cane. In later years prune as needed following established local practices, and prune back 90% of the new growth on older vines each year.
4. Prune vines when dormant.
Always always prune grapevines when they are dormant. They will otherwise bleed their sap - losing vigour. This is typically in late winter when it is no longer cold enough to frost outside.

5. Mulch around the vines.
A layer of mulch around your plants will regulate soil temperature, retain water, and reduce weeds.
6. Apply pest control as needed.
Little pest control is needed as grapevines are naturally hardy. Keep weeds at bay by hand-weeding on a regular basis, and cover you grapevines in bird net to keep birds away if necessary. Seek guidance from your local gardening club or agricultural extension on how to combat the Vine Moth. It is one of the few pests that can decimate grapevines.
7. Harvest your grapes when appropriate. Strong, edible fruit likely won’t appear for anywhere from 1-3 years. When it appears, test its ripeness by picking a few grapes from different areas and tasting them. If the grapes are sweet, start picking as they ready for harvesting and eating.
source:wikihow

Hope you can enjoy a fine harvest!
1. Plant your grapevines.
Depending on the species of grapes you are planting, spacing will be different for each plant. For American and European grapes, plant each vine 6–10 feet (1.8–3.0 m) apart. Muscadines require much more space, and should be planted approximately 16 feet (4.9 m) apart. Plant the cuttings in a trench with the basal and center bud covered. The top bud should be just above the soil surface. Press the soil firmly around the newly planted grapevine cuttings.
2. Give your plants a good watering.
Grapevines don’t prefer heavy water or rain, so after the first watering keep the amount of water you give them to a minimum. Keep water near the roots so that the majority of it gets absorbed rather than evaporated by the sun. If your area doesn’t get much rain, set up a drip system directly at the roots so that the grapevines get small amounts of water on a regular basis.

3. Prune your grapevines.
The first year, the grapevine should not be allowed to produce any fully matured fruits as these can damage the young vine with their weight. Cut back all the fruit, as well as all the vines except for the strongest that branch off the cane. In later years prune as needed following established local practices, and prune back 90% of the new growth on older vines each year.
4. Prune vines when dormant.
Always always prune grapevines when they are dormant. They will otherwise bleed their sap - losing vigour. This is typically in late winter when it is no longer cold enough to frost outside.

5. Mulch around the vines.
A layer of mulch around your plants will regulate soil temperature, retain water, and reduce weeds.
6. Apply pest control as needed.
Little pest control is needed as grapevines are naturally hardy. Keep weeds at bay by hand-weeding on a regular basis, and cover you grapevines in bird net to keep birds away if necessary. Seek guidance from your local gardening club or agricultural extension on how to combat the Vine Moth. It is one of the few pests that can decimate grapevines.
7. Harvest your grapes when appropriate. Strong, edible fruit likely won’t appear for anywhere from 1-3 years. When it appears, test its ripeness by picking a few grapes from different areas and tasting them. If the grapes are sweet, start picking as they ready for harvesting and eating.
source:wikihow

Hope you can enjoy a fine harvest!
0
0


