文章
Miss Chen
2022年05月05日

If you are looking for a flower to add to a charming cottage garden, look no further than the common hollyhock (Alcea rosea). This traditional garden favorite can grow up to 8 feet tall with large, heart-shaped foliage and long-blooming ornamental flowers. This biennial herbaceous plant adds plenty of interest, and readily self-seeds to provide new growth year after year. You can plant hollyhocks in late summer when growing from seed, and they will bloom the following year.
Botanical Name Alcea rosea
Common Name Common hollyhock
Family Malvaceae
Plant Type Biennial, Herbaceous
Mature Size 6-8 ft. tall, 1 to 2 ft. wide
Sun Exposure Full sun
Soil Type Moist, Well-drained
Soil pH Acid, Neutral, Alkaline
Bloom Time Summer
Flower Color White, Pink, Red, Yellow, Lavender
Hardiness Zones 2-10, USA
Native Area Turkey
How to Grow and Care for Aloe
Common Hollyhock Care
These adaptable plants can grow in a range of conditions but aren't fans of wet winter soils. Hollyhocks grow on strong, sturdy stems which will stay upright without staking when planted in a sheltered spot. With large, showy blooms in a range of colors, this old-fashioned favorite is eye-catching when planted at the back of a border or along a fence or wall. Space your common hollyhocks far enough apart when planting to promote good air circulation and reduce problems with the fungal disease rust. Positioning them about 18 inches apart should be adequate.
Light
Although common hollyhocks can tolerate partial shade, they prefer a warm, full sun position. Too much shade will result in these tall plants flopping over, but excessively hot, dry weather can cause lower leaves to wither and die.
Soil
Part of the appeal of common hollyhocks is their ability to succeed in most soils. They prefer fertile, heavy soils, but, providing you enrich poor soils with organic matter, your plants should still do well.
Water
Common hollyhocks prefer evenly moist conditions, but wet winter soils are problematic. If your soil is not draining well during a wet winter, you could amend it with compost to improve air circulation and drainage. Water the roots and not the leaves of this plant, as wet leaves promote problems with the fungal diseases these plants are susceptible to.
Temperature and Humidity
Hardy down to about 5 degrees Fahrenheit, hollyhocks are pretty cold tolerant. However, early frosts can damage the flowers. Ideal daytime temperatures for flowering plants are around 65 to 70 degrees Fahrenheit.
Excessive humidity can result in problems with the fungal disease hollyhock rust.

Fertilizer
In terms of maintenance, one of the most important considerations for common hollyhocks is their nutrient levels. These plants love fertile conditions and are heavy feeders. Adding organic matter to your soil in the spring and applying an organic flower fertilizer or fish emulsion that is high in nitrogen every few weeks during the bloom period will result in bigger flowers and healthier foliage. Poor nutrient levels can result in yellowing of the plant's leaves and disappointing blooms.
Propagating Common Hollyhock
You can propagate common hollyhocks through division in the fall or spring when the plants are not flowering. Take root cuttings in winter (around Decembe, and you can propagate basal cuttings at any time of the year. Make sure to select rust-free plants.
How to Grow Common Hollyhock From Seed
Common hollyhocks are easy to grow from seeds. Sow seeds around late spring or late summer. The ideal temperature for germination is around 60 degrees Fahrenheit. After danger of frost, direct sow in the garden bed about 1/4 inch deep and 18 to 20 inches apart. Cover lightly with soil. If you plan to start your seeds in pots, start about 2 weeks prior to the last frost. Select deep pots and transplant outdoors as soon as true leaves emerge. Hollyhocks have a deep taproot which, once established, may not transplant well. Regardless of where you start your hollyhock seeds, be patient: they typically take around two weeks to germinate.
Common Pests & Plant Diseases
The fungal disease rust can be a major problem for the foliage and it can quickly spread resulting in premature leaf drop and stunted growth. Removing the leaves on the lower part of the plant stem, cutting the plants back in the fall, and promptly removing the debris will help to minimize fungus problems and spread.
You might also find that Japanese beetles and spider mites are attracted to your common hollyhock, and young growth tends to be a tasty treat for slugs.
How to Get Common Hollyhocks to Bloom
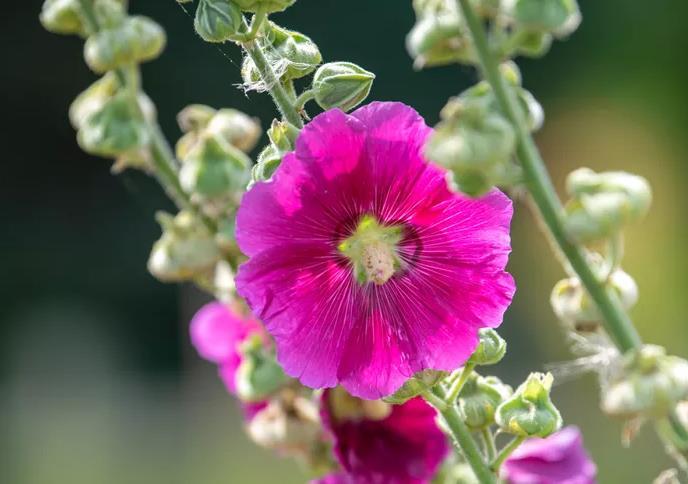
The flowers of the common hollyhock are large (around 4 to 5 inches in diameter), face outwards on the long central stem, and come in various colors, including white, pink, red, yellow, and lavender. Some say the flowers resemble those of opium poppies (Papaver somniferum).
Although these plants are typically grown as biennials, meaning there will only be one flowering season, they have a long bloom period, lasting from mid-summer to early fall. A fertile soil with lots of nutrients, consistent moisture, and deadheading wilted blooms will encourage abundant, large, healthy blooms.
FAQ
Are common hollyhocks easy to grow?
Although the common hollyhock grows from seed easily, they need the right amount of nutrients, spacing, and moisture levels to encourage healthy blooms and minimize problems with the fungal disease rust.
How long can common hollyhocks live?
This species is a short-lived perennial that is typically grown as a biennial. This means the plant takes two years to complete it's life cycle. Look for a leafy rosette the first year, followed by a sturdy central stock with blooms the second year. With the right care and conditions, you may get an additional year of flowering from your common hollyhock.
Where can I grow common hollyhock in my garden?
These tall cottage garden favorites are well suited to be grown against walls or fences or as a stunning backdrop in beds and borders.
Botanical Name Alcea rosea
Common Name Common hollyhock
Family Malvaceae
Plant Type Biennial, Herbaceous
Mature Size 6-8 ft. tall, 1 to 2 ft. wide
Sun Exposure Full sun
Soil Type Moist, Well-drained
Soil pH Acid, Neutral, Alkaline
Bloom Time Summer
Flower Color White, Pink, Red, Yellow, Lavender
Hardiness Zones 2-10, USA
Native Area Turkey
How to Grow and Care for Aloe
Common Hollyhock Care
These adaptable plants can grow in a range of conditions but aren't fans of wet winter soils. Hollyhocks grow on strong, sturdy stems which will stay upright without staking when planted in a sheltered spot. With large, showy blooms in a range of colors, this old-fashioned favorite is eye-catching when planted at the back of a border or along a fence or wall. Space your common hollyhocks far enough apart when planting to promote good air circulation and reduce problems with the fungal disease rust. Positioning them about 18 inches apart should be adequate.
Light
Although common hollyhocks can tolerate partial shade, they prefer a warm, full sun position. Too much shade will result in these tall plants flopping over, but excessively hot, dry weather can cause lower leaves to wither and die.
Soil
Part of the appeal of common hollyhocks is their ability to succeed in most soils. They prefer fertile, heavy soils, but, providing you enrich poor soils with organic matter, your plants should still do well.
Water
Common hollyhocks prefer evenly moist conditions, but wet winter soils are problematic. If your soil is not draining well during a wet winter, you could amend it with compost to improve air circulation and drainage. Water the roots and not the leaves of this plant, as wet leaves promote problems with the fungal diseases these plants are susceptible to.
Temperature and Humidity
Hardy down to about 5 degrees Fahrenheit, hollyhocks are pretty cold tolerant. However, early frosts can damage the flowers. Ideal daytime temperatures for flowering plants are around 65 to 70 degrees Fahrenheit.
Excessive humidity can result in problems with the fungal disease hollyhock rust.

Fertilizer
In terms of maintenance, one of the most important considerations for common hollyhocks is their nutrient levels. These plants love fertile conditions and are heavy feeders. Adding organic matter to your soil in the spring and applying an organic flower fertilizer or fish emulsion that is high in nitrogen every few weeks during the bloom period will result in bigger flowers and healthier foliage. Poor nutrient levels can result in yellowing of the plant's leaves and disappointing blooms.
Propagating Common Hollyhock
You can propagate common hollyhocks through division in the fall or spring when the plants are not flowering. Take root cuttings in winter (around Decembe, and you can propagate basal cuttings at any time of the year. Make sure to select rust-free plants.
How to Grow Common Hollyhock From Seed
Common hollyhocks are easy to grow from seeds. Sow seeds around late spring or late summer. The ideal temperature for germination is around 60 degrees Fahrenheit. After danger of frost, direct sow in the garden bed about 1/4 inch deep and 18 to 20 inches apart. Cover lightly with soil. If you plan to start your seeds in pots, start about 2 weeks prior to the last frost. Select deep pots and transplant outdoors as soon as true leaves emerge. Hollyhocks have a deep taproot which, once established, may not transplant well. Regardless of where you start your hollyhock seeds, be patient: they typically take around two weeks to germinate.
Common Pests & Plant Diseases
The fungal disease rust can be a major problem for the foliage and it can quickly spread resulting in premature leaf drop and stunted growth. Removing the leaves on the lower part of the plant stem, cutting the plants back in the fall, and promptly removing the debris will help to minimize fungus problems and spread.
You might also find that Japanese beetles and spider mites are attracted to your common hollyhock, and young growth tends to be a tasty treat for slugs.

How to Get Common Hollyhocks to Bloom
The flowers of the common hollyhock are large (around 4 to 5 inches in diameter), face outwards on the long central stem, and come in various colors, including white, pink, red, yellow, and lavender. Some say the flowers resemble those of opium poppies (Papaver somniferum).
Although these plants are typically grown as biennials, meaning there will only be one flowering season, they have a long bloom period, lasting from mid-summer to early fall. A fertile soil with lots of nutrients, consistent moisture, and deadheading wilted blooms will encourage abundant, large, healthy blooms.
FAQ
Are common hollyhocks easy to grow?
Although the common hollyhock grows from seed easily, they need the right amount of nutrients, spacing, and moisture levels to encourage healthy blooms and minimize problems with the fungal disease rust.
How long can common hollyhocks live?
This species is a short-lived perennial that is typically grown as a biennial. This means the plant takes two years to complete it's life cycle. Look for a leafy rosette the first year, followed by a sturdy central stock with blooms the second year. With the right care and conditions, you may get an additional year of flowering from your common hollyhock.
Where can I grow common hollyhock in my garden?
These tall cottage garden favorites are well suited to be grown against walls or fences or as a stunning backdrop in beds and borders.
0
0
文章
Miss Chen
2022年03月24日

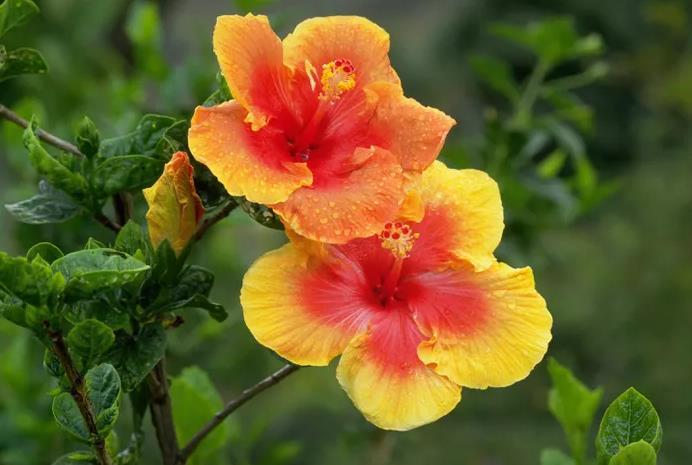
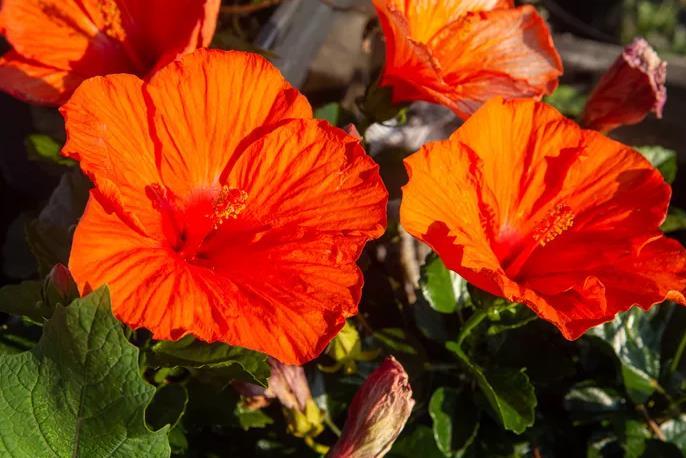
If you are looking for a plant that boasts dramatic, vibrant flowers, you may want to consider tropical hibiscus. The trumpet-shaped blooms are typically 3 to 8 inches in diameter with dramatic protruding stamens.
Native to Asia, tropical hibiscus plants produce flowers constantly, but each blossom only lasts one day. The shrub is fast-growing and can add up to 24 inches per year, eventually reaching heights of up 15 feet when growing under the ideal conditions. In colder climates, they are often planted as container specimens that are either replanted annually or brought indoors during the cold months. Start new plants in spring, whether in the ground or containers.
Common Name Tropical hibiscus, Chinese hibiscus, China rose
Botanical Name Hibiscus rosa-sinensis
Family Malvaceae
Plant Type Evergreen shrub
Mature Size 4–10 ft. tall, 5–8 ft. wide
Sun Exposure Full sun, partial shade
Sun Type Moist but well-drained
Soil pH Neutral to acidic
Bloom Time Summer to fall in containers; year-round outdoors in tropical climates
Flower Color White, red, pink, orange, yellow, peach, and purple
Hardiness Zones 9–11 (USDA)
Native Area Asia
Tropical Hibiscus Care
No matter where you live, there's a way for to you enjoy a hibiscus plant, at least for part of the year. In warmer climates, tropical hibiscus plants are grown as perennial garden plants and used as shrubs for hedges and screens. Meanwhile, in colder climates, they're often planted in large containers as patio or deck specimens. With dozens of colors of flowers to choose from, the plants will reward your garden and home with days and days of vibrant blooms reminiscent of a vacation in the tropics.
Light
While you may assume that a tropical plant like the hibiscus loves the sun, it's more nuanced than that. In northern climates, your hibiscus plants will probably be happiest in full sun. However, if you live somewhere that's more hot and dry, you're better off putting your plant in a location that gets partial shade.
If your outdoor plant is consistently producing hibiscus flowers, it is happy, so keep doing what you're doing. If your plant is not producing buds and flowers, try moving it into an area that has more sunlight.
Soil
If you're growing your hibiscus plant in a container, use a well-drained potting mix as the soil, preferably one formulated for tropical plants. Outdoors, your soil should have lots of organic matter. The soil in both grow locations should be well-draining, to help avoid the risk of root rot.
Water
Tropical hibiscus is a thirsty plant and will thrive and produce blossoms only if it is given enough water. Depending on the heat, wind, and humidity in your environment, your plant may need to be watered daily, or even twice a day in extremely dry conditions. Typically, tropical hibiscus plants thrive best with 1 to 2 inches of water per week.
Temperature and Humidity
The tropical hibiscus plant prefers average temperatures between 55 and 70 degrees Fahrenheit. The plant can be killed by even a few nights below 50 degrees Fahrenheit, so plan to move it inside if cold weather is in the forecast.
Fertilizer
When you buy a potted hibiscus, it likely has a slow-release fertilizer mixed into the soil, so it will not require additional feeding in the first few months. After that, regular feeding with a diluted fish emulsion fertilizer will keep it blooming vigorously.
Types of Tropical Hibiscus
Hibiscus rosa-sinensis 'Bonjour': This varietal constantly blooms with a mixture of red and pink flowers. It can grow 4 to 6 feet high.
Hibiscus sinensis 'Magic Moment': This plant varietal boasts 10-inch flowers in hues of peach, orange, pink, and light purple, on plants growing up to 8 feet tall.
Hibiscus rosa-sinensis 'Cajun Cocktail': This unique varietal has lovely variegated blooms that are around 6 inches wide, with no two blooms exactly alike.
Pruning
The best time for pruning tropical hibiscus is in the fall for both garden and container plants. Pruning will help keep your tropical hibiscus flowering as buds form on the new growth that has been stimulated by pruning, and removing some branches can let in some much-needed light. Give any hibiscus plants that are potted in containers a hard pruning before bringing them indoors for the winter season.
Propagating Tropical Hibiscus
Propagating tropical hibiscus using cuttings can give you the exact same plant as the parent. Propagate your tropical hibiscus from soft-stem cuttings taken in late spring or early summer after the plant has begun active growth for the season. Here's how to propagate this plant using cuttings:
Choose a stem with a greenish cast that's 4 to 6 inches long. Use a sterile, sharp cutting tool to cut the stem. Remove all but the top set of leaves from the stem.
Trim the bottom of the stem just below the bottom leaf node and dip the end in a rooting hormone.
Put the cutting in a pot of well-draining soil that's half potting soil and half perlite.
Moisten the soil and push a hole into the dirt in which you place the cutting.
Put a clear plastic bag over the plant, but make sure it does not touch the leaves. Bagging the cutting preserves moisture and retains heat while it establishes roots.
Keep the cuttings out of direct sunlight and in partial shade until they are actively growing, at which time you can repot them in a larger container.
Potting and Repotting Tropical Hibiscus
You will likely need to repot your plant every one to two years. Regular repotting helps ensure that the soil provides sufficient nutrition for the plant.
For consistent flower production in container plantings, avoid very deep containers, which can cause the plant to spend its energy on root development at the expense of producing flowers. The ideal pot shape is quite wide but relatively shallow. The best pot will be an unglazed clay material and have several draining holes (not just one). Unglazed clay pots are porous and let water and air easily flow through the plant.
Overwintering
If you live in a northern climate, it is possible to overwinter hibiscus indoors, as long as you can provide two to three hours of direct sunlight daily. Your plant will also need less water in the winter, but dry indoor heat can be hard on tropical plants, so you will need frequent shallow waterings, as well as daily misting (if the air is dry).
If you see any buds form on the plant, remove them—you don't want your hibiscus to waste any energy by flowering in the winter. In the spring, cut the plant back and put it outside once the nighttime temperatures are consistently above 50 degrees Fahrenheit.
Common Pests & Plant Diseases
Tropical hibiscus is generally free of pests and diseases, but you may encounter spider mites and aphids, especially if you bring the plant indoors.1 You should also try to remove all insects currently residing on the plant using neem oil, a liquid detergent, or by spraying the plant forcefully with water.
Hibiscus plants can also develop bacterial diseases due to transmission from insects, rain, and fog—symptoms of such can include leaf wilt, dwarfing, stem rot, and distortion of leaves.2
Common Problems With Tropical Hibiscus
There will be telltale signs that your tropical hibiscus plant may not be very happy. Here are a two common issues to watch for.
Dropping Leaves
If your plant has dropping leaves, appears stressed, or hasn't been growing well, there are three main reasons:
Your plant needs to be repotted.
It's overheated from living in prolonged heat that's over 85 degrees Fahrenheit.
It's being underwatered.
Yellowing Leaves
If you're seeing yellowing leaves at the top of the plant, chances are it's not getting enough water. Likewise, if your hibiscus has yellowing leaves in the middle or toward the bottom of the plant, it's probably drowning in too much water.
FAQ
Are tropical hibiscus plants easy to care for?
Tropical hibiscus plants are relatively easy to care for as long as they get enough light and water.
Why do tropical hibiscus blooms only last a day?
It takes a lot of energy for a plant to create a beautiful hibiscus bloom. However, once the bloom fades, a new one immediately takes its place. Cooler weather may yield slightly longer blooms and newer hybrids have blooms that can last three days.
How long will tropical hibiscus live?
Many traditional varieties of tropical hibiscus can live for over 50 years, but newer hybrids have a lifespan of up to 10 years.
Native to Asia, tropical hibiscus plants produce flowers constantly, but each blossom only lasts one day. The shrub is fast-growing and can add up to 24 inches per year, eventually reaching heights of up 15 feet when growing under the ideal conditions. In colder climates, they are often planted as container specimens that are either replanted annually or brought indoors during the cold months. Start new plants in spring, whether in the ground or containers.
Common Name Tropical hibiscus, Chinese hibiscus, China rose
Botanical Name Hibiscus rosa-sinensis
Family Malvaceae
Plant Type Evergreen shrub
Mature Size 4–10 ft. tall, 5–8 ft. wide
Sun Exposure Full sun, partial shade
Sun Type Moist but well-drained
Soil pH Neutral to acidic
Bloom Time Summer to fall in containers; year-round outdoors in tropical climates
Flower Color White, red, pink, orange, yellow, peach, and purple
Hardiness Zones 9–11 (USDA)
Native Area Asia
Tropical Hibiscus Care
No matter where you live, there's a way for to you enjoy a hibiscus plant, at least for part of the year. In warmer climates, tropical hibiscus plants are grown as perennial garden plants and used as shrubs for hedges and screens. Meanwhile, in colder climates, they're often planted in large containers as patio or deck specimens. With dozens of colors of flowers to choose from, the plants will reward your garden and home with days and days of vibrant blooms reminiscent of a vacation in the tropics.
Light
While you may assume that a tropical plant like the hibiscus loves the sun, it's more nuanced than that. In northern climates, your hibiscus plants will probably be happiest in full sun. However, if you live somewhere that's more hot and dry, you're better off putting your plant in a location that gets partial shade.

If your outdoor plant is consistently producing hibiscus flowers, it is happy, so keep doing what you're doing. If your plant is not producing buds and flowers, try moving it into an area that has more sunlight.
Soil
If you're growing your hibiscus plant in a container, use a well-drained potting mix as the soil, preferably one formulated for tropical plants. Outdoors, your soil should have lots of organic matter. The soil in both grow locations should be well-draining, to help avoid the risk of root rot.
Water
Tropical hibiscus is a thirsty plant and will thrive and produce blossoms only if it is given enough water. Depending on the heat, wind, and humidity in your environment, your plant may need to be watered daily, or even twice a day in extremely dry conditions. Typically, tropical hibiscus plants thrive best with 1 to 2 inches of water per week.
Temperature and Humidity
The tropical hibiscus plant prefers average temperatures between 55 and 70 degrees Fahrenheit. The plant can be killed by even a few nights below 50 degrees Fahrenheit, so plan to move it inside if cold weather is in the forecast.
Fertilizer
When you buy a potted hibiscus, it likely has a slow-release fertilizer mixed into the soil, so it will not require additional feeding in the first few months. After that, regular feeding with a diluted fish emulsion fertilizer will keep it blooming vigorously.
Types of Tropical Hibiscus
Hibiscus rosa-sinensis 'Bonjour': This varietal constantly blooms with a mixture of red and pink flowers. It can grow 4 to 6 feet high.
Hibiscus sinensis 'Magic Moment': This plant varietal boasts 10-inch flowers in hues of peach, orange, pink, and light purple, on plants growing up to 8 feet tall.
Hibiscus rosa-sinensis 'Cajun Cocktail': This unique varietal has lovely variegated blooms that are around 6 inches wide, with no two blooms exactly alike.
Pruning
The best time for pruning tropical hibiscus is in the fall for both garden and container plants. Pruning will help keep your tropical hibiscus flowering as buds form on the new growth that has been stimulated by pruning, and removing some branches can let in some much-needed light. Give any hibiscus plants that are potted in containers a hard pruning before bringing them indoors for the winter season.
Propagating Tropical Hibiscus
Propagating tropical hibiscus using cuttings can give you the exact same plant as the parent. Propagate your tropical hibiscus from soft-stem cuttings taken in late spring or early summer after the plant has begun active growth for the season. Here's how to propagate this plant using cuttings:
Choose a stem with a greenish cast that's 4 to 6 inches long. Use a sterile, sharp cutting tool to cut the stem. Remove all but the top set of leaves from the stem.
Trim the bottom of the stem just below the bottom leaf node and dip the end in a rooting hormone.
Put the cutting in a pot of well-draining soil that's half potting soil and half perlite.
Moisten the soil and push a hole into the dirt in which you place the cutting.
Put a clear plastic bag over the plant, but make sure it does not touch the leaves. Bagging the cutting preserves moisture and retains heat while it establishes roots.
Keep the cuttings out of direct sunlight and in partial shade until they are actively growing, at which time you can repot them in a larger container.
Potting and Repotting Tropical Hibiscus
You will likely need to repot your plant every one to two years. Regular repotting helps ensure that the soil provides sufficient nutrition for the plant.
For consistent flower production in container plantings, avoid very deep containers, which can cause the plant to spend its energy on root development at the expense of producing flowers. The ideal pot shape is quite wide but relatively shallow. The best pot will be an unglazed clay material and have several draining holes (not just one). Unglazed clay pots are porous and let water and air easily flow through the plant.
Overwintering
If you live in a northern climate, it is possible to overwinter hibiscus indoors, as long as you can provide two to three hours of direct sunlight daily. Your plant will also need less water in the winter, but dry indoor heat can be hard on tropical plants, so you will need frequent shallow waterings, as well as daily misting (if the air is dry).
If you see any buds form on the plant, remove them—you don't want your hibiscus to waste any energy by flowering in the winter. In the spring, cut the plant back and put it outside once the nighttime temperatures are consistently above 50 degrees Fahrenheit.
Common Pests & Plant Diseases
Tropical hibiscus is generally free of pests and diseases, but you may encounter spider mites and aphids, especially if you bring the plant indoors.1 You should also try to remove all insects currently residing on the plant using neem oil, a liquid detergent, or by spraying the plant forcefully with water.
Hibiscus plants can also develop bacterial diseases due to transmission from insects, rain, and fog—symptoms of such can include leaf wilt, dwarfing, stem rot, and distortion of leaves.2
Common Problems With Tropical Hibiscus
There will be telltale signs that your tropical hibiscus plant may not be very happy. Here are a two common issues to watch for.
Dropping Leaves
If your plant has dropping leaves, appears stressed, or hasn't been growing well, there are three main reasons:

Your plant needs to be repotted.
It's overheated from living in prolonged heat that's over 85 degrees Fahrenheit.
It's being underwatered.
Yellowing Leaves
If you're seeing yellowing leaves at the top of the plant, chances are it's not getting enough water. Likewise, if your hibiscus has yellowing leaves in the middle or toward the bottom of the plant, it's probably drowning in too much water.
FAQ
Are tropical hibiscus plants easy to care for?
Tropical hibiscus plants are relatively easy to care for as long as they get enough light and water.
Why do tropical hibiscus blooms only last a day?
It takes a lot of energy for a plant to create a beautiful hibiscus bloom. However, once the bloom fades, a new one immediately takes its place. Cooler weather may yield slightly longer blooms and newer hybrids have blooms that can last three days.
How long will tropical hibiscus live?
Many traditional varieties of tropical hibiscus can live for over 50 years, but newer hybrids have a lifespan of up to 10 years.
0
0
文章
Miss Chen
2021年09月08日

Growing avocados outdoors as productive fruit trees can be tricky, but growing them as houseplants is fun and easy, resulting in a seedling that will eventually turn into an attractive little specimen with glossy, oval leaves 4 to 8 inches long. True, it's unlikely your tree will ever bear fruit (unless you give it about 10 years), and even if it does, the fruit from the offspring most likely won't resemble the original. But as an indoor plant, an avocado has plenty of merit as a decorative novelty. Keep in mind that all parts of the avocado plant are toxic to animals.1
Common Name Avocado
Botanical Name Persea americana
Family Lauraceae
Plant Type Broadleaf evergreen fruit tree
Mature Size 30 to 60 ft. in the landscape; potted plants can be pruned to remain small
Sun Exposure Full sun
Soil Type General-purpose potting soil
Soil pH 6.0 to 6.5, tolerates acidic or alkaline soil
Bloom Time Seasonal bloomer
Flower Color Greenish-yellow
Hardiness Zones 10-12 (USDA), any zone as a houseplant
Native Area Mexico
Toxicity Toxic to dogs, birds, and horses
Avocado Plant Care
When avocado is grown as a houseplant, it is often grown from seed (the fruit pits) that can be sprouted in water or directly in potting soil.
Established plants will do best in sunny windows. Fertilize them regularly in spring and summer with a balanced granular fertilizer.
Avocados grown indoors are mostly novelty plants. If you want it to bear fruit and turn into the tree it really is, you'll have to move your avocado outside, but this may only work if you live in a warmer climate.
Light
Like banana trees, avocado plants thrive in full sun. They will tolerate some shade, but potted indoor plants generally need the brightest spot you can find. If you're starting from a seed, the seed can be kept on a bright windowsill until roots form, and the first leaves emerge.
Water
Avocado plants should be kept continuously moist, but adequate drainage is essential. Watch for leaf yellowing, which is a sign of too much water.
Temperature
Avocado plants prefer warm growing seasons, but can take winter temperatures down to 50 degrees Fahrenheit, when growth will slow.
Soil
A rich, fast-draining potting soil mix is ideal.
Fertilizer
Fertilize abundantly during the growing season with a balanced fertilizer.
Types of Avocado Plants
Although there are about 1,000 varieties of avocado, the one most likely to find its way into your home is the Haas avocado, which is grown in tremendous quantities in California and throughout Latin America. These are small, pebbly avocados with high-fat content and delicious flesh. Larger, lighter green Florida avocados are also found in season. These have less fat and are sometimes marketed as health-conscious avocados. You'll find plenty of healthy pits inside any of these types of avocados that you can use to grow your plants.
Pruning
The first serious trimming should occur when the plant is only 12 inches tall. At that time, cut it back to 6 inches and allow for new leaves and stems to form.
As it gets taller, pinch off new growth throughout the summer to force new branches to form, because avocado fruit develops on new growth. Keeping the new growth pinched off will also keep the plant bushy while controlling its size.
Propagating Avocado Plants
Avocado can be propagated in a number of ways., but is usually done for avocado trees planted in the landscape. Professionals graft desirable avocado varieties onto disease-resistant root-stock to produce a disease-resistant tree with the desired kind of fruit or preferred size.
They can also be propagated by air-layering: Encouraging roots to grow by scarring a tree branch, wrapping the wounded area with a small amount of rooting medium, and allowing a bundle of roots to develop while the branch is still on the tree. Once a network of roots are developed, the branch is snipped off and planted in soil.
How to Grow Avocado Plants From Seed
For houseplants, propagate an avocado plant with the seed of the fruit. The seed of an avocado is the large brown pit. Here's how to grow your avocado houseplant:
To sprout an avocado seed, insert three toothpicks into the seed and suspend it with the broad end down over a glass of water.
Cover about an inch of the seed with water.
Keep it in a warm place, but not in direct sunlight.
The seed should sprout in two to six weeks. Let the young plant grow to six inches, then cut it back to three inches to encourage stronger root growth.
When the roots have grown thick and the stem has new leaves again, plant in soil in a pot about 10 inches in diameter, leaving half the seed still exposed above the soil. Make sure the pot has a drainage hole.
Potting and Repotting Avocado Plants
Repot your avocado every spring when the plant begins to grow again. For the first few years, trimming your avocado is necessary to encourage a bushy plant. You can place the avocado outside during summer, and bring it inside before first frost.
Overwintering
Bring your plants inside if it's going to be below 50 degrees Fahrenheit. Winter's lack of humidity may cause your plant to lose leaves, but they will come back when the weather is warm.
Common Pests & Plant Diseases
Look for symptoms like leaf yellowing, which can indicate too much water or sluggish drainage. They may develop root rot in overly wet potting soil. Also, keep an eye out for a white crust on the soil, this means an excess of salt build-up from the fertilizer. Flush the pot regularly.2
When grown outdoors, avocado trees are threatened by laurel wilt, caused by the Raffaelea lauricola fungus. It is transmitted by several different species of ambrosia beetle. Infected trees usually succumb within 4 to 8 weeks.
0
0


