成长记
echo_zly
2018年09月07日

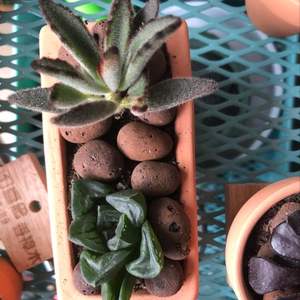
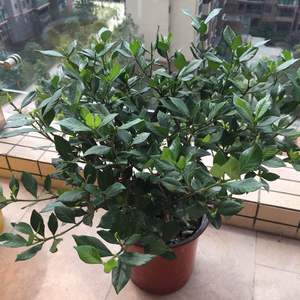
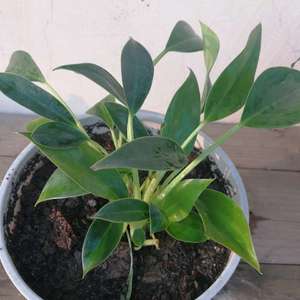
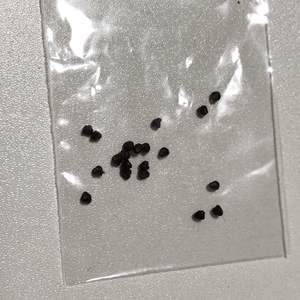
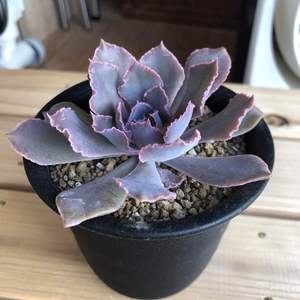
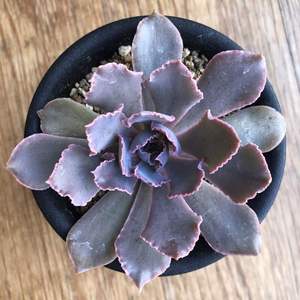
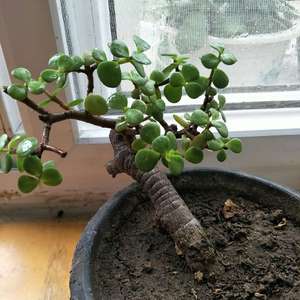
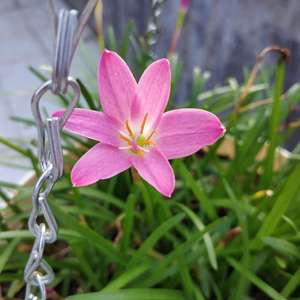
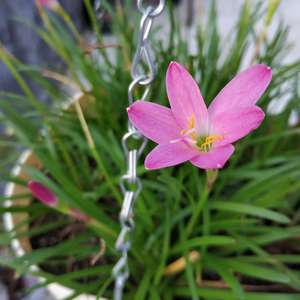
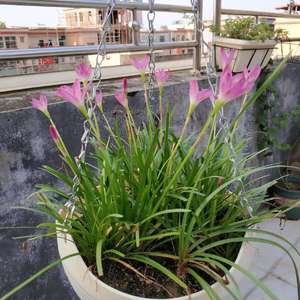
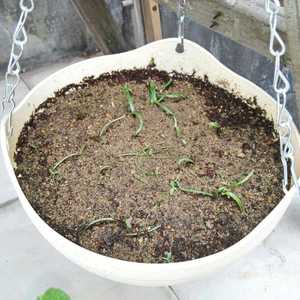
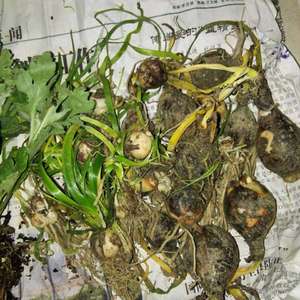
3月25日就种下11球,挤在23口径的吊盆。8月左右开花的,球种就是最后一张图里的白色小球,大点的球是普粉,隔月就能陆续开花。风雨兰很好养,粗养即可。


1
0
文章
Miss Chen
2018年09月06日

A plant for pond edges, bog gardens and other wet sites, horsetail (Equisetum hyemale) grows in stands of bamboo-like, dark green stems. Also called scouring rush, horsetail is hardy in U.S. Department of Agriculture plant hardiness zones 3 through 11, and is a member of an ancient plant family that dates back 350 million years, notes the Missouri Botanical Garden. One reason for this perennial's long survival is its extremely aggressive spreading habit, but growing horsetail in containers gives you some control.
Containing Horsetail

Horsetail spreads outward through underground stems called rhizomes, and containers provide a barrier to these rhizomes. Plant horsetail in a container, with drainage holes, that's just large enough to accommodate the plant's root ball. Place a sheet of fine mesh, such as screen mesh, over the drainage holes to prevent horsetail rhizomes from growing through them, and spread a layer of general purpose potting soil over the mesh. Place the horsetail in the container. The top of the root ball should be 1 inch below the container rim. Fill in gaps around the root ball with more potting soil, and apply water until it runs though the drainage holes.
Planting in Water

Horsetail thrives in water gardens and on stream banks. Providing year-round color and structure in wet, full-sun and partial-shade sites, horsetail tolerates water to a depth of 4 inches over its roots. To add horsetail to your water garden or pond site, spread a 1-inch layer of gravel over the potting soil in the horsetail container to protect it. Place bricks on the bottom of the planting site to provide a firm, level base. Sink the horsetail container into the water slowly until it's submerged and resting firmly on the bricks.
Planting in Soil

Horsetail provides strong, vertical lines in Japanese gardens and can grow where few other plants survive. Dig a hole 2 or 3 inches wider than the horsetail container and 1 inch less deep. Place the container in the hole, and check that it's level. Twisting the container and pushing down gently helps level the container and firm the soil beneath it. Check that the container rim is protruding from the soil by 1 inch, and fill in the gaps around it with dug soil. Water the ground around the container to settle the soil, and fill in any hollows with more soil.
Controlling Horsetail
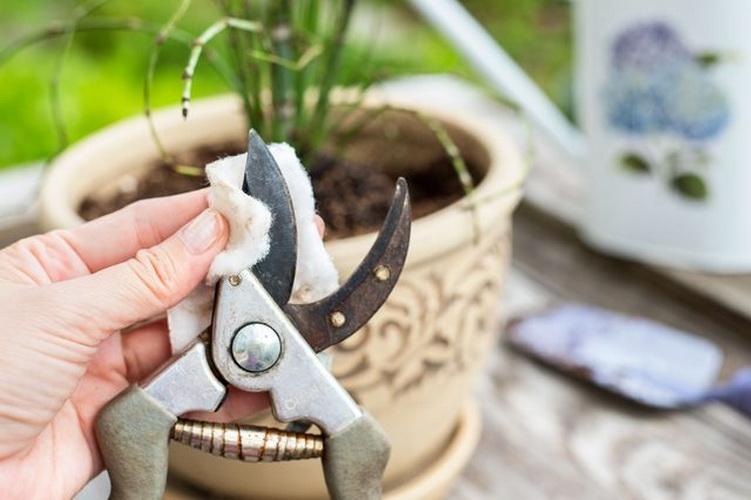
Prune regularly to control horsetail's spreading habit. Horsetail grows 2 to 4 feet tall and spreads indefinitely in favorable conditions. Check the horsetail monthly, at least, for rhizomes climbing over the container rim and stems with cone-like, spore-producing heads, which usually appear in spring. Clean pruning shear blades with rubbing alcohol, and prune escaping rhizomes and fruiting stems at ground level. Wipe the pruning shear blades with rubbing alcohol again after use. Place pruned horsetail debris in a sealed plastic bag in the trash. Don't grow horsetail in areas accessible to pets or livestock. Horsetail can be deadly to animals when eaten.
Containing Horsetail

Horsetail spreads outward through underground stems called rhizomes, and containers provide a barrier to these rhizomes. Plant horsetail in a container, with drainage holes, that's just large enough to accommodate the plant's root ball. Place a sheet of fine mesh, such as screen mesh, over the drainage holes to prevent horsetail rhizomes from growing through them, and spread a layer of general purpose potting soil over the mesh. Place the horsetail in the container. The top of the root ball should be 1 inch below the container rim. Fill in gaps around the root ball with more potting soil, and apply water until it runs though the drainage holes.
Planting in Water

Horsetail thrives in water gardens and on stream banks. Providing year-round color and structure in wet, full-sun and partial-shade sites, horsetail tolerates water to a depth of 4 inches over its roots. To add horsetail to your water garden or pond site, spread a 1-inch layer of gravel over the potting soil in the horsetail container to protect it. Place bricks on the bottom of the planting site to provide a firm, level base. Sink the horsetail container into the water slowly until it's submerged and resting firmly on the bricks.
Planting in Soil

Horsetail provides strong, vertical lines in Japanese gardens and can grow where few other plants survive. Dig a hole 2 or 3 inches wider than the horsetail container and 1 inch less deep. Place the container in the hole, and check that it's level. Twisting the container and pushing down gently helps level the container and firm the soil beneath it. Check that the container rim is protruding from the soil by 1 inch, and fill in the gaps around it with dug soil. Water the ground around the container to settle the soil, and fill in any hollows with more soil.
Controlling Horsetail

Prune regularly to control horsetail's spreading habit. Horsetail grows 2 to 4 feet tall and spreads indefinitely in favorable conditions. Check the horsetail monthly, at least, for rhizomes climbing over the container rim and stems with cone-like, spore-producing heads, which usually appear in spring. Clean pruning shear blades with rubbing alcohol, and prune escaping rhizomes and fruiting stems at ground level. Wipe the pruning shear blades with rubbing alcohol again after use. Place pruned horsetail debris in a sealed plastic bag in the trash. Don't grow horsetail in areas accessible to pets or livestock. Horsetail can be deadly to animals when eaten.
0
0
文章
Miss Chen
2018年09月06日

Winter-blooming clivia (Clivia miniata) flowers in winter and early spring. The clusters of yellow and orange blossoms are surrounded by strappy green leaves. Clivia grows outdoors in U.S. Department of Agriculture plant hardiness zones 9 through 11, but it can grow as a houseplant anywhere with proper care.

Pick a Spot
Whether you grow clivia outdoors in the garden, or indoors in a pot, provide the plant with partial shade. Outdoor beds with dappled sunlight work well, while indoors you can set them in an area with bright but indirect sunlight. Clivia is prone to root rot in wet soil, so grow them in well-draining beds or use pots with bottom drainage holes. Temperatures below 32 degrees Fahrenheit kill the plant, so bring outdoor potted plants indoors before a freeze and don't allow the foliage to touch a window during cold weather.
Watering Wisely
How much water a clivia needs depends on the season. During spring and summer, water the soil when the top 1 inch feels completely dry. When watering a potted plant, allow the excess to drain from the bottom drainage in the pot and empty the drip tray afterward. Withhold water from late fall through midwinter if you want the plant to flower, because clivia only flowers in response to drought stress. During this dry rest period, keep the temperature below 60 F to further encourage blooms. Resume regular watering and increase temperatures when the flower stalk is about 6 inches tall.
Feeding Tips
Light fertilizer encourages healthy growth, whether the clivia is grown indoors or outside. Fertilize once a week in spring and summer. Dilute 1/2 teaspoon of 15-15-15 fertilizer in 1 gallon of water, and use the mixture water for one regular watering each week. Clivia doesn't need fertilizer during its dormant period in fall and winter.
Pruning Needs
Clivia doesn't require any regular pruning, but you can trim off dead or badly damaged leaves to improve the plant's appearance. Gently pull off the leaves or trim them off with shears wiped with a rubbing alcohol-soaked cloth. Potted clivia also rarely needs repotting and grows best when root bound. If the roots completely fill the pot, which happens about every three or four years, transplant it in spring to a new pot one size larger than the old one. The new pot must have bottom drainage holes. Plant the clivia at the same depth it was growing previously, and handle the roots gently to avoid damage.

Controlling Pests
Diseases rarely affect clivia, with the exception of root rot in overly wet soil. Indoors, aphids and mites may feed on the foliage, but you can rinse these off with a strong stream of water. Slugs and snails may feast on clivia foliage outdoors. Pick these off by hand and drop them into a bucket of soapy water.

Pick a Spot
Whether you grow clivia outdoors in the garden, or indoors in a pot, provide the plant with partial shade. Outdoor beds with dappled sunlight work well, while indoors you can set them in an area with bright but indirect sunlight. Clivia is prone to root rot in wet soil, so grow them in well-draining beds or use pots with bottom drainage holes. Temperatures below 32 degrees Fahrenheit kill the plant, so bring outdoor potted plants indoors before a freeze and don't allow the foliage to touch a window during cold weather.
Watering Wisely
How much water a clivia needs depends on the season. During spring and summer, water the soil when the top 1 inch feels completely dry. When watering a potted plant, allow the excess to drain from the bottom drainage in the pot and empty the drip tray afterward. Withhold water from late fall through midwinter if you want the plant to flower, because clivia only flowers in response to drought stress. During this dry rest period, keep the temperature below 60 F to further encourage blooms. Resume regular watering and increase temperatures when the flower stalk is about 6 inches tall.
Feeding Tips
Light fertilizer encourages healthy growth, whether the clivia is grown indoors or outside. Fertilize once a week in spring and summer. Dilute 1/2 teaspoon of 15-15-15 fertilizer in 1 gallon of water, and use the mixture water for one regular watering each week. Clivia doesn't need fertilizer during its dormant period in fall and winter.
Pruning Needs
Clivia doesn't require any regular pruning, but you can trim off dead or badly damaged leaves to improve the plant's appearance. Gently pull off the leaves or trim them off with shears wiped with a rubbing alcohol-soaked cloth. Potted clivia also rarely needs repotting and grows best when root bound. If the roots completely fill the pot, which happens about every three or four years, transplant it in spring to a new pot one size larger than the old one. The new pot must have bottom drainage holes. Plant the clivia at the same depth it was growing previously, and handle the roots gently to avoid damage.

Controlling Pests
Diseases rarely affect clivia, with the exception of root rot in overly wet soil. Indoors, aphids and mites may feed on the foliage, but you can rinse these off with a strong stream of water. Slugs and snails may feast on clivia foliage outdoors. Pick these off by hand and drop them into a bucket of soapy water.
1
1
文章
Miss Chen
2018年09月04日

The care and effort it takes to overwinter elephant ears (Colocasia spp.), which grow in U.S. Department of Agriculture plant hardiness zones 8 through 11 with some variation within species, depends on your climate. In frost-free tropical and sub-tropical areas, these lush foliage plants grow year-round with minimal winter care. In frost-prone regions, overwintering elephant ears takes a little more effort, but it's worth it when the 2- to 3-foot-long heart-shaped leaves bring a tropical flair to the garden the following summer.

Mild Climates Need Little Care
In USDA zones 10 through 11, elephant ear plants will grow year-round, remaining green through the winter. Discontinue watering from late fall through winter so the soil dries out. The soil can dry out completely during the dormant period, but natural rainfall will likely keep the soil moist. Cut back dead foliage and stalks as they die 2 to 4 inches from the soil line. Elephant ear foliage dies back throughout the year, but winter is a good time to tidy plants. You can cut out dead leaves any time of year.
Frosty Areas Require Some Protection
While elephant ear plants survive winters in frost-prone areas, specifically within USDA zones 8 through 9, the foliage will die back after a frost or cold spell. Once the first frost kills the foliage, cut back the stalks 2 to 4 inches from the soil line, then cover the soil with a layer of mulch 4 inches deep. No additional water is necessary during the dormant period. The mulch helps insulate the soil. Sawdust, seed-free straw, leaf-mold and compost all make good mulching materials.
Overwintering Indoors
Outside of the growing zone -- anywhere colder than USDA zone 8 -- elephant ears are not reliably hardy. The roots will freeze in the cold soil, killing the plants. In cold areas you have two choices: you can grow elephant ears in pots and keep them in a frost-free area over winter in a dormant state, or dig the tubers in the fall and .
Overwintering Pots Indoors
Before the first frost, move the container to an area that won't freeze over winter. An unheated garage or shed that stays above 50 degrees Fahrenheit works well. Discontinue watering through the winter. This forces elephant ear tubers into dormancy. Cut all the stalks down at the soil level. In the spring when the temperature is consistently at or above 60 degrees F, water when the top of the soil feels dry. Once the last frost has passed, you can return the pots outdoors.

Digging and Storing Tubers
Allow the leaves and stalks to die back naturally with the first of the winter frosts. Once dead, cut back the foliage 2 to 4 inches from the soil, then carefully dig out the roots. Elephant ears have fleshy tubers for roots. Brush soil away from the surface and identify the shape and size of the tuber, then dig down around the outside of the root and lift it from the soil. Brush off extra dirt and pack the tubers in dry sawdust or peat moss in a bucket or tub. Keep the tubers dry in a 50-degrees F spot through the winter.

Mild Climates Need Little Care
In USDA zones 10 through 11, elephant ear plants will grow year-round, remaining green through the winter. Discontinue watering from late fall through winter so the soil dries out. The soil can dry out completely during the dormant period, but natural rainfall will likely keep the soil moist. Cut back dead foliage and stalks as they die 2 to 4 inches from the soil line. Elephant ear foliage dies back throughout the year, but winter is a good time to tidy plants. You can cut out dead leaves any time of year.
Frosty Areas Require Some Protection
While elephant ear plants survive winters in frost-prone areas, specifically within USDA zones 8 through 9, the foliage will die back after a frost or cold spell. Once the first frost kills the foliage, cut back the stalks 2 to 4 inches from the soil line, then cover the soil with a layer of mulch 4 inches deep. No additional water is necessary during the dormant period. The mulch helps insulate the soil. Sawdust, seed-free straw, leaf-mold and compost all make good mulching materials.
Overwintering Indoors
Outside of the growing zone -- anywhere colder than USDA zone 8 -- elephant ears are not reliably hardy. The roots will freeze in the cold soil, killing the plants. In cold areas you have two choices: you can grow elephant ears in pots and keep them in a frost-free area over winter in a dormant state, or dig the tubers in the fall and .
Overwintering Pots Indoors
Before the first frost, move the container to an area that won't freeze over winter. An unheated garage or shed that stays above 50 degrees Fahrenheit works well. Discontinue watering through the winter. This forces elephant ear tubers into dormancy. Cut all the stalks down at the soil level. In the spring when the temperature is consistently at or above 60 degrees F, water when the top of the soil feels dry. Once the last frost has passed, you can return the pots outdoors.

Digging and Storing Tubers
Allow the leaves and stalks to die back naturally with the first of the winter frosts. Once dead, cut back the foliage 2 to 4 inches from the soil, then carefully dig out the roots. Elephant ears have fleshy tubers for roots. Brush soil away from the surface and identify the shape and size of the tuber, then dig down around the outside of the root and lift it from the soil. Brush off extra dirt and pack the tubers in dry sawdust or peat moss in a bucket or tub. Keep the tubers dry in a 50-degrees F spot through the winter.
0
0
文章
Miss Chen
2018年08月31日

Sometimes called purple queen, purple heart (Setcreasea pallida) is a low-growing tender perennial grown for its showy violet leaves and sprawling, dark-purple stems. It grows in U.S. Department of Agriculture plant hardiness zones 7 through 11 and it's usually used as a ground cover or container plant. Purple heart needs little care, but providing some general maintenance will keep it looking its best.

Seasonal Watering
Although highly drought-tolerant once established, purple heart will look tidier and more lush if it gets regular water in summer. Water it weekly from spring until fall, providing 1 inch of water each time. Allow the soil to dry out on the surface between waterings to keep the roots healthy. During times of extreme heat or drought, increase watering to twice weekly if the soil is drying out faster than normal. Reduce watering to once every two weeks in winter and provide no water during rainy weather. Pot-grown purple hearts should also be watered whenever the soil dries on the surface. Water until the excess flows from the drainage holes of the pot. Always use pots with drainage holes for this plant.
Fertilizer Needs
Purple heart uses its soil nutrients efficiently and requires little supplemental fertilizer. Potted plants or those grown in poor or especially fast-draining soil may need a boost of nutrients during the active growing season to enhance their lush, violet foliage. Dissolve 1/2 teaspoon of general-purpose, 15-15-15 ratio fertilizer in 1 gallon of water. Apply the solution monthly and watch for pale or washed out-looking foliage, which is a sign of overfeeding. Reduce feeding to once every two months if the purple heart's foliage turns pale or if it starts producing an abundance of leggy, weedy growth.
Pruning and Grooming
Among purple heart's most positive attributes is its gracefully trailing habit and vigorous growth. This is also one of its greatest drawbacks because can quickly overtake a bed or produce spindly, unattractive growth if left unpruned. Pruning purple heart should be done in spring or early summer just after it finishes flowering. Remove up to two-thirds of the growth to promote a fuller, bushier appearance and encourage more blooming. Before pruning, soak your shears in a solution of equal parts water and rubbing alcohol or full-strength household disinfectant for five minutes and then rinse the blades. The pruned stems can be discarded in a green waste can or used to propagate new purple heart plants.
Considerations
Purple heart doesn't have serious pest or disease issues if it is grown under the right conditions, making it a smart choice for a low-maintenance yard. But it does have some significant drawbacks that may cause issues in your garden. Its vigorous growth may become invasive in warm, frost-free climates. Keeping it pruned helps limit its spread, but it may also require inorganic mulch or an underground root barrier to keep its roots from spreading. Another issue with purple heart is its foliage, which may irritate the skin. Growing it in a pot will address both concerns, as long as the pot is kept away from where people might accidentally brush against it.
1
1
文章
Miss Chen
2018年08月29日

Salvia (Salvia spp.), commonly known as sage, is a plant group that ranges from annuals to woody perennials hardy from U.S. Department of Agriculture plant hardiness zones 4 through 11. Many varieties are used for cooking and present fragrant ornamental foliage. Aromatic blooms range from white to shades of pink, red or purple-blue. Sages may flower from spring through fall, or deliver seasonal flushes of color. Perennial sages often develop old, woody stems and require pruning to stay attractive. This cleans up the plant and elicits a second burst of blooms and growth. If your sage looks a little listless, a haircut may be all it needs.

Sterilize your pruning implements with household disinfectant before and after your prune your sage to prevent the spread of disease. Use sharp, bypass pruning shears for clean, healthy cuts on woody stems. Garden scissors shape up soft annual and perennials stems. Wear gloves to protect your hands.

Prune off dead and damaged sage stems any time of year, but leave most stems until spring when the plant begins to grow again and danger of frost has passed. The old stems, though unsightly, protect new growth. When new shoots emerge at the plant's the base and on stems, cut old woody stems back to new growth. Cut dead, soft stems to the ground.

Trim soft-stemmed perennial sages in the summer to encourage re-blooming. Wait until after the first burst of blooms, then remove at least half of the plant. If you have a mass planting of sage, cut plants at different levels to keep a natural look. The plants will reward you by bouncing back quickly with renewed vigor and lots of blossoms.

Deadhead sage to remove old flower spikes throughout the growing season. This helps encourage more blooms, shape the plant and neaten its appearance. Hold the end of a spent flower spike and move down with your other hand until just below the bloom. This method prevents you from chopping off a stalk you don't want to cut.

Pick up all fallen leaves, spent flower heads and pruned stems around your sage. If there is any sign of disease, dispose of the debris instead of composting it. This reduces the chances of fungal infections spreading. Always check for signs of pests, but sages have few problems with insects.

Sterilize your pruning implements with household disinfectant before and after your prune your sage to prevent the spread of disease. Use sharp, bypass pruning shears for clean, healthy cuts on woody stems. Garden scissors shape up soft annual and perennials stems. Wear gloves to protect your hands.

Prune off dead and damaged sage stems any time of year, but leave most stems until spring when the plant begins to grow again and danger of frost has passed. The old stems, though unsightly, protect new growth. When new shoots emerge at the plant's the base and on stems, cut old woody stems back to new growth. Cut dead, soft stems to the ground.

Trim soft-stemmed perennial sages in the summer to encourage re-blooming. Wait until after the first burst of blooms, then remove at least half of the plant. If you have a mass planting of sage, cut plants at different levels to keep a natural look. The plants will reward you by bouncing back quickly with renewed vigor and lots of blossoms.

Deadhead sage to remove old flower spikes throughout the growing season. This helps encourage more blooms, shape the plant and neaten its appearance. Hold the end of a spent flower spike and move down with your other hand until just below the bloom. This method prevents you from chopping off a stalk you don't want to cut.

Pick up all fallen leaves, spent flower heads and pruned stems around your sage. If there is any sign of disease, dispose of the debris instead of composting it. This reduces the chances of fungal infections spreading. Always check for signs of pests, but sages have few problems with insects.
0
0
文章
Miss Chen
2018年08月19日

One of the first, and best known, re-blooming daylilies is the cultivar "Stella de Oro" (Hemerocallis "Stella de Oro"), which is hardy in U.S. Department of Agriculture plant hardiness zones 4 through 11. It first appeared in 1975, and 10 years later won the Stout Silver Medal. This is the highest award a daylily cultivar can receive from the American Hemerocallis Society. Like most daylilies, "Stella de Oro" benefits from division every few years.

How Often Should I Divide?
"Stella de Oro" is a dwarf daylily with foliage that only grows 12 inches tall. It tends to form tidy clumps that work well planted in rows, as individual clumps in perennial borders or massed as a groundcover. As the clumps grow, the individual daylily fans become crowded. Regular division reinvigorates daylilies, and gives you more plants for your garden or to pass along to other gardeners. Divide "Stella de Oro" every two to three years, when you notice a decrease in the number of blooms.
What Time of Year Is Best?
Daylilies are remarkably resilient plants, and can be divided any time during the spring, summer or fall growing seasons. Spring is the best season for division, however, since daylilies are actively growing. You want to divide plants when the new foliage is just starting to grow. This gives the daylilies time to put out new growth before blooming in the summer. Plants that were divided in the early spring will still flower, and may even produce more flowers than plants that were not divided.
If you miss dividing in the early spring, the second best time to divide plants is in the early fall. Daylilies put out another flush of growth after blooming. For "Stella de Oro," this doesn't happen until the weather starts to cool. You might have to cut off some late bloom stalks in order to divide the plants in early fall.
How Do I Divide Daylilies?
If you divide in the late spring, summer or fall, cut back the foliage to 8 inches tall with a pair of hedge shears and remove any flower stalks before dividing. For early spring division, you can skip this step. Make sure you disinfect shears and other cutting tools before use. Do this by soaking the tools in a mixture of 1 part bleach to 3 parts water for at least 5 minutes. Rinse tools in clean water, then let them air dry.

Use a gardening fork to lift the entire daylily clump from the soil. Separate the clump into smaller clumps using the gardening fork or a large, sharp knife. Each fan-shaped plant can grow on its own, but it is best to leave at least four fans together in each clump when you're dividing daylilies.
What Comes After Division?
Before replanting the daylily divisions, amend the soil with 2 to 3 inches of well-rotted compost worked in to a depth of 6 to 8 inches. This will provide a slow-release form of nitrogen and loosen the soil for new roots.
Re-plant each division at the same depth the plant was originally growing and space clumps 18 to 24 inches apart. Water each daylily clump thoroughly, and continue watering enough to keep the soil moist throughout the spring, summer and early fall. "Stella de Oro" needs little supplemental water after this first year.

How Often Should I Divide?
"Stella de Oro" is a dwarf daylily with foliage that only grows 12 inches tall. It tends to form tidy clumps that work well planted in rows, as individual clumps in perennial borders or massed as a groundcover. As the clumps grow, the individual daylily fans become crowded. Regular division reinvigorates daylilies, and gives you more plants for your garden or to pass along to other gardeners. Divide "Stella de Oro" every two to three years, when you notice a decrease in the number of blooms.
What Time of Year Is Best?
Daylilies are remarkably resilient plants, and can be divided any time during the spring, summer or fall growing seasons. Spring is the best season for division, however, since daylilies are actively growing. You want to divide plants when the new foliage is just starting to grow. This gives the daylilies time to put out new growth before blooming in the summer. Plants that were divided in the early spring will still flower, and may even produce more flowers than plants that were not divided.
If you miss dividing in the early spring, the second best time to divide plants is in the early fall. Daylilies put out another flush of growth after blooming. For "Stella de Oro," this doesn't happen until the weather starts to cool. You might have to cut off some late bloom stalks in order to divide the plants in early fall.
How Do I Divide Daylilies?
If you divide in the late spring, summer or fall, cut back the foliage to 8 inches tall with a pair of hedge shears and remove any flower stalks before dividing. For early spring division, you can skip this step. Make sure you disinfect shears and other cutting tools before use. Do this by soaking the tools in a mixture of 1 part bleach to 3 parts water for at least 5 minutes. Rinse tools in clean water, then let them air dry.

Use a gardening fork to lift the entire daylily clump from the soil. Separate the clump into smaller clumps using the gardening fork or a large, sharp knife. Each fan-shaped plant can grow on its own, but it is best to leave at least four fans together in each clump when you're dividing daylilies.
What Comes After Division?
Before replanting the daylily divisions, amend the soil with 2 to 3 inches of well-rotted compost worked in to a depth of 6 to 8 inches. This will provide a slow-release form of nitrogen and loosen the soil for new roots.
Re-plant each division at the same depth the plant was originally growing and space clumps 18 to 24 inches apart. Water each daylily clump thoroughly, and continue watering enough to keep the soil moist throughout the spring, summer and early fall. "Stella de Oro" needs little supplemental water after this first year.
0
0
文章
Miss Chen
2018年08月05日

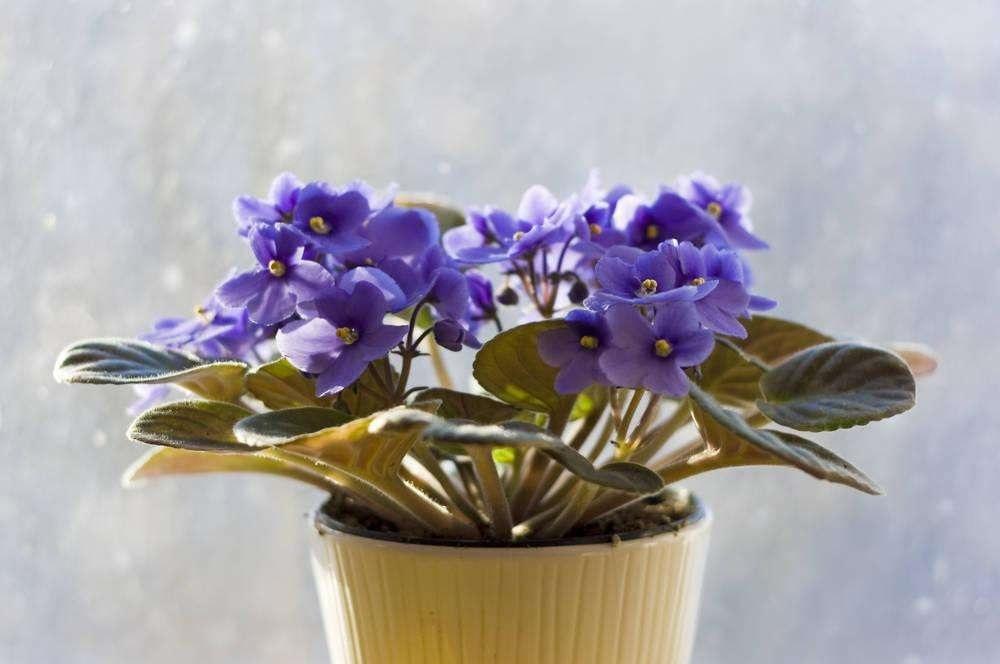
Hailing from Tanzania in East Africa, the aptly-named African violet (Saintpaulia spp.) has been grown a houseplant for generations, although it potentially grows outdoors in U.S. Department of Agriculture plant hardiness zone 11. This dainty-looking beauty has deep green, symmetrical leaves and colorful flowers that bloom nearly year-round on healthy plants. An African violet may attract many sucking insect pests, including aphids, which can affect its health. Get rid of these pests to keep your plant blooming and looking its best.

Use Nonchemical Control Methods
Washing aphids off African violets is one of the simplest ways to kill aphids, although the plant's leaves may end up with spots. Make a soap solution by mixing 2 teaspoons mild liquid dish soap into 1 gallon of warm water. Use a soft cloth or soft-bristle brush to gently wash the tops and undersides of leaves. Wash your plant whenever aphids reappear. Don't use dishwasher or laundry detergent because they may damage the African violet's leaves. Pinching off infested leaves can help control small aphid populations. Placing the African violet in a sink or tub and hosing it down with a strong stream of water rinses the pests off your plant and down the drain. Or, if you only have a few aphids, dip a cotton ball in isopropyl alcohol and wipe the bugs off the plant.
Spray Houseplants Indoors
Insecticidal soaps kill off aphids and are safe to use inside your home. Carefully read and follow your specific product's instructions and safety precautions because directions will vary. A ready-to-use formula simplifies things. Spray to thoroughly cover the leaves and stems, including the undersides of leaves. To work, the spray needs to smother the aphids. Repeat treatment every four to seven days until you spot no more aphids on your African violet. Insecticidal soaps sometimes burn plant leaves, so test the solution on a small section of an inconspicuous leaf and check for damage about 48 hours later. Treat your entire plant if the test spot wasn't damaged. If you're worried, rinse the African violet two hours after treatment to remove the insecticidal soap residue.
Treat Plants Outdoors
If you live in a warm enough climate to grow African violets outdoors, or if the weather is warm enough to bring houseplants outside, Upper Pinellas African Violet Society recommends treating plants with a malathion solution containing 2 teaspoons of product, 1 gallon of water and several drops of mild dish soap. Use a small hand sprayer or spray bottle to completely cover the foliage, including the tops and undersides of leaves. Spray African violets every seven to 10 days until the aphids are gone. Let the spray dry completely before you bring the plant back inside. Malathion is toxic to honeybees, so spray your African violets in the early morning or around dusk when bees aren't actively pollinating.
Safety First
Insecticidal soap solutions and chemical pesticides can cause skin and eye irritation on contact. Protect yourself from exposure by wearing long sleeves, pants, shoes with socks, waterproof gloves, goggles and a face mask. Early pest detection and control is crucial to keep aphids from injuring an African violet. If possible, isolate any new plants for two to three weeks before placing them among your established houseplants.

Use Nonchemical Control Methods
Washing aphids off African violets is one of the simplest ways to kill aphids, although the plant's leaves may end up with spots. Make a soap solution by mixing 2 teaspoons mild liquid dish soap into 1 gallon of warm water. Use a soft cloth or soft-bristle brush to gently wash the tops and undersides of leaves. Wash your plant whenever aphids reappear. Don't use dishwasher or laundry detergent because they may damage the African violet's leaves. Pinching off infested leaves can help control small aphid populations. Placing the African violet in a sink or tub and hosing it down with a strong stream of water rinses the pests off your plant and down the drain. Or, if you only have a few aphids, dip a cotton ball in isopropyl alcohol and wipe the bugs off the plant.
Spray Houseplants Indoors
Insecticidal soaps kill off aphids and are safe to use inside your home. Carefully read and follow your specific product's instructions and safety precautions because directions will vary. A ready-to-use formula simplifies things. Spray to thoroughly cover the leaves and stems, including the undersides of leaves. To work, the spray needs to smother the aphids. Repeat treatment every four to seven days until you spot no more aphids on your African violet. Insecticidal soaps sometimes burn plant leaves, so test the solution on a small section of an inconspicuous leaf and check for damage about 48 hours later. Treat your entire plant if the test spot wasn't damaged. If you're worried, rinse the African violet two hours after treatment to remove the insecticidal soap residue.
Treat Plants Outdoors
If you live in a warm enough climate to grow African violets outdoors, or if the weather is warm enough to bring houseplants outside, Upper Pinellas African Violet Society recommends treating plants with a malathion solution containing 2 teaspoons of product, 1 gallon of water and several drops of mild dish soap. Use a small hand sprayer or spray bottle to completely cover the foliage, including the tops and undersides of leaves. Spray African violets every seven to 10 days until the aphids are gone. Let the spray dry completely before you bring the plant back inside. Malathion is toxic to honeybees, so spray your African violets in the early morning or around dusk when bees aren't actively pollinating.

Safety First
Insecticidal soap solutions and chemical pesticides can cause skin and eye irritation on contact. Protect yourself from exposure by wearing long sleeves, pants, shoes with socks, waterproof gloves, goggles and a face mask. Early pest detection and control is crucial to keep aphids from injuring an African violet. If possible, isolate any new plants for two to three weeks before placing them among your established houseplants.
0
0


