成长记
笔润烟岚
2019年02月06日

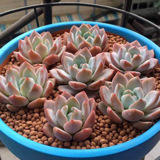
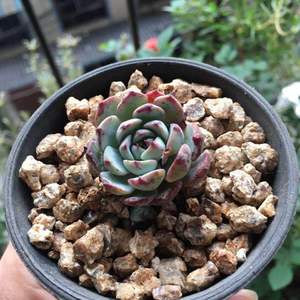
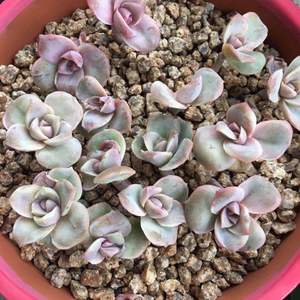
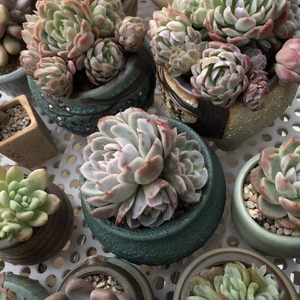
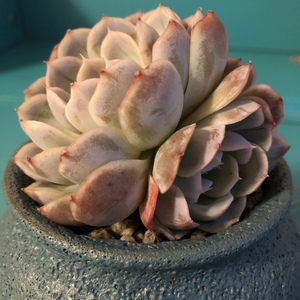
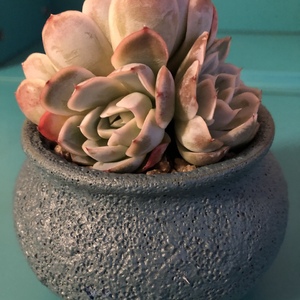
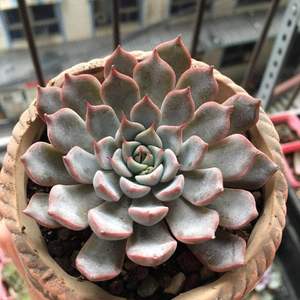
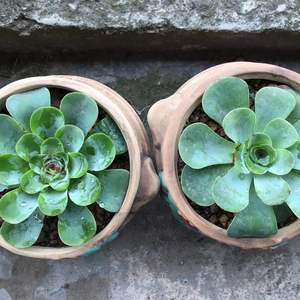
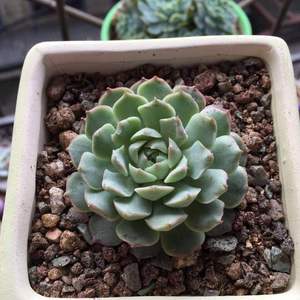
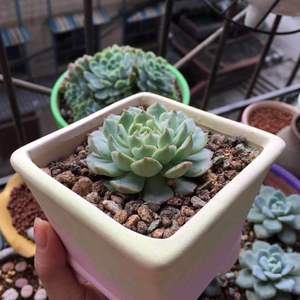
11月初到家,秀妍手捧根系不错,晾根未修根。历经三个月,虽颜色不褪却日渐消瘦。扒出来,如我所料,中间有月余忘了给水,根系已枯萎至零星一点。略做修剪,再次晾根,择日换盆。


0
0
文章
Andy
2018年12月26日

Facebook Pinterest Twitter Google+ LinkedIn StumbleUponLearn how to grow a tamarind tree in this complete article. Growing tamarind tree is easy, it’s a low care plant with a few requirements.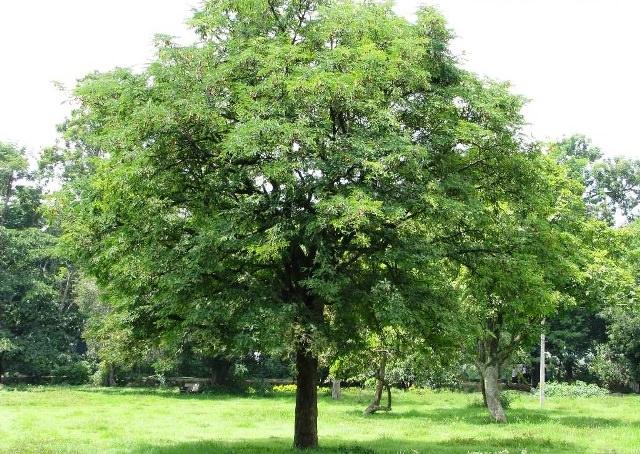

USDA Zone — 9b to 11
Difficulty — Easy
(adsbygoogle = window.adsbygoogle || []).push({});
Other Names — Tamarindus indica, tamarindo, tamarin, tamarinier, tamarinier des Indes, tamarindier, tamarinde, sampalok, asam jawa, ambli, imli, chinch, ma-kharm.
Tamarind tree is native to Africa and grows like a wild plant in Indian subcontinent. It’s also grown across Southeast Asia, South America and tropical parts of Australia and North America.
Information about Tamarind Tree
Tamarind is a slow-growing tree. It’s able to reach a height of 25 m and a circumference of 7 m, very long-lived, in fact, it can survive for more than 300 years.
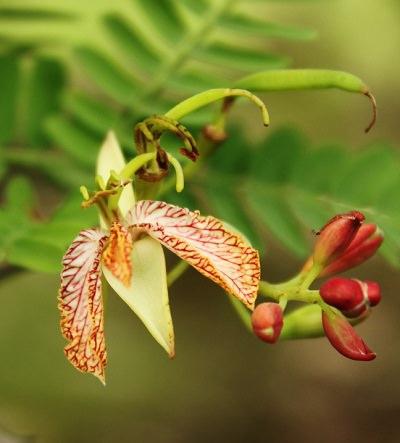

Tamarind leaves are evergreen, like pinnate up to 15 cm long consisting of 10 – 12 pairs of leaflets. Its leaves somewhat looks like acacia leaves. Tamarind flowers are grouped in inflorescence and have five yellow petals with red streaks. Pollination of flowers is entomophilous (pollinated by insects).
(adsbygoogle = window.adsbygoogle || []).push({});
Tamarind fruits are legumes. Slightly curved, 10 to 15 cm long and have a brown color. Its seeds, 4 to 12 in each pod, make up 34% of the legume and are inserted into a yellowish or brown colored pulp that taste very sour and sweet but pleasant and represents most of the fruit.
Compared to other fruits, in tamarind, during the maturation phase the acidity does not decrease, while the hydrolysis of the starch leads to an accumulation of reducing sugar (sucrose).
Tamarind pulp contains 70% carbohydrate, 3% protein and less than 1% fat, it also contains tartaric acid (8-10%), which also occurs in other fruits like bananas and grapes.
Tamarind Tree Varieties
There are different types of tamarind varieties, among which include: Sweet Tamarind, Australian tamarind, Manila tamarind, Velvet tamarind, Spanish Tamarind.
Propagation
Tamarind is propagated by seeds, grafting, cuttings and air layering. Seeds are viable for many months.
How to Grow Tamarind Tree from Seed
Soak tamarind seeds overnight in warm water to speed up germination. Sow seeds 1/2 inches deep in good quality seed starting mix. Germination occurs within one or two week after sowing.
*Plants grown from seeds do not go into production before the 6 – 7 years after germination. So it is better to grow tamarind from cutting or buy a plant from nursery if you want quick results.
Planting Tamarind
Dig a hole twice the size of the root ball of the plant. Gently remove the plant from the pot and cut dead or damaged roots. Insert the root ball in the hole and fill the soil around root ball to maintain the tree trunk above the soil line. Firm the soil and water the plant thoroughly.
For commercial growers, the planting density is large because of well developed foliage and width tamarind tree needs, the spacing should be around 5 – 15 m, depending more on the variety.
Position For Growing Tamarind Tree
Tamarind prefers tropical and subtropical, dry and windy climate. It can adapt even to the warm temperate climate, but there it’ll not be very productive. Young plants can’t withstand the cold, while the adults are resistant to temperature till 28 degree Fahrenheit only.
Best planting position is in full sun. For flowering, fruit setting and fruit development, tamarind tree needs clear sky and drier days.
How to Grow Tamarind Tree in Cold Climate

Tamarind is a tropical tree, it endures mild winter but growing it outside in colder climate is definitely a bad idea. If you want to grow it, grow tamarind tree in pot and keep it indoors or in a greenhouse during winter. You can also make a beautiful bonsai of tamarind tree.
Tamarind Tree Growing RequirementsSun
Tamarind loves full sun and heat.
Soil
Tamarind prefers deep loamy soil. It thrives in neutral, gritty, clay, even saline soil type. Soil should be well drained. For growing tamarind you don’t need to care about soil pH level. It grows in pH level around 4.5 – 9.
Watering
Water saplings deeply when the first inch of soil is dry to the touch. Once established, tamarind trees don’t need watering and can withstand periods of extreme drought conditions without experiencing adverse effects.
Fertilizer
Feed the tamarind plant with organic fertilizer according to the manufacturer’s instructions. Fertilize young trees with 6 – 6 – 3 (N – P – K) fertilizer every 2-3 month during season. Mature trees don’t need fertilizer but can be fertilized occasionally with 8 – 3 – 9 fertilizer to give a boost.
Application of compost and manure should be done too, to reduce the need of fertilizer.
Tamarind Tree CareMulching

Spread 4 or 5 inches thick layer of mulch around tamarind tree at the beginning of each spring. This helps to protect the roots of the tree, prevents weed and keeps the soil moist, mimicking the effects of a natural forest floor.
(adsbygoogle = window.adsbygoogle || []).push({}); Pruning
Prune your tamarind tree regularly to control its growth and maintain its shape. Remove dead and damaged wood from the plant.
Pests and Diseases
Tamarind tree is susceptible to pests like scales, mealy bugs, aphids and fruit borers. In diseases, it’s affected by root rot, sooty mold and leaf spot.
Tamarind Uses (adsbygoogle = window.adsbygoogle || []).push({});
Tamarind fruits are used for fresh consumption and for the preparation of juices, sauces, jams, beverages and syrups. Tamarind pulp is used in preparation of many South Asian cuisines and curry recipes.
Facebook Pinterest Twitter Google+ LinkedIn StumbleUpondiv.OUTBRAIN{padding:30px}


USDA Zone — 9b to 11
Difficulty — Easy
(adsbygoogle = window.adsbygoogle || []).push({});
Other Names — Tamarindus indica, tamarindo, tamarin, tamarinier, tamarinier des Indes, tamarindier, tamarinde, sampalok, asam jawa, ambli, imli, chinch, ma-kharm.
Tamarind tree is native to Africa and grows like a wild plant in Indian subcontinent. It’s also grown across Southeast Asia, South America and tropical parts of Australia and North America.
Information about Tamarind Tree
Tamarind is a slow-growing tree. It’s able to reach a height of 25 m and a circumference of 7 m, very long-lived, in fact, it can survive for more than 300 years.


Tamarind leaves are evergreen, like pinnate up to 15 cm long consisting of 10 – 12 pairs of leaflets. Its leaves somewhat looks like acacia leaves. Tamarind flowers are grouped in inflorescence and have five yellow petals with red streaks. Pollination of flowers is entomophilous (pollinated by insects).
(adsbygoogle = window.adsbygoogle || []).push({});
Tamarind fruits are legumes. Slightly curved, 10 to 15 cm long and have a brown color. Its seeds, 4 to 12 in each pod, make up 34% of the legume and are inserted into a yellowish or brown colored pulp that taste very sour and sweet but pleasant and represents most of the fruit.
Compared to other fruits, in tamarind, during the maturation phase the acidity does not decrease, while the hydrolysis of the starch leads to an accumulation of reducing sugar (sucrose).
Tamarind pulp contains 70% carbohydrate, 3% protein and less than 1% fat, it also contains tartaric acid (8-10%), which also occurs in other fruits like bananas and grapes.
Tamarind Tree Varieties
There are different types of tamarind varieties, among which include: Sweet Tamarind, Australian tamarind, Manila tamarind, Velvet tamarind, Spanish Tamarind.
Propagation
Tamarind is propagated by seeds, grafting, cuttings and air layering. Seeds are viable for many months.
How to Grow Tamarind Tree from Seed
Soak tamarind seeds overnight in warm water to speed up germination. Sow seeds 1/2 inches deep in good quality seed starting mix. Germination occurs within one or two week after sowing.
*Plants grown from seeds do not go into production before the 6 – 7 years after germination. So it is better to grow tamarind from cutting or buy a plant from nursery if you want quick results.
Planting Tamarind
Dig a hole twice the size of the root ball of the plant. Gently remove the plant from the pot and cut dead or damaged roots. Insert the root ball in the hole and fill the soil around root ball to maintain the tree trunk above the soil line. Firm the soil and water the plant thoroughly.
For commercial growers, the planting density is large because of well developed foliage and width tamarind tree needs, the spacing should be around 5 – 15 m, depending more on the variety.
Position For Growing Tamarind Tree
Tamarind prefers tropical and subtropical, dry and windy climate. It can adapt even to the warm temperate climate, but there it’ll not be very productive. Young plants can’t withstand the cold, while the adults are resistant to temperature till 28 degree Fahrenheit only.
Best planting position is in full sun. For flowering, fruit setting and fruit development, tamarind tree needs clear sky and drier days.
How to Grow Tamarind Tree in Cold Climate


Tamarind is a tropical tree, it endures mild winter but growing it outside in colder climate is definitely a bad idea. If you want to grow it, grow tamarind tree in pot and keep it indoors or in a greenhouse during winter. You can also make a beautiful bonsai of tamarind tree.
Tamarind Tree Growing RequirementsSun
Tamarind loves full sun and heat.
Soil
Tamarind prefers deep loamy soil. It thrives in neutral, gritty, clay, even saline soil type. Soil should be well drained. For growing tamarind you don’t need to care about soil pH level. It grows in pH level around 4.5 – 9.
Watering
Water saplings deeply when the first inch of soil is dry to the touch. Once established, tamarind trees don’t need watering and can withstand periods of extreme drought conditions without experiencing adverse effects.
Fertilizer
Feed the tamarind plant with organic fertilizer according to the manufacturer’s instructions. Fertilize young trees with 6 – 6 – 3 (N – P – K) fertilizer every 2-3 month during season. Mature trees don’t need fertilizer but can be fertilized occasionally with 8 – 3 – 9 fertilizer to give a boost.
Application of compost and manure should be done too, to reduce the need of fertilizer.
Tamarind Tree CareMulching


Spread 4 or 5 inches thick layer of mulch around tamarind tree at the beginning of each spring. This helps to protect the roots of the tree, prevents weed and keeps the soil moist, mimicking the effects of a natural forest floor.
(adsbygoogle = window.adsbygoogle || []).push({}); Pruning
Prune your tamarind tree regularly to control its growth and maintain its shape. Remove dead and damaged wood from the plant.
Pests and Diseases
Tamarind tree is susceptible to pests like scales, mealy bugs, aphids and fruit borers. In diseases, it’s affected by root rot, sooty mold and leaf spot.
Tamarind Uses (adsbygoogle = window.adsbygoogle || []).push({});
Tamarind fruits are used for fresh consumption and for the preparation of juices, sauces, jams, beverages and syrups. Tamarind pulp is used in preparation of many South Asian cuisines and curry recipes.
Facebook Pinterest Twitter Google+ LinkedIn StumbleUpondiv.OUTBRAIN{padding:30px}
0
0
文章
Andy
2018年12月26日

Facebook Pinterest Twitter Google+ WhatsApp StumbleUponTurmeric is a superfood and has many medicinal benefits. Growing turmeric in pots is not so difficult if you follow this how-to guide.


USDA Zones— 7b – 11, below these zones grow it from spring to fall
(adsbygoogle = window.adsbygoogle || []).push({});
Difficulty— Easy to Moderate
Other Names— Curcuma, Curcuma aromatica, Curcuma domestica, Curcumae longa, Curcumae Longae Rhizoma, Curcumin, Curcumine, Curcuminoid, Curcuminoïde, Curcuminoïdes, Curcuminoids, Halada, Haldi, Haridra, Indian Saffron, Nisha, Pian Jiang Huang, Racine de Curcuma, Radix Curcumae, Rajani, Rhizoma Cucurmae Longae, Safran Bourbon, Safran de Batallita, Safran des Indes, Turmeric Root, Yu Jin.
Soil pH— Slightly acidic to slightly alkaline soil
Turmeric (Curcuma longa) is obtained from the underground tubers or rhizomes. Originated in India, it is now cultivated throughout the tropical Asia and in smaller extent in other subtropical and tropical parts of the world.
(adsbygoogle = window.adsbygoogle || []).push({}); Turmeric plants look good too, you can grow them outdoors to get a tropical look in your garden.

Where to Find the Rhizome or Turmeric Plant
As you may already know, turmeric grows from the rhizomes like ginger. The easiest way to find them is to search for fresh turmeric rhizome in organic food stores. Also, try searching for it in the local garden center or seed store. Alternatively, you can find a turmeric plant or rhizome online.
Choosing a Pot
For growing turmeric in pots, choose a large pot as this amazing herb can easily exceed the height of 1 m. Pot should be at least 12 inches deep and 12-18 inches wide so that the plant can spread its tubers freely. Plant 1 or 2 rhizomes in such a pot.
Planting Turmeric
The best season to plant turmeric is spring or summer when the temperature starts to stay above 54 F (12 C), but if you are living in tropics, it can be planted throughout the year.
After you have got the rhizome follow the steps below for planting:
Break large rhizome into small pieces, each one should have at least two or three buds.Fill a pot with rich organic soil that is moist and well-drained.Place it about 2 inches (5 cm) below the soil surface, with the buds facing up.Water the pot thoroughly.Requirements for Growing Turmeric in Containers
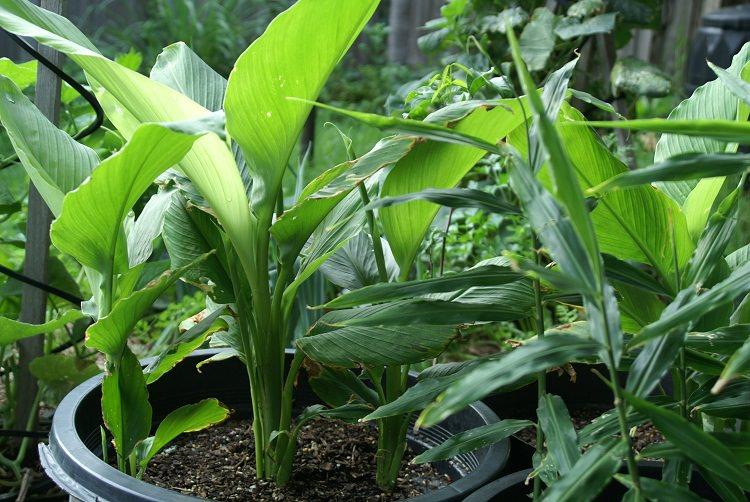

Growing turmeric is similar to ginger, it requires warm and humid climate to thrive. If you live in a cool temperate climate or if you’re short of space and want to grow your own turmeric rhizomes then learn how to grow turmeric in pots.
Position
The position must be sheltered from the wind. In tropics, the plant is grown in dappled shade and does not like all day long intense direct sun, considering this keep the turmeric plant in partial sun in the warmer zones (USDA Zone 9 and above). However, in temperate climates, provide it full sun for optimum growth, some shade in the afternoon would be okay.
Soil
Plant turmeric in a light and loamy soil that is rich in organic matters. Use well-drained soil otherwise the plant will suffer.
Water
Watering requirements are similar to ginger. Keep the soil moist throughout the growing season from spring to fall and do not hesitate to mist the foliage in dry weather to increase the humidity level around the plant.
If growing turmeric in a warmer region, keep watering the plant to maintain moist soil in winters too.
Temperature
The ideal temperature range for growing turmeric is between 68-95 F (20-35 C). When the temperature drop below 50 F (10 C) the plant suffers.
Turmeric Plant Care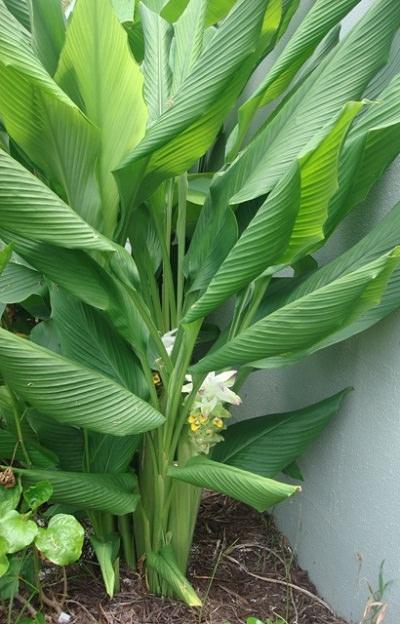

Overwintering
Since you are growing turmeric in a pot, move the plant inside even in low-light conditions. Because you have to only overwinter the roots. It is important that when you grow turmeric indoors maintain a constant ambient temperature of approximately 64 F (18 C).
Overwintering turmeric on ground
If you’re growing turmeric in true tropical climate then you don’t need to care about winter. But in warm temperate zones (below USDA Zones 9b and down to 7) to overwinter your turmeric plants, reduce watering around the end of fall and when the leaves begin to wilt and turn yellow due to temperature drop cut the plant back to the ground so that it can hibernate. It will perk up again in the spring.
If you want to grow turmeric in cooler areas (below zone 7) then you have to dig up the rhizomes to save them from freezing. For this, dig up the rhizomes and rinse off excess soil from them, snap off rotting pieces. Air dry them and store in a cool and dry place until spring.
Fertilizer
Fertilize turmeric every month with an all-purpose liquid fertilizer during the growing season. Application of manure or compost also helps.
Pruning
The turmeric plant should not be pruned. It is sufficient if you remove dried leaves time to time.
Pests and Diseases
Turmeric plant is not prone to any serious disease or pests. However, red spider mites and scales can become a problem. In diseases, it only suffers from rhizome rot and leaf spot. Rot appears when the plant is grown in waterlogged soil. Therefore, it is important to grow turmeric in well-drained soil.
Harvesting
Turmeric plant takes 8 to 10 months to mature. Harvesting is done once the leaves become yellow and stems start to dry. Harvesting turmeric is not difficult, simply dig up the plant entirely, including the roots.
(adsbygoogle = window.adsbygoogle || []).push({});
Cut the required amount and then replant the remaining part again to get a new plant growing.
After you cut the rhizome, follow the steps below to process it:
Boil the rhizomes.Carefully remove the skin from rhizomes.Place the bare rhizomes in a tray.Dry them by exposing to sunlight.
When the rhizomes are dry, grind them and store your homemade organic fresh turmeric powder in an air tight container.
Turmeric Uses and Benefits
Turmeric powder has many medicinal properties that have long been known in the India and China. Turmeric is termed as ‘Super Food‘ probably the most powerful natural anti-inflammatory and antioxidant. It is used as an anti-depressant and plays a protective role against Alzheimer’s disease and against different types of cancers. Turmeric powder is the most prominent ingredient in almost all kind of curry recipes, a pinch of it is used to provide pretty orange color. Its leaves are also useful. Young shoots and flowers are used in Thai cuisines while the leaves are used to flavor the fish in Indonesia.
One thing you did not know and surprise you is the addition of pepper in a diet as it contains piperine helps in the absorption of turmeric. Especially the black pepper, it can tenfold the benefits of this superfood.
Pin it (adsbygoogle = window.adsbygoogle || []).push({});


Facebook Pinterest Twitter Google+ WhatsApp StumbleUpondiv.OUTBRAIN{padding:30px}


USDA Zones— 7b – 11, below these zones grow it from spring to fall
(adsbygoogle = window.adsbygoogle || []).push({});
Difficulty— Easy to Moderate
Other Names— Curcuma, Curcuma aromatica, Curcuma domestica, Curcumae longa, Curcumae Longae Rhizoma, Curcumin, Curcumine, Curcuminoid, Curcuminoïde, Curcuminoïdes, Curcuminoids, Halada, Haldi, Haridra, Indian Saffron, Nisha, Pian Jiang Huang, Racine de Curcuma, Radix Curcumae, Rajani, Rhizoma Cucurmae Longae, Safran Bourbon, Safran de Batallita, Safran des Indes, Turmeric Root, Yu Jin.
Soil pH— Slightly acidic to slightly alkaline soil
Turmeric (Curcuma longa) is obtained from the underground tubers or rhizomes. Originated in India, it is now cultivated throughout the tropical Asia and in smaller extent in other subtropical and tropical parts of the world.
(adsbygoogle = window.adsbygoogle || []).push({}); Turmeric plants look good too, you can grow them outdoors to get a tropical look in your garden.


Where to Find the Rhizome or Turmeric Plant
As you may already know, turmeric grows from the rhizomes like ginger. The easiest way to find them is to search for fresh turmeric rhizome in organic food stores. Also, try searching for it in the local garden center or seed store. Alternatively, you can find a turmeric plant or rhizome online.
Choosing a Pot
For growing turmeric in pots, choose a large pot as this amazing herb can easily exceed the height of 1 m. Pot should be at least 12 inches deep and 12-18 inches wide so that the plant can spread its tubers freely. Plant 1 or 2 rhizomes in such a pot.
Planting Turmeric
The best season to plant turmeric is spring or summer when the temperature starts to stay above 54 F (12 C), but if you are living in tropics, it can be planted throughout the year.
After you have got the rhizome follow the steps below for planting:
Break large rhizome into small pieces, each one should have at least two or three buds.Fill a pot with rich organic soil that is moist and well-drained.Place it about 2 inches (5 cm) below the soil surface, with the buds facing up.Water the pot thoroughly.Requirements for Growing Turmeric in Containers


Growing turmeric is similar to ginger, it requires warm and humid climate to thrive. If you live in a cool temperate climate or if you’re short of space and want to grow your own turmeric rhizomes then learn how to grow turmeric in pots.
Position
The position must be sheltered from the wind. In tropics, the plant is grown in dappled shade and does not like all day long intense direct sun, considering this keep the turmeric plant in partial sun in the warmer zones (USDA Zone 9 and above). However, in temperate climates, provide it full sun for optimum growth, some shade in the afternoon would be okay.
Soil
Plant turmeric in a light and loamy soil that is rich in organic matters. Use well-drained soil otherwise the plant will suffer.
Water
Watering requirements are similar to ginger. Keep the soil moist throughout the growing season from spring to fall and do not hesitate to mist the foliage in dry weather to increase the humidity level around the plant.
If growing turmeric in a warmer region, keep watering the plant to maintain moist soil in winters too.
Temperature
The ideal temperature range for growing turmeric is between 68-95 F (20-35 C). When the temperature drop below 50 F (10 C) the plant suffers.
Turmeric Plant Care


Overwintering
Since you are growing turmeric in a pot, move the plant inside even in low-light conditions. Because you have to only overwinter the roots. It is important that when you grow turmeric indoors maintain a constant ambient temperature of approximately 64 F (18 C).
Overwintering turmeric on ground
If you’re growing turmeric in true tropical climate then you don’t need to care about winter. But in warm temperate zones (below USDA Zones 9b and down to 7) to overwinter your turmeric plants, reduce watering around the end of fall and when the leaves begin to wilt and turn yellow due to temperature drop cut the plant back to the ground so that it can hibernate. It will perk up again in the spring.
If you want to grow turmeric in cooler areas (below zone 7) then you have to dig up the rhizomes to save them from freezing. For this, dig up the rhizomes and rinse off excess soil from them, snap off rotting pieces. Air dry them and store in a cool and dry place until spring.
Fertilizer
Fertilize turmeric every month with an all-purpose liquid fertilizer during the growing season. Application of manure or compost also helps.
Pruning
The turmeric plant should not be pruned. It is sufficient if you remove dried leaves time to time.
Pests and Diseases
Turmeric plant is not prone to any serious disease or pests. However, red spider mites and scales can become a problem. In diseases, it only suffers from rhizome rot and leaf spot. Rot appears when the plant is grown in waterlogged soil. Therefore, it is important to grow turmeric in well-drained soil.
Harvesting
Turmeric plant takes 8 to 10 months to mature. Harvesting is done once the leaves become yellow and stems start to dry. Harvesting turmeric is not difficult, simply dig up the plant entirely, including the roots.
(adsbygoogle = window.adsbygoogle || []).push({});
Cut the required amount and then replant the remaining part again to get a new plant growing.
After you cut the rhizome, follow the steps below to process it:
Boil the rhizomes.Carefully remove the skin from rhizomes.Place the bare rhizomes in a tray.Dry them by exposing to sunlight.
When the rhizomes are dry, grind them and store your homemade organic fresh turmeric powder in an air tight container.
Turmeric Uses and Benefits
Turmeric powder has many medicinal properties that have long been known in the India and China. Turmeric is termed as ‘Super Food‘ probably the most powerful natural anti-inflammatory and antioxidant. It is used as an anti-depressant and plays a protective role against Alzheimer’s disease and against different types of cancers. Turmeric powder is the most prominent ingredient in almost all kind of curry recipes, a pinch of it is used to provide pretty orange color. Its leaves are also useful. Young shoots and flowers are used in Thai cuisines while the leaves are used to flavor the fish in Indonesia.
One thing you did not know and surprise you is the addition of pepper in a diet as it contains piperine helps in the absorption of turmeric. Especially the black pepper, it can tenfold the benefits of this superfood.
Pin it (adsbygoogle = window.adsbygoogle || []).push({});


Facebook Pinterest Twitter Google+ WhatsApp StumbleUpondiv.OUTBRAIN{padding:30px}
0
0
文章
Andy
2018年12月26日

Facebook Pinterest Twitter Google+ LinkedIn StumbleUponLearn how to grow feijoa in this article. If you live in a mild temperate or warm subtropical climate, growing feijoa (Pineapple Guava) will be really easy for you.
USDA Zones— 8 to 11
Difficulty— Easy
Soil pH— Slightly acidic to slightly neutral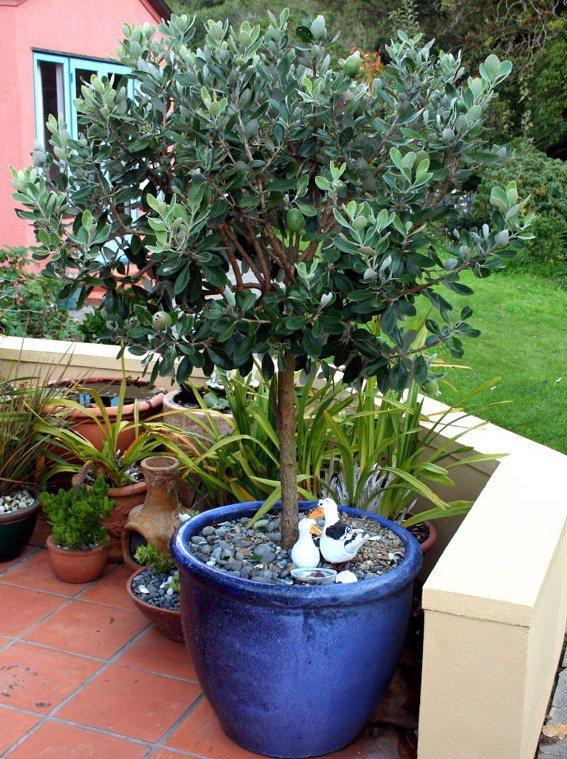

Feijoa or pineapple guava is a large and attractive evergreen shrub that is native of South America. It belongs to the myrtle family (Myrtaceae) and is widely known with the name of guaiabo, pineapple guava, guavasteen. However, it is not real guava and generally grown for its ornamental values and sweet, aromatic fruits that taste like a combination of guava, pineapple, and mint.
Growing Habit of Feijoa
If you’re growing pineapple guava, you should know it is a slow growing shrub that can grow up to 5.5 meters (18 feet). Its edible and mildly fragrant white flowers bloom in summer. Fruits mature in 5-6 months after the flowers.
These fruits have the shape of an oval, similar to chicken egg and they look like guavas with a combined flavor of pineapple, guava, and mint.
Feijoa lives long between 50 to 70 years. Despite its subtropical origin, it is resistant to some freezing temperature, although below 12 ° F (-11 ° C) the plant suffers.
How to Plant Pineapple GuavaPlant the shrub in slightly acidic soil that is rich and well drained. Pineapple guava can grow in a variety of soil types, but the plant does best in slightly acidic soil.Dig a hole that is twice in depth and width of the previous pot in which you’ve bought the plant from the nursery.Mix one part of soil with one part of compost and peat.Remove the plant from the container, loose the root ball and place the plant in the hole. Plant the plant in the depth of or slightly higher than it was planted in its previous pot.Pour the soil into the hole and gently pat the soil over the roots and around the plant.Water the growing medium around the plant carefully so that air bubbles are removed and the soil settles.Growing Feijoa in Pot
If you live below USDA Zone 8 or in a more cooler climate, growing feijoa in the pot is the best option. All the growing requirements and caring tips are similar as we’ve recommended for planting on the ground.
Also Read: How to Grow Dragon Fruit
Requirements for Growing FeijoaLocation
Make sure your plant is exposed to full sun, at least 6 hours. Grow other plants around it, to shade the base of your tree. It is resistant to some cold, drought and heat but it doesn’t grow well in a windy spot so don’t hesitate to plant it near a wall to protect it.
Soil
It prefers sandy soil that is rich in organic matter–loose, light and gritty. Soil should be well-drained but not too dry. While planting, add some perlite or sand in your garden soil.
Fertilization
Feijoas grow slowly and require the application of 8-8-8 NPK organic fertilizer once every two months to speed up growth. The fertilizer you use should contain trace elements like copper, boron, magnesium, zinc, manganese, iron, and molybdenum.
Watering
Water the plant frequently, especially during the plant’s first year of growth. Established and mature plants are drought-tolerant. Still, the plant should receive an inch of water every week. Water clayey soil once a week and light soil twice a week on the ground. Reduce the amount of watering in winter and rainy season.
Pineapple Guava CarePruning
It is not necessary to prune feijoa, except if you want to give it a shape that suits you. You can prune your tree only at the time when there are no fruits hanging on the plant. In fall when the harvest is done, it’s an excellent time to prune it.
Mulching
Do mulching at the base of your tree with organic matters like straws, grass clippings, and twigs. You can also use coffee grounds. Mulching conserves the moisture content in soil, prevent weeds and insulate the plant in winter.
USDA Zones— 8 to 11
Difficulty— Easy
Soil pH— Slightly acidic to slightly neutral


Feijoa or pineapple guava is a large and attractive evergreen shrub that is native of South America. It belongs to the myrtle family (Myrtaceae) and is widely known with the name of guaiabo, pineapple guava, guavasteen. However, it is not real guava and generally grown for its ornamental values and sweet, aromatic fruits that taste like a combination of guava, pineapple, and mint.
Growing Habit of Feijoa
If you’re growing pineapple guava, you should know it is a slow growing shrub that can grow up to 5.5 meters (18 feet). Its edible and mildly fragrant white flowers bloom in summer. Fruits mature in 5-6 months after the flowers.
These fruits have the shape of an oval, similar to chicken egg and they look like guavas with a combined flavor of pineapple, guava, and mint.
Feijoa lives long between 50 to 70 years. Despite its subtropical origin, it is resistant to some freezing temperature, although below 12 ° F (-11 ° C) the plant suffers.
How to Plant Pineapple GuavaPlant the shrub in slightly acidic soil that is rich and well drained. Pineapple guava can grow in a variety of soil types, but the plant does best in slightly acidic soil.Dig a hole that is twice in depth and width of the previous pot in which you’ve bought the plant from the nursery.Mix one part of soil with one part of compost and peat.Remove the plant from the container, loose the root ball and place the plant in the hole. Plant the plant in the depth of or slightly higher than it was planted in its previous pot.Pour the soil into the hole and gently pat the soil over the roots and around the plant.Water the growing medium around the plant carefully so that air bubbles are removed and the soil settles.Growing Feijoa in Pot
If you live below USDA Zone 8 or in a more cooler climate, growing feijoa in the pot is the best option. All the growing requirements and caring tips are similar as we’ve recommended for planting on the ground.
Also Read: How to Grow Dragon Fruit
Requirements for Growing FeijoaLocation
Make sure your plant is exposed to full sun, at least 6 hours. Grow other plants around it, to shade the base of your tree. It is resistant to some cold, drought and heat but it doesn’t grow well in a windy spot so don’t hesitate to plant it near a wall to protect it.
Soil
It prefers sandy soil that is rich in organic matter–loose, light and gritty. Soil should be well-drained but not too dry. While planting, add some perlite or sand in your garden soil.
Fertilization
Feijoas grow slowly and require the application of 8-8-8 NPK organic fertilizer once every two months to speed up growth. The fertilizer you use should contain trace elements like copper, boron, magnesium, zinc, manganese, iron, and molybdenum.
Watering
Water the plant frequently, especially during the plant’s first year of growth. Established and mature plants are drought-tolerant. Still, the plant should receive an inch of water every week. Water clayey soil once a week and light soil twice a week on the ground. Reduce the amount of watering in winter and rainy season.
Pineapple Guava CarePruning
It is not necessary to prune feijoa, except if you want to give it a shape that suits you. You can prune your tree only at the time when there are no fruits hanging on the plant. In fall when the harvest is done, it’s an excellent time to prune it.
Mulching
Do mulching at the base of your tree with organic matters like straws, grass clippings, and twigs. You can also use coffee grounds. Mulching conserves the moisture content in soil, prevent weeds and insulate the plant in winter.
0
0


