meriunkat
2018年05月15日

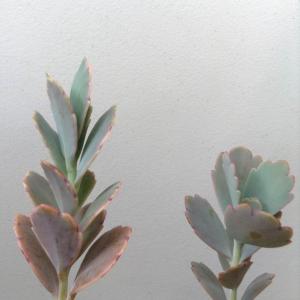
🌵🌸‼️ Here is the difference between the Kalanchoe that i own. On the second picture you can see that the two Kalanchoe look almost exactly the same, but on the first picture you can tell in fact that they are two different types of Kalanchoe prof taken feom the propagations. The second picture: First plant is Kalanchoe Glaucenscens that has white variegation and i am waiting for her to grow older to see if it may be in fact Kalanchoe Fedtschenkoi Variegata which turn pink aswell, the second Kalanchoe i am still trying to figure out the name..



0
1
文章
Miss Chen
2017年11月14日

Strawberries (Fragaria × ananassa) are a tasty summer fruit that can be enjoyed fresh, frozen, or in favorite desserts. Whether grown in a traditional garden or in raised beds, hardy cultivars are capable of producing abundant crops when planted with proper care. Three varieties of strawberry plants are popular with gardeners across the United States.
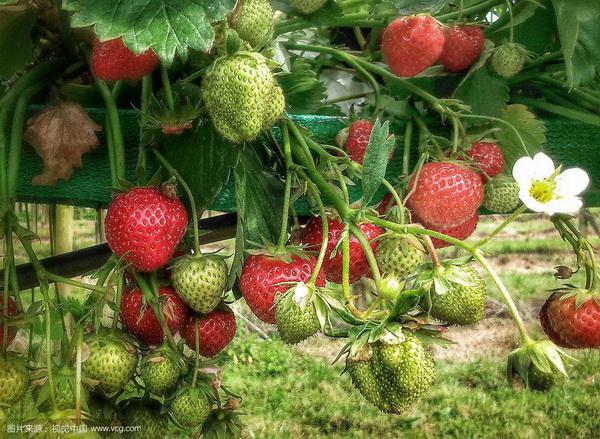
June-bearing Strawberries
June-bearing strawberry cultivars are the most popular among home and commercial growers because of the quantity and quality of the fruit. June-bearing plants produce a full crop the season after planting. Blooms and fruit appear from late May until the end of June.
Prior to planting, the garden soil requires attentive care in preparation for the second season of fruit-bearing. Gardeners may need to amend the soil to achieve a loamy condition. Organic matter, such as compost or animal manure, can help poor soil become loamy soil.
In addition, a 10-10-10 garden fertilizer broadcast in the spring of the planting year will boost yields the second season. David T. Handley, vegetable and small fruit specialist at the University of Maine Cooperative Extension, recommends having the soil tested for pH levels in conjunction with fertilizing. A soil pH level of 5.8 to 6.2 is optimal for strawberry plant growth and fruit production.
Once the soil is prepared, transplant June-bearing strawberry plants in the spring after hard frosts are over and the ground is dry. Plants do not tolerate wet conditions or the occurrences of repeated freezing and thawing.
Day-neutral Strawberries
Day-neutral strawberry plants produce a steady crop of fruit over the entire growing season. Although harvesting extends beyond June, total yield may fall short of fruit quantities produced by June-bearing plants. Day-neutral cultivars should be planted yearly as annuals.

As with June-bearing cultivars, Day-neutral strawberry plants should be transplanted in early spring once the ground can be worked and the soil has dried from winter thawing. If purchasing, buy stock from a reputable local grower and plant in your garden immediately.
Follow soil preparation guidelines for June-bearing varieties, as soil requirements are similar. The University of Maine Extension also recommends choosing a garden plot offering six to 10 hours of sunlight per day. All strawberry plant varieties produce well when afforded enough full sun.
Everbearing Strawberries
Everbearing strawberry types differ from June-bearing and day-neutral plants because they produce small crops only in late spring and early fall. Everbearing is the oldest variety of strawberry plant and its popularity is waning. Many growers believe the June-bearing and day-neutral cultivars have superior-tasting fruit.
Consistent with June-bearing and day-neutral plants, everbearing strawberry plants require the same type of soil and plot location. Early spring, with drying soil conditions, is the optimal time for transplanting Everbearing strawberry plants.
Regional Considerations
Strawberry cultivars are available that are hardy in U. S. Department of Agriculture plant hardiness zones 2 to 11. As Floridata puts it, cultivars have been adapted for "all climatic zones where plants will grow."
Among the many varieties to choose from, a sampling of recommended types might begin, for areas with cold winter temperatures, with Junebearing "Northeaster" (Fragaria x ananassa "Northeaster," which is hardy in USDA zones 4-8) and "Sable" (Fragaria x ananassa "Sable," hardy in USDA zones 3 to 8). For Midwesterners, Ohio State University suggests day-neutral "Tribute" (Fragaria x ananassa "Tribute") and Junebearing "Earliglow" (Fragaria x ananassa "Earliglow"), both hardy in USDA zones 4 to 8, among others. Gardeners in the South will find success with "Cardinal" (Fragaria x ananassa "Cardinal"), hardy in USDA zones 5 to 9, while West Coast growers should consider "Sequoia" (Fragaria x ananassa "Sequoia"), a Junebearing variety hardy in USDA zones 6 to 9.
Purchasing stock from local growers ensures the plant selection offered is pre-screened and adaptable to your hardiness zone. With careful selection and proper care, gardeners in most states can enjoy juicy strawberries from their summer gardens.

June-bearing Strawberries
June-bearing strawberry cultivars are the most popular among home and commercial growers because of the quantity and quality of the fruit. June-bearing plants produce a full crop the season after planting. Blooms and fruit appear from late May until the end of June.
Prior to planting, the garden soil requires attentive care in preparation for the second season of fruit-bearing. Gardeners may need to amend the soil to achieve a loamy condition. Organic matter, such as compost or animal manure, can help poor soil become loamy soil.
In addition, a 10-10-10 garden fertilizer broadcast in the spring of the planting year will boost yields the second season. David T. Handley, vegetable and small fruit specialist at the University of Maine Cooperative Extension, recommends having the soil tested for pH levels in conjunction with fertilizing. A soil pH level of 5.8 to 6.2 is optimal for strawberry plant growth and fruit production.
Once the soil is prepared, transplant June-bearing strawberry plants in the spring after hard frosts are over and the ground is dry. Plants do not tolerate wet conditions or the occurrences of repeated freezing and thawing.
Day-neutral Strawberries
Day-neutral strawberry plants produce a steady crop of fruit over the entire growing season. Although harvesting extends beyond June, total yield may fall short of fruit quantities produced by June-bearing plants. Day-neutral cultivars should be planted yearly as annuals.

As with June-bearing cultivars, Day-neutral strawberry plants should be transplanted in early spring once the ground can be worked and the soil has dried from winter thawing. If purchasing, buy stock from a reputable local grower and plant in your garden immediately.
Follow soil preparation guidelines for June-bearing varieties, as soil requirements are similar. The University of Maine Extension also recommends choosing a garden plot offering six to 10 hours of sunlight per day. All strawberry plant varieties produce well when afforded enough full sun.
Everbearing Strawberries
Everbearing strawberry types differ from June-bearing and day-neutral plants because they produce small crops only in late spring and early fall. Everbearing is the oldest variety of strawberry plant and its popularity is waning. Many growers believe the June-bearing and day-neutral cultivars have superior-tasting fruit.
Consistent with June-bearing and day-neutral plants, everbearing strawberry plants require the same type of soil and plot location. Early spring, with drying soil conditions, is the optimal time for transplanting Everbearing strawberry plants.
Regional Considerations
Strawberry cultivars are available that are hardy in U. S. Department of Agriculture plant hardiness zones 2 to 11. As Floridata puts it, cultivars have been adapted for "all climatic zones where plants will grow."
Among the many varieties to choose from, a sampling of recommended types might begin, for areas with cold winter temperatures, with Junebearing "Northeaster" (Fragaria x ananassa "Northeaster," which is hardy in USDA zones 4-8) and "Sable" (Fragaria x ananassa "Sable," hardy in USDA zones 3 to 8). For Midwesterners, Ohio State University suggests day-neutral "Tribute" (Fragaria x ananassa "Tribute") and Junebearing "Earliglow" (Fragaria x ananassa "Earliglow"), both hardy in USDA zones 4 to 8, among others. Gardeners in the South will find success with "Cardinal" (Fragaria x ananassa "Cardinal"), hardy in USDA zones 5 to 9, while West Coast growers should consider "Sequoia" (Fragaria x ananassa "Sequoia"), a Junebearing variety hardy in USDA zones 6 to 9.
Purchasing stock from local growers ensures the plant selection offered is pre-screened and adaptable to your hardiness zone. With careful selection and proper care, gardeners in most states can enjoy juicy strawberries from their summer gardens.
0
0
文章
Dummer. ゛☀
2017年10月01日

Scientific Name
Pereskia aculeata Mill.
Common Names
Barbados Gooseberry, Barbados Shrub, Leaf Cactus, Ora-Pro-Nobis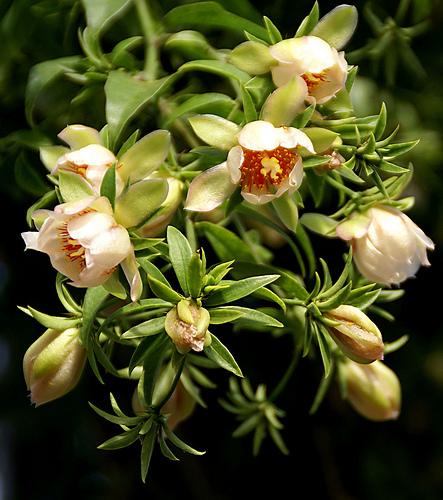
Synonyms
Cactus lucidus, Cactus pereskia, Pereskia foetens, Pereskia fragrans, Pereskia godseffiana, Pereskia longispina, Pereskia pereskia, Pereskia rubescens, Pereskia undulata
Scientific Classification
Family: Cactaceae
Subfamily: Pereskioideae
Genus: Pereskia
Description
Pereskia aculeata is a scrambling vine growing up to 33 feet (10 m) tall in trees, with stems up to 1.2 inches (3 cm) thick. Younger stems have hooked thorns and older stems have clusters of woody spines. The leaves are up to 4 inches (10 cm) long and up to 1.6 inches (4 cm) wide, simple, entire, and deciduous in the dry season. The strongly scented flowers are white, cream or pinkish, up to 2 inches (5 cm) in diameter, and numerous, produced in panicles. The fruit is a rounded berry, translucent white to pink, yellow, orange or red, and up to 0.8 inch (2 cm) in diameter.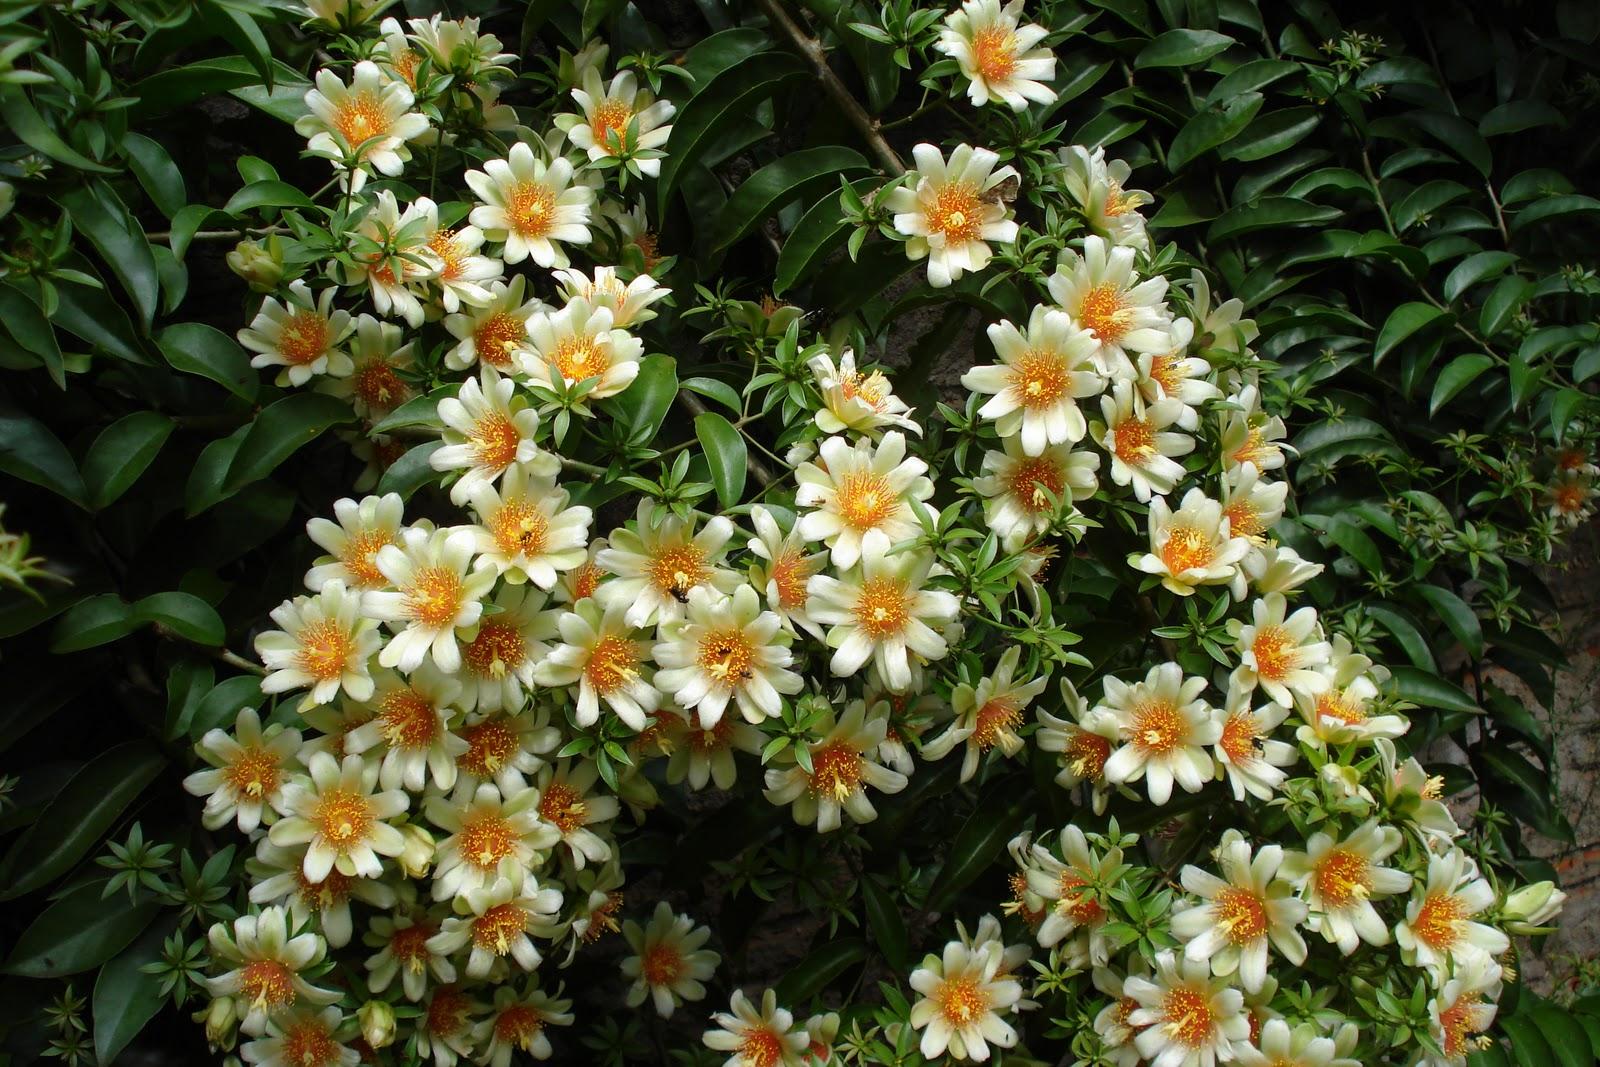
How to Grow and Care
As with many cacti, Pereskias can be almost ignored and still flourish. One of the major advantages that succulents pose as houseplants is their ease, and overwatering or overfeeding them is a bigger danger than neglecting them because it can damage their roots. If you repot them, remember to leave them alone for a brief period so as to avoid overstressing them, and make sure to keep an eye out for common houseplant pests.
Pereskia aculeata Mill.
Common Names
Barbados Gooseberry, Barbados Shrub, Leaf Cactus, Ora-Pro-Nobis

Synonyms
Cactus lucidus, Cactus pereskia, Pereskia foetens, Pereskia fragrans, Pereskia godseffiana, Pereskia longispina, Pereskia pereskia, Pereskia rubescens, Pereskia undulata
Scientific Classification
Family: Cactaceae
Subfamily: Pereskioideae
Genus: Pereskia

Description
Pereskia aculeata is a scrambling vine growing up to 33 feet (10 m) tall in trees, with stems up to 1.2 inches (3 cm) thick. Younger stems have hooked thorns and older stems have clusters of woody spines. The leaves are up to 4 inches (10 cm) long and up to 1.6 inches (4 cm) wide, simple, entire, and deciduous in the dry season. The strongly scented flowers are white, cream or pinkish, up to 2 inches (5 cm) in diameter, and numerous, produced in panicles. The fruit is a rounded berry, translucent white to pink, yellow, orange or red, and up to 0.8 inch (2 cm) in diameter.

How to Grow and Care
As with many cacti, Pereskias can be almost ignored and still flourish. One of the major advantages that succulents pose as houseplants is their ease, and overwatering or overfeeding them is a bigger danger than neglecting them because it can damage their roots. If you repot them, remember to leave them alone for a brief period so as to avoid overstressing them, and make sure to keep an eye out for common houseplant pests.
0
0
文章
Dummer. ゛☀
2017年10月01日

Scientific Name
Fenestraria rhopalophylla subsp. aurantiaca (N.E.Br.) H.E.K.Hartmann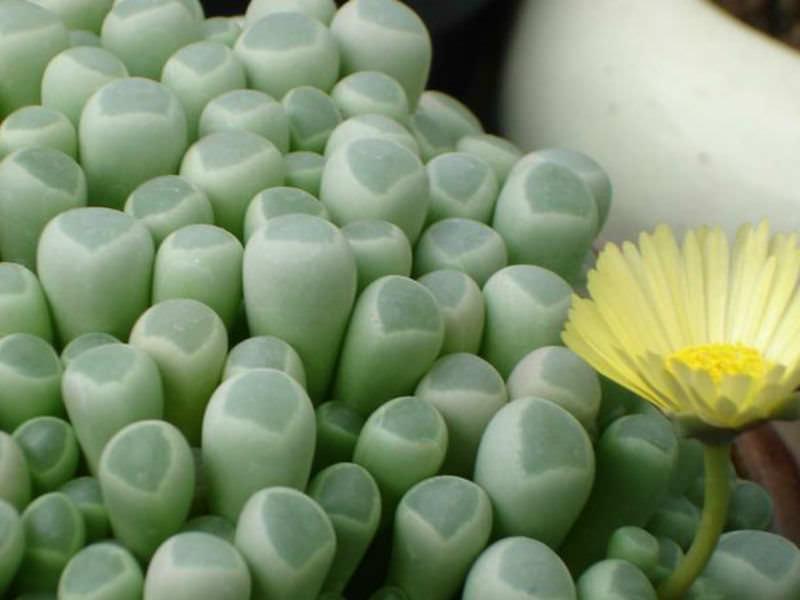
Common Names
Baby Toes, Baby’s Toes, Window Plant
Synonyms
Fenestraria aurantiaca
The status of Fenestraria aurantiaca is under review to determine whether its proper status is that of a full species or a subspecies of Fenestraria rhopalophylla.
Scientific Classification
Family: Aizoaceae
Subfamily: Ruschioideae
Tribe: Ruschieae
Genus: Fenestraria
Description
Fenestraria rhopalophylla is an evergreen, perennial succulent, up to 6 inches (15 cm) tall. Not present or very reduced stem. The tip of each leaf is transparent, and diffuse the light to the rest of the leaf. The roots are thick, shallow, and spreading. The leaves are glaucous green, smooth, up to 1.5 inches (4 cm) long and with a convex apex. Medium-large up to 1.2 inch (3 cm) in diametar, rich golden yellow, solitary or in groups of up to three flowers borne on long pedicels.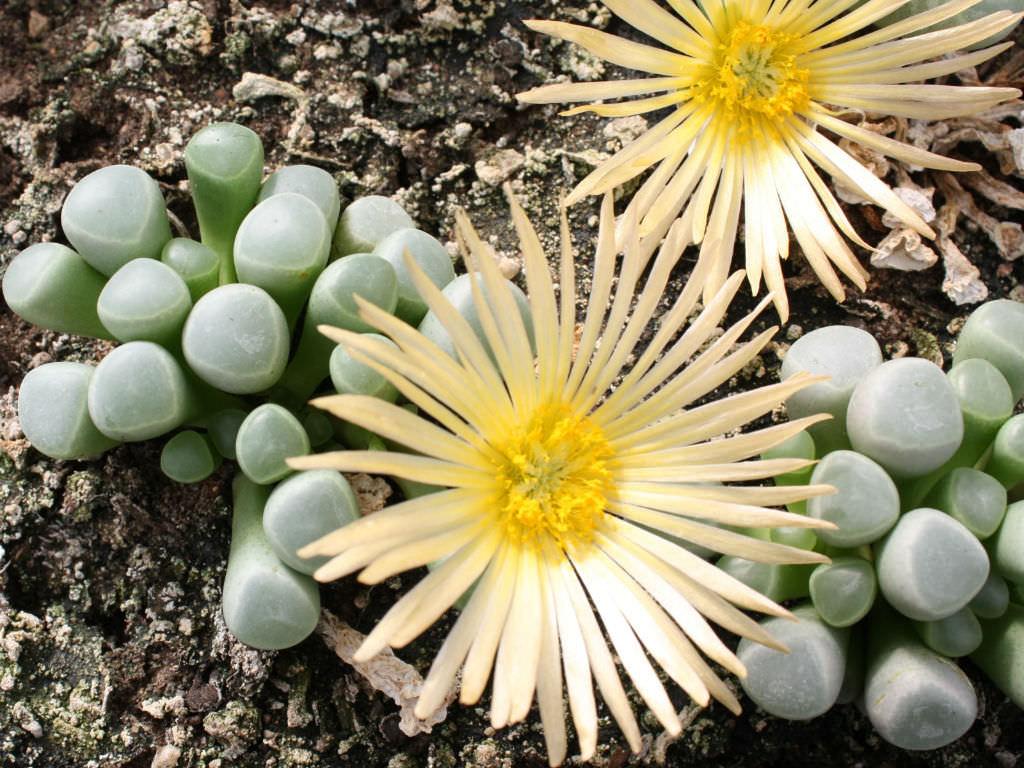
How to Grow and Care
Fenestraria prefer sandy soil and should be watered sparingly at all times to avoid root rot and split leaves. They need to be kept somewhat dry in the summer. Mix equals parts potting soil with pumice or perlite. Outdoors, grow in full to part sun; indoors, provide bright indirect light. Water thoroughly when soil is dry to the touch. Fenestrarias are somewhat frost tolerant, but protection is advisable to prevent scarring. They are usually propagated by seed but sometimes by cuttings. Like many succulents, Fenestrarias produces offsets as the clusters of leaves mature and spread. These are easy to divide from the main clump and will readily produce another plant.
Fenestraria rhopalophylla subsp. aurantiaca (N.E.Br.) H.E.K.Hartmann

Common Names
Baby Toes, Baby’s Toes, Window Plant
Synonyms
Fenestraria aurantiaca
The status of Fenestraria aurantiaca is under review to determine whether its proper status is that of a full species or a subspecies of Fenestraria rhopalophylla.
Scientific Classification
Family: Aizoaceae
Subfamily: Ruschioideae
Tribe: Ruschieae
Genus: Fenestraria

Description
Fenestraria rhopalophylla is an evergreen, perennial succulent, up to 6 inches (15 cm) tall. Not present or very reduced stem. The tip of each leaf is transparent, and diffuse the light to the rest of the leaf. The roots are thick, shallow, and spreading. The leaves are glaucous green, smooth, up to 1.5 inches (4 cm) long and with a convex apex. Medium-large up to 1.2 inch (3 cm) in diametar, rich golden yellow, solitary or in groups of up to three flowers borne on long pedicels.

How to Grow and Care
Fenestraria prefer sandy soil and should be watered sparingly at all times to avoid root rot and split leaves. They need to be kept somewhat dry in the summer. Mix equals parts potting soil with pumice or perlite. Outdoors, grow in full to part sun; indoors, provide bright indirect light. Water thoroughly when soil is dry to the touch. Fenestrarias are somewhat frost tolerant, but protection is advisable to prevent scarring. They are usually propagated by seed but sometimes by cuttings. Like many succulents, Fenestrarias produces offsets as the clusters of leaves mature and spread. These are easy to divide from the main clump and will readily produce another plant.
0
0
文章
Dummer. ゛☀
2017年09月24日

ACCORDING to the Gallup Gardening Survey, less than half of the country's home gardeners use any kind of fertilizer on their lawns or gardens. What's unfortunate about this statistic is that it means gardeners aren't getting as many flowers or as much produce as they should. And they're probably struggling with disease and insect problems that could be avoided.
Well-fed plants are healthier, more productive and more beautiful. This article covers the basics of why and how to fertilize your garden.

Plant Nutrients 101
Plants need to be fertilized because most soil does not provide the essential nutrients required for optimum growth. Even if you are lucky enough to start with great garden soil, as your plants grow, they absorb nutrients and leave the soil less fertile. Remember those tasty tomatoes and beautiful roses you grew last year? It took nutrients from the soil to build those plant tissues. By fertilizing your garden, you replenish lost nutrients and ensure that this year's plants have the food they need to flourish.
There are six primary nutrients that plants require. Plants get the first three—carbon, hydrogen and oxygen—from air and water. The other three are nitrogen, phosphorus and potassium.
Nitrogen helps plants make the proteins they need to produce new tissues. In nature, nitrogen is often in short supply so plants have evolved to take up as much nitrogen as possible, even if it means not taking up other necessary elements. If too much nitrogen is available, the plant may grow abundant foliage but not produce fruit or flowers. Growth may actually be stunted because the plant isn't absorbing enough of the other elements it needs.
Phosphorus stimulates root growth, helps the plant set buds and flowers, improves vitality and increases seed size. It does this by helping transfer energy from one part of the plant to another. To absorb phosphorus, most plants require a soil pH of 6.5 to 6.8. Organic matter and the activity of soil organisms also increase the availability of phosphorus.
Potassium improves overall vigor of the plant. It helps the plants make carbohydrates and provides disease resistance. It also helps regulate metabolic activities.

There are three additional nutrients that plants need, but in much smaller amounts:
Calcium is used by plants in cell membranes, at their growing points and to neutralize toxic materials. In addition, calcium improves soil structure and helps bind organic and inorganic particles together.
Magnesium is the only metallic component of chlorophyll. Without it, plants can't process sunlight.
Sulfur is a component of many proteins.
Finally, there are eight elements that plants need in tiny amounts. These are called micronutrients and include boron, copper and iron. Healthy soil that is high in organic matter usually contains adequate amounts of each of these micronutrients.

Organic vs. Synthetic
Do plants really care where they get their nutrients? Yes, because organic and synthetic fertilizers provide nutrients in different ways. Organic fertilizers are made from naturally occurring mineral deposits and organic material, such as bone or plant meal or composted manure. Synthetic fertilizers are made by chemically processing raw materials.
In general, the nutrients in organic fertilizers are not water-soluble and are released to the plants slowly over a period of months or even years. For this reason, organic fertilizers are best applied in the fall so the nutrients will be available in the spring. These organic fertilizers stimulate beneficial soil microorganisms and improve the structure of the soil. Soil microbes play an important role in converting organic fertilizers into soluble nutrients that can be absorbed by your plants. In most cases, organic fertilizers and compost will provide all the secondary and micronutrients your plants need.
Synthetic fertilizers are water-soluble and can be taken up by the plant almost immediately. In fact applying too much synthetic fertilizer can "burn" foliage and damage your plants. Synthetic fertilizers give plants a quick boost but do little to improve soil texture, stimulate soil life, or improve your soil's long-term fertility. Because synthetic fertilizers are highly water-soluble, they can also leach out into streams and ponds. Synthetic fertilizers do have some advantages in early spring. Because they are water-soluble, they are available to plants even when the soil is still cold and soil microbes are inactive. For this reason, some organically-based fertilizers, such as PHC All-Purpose Fertilizer, also contain small amounts of synthetic fertilizers to ensure the availability of nutrients.
For the long-term health of your garden, feeding your plants by building the soil with organic fertilizers and compost is best. This will give you soil that is rich in organic matter and teeming with microbial life.
Foliar Feeding?
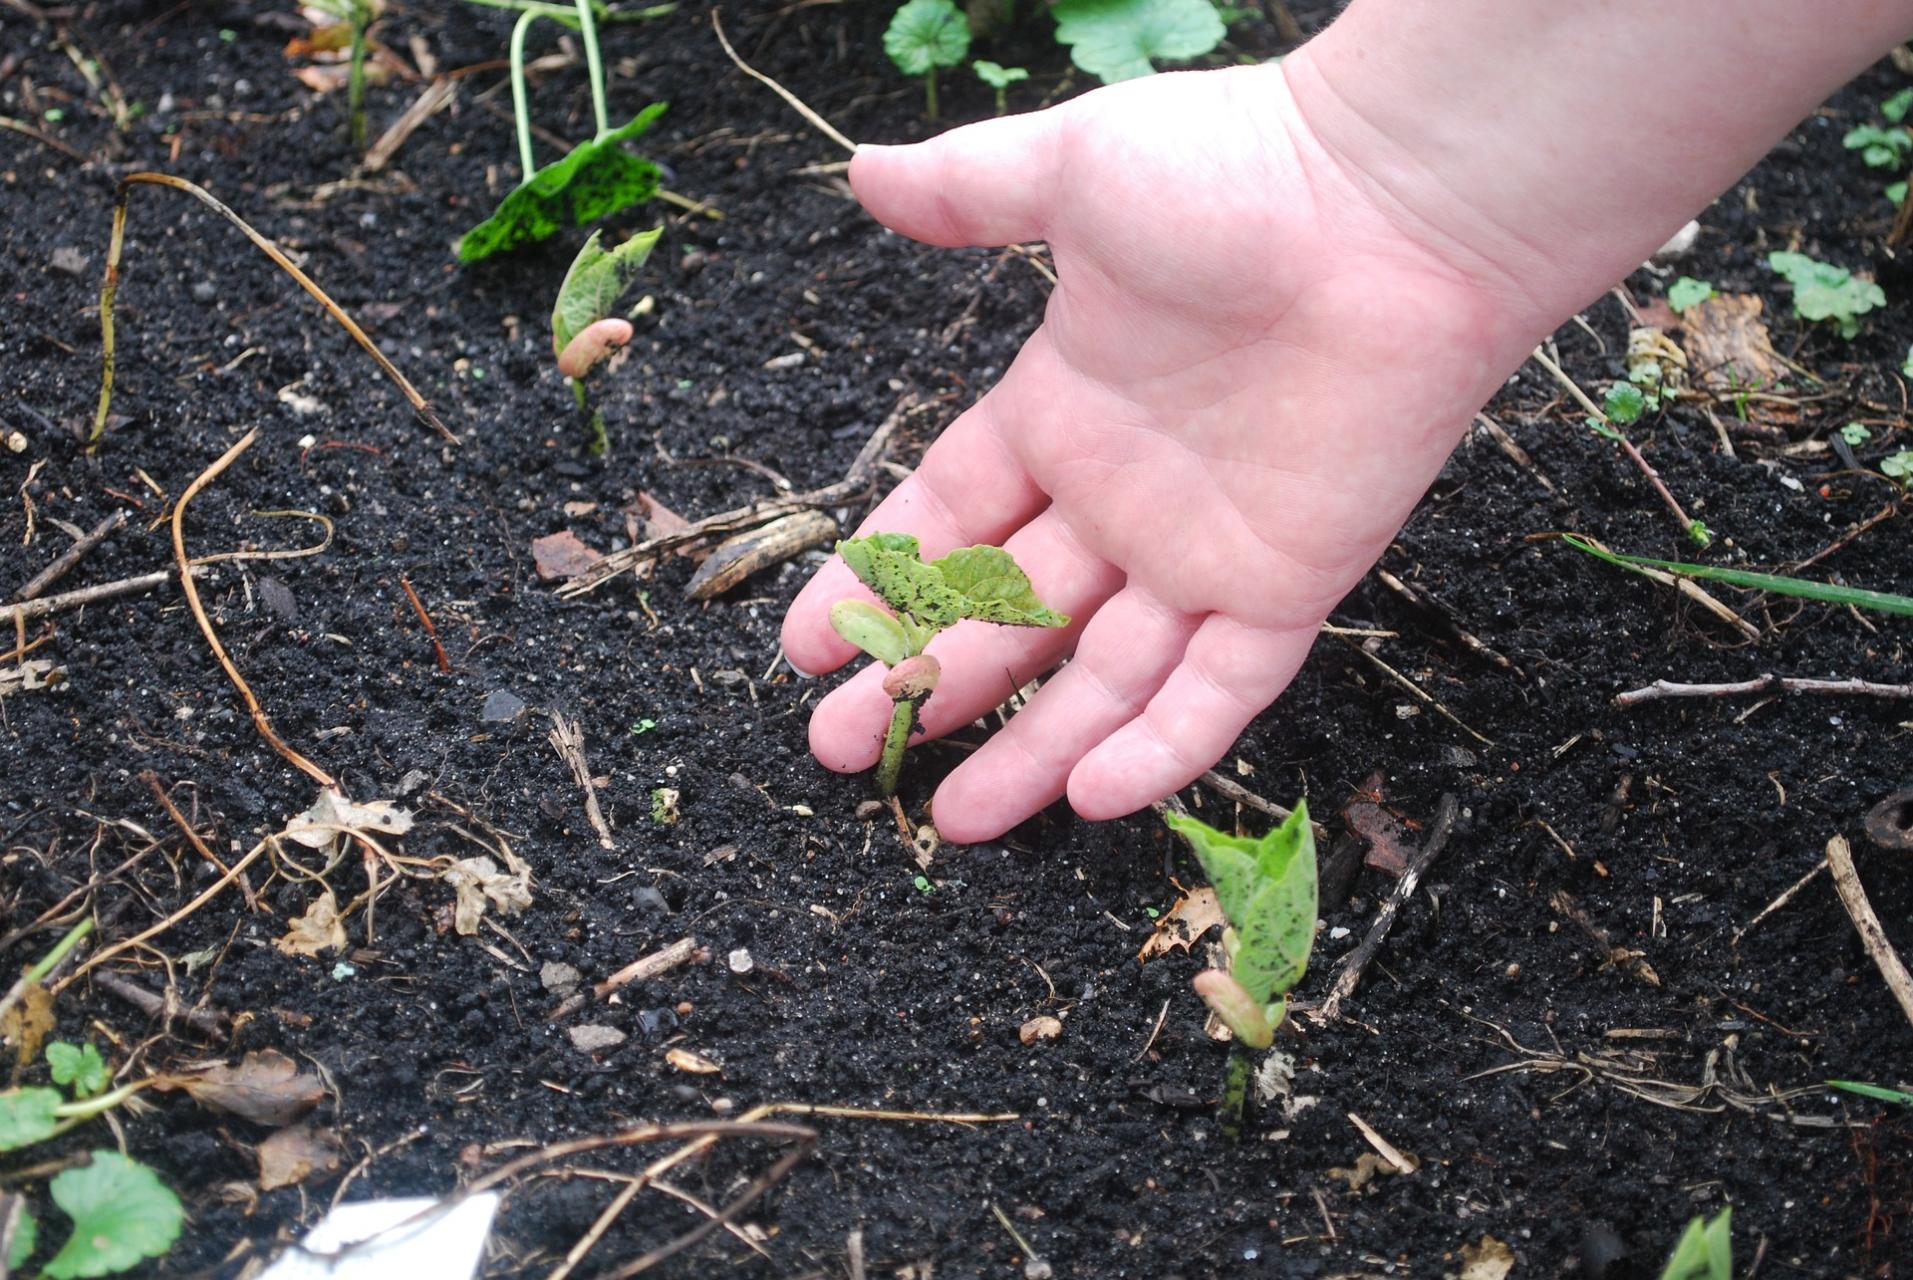
Plants can absorb nutrients eight to 20 times more efficiently through their leaf surfaces than through their roots. As a result, spraying foliage with liquid nutrients can produce remarkable yields. For best results, spray plants during their critical growth stages such as transplanting time, blooming time and just after fruit sets.
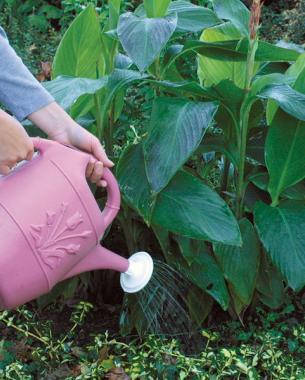
What About pH?
Even if proper nutrients are present in the soil, some nutrients cannot be absorbed by plants if the soil pH is too high or too low. For most plants, soil pH should be between 6.0 and 7.0. A soil test will measure the pH of your soil. You can send a sample to a lab (contact your local extension service for a low-cost kit) or buy a home kit and do it yourself. Lime or wood ash can be used to raise pH; sulfur or aluminum sulfate can lower pH. Keep in mind that it's best to raise or lower soil pH slowly over the course of a year or two. Dramatic adjustments can result in the opposite extreme, which may be worse than what you started with. Once again, a helpful solution is to apply compost. Compost moderates soil pH and is one of the best ways to maintain the 6.5 ideal.
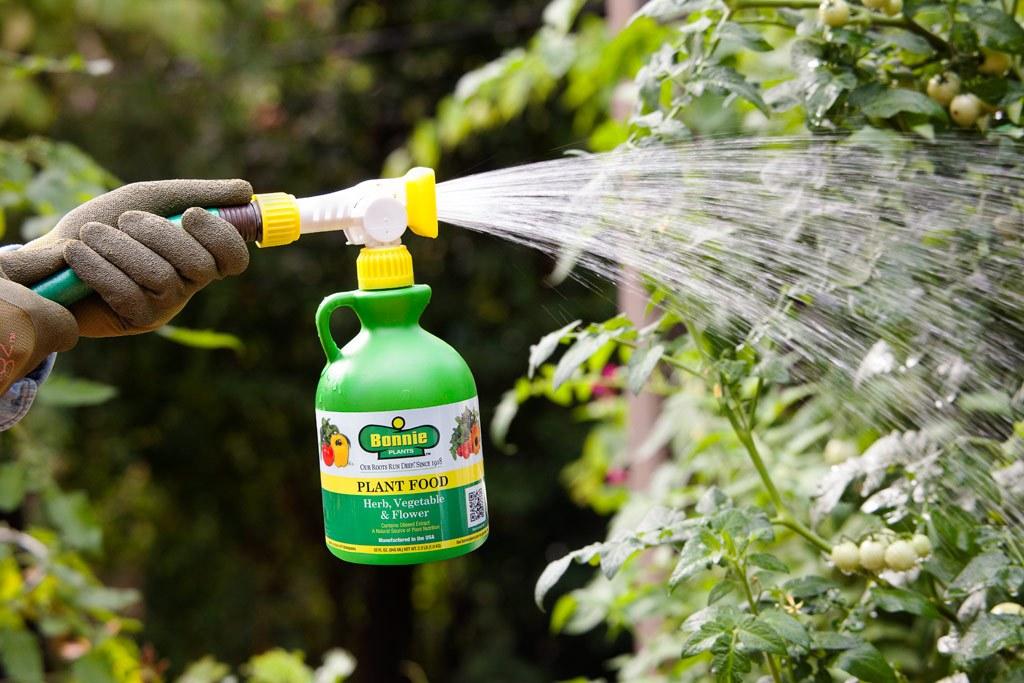
How to Choose a Fertilizer
In most cases, an all-purpose, 5-5-5 fertilizer will provide the nutrients all plants need for healthy growth. If a soil test reveals certain nutrient deficiencies, or if you want to tailor your fertilizer to the needs of particular plants (tomatoes vs. flowers), you can select a special formulation. What you choose will depend on your soil and what you are growing.
The three numbers that you see on a fertilizer label, such as 5-5-5, tell you what proportion of each macronutrient the fertilizer contains. The first number is always nitrogen (N), the second is phosphorus (P) and the third is potassium (K). This "N-P-K" ratio reflects the available nutrients —by weight—contained in that fertilizer. For example, if a 100-pound bag of fertilizer has an N-P-K ratio of 5-7-4, it contains 5 pounds of nitrate, 7 pounds of phosphate (which contains phosphorus), 4 pounds of potash (which contains potassium) and 84 pounds of filler.
Note that the N-P-K ratio of organic fertilizers is typically lower than that of a synthetic fertilizer. This is because by law, the ratio can only express nutrients that are immediately available. Most organic fertilizers contain slow-release nutrients that will become available over time. They also contain many trace elements that might not be supplied by synthetic fertilizers.
Fertilizers offered by Gardener's Supply are either all-organic, or contain primarily organic materials. To build the long-term health and fertility of your soil, we recommend using granular organic fertilizers. Supplementing with a water-soluble fertilizer ensures that your plants have the nutrients they need when they're in active growth
Well-fed plants are healthier, more productive and more beautiful. This article covers the basics of why and how to fertilize your garden.

Plant Nutrients 101
Plants need to be fertilized because most soil does not provide the essential nutrients required for optimum growth. Even if you are lucky enough to start with great garden soil, as your plants grow, they absorb nutrients and leave the soil less fertile. Remember those tasty tomatoes and beautiful roses you grew last year? It took nutrients from the soil to build those plant tissues. By fertilizing your garden, you replenish lost nutrients and ensure that this year's plants have the food they need to flourish.
There are six primary nutrients that plants require. Plants get the first three—carbon, hydrogen and oxygen—from air and water. The other three are nitrogen, phosphorus and potassium.
Nitrogen helps plants make the proteins they need to produce new tissues. In nature, nitrogen is often in short supply so plants have evolved to take up as much nitrogen as possible, even if it means not taking up other necessary elements. If too much nitrogen is available, the plant may grow abundant foliage but not produce fruit or flowers. Growth may actually be stunted because the plant isn't absorbing enough of the other elements it needs.
Phosphorus stimulates root growth, helps the plant set buds and flowers, improves vitality and increases seed size. It does this by helping transfer energy from one part of the plant to another. To absorb phosphorus, most plants require a soil pH of 6.5 to 6.8. Organic matter and the activity of soil organisms also increase the availability of phosphorus.
Potassium improves overall vigor of the plant. It helps the plants make carbohydrates and provides disease resistance. It also helps regulate metabolic activities.

There are three additional nutrients that plants need, but in much smaller amounts:
Calcium is used by plants in cell membranes, at their growing points and to neutralize toxic materials. In addition, calcium improves soil structure and helps bind organic and inorganic particles together.
Magnesium is the only metallic component of chlorophyll. Without it, plants can't process sunlight.
Sulfur is a component of many proteins.
Finally, there are eight elements that plants need in tiny amounts. These are called micronutrients and include boron, copper and iron. Healthy soil that is high in organic matter usually contains adequate amounts of each of these micronutrients.

Organic vs. Synthetic
Do plants really care where they get their nutrients? Yes, because organic and synthetic fertilizers provide nutrients in different ways. Organic fertilizers are made from naturally occurring mineral deposits and organic material, such as bone or plant meal or composted manure. Synthetic fertilizers are made by chemically processing raw materials.
In general, the nutrients in organic fertilizers are not water-soluble and are released to the plants slowly over a period of months or even years. For this reason, organic fertilizers are best applied in the fall so the nutrients will be available in the spring. These organic fertilizers stimulate beneficial soil microorganisms and improve the structure of the soil. Soil microbes play an important role in converting organic fertilizers into soluble nutrients that can be absorbed by your plants. In most cases, organic fertilizers and compost will provide all the secondary and micronutrients your plants need.
Synthetic fertilizers are water-soluble and can be taken up by the plant almost immediately. In fact applying too much synthetic fertilizer can "burn" foliage and damage your plants. Synthetic fertilizers give plants a quick boost but do little to improve soil texture, stimulate soil life, or improve your soil's long-term fertility. Because synthetic fertilizers are highly water-soluble, they can also leach out into streams and ponds. Synthetic fertilizers do have some advantages in early spring. Because they are water-soluble, they are available to plants even when the soil is still cold and soil microbes are inactive. For this reason, some organically-based fertilizers, such as PHC All-Purpose Fertilizer, also contain small amounts of synthetic fertilizers to ensure the availability of nutrients.
For the long-term health of your garden, feeding your plants by building the soil with organic fertilizers and compost is best. This will give you soil that is rich in organic matter and teeming with microbial life.

Foliar Feeding?
Plants can absorb nutrients eight to 20 times more efficiently through their leaf surfaces than through their roots. As a result, spraying foliage with liquid nutrients can produce remarkable yields. For best results, spray plants during their critical growth stages such as transplanting time, blooming time and just after fruit sets.

What About pH?
Even if proper nutrients are present in the soil, some nutrients cannot be absorbed by plants if the soil pH is too high or too low. For most plants, soil pH should be between 6.0 and 7.0. A soil test will measure the pH of your soil. You can send a sample to a lab (contact your local extension service for a low-cost kit) or buy a home kit and do it yourself. Lime or wood ash can be used to raise pH; sulfur or aluminum sulfate can lower pH. Keep in mind that it's best to raise or lower soil pH slowly over the course of a year or two. Dramatic adjustments can result in the opposite extreme, which may be worse than what you started with. Once again, a helpful solution is to apply compost. Compost moderates soil pH and is one of the best ways to maintain the 6.5 ideal.

How to Choose a Fertilizer
In most cases, an all-purpose, 5-5-5 fertilizer will provide the nutrients all plants need for healthy growth. If a soil test reveals certain nutrient deficiencies, or if you want to tailor your fertilizer to the needs of particular plants (tomatoes vs. flowers), you can select a special formulation. What you choose will depend on your soil and what you are growing.
The three numbers that you see on a fertilizer label, such as 5-5-5, tell you what proportion of each macronutrient the fertilizer contains. The first number is always nitrogen (N), the second is phosphorus (P) and the third is potassium (K). This "N-P-K" ratio reflects the available nutrients —by weight—contained in that fertilizer. For example, if a 100-pound bag of fertilizer has an N-P-K ratio of 5-7-4, it contains 5 pounds of nitrate, 7 pounds of phosphate (which contains phosphorus), 4 pounds of potash (which contains potassium) and 84 pounds of filler.
Note that the N-P-K ratio of organic fertilizers is typically lower than that of a synthetic fertilizer. This is because by law, the ratio can only express nutrients that are immediately available. Most organic fertilizers contain slow-release nutrients that will become available over time. They also contain many trace elements that might not be supplied by synthetic fertilizers.
Fertilizers offered by Gardener's Supply are either all-organic, or contain primarily organic materials. To build the long-term health and fertility of your soil, we recommend using granular organic fertilizers. Supplementing with a water-soluble fertilizer ensures that your plants have the nutrients they need when they're in active growth
0
0
文章
Dummer. ゛☀
2017年08月26日

What are tea plants? The tea we drink comes from various cultivars of Camellia sinensis, a small tree or large shrub commonly known as the tea plant. Familiar teas such as white, black, green and oolong all come from tea plants, although the method of processing varies considerably. Read on to learn about growing tea plants at home.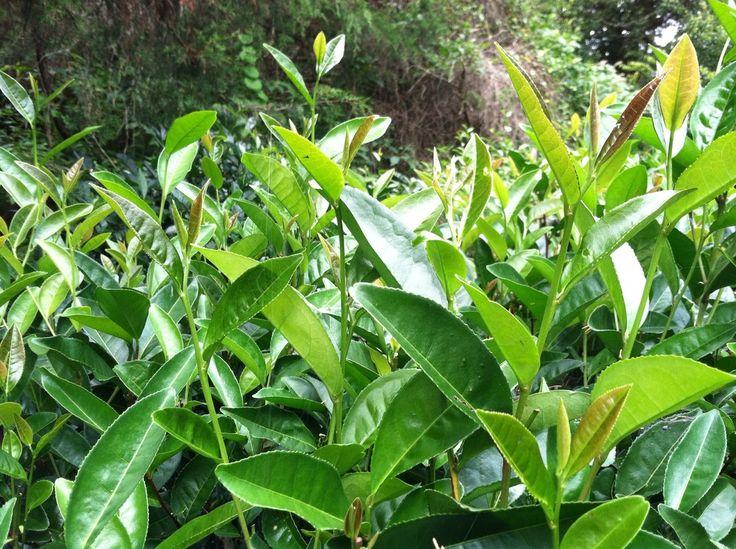
Tea Plants in the Garden
The most familiar and widely grown tea plants include two common varieties: Camellia sinensis var. sinensis, used primarily for white and green tea, and Camellia sinensis var. assamica, used for black tea.
The first is native to China, where it grows at very high elevations. This variety is suitable for moderate climates, generally USDA plant hardiness zones 7 through 9. The second variety, however, is native to India. It isn’t frost tolerant and grows in tropical climates of zone 10b and above. There are countless cultivars derived from the two main varieties. Some are hardy plants that grow in climates as far north as zone 6b. In colder climates, tea plants do well in containers. Bring the plants indoors before temperatures drop in autumn.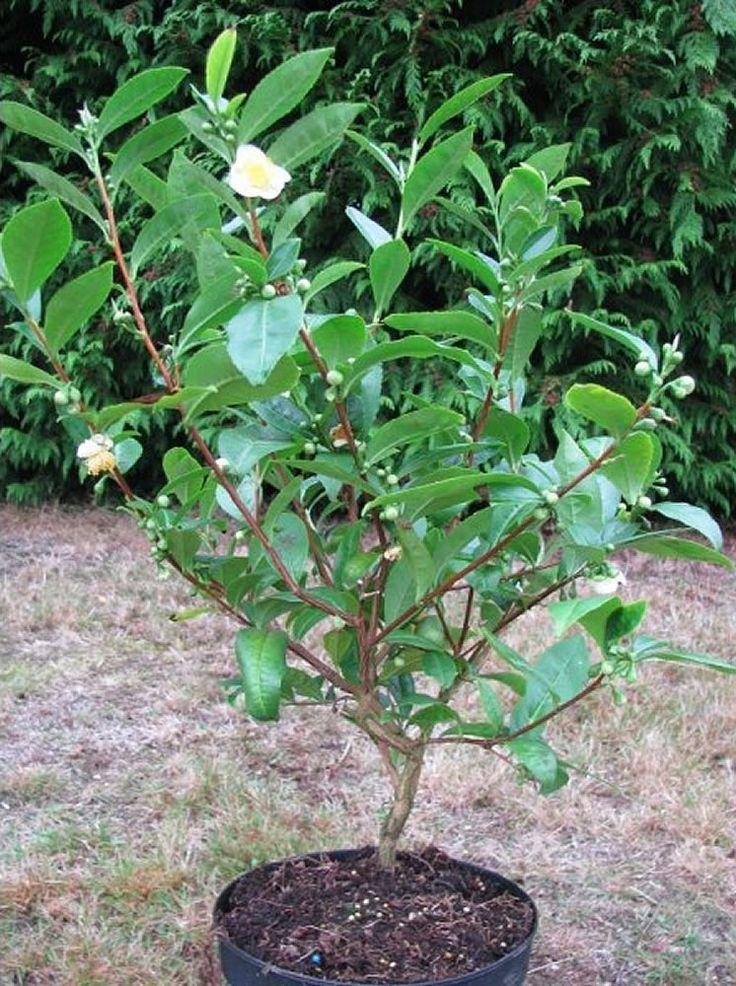
Growing Tea Plants at Home
Tea plants in the garden require well drained, slightly acidic soil. An acidic mulch, such as pine needles, will help retain the proper soil pH. Full or dappled sunlight is ideal, as are temperatures between 55 and 90 F. (13-32 C). Avoid full shade, as tea plants in sun are more robust. Otherwise, tea plant care isn’t complicated. Water plants frequently during the first two years – generally two or three times per week during the summer, using rainwater whenever possible. Allow the soil to dry slightly between waterings. Saturate the rootball but don’t overwater, as tea plants don’t appreciate wet feet. Once the plants are well established, continue to water as needed during hot, dry weather. Spray or mist the leaves lightly during dry periods, as tea plants are tropical plants that thrive in humidity.
Pay close attention to tea plants grown in containers, and never allow the soil to become completely dry. Fertilize in spring and early summer, using a product formulated for camellia, azaleaand other acid-loving plants. Always water well before feeding tea plants in the garden, and immediately rinse any fertilizer that lands on the leaves. You can also use a water-soluble fertilizer.

Tea Plants in the Garden
The most familiar and widely grown tea plants include two common varieties: Camellia sinensis var. sinensis, used primarily for white and green tea, and Camellia sinensis var. assamica, used for black tea.
The first is native to China, where it grows at very high elevations. This variety is suitable for moderate climates, generally USDA plant hardiness zones 7 through 9. The second variety, however, is native to India. It isn’t frost tolerant and grows in tropical climates of zone 10b and above. There are countless cultivars derived from the two main varieties. Some are hardy plants that grow in climates as far north as zone 6b. In colder climates, tea plants do well in containers. Bring the plants indoors before temperatures drop in autumn.

Growing Tea Plants at Home
Tea plants in the garden require well drained, slightly acidic soil. An acidic mulch, such as pine needles, will help retain the proper soil pH. Full or dappled sunlight is ideal, as are temperatures between 55 and 90 F. (13-32 C). Avoid full shade, as tea plants in sun are more robust. Otherwise, tea plant care isn’t complicated. Water plants frequently during the first two years – generally two or three times per week during the summer, using rainwater whenever possible. Allow the soil to dry slightly between waterings. Saturate the rootball but don’t overwater, as tea plants don’t appreciate wet feet. Once the plants are well established, continue to water as needed during hot, dry weather. Spray or mist the leaves lightly during dry periods, as tea plants are tropical plants that thrive in humidity.

Pay close attention to tea plants grown in containers, and never allow the soil to become completely dry. Fertilize in spring and early summer, using a product formulated for camellia, azaleaand other acid-loving plants. Always water well before feeding tea plants in the garden, and immediately rinse any fertilizer that lands on the leaves. You can also use a water-soluble fertilizer.
2
1
文章
Dummer. ゛☀
2017年08月24日

With dozens of uses in the kitchen, oregano is an essential plant for culinary herb gardens. This Mediterranean herb is easy to grow in the right location. Plant it in full sun in an area with good air circulation and well-drained soil to keep oregano problems to a minimum.
Oregano Disease Problems
Diseases affecting oregano plants are primarily caused by fungi. Fungi thrive in moist conditions where the air doesn’t circulate well enough to keep the foliage dry. Pruning plants will open them up for better air circulation, and spacing them according to the plant tag solves some oregano problems. If your soil doesn’t drain well, grow oregano in a raised bed or in containers.
The fungi that cause oregano disease problems often result in rotting leaves or roots. If older leaves in the center of the plant begin to rot, the plant is probably infected with botrytis rot. There is no cure for this; therefore, you should remove and destroy the plant to prevent spreading of the disease. Gradual wilting may be a sign of rhizoctonia root rot. Examine the base of the stems and the roots for brownish or black discoloration. If you see these symptoms, destroy the plant and don’t grow oregano in the same location for at least three years. Rust is another fungal disease that sometimes causes oregano problems. Rust causes circular spots on the foliage, and if caught early enough, you may be able to save the plant by pruning off the affected parts. Destroy diseased plants by burning them or bagging and discarding them. Never compost plants with fungal diseases.
Oregano Pests
While oregano pests are few, they should still be mentioned as inclusion for common oregano problems. Aphids and spider mites sometimes infest oregano plants. You can control mild infestations with a strong spray of water from a hose every other day until the insects are gone. Once knocked off the plant, these insects are unable to return. For stubborn infestations, use insecticidal soap or neem oil spray. These insecticides must come into direct contact to kill the insect, so spray the plant thoroughly, paying particular attention to the undersides of leaves.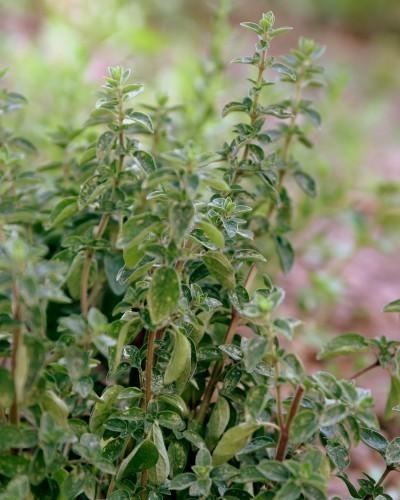
Leaf miners are the larvae of black flies. These tiny, wormlike larvae feed inside oregano leaves, leaving meandering tan or brown trails. Insecticides can’t reach leaf miner larvae inside the leaves, so the only treatment is to pick off and destroy affected leaves before the larvae mature. Don’t let the few diseases affecting oregano plants or oregano pests put you off in growing this herb. With proper care, these oregano problems can be prevented and you’ll be rewarded with a flavorful harvest.

Oregano Disease Problems
Diseases affecting oregano plants are primarily caused by fungi. Fungi thrive in moist conditions where the air doesn’t circulate well enough to keep the foliage dry. Pruning plants will open them up for better air circulation, and spacing them according to the plant tag solves some oregano problems. If your soil doesn’t drain well, grow oregano in a raised bed or in containers.
The fungi that cause oregano disease problems often result in rotting leaves or roots. If older leaves in the center of the plant begin to rot, the plant is probably infected with botrytis rot. There is no cure for this; therefore, you should remove and destroy the plant to prevent spreading of the disease. Gradual wilting may be a sign of rhizoctonia root rot. Examine the base of the stems and the roots for brownish or black discoloration. If you see these symptoms, destroy the plant and don’t grow oregano in the same location for at least three years. Rust is another fungal disease that sometimes causes oregano problems. Rust causes circular spots on the foliage, and if caught early enough, you may be able to save the plant by pruning off the affected parts. Destroy diseased plants by burning them or bagging and discarding them. Never compost plants with fungal diseases.

Oregano Pests
While oregano pests are few, they should still be mentioned as inclusion for common oregano problems. Aphids and spider mites sometimes infest oregano plants. You can control mild infestations with a strong spray of water from a hose every other day until the insects are gone. Once knocked off the plant, these insects are unable to return. For stubborn infestations, use insecticidal soap or neem oil spray. These insecticides must come into direct contact to kill the insect, so spray the plant thoroughly, paying particular attention to the undersides of leaves.

Leaf miners are the larvae of black flies. These tiny, wormlike larvae feed inside oregano leaves, leaving meandering tan or brown trails. Insecticides can’t reach leaf miner larvae inside the leaves, so the only treatment is to pick off and destroy affected leaves before the larvae mature. Don’t let the few diseases affecting oregano plants or oregano pests put you off in growing this herb. With proper care, these oregano problems can be prevented and you’ll be rewarded with a flavorful harvest.
0
0
文章
Dummer. ゛☀
2017年08月24日

If you are lucky enough to live in a neighborhood populated by Caribbean or South American grocers, have lived or visited those areas, or are yourself from the tropics or South America, then you may be familiar with malanga root uses. Everyone else is probably saying “what is a malanga root?” Read on to find out more malanga plant info and about growing malanga roots in the garden.
Malanga Plant Info
Malanga is very similar to taro and eddo, and can be easily confused with them. In fact, in some areas, malanga root is called eddo, as well as yautia, cocoyam, coco, tannia, sato-imo and Japanese potato. The plant is grown for its tubers, or belembe or calalous, which are used in a variety of dishes.
What is a Malanga Root?
In North America, malanga is more commonly referred to as “elephant ear” and is generally grown as an ornamental. At the base of the plant is the corm or tuber around which radiate smaller corms. The plant’s foliage can grow up to five feet long with huge leaves that look much akin to elephant ears. The young leaves are edible and used like spinach. The corm or tuber is earthy brown, looks kind of like big yam and can range from anywhere between ½ to 2 pounds in size. The exterior hides the crisp interior yellow to reddish flesh.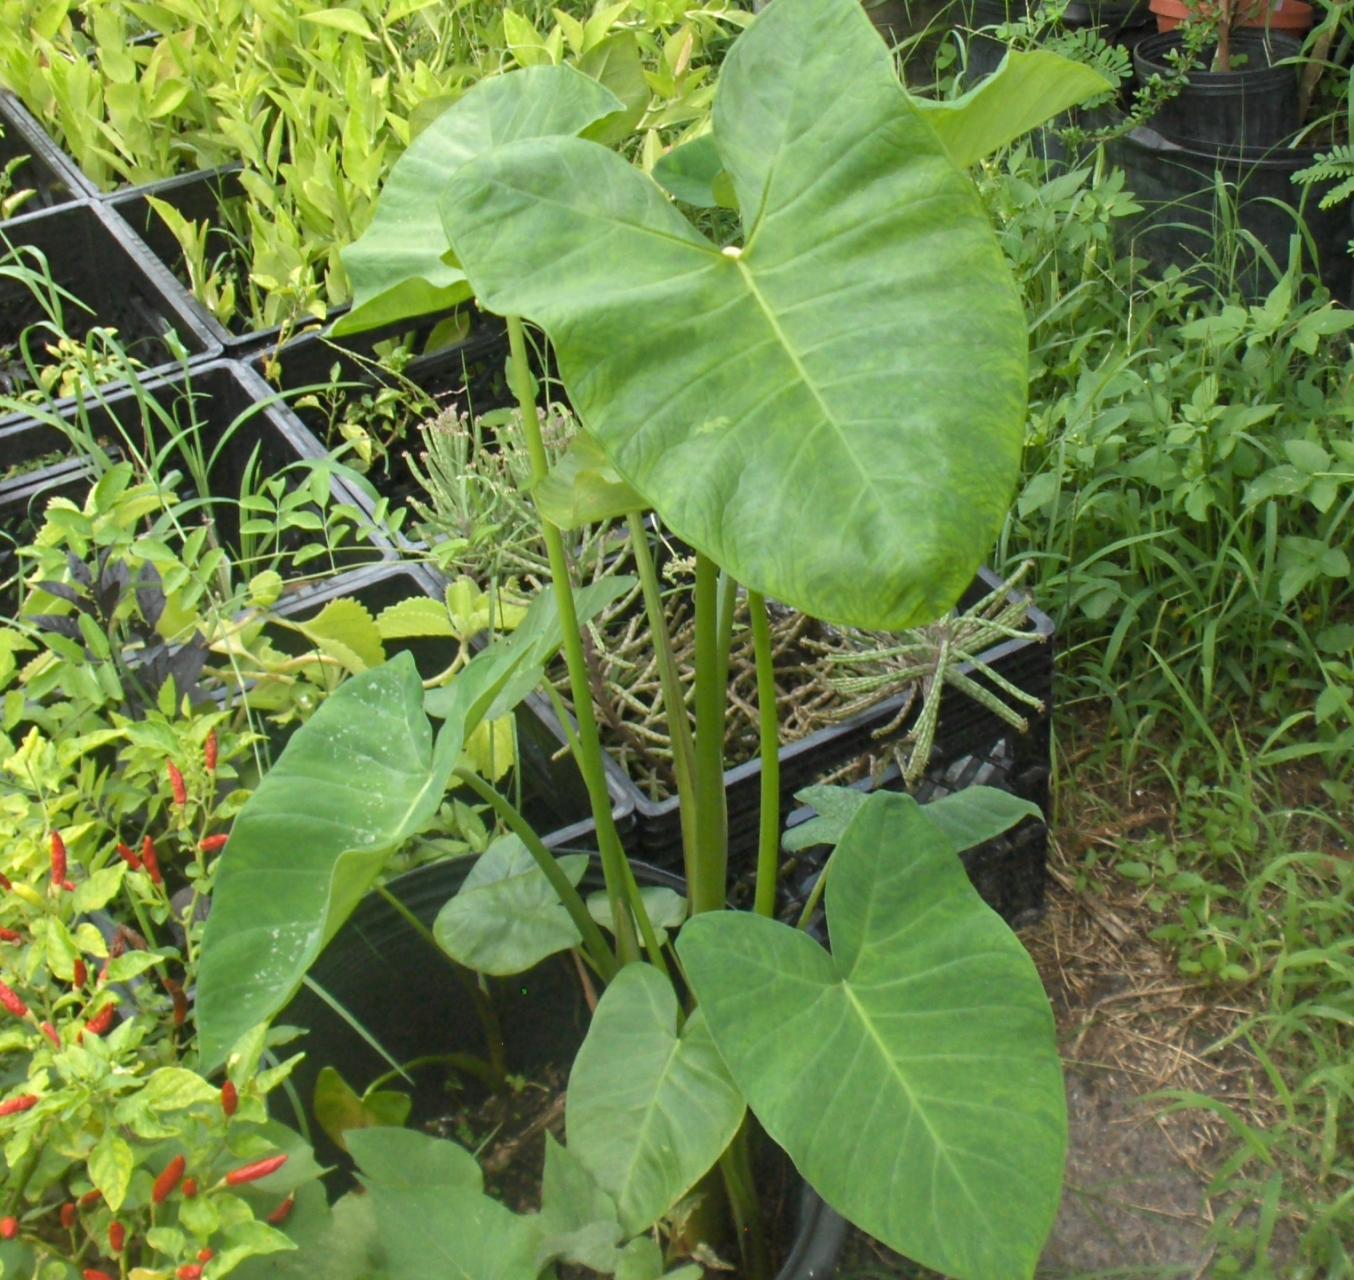
Malanga Root Uses
In South America and other tropical regions, malanga tubers are commonly cultivated for use in the cuisines of those regions. The flavor is like a starchy nut. The tuber is high in calories and fiber along with riboflavin and folate. It also contains a modicum of iron and vitamin C. It is often ground into flour but is also stewed, grilled, and sliced and then fried. For people with food allergies, malanga flour is an excellent substitute for wheat flour. This is because the starch grains contained in malanga are smaller, thus more easily digestible which reduces the risk of allergic reaction. As mentioned, the young leaves are also edible and are often used in stews and other dishes. In Cuba and Puerto Rico, malanga features prominently in such dishes as alcapurrias, mondongo, pastels and sancocho; while in the Caribbean, the young leaves are integral to the famous callaloo. Basically, malanga root can be used anywhere you would use a potato, yam or other root veggie. As with most other species of Araceae, malanga root contains calcium oxalate and saponin, whose bitter taste and toxic effects are cancelled out during cooking. When the root is cooked, it softens and is ideal for use as a thickener and to make creamy dishes. The root is also often cooked down and mashed as potatoes for a creamy side dish. Malanga can be peeled, grated and then mixed with flour, egg, and herbs to make fritters. Fresh malanga root can be kept at room temperature for a few weeks and even longer if kept in the refrigerator.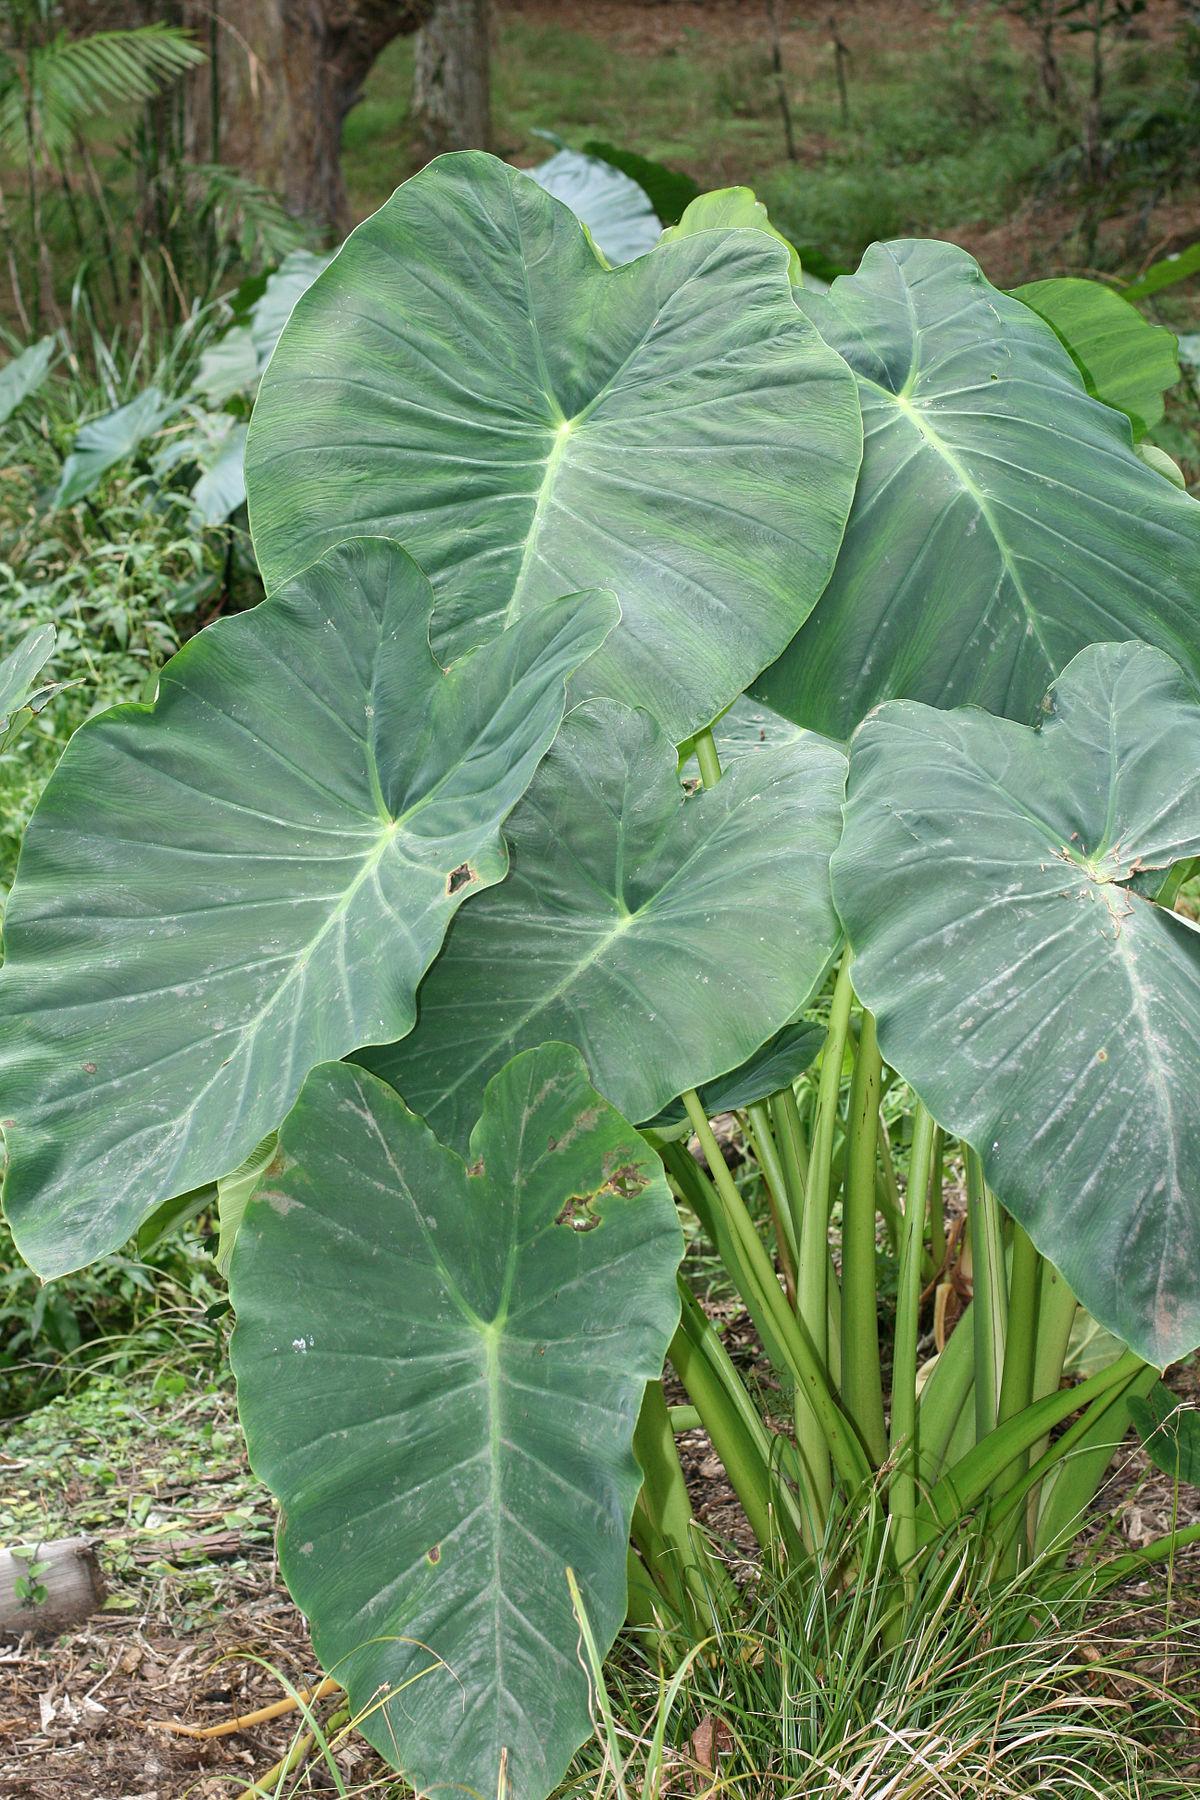
Growing Malanga Roots
There are two different malangas. Malanga blanca (Xantyosoma sagittifikium), which is grown on dry land, and malanga Amarillo (Colocasia esculenta), which is grown in boggy areas. Malanga plants need full sun, temperatures above 68 degrees F. (20 C.) and damp, but well-draining soil with a pH of between 5.5 and 7.8. Propagate by planting the entire main tuber or secondary tubers of just a piece of the main tuber. If you are using seed pieces, cure them first by dipping them into a fungicide and then allow to air dry for 2 hours. Plant 3-4 inches deep in rows spaced 72 inches apart. Use an organic mulch to retain moisture and apply a 10-20-20 fertilizer, three times. Feed the plant first at 2 months and thereafter at 5 and 7 months.

Malanga Plant Info
Malanga is very similar to taro and eddo, and can be easily confused with them. In fact, in some areas, malanga root is called eddo, as well as yautia, cocoyam, coco, tannia, sato-imo and Japanese potato. The plant is grown for its tubers, or belembe or calalous, which are used in a variety of dishes.
What is a Malanga Root?
In North America, malanga is more commonly referred to as “elephant ear” and is generally grown as an ornamental. At the base of the plant is the corm or tuber around which radiate smaller corms. The plant’s foliage can grow up to five feet long with huge leaves that look much akin to elephant ears. The young leaves are edible and used like spinach. The corm or tuber is earthy brown, looks kind of like big yam and can range from anywhere between ½ to 2 pounds in size. The exterior hides the crisp interior yellow to reddish flesh.

Malanga Root Uses
In South America and other tropical regions, malanga tubers are commonly cultivated for use in the cuisines of those regions. The flavor is like a starchy nut. The tuber is high in calories and fiber along with riboflavin and folate. It also contains a modicum of iron and vitamin C. It is often ground into flour but is also stewed, grilled, and sliced and then fried. For people with food allergies, malanga flour is an excellent substitute for wheat flour. This is because the starch grains contained in malanga are smaller, thus more easily digestible which reduces the risk of allergic reaction. As mentioned, the young leaves are also edible and are often used in stews and other dishes. In Cuba and Puerto Rico, malanga features prominently in such dishes as alcapurrias, mondongo, pastels and sancocho; while in the Caribbean, the young leaves are integral to the famous callaloo. Basically, malanga root can be used anywhere you would use a potato, yam or other root veggie. As with most other species of Araceae, malanga root contains calcium oxalate and saponin, whose bitter taste and toxic effects are cancelled out during cooking. When the root is cooked, it softens and is ideal for use as a thickener and to make creamy dishes. The root is also often cooked down and mashed as potatoes for a creamy side dish. Malanga can be peeled, grated and then mixed with flour, egg, and herbs to make fritters. Fresh malanga root can be kept at room temperature for a few weeks and even longer if kept in the refrigerator.

Growing Malanga Roots
There are two different malangas. Malanga blanca (Xantyosoma sagittifikium), which is grown on dry land, and malanga Amarillo (Colocasia esculenta), which is grown in boggy areas. Malanga plants need full sun, temperatures above 68 degrees F. (20 C.) and damp, but well-draining soil with a pH of between 5.5 and 7.8. Propagate by planting the entire main tuber or secondary tubers of just a piece of the main tuber. If you are using seed pieces, cure them first by dipping them into a fungicide and then allow to air dry for 2 hours. Plant 3-4 inches deep in rows spaced 72 inches apart. Use an organic mulch to retain moisture and apply a 10-20-20 fertilizer, three times. Feed the plant first at 2 months and thereafter at 5 and 7 months.
0
0
文章
Miss Chen
2017年08月14日

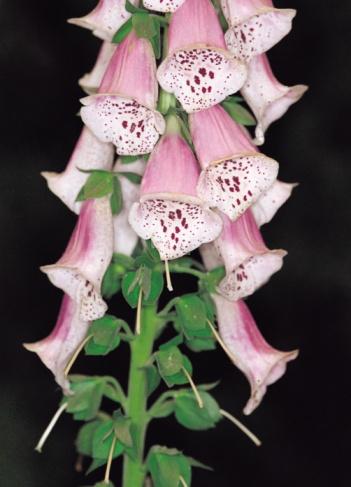
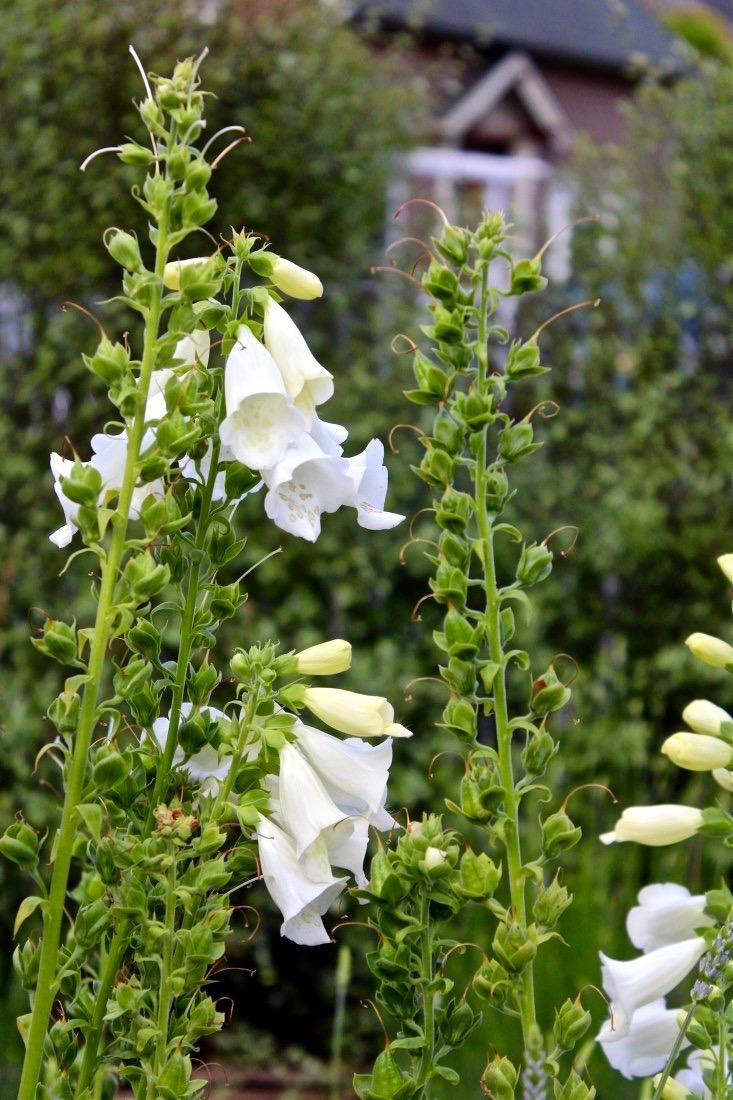
Deadheading or pinching back spent blossoms is a simple and effective pruning technique. By deadheading, you encourage both perennial and annual flowers to put forth continued blossoms throughout the growing season, as they are not expending energy on producing seed. Foxglove plants, growing energetically to fill in shady garden areas, blooms with tall spires of pink and yellow flowers in the first part of the summer. Foxglove may respond to deadheading by blooming again later in the season.
Step 1
Watch the foxglove blossoms as they begin to die back in early to mid summer.
Step 2
Clip off the spent blossoms with the pruning shears or pinch them off with your thumb and forefinger. Remove the blossoms at the point of the first set of leaves on the stems.
Step 3
Discard the blossoms into the bucket as you remove them. Throw away the blossoms in the bucket in a compost pile or in the trash. Never leave clipped blossoms on the soil beneath plants because this can lead to fungal infections.
Step 4
Watch for a second bloom. Because you clipped the blossoms off at the leaf intersection, new stem growth may occur with new blossoms.
Step 5
Allow the second bloom to wither and go to seed on the plants, if you wish to propagate volunteer plants for the next growing season.

Step 1
Watch the foxglove blossoms as they begin to die back in early to mid summer.
Step 2
Clip off the spent blossoms with the pruning shears or pinch them off with your thumb and forefinger. Remove the blossoms at the point of the first set of leaves on the stems.
Step 3
Discard the blossoms into the bucket as you remove them. Throw away the blossoms in the bucket in a compost pile or in the trash. Never leave clipped blossoms on the soil beneath plants because this can lead to fungal infections.

Step 4
Watch for a second bloom. Because you clipped the blossoms off at the leaf intersection, new stem growth may occur with new blossoms.
Step 5
Allow the second bloom to wither and go to seed on the plants, if you wish to propagate volunteer plants for the next growing season.
0
1
文章
Miss Chen
2017年08月09日

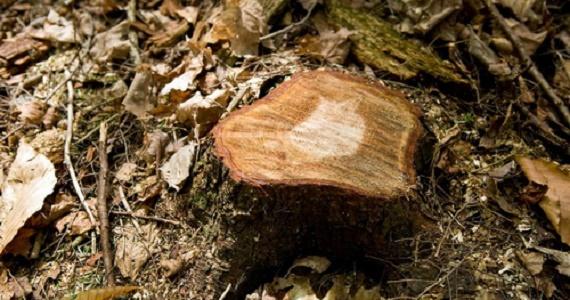
When you cut a tree down or pull a stump out of the ground, roots remaining the soil are often still alive and may produce new shoots. Certain trees including willows (Salix spp.), some maples (Acer spp.) and Populus species such as cottonwood tend to produce new sprouts very vigorously. Treating a stump with herbicide immediately following cutting the tree down can kill the tree's root system. Where the bulk of the stump and tree crown were pulled out or ground up and there is no cut surface remaining, you will have to address the remaining root system by treating new sprouts as they emerge.
Step 1
Grind out as much of the remaining stump and root system as possible. This will greatly decrease the number of sprouts that appear.
Step 2
Drill holes into the remaining stump and root system, pour a slow-release nitrogen fertilizer into the prepared holes and cover the area with mulch or soil. This will accelerate decay.
Step 3
Monitor the site for new sprouts and cut them off at or below ground level as soon as they appear. Constantly removing young sprouts or mowing them off at ground level will eventually deplete the root system's reserves.
Herbicide to Kill Roots
Step 4
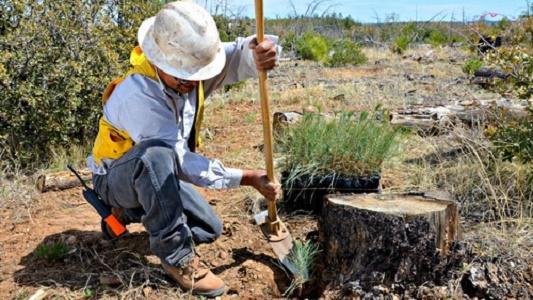
Cut any remaining stump down to as near as possible to ground level, exposing living tissue, and make the cut as level as possible so herbicide will not run off of the surface. Brush any sawdust or dirt off of the cut surface, as debris will interfere with herbicide absorption.
Step 5
Prepare a herbicide solution that contains 8 to 10 percent glyphosate or triclopyr. Look at the active ingredients list on the product's label and observe the percentage of glyphosate or triclopyr in the material. Blend this product with water so that the new solution contains 8 to 10 percent active ingredient. Specific manufacturers may offer different directions for product preparation and use with cut surface treatments. Always follow manufacturer recommendations to ensure safe and effective use.
Step 6
Brush the prepared herbicide solution onto the cut surface using a foam brush or applicator. For small stems, coat the entire surface. For larger stumps, you only have to paint the chemical onto the outer three inches of the cut surface, as this is where the living tissue is located. Alternatively, you can use a small hand or garden sprayer to apply the product, coating the cut surface thoroughly, though not to the point of runoff.
Step 7
Monitor the area regularly for any emerging suckers. Cut the suckers down at or just below the soil surface as soon as you notice them. This will gradually deplete the root system's reserves. Alternatively, wait until the leaves on the sucker have fully expanded and spray the foliage on the sprout with a solution that contains 1 to 2 percent glyphosate or triclopyr unless otherwise directed by the product manufacturer. If the sprouts are located in a lawn area or where there is desirable vegetation, use triclopyr or another herbicide that will kill broadleaf plants without injuring grasses or apply the chemical very carefully.

Step 1
Grind out as much of the remaining stump and root system as possible. This will greatly decrease the number of sprouts that appear.
Step 2
Drill holes into the remaining stump and root system, pour a slow-release nitrogen fertilizer into the prepared holes and cover the area with mulch or soil. This will accelerate decay.
Step 3
Monitor the site for new sprouts and cut them off at or below ground level as soon as they appear. Constantly removing young sprouts or mowing them off at ground level will eventually deplete the root system's reserves.

Herbicide to Kill Roots
Step 4
Cut any remaining stump down to as near as possible to ground level, exposing living tissue, and make the cut as level as possible so herbicide will not run off of the surface. Brush any sawdust or dirt off of the cut surface, as debris will interfere with herbicide absorption.
Step 5
Prepare a herbicide solution that contains 8 to 10 percent glyphosate or triclopyr. Look at the active ingredients list on the product's label and observe the percentage of glyphosate or triclopyr in the material. Blend this product with water so that the new solution contains 8 to 10 percent active ingredient. Specific manufacturers may offer different directions for product preparation and use with cut surface treatments. Always follow manufacturer recommendations to ensure safe and effective use.
Step 6
Brush the prepared herbicide solution onto the cut surface using a foam brush or applicator. For small stems, coat the entire surface. For larger stumps, you only have to paint the chemical onto the outer three inches of the cut surface, as this is where the living tissue is located. Alternatively, you can use a small hand or garden sprayer to apply the product, coating the cut surface thoroughly, though not to the point of runoff.
Step 7
Monitor the area regularly for any emerging suckers. Cut the suckers down at or just below the soil surface as soon as you notice them. This will gradually deplete the root system's reserves. Alternatively, wait until the leaves on the sucker have fully expanded and spray the foliage on the sprout with a solution that contains 1 to 2 percent glyphosate or triclopyr unless otherwise directed by the product manufacturer. If the sprouts are located in a lawn area or where there is desirable vegetation, use triclopyr or another herbicide that will kill broadleaf plants without injuring grasses or apply the chemical very carefully.
0
0
成长记
Plants Encyclopdias
2016年08月17日

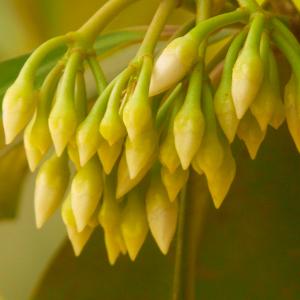
Name: China-shrub
Latin: Ardisia solanacea
Origin: Asia
Plant height: 80 - 200 cm
Reproduction: #Seeds
Difficulty level: #Pro
Tags: #Asia #Ardisiasolanacea
Latin: Ardisia solanacea
Origin: Asia
Plant height: 80 - 200 cm
Reproduction: #Seeds
Difficulty level: #Pro
Tags: #Asia #Ardisiasolanacea

3
1
成长记
Plants Encyclopdias
2016年08月17日

Name: Low shoebutton
Latin: Ardisia humilis
Origin: Asia
Plant height: 60 - 80 cm
Reproduction: #Seeds
Difficulty level: #Pro
Tags: #Asia #Ardisiahumilis
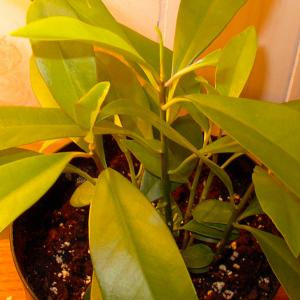
Latin: Ardisia humilis
Origin: Asia
Plant height: 60 - 80 cm
Reproduction: #Seeds
Difficulty level: #Pro
Tags: #Asia #Ardisiahumilis

1
1
成长记
Plants Encyclopdias
2016年08月17日

Name: Japanese holly
Latin: Ardisia crispa
Origin: Asia
Plant height: 60 - 80 cm
Reproduction: #Seeds
Difficulty level: #Pro
Tags: #Asia #Ardisiacrispa
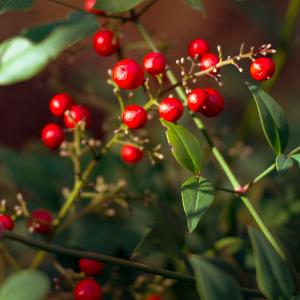
Latin: Ardisia crispa
Origin: Asia
Plant height: 60 - 80 cm
Reproduction: #Seeds
Difficulty level: #Pro
Tags: #Asia #Ardisiacrispa

3
1


