文章
Dummer. ゛☀
2017年09月20日

A small- to medium-sized slow-growing Mexican member of the succulent family Crassulaceae (making them relatives of Kalanchoe and Jade Plant). Pachyphytum leaves are plump and fleshy, and range in color from green to lovely orange and even purple. The leaves form a loose rosette. They may be grape-shaped or tubular, and may have a powdery coating called farina. Pachyphytum forms small, unimpressive bell-shaped flowers in spring and summer which are usually greenish-white and deep red, and which grow on long spikey inflorescences. Pachyphytum rosettes will not die after flowering. The genus name Pachyphytum comes from the Greek for “thick leaves”. It grows in both shrub-forming and stemless rosettes and eventually forms clumps.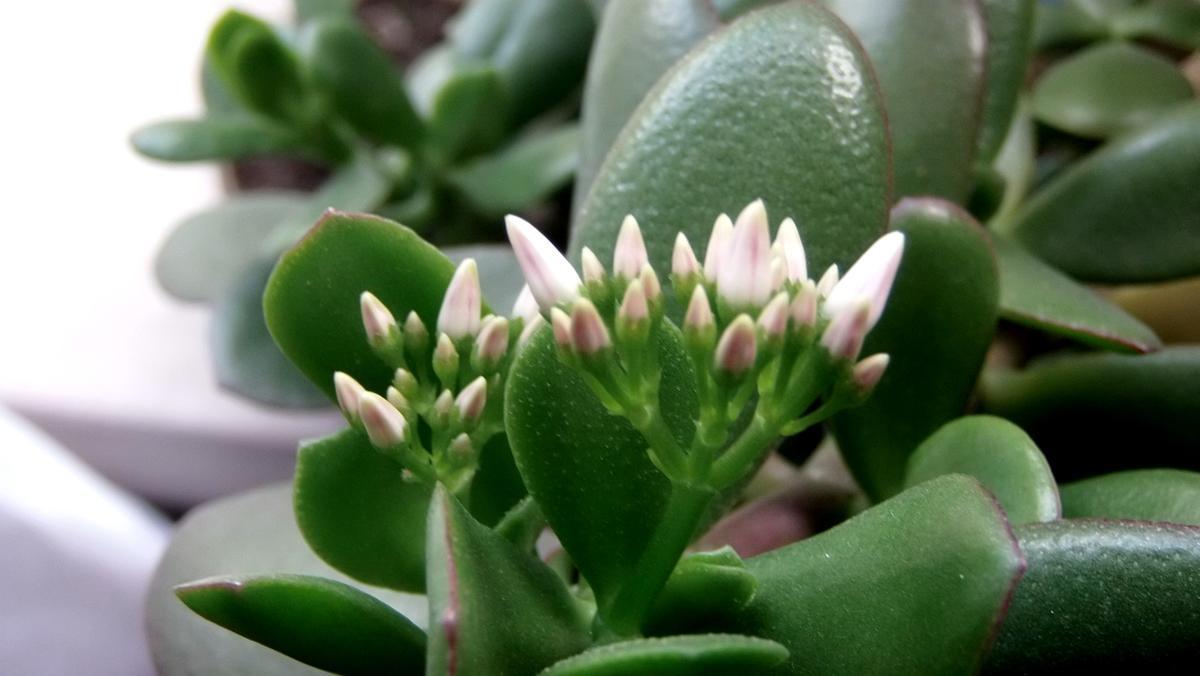
Pachyphytum plants are fairly hardy, and are common houseplants. However, like Graptopetalum, Pachyphytum is sensitive to being handled, as skin oil can damage leaves, in particular those with a pearlescent coloration or farina.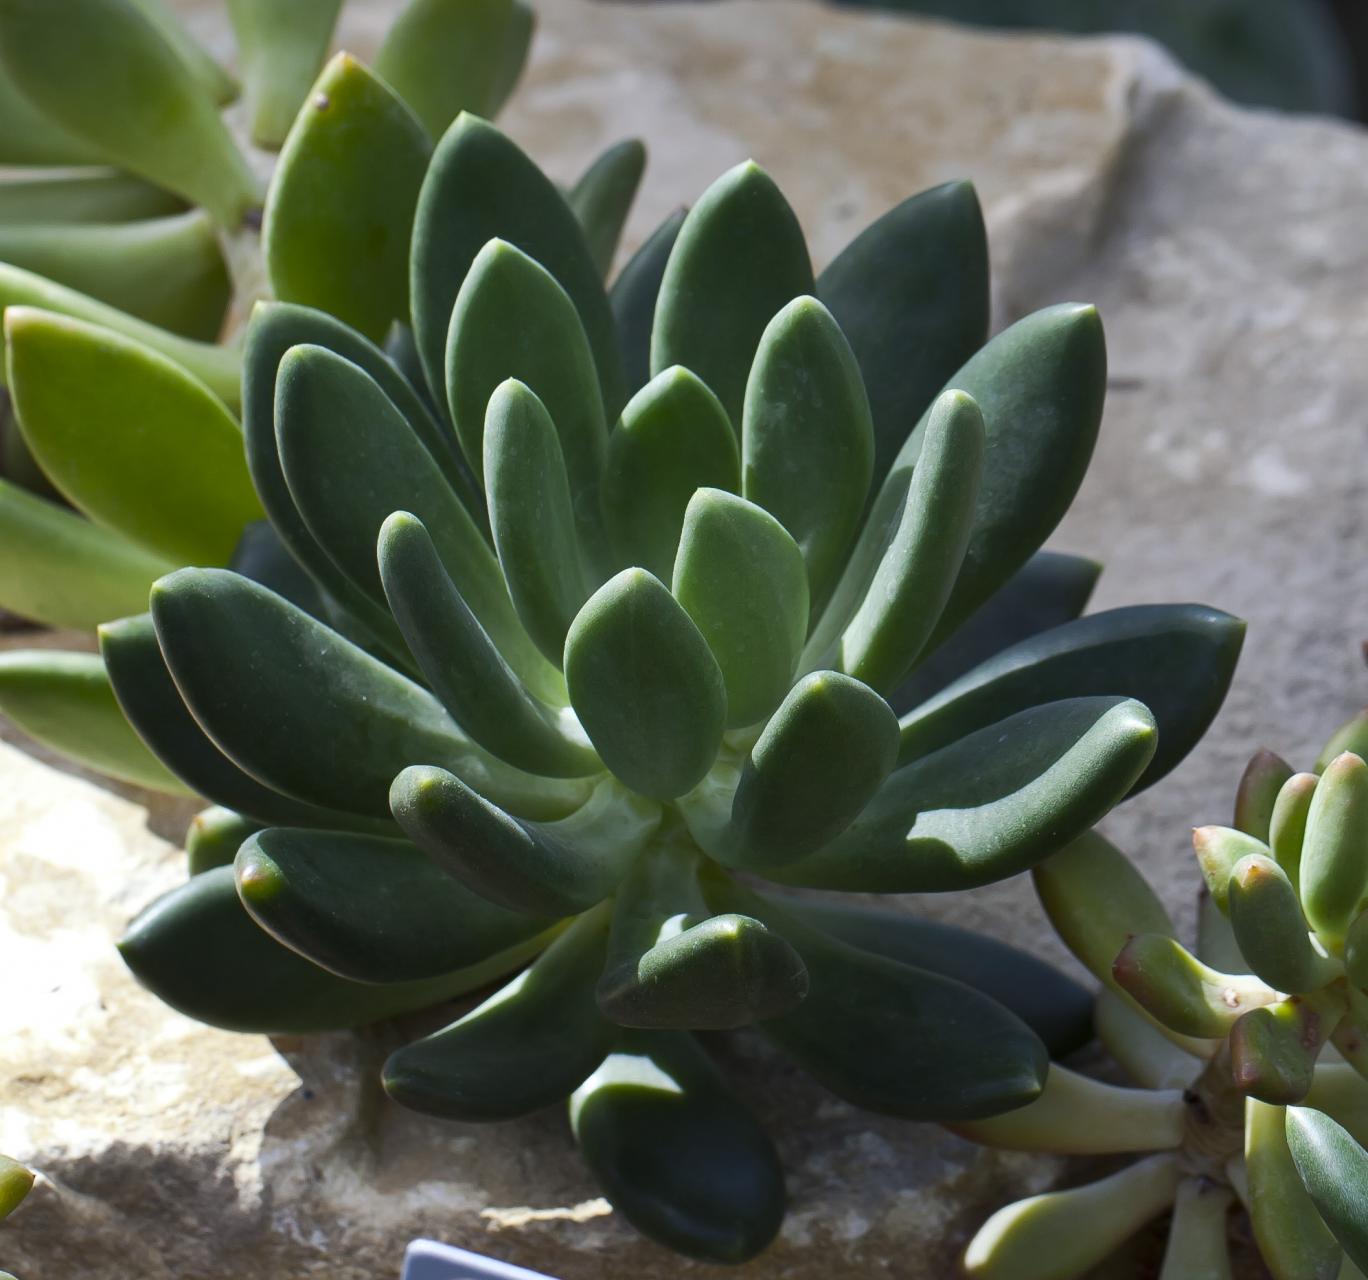
Growing Conditions
Pachyphytum will not tolerate frosts well. Temperatures below 20 °F (-6 °C) will kill the plant, and temperatures which may go below 45 °F (7 °C) during extended period should be avoided. Pachyphytum tolerates high heat and intense sunlight. As with most Crassulaceae, Pachyphytum can tolerate (and even appreciated) poor soil conditions, so long as it is well draining. Pachyphytum can thrive in full or partial sunlight.
Allow the soil to dry out before watering, and be careful to avoid getting water on the leaves. In winter, the plants will require more water, as winter begins its active growth season. If you are unsure when to water your Pachyphytum, watch the lower most leaves for signs of drying and water them then. Pachyphytum is FAR more likely to survive under-watering than over-watering. The thick fleshy leaves will appear wilted and a bit “under-full” when they need water.
Propagation
Leaf cutting entails cutting a young leaf from near the center of the rosette. Leave the leaf out in the open air for a day to allow the wound to callous over. Dip the leaf into rooting hormone and place the leaf (cut-side down) into slightly moist succulent mix potting soil (even better is very lightly moist sand). Soon, a new rosette will grow from the base of the leaf. As soon as enough roots are present to repot, remove the original leaf cutting and repot the rosette.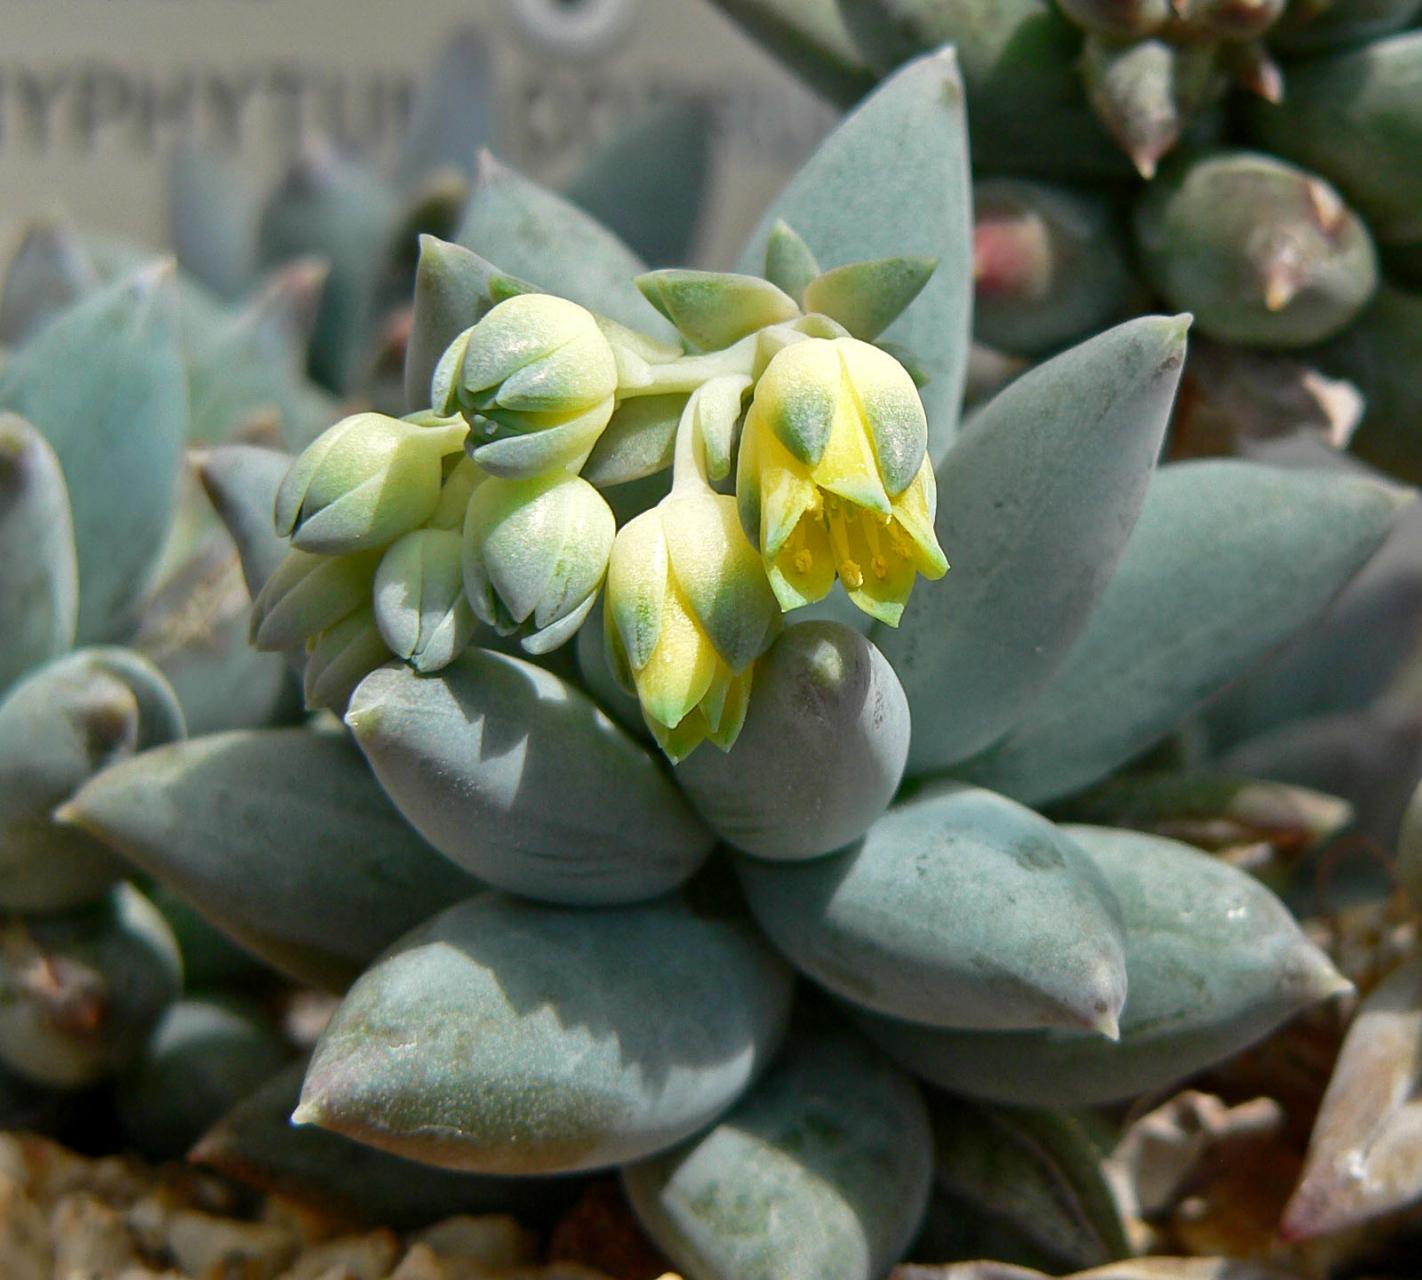
General Care
No pruning is necessary except to remove any leaves which have died. This will help to avoid rot and bugs. Avoid touching the healthy leaves of the plant, as your body oils will leave marks.
Whether grown outdoors or in, these plants are good to forget about. Too much attention by nervous gardeners will kill the plant. When grown outdoors in a wet environment, make sure that the soil is sandy and well-draining. If you aren’t careful, your plant will turn to rotten mush. When grown indoors, a standard commercial cactus and succulent soil mixture works well.
Pests and Problems
One of the most common pests to houseplants is the mealybug, and your Pachyphytum may fall prey to this pest. The symptoms of a mealybug infestation is slowed or stopped growth (though in summer this is a normal sign of dormancy). If this occurs without apparent cause, remove the plant from the pot and examine the roots or look at the leaf-stem junctions. A white cottony substance is a sure sign of mealybug infestation. Remove all soil and wash the roots gently. Dab the cottony spots with a q-tip dipped in rubbing alchohol. Remove any roots which appear damaged with a sharp sterile knife or scissors. Let them dry very throroughly before replanting.
In the event of an unhealthy plant, the first thing to examine is your watering habits. The most common problem is root rot due to overwatering. If the soil is too wet, don’t hope it will safely dry out so long as you don’t water it for a while. Replace the soil immediately, but be very careful in handling your Pachyphytum, it’s leaves are very sensitive.

Pachyphytum plants are fairly hardy, and are common houseplants. However, like Graptopetalum, Pachyphytum is sensitive to being handled, as skin oil can damage leaves, in particular those with a pearlescent coloration or farina.

Growing Conditions
Pachyphytum will not tolerate frosts well. Temperatures below 20 °F (-6 °C) will kill the plant, and temperatures which may go below 45 °F (7 °C) during extended period should be avoided. Pachyphytum tolerates high heat and intense sunlight. As with most Crassulaceae, Pachyphytum can tolerate (and even appreciated) poor soil conditions, so long as it is well draining. Pachyphytum can thrive in full or partial sunlight.
Allow the soil to dry out before watering, and be careful to avoid getting water on the leaves. In winter, the plants will require more water, as winter begins its active growth season. If you are unsure when to water your Pachyphytum, watch the lower most leaves for signs of drying and water them then. Pachyphytum is FAR more likely to survive under-watering than over-watering. The thick fleshy leaves will appear wilted and a bit “under-full” when they need water.

Propagation
Leaf cutting entails cutting a young leaf from near the center of the rosette. Leave the leaf out in the open air for a day to allow the wound to callous over. Dip the leaf into rooting hormone and place the leaf (cut-side down) into slightly moist succulent mix potting soil (even better is very lightly moist sand). Soon, a new rosette will grow from the base of the leaf. As soon as enough roots are present to repot, remove the original leaf cutting and repot the rosette.

General Care
No pruning is necessary except to remove any leaves which have died. This will help to avoid rot and bugs. Avoid touching the healthy leaves of the plant, as your body oils will leave marks.
Whether grown outdoors or in, these plants are good to forget about. Too much attention by nervous gardeners will kill the plant. When grown outdoors in a wet environment, make sure that the soil is sandy and well-draining. If you aren’t careful, your plant will turn to rotten mush. When grown indoors, a standard commercial cactus and succulent soil mixture works well.

Pests and Problems
One of the most common pests to houseplants is the mealybug, and your Pachyphytum may fall prey to this pest. The symptoms of a mealybug infestation is slowed or stopped growth (though in summer this is a normal sign of dormancy). If this occurs without apparent cause, remove the plant from the pot and examine the roots or look at the leaf-stem junctions. A white cottony substance is a sure sign of mealybug infestation. Remove all soil and wash the roots gently. Dab the cottony spots with a q-tip dipped in rubbing alchohol. Remove any roots which appear damaged with a sharp sterile knife or scissors. Let them dry very throroughly before replanting.

In the event of an unhealthy plant, the first thing to examine is your watering habits. The most common problem is root rot due to overwatering. If the soil is too wet, don’t hope it will safely dry out so long as you don’t water it for a while. Replace the soil immediately, but be very careful in handling your Pachyphytum, it’s leaves are very sensitive.
0
0
文章
Dummer. ゛☀
2017年09月20日

Turbinicarpus is a genus of very small to medium-sized cacti, which inhabit the north-eastern regions of Mexico and are extremely popular among collectors. Certainly their small size and readiness to flower attribute to their popularity. As is typical of any group of plants that receives a lot of attention from hobbyists and researchers, many names are described for plants with even the slightest difference. This can be either at the level of subspecies or species.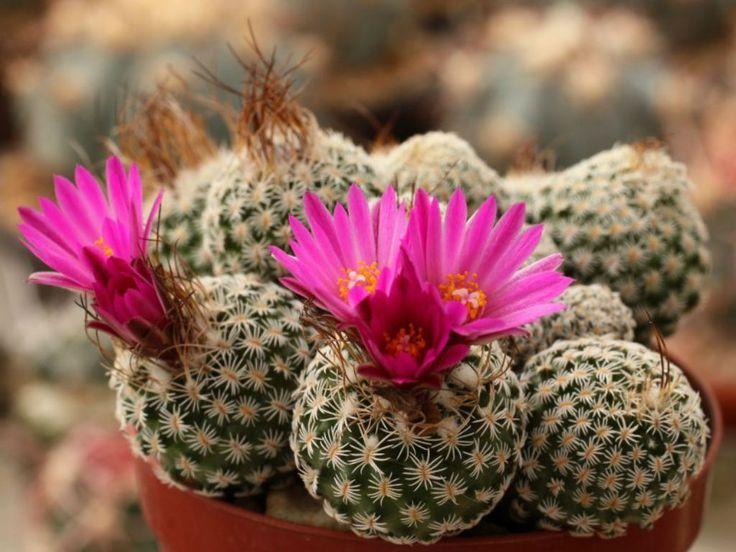
The plants in this genus have small stems, often growing hidden in the soil in habitat. In cultivation, the plants are often solitary globose stems with distinct tubercles. Spines vary considerably from species to species. Flowers arise from the stem tips and range from white to dark pink.
Growing Conditions
Light: Turbinicarpus prefer to be in a well ventilated position in full sun to maintain a good body color and spinal development.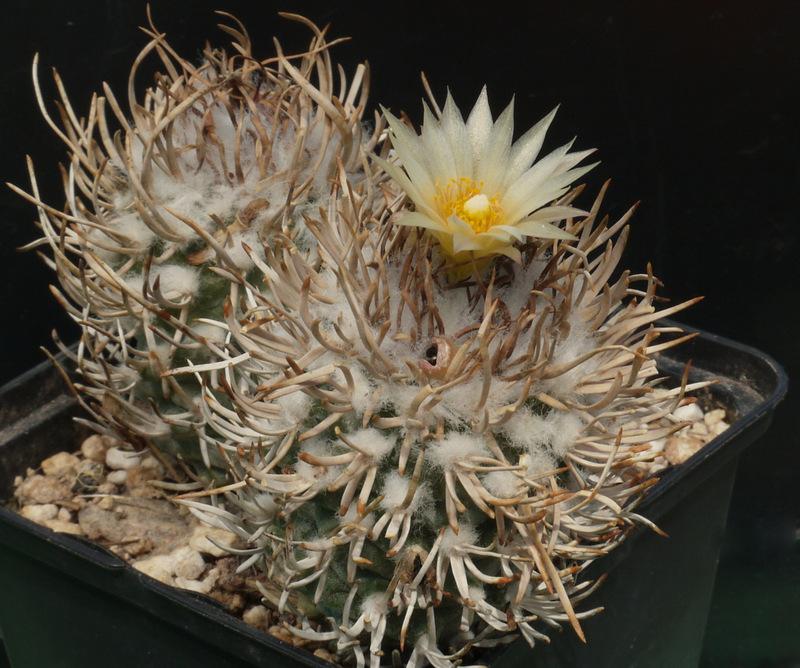
Water: The golden rule when it comes to watering Turbinicarpus species is “never water when the compost is still damp”. This is the one error that will certainly kill any plant! Watering should commence in the spring late March to early April depending upon the weather conditions at the time. The plants should initially be given a light spray to gently encourage them into growth. A number of species those with papery spines e.g. (Turbinicarpus schmiedickeanus) have the ability to absorb water through their spines. Never introduce water too quickly as the plants may take up too much and split. However, should this happen dust the wound with ‘Flowers of Sulphur’, and allow to form a callous. The plant should survive but it may take many years before the wound disappears below ground level. Once the plants have swollen after their winters rest amounts of water can be increased. Water thoroughly at each watering, this should be about every two weeks. Water sufficiently to ensure it runs from the bottom of the pot but try not to water over the plant, especially if it is a hot sunny day as this can scorch the plant. Always choose a bright sunny day to water and do so in the early morning to allow excess moisture to dry up as soon as possible. As I mentioned earlier, but well worth repeating, don’t water again until to compost has completely dried out. If you are in doubt don’t water. During a hot mid-summer period, the plants may go into dormancy for a short time, during this period reduce the water levels. Reduce watering early September and stop watering completely by the end of September – early October depending on the weather. The plants should then remain completely dry for the autumn and winter period.
Temperature: Turbinicarpus species are all able to withstand high summer temperatures and indeed benefit, providing accompanied by good ventilation. Do not be tempted to overcrowd the plants, they will be far happier with a little space to allow the air to circulate. Winter temperatures can be set as low at 44-46 °F (7-8 °C) and providing the plants are kept dry and the humidity levels are also kept low, by good ventilation on bright days. Indeed the plants need these low temperatures to ensure a sustained dormant period resulting in good growth and flowering the following growing season.
Fertilizer: Do not overfeed! Overfeeding and indeed over watering will produce bloated unnatural looking plants looking nothing like the species in habitat. Remember these are miniature plants and should therefore remain so. I endeavour to grow my plant to closely mimic their appearance in habitat and not to get the biggest plants. One liquid feed per year using a general cactus fertiliser applied during the spring is probably all that is needed.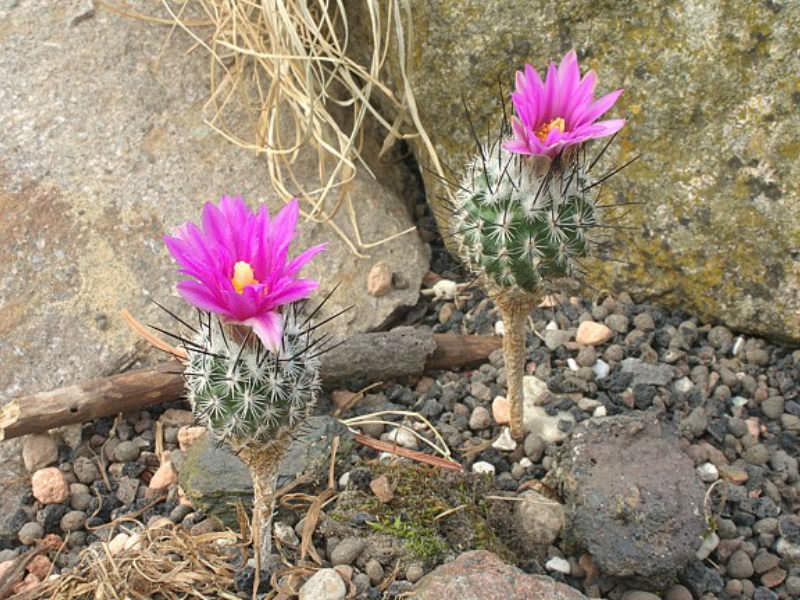
Repotting
Repotting is best carried out once every two years in early spring although this can actually be at any time of the year with caution. Either clay or plastic pots can be used remembering clay pots will dry out quicker. The majority of Turbinicarpus species will require a deep pot to accommodate the taproot once the plant has matured, up to this time shallow pots can be used. Always use a dry compost mix especially if choosing to re-pot during the dormant period. Always ensure the plant is dry in the pot before attempting to re-pot.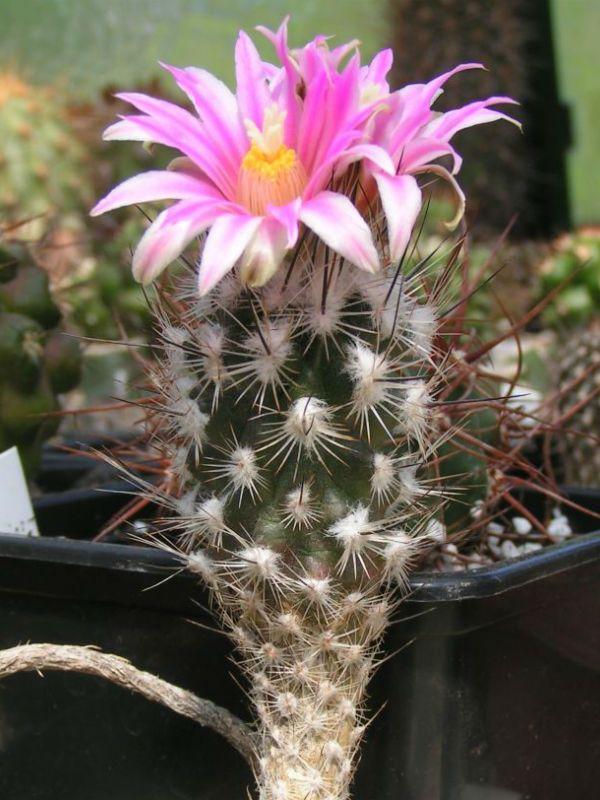
Propagation
Unfortunately as the majority of the species are solitary they do not produce offsets there cuttings are not an option. Fortunately the majority of the species are easily propagated from seed and success levels are generally quite good. Seedlings tend to grow away quite quickly and can produce flowering sized plants within just a few years.
Pests and Problems
From my experience Turbinicarpus species do not seem to be that susceptible to pests although I have experienced red spider mite and mealy bug over the years. The one disease that all Turbinicarpus species are susceptible to is rot, which can easily kill any plant within just a few days.

The plants in this genus have small stems, often growing hidden in the soil in habitat. In cultivation, the plants are often solitary globose stems with distinct tubercles. Spines vary considerably from species to species. Flowers arise from the stem tips and range from white to dark pink.
Growing Conditions
Light: Turbinicarpus prefer to be in a well ventilated position in full sun to maintain a good body color and spinal development.

Water: The golden rule when it comes to watering Turbinicarpus species is “never water when the compost is still damp”. This is the one error that will certainly kill any plant! Watering should commence in the spring late March to early April depending upon the weather conditions at the time. The plants should initially be given a light spray to gently encourage them into growth. A number of species those with papery spines e.g. (Turbinicarpus schmiedickeanus) have the ability to absorb water through their spines. Never introduce water too quickly as the plants may take up too much and split. However, should this happen dust the wound with ‘Flowers of Sulphur’, and allow to form a callous. The plant should survive but it may take many years before the wound disappears below ground level. Once the plants have swollen after their winters rest amounts of water can be increased. Water thoroughly at each watering, this should be about every two weeks. Water sufficiently to ensure it runs from the bottom of the pot but try not to water over the plant, especially if it is a hot sunny day as this can scorch the plant. Always choose a bright sunny day to water and do so in the early morning to allow excess moisture to dry up as soon as possible. As I mentioned earlier, but well worth repeating, don’t water again until to compost has completely dried out. If you are in doubt don’t water. During a hot mid-summer period, the plants may go into dormancy for a short time, during this period reduce the water levels. Reduce watering early September and stop watering completely by the end of September – early October depending on the weather. The plants should then remain completely dry for the autumn and winter period.

Temperature: Turbinicarpus species are all able to withstand high summer temperatures and indeed benefit, providing accompanied by good ventilation. Do not be tempted to overcrowd the plants, they will be far happier with a little space to allow the air to circulate. Winter temperatures can be set as low at 44-46 °F (7-8 °C) and providing the plants are kept dry and the humidity levels are also kept low, by good ventilation on bright days. Indeed the plants need these low temperatures to ensure a sustained dormant period resulting in good growth and flowering the following growing season.
Fertilizer: Do not overfeed! Overfeeding and indeed over watering will produce bloated unnatural looking plants looking nothing like the species in habitat. Remember these are miniature plants and should therefore remain so. I endeavour to grow my plant to closely mimic their appearance in habitat and not to get the biggest plants. One liquid feed per year using a general cactus fertiliser applied during the spring is probably all that is needed.

Repotting
Repotting is best carried out once every two years in early spring although this can actually be at any time of the year with caution. Either clay or plastic pots can be used remembering clay pots will dry out quicker. The majority of Turbinicarpus species will require a deep pot to accommodate the taproot once the plant has matured, up to this time shallow pots can be used. Always use a dry compost mix especially if choosing to re-pot during the dormant period. Always ensure the plant is dry in the pot before attempting to re-pot.

Propagation
Unfortunately as the majority of the species are solitary they do not produce offsets there cuttings are not an option. Fortunately the majority of the species are easily propagated from seed and success levels are generally quite good. Seedlings tend to grow away quite quickly and can produce flowering sized plants within just a few years.

Pests and Problems
From my experience Turbinicarpus species do not seem to be that susceptible to pests although I have experienced red spider mite and mealy bug over the years. The one disease that all Turbinicarpus species are susceptible to is rot, which can easily kill any plant within just a few days.
0
0
文章
Dummer. ゛☀
2017年09月19日

The Saguaro Cactus (Carnegiea gigantea) sports a medium-green, furrowed trunk with gray spikes. Saguaro Cacti grow very slowly and have a mature height of up to 50 feet (15 m). These cacti make a bold statement in the landscape with their stiff arms and coarse texture. Hardy in U.S. Department of Agriculture hardiness plant zones 9 and 10, Saguaro Cacti require full sunlight and extremely fast-draining soil. Planting a young nursery-grown specimen, 3 feet (90 cm) or less in height, is the best way to introduce one of these succulents into your yard. Raising a Saguaro Cactus is extremely easy, as they requiring only infrequent supplemental watering after planting.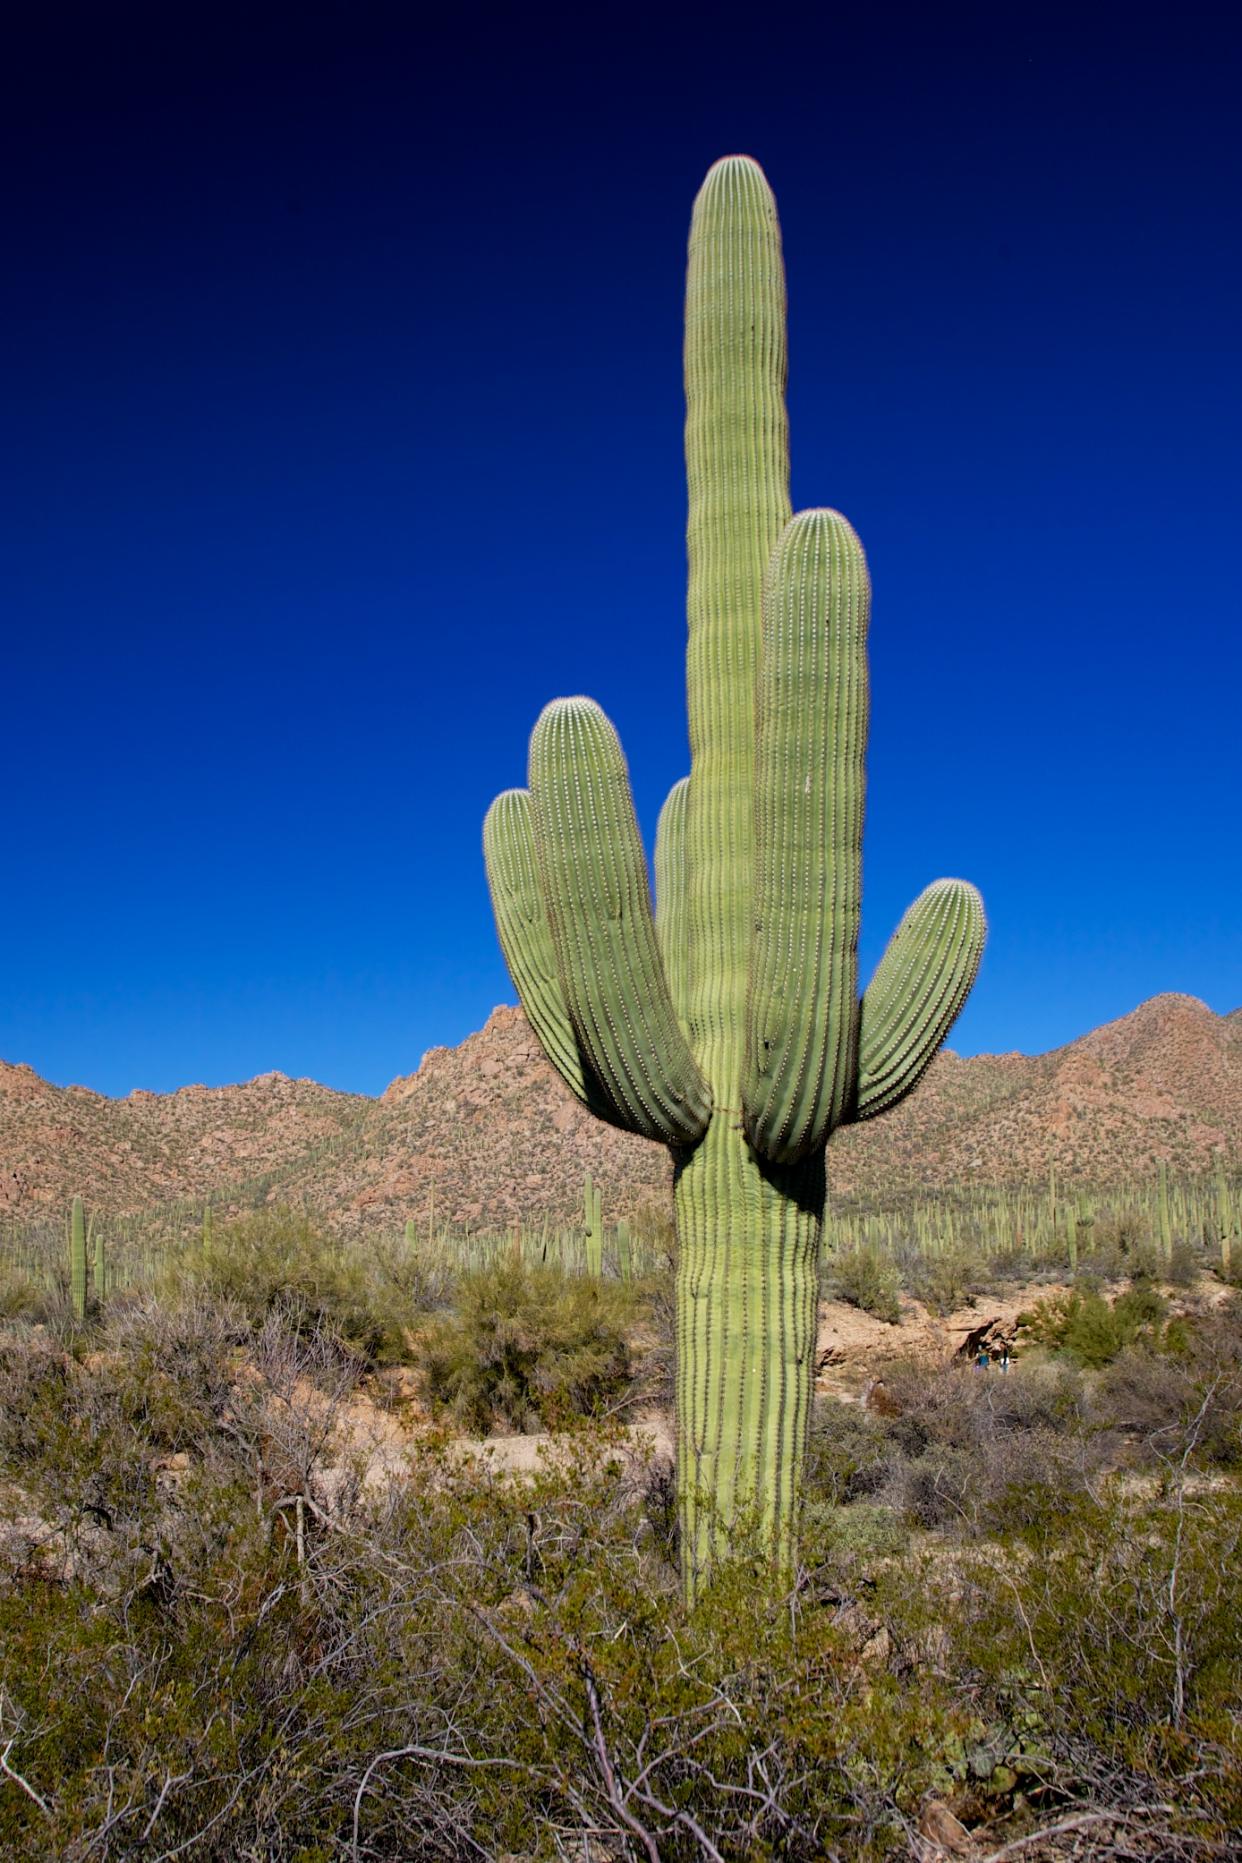
1. Dig a hole with a shovel in the southernmost portion of your landscape for the Saguaro Cactus. Fashion the hole twice as wide and equal in depth to the plant’s root ball. Remove any rocks from the hole and displaced soil.
2. Wear heavy gloves when handling the Saguaro Cactus to avoid injury. Look for markings on the pot that indicate which side of the plant was previously growing facing the south. Remove the cactus carefully from its pot.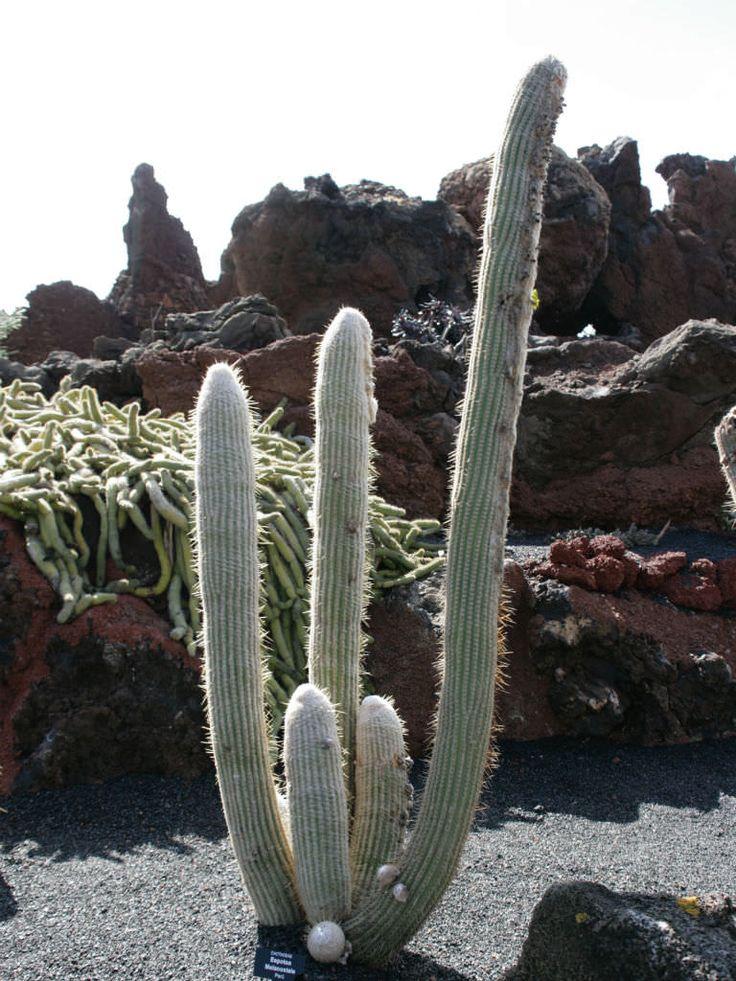
3. Place the plant in the center of the hole, positioning its southern side facing the southern exposure in your landscape. Add or remove soil from the hole’s bottom as needed to ensure that the root ball’s top is level with the surrounding ground. Fill the hole with soil, tamping it down periodically around the roots. Do not plant the cactus deeper than it was previously growing.
4. Flood the area with water from a garden hose immediately after planting. Water the soil to a depth of 8 to 10 inches (20 to 25 cm). Wait for the water to drain down through the soil. Fill in any resulting depressions in the planting area with additional soil if needed.
5. Cover the Saguaro with a 50 percent shade cloth to protect its flesh from burning in the sun while the plant establishes new roots. Remove the shade cloth after one year of growth.
6. Water the Saguaro Cactus once every four weeks only if rainfall is absent during that time. Do not allow the soil to become soggy by watering too frequently, as this will cause the roots to rot. Never water the soil if it is damp to the touch.

1. Dig a hole with a shovel in the southernmost portion of your landscape for the Saguaro Cactus. Fashion the hole twice as wide and equal in depth to the plant’s root ball. Remove any rocks from the hole and displaced soil.
2. Wear heavy gloves when handling the Saguaro Cactus to avoid injury. Look for markings on the pot that indicate which side of the plant was previously growing facing the south. Remove the cactus carefully from its pot.

3. Place the plant in the center of the hole, positioning its southern side facing the southern exposure in your landscape. Add or remove soil from the hole’s bottom as needed to ensure that the root ball’s top is level with the surrounding ground. Fill the hole with soil, tamping it down periodically around the roots. Do not plant the cactus deeper than it was previously growing.
4. Flood the area with water from a garden hose immediately after planting. Water the soil to a depth of 8 to 10 inches (20 to 25 cm). Wait for the water to drain down through the soil. Fill in any resulting depressions in the planting area with additional soil if needed.

5. Cover the Saguaro with a 50 percent shade cloth to protect its flesh from burning in the sun while the plant establishes new roots. Remove the shade cloth after one year of growth.
6. Water the Saguaro Cactus once every four weeks only if rainfall is absent during that time. Do not allow the soil to become soggy by watering too frequently, as this will cause the roots to rot. Never water the soil if it is damp to the touch.
0
0
文章
Dummer. ゛☀
2017年09月18日

The eastern white pine, Pinus strobus, is a fast growing, easily transplanted tree. It can become quite large, requiring sufficient room to develop properly. White pine needles are bluish-green to medium-green with five per bundle, about 4 inches long, very thin, and not stiff. Used as a windbreak, the limbs are brittle and may suffer wind damage which can help lead to decline of the tree. In general, symptoms of decline include some pattern of needle yellowing or browning, shriveled bark on trunk and branches, oozing sap, and in some cases, death of the tree. Affected trees can range from 2 feet to 20 feet or more. The main factor is root decline.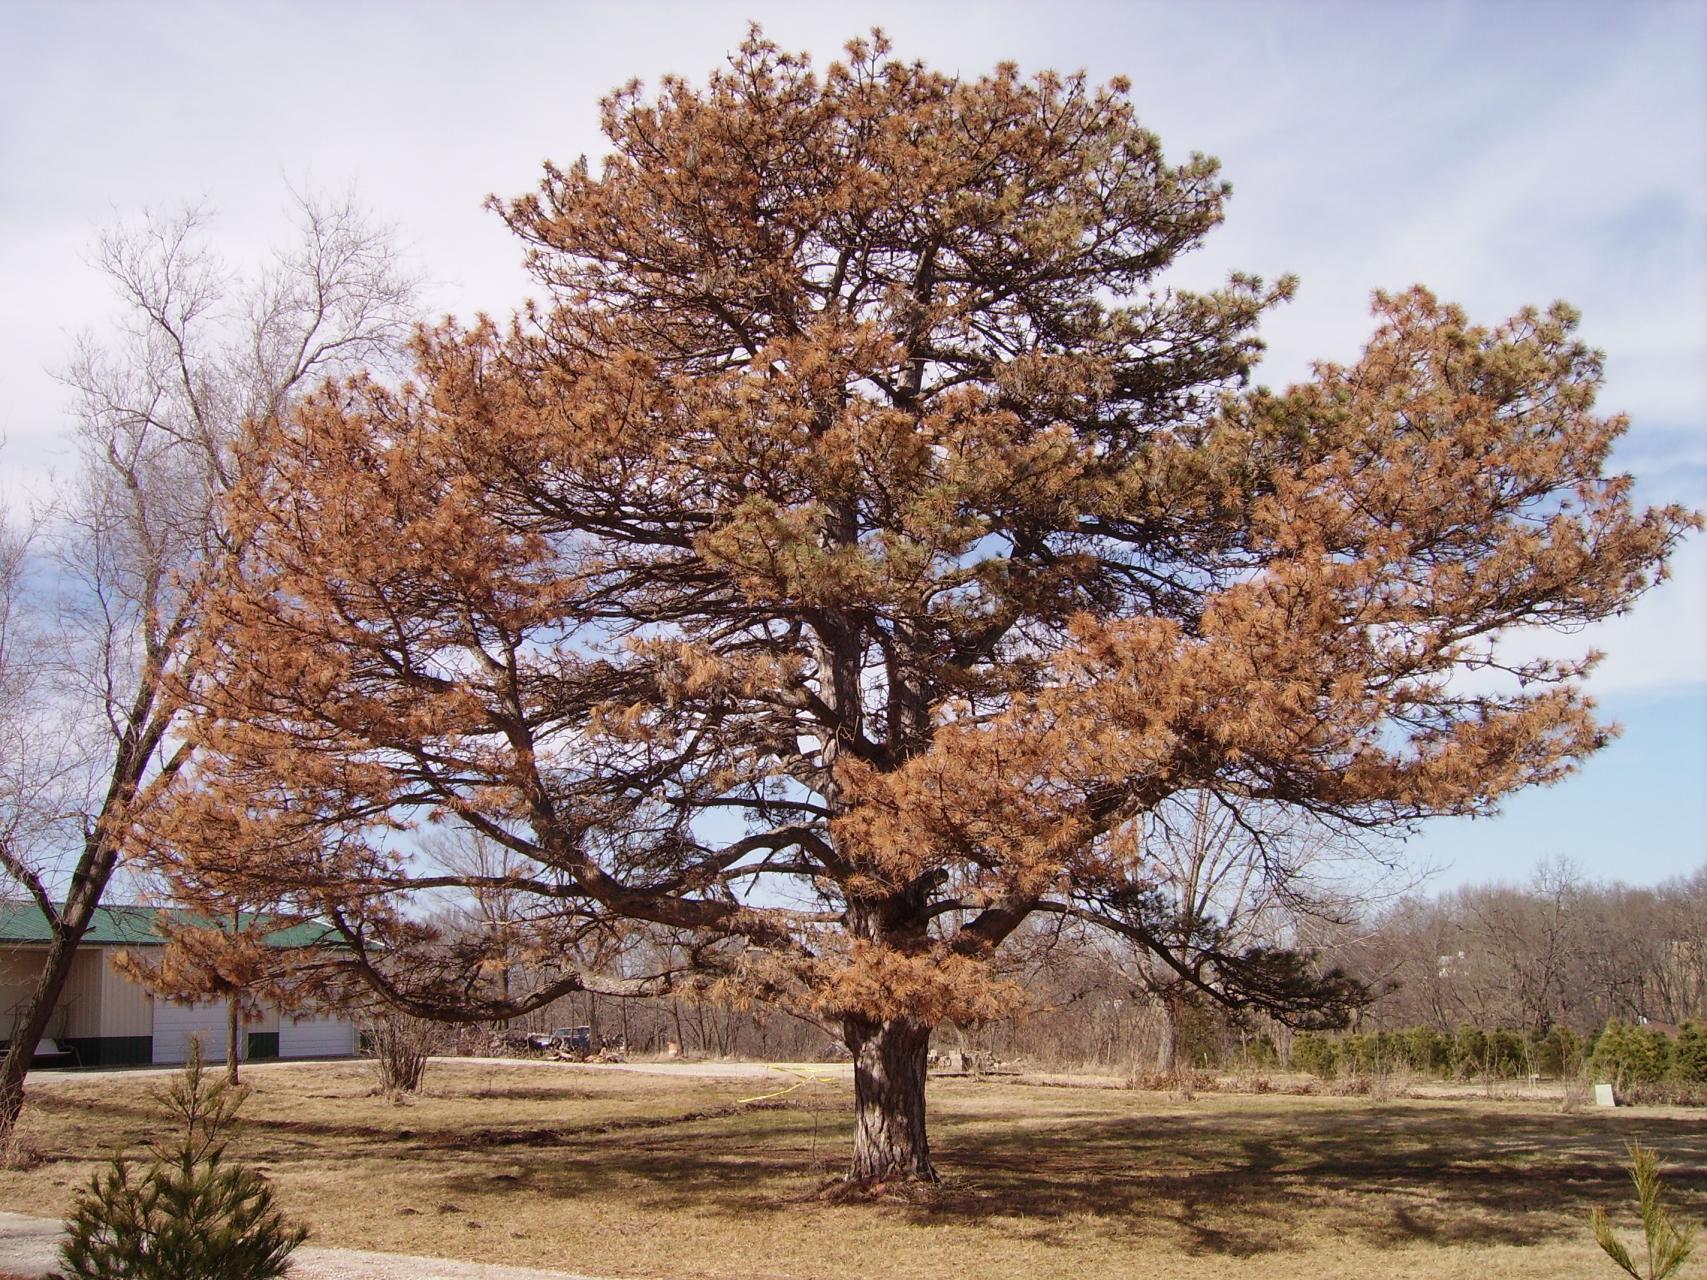
Symptoms and Diagnosis
Inspect the roots for brown discoloration and the outer layer pulling off or not present. If the roots are white and healthy, then there are other problems. Other symptoms will be yellowing or browning of the needles and a limp appearance. Do not, however, confuse this with the normal yellowing and shedding of just older needles that occurs annually in the fall. The bark of the trunk and branches may shrivel and ooze sap. White pines suffer under conditions of urban stress, resulting in decreased vigor, less branching, shorter needles, and noticeable foliage chlorosis.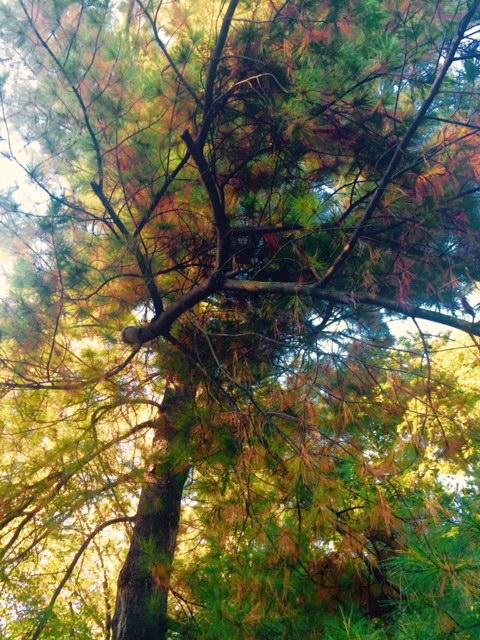
Life Cycle
There is no life cycle as the problem is environmental. There can be many contributing factors, one of which is air pollutants. Other factors can be soil pH, water-logged soil, drought, flooding, heat, and sudden extremes in temperature and moisture. Heat is a main consideration. Even though white pine grows from USDA Zone 3 to 8, it does not appear to thrive in the hot humid areas. Possible use as an understory tree in these areas may help it survive.
A white pine in poor health can be attacked by two root pathogens which can speed the decline of the tree; however, they are not the cause of decline. These pathogens are Phytophthora and Verticicladiella. Fungicides are not recommended as the fungi are not the cause of the tree decline.
Integrated Pest Management Strategies
1. Maintain plant vigor. When planting the tree, insure that the soil is moist, rich, well-drained, and on the acid side. The white pine can tolerate full sun though it will perform better in partial shade. Avoid hot, west-facing sites.
2. Select the planting area carefully. Do not use white pines as a windbreak. Since the branches are brittle, they can be damaged, causing stress in the tree. The brittleness can also lead to damage from snow and ice. Do not plant along roadways as salt spray is injurious to the tree. The tree is also subjected to ozone stress which causes needle tips to brown.
3. Planting time. White pines are best planted in spring. If fall planting is done, care should be taken to amend the soil, fertilize, water thoroughly, mulch adequately, and consider application of an anti-desiccant during early winter. Avoid using winter salt on roadways and paths especially where traffic is high.
4. On-going care. Make sure the soil is adequately drained and that the tree is watered in periods of drought. Fertilize with an acid-type fertilizer like ammonium sulfate.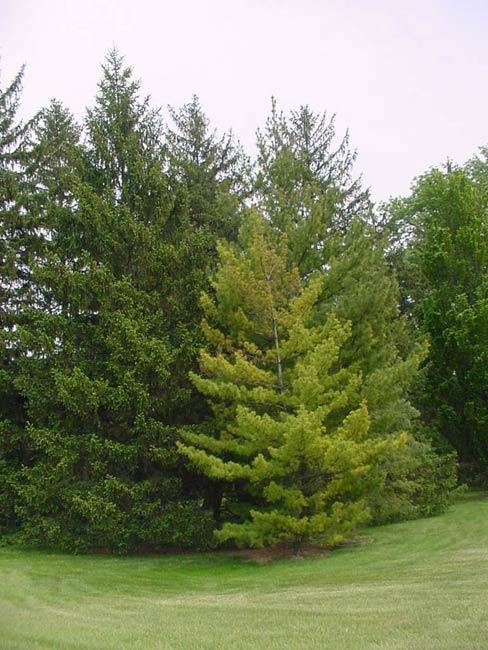
5. Removal. Prompt removal of white pines suffering from decline is not required as they will not infect surrounding pines.

Symptoms and Diagnosis
Inspect the roots for brown discoloration and the outer layer pulling off or not present. If the roots are white and healthy, then there are other problems. Other symptoms will be yellowing or browning of the needles and a limp appearance. Do not, however, confuse this with the normal yellowing and shedding of just older needles that occurs annually in the fall. The bark of the trunk and branches may shrivel and ooze sap. White pines suffer under conditions of urban stress, resulting in decreased vigor, less branching, shorter needles, and noticeable foliage chlorosis.

Life Cycle
There is no life cycle as the problem is environmental. There can be many contributing factors, one of which is air pollutants. Other factors can be soil pH, water-logged soil, drought, flooding, heat, and sudden extremes in temperature and moisture. Heat is a main consideration. Even though white pine grows from USDA Zone 3 to 8, it does not appear to thrive in the hot humid areas. Possible use as an understory tree in these areas may help it survive.
A white pine in poor health can be attacked by two root pathogens which can speed the decline of the tree; however, they are not the cause of decline. These pathogens are Phytophthora and Verticicladiella. Fungicides are not recommended as the fungi are not the cause of the tree decline.

Integrated Pest Management Strategies
1. Maintain plant vigor. When planting the tree, insure that the soil is moist, rich, well-drained, and on the acid side. The white pine can tolerate full sun though it will perform better in partial shade. Avoid hot, west-facing sites.
2. Select the planting area carefully. Do not use white pines as a windbreak. Since the branches are brittle, they can be damaged, causing stress in the tree. The brittleness can also lead to damage from snow and ice. Do not plant along roadways as salt spray is injurious to the tree. The tree is also subjected to ozone stress which causes needle tips to brown.

3. Planting time. White pines are best planted in spring. If fall planting is done, care should be taken to amend the soil, fertilize, water thoroughly, mulch adequately, and consider application of an anti-desiccant during early winter. Avoid using winter salt on roadways and paths especially where traffic is high.
4. On-going care. Make sure the soil is adequately drained and that the tree is watered in periods of drought. Fertilize with an acid-type fertilizer like ammonium sulfate.

5. Removal. Prompt removal of white pines suffering from decline is not required as they will not infect surrounding pines.
0
0
文章
Dummer. ゛☀
2017年09月03日

Ohio’s state tree and the symbol for Ohio State University’s intercollegiate athletics, Ohio buckeye trees (Aesculus glabra) are the best known of the 13 species of buckeyes. Other members of the genus include medium to large trees such as the horse chestnut (A. hippocastanum) and large shrubs like the red buckeye (A. pavia). Read on for information about buckeye tree planting and some interesting buckeye tree facts.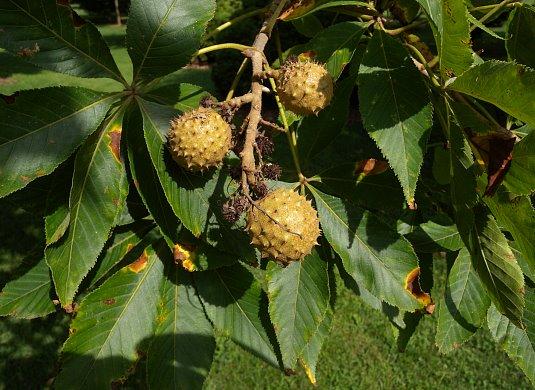
Buckeye Tree Facts
Buckeye leaves are made up of five leaflets that are arranged like spread fingers on a hand. They are bright green when they emerge and darken as they age. The flowers, which are arranged in long panicles, bloom in spring. Green, leathery fruit replace the flowers in summer. Buckeyes are one of the first trees to leaf out in spring, and also the first to drop their foliage in fall. Most of the trees in North America called “chestnuts” are actually horse chestnuts or buckeyes. A fungal blight wiped out most of the true chestnuts between 1900 and 1940 and very few specimens survived. The nuts from buckeyes and horse chestnuts are poisonous to humans.
How to Plant a Buckeye Tree
Plant buckeye trees in spring or fall. They grow well in full sun or partial shade and adapt to most any soil, but they don’t like an extremely dry environment. Dig the hole deep enough to accommodate the root ball and at least twice as wide. When you set the tree in the hole, lay a yardstick or flat tool handle across the hole to make sure the soil line on the tree is even with the surrounding soil. Trees that are buried too deep are susceptible to rot. Backfill the hole with unamended soil. There is no need to fertilize or add soil amendments until the following spring.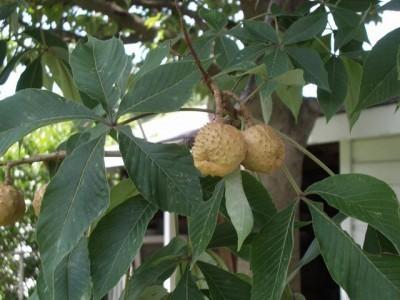
Water deeply and in the absence of rain, following up with weekly waterings until the tree is established and beginning to grow. A 2- to 3-inch layer of mulch around the tree will help keep the soil evenly moist. Pull the mulch back a few inches from the trunk to discourage rot. The main reason you don’t see more buckeyes as a yard tree is the litter they create. From dead flowers to leaves to the leathery and sometimes spiny fruit, it seems that something is always falling from the trees. Most property owners prefer to grow buckeyes in woodland settings and out-of-the-way areas.

Buckeye Tree Facts
Buckeye leaves are made up of five leaflets that are arranged like spread fingers on a hand. They are bright green when they emerge and darken as they age. The flowers, which are arranged in long panicles, bloom in spring. Green, leathery fruit replace the flowers in summer. Buckeyes are one of the first trees to leaf out in spring, and also the first to drop their foliage in fall. Most of the trees in North America called “chestnuts” are actually horse chestnuts or buckeyes. A fungal blight wiped out most of the true chestnuts between 1900 and 1940 and very few specimens survived. The nuts from buckeyes and horse chestnuts are poisonous to humans.

How to Plant a Buckeye Tree
Plant buckeye trees in spring or fall. They grow well in full sun or partial shade and adapt to most any soil, but they don’t like an extremely dry environment. Dig the hole deep enough to accommodate the root ball and at least twice as wide. When you set the tree in the hole, lay a yardstick or flat tool handle across the hole to make sure the soil line on the tree is even with the surrounding soil. Trees that are buried too deep are susceptible to rot. Backfill the hole with unamended soil. There is no need to fertilize or add soil amendments until the following spring.

Water deeply and in the absence of rain, following up with weekly waterings until the tree is established and beginning to grow. A 2- to 3-inch layer of mulch around the tree will help keep the soil evenly moist. Pull the mulch back a few inches from the trunk to discourage rot. The main reason you don’t see more buckeyes as a yard tree is the litter they create. From dead flowers to leaves to the leathery and sometimes spiny fruit, it seems that something is always falling from the trees. Most property owners prefer to grow buckeyes in woodland settings and out-of-the-way areas.
0
0
文章
Dummer. ゛☀
2017年09月03日

Red buckeye trees are relatively easy to care for, medium sized trees or shrubs that produce showy red flowers in the spring. They are a great choice for large, easy decoration along borders. Keep reading to learn more about red buckeye tree care and red buckeye tree growth.
Red Buckeye Tree Growth
What is a red buckeye tree? Red buckeye trees (Aesculus pavia) are North American natives from southern Missouri. They grow in USDA zones 4 through 8. For several weeks in the spring the trees produce bright red panicles of tube-shaped flowers. The flowers have no real scent, but they are striking in color and very attractive to hummingbirds.
Once the flowers fade, they are replaced by dry, round, orange fruits. These fruits are toxic to both animals and humans. Keep this in mind when choosing a planting location. The trees produce a lot of fruit, and when it drops it can be a nuisance to clean up and a real danger to pets and children. Red buckeye trees are deciduous, but their leaves aren’t showy in the fall. They barely change color and drop relatively early.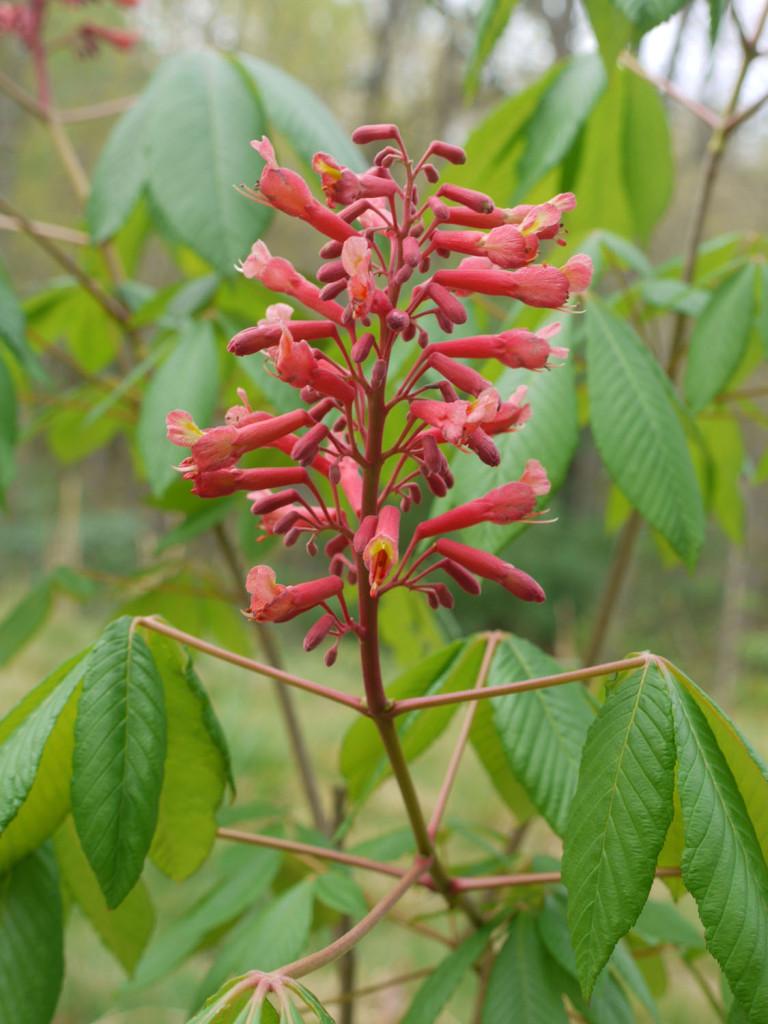
Red Buckeye Tree Care
Planting a red buckeye tree is relatively easy. The trees can be grown very successfully from seed and should bloom within three years. Red buckeye tree growth is best in rich soil that is well drained but moist. The trees do not handle drought well. They will grow in both shade and sun, but they’ll stay smaller and won’t fill out as nicely in the shade. In sun, the trees tend to grow between 15 and 20 feet in height, though they will sometimes reach as high as 35 feet.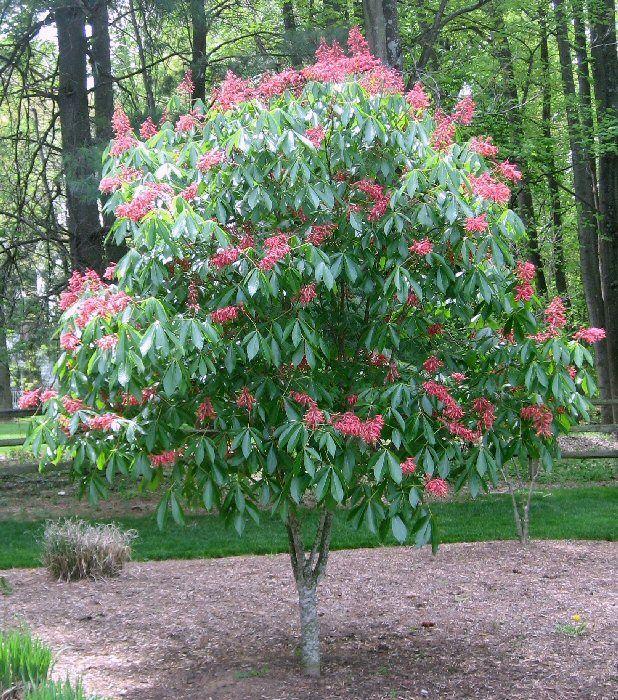

Red Buckeye Tree Growth
What is a red buckeye tree? Red buckeye trees (Aesculus pavia) are North American natives from southern Missouri. They grow in USDA zones 4 through 8. For several weeks in the spring the trees produce bright red panicles of tube-shaped flowers. The flowers have no real scent, but they are striking in color and very attractive to hummingbirds.
Once the flowers fade, they are replaced by dry, round, orange fruits. These fruits are toxic to both animals and humans. Keep this in mind when choosing a planting location. The trees produce a lot of fruit, and when it drops it can be a nuisance to clean up and a real danger to pets and children. Red buckeye trees are deciduous, but their leaves aren’t showy in the fall. They barely change color and drop relatively early.

Red Buckeye Tree Care
Planting a red buckeye tree is relatively easy. The trees can be grown very successfully from seed and should bloom within three years. Red buckeye tree growth is best in rich soil that is well drained but moist. The trees do not handle drought well. They will grow in both shade and sun, but they’ll stay smaller and won’t fill out as nicely in the shade. In sun, the trees tend to grow between 15 and 20 feet in height, though they will sometimes reach as high as 35 feet.

0
0
文章
Dummer. ゛☀
2017年09月02日

If you’ve never heard of the exotic Tipuana tipu, you aren’t alone. It isn’t grown extensively in most parts of the country. What is a tipu tree? It’s a medium-sized flowering legume tree native to Bolivia. If you are thinking of growing a tipu tree, read on. You’ll find lots of Tipuana tipu information as well as tips on how to grow a Tipuana tree.
What is a Tipu Tree?
A tipu tree (Tipuana tipu) is a shade tree planted frequently in the warmer parts of the world. In the United States it is used as a flowering accent tree or a landscape tree. The tree has a single trunk and a high spreading canopy. It can grow to over 60 feet (18 m.) in height and about the same in width. However, in cultivation the trees usually don’t get that big. Beautiful yellow flowers cover the tipu’s canopy during the summer months. These turn into the tipu fruit, large brown seed pods. Both flowers and pods create litter below, so this is something you should consider prior to planting.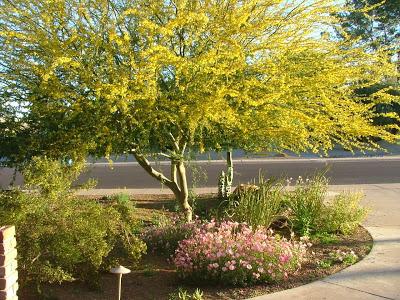
Additional Tipuana Tipu Information
If you are thinking of growing a tipu tree in your garden, you’ll need to know a little more about the species. The first rule for how to grow a tipuana tree involves climate. The tipu is a tropical tree. It only thrives in very warm climates such as in U.S. Department of Agriculture hardiness zones 9 through 11. However, even zone 9 may be too cold and you’ll have to consider protection. If you are able to grow tipu trees, you’ll find them to be some of the most beautiful flowering trees for warm climates. The blossoms are yellow or apricot and pea-shaped. Tipu trees grow quite quickly. With proper tipu tree care, they can live to 150 years.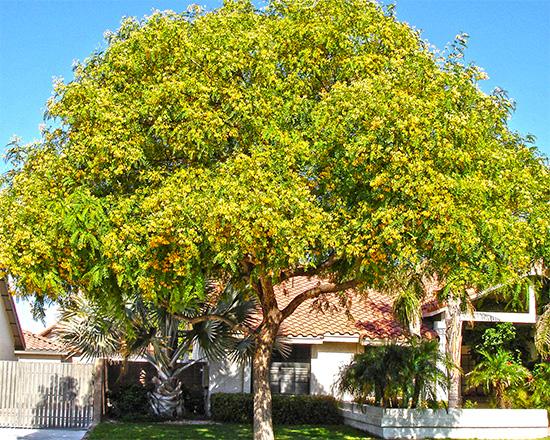
Tipu Tree Care
To start growing a tipu tree, plant the tree in a site with full sun or partial sun. Be a little careful about selecting a site. The tipu has a large trunk that buttresses out at the base. In time, the roots may be able to lift sidewalks. If you want to know how to grow a tipu tree, you’ll be happy to learn that the trees are not picky about soil. They will grow in moist or dry soil, in clay, loam or sand. They prefer acidic soil but also tolerate slightly alkaline soil.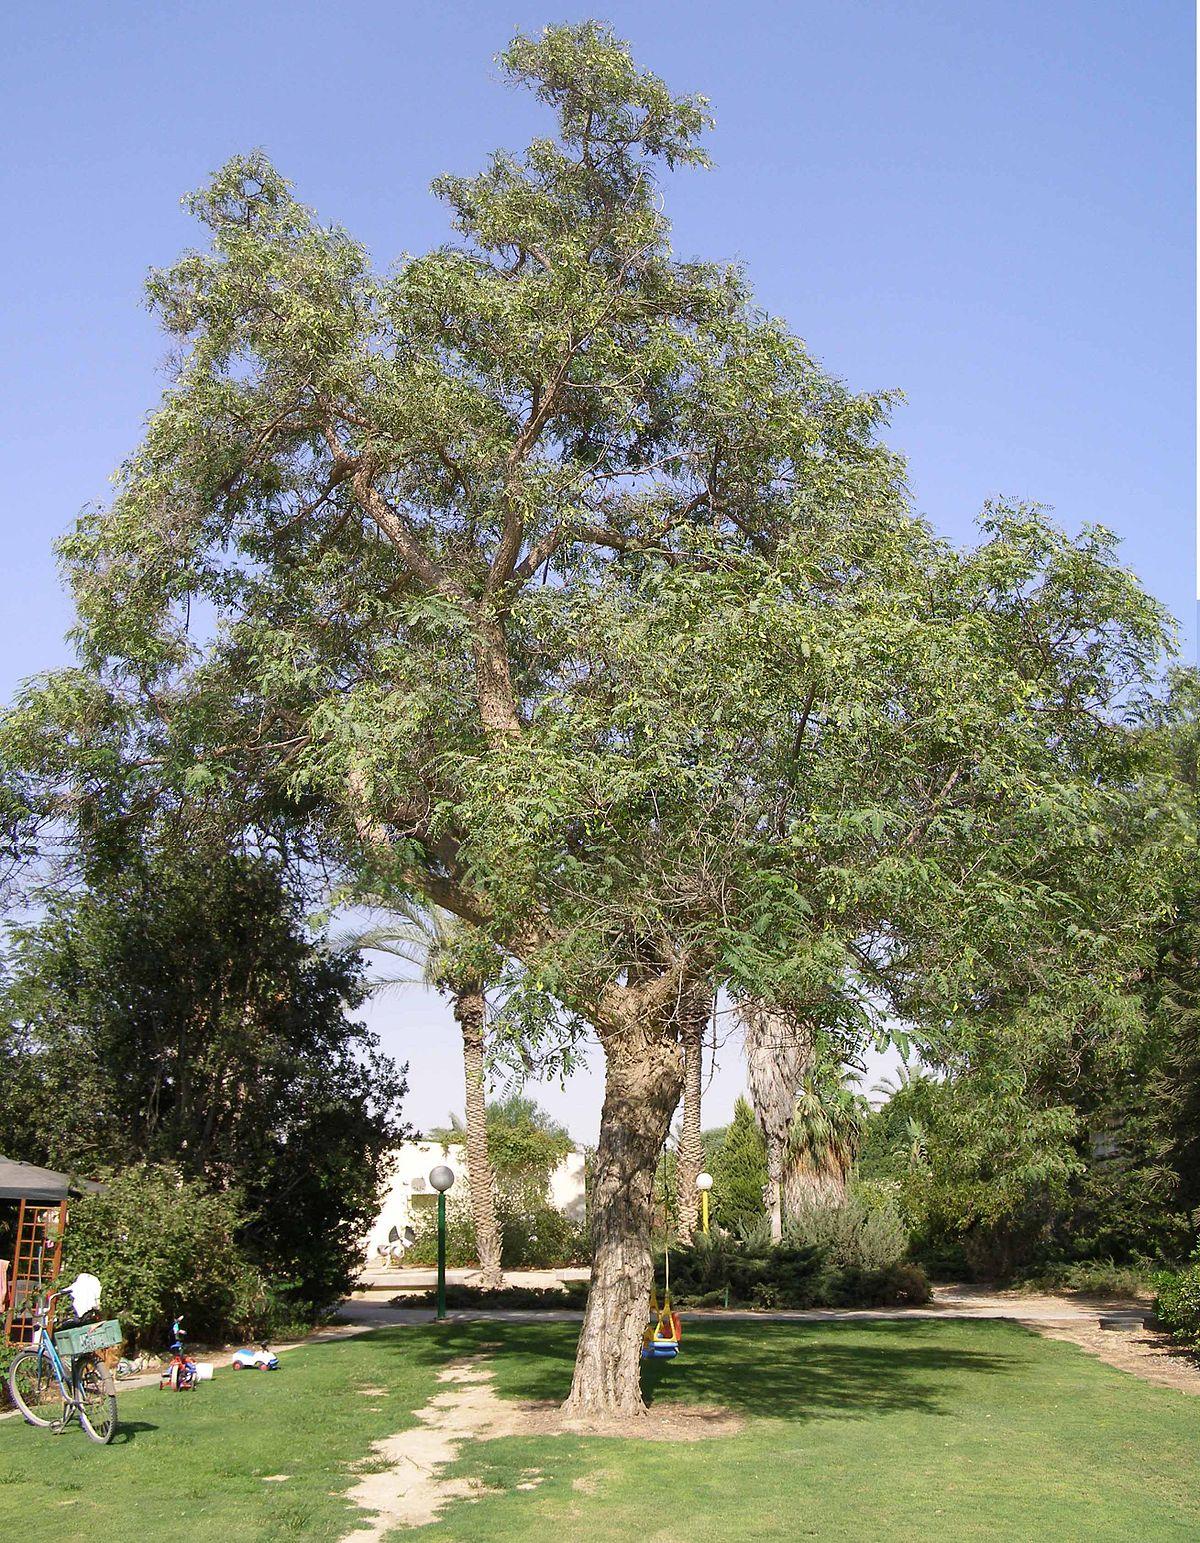
Although tipu trees are reputedly drought resistant, tipu tree care means providing regular irrigation. This is particularly important during dry spells.

What is a Tipu Tree?
A tipu tree (Tipuana tipu) is a shade tree planted frequently in the warmer parts of the world. In the United States it is used as a flowering accent tree or a landscape tree. The tree has a single trunk and a high spreading canopy. It can grow to over 60 feet (18 m.) in height and about the same in width. However, in cultivation the trees usually don’t get that big. Beautiful yellow flowers cover the tipu’s canopy during the summer months. These turn into the tipu fruit, large brown seed pods. Both flowers and pods create litter below, so this is something you should consider prior to planting.

Additional Tipuana Tipu Information
If you are thinking of growing a tipu tree in your garden, you’ll need to know a little more about the species. The first rule for how to grow a tipuana tree involves climate. The tipu is a tropical tree. It only thrives in very warm climates such as in U.S. Department of Agriculture hardiness zones 9 through 11. However, even zone 9 may be too cold and you’ll have to consider protection. If you are able to grow tipu trees, you’ll find them to be some of the most beautiful flowering trees for warm climates. The blossoms are yellow or apricot and pea-shaped. Tipu trees grow quite quickly. With proper tipu tree care, they can live to 150 years.

Tipu Tree Care
To start growing a tipu tree, plant the tree in a site with full sun or partial sun. Be a little careful about selecting a site. The tipu has a large trunk that buttresses out at the base. In time, the roots may be able to lift sidewalks. If you want to know how to grow a tipu tree, you’ll be happy to learn that the trees are not picky about soil. They will grow in moist or dry soil, in clay, loam or sand. They prefer acidic soil but also tolerate slightly alkaline soil.

Although tipu trees are reputedly drought resistant, tipu tree care means providing regular irrigation. This is particularly important during dry spells.
0
0
文章
Dummer. ゛☀
2017年09月02日

Plum leaf sand cherry, also referred to as purple leaf sand cherry plants, is a medium sized ornamental shrub or small tree that when mature reaches a height of approximately 8 feet tall by 8 feet wide. This easy care plant makes a great addition to the landscape.
About Plum Leaf Sand Cherry
Purple leaf sand cherry (Prunus x cistena) is a member of the Rose family. Prunus is Latin for ‘plum’ while cistena is the Sioux word for ‘baby’ in reference to its smallish size. The “x” is indicative of the shrub’s hybridism.
This Prunus hybrid is useful as an ornamental specimen due to its beautiful red, maroon, or purple foliage. The shrub grows at a moderate rate and is suitable in USDA zones 2-8. The parent plants of sandcherry bush hail from Western Asia (Prunus cerasifera) and the Northeastern United States (Prunus pumila).
This purplish-red leafed plant has an oval growth habit gradually maturing into an arched form and opening out from the center of the shrub. The stunning 2-inch long, serrated foliage emerges crimson-purple and remains throughout the summer, gradually changing to a green-bronze hue in the fall. Around early spring, the plant’s pink buds open into whitish-pink flowers – the same time as the red foliage. The innocuous blooms become small black-purple fruit barely noticeable without contrast to the purple foliage in July. The multiple gray-brown trunks are prone to trunk fissuring and cankers, which ooze sap.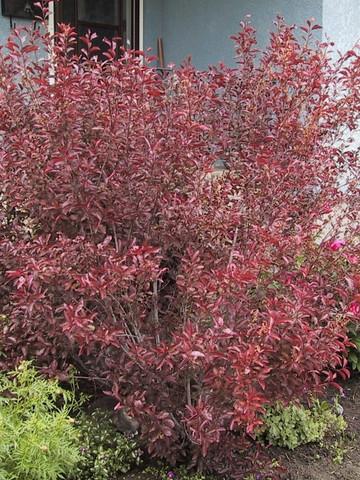
How to Grow a Purple Leaf Sand Cherry
This specimen is urban tolerant and establishes rapidly to lend a brilliant pop of color to the landscape. So how do you grow a purple leaf sand cherry? Sand cherry is readily available through the local nursery and/or propagated via rooted stem cuttings. Sand cherry is sensitive to being transplanted in the autumn, so extra care should be taken in amending the soil, fertilizing, mulching heavily and watering thoroughly. Ideally, you should plant the purple leaf sand cherry in full to partial sun exposure in moist, well-draining soil. However, the sand cherry bush is adaptable to lesser soils, drought, heat and over aggressive pruning.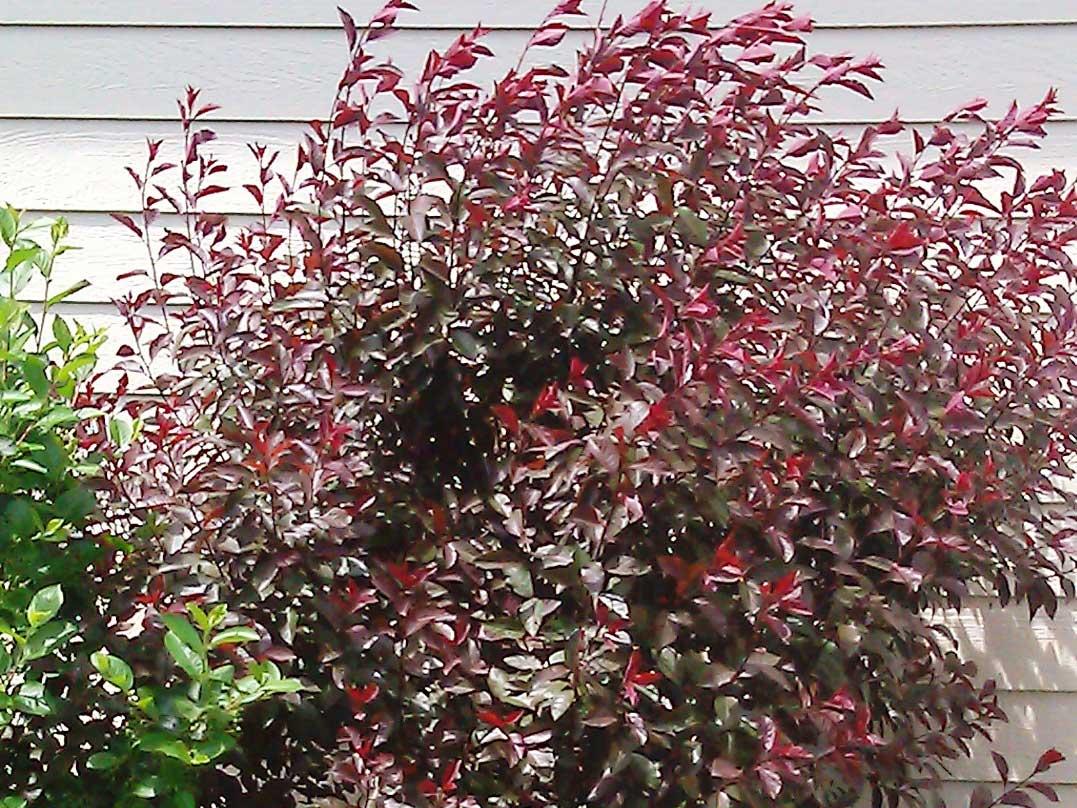
Sand Cherry Plant Care
Because, the sand cherry is a member of the Rose family, it is susceptible to several diseases, such as trunk canker, and pests, like borers and Japanese beetle assaults in mid-summer. It also has a short lifespan at between 10 to 15 years primarily due to assault by pests or diseases. Other than these issues, the sand cherry plant care is relatively fuss free and is tolerant of a variety of conditions – hardy in cold winters and hot summers. Prune the sand cherry bush to remove heavy branching that will weigh the plant down. It can even be pruned into a formal hedge or used in borders, at entranceways or in group plantings.

About Plum Leaf Sand Cherry
Purple leaf sand cherry (Prunus x cistena) is a member of the Rose family. Prunus is Latin for ‘plum’ while cistena is the Sioux word for ‘baby’ in reference to its smallish size. The “x” is indicative of the shrub’s hybridism.
This Prunus hybrid is useful as an ornamental specimen due to its beautiful red, maroon, or purple foliage. The shrub grows at a moderate rate and is suitable in USDA zones 2-8. The parent plants of sandcherry bush hail from Western Asia (Prunus cerasifera) and the Northeastern United States (Prunus pumila).

This purplish-red leafed plant has an oval growth habit gradually maturing into an arched form and opening out from the center of the shrub. The stunning 2-inch long, serrated foliage emerges crimson-purple and remains throughout the summer, gradually changing to a green-bronze hue in the fall. Around early spring, the plant’s pink buds open into whitish-pink flowers – the same time as the red foliage. The innocuous blooms become small black-purple fruit barely noticeable without contrast to the purple foliage in July. The multiple gray-brown trunks are prone to trunk fissuring and cankers, which ooze sap.

How to Grow a Purple Leaf Sand Cherry
This specimen is urban tolerant and establishes rapidly to lend a brilliant pop of color to the landscape. So how do you grow a purple leaf sand cherry? Sand cherry is readily available through the local nursery and/or propagated via rooted stem cuttings. Sand cherry is sensitive to being transplanted in the autumn, so extra care should be taken in amending the soil, fertilizing, mulching heavily and watering thoroughly. Ideally, you should plant the purple leaf sand cherry in full to partial sun exposure in moist, well-draining soil. However, the sand cherry bush is adaptable to lesser soils, drought, heat and over aggressive pruning.

Sand Cherry Plant Care
Because, the sand cherry is a member of the Rose family, it is susceptible to several diseases, such as trunk canker, and pests, like borers and Japanese beetle assaults in mid-summer. It also has a short lifespan at between 10 to 15 years primarily due to assault by pests or diseases. Other than these issues, the sand cherry plant care is relatively fuss free and is tolerant of a variety of conditions – hardy in cold winters and hot summers. Prune the sand cherry bush to remove heavy branching that will weigh the plant down. It can even be pruned into a formal hedge or used in borders, at entranceways or in group plantings.
1
1
文章
Dummer. ゛☀
2017年09月02日

Water oaks are native to North America and found across the American South. These medium sized trees are ornamental shade trees and have an ease of care that makes them perfect in the landscape. Try growing water oak trees as street plants or primary shade trees, but be aware that these plants are short lived and can be assumed to survive 30 to 50 years. Read the article below for more water oak information.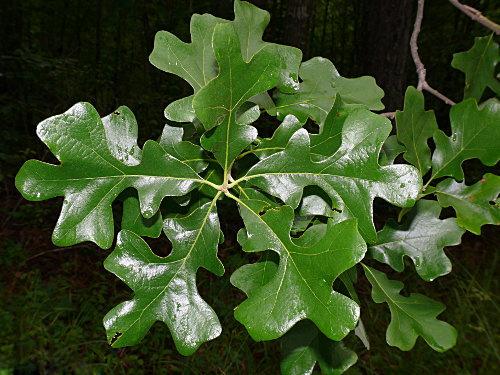
Water Oak Information
Quercus nigra is a tolerant plant that can grow in partial shade or sun to full sun. These elegant trees are deciduous to semi-evergreen and an important part of ecosystems from New Jersey to Florida and west to Texas. Water oaks grow at a fantastic rate of up to 24 inches per year. Caring for a water oak is easy, but it is a weak wooded tree prone to many diseases and insect pests.
Water oaks produce copious quantities of acorns, which are a favorite food of squirrels, raccoons, turkeys, pigs, ducks, quail and deer. Deer also browse young stems and twigs in winter. The trees tend to develop hollow stems, which are habitat for a host of insects and animals. In the wild, it is found in lowlands, flood plains and near rivers and streams. It has the capacity to thrive in compact or loose soil, provided there is adequate moisture. Water oaks may be short lived but their rapid growth makes them an excellent shade tree for decades. However, special water oak tree care when young is essential to produce a strong scaffold. Both pruning and staking may be necessary to help the tree develop a sturdy skeleton.
Growing Water Oak Trees
Water oaks are so adaptable they are often used as residential, reclamation or even drought zone trees. They may be planted in areas with pollution and poor air quality and the tree still thrives. The trees are reliably hardy in United States Department of Agriculture zones 6 to 9. Water oaks get 50 to 80 feet tall with a nice cone shaped crown. Bark ages to brownish black and thickly scaled. Male flowers are insignificant but female catkins appear in spring and become wide ½ inch long acorns. The leaves are oblong, spatulate and deeply tri-lobed or entire. Foliage may grow 2 to 4 inches long. These trees are extremely adaptable and, once established, caring for a water oak is reduced to handling any pest or disease issues and providing supplemental water during extremely dry periods.
Water Oak Tree Care
Water oaks must be trained when young to prevent the crotch from splitting due to poor collar formation and the weight of the side limbs. Young trees should be trained to a central trunk for best plant health. The rapid growth of the plant contributes to its weak wood, which is often hollow by its 40th year. Provide young trees with plenty of water to ensure good cell development and thick wood. Oaksare host to a number of pest and disease issues. Caterpillars, scale, galls, and borers are the insects of most concern.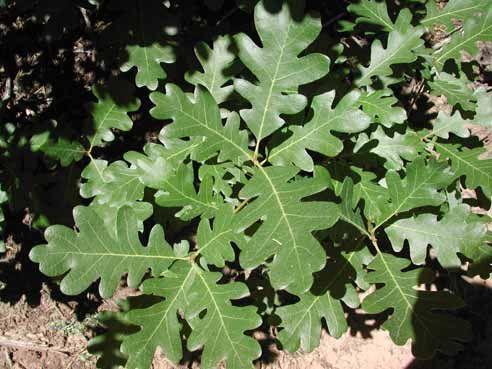
Oak wilt is the most serious disease but many fungal issues are often present. These might include powdery mildew, canker, leaf blight, anthracnose, and fungal leaf spot. A common deficiency in iron causes chlorosisand yellowing of the leaves. Most issues aren’t serious and can be combated by good cultural care.

Water Oak Information
Quercus nigra is a tolerant plant that can grow in partial shade or sun to full sun. These elegant trees are deciduous to semi-evergreen and an important part of ecosystems from New Jersey to Florida and west to Texas. Water oaks grow at a fantastic rate of up to 24 inches per year. Caring for a water oak is easy, but it is a weak wooded tree prone to many diseases and insect pests.

Water oaks produce copious quantities of acorns, which are a favorite food of squirrels, raccoons, turkeys, pigs, ducks, quail and deer. Deer also browse young stems and twigs in winter. The trees tend to develop hollow stems, which are habitat for a host of insects and animals. In the wild, it is found in lowlands, flood plains and near rivers and streams. It has the capacity to thrive in compact or loose soil, provided there is adequate moisture. Water oaks may be short lived but their rapid growth makes them an excellent shade tree for decades. However, special water oak tree care when young is essential to produce a strong scaffold. Both pruning and staking may be necessary to help the tree develop a sturdy skeleton.

Growing Water Oak Trees
Water oaks are so adaptable they are often used as residential, reclamation or even drought zone trees. They may be planted in areas with pollution and poor air quality and the tree still thrives. The trees are reliably hardy in United States Department of Agriculture zones 6 to 9. Water oaks get 50 to 80 feet tall with a nice cone shaped crown. Bark ages to brownish black and thickly scaled. Male flowers are insignificant but female catkins appear in spring and become wide ½ inch long acorns. The leaves are oblong, spatulate and deeply tri-lobed or entire. Foliage may grow 2 to 4 inches long. These trees are extremely adaptable and, once established, caring for a water oak is reduced to handling any pest or disease issues and providing supplemental water during extremely dry periods.

Water Oak Tree Care
Water oaks must be trained when young to prevent the crotch from splitting due to poor collar formation and the weight of the side limbs. Young trees should be trained to a central trunk for best plant health. The rapid growth of the plant contributes to its weak wood, which is often hollow by its 40th year. Provide young trees with plenty of water to ensure good cell development and thick wood. Oaksare host to a number of pest and disease issues. Caterpillars, scale, galls, and borers are the insects of most concern.

Oak wilt is the most serious disease but many fungal issues are often present. These might include powdery mildew, canker, leaf blight, anthracnose, and fungal leaf spot. A common deficiency in iron causes chlorosisand yellowing of the leaves. Most issues aren’t serious and can be combated by good cultural care.
0
0
文章
Dummer. ゛☀
2017年09月01日

Mulberry is a deciduous, medium to large tree (20-60 feet tall) that is available in fruiting and fruitless varieties. If you currently have a mulberry that fruits, you may be well aware of the mess the fruit can create. Although the fruit is edible, there may be more of it than you can handle with an end result of a driveway that is stained purple and a car that has been bombed by bird, ahem, droppings. With such a nuisance, you may be wondering how to stop a mulberry from fruiting or mulberry fruit tree sterilization.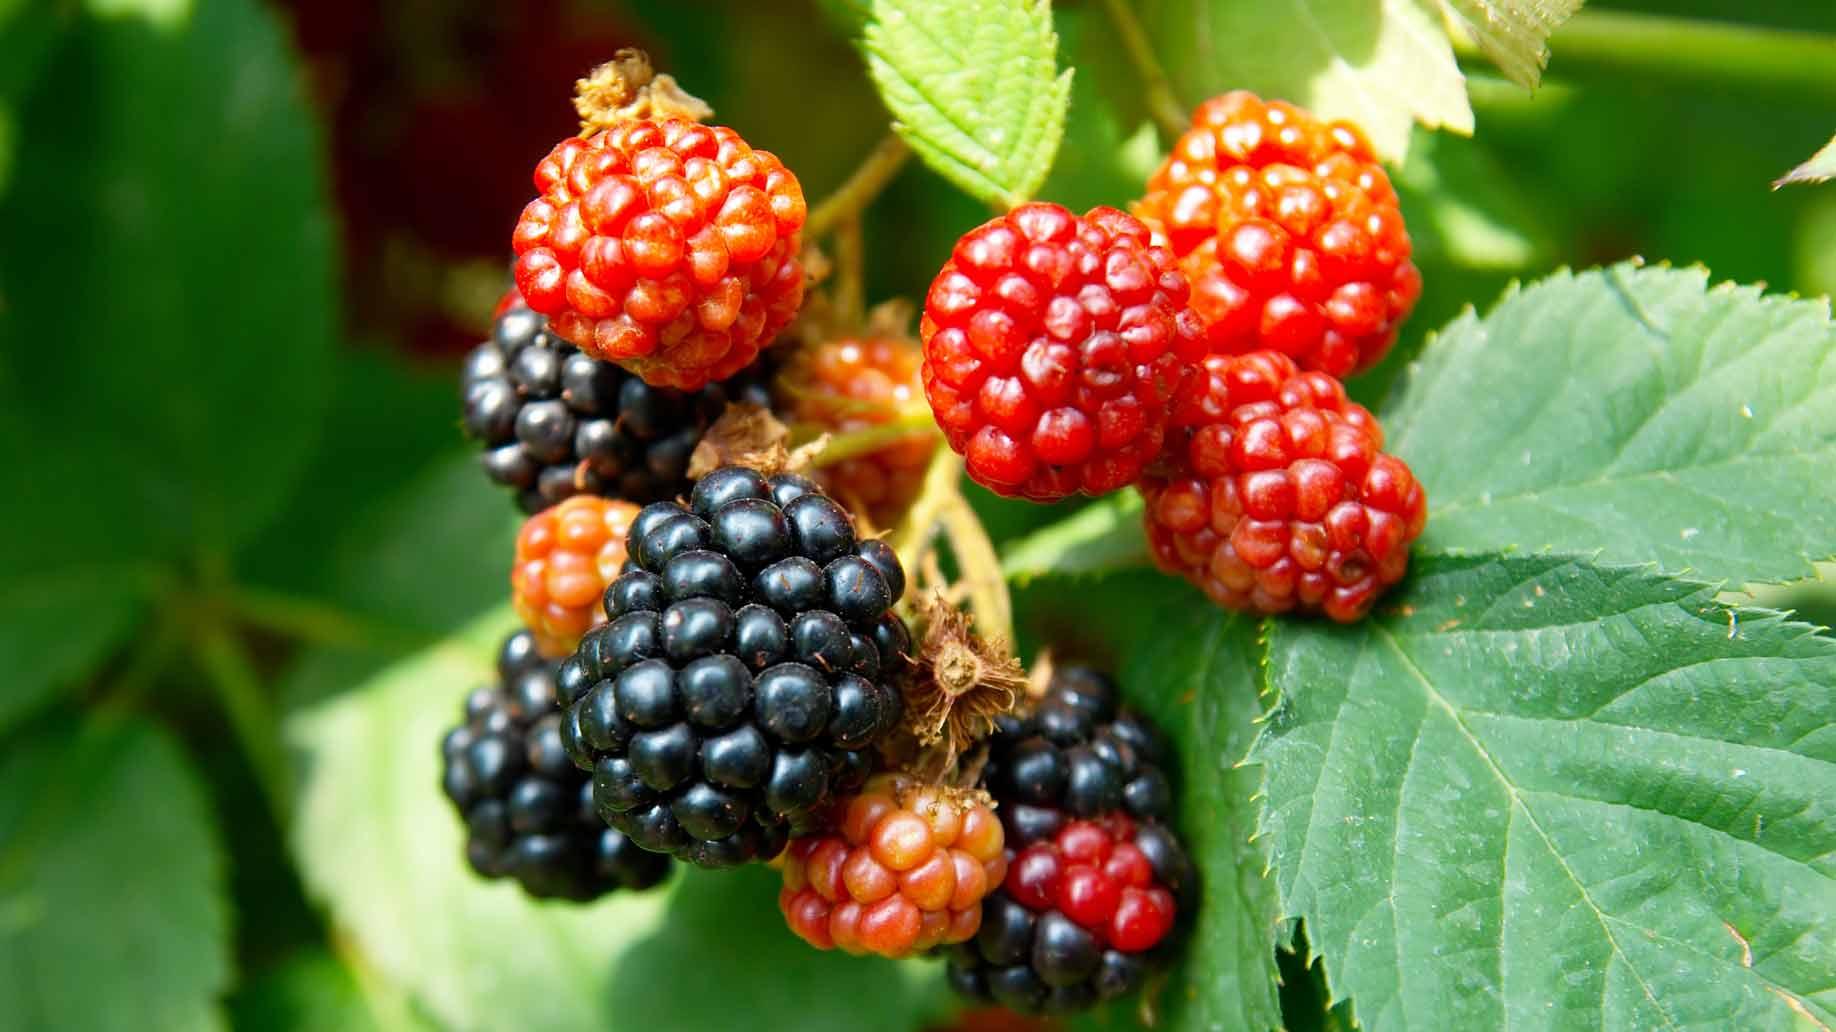
How to Sterilize Mulberry Trees
Ask any arborist and they will probably tell you that sterilizing mulberry trees is a difficult proposition, if not impossible. Expensive chemicals are required and the potential drift can affect surrounding unprotected trees and bushes. Generally, the results are inconsistent and must be timed perfectly during fruit bloom and in prime temperature conditions for any efficacy.
The best course of action to stop a mulberry from fruiting and preventing the type of mess described above is to plant a male tree or fruitless variety of mulberry. If it’s too late for that and you have a female tree, thinning or pruning the tree to reduce the amount of viable fruit is certainly a thought. You will still get some fruit but between eating some and the reduction of fruit set, you may be able to stay ahead of the untidiness. Really, the only other method to try for preventing mulberry fruit is to use a chemical application. These chemicals can be applied by you or preferably by a licensed tree company.
Chemically Preventing Mulberry Fruit
An attempt can be made sterilizing mulberry trees with the use of such chemicals as Florel Fruit Eliminator. Florel contains ethephon, which will stop fruiting and breaks down into a natural plant hormone, ethylene. It must be applied at full bloom at just the right temperatures (60-95 F./16-32 C.) and will cause fruit to drop prior to setting. All conditions must be optimal, including a lack of disease or insect infestation, sufficient irrigation, excellent drainage and soil conditions. An issue with any of these puts the tree under stress, causing its natural production of ethylene. Too much ethylene will damage the tree, causing defoliation, stem damage and leaf scorch. For this reason, even professionals have a difficult time determining the best time for application.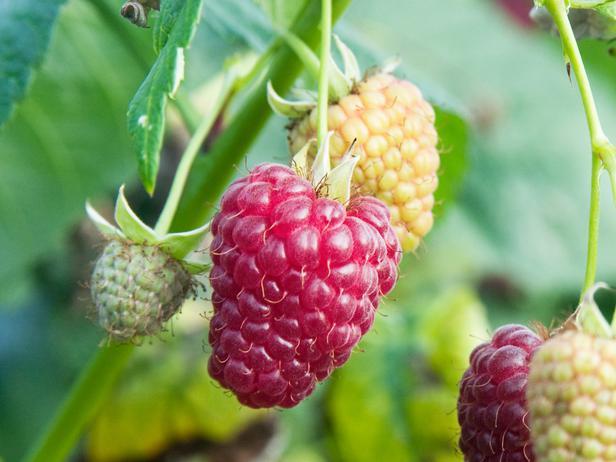
A professional company may also use a deflowering hormonal solution applied internally as a basal or tree trunk panacea for mulberry fruit tree sterilization. Known as Snipper, this is an acid solution that is micro-injectable and again, has a window of optimum opportunity for use. All hormonal sprays should be applied during flowering before fruit set. This timing is crucial and any derivation will result in wasted time and money.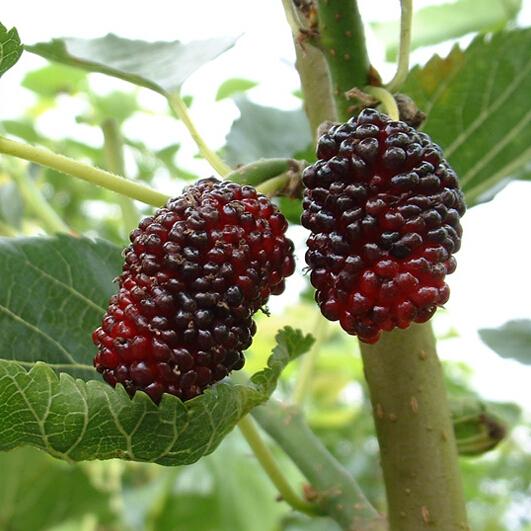
Other chemicals may be useful for mulberry sterilization. Consult with an arborist or the like for professional grade information. Professional application is likely to be costly, so keep that in mind. If all else fails, consider the removal of the tree (although that costs a pretty penny too!) and replanting of a less disorderly specimen.

How to Sterilize Mulberry Trees
Ask any arborist and they will probably tell you that sterilizing mulberry trees is a difficult proposition, if not impossible. Expensive chemicals are required and the potential drift can affect surrounding unprotected trees and bushes. Generally, the results are inconsistent and must be timed perfectly during fruit bloom and in prime temperature conditions for any efficacy.
The best course of action to stop a mulberry from fruiting and preventing the type of mess described above is to plant a male tree or fruitless variety of mulberry. If it’s too late for that and you have a female tree, thinning or pruning the tree to reduce the amount of viable fruit is certainly a thought. You will still get some fruit but between eating some and the reduction of fruit set, you may be able to stay ahead of the untidiness. Really, the only other method to try for preventing mulberry fruit is to use a chemical application. These chemicals can be applied by you or preferably by a licensed tree company.

Chemically Preventing Mulberry Fruit
An attempt can be made sterilizing mulberry trees with the use of such chemicals as Florel Fruit Eliminator. Florel contains ethephon, which will stop fruiting and breaks down into a natural plant hormone, ethylene. It must be applied at full bloom at just the right temperatures (60-95 F./16-32 C.) and will cause fruit to drop prior to setting. All conditions must be optimal, including a lack of disease or insect infestation, sufficient irrigation, excellent drainage and soil conditions. An issue with any of these puts the tree under stress, causing its natural production of ethylene. Too much ethylene will damage the tree, causing defoliation, stem damage and leaf scorch. For this reason, even professionals have a difficult time determining the best time for application.

A professional company may also use a deflowering hormonal solution applied internally as a basal or tree trunk panacea for mulberry fruit tree sterilization. Known as Snipper, this is an acid solution that is micro-injectable and again, has a window of optimum opportunity for use. All hormonal sprays should be applied during flowering before fruit set. This timing is crucial and any derivation will result in wasted time and money.

Other chemicals may be useful for mulberry sterilization. Consult with an arborist or the like for professional grade information. Professional application is likely to be costly, so keep that in mind. If all else fails, consider the removal of the tree (although that costs a pretty penny too!) and replanting of a less disorderly specimen.
0
1
文章
Dummer. ゛☀
2017年08月31日

If you are seeking a beautiful medium to large sized maple tree, look no further than the Norway maple. This lovely plant is native to Europe and western Asia, and has become naturalized in some areas of North America. In some regions, growing a Norway maple tree can be a problem where it self-seeds and displaces other native vegetation. With good care and careful management, however, this tree can be a good shade or standalone specimen. Learn how to grow Norway maple trees and enjoy their ornamental classic look and ease of care.
Norway Maple Tree Info
Maple trees are classics of the landscape genre. Norway maple (Acer platanoides) has made its own place in the culture and is a common shade tree that resembles sugar maples. The plant has several seasons of interest and retains a compact crown and dense growth. Norway maple has high tolerance to pollution and is adaptable to many soils including clay, sand or acidic conditions. This elegant tree is a useful addition to the landscape, provided some care is taken to minimize seedlings, which are rampant the following season.
The Norway maple was introduced by John Bartram to Philadelphia in 1756. It quickly became a popular shade tree due to its adaptability and attractive form. However, in some areas of the United States, it has begun to replace native populations of maples and may be invasive from the northeastern U.S. south to Tennessee and Virginia. It is also a plant of concern in the Pacific Northwest.
Trees can grow up to 90 feet in height and have nicely rounded, compact crowns. Young trees have smooth bark, which becomes black and furrowed with age. The fall color is bright gold but one of the types of Norway maple trees, Crimson King, develops deep reddish fall tones. One of the important items of Norway maple tree info is regarding its root system. Roots can become a hazard due to the huge number of surface roots the plant produces.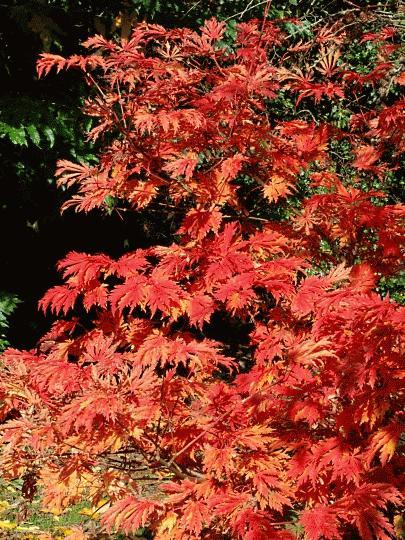
How to Grow Norway Maple Trees
Acer platanoides is hardy to United States Department of Agriculture zones 4 to 7. This remarkably adaptable tree performs well in either full sun or partial shade. While it prefers well drained, moist soil, it is drought tolerant for short periods of time, although some leaf drop may occur. Growing a Norway maple tree may require some training when the tree is young to help it develop a good strong central leader and stout scaffold. Plants transplant easily with little effect on the root system or foliage. Norway maple has good resistance to storm and ice damage and has a vigorous growth rate. These trees, if carefully managed, can quickly become attractive focal points of the shade garden.
Norway Maple Tree Care
One of the highlights of Norway maple tree care is managing the samaras, or seed fruits. These winged fruits can catch the wind and navigate far away from the parent tree. They germinate readily and can become an issue in rural settings or near native woods. Pruning at the end of the season, just before the samaras turn brown, can prevent wild seedlings from becoming a pest.
Other management is limited to supplemental watering in hot summers, once a year fertilizing with a good balanced food in early spring, and removing any damaged or diseased wood. These trees have few of the classic maple issues and are quite fine if left alone most of the time. While this adds to their popularity, caution should be observed in some regions where the plant is considered invasive.

Norway Maple Tree Info
Maple trees are classics of the landscape genre. Norway maple (Acer platanoides) has made its own place in the culture and is a common shade tree that resembles sugar maples. The plant has several seasons of interest and retains a compact crown and dense growth. Norway maple has high tolerance to pollution and is adaptable to many soils including clay, sand or acidic conditions. This elegant tree is a useful addition to the landscape, provided some care is taken to minimize seedlings, which are rampant the following season.
The Norway maple was introduced by John Bartram to Philadelphia in 1756. It quickly became a popular shade tree due to its adaptability and attractive form. However, in some areas of the United States, it has begun to replace native populations of maples and may be invasive from the northeastern U.S. south to Tennessee and Virginia. It is also a plant of concern in the Pacific Northwest.

Trees can grow up to 90 feet in height and have nicely rounded, compact crowns. Young trees have smooth bark, which becomes black and furrowed with age. The fall color is bright gold but one of the types of Norway maple trees, Crimson King, develops deep reddish fall tones. One of the important items of Norway maple tree info is regarding its root system. Roots can become a hazard due to the huge number of surface roots the plant produces.

How to Grow Norway Maple Trees
Acer platanoides is hardy to United States Department of Agriculture zones 4 to 7. This remarkably adaptable tree performs well in either full sun or partial shade. While it prefers well drained, moist soil, it is drought tolerant for short periods of time, although some leaf drop may occur. Growing a Norway maple tree may require some training when the tree is young to help it develop a good strong central leader and stout scaffold. Plants transplant easily with little effect on the root system or foliage. Norway maple has good resistance to storm and ice damage and has a vigorous growth rate. These trees, if carefully managed, can quickly become attractive focal points of the shade garden.

Norway Maple Tree Care
One of the highlights of Norway maple tree care is managing the samaras, or seed fruits. These winged fruits can catch the wind and navigate far away from the parent tree. They germinate readily and can become an issue in rural settings or near native woods. Pruning at the end of the season, just before the samaras turn brown, can prevent wild seedlings from becoming a pest.

Other management is limited to supplemental watering in hot summers, once a year fertilizing with a good balanced food in early spring, and removing any damaged or diseased wood. These trees have few of the classic maple issues and are quite fine if left alone most of the time. While this adds to their popularity, caution should be observed in some regions where the plant is considered invasive.
0
0
文章
Dummer. ゛☀
2017年08月31日

Flat stems of feathery, blue-green foliage and ornamental bark combine to make Leyland cypress an appealing choice for medium to large landscapes. Leyland cypress trees grow three feet or more per year, making it an excellent choice for a quick specimen or lawn tree, or a privacy hedge. Information about Leyland cypress will help with growing healthy trees.
Information About Leyland Cypress
Leland cypress (x Cupressocyparis leylandii) is a rare, but successful, hybrid between two different genera: Cupressus and Chamaecyparis. Leyland cypress has a short lifespan for an evergreen tree, surviving for 10 to 20 years. This tall evergreen conifer is grown commercially in the Southeast as a Christmas tree. The tree grows to a height of 50 to 70 feet, and although the spread is only 12 to 15 feet, it may overwhelm small, residential properties. Therefore, larger areas are most suitable for growing a Leyland cypress tree. The tree is also useful in coastal landscapes where it tolerates salt spray.
How to Grow Leyland Cypress Trees
Leyland cypress trees need a location in full sun or partial shade and a rich, well-drained soil. Avoid windy sites where the tree may be blown over. Plant the tree so that the soil line on the tree is even with the surrounding soil in a hole about twice as wide as the root ball. Backfill the hole with the soil that you removed from it without amendments. Press down with your foot as you fill the hole to remove any air pockets that may be present.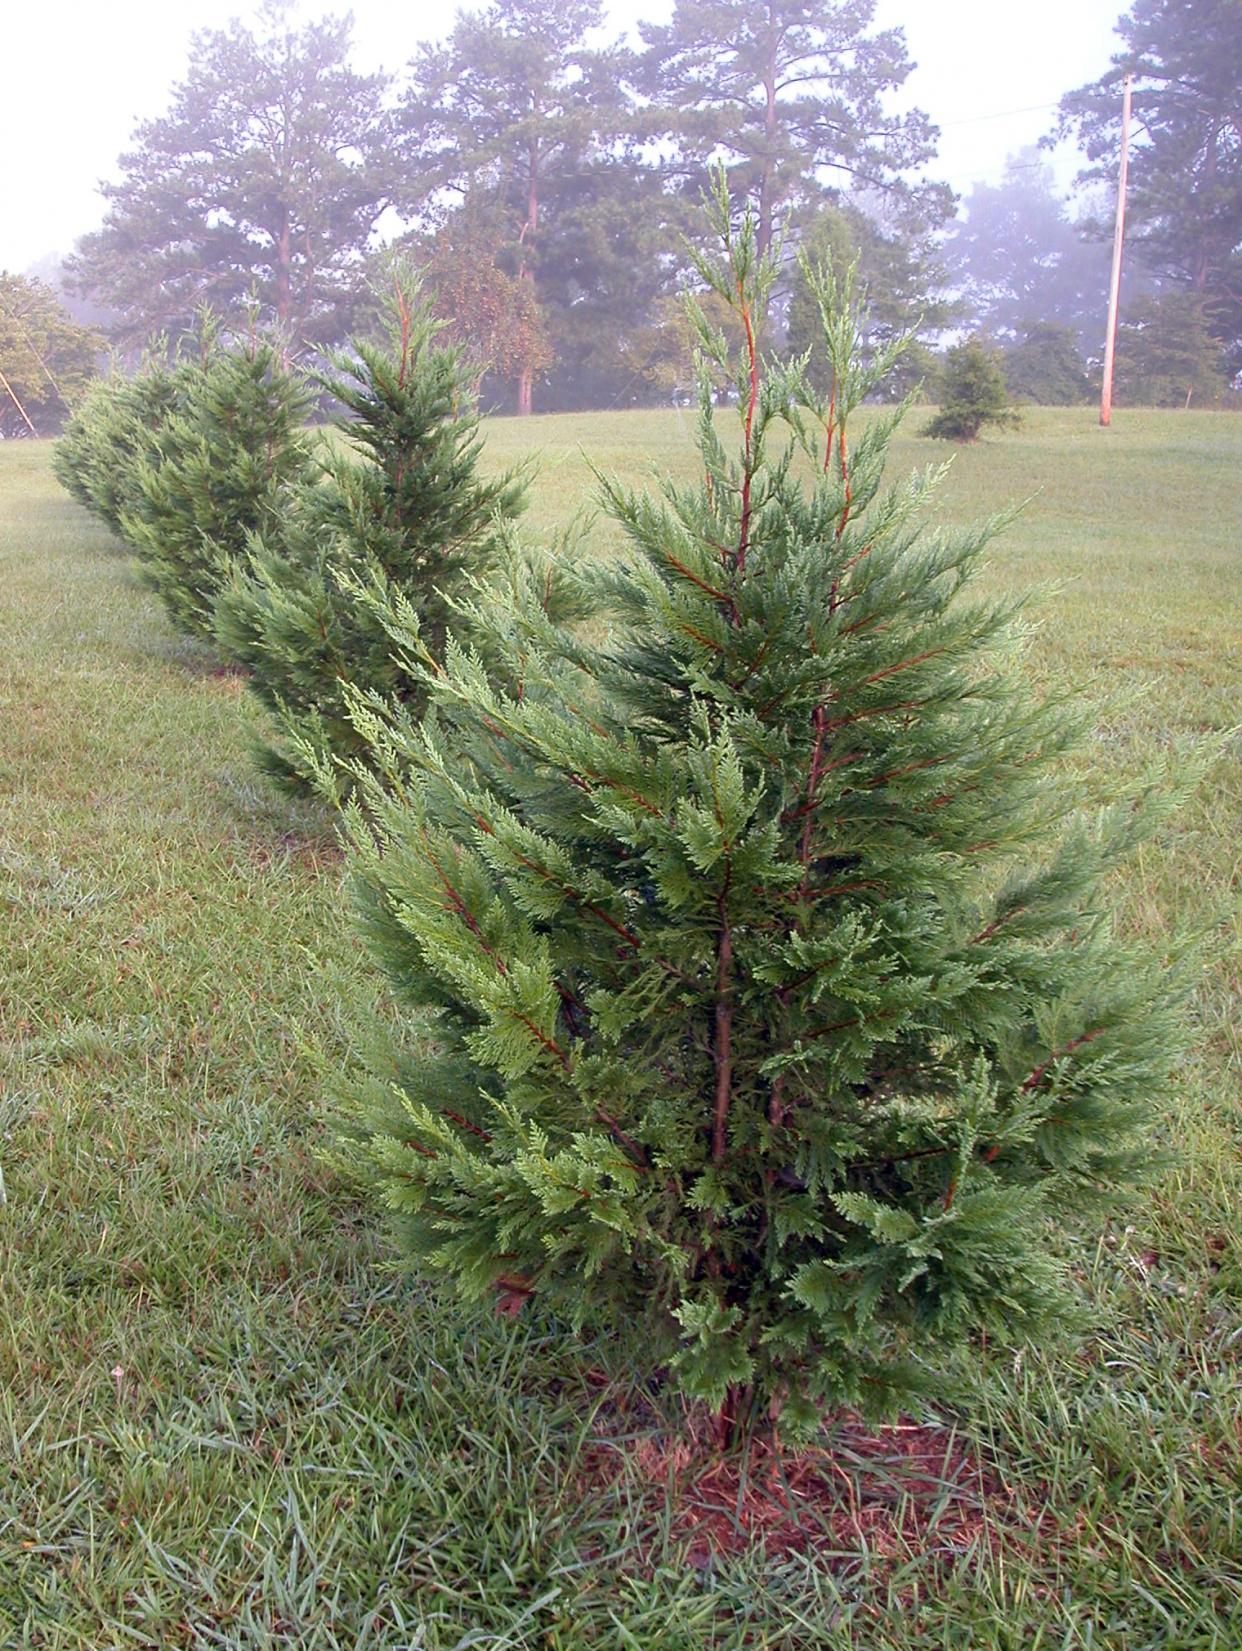
Leyland Cypress Care
Leyland cypress trees need very little care. Water them deeply during prolonged drought, but avoid overwatering, which can lead to root rot. The tree doesn’t need regular fertilization. Watch for bagworms and, if possible, remove the bags before the larvae they contain have a chance to emerge.
Growing a Leyland Cypress Pruned Hedge
Its narrow, columnar growth pattern makes Leyland cypress ideal for use as a hedge to screen out unsightly views or protect your privacy. To form a pruned hedge, set out the trees with 3 feet of space between them. When they reach a height about a foot beyond the desired height of the hedge, top them to about 6 inches below that height. Prune the shrubs every year in midsummer to maintain the height and shape the hedge. Pruning during damp weather, however, can lead to disease.

Information About Leyland Cypress
Leland cypress (x Cupressocyparis leylandii) is a rare, but successful, hybrid between two different genera: Cupressus and Chamaecyparis. Leyland cypress has a short lifespan for an evergreen tree, surviving for 10 to 20 years. This tall evergreen conifer is grown commercially in the Southeast as a Christmas tree. The tree grows to a height of 50 to 70 feet, and although the spread is only 12 to 15 feet, it may overwhelm small, residential properties. Therefore, larger areas are most suitable for growing a Leyland cypress tree. The tree is also useful in coastal landscapes where it tolerates salt spray.

How to Grow Leyland Cypress Trees
Leyland cypress trees need a location in full sun or partial shade and a rich, well-drained soil. Avoid windy sites where the tree may be blown over. Plant the tree so that the soil line on the tree is even with the surrounding soil in a hole about twice as wide as the root ball. Backfill the hole with the soil that you removed from it without amendments. Press down with your foot as you fill the hole to remove any air pockets that may be present.

Leyland Cypress Care
Leyland cypress trees need very little care. Water them deeply during prolonged drought, but avoid overwatering, which can lead to root rot. The tree doesn’t need regular fertilization. Watch for bagworms and, if possible, remove the bags before the larvae they contain have a chance to emerge.

Growing a Leyland Cypress Pruned Hedge
Its narrow, columnar growth pattern makes Leyland cypress ideal for use as a hedge to screen out unsightly views or protect your privacy. To form a pruned hedge, set out the trees with 3 feet of space between them. When they reach a height about a foot beyond the desired height of the hedge, top them to about 6 inches below that height. Prune the shrubs every year in midsummer to maintain the height and shape the hedge. Pruning during damp weather, however, can lead to disease.
0
0
文章
Dummer. ゛☀
2017年08月31日

Tamarack tree planting is not difficult, nor is care for tamarack trees once they are established. Read on for information about how to grow a tamarack tree.
Tamarack Tree Information
Tamaracks (Larix laricina) are medium-sized deciduous conifers that are native to this country. They grow wild from the Atlantic all the way across to central Alaska. If you look for tamarack tree information, you may find it under other common names for this tree, like American larch, eastern larch, Alaska larch or hackmatack.
Given the huge range of the tamarack, it tolerates extremely varied climatic conditions, from -30 degrees to 110 degrees Fahrenheit (34 to 43 C.). It can thrive in regions where rainfall is only 7 inches annually and also where it is 55 inches annually. That means that wherever you live in the country, growing tamarack trees may be possible. The trees also accept varied types of soil. However, tamaracks grow best in wet or at least moist soil with a high organic content like sphagnum peat and woody peat. They thrive on moist, well-drained loamy soils beside rivers, lakes or swamps.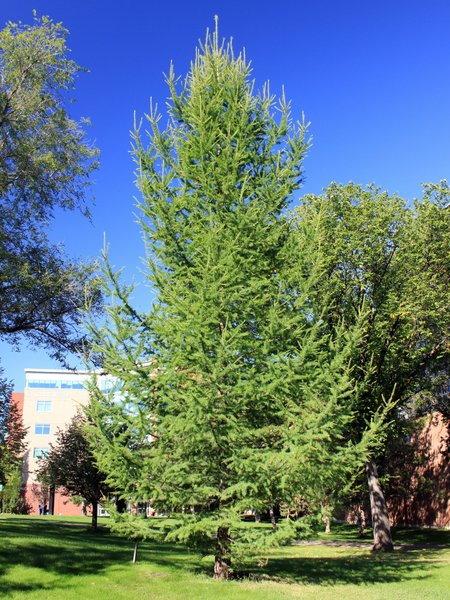
Tamarack Tree Planting
Tamaracks are attractive trees with needles that turn brilliant yellow in autumn. These trees could be used as ornamentals far more than they are currently. If you are interested in tamarack tree planting, sow the seeds in warm, moist organic soil. Be sure to clear all brush and weeds before you begin. Your seeds need full light to germinate. In nature, germination rates are low since rodents feast on the seeds, but in cultivation, this should be less of a problem. Tamaracks do not support shade, so plant these conifers in open areas. Space the trees well apart when you are doing tamarack tree planting, so that the young trees do not shade one another.
How to Grow a Tamarack Tree
Once your seeds become seedlings, be sure to provide a constant water supply for them. Drought conditions can kill them. As long as they have full light and regular irrigation, they should thrive. If you are growing tamarack trees, you will find that they grow fast. Correctly planted, tamaracks are the fastest growing boreal conifers for their first 50 years. Expect your tree to live between 200 and 300 years. Care for tamarack trees is easy, once they are correctly established. They require virtually no work other than irrigation and keeping down competing trees. The greatest threat to the health of the trees in the wild is destruction by fire. Because their bark is so thin and their roots so shallow, even a light burn can kill them.
The tamarack foliage can be attacked by the larch sawfly and the larch casebearer. If your tree is attacked, consider biological control. Parasites of these pests are now available in commerce.

Tamarack Tree Information
Tamaracks (Larix laricina) are medium-sized deciduous conifers that are native to this country. They grow wild from the Atlantic all the way across to central Alaska. If you look for tamarack tree information, you may find it under other common names for this tree, like American larch, eastern larch, Alaska larch or hackmatack.
Given the huge range of the tamarack, it tolerates extremely varied climatic conditions, from -30 degrees to 110 degrees Fahrenheit (34 to 43 C.). It can thrive in regions where rainfall is only 7 inches annually and also where it is 55 inches annually. That means that wherever you live in the country, growing tamarack trees may be possible. The trees also accept varied types of soil. However, tamaracks grow best in wet or at least moist soil with a high organic content like sphagnum peat and woody peat. They thrive on moist, well-drained loamy soils beside rivers, lakes or swamps.

Tamarack Tree Planting
Tamaracks are attractive trees with needles that turn brilliant yellow in autumn. These trees could be used as ornamentals far more than they are currently. If you are interested in tamarack tree planting, sow the seeds in warm, moist organic soil. Be sure to clear all brush and weeds before you begin. Your seeds need full light to germinate. In nature, germination rates are low since rodents feast on the seeds, but in cultivation, this should be less of a problem. Tamaracks do not support shade, so plant these conifers in open areas. Space the trees well apart when you are doing tamarack tree planting, so that the young trees do not shade one another.

How to Grow a Tamarack Tree
Once your seeds become seedlings, be sure to provide a constant water supply for them. Drought conditions can kill them. As long as they have full light and regular irrigation, they should thrive. If you are growing tamarack trees, you will find that they grow fast. Correctly planted, tamaracks are the fastest growing boreal conifers for their first 50 years. Expect your tree to live between 200 and 300 years. Care for tamarack trees is easy, once they are correctly established. They require virtually no work other than irrigation and keeping down competing trees. The greatest threat to the health of the trees in the wild is destruction by fire. Because their bark is so thin and their roots so shallow, even a light burn can kill them.

The tamarack foliage can be attacked by the larch sawfly and the larch casebearer. If your tree is attacked, consider biological control. Parasites of these pests are now available in commerce.
0
0
文章
Dummer. ゛☀
2017年08月31日

So, what is a hackberry and why would one want to grow it in the landscape? Keep reading to learn more about this interesting tree.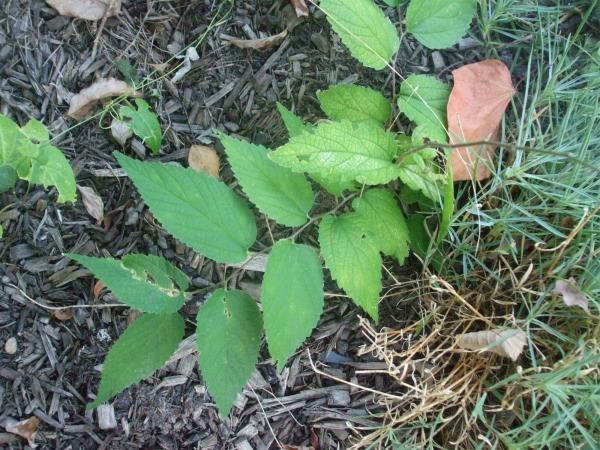
What is a Hackberry Tree?
A hackberry is a medium sized tree indigenous to North Dakota but able to survive throughout most of the United States. Hackberry is an easy to identify member of the Elm family but in a different genus (Celtis occidentalis). It has a distinctive warty bark surface sometimes described as stucco-like. It has 2 to 5-inch long, alternate leaves with unequal bases and tapered ends. The leaves are dull green to glossy with a network of veining and serrated except at their base.
Hackberry Tree Info
Hackberry trees also bear ¼-inch sized, dark purple pitted fruit (drupes) that are valuable food sources through the late winter months for a variety of bird species including flickers, cardinals, cedar waxwings, robins and brown thrashers. Of course, in the yin and yang of things, this attraction has a detriment as well since small mammals and deer may damage the tree when browsing.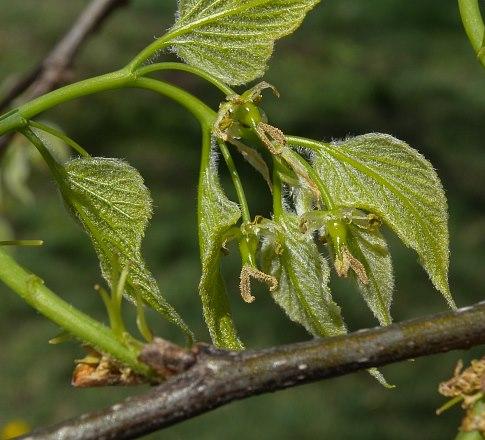
Patience does not necessarily need to be a virtue when hackberry growing; the tree matures rapidly, attaining heights of 40 to 60 feet at the crown and 25 to 45 feet across. Above the gray ridged barked trunk, the tree broadens and arches out from the top as it matures. The wood of the hackberry tree is used for boxes, crates and firewood, so not necessarily a wood for finely crafted furniture. The Native Americans once used the fruit of the hackberry to flavor meats much as we use pepper today.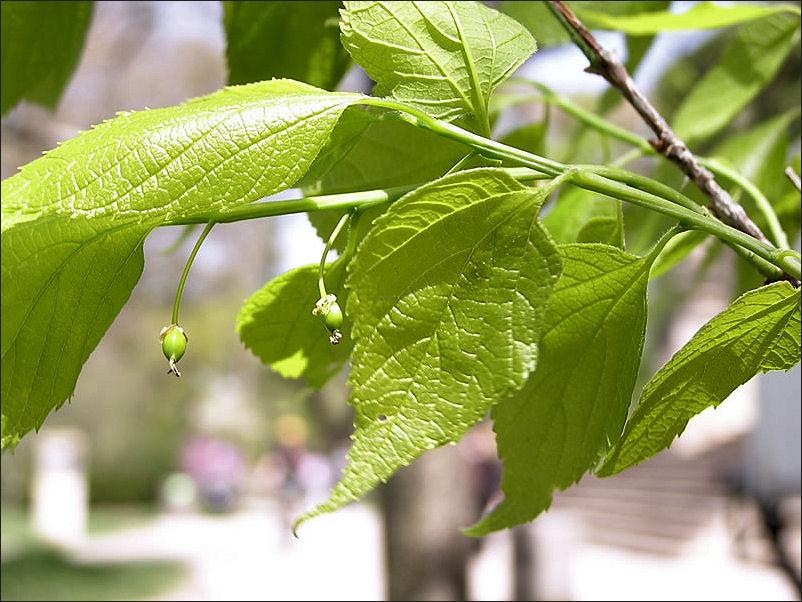
How to Grow Hackberry Trees
Grow this medium to tall tree on farms as field windbreaks, riparian planting or along highways in beautification projects – as it does well in dry and windy areas. The tree also enlivens boulevards, parks and other ornamental landscapes. Other hackberry tree info tells us that the specimen is hardy in USDA zones 2-9, which covers a good bit of the United States. This tree is moderately drought hardy but will do best on moist but well draining sites. When hackberry growing, the tree thrives in most any type of soil with a pH of between 6.0 and 8.0; it is also able to withstand more alkaline soils.
Hackberry trees should be planted in full sun to partial shade. It truly is quite an adaptable species of tree and requires little care.

What is a Hackberry Tree?
A hackberry is a medium sized tree indigenous to North Dakota but able to survive throughout most of the United States. Hackberry is an easy to identify member of the Elm family but in a different genus (Celtis occidentalis). It has a distinctive warty bark surface sometimes described as stucco-like. It has 2 to 5-inch long, alternate leaves with unequal bases and tapered ends. The leaves are dull green to glossy with a network of veining and serrated except at their base.

Hackberry Tree Info
Hackberry trees also bear ¼-inch sized, dark purple pitted fruit (drupes) that are valuable food sources through the late winter months for a variety of bird species including flickers, cardinals, cedar waxwings, robins and brown thrashers. Of course, in the yin and yang of things, this attraction has a detriment as well since small mammals and deer may damage the tree when browsing.

Patience does not necessarily need to be a virtue when hackberry growing; the tree matures rapidly, attaining heights of 40 to 60 feet at the crown and 25 to 45 feet across. Above the gray ridged barked trunk, the tree broadens and arches out from the top as it matures. The wood of the hackberry tree is used for boxes, crates and firewood, so not necessarily a wood for finely crafted furniture. The Native Americans once used the fruit of the hackberry to flavor meats much as we use pepper today.

How to Grow Hackberry Trees
Grow this medium to tall tree on farms as field windbreaks, riparian planting or along highways in beautification projects – as it does well in dry and windy areas. The tree also enlivens boulevards, parks and other ornamental landscapes. Other hackberry tree info tells us that the specimen is hardy in USDA zones 2-9, which covers a good bit of the United States. This tree is moderately drought hardy but will do best on moist but well draining sites. When hackberry growing, the tree thrives in most any type of soil with a pH of between 6.0 and 8.0; it is also able to withstand more alkaline soils.

Hackberry trees should be planted in full sun to partial shade. It truly is quite an adaptable species of tree and requires little care.
0
0
文章
Miss Chen
2017年08月11日

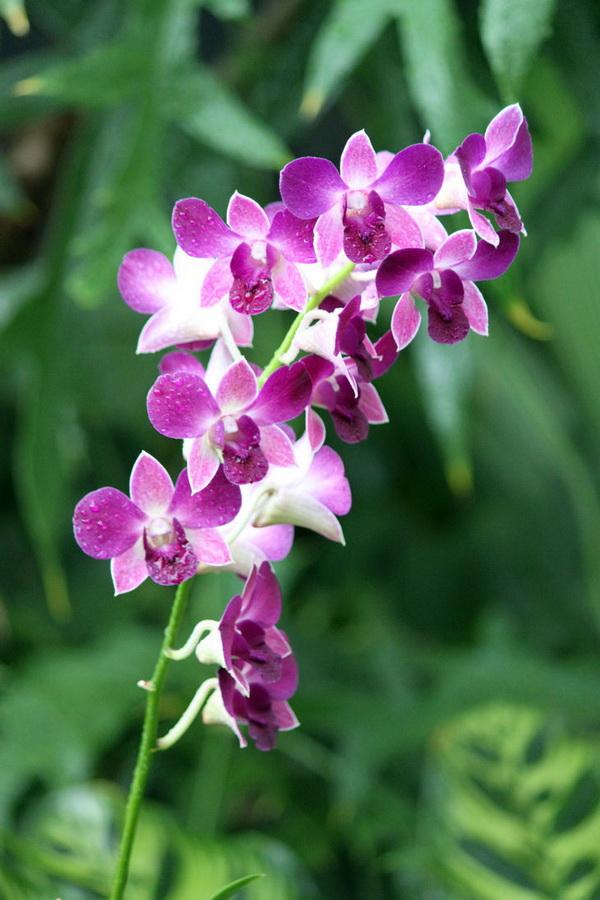
It is time to transplant your orchid when the roots are growing over the side of the pot or the lower leaves have died and weakened the center stem. The plant has either become too big for the container or the potting medium has broken down and no longer supports the plant. Always wait for an orchid to finish blooming before transplanting.

Transplanting Materials
Gather together new potting medium, hand-held pruners and a pot one size bigger than its present container. The potting medium must be fast-draining and also water-retentive. Commercial orchid potting medium contains volcanic rock, coconut fiber, tree bark, charcoal or a combination of these. Aliflor is an expanding clay medium that is often used in orchid mixes. Bark-based potting medium drains well but breaks down easily. Peat-based material retains moisture well but must be replaced yearly. Choose either clay or plastic pots for your orchid. Ensure the hand-held pruners are sterilized with alcohol before using, to prevent the spread of harmful bacteria.
Remove Orchid From Pot
Grasp the orchid plant by the main stem and gently remove it from the overturned pot. A very root-bound plant will be difficult to shake loose, and sometimes the pot needs to be broken. Remove all of the old potting medium by shaking the plant and picking the medium out from between the roots. Do not reuse any of this material in the transplant process. Gently wash off the orchid roots with water to remove fine particles. Pull off dead or weak lower leaves and pull off plant tissue at the leaf juncture. Prune all shriveled roots carefully with hand-held pruners, being careful not to cut healthy growth. Dead tissue is hollow when squeezed or wiry looking.
New Pot
Choose a plastic or clay pot that will accommodate the entire root system comfortably. Cover the bottom of the pot with a thin layer of potting mix. Place the plant in the pot with the lower leaves slightly above the rim. Place and push potting material in the spaces between the roots, pressing gently as you go. Ensure the bottom leaves remain slightly above the pot rim. Tap the pot gently to settle the materials and add more if needed to fill the space. Experienced orchid gardeners add a label to each plant indicating its name and bloom time.
Water and Ongoing Care
An orchid needs to be soaked thoroughly after it has been transplanted to a new pot. Always use tepid water and soak long enough so all the planting material is wet. Allow the pot to drain completely and empty the drip pan so the roots do not continue to absorb water through the drainage hole. Orchids are watered once a week after the transplant. Fertilize monthly with 1/2-strength commercial orchid fertilizer during summer and fall. Do not fertilize during the spring flowering cycle.

Transplanting Materials
Gather together new potting medium, hand-held pruners and a pot one size bigger than its present container. The potting medium must be fast-draining and also water-retentive. Commercial orchid potting medium contains volcanic rock, coconut fiber, tree bark, charcoal or a combination of these. Aliflor is an expanding clay medium that is often used in orchid mixes. Bark-based potting medium drains well but breaks down easily. Peat-based material retains moisture well but must be replaced yearly. Choose either clay or plastic pots for your orchid. Ensure the hand-held pruners are sterilized with alcohol before using, to prevent the spread of harmful bacteria.
Remove Orchid From Pot
Grasp the orchid plant by the main stem and gently remove it from the overturned pot. A very root-bound plant will be difficult to shake loose, and sometimes the pot needs to be broken. Remove all of the old potting medium by shaking the plant and picking the medium out from between the roots. Do not reuse any of this material in the transplant process. Gently wash off the orchid roots with water to remove fine particles. Pull off dead or weak lower leaves and pull off plant tissue at the leaf juncture. Prune all shriveled roots carefully with hand-held pruners, being careful not to cut healthy growth. Dead tissue is hollow when squeezed or wiry looking.
New Pot
Choose a plastic or clay pot that will accommodate the entire root system comfortably. Cover the bottom of the pot with a thin layer of potting mix. Place the plant in the pot with the lower leaves slightly above the rim. Place and push potting material in the spaces between the roots, pressing gently as you go. Ensure the bottom leaves remain slightly above the pot rim. Tap the pot gently to settle the materials and add more if needed to fill the space. Experienced orchid gardeners add a label to each plant indicating its name and bloom time.

Water and Ongoing Care
An orchid needs to be soaked thoroughly after it has been transplanted to a new pot. Always use tepid water and soak long enough so all the planting material is wet. Allow the pot to drain completely and empty the drip pan so the roots do not continue to absorb water through the drainage hole. Orchids are watered once a week after the transplant. Fertilize monthly with 1/2-strength commercial orchid fertilizer during summer and fall. Do not fertilize during the spring flowering cycle.
0
0


