成长记
LaneyTea
2017年11月04日

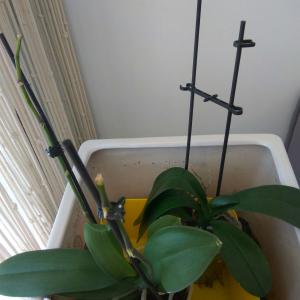
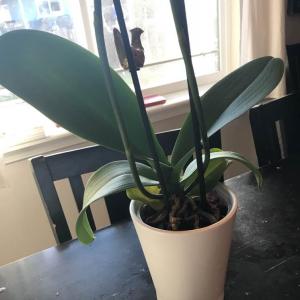
I now added "Phalaenopsis Orchid" in my "garden"

0
0
Jabandit:Aka bought an orchid at Home Depot lol
文章
Dummer. ゛☀
2017年09月29日

Scientific Name
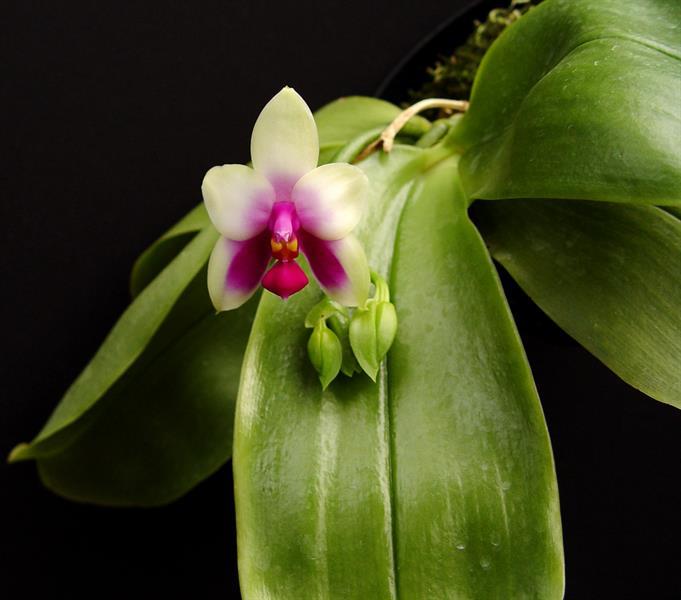
Phalaenopsis bellina (Rchb.f.) Christenson
Synonyms
Phalaenopsis violacea var. bellina
Scientific Classification
Family: Orchidaceae
Subfamily: Epidendroideae
Genus: Phalaenopsis
Subgenus: Phalaenopsis

Flower
Color: Green and purple
Bloom Time: Summer to fall
Description
Phalaenopsis bellina is a monopodial orchid. The leaves are a light green and appear to be very glossy and slightly wavy. With age they can grow up to 12 inches (30 cm) long and have a downward growth. Each year the orchid will produce 1 or 2 new leaves and the bottom leaves will dry and fall regularly. The flowers are displayed on a short and compact flower spike which emerges from between the leaves are elongates forward. They are waxy, green and purple, up to 2 inches (5 cm) in diameter and are usually produced above the leaves.
Hardiness
USDA hardiness zone 11a to 12b: from 40 °F (+4.4 °C) to 60 °F (15.6 °C).

How to Grow and Care
Phalaenopsis are generally very rewarding plants. They are not demanding and, in the right conditions, they will reward the grower with months of showy blooms. It is vitally important, however, that water never be allowed to rest in the growing tip of the plant. This will cause the new leaves to rot, and the plant will die. Thus, they should only be watered in the morning. As with all Orchids, the higher the humidity and temperature, the greater the need for turbulent air flow to prevent rot, fungus and diseases. Successful growth means finding the right balance between humidity, temperature, light and air flow.
Phalaenopsis can be grown in most Orchid potting media, including chunks of pine bark, clay aggregate pellets, charcoal, perlite, sphagnum moss, and styrofoam. They can also be grown in hanging baskets or mounted on slabs in a greenhouse-type environment. As with all Epiphytic Orchids, they should be planted in free-draining containers. Repot Phalaenopsis in spring, after the bloom is done. Adult Phalaenopsis can often go for two years or more before they need to be repotted.
Origin
Native to Malaysia and Borneo.
Phalaenopsis bellina (Rchb.f.) Christenson

Synonyms
Phalaenopsis violacea var. bellina
Scientific Classification
Family: Orchidaceae
Subfamily: Epidendroideae
Genus: Phalaenopsis
Subgenus: Phalaenopsis

Flower
Color: Green and purple
Bloom Time: Summer to fall
Description
Phalaenopsis bellina is a monopodial orchid. The leaves are a light green and appear to be very glossy and slightly wavy. With age they can grow up to 12 inches (30 cm) long and have a downward growth. Each year the orchid will produce 1 or 2 new leaves and the bottom leaves will dry and fall regularly. The flowers are displayed on a short and compact flower spike which emerges from between the leaves are elongates forward. They are waxy, green and purple, up to 2 inches (5 cm) in diameter and are usually produced above the leaves.
Hardiness
USDA hardiness zone 11a to 12b: from 40 °F (+4.4 °C) to 60 °F (15.6 °C).

How to Grow and Care
Phalaenopsis are generally very rewarding plants. They are not demanding and, in the right conditions, they will reward the grower with months of showy blooms. It is vitally important, however, that water never be allowed to rest in the growing tip of the plant. This will cause the new leaves to rot, and the plant will die. Thus, they should only be watered in the morning. As with all Orchids, the higher the humidity and temperature, the greater the need for turbulent air flow to prevent rot, fungus and diseases. Successful growth means finding the right balance between humidity, temperature, light and air flow.
Phalaenopsis can be grown in most Orchid potting media, including chunks of pine bark, clay aggregate pellets, charcoal, perlite, sphagnum moss, and styrofoam. They can also be grown in hanging baskets or mounted on slabs in a greenhouse-type environment. As with all Epiphytic Orchids, they should be planted in free-draining containers. Repot Phalaenopsis in spring, after the bloom is done. Adult Phalaenopsis can often go for two years or more before they need to be repotted.
Origin
Native to Malaysia and Borneo.
0
0
文章
Dummer. ゛☀
2017年09月29日

Scientific Name
Phalaenopsis amabilis (L.) Blume

Common Names
Moon Orchid, Moth Orchid, The Lovely Phalaenopsis
Synonyms
Cymbidium amabile, Epidendrum amabile, Phalaenopsis amabilis subsp. amabilis, Phalaenopsis aphrodite var. gloriosa, Phalaenopsis elisabethae, Phalaenopsis gloriosa, Phalaenopsis grandiflora, Phalaenopsis rimestadiana, Synadena amabilis
Scientific Classification
Family: Orchidaceae
Subfamily: Epidendroideae
Genus: Phalaenopsis
Subgenus: Phalaenopsis

Flower
Color: White
Bloom Time: Spring to summer
Description
Phalaenopsis amabilis is the national flower of Indonesia. It has a short stem. The shiny green leaves are up to 20 inches (50 cm) long and up to 4 inches (10 cm) wide and vary from oblong to elliptic at the base and obtuse, minutely, at the tip or apex. The flower is showy, membranous, white, the lip, (the unpared petals of an orchid) which is three-lobed, and the callus are a variety of yellow and red depending on the individual plant. It bloom from spring to summer with several flowers, up to 4 inches (10 cm) in diameter and more.

How to Grow and Care
Phalaenopsis are generally very rewarding plants. They are not demanding and, in the right conditions, they will reward the grower with months of showy blooms. It is vitally important, however, that water never be allowed to rest in the growing tip of the plant. This will cause the new leaves to rot, and the plant will die. Thus, they should only be watered in the morning. As with all Orchids, the higher the humidity and temperature, the greater the need for turbulent air flow to prevent rot, fungus and diseases. Successful growth means finding the right balance between humidity, temperature, light and air flow.
Phalaenopsis can be grown in most Orchid potting media, including chunks of pine bark, clay aggregate pellets, charcoal, perlite, sphagnum moss, and styrofoam. They can also be grown in hanging baskets or mounted on slabs in a greenhouse-type environment. As with all Epiphytic Orchids, they should be planted in free-draining containers. Repot Phalaenopsis in spring, after the bloom is done. Adult Phalaenopsis can often go for two years or more before they need to be repotted.
Origin
Native of northern Australia, Indonesia, Papua New Guinea, the Philippines and New Britain occuring at elevations up to 600 meters in rainforests on trunks and branches overhanging rivers.
Phalaenopsis amabilis (L.) Blume

Common Names
Moon Orchid, Moth Orchid, The Lovely Phalaenopsis
Synonyms
Cymbidium amabile, Epidendrum amabile, Phalaenopsis amabilis subsp. amabilis, Phalaenopsis aphrodite var. gloriosa, Phalaenopsis elisabethae, Phalaenopsis gloriosa, Phalaenopsis grandiflora, Phalaenopsis rimestadiana, Synadena amabilis
Scientific Classification
Family: Orchidaceae
Subfamily: Epidendroideae
Genus: Phalaenopsis
Subgenus: Phalaenopsis

Flower
Color: White
Bloom Time: Spring to summer
Description
Phalaenopsis amabilis is the national flower of Indonesia. It has a short stem. The shiny green leaves are up to 20 inches (50 cm) long and up to 4 inches (10 cm) wide and vary from oblong to elliptic at the base and obtuse, minutely, at the tip or apex. The flower is showy, membranous, white, the lip, (the unpared petals of an orchid) which is three-lobed, and the callus are a variety of yellow and red depending on the individual plant. It bloom from spring to summer with several flowers, up to 4 inches (10 cm) in diameter and more.

How to Grow and Care
Phalaenopsis are generally very rewarding plants. They are not demanding and, in the right conditions, they will reward the grower with months of showy blooms. It is vitally important, however, that water never be allowed to rest in the growing tip of the plant. This will cause the new leaves to rot, and the plant will die. Thus, they should only be watered in the morning. As with all Orchids, the higher the humidity and temperature, the greater the need for turbulent air flow to prevent rot, fungus and diseases. Successful growth means finding the right balance between humidity, temperature, light and air flow.
Phalaenopsis can be grown in most Orchid potting media, including chunks of pine bark, clay aggregate pellets, charcoal, perlite, sphagnum moss, and styrofoam. They can also be grown in hanging baskets or mounted on slabs in a greenhouse-type environment. As with all Epiphytic Orchids, they should be planted in free-draining containers. Repot Phalaenopsis in spring, after the bloom is done. Adult Phalaenopsis can often go for two years or more before they need to be repotted.
Origin
Native of northern Australia, Indonesia, Papua New Guinea, the Philippines and New Britain occuring at elevations up to 600 meters in rainforests on trunks and branches overhanging rivers.
0
0
文章
Dummer. ゛☀
2017年09月28日

Most people are introduced to Orchids through Phalaenopsis Orchids. These are the thick-leaved plants with elegant, arching sprays of blooms that can be seen in so many design magazines and sitting on coffee tables across America. There are about 60 true species of Phalaenopsis; they are native to tropical Asian countries including the Philippines, Borneo, Java and elsewhere. These plants have been extensively hybridized, and there are thousands of Phalaenopsis hybrids, ranging from the stark, classic white hybrid (often called a Moth Orchid) to jewel-like miniatures with clouds of yellow and candy pink blooms.
Growing Conditions and General Care
Light: Phalaenopsis are low-light Orchids and will thrive in a east window, or a shaded southerly or westerly exposure. They do not like direct sunlight and will scorch. They also will do well under common grow lights, positioned about a foot off the plant. A well-grown phal will have darker green leaves on top and streaks of red or burgundy on the undersides.
Water: The Phalaenopsis is a Monopodial Orchid that grows from a single stem. It does not have the large water-storing pseudobulbs found on Sympodial Orchids, although its leaves can store some water. Thus, the plant has a lower tolerance for drought. During the growth season, water the plant whenever its exposed roots turn silvery white, usually weekly. Try to keep the potting media slightly damp. During the flowering season, you can cut the water back to every other week. The higher the humidity, the more important it is to maintain a good air flow around the roots and leaves.
Fertilizer: During the growing season, fertilize with a weak Orchid fertilizer weekly (weakly weekly, as the growers say). Cut fertilizer back to once a month during the winter and flowering season. Some growers like to give the plant a boost of blooming fertilizer in September or October to provoke a flower spike.
Temperature: Generally, Phalaenopsis are considered a warm-house plant. During active growth, they like temperatures between about 75°F and 85°F (24°C and 30°C), but they can adapt to a normal house temperature of 65°F to 70°F (18°C to 21°C). The higher the temperature, the greater the plant’s need for humidity. However, they also like a nice contrast between night and day temperatures.
Blooming
Phalaenopsis typically bloom in the late winter or early spring. Their long-lasting flowers are held on arching branches and open successively. A single multi-branching flower spike can have more than 20 flowers. Individual Phalaenopsis flowers can last for weeks. To induce a flower spike, the plant needs a few cooler nights, down to 55°F (13°C). The plants will not bloom well without this temperature contrast.
Potting and Media
Phalaenopsis can be grown in most Orchid potting media, including chunks of pine bark, clay aggregate pellets, charcoal, perlite, sphagnum moss, and styrofoam. They can also be grown in hanging baskets or mounted on slabs in a greenhouse-type environment. As with all Epiphytic Orchids, they should be planted in free-draining containers. Repot Phalaenopsis in spring, after the bloom is done. Adult Phalaenopsis can often go for two years or more before they need to be repotted.
Grower’s Tips
Phalaenopsis are generally very rewarding plants. They are not demanding and, in the right conditions, they will reward the grower with months of showy blooms. It is vitally important, however, that water never be allowed to rest in the growing tip of the plant. This will cause the new leaves to rot, and the plant will die. Thus, they should only be watered in the morning. As with all Orchids, the higher the humidity and temperature, the greater the need for turbulent air flow to prevent rot, fungus and diseases. Successful growth means finding the right balance between humidity, temperature, light and air flow.

Growing Conditions and General Care
Light: Phalaenopsis are low-light Orchids and will thrive in a east window, or a shaded southerly or westerly exposure. They do not like direct sunlight and will scorch. They also will do well under common grow lights, positioned about a foot off the plant. A well-grown phal will have darker green leaves on top and streaks of red or burgundy on the undersides.

Water: The Phalaenopsis is a Monopodial Orchid that grows from a single stem. It does not have the large water-storing pseudobulbs found on Sympodial Orchids, although its leaves can store some water. Thus, the plant has a lower tolerance for drought. During the growth season, water the plant whenever its exposed roots turn silvery white, usually weekly. Try to keep the potting media slightly damp. During the flowering season, you can cut the water back to every other week. The higher the humidity, the more important it is to maintain a good air flow around the roots and leaves.
Fertilizer: During the growing season, fertilize with a weak Orchid fertilizer weekly (weakly weekly, as the growers say). Cut fertilizer back to once a month during the winter and flowering season. Some growers like to give the plant a boost of blooming fertilizer in September or October to provoke a flower spike.

Temperature: Generally, Phalaenopsis are considered a warm-house plant. During active growth, they like temperatures between about 75°F and 85°F (24°C and 30°C), but they can adapt to a normal house temperature of 65°F to 70°F (18°C to 21°C). The higher the temperature, the greater the plant’s need for humidity. However, they also like a nice contrast between night and day temperatures.
Blooming
Phalaenopsis typically bloom in the late winter or early spring. Their long-lasting flowers are held on arching branches and open successively. A single multi-branching flower spike can have more than 20 flowers. Individual Phalaenopsis flowers can last for weeks. To induce a flower spike, the plant needs a few cooler nights, down to 55°F (13°C). The plants will not bloom well without this temperature contrast.

Potting and Media
Phalaenopsis can be grown in most Orchid potting media, including chunks of pine bark, clay aggregate pellets, charcoal, perlite, sphagnum moss, and styrofoam. They can also be grown in hanging baskets or mounted on slabs in a greenhouse-type environment. As with all Epiphytic Orchids, they should be planted in free-draining containers. Repot Phalaenopsis in spring, after the bloom is done. Adult Phalaenopsis can often go for two years or more before they need to be repotted.

Grower’s Tips
Phalaenopsis are generally very rewarding plants. They are not demanding and, in the right conditions, they will reward the grower with months of showy blooms. It is vitally important, however, that water never be allowed to rest in the growing tip of the plant. This will cause the new leaves to rot, and the plant will die. Thus, they should only be watered in the morning. As with all Orchids, the higher the humidity and temperature, the greater the need for turbulent air flow to prevent rot, fungus and diseases. Successful growth means finding the right balance between humidity, temperature, light and air flow.
0
1
文章
Dummer. ゛☀
2017年09月26日

Scientific Name
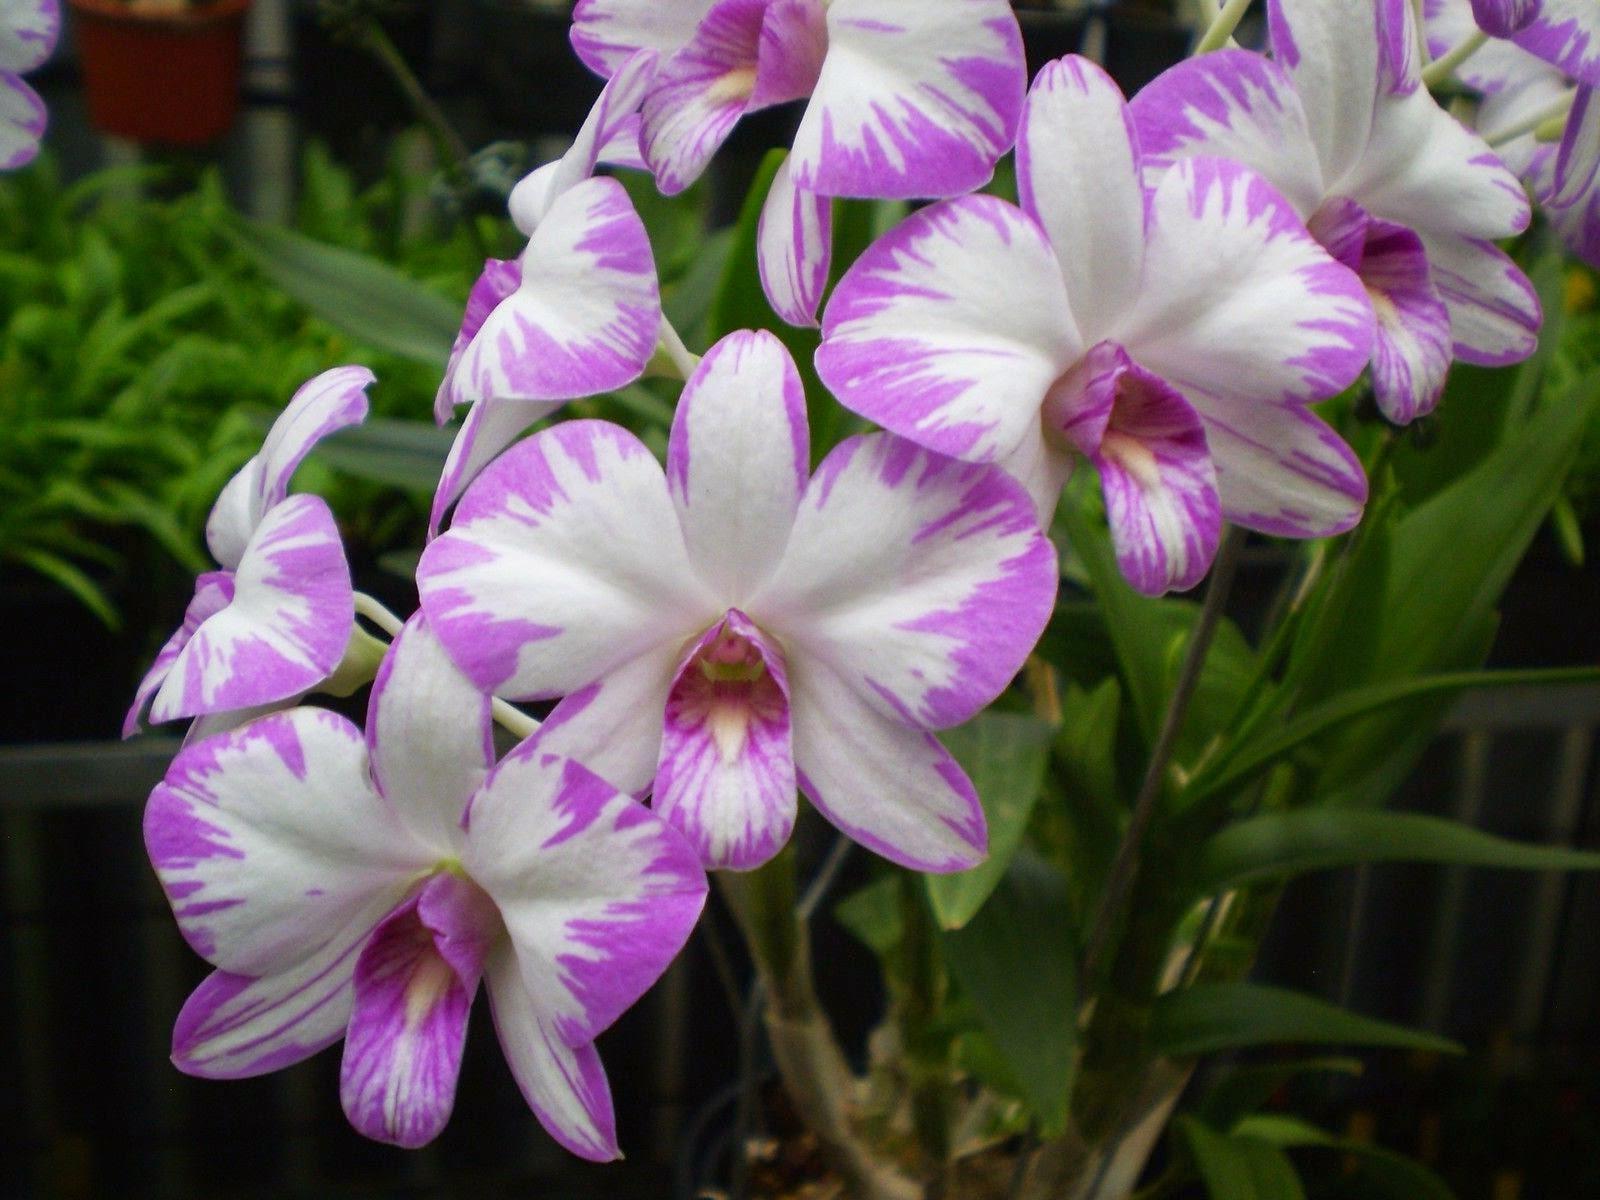
Dendrobium bigibbum Lindl.
Common Names
Cooktown Orchid
Synonyms
Callista bigibba, Callista phalaenopsis, Callista sumneri, Dendrobium lithocola, Dendrobium phalaenopsis, Dendrobium sumneri, Vappodes bigibba, Vappodes lithocola, Vappodes phalaenopsis
Scientific Classification
Family: Orchidaceae
Subfamily: Epidendroideae
Tribe: Dendrobieae
Genus: Dendrobium

Flower
Color: Pink or purple
Bloom Time: March to July
Description
Dendrobium bigibbum is flowering plants, up to 32 inches (80 cm) tall. The flowers are pink or purple (sometimes almost white) on canes up to 16 inches (40 cm) long. Flowering time is usually between March and July.

How to Grow and Care
Although there is a huge variety from which to choose, when it comes to learning how to grow Dendrobium orchids, there are two important rules that they all follow.
First, they like to live in little pots with their roots crowded into a tiny area. If you try to be nice and give them room to spread out, the roots are likely to stay too moist and begin to rot. If you don’t like the look of a large plant growing in a ridiculously small pot, camouflage it in a larger planter.
The other way to care for Dendrobium orchids is to give them as much bright light as possible. This doesn’t mean sticking them in the desert sunlight, but a south-facing window in the house is the place where they will thrive. In almost all cases, when your Dendrobium orchid isn’t flowering, it’s a case of not enough sunlight.
Origin
Native to New Guinea and to the Cape York Peninsula of Queensland. It is also reportedly naturalized in Hawaii.
Dendrobium bigibbum Lindl.

Common Names
Cooktown Orchid
Synonyms
Callista bigibba, Callista phalaenopsis, Callista sumneri, Dendrobium lithocola, Dendrobium phalaenopsis, Dendrobium sumneri, Vappodes bigibba, Vappodes lithocola, Vappodes phalaenopsis
Scientific Classification
Family: Orchidaceae
Subfamily: Epidendroideae
Tribe: Dendrobieae
Genus: Dendrobium

Flower
Color: Pink or purple
Bloom Time: March to July
Description
Dendrobium bigibbum is flowering plants, up to 32 inches (80 cm) tall. The flowers are pink or purple (sometimes almost white) on canes up to 16 inches (40 cm) long. Flowering time is usually between March and July.

How to Grow and Care
Although there is a huge variety from which to choose, when it comes to learning how to grow Dendrobium orchids, there are two important rules that they all follow.
First, they like to live in little pots with their roots crowded into a tiny area. If you try to be nice and give them room to spread out, the roots are likely to stay too moist and begin to rot. If you don’t like the look of a large plant growing in a ridiculously small pot, camouflage it in a larger planter.
The other way to care for Dendrobium orchids is to give them as much bright light as possible. This doesn’t mean sticking them in the desert sunlight, but a south-facing window in the house is the place where they will thrive. In almost all cases, when your Dendrobium orchid isn’t flowering, it’s a case of not enough sunlight.
Origin
Native to New Guinea and to the Cape York Peninsula of Queensland. It is also reportedly naturalized in Hawaii.
0
0
文章
Dummer. ゛☀
2017年09月24日

WHEN it comes to orchids, phalaenopsis (moth orchids) are among the easiest to grow. Blooms last for several months and you can get them to rebloom without a lot of effort. Well, some folks can. I haven't had good luck getting another bloom, and I have the shelf of non-blooming phalaenopsis to prove it. Frankly, I'm a little bit embarrassed. How do I get my orchids to bloom again?
In an effort to improve my success, I checked in with our orchid expert at Gardener's Supply, Anita Nadeau. She helps customers in the conservatory at our Williston, VT, store. Here are her tips for getting phalaenopsis to rebloom:

Pay attention to watering and humidity. If you neglect your phalaenopsis, it will not reward you with blooms. The plants are probably growing in a free-draining blend of fir bark, so you need to water regularly. Don't let the roots dry out completely between waterings. Most homes are quite dry during the winter, but you can increase the humidity by setting the orchid pots on a tray of pebbles or a special humidity grid. Make sure the pots are not sitting in the water; they should be just above it.
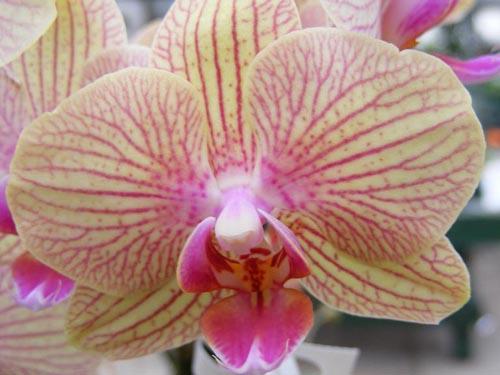
Fertilize regularly. A fertilizing routine is just as important as a watering routine. Anita recommends feeding orchids with water-soluble fertilizer that's formulated for orchids. Mix at the rate recommended on the package.
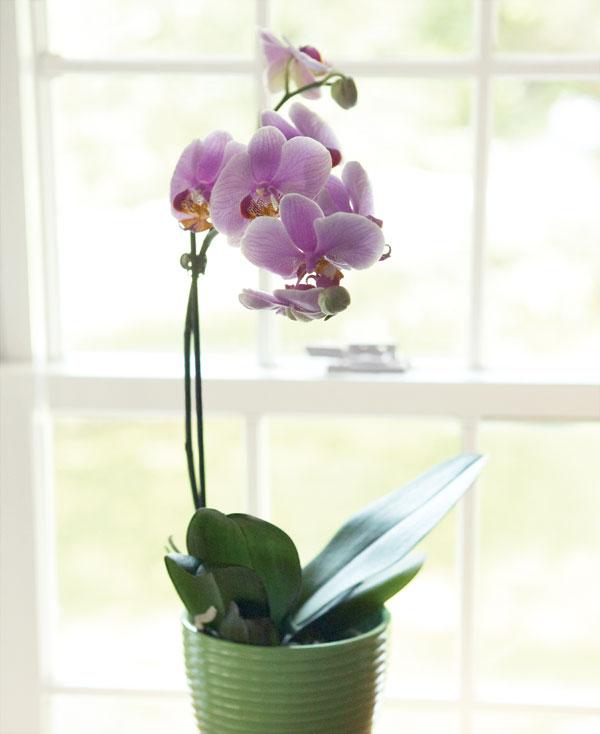
Make sure plants get enough light—but not too much. Anita says, "When a healthy orchid does not flower, it is usually due to not enough light." Phalaenopsis thrive in bright light, but not direct sun. This means east- or west-facing windows are best. If you can't provide adequate natural light, orchids will also thrive under full-spectrum lights.+

Provide cool nights. Most orchids thrive best when there is a marked drop in temperature at night, usually about 10 to 15 degrees F. Phalaenopsis are more forgiving in this respect, but a reluctant plant can usually be coaxed into bloom more easily if it's grown where nights are cool.
In an effort to improve my success, I checked in with our orchid expert at Gardener's Supply, Anita Nadeau. She helps customers in the conservatory at our Williston, VT, store. Here are her tips for getting phalaenopsis to rebloom:

Pay attention to watering and humidity. If you neglect your phalaenopsis, it will not reward you with blooms. The plants are probably growing in a free-draining blend of fir bark, so you need to water regularly. Don't let the roots dry out completely between waterings. Most homes are quite dry during the winter, but you can increase the humidity by setting the orchid pots on a tray of pebbles or a special humidity grid. Make sure the pots are not sitting in the water; they should be just above it.

Fertilize regularly. A fertilizing routine is just as important as a watering routine. Anita recommends feeding orchids with water-soluble fertilizer that's formulated for orchids. Mix at the rate recommended on the package.

Make sure plants get enough light—but not too much. Anita says, "When a healthy orchid does not flower, it is usually due to not enough light." Phalaenopsis thrive in bright light, but not direct sun. This means east- or west-facing windows are best. If you can't provide adequate natural light, orchids will also thrive under full-spectrum lights.+

Provide cool nights. Most orchids thrive best when there is a marked drop in temperature at night, usually about 10 to 15 degrees F. Phalaenopsis are more forgiving in this respect, but a reluctant plant can usually be coaxed into bloom more easily if it's grown where nights are cool.
0
0
成长记
Aqua plants kong
2017年09月23日

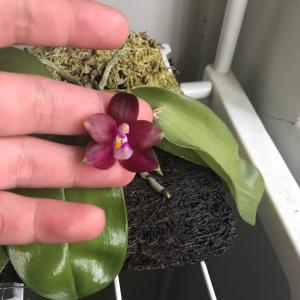
제가 새로운 식물 “Phalaenopsis violacea inadigo* amboinensis flava”한 그루를 나의 “화원”에 옴겼어요.

2
0
文章
Dummer. ゛☀
2017年09月13日

Yellowing leaves on a phalaenopsis are not necessarily a cause for alarm. It's normal and natural for older leaves to yellow and gradually drop off. Older phalaenopsis often have somewhat elongated stems where old leaves have dropped away. On healthy plants, new roots will continuously emerge from the stem, eventually forming a mass of roots.
However, if the leaves are yellowing from the top of the plant, there is a problem.
If the leaves are still plump and firm, the plant is most likely receiving too much light and it's washing out the color. If the leaves are wrinkled and listless, the plant is most likely dehydrated.
Yellow Leaves
If the leaves on your Phalaenopsis orchid are yellow, it could be an indication that something is wrong. There are a number of factors that can cause the leaves of an orchid to become discolored, including direct sunlight, low temperatures, and root rot.
Once any yellowing is discovered, it is time to figure out if there is a problem with the plant. If you discover the yellowing leaf is located on the bottom of the plant, don’t worry. This is a natural process of the plant to discard the mature leaf in order to produce a new leaf. However, if multiple leaves are turning yellow or top leaves are yellow, your plant may be sick.
3 Reasons Why Your Phalaenopsis Leaves Are Yellow
The first step is to isolate the plant away from any other orchids that you may have to ensure that they do not become ill as well.
Here are 3 steps to take to try to determine the problem:
Direct sun may be the culprit. The leaves of a Phalaenopsis orchid can burn and turn yellow if they are exposed to direct sunlight. Try putting your orchid in a place that receives sufficient indirect sunlight.
Is the temperature right? Overly low temperatures can also cause orchid leaves to turn yellow. Make sure the temperatures around your orchid are between 65 and 80 degrees Fahrenheit during the day and 60 and 70 degrees at night.
Check the roots. Overwatering can lead to root rot, which can in turn cause its leaves to turn yellow. You should only water the plant when the top one inch of the potting medium is dry and the roots are white, and make sure there are enough holes in the pot to allow proper drainage. If your orchid is suffering from root rot but you see your plant still has some healthy green roots, trim the rotted roots and repot the plant in new media. Mist the leaves the first week in place of watering.
A Tip to Prevent Overwatering
Overwatering is one of the most common problems and one of the most serious Here's a hint to make sure that in your quest to keep your orchid happy, healthy and beautiful that you don't overwater.
To avoid overwatering, we recommend watering your Phalaenopsis orchid with three ice cubes once a week so that the roots will soak up water slowly.

However, if the leaves are yellowing from the top of the plant, there is a problem.
If the leaves are still plump and firm, the plant is most likely receiving too much light and it's washing out the color. If the leaves are wrinkled and listless, the plant is most likely dehydrated.

Yellow Leaves
If the leaves on your Phalaenopsis orchid are yellow, it could be an indication that something is wrong. There are a number of factors that can cause the leaves of an orchid to become discolored, including direct sunlight, low temperatures, and root rot.
Once any yellowing is discovered, it is time to figure out if there is a problem with the plant. If you discover the yellowing leaf is located on the bottom of the plant, don’t worry. This is a natural process of the plant to discard the mature leaf in order to produce a new leaf. However, if multiple leaves are turning yellow or top leaves are yellow, your plant may be sick.

3 Reasons Why Your Phalaenopsis Leaves Are Yellow
The first step is to isolate the plant away from any other orchids that you may have to ensure that they do not become ill as well.
Here are 3 steps to take to try to determine the problem:
Direct sun may be the culprit. The leaves of a Phalaenopsis orchid can burn and turn yellow if they are exposed to direct sunlight. Try putting your orchid in a place that receives sufficient indirect sunlight.

Is the temperature right? Overly low temperatures can also cause orchid leaves to turn yellow. Make sure the temperatures around your orchid are between 65 and 80 degrees Fahrenheit during the day and 60 and 70 degrees at night.
Check the roots. Overwatering can lead to root rot, which can in turn cause its leaves to turn yellow. You should only water the plant when the top one inch of the potting medium is dry and the roots are white, and make sure there are enough holes in the pot to allow proper drainage. If your orchid is suffering from root rot but you see your plant still has some healthy green roots, trim the rotted roots and repot the plant in new media. Mist the leaves the first week in place of watering.

A Tip to Prevent Overwatering
Overwatering is one of the most common problems and one of the most serious Here's a hint to make sure that in your quest to keep your orchid happy, healthy and beautiful that you don't overwater.
To avoid overwatering, we recommend watering your Phalaenopsis orchid with three ice cubes once a week so that the roots will soak up water slowly.
0
1
文章
Dummer. ゛☀
2017年09月13日

Diagnosing the Problem
Phalaenopsis and other orchids respond quickly to anything amiss in their environment. Black spots are one of the trouble signs. The first step in treating the dark spots on your orchid's leaves is diagnosing the problem. Some phalaenopsis have naturally mottled leaves, so it may be natural coloration. However, leaf spotting can also signify a bacterial or fungal disease. Bacterial leaf spot is fairly common among orchids, and it can be aggressive and dangerous on phalaenopsis.
Similarly, fungal disorders and cause leaf spots, especially if the plant is left exposed to moisture on chilly nights.
Unless the plant is valuable, the best approach is to discard it, as the disease is highly contagious and will spread from plant to plant from splashing water.
Black Rot
A danger to orchids any time the weather is rainy or damp for extended periods, black rot can quickly destroy an entire plant if left unchecked. Caused by one or both of the fungi Pythium ultimum and Phytophthora cactorum, black rot affects a wide variety of orchids.
A Fungal Infection
The fungi that cause black rot in orchids consist of spores capable of independent movement, called zoospores, which swim through the water. If that water happens to be sitting on an orchid leaf, the zoospores can penetrate the plant tissue and begin the next stage in their life cycle. Once this occurs, the visible signs of infection - small, watery, translucent spots - expand quickly and change to brown and then black.
Left untreated, the affected plant or plants may infect others and will probably die themselves.
Symptoms
As it name implies, black rot shows up as dark blackish spots or lesions on the affected plant part. The black spot or spots enlarge rapidly and can spread throughout the plant. If allowed to reach the crown of a monopodial (single-stemmed) orchid, the rot will kill the plant.
Affected leaves may turn yellow around the infected area, and the lesions themselves will be soft and exude water when pressure is applied.
Prevention.
Unsterilized pots, media or water sources, as well as water splashed from affected plants nearby, are all excellent means of spreading the fungus. If your orchids are outside, keep them 3 to 4 feet above the ground to avoid splash contamination. Whether outside or inside, do not allow your orchids' leaves to remain wet for any extended periods. Good air circulation in the growing area is key. At first signs of infection, segregate all affected plants to avoid contaminating healthy plants. Finally, some growers recommend the use of a high-calcium fertilizer in the spring to help avoid black rot in new growth.
Cut Out the Rot
To stop the spread of black rot in your orchid, begin with a sterile knife and cut out the diseased portion of the plant. Remove the infected portion of the leaf, or the entire leaf if necessary, to halt the spread of the fungus before it reaches the crown. Place the plant in an area that receives good air circulation to allow the cut to dry.
Use a Fungicide
Once the infected plant parts have been removed, a fungicide should be applied to protect the remaining healthy tissue.
Cinnamon is an excellent fungicide, and ground cinnamon may be applied straight from the spice jar directly to the exposed area where infected portions of the plant have been excised. First Rays Orchids also recommends mixing cinnamon with either casein-based glue (such as Elmer's) or cooking oil to form a thick paste. This paste is fairly waterproof and can be used to cover the wound.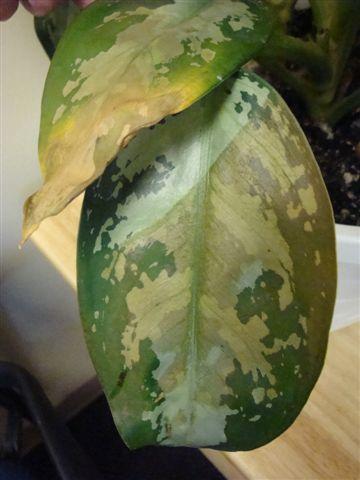
Drenching the affected plant with a fungicide is also an option. Drenches of a protectant fungicide such as Truban or Terrazole are recommended if the disease is diagnosed early. For more advanced cases, a systemic fungicide such as Aliette or Subdue is more effective. Captan, Dithane M-45, BanRot, Subdue and Physan 20 have also been recommended by some growers for control of black rot.
Phalaenopsis and other orchids respond quickly to anything amiss in their environment. Black spots are one of the trouble signs. The first step in treating the dark spots on your orchid's leaves is diagnosing the problem. Some phalaenopsis have naturally mottled leaves, so it may be natural coloration. However, leaf spotting can also signify a bacterial or fungal disease. Bacterial leaf spot is fairly common among orchids, and it can be aggressive and dangerous on phalaenopsis.

Similarly, fungal disorders and cause leaf spots, especially if the plant is left exposed to moisture on chilly nights.
Unless the plant is valuable, the best approach is to discard it, as the disease is highly contagious and will spread from plant to plant from splashing water.

Black Rot
A danger to orchids any time the weather is rainy or damp for extended periods, black rot can quickly destroy an entire plant if left unchecked. Caused by one or both of the fungi Pythium ultimum and Phytophthora cactorum, black rot affects a wide variety of orchids.
A Fungal Infection
The fungi that cause black rot in orchids consist of spores capable of independent movement, called zoospores, which swim through the water. If that water happens to be sitting on an orchid leaf, the zoospores can penetrate the plant tissue and begin the next stage in their life cycle. Once this occurs, the visible signs of infection - small, watery, translucent spots - expand quickly and change to brown and then black.
Left untreated, the affected plant or plants may infect others and will probably die themselves.

Symptoms
As it name implies, black rot shows up as dark blackish spots or lesions on the affected plant part. The black spot or spots enlarge rapidly and can spread throughout the plant. If allowed to reach the crown of a monopodial (single-stemmed) orchid, the rot will kill the plant.
Affected leaves may turn yellow around the infected area, and the lesions themselves will be soft and exude water when pressure is applied.
Prevention.

Unsterilized pots, media or water sources, as well as water splashed from affected plants nearby, are all excellent means of spreading the fungus. If your orchids are outside, keep them 3 to 4 feet above the ground to avoid splash contamination. Whether outside or inside, do not allow your orchids' leaves to remain wet for any extended periods. Good air circulation in the growing area is key. At first signs of infection, segregate all affected plants to avoid contaminating healthy plants. Finally, some growers recommend the use of a high-calcium fertilizer in the spring to help avoid black rot in new growth.

Cut Out the Rot
To stop the spread of black rot in your orchid, begin with a sterile knife and cut out the diseased portion of the plant. Remove the infected portion of the leaf, or the entire leaf if necessary, to halt the spread of the fungus before it reaches the crown. Place the plant in an area that receives good air circulation to allow the cut to dry.

Use a Fungicide
Once the infected plant parts have been removed, a fungicide should be applied to protect the remaining healthy tissue.
Cinnamon is an excellent fungicide, and ground cinnamon may be applied straight from the spice jar directly to the exposed area where infected portions of the plant have been excised. First Rays Orchids also recommends mixing cinnamon with either casein-based glue (such as Elmer's) or cooking oil to form a thick paste. This paste is fairly waterproof and can be used to cover the wound.

Drenching the affected plant with a fungicide is also an option. Drenches of a protectant fungicide such as Truban or Terrazole are recommended if the disease is diagnosed early. For more advanced cases, a systemic fungicide such as Aliette or Subdue is more effective. Captan, Dithane M-45, BanRot, Subdue and Physan 20 have also been recommended by some growers for control of black rot.
0
0
文章
Miss Chen
2017年08月11日

Growing orchids indoors brings a touch of the tropics into your home. These perennial beauties crave the humidity and light of their native jungle environments, but they're far from fussy when grown inside. Species from the Phalaenopsis, Cattleya and Dendrobium genus are commonly grown as houseplants. It's smart to start with an established plant, which should be planted in a pot with drainage holes containing fir tree bark chips, sphagnum moss, tree fern fiber or other similar materials suited for tropical orchid growth. Provide them with warmth, sunlight, and a regular watering schedule to ensure these exotic flowers thrive and bloom in your home.

Increase Humidity
Place an established, potted orchid on a tray of pebbles covered to the top in water. This increases humidity for the orchid, which is necessary for successful blooming. Alternatively, keep a humidifier in the room near the orchid. Humidity should be around 50 percent for epiphytic orchids.
Provide Lots of Light
Place the orchid in a well-lit window, preferably facing east or south to let in the ideal light intensity. Watch the leaf color to determine whether your orchid is receiving too much or too little light; dark green indicates that the orchid needs more light, while yellow leaves are receiving too much sun. Orchids may be protected from intense light with a sheer curtain.
You can also grow orchids under artificial light -- specifically four fluorescent tubes that are 4 feet long and placed 6 inches apart. Set the orchids 6 to 8 inches under the tubes, and keep the tubes lit for 14 to 16 hours every day.
Keep the Temperature Comfortable
Keep the temperature range between 50 and 90 degrees Fahrenheit for the orchid. The good news is that this is a typical room temperature comfortable for humans, so it shouldn't be hard to live with your orchid. Just make sure the orchid doesn't become overheated or chilled next to the window glass during the heat of midday or on cold nights.
Water Once a Week
Water the orchid thoroughly in tepid water once a week, preferably by the afternoon to allow the foliage to dry before nightfall in case it accidentally gets splashed. Allow the water to drain afterwards; waterlogging can kill orchids faster than a period of mild drought.
In between waterings, let the orchid's potting materials dry out until they feel almost dry to the touch. This is important for all kinds of orchids, including black orchids (Coelogyne pandurata).
Fertilize Once or Twice a Month
As a general rule, fertilize twice a month during growth periods and once a month during rest periods. Choose a water-soluble, balanced fertilizer formulated specifically for orchids, such as a 20-20-20 blend which has an equal ratio of nitrogen, phosphorus and potassium. Orchids grown in bark need a higher ratio of nitrogen, such as a 30-10-10 or 15-5-5 blend. One orchid fertilizer recommends 1/4 teaspoon per gallon of water, but always follow label directions.
Every month, water pot thoroughly to flush out any accumulated salts.
0
0
文章
Miss Chen
2017年08月11日

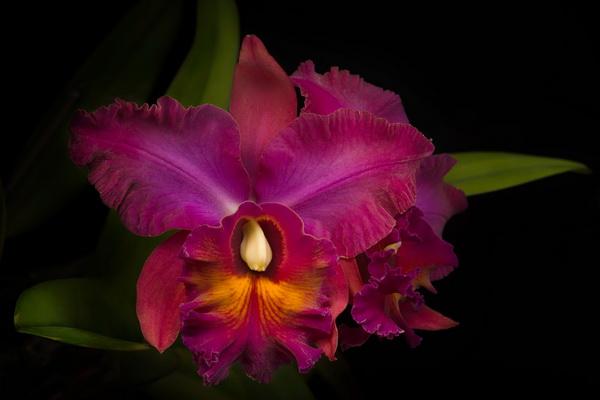
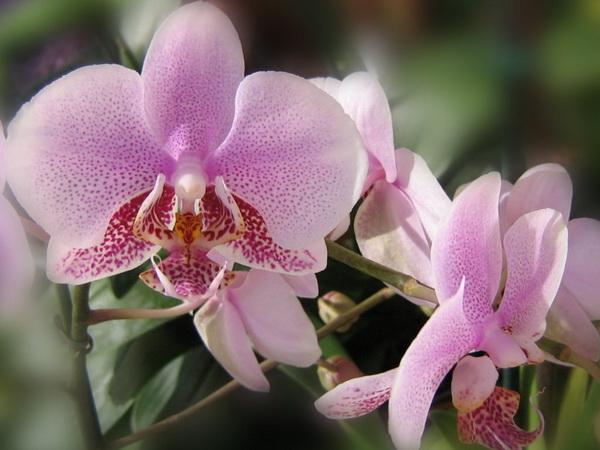
Despite their upscale reputation, orchids can be as easy to grow as more plebian plants. Among the varieties recommended for novices are the moth orchid (Phalaenopsis spp.), dancing ladies orchid (Oncidium spp. ), slipper orchid (Paphiopedilum spp.), and florist's orchid (Cattleya spp.). The first type is perennial in U.S. Department of Agriculture plant hardiness zones 11 to 12 and the second in USDA zones 10 to 11, while the hardiness of the latter two varies according to species from USDA zones 10 to 12. Most orchids are grown as potted house plants or greenhouse plants.
Windows and Warmth
Moth and slipper orchids will burn if given too much sunlight. They should occupy an east- or west-facing windowsill where they receive only a few hours of early morning or late afternoon rays or bright, indirect light. Dancing ladies and florist's orchids require stronger illumination. Place them on a sunny south-facing windowsill with a sheer curtain between them and the glass. Orchids will also grow happily under two shop lights, hung side by side 6 to 12 inches above the plants' leaves and timed to run for 12 to 16 hours every day. Position the most light-loving plants under the center of the four fluorescent tubes and the others closer to the ends. Orchids prefer a 10-degree drop in night-time temperatures, which you can provide for part of the year by keeping them outdoors -- on a roofed porch or under the high shade of a tree -- during summer.
Soil and Sustenance
Because most of these orchids grow on trees in their native habitats, they should be potted in orchid bark rather than soil. The exception is the semi-terrestrial slipper orchid, which needs a constantly damp medium, so grow it in an orchid mix which combines both compost and bark. For plants potted solely in bark, apply a high-nitrogen orchid plant food such as 30-10-10 once every two weeks during spring and summer, mixing 1/4 teaspoon of the plant food crystals with 1 gallon of water. For those whose mix contains soil, opt for a balanced 20-20-20 plant food every two weeks, using 1/2 teaspoon per gallon of water. In the fall, switch to a 10-30-20 plant food for all types, at the 1/2 teaspoon per gallon rate, to encourage bud production. Reduce the feedings to once a month at the same rate during the winter.
H2O and Humidity
With the exception of the slipper types, whose soil should be kept lightly moist, the orchids should be allowed to almost dry out before you water them again. They usually won't need to be watered more than twice a week during the summer months, perhaps once a week during the winter. If you grow your orchids in cache pots -- outer pots which conceal the inner ones -- be sure to empty the excess water out of those pots or the plants' roots will rot. To help provide the high humidity orchids prefer, place trays of gravel beneath the pots, but always keep the water level in those trays below the surface of the gravel.
Pests and Pathogens
These orchids can suffer from aphids, scale insects, spider mites, and thrips, which give the appearance respectively of green lice, brown bumps, mottled leaves with webbing, and white streaks on the flowers. Spray the plants thoroughly in the early morning with insecticidal soap, using about 1 1/4 tablespoons of the soap solution per quart of water. Repeat the treatment two days later for aphids or one week later for other insects. If kept too wet and/or cold, orchids can also suffer from black or brown blotches or rot on the foliage. Use pruning shears or a pruning knife to cut out the affected areas, dipping the blade or blades between cuts in a mix of 1 part rubbing alcohol and 1 part water, and dust the cut edges with an anti-fungal such as powdered cinnamon.
Windows and Warmth
Moth and slipper orchids will burn if given too much sunlight. They should occupy an east- or west-facing windowsill where they receive only a few hours of early morning or late afternoon rays or bright, indirect light. Dancing ladies and florist's orchids require stronger illumination. Place them on a sunny south-facing windowsill with a sheer curtain between them and the glass. Orchids will also grow happily under two shop lights, hung side by side 6 to 12 inches above the plants' leaves and timed to run for 12 to 16 hours every day. Position the most light-loving plants under the center of the four fluorescent tubes and the others closer to the ends. Orchids prefer a 10-degree drop in night-time temperatures, which you can provide for part of the year by keeping them outdoors -- on a roofed porch or under the high shade of a tree -- during summer.

Soil and Sustenance
Because most of these orchids grow on trees in their native habitats, they should be potted in orchid bark rather than soil. The exception is the semi-terrestrial slipper orchid, which needs a constantly damp medium, so grow it in an orchid mix which combines both compost and bark. For plants potted solely in bark, apply a high-nitrogen orchid plant food such as 30-10-10 once every two weeks during spring and summer, mixing 1/4 teaspoon of the plant food crystals with 1 gallon of water. For those whose mix contains soil, opt for a balanced 20-20-20 plant food every two weeks, using 1/2 teaspoon per gallon of water. In the fall, switch to a 10-30-20 plant food for all types, at the 1/2 teaspoon per gallon rate, to encourage bud production. Reduce the feedings to once a month at the same rate during the winter.
H2O and Humidity
With the exception of the slipper types, whose soil should be kept lightly moist, the orchids should be allowed to almost dry out before you water them again. They usually won't need to be watered more than twice a week during the summer months, perhaps once a week during the winter. If you grow your orchids in cache pots -- outer pots which conceal the inner ones -- be sure to empty the excess water out of those pots or the plants' roots will rot. To help provide the high humidity orchids prefer, place trays of gravel beneath the pots, but always keep the water level in those trays below the surface of the gravel.

Pests and Pathogens
These orchids can suffer from aphids, scale insects, spider mites, and thrips, which give the appearance respectively of green lice, brown bumps, mottled leaves with webbing, and white streaks on the flowers. Spray the plants thoroughly in the early morning with insecticidal soap, using about 1 1/4 tablespoons of the soap solution per quart of water. Repeat the treatment two days later for aphids or one week later for other insects. If kept too wet and/or cold, orchids can also suffer from black or brown blotches or rot on the foliage. Use pruning shears or a pruning knife to cut out the affected areas, dipping the blade or blades between cuts in a mix of 1 part rubbing alcohol and 1 part water, and dust the cut edges with an anti-fungal such as powdered cinnamon.
0
0
文章
Miss Chen
2017年08月11日

The profuse blossoms fade and fall from the flower spike, leaving your moth orchid (Phalaenopsis spp.) bare. Phalaenopsis are the lovely flowering orchids found in many stores and florist shops. While other orchids may be available, Phalaenopsis is the easiest to locate, grow and rebloom. Hardy in U.S. Department of Agriculture plant hardiness zones 10 through 12, it thrives indoors in winter and enjoys shady outdoor locations in summer.

Reduce the Temperature
Phalaenopsis, Odontoglossum and Zygopetalum are among the orchid species that are stimulated to rebloom when temperatures drop 10 to 15 degrees Fahrenheit at night. The ideal temperatures for these orchids are 75 to 85 degrees F during the day and 60 to 65 degrees F at night. If the orchid is a houseplant, when outside temperatures drop at night, open a window to pull in the cooler night air. Monitor night temperatures -- the orchid should not be exposed to temperatures below 58 degrees F.
Provide More Light
Phalaenopsis, like other orchids, prefers bright, filtered light from an east- or west-facing window. In winter, you can use a full-spectrum grow light to provide additional light to help stimulate growth and new flower spike development. If the orchid's leaves are dark green, it's not receiving enough light. The leaves should be a light greenish-yellow. However, avoid placing the orchid in direct sun; the leaves easily burn in sunlight.
Water Regularly
Orchids require regular watering, generally once a week when the potting mix is dry. Place the orchid pot in the sink and fill the pot with water. Allow the water to drain completely from the potting mix, and then repeat twice to ensure that the bark or other medium is moist. Orchids also require higher humidity than most homes provide. A tray filled with pebbles and water under the orchid pot helps raise the humidity, while a cool steam vaporizer adds additional moisture to the air around the orchid.

Fertilize Weekly
To encourage the orchid to rebloom, it needs regular feeding. Feed the plant with a one-quarter strength 20-20-20 fertilizer solution every week, immediately after watering. Mix 1/4 teaspoon liquid fertilizer with 1 gallon of water, and pour the solution over the potting mix until it drains from the bottom of the pot. The American Orchid Society recommends avoiding fertilizers formulated with urea, which may burn the orchid's roots.
Trim the Flower Spike
Phalaenopsis reblooms from the flower spike, but the second blooming may have fewer, smaller flowers. Some gardeners trim the flower spike to one or two nodes, approximately 1 to 2 inches long. Others recommend trimming the flower spike to the base of the plant. Always sterilize your pruners before and after cutting the flower spike to prevent the spread of fungi or disease, using a solution made of equal parts water and rubbing alcohol.
Enjoy the Flowers
Orchids vary when reblooming. Some species may not bloom again until spring, while Phalaenopsis may begin developing new flower spikes from the nodes left on the trimmed flower spike and bloom again in eight to 12 weeks. Once the orchid blooms, the flowers linger for four months or more.

Reduce the Temperature
Phalaenopsis, Odontoglossum and Zygopetalum are among the orchid species that are stimulated to rebloom when temperatures drop 10 to 15 degrees Fahrenheit at night. The ideal temperatures for these orchids are 75 to 85 degrees F during the day and 60 to 65 degrees F at night. If the orchid is a houseplant, when outside temperatures drop at night, open a window to pull in the cooler night air. Monitor night temperatures -- the orchid should not be exposed to temperatures below 58 degrees F.
Provide More Light
Phalaenopsis, like other orchids, prefers bright, filtered light from an east- or west-facing window. In winter, you can use a full-spectrum grow light to provide additional light to help stimulate growth and new flower spike development. If the orchid's leaves are dark green, it's not receiving enough light. The leaves should be a light greenish-yellow. However, avoid placing the orchid in direct sun; the leaves easily burn in sunlight.
Water Regularly
Orchids require regular watering, generally once a week when the potting mix is dry. Place the orchid pot in the sink and fill the pot with water. Allow the water to drain completely from the potting mix, and then repeat twice to ensure that the bark or other medium is moist. Orchids also require higher humidity than most homes provide. A tray filled with pebbles and water under the orchid pot helps raise the humidity, while a cool steam vaporizer adds additional moisture to the air around the orchid.

Fertilize Weekly
To encourage the orchid to rebloom, it needs regular feeding. Feed the plant with a one-quarter strength 20-20-20 fertilizer solution every week, immediately after watering. Mix 1/4 teaspoon liquid fertilizer with 1 gallon of water, and pour the solution over the potting mix until it drains from the bottom of the pot. The American Orchid Society recommends avoiding fertilizers formulated with urea, which may burn the orchid's roots.
Trim the Flower Spike
Phalaenopsis reblooms from the flower spike, but the second blooming may have fewer, smaller flowers. Some gardeners trim the flower spike to one or two nodes, approximately 1 to 2 inches long. Others recommend trimming the flower spike to the base of the plant. Always sterilize your pruners before and after cutting the flower spike to prevent the spread of fungi or disease, using a solution made of equal parts water and rubbing alcohol.
Enjoy the Flowers
Orchids vary when reblooming. Some species may not bloom again until spring, while Phalaenopsis may begin developing new flower spikes from the nodes left on the trimmed flower spike and bloom again in eight to 12 weeks. Once the orchid blooms, the flowers linger for four months or more.
0
0
文章
Miss Chen
2017年08月11日

Orchids have an undeserved reputation for being difficult to grow and easy to kill, which, unfortunately, causes many people to shy away from growing them in their homes. In reality, you can grow many popular orchid species, such as Cattleya, Phalaenopsis and Dendrobium, at home with simple, common-sense care. Overwatering is a common concern when growing orchids; the ice cube watering method is a simple trick that you can use to avoid over-irrigating your new houseplant.

Sunlight
Orchids require just the right amount of sunlight in order to grow successfully. If provided too little sunlight, the plant will fail to blossom; if provided too much sunlight, the blossoms will fade and the foliage will burn. The best way to expose your orchid to the sunlight it needs is to place it within 4 feet of a sunny south-facing window where it can receive filtered light for at least four hours each day.
Water
If it's your first time growing an orchid, knowing just how much water to give your new houseplant may seem a bit tricky. Fortunately, using the ice cube watering method takes all the guesswork out of irrigating your orchid. Simply arrange three standard-size ice cubes on the surface of the potting mix around the plant; avoid letting the ice touch the orchid directly. As the ice cubes melt, they will slowly and evenly moisten the potting mix. Water your orchid once a week using this method.
Fertilize
When grown in their native climates, orchids use their thick, fleshy roots to draw nutrients from the air around them. When you grow them indoors as houseplants, you must provide nutrients for your orchids by following a regular fertilization schedule. Feed the orchid with weekly applications of a specially formulated orchid fertilizer from early spring through summer. Cease fertilization during the fall and winter months; the plant is not actively growing and doesn't need the steady stream of supplemental nutrients.

Re-pot
Occasional re-potting is essential to maintaining the long-term health of your orchid. The University of Tennessee recommends re-potting indoor orchids every one to three years to replace the potting mix and to trim out any problematic roots. Gently remove the orchid from its planting container and rinse its roots under warm running water. Feel the roots with your fingertips; healthy roots will feel stiff and turgid. Use a sharpened and sterilized gardening knife to cut out any roots that are brown or mushy. Repot the orchid in a well-draining potting mix composed of equal parts peat moss, redwood bark, charcoal and volcanic rock.

Sunlight
Orchids require just the right amount of sunlight in order to grow successfully. If provided too little sunlight, the plant will fail to blossom; if provided too much sunlight, the blossoms will fade and the foliage will burn. The best way to expose your orchid to the sunlight it needs is to place it within 4 feet of a sunny south-facing window where it can receive filtered light for at least four hours each day.
Water
If it's your first time growing an orchid, knowing just how much water to give your new houseplant may seem a bit tricky. Fortunately, using the ice cube watering method takes all the guesswork out of irrigating your orchid. Simply arrange three standard-size ice cubes on the surface of the potting mix around the plant; avoid letting the ice touch the orchid directly. As the ice cubes melt, they will slowly and evenly moisten the potting mix. Water your orchid once a week using this method.
Fertilize
When grown in their native climates, orchids use their thick, fleshy roots to draw nutrients from the air around them. When you grow them indoors as houseplants, you must provide nutrients for your orchids by following a regular fertilization schedule. Feed the orchid with weekly applications of a specially formulated orchid fertilizer from early spring through summer. Cease fertilization during the fall and winter months; the plant is not actively growing and doesn't need the steady stream of supplemental nutrients.

Re-pot
Occasional re-potting is essential to maintaining the long-term health of your orchid. The University of Tennessee recommends re-potting indoor orchids every one to three years to replace the potting mix and to trim out any problematic roots. Gently remove the orchid from its planting container and rinse its roots under warm running water. Feel the roots with your fingertips; healthy roots will feel stiff and turgid. Use a sharpened and sterilized gardening knife to cut out any roots that are brown or mushy. Repot the orchid in a well-draining potting mix composed of equal parts peat moss, redwood bark, charcoal and volcanic rock.
0
1


