文章
Miss Chen
2018年08月16日

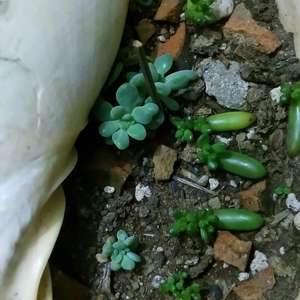
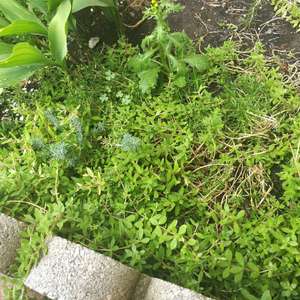
Sedum plants, also called stonecrop, require very little water to survive. The fleshy, plump leaves store water, making sedums tolerant of drought and dry, harsh conditions. All plants need water, and sedums are no exception — the trick is to water enough to keep the plants happy without watering too much. Sedum plants are easy to over water both in the ground and in containers. An over-watered sedum is likely to flop over and die more quickly than an under-watered sedum.

Step 1
Water sedums in the garden only during hot, dry weather. Press your index finger into the top 2 inches of the soil. If it is dry at the bottom, soak each plant until the ground is damp 4 inches deep.
Step 2
Allow sedums to dry out between waterings. In wet and rainy weather, do not provide sedums with additional water.
Step 3
Water potted sedums when the top 1 inch of soil dries out. Press your index finger into the soil at the edge of the pot to see how deep the moisture level is.

Step 4
Place the pot into the sink and soak it with water until it runs out of the drainage holes in the bottom of the pot. Leave the pot in the sink to drain before replacing it in its permanent location.

Step 1
Water sedums in the garden only during hot, dry weather. Press your index finger into the top 2 inches of the soil. If it is dry at the bottom, soak each plant until the ground is damp 4 inches deep.
Step 2
Allow sedums to dry out between waterings. In wet and rainy weather, do not provide sedums with additional water.
Step 3
Water potted sedums when the top 1 inch of soil dries out. Press your index finger into the soil at the edge of the pot to see how deep the moisture level is.

Step 4
Place the pot into the sink and soak it with water until it runs out of the drainage holes in the bottom of the pot. Leave the pot in the sink to drain before replacing it in its permanent location.
0
0
文章
Miss Chen
2018年08月15日

When to prune sedum (Sedum spp.) is a question that is not answered with just a simple date. Pruning the flowering perennial, which grows in U.S. Department of Agriculture plant hardiness zones 3 through 10, depends on the size of the plant, the variety and how you want it to look. A compact, low-growing sedum requires different maintenance pruning than a tall, late-blooming variety.

Before You Prune
Before you prune your sedum, disinfect your pruning tools. Pruning shears are best for cutting back tall plants, while snips work well for pinching or clipping leaves. After brushing any dirt from the tool blades, disinfect the blades by soaking them for at least five minutes in a household disinfectant. After removing the tool from the disinfectant, rinse the blades with clean water and let them dry before using them on your plants. Repeat the disinfecting process before pruning another plant to avoid spreading disease.
Pinching for Shape
To encourage branching and low growth on young plants, pinching is recommended. To pinch the plant, use your fingers or pruning snips to remove the center growth from the top of a stem. Take care not to damage the buds or small leaf sets on either side of the center growth; these buds are where the branching will occur. Pinch back new plants when they are about 8 inches tall. You can still pinch off up to 2 inches after blooms start to appear, but it will delay flowering. The result is sedum with more horizontal growth, less vertical growth and added fullness.
Late Spring Pruning
A more severe pruning is required to encourage bushiness on an older plant that has gotten top heavy or leggy. To encourage new plant growth and get a fuller plant, cut the sedum back by one-half in May or June. New flower buds will form on the cut stalks, so you won't be sacrificing any of the showy display for the sake of a neater looking plant. Choose a point about halfway down a stalk and just above a set of leaves to make your cut. Cut cleanly through the stalk with sharp pruning shears, taking care not to damage the leaf set. Repeat with each stalk until the sedum is a uniform height.
Early Spring Pruning
Some varieties of tall sedum, such as "Autumn Joy" (Sedum x "Autumn Joy"), which grows in USDA zones 5 through 9, flower through the winter and need cut back in late winter or early spring. You can cut the sedum back in winter as soon as the flowers fade or any time after that until you see green peeping from the ground in spring. Cut the entire plant back to ground level using pruning shears or break the stalks at ground level by hand. In the spring, the sedum will re-emerge from the roots.

Year-Round Pruning
Some types of pruning are necessary year-round. This includes pruning out dead plant growth and cutting out diseased plant material. Removing these from your sedum as you see them will help keep the plant looking its best, keep it healthy and less prone to fungal or insect infestations. Cut dead stalks back to the base of the stalk. Pull any dead leaves when you spot them. Remove diseased portions of the plant to keep disease from spreading. Make sure you cut back far enough that you are leaving only healthy plant material. Make the cut just above a leaf set for new growth. Do not compost diseased sedum material.

Before You Prune
Before you prune your sedum, disinfect your pruning tools. Pruning shears are best for cutting back tall plants, while snips work well for pinching or clipping leaves. After brushing any dirt from the tool blades, disinfect the blades by soaking them for at least five minutes in a household disinfectant. After removing the tool from the disinfectant, rinse the blades with clean water and let them dry before using them on your plants. Repeat the disinfecting process before pruning another plant to avoid spreading disease.
Pinching for Shape
To encourage branching and low growth on young plants, pinching is recommended. To pinch the plant, use your fingers or pruning snips to remove the center growth from the top of a stem. Take care not to damage the buds or small leaf sets on either side of the center growth; these buds are where the branching will occur. Pinch back new plants when they are about 8 inches tall. You can still pinch off up to 2 inches after blooms start to appear, but it will delay flowering. The result is sedum with more horizontal growth, less vertical growth and added fullness.
Late Spring Pruning
A more severe pruning is required to encourage bushiness on an older plant that has gotten top heavy or leggy. To encourage new plant growth and get a fuller plant, cut the sedum back by one-half in May or June. New flower buds will form on the cut stalks, so you won't be sacrificing any of the showy display for the sake of a neater looking plant. Choose a point about halfway down a stalk and just above a set of leaves to make your cut. Cut cleanly through the stalk with sharp pruning shears, taking care not to damage the leaf set. Repeat with each stalk until the sedum is a uniform height.
Early Spring Pruning
Some varieties of tall sedum, such as "Autumn Joy" (Sedum x "Autumn Joy"), which grows in USDA zones 5 through 9, flower through the winter and need cut back in late winter or early spring. You can cut the sedum back in winter as soon as the flowers fade or any time after that until you see green peeping from the ground in spring. Cut the entire plant back to ground level using pruning shears or break the stalks at ground level by hand. In the spring, the sedum will re-emerge from the roots.

Year-Round Pruning
Some types of pruning are necessary year-round. This includes pruning out dead plant growth and cutting out diseased plant material. Removing these from your sedum as you see them will help keep the plant looking its best, keep it healthy and less prone to fungal or insect infestations. Cut dead stalks back to the base of the stalk. Pull any dead leaves when you spot them. Remove diseased portions of the plant to keep disease from spreading. Make sure you cut back far enough that you are leaving only healthy plant material. Make the cut just above a leaf set for new growth. Do not compost diseased sedum material.
0
0
成长记
Mari Mari
2018年08月15日

I Nuevo agregado un Sedum Nossbaumerianum / sedum naranja en mi jardín


0
0
成长记
Mari Mari
2018年08月15日

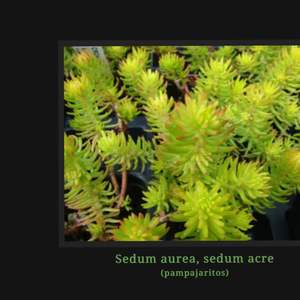
I Nuevo agregado un Sedum aurea, sedum acre/ pampajaritos en mi jardín

0
0
文章
Miss Chen
2018年08月11日

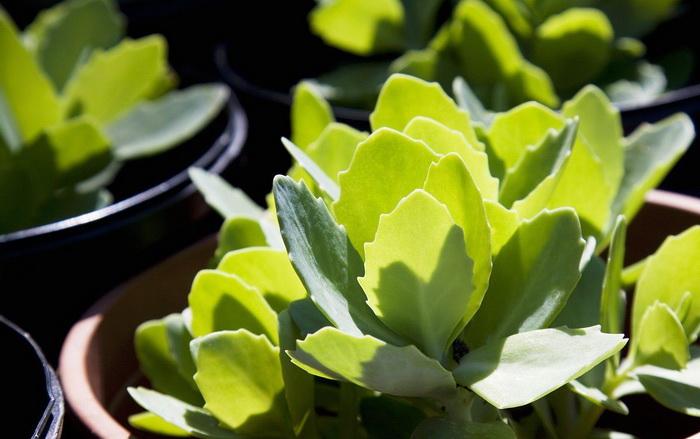
Although sedums are hardy plants that grow in even harsh conditions with little care, they often become floppy and collapse in the center. Floppiness is especially a problem with tall sedum varieties such as "Autumn Joy," "Black Jack" and "Autumn Fire. A few minutes of routine maintenance keeps sedums bushy and upright.

Causes
Floppiness is normal for tall sedum varieties that aren't routinely pruned; the plant eventually becomes top heavy and collapses under the weight of the blooms. Lack of sunlight and too much fertility in the soil are also common causes of floppiness and caving in at the center of the plant. Sedum is a warm-weather succulent plant that thrives in full sunlight and average or poor soil. Some sedum varieties are tough enough to thrive in dry, gravelly soil.
Pinching
Pinching is a simple method of promoting compact, sturdy, bushy growth on new sedum plants. Pinch the growing tips of young plants when they are about 6 to 8 inches tall. Pinching causes a slight delay in blooming, but the result will be more blooms and healthier plants.
Pruning
While it seems extreme, a good pruning is the best solution for a tall, lanky sedum. If your plants are beginning to look tipsy in late spring or early summer, use your garden shears or clippers to cut the plants to a height of about 6 to 8 inches. The plants may initially look like victims of a bad haircut, but they will soon rebound and look better than ever. Pruning can safely be done every year if needed and is especially effective for sedums grown in shade.
Division
Division is the best fix for an older sedum, especially if the center of the plant looks like it's dying down and becoming woody and unattractive. To divide sedum, dig up the entire plant. Pull the plant apart into smaller plants, each with several healthy roots. If a plant is too large to dig, use a trowel or shovel to cut a section from the side of the plant. Division is a good opportunity to move the sedum to a spot in full sunlight and to discard old, woody sections. To keep sedum healthy, get in the habit of routinely dividing the plant every other year.
Tips
Water sedum sparingly; wet soil may cause sedum to rot and die. In most parts of the country, sedum thrives with no supplemental irrigation but benefits from an occasional light watering during long periods of hot, dry weather. Don't fertilize sedum; fertilizer contributes to rich soil, which can cause floppiness and weak growth.

Causes
Floppiness is normal for tall sedum varieties that aren't routinely pruned; the plant eventually becomes top heavy and collapses under the weight of the blooms. Lack of sunlight and too much fertility in the soil are also common causes of floppiness and caving in at the center of the plant. Sedum is a warm-weather succulent plant that thrives in full sunlight and average or poor soil. Some sedum varieties are tough enough to thrive in dry, gravelly soil.
Pinching
Pinching is a simple method of promoting compact, sturdy, bushy growth on new sedum plants. Pinch the growing tips of young plants when they are about 6 to 8 inches tall. Pinching causes a slight delay in blooming, but the result will be more blooms and healthier plants.
Pruning
While it seems extreme, a good pruning is the best solution for a tall, lanky sedum. If your plants are beginning to look tipsy in late spring or early summer, use your garden shears or clippers to cut the plants to a height of about 6 to 8 inches. The plants may initially look like victims of a bad haircut, but they will soon rebound and look better than ever. Pruning can safely be done every year if needed and is especially effective for sedums grown in shade.
Division
Division is the best fix for an older sedum, especially if the center of the plant looks like it's dying down and becoming woody and unattractive. To divide sedum, dig up the entire plant. Pull the plant apart into smaller plants, each with several healthy roots. If a plant is too large to dig, use a trowel or shovel to cut a section from the side of the plant. Division is a good opportunity to move the sedum to a spot in full sunlight and to discard old, woody sections. To keep sedum healthy, get in the habit of routinely dividing the plant every other year.

Tips
Water sedum sparingly; wet soil may cause sedum to rot and die. In most parts of the country, sedum thrives with no supplemental irrigation but benefits from an occasional light watering during long periods of hot, dry weather. Don't fertilize sedum; fertilizer contributes to rich soil, which can cause floppiness and weak growth.
0
0


