文章
Miss Chen
2017年08月10日

Life may not be a bed of roses, but growing a bed of roses (Rosa spp.) captures life's hopes and disappointments more than most gardening experiences. Not many plants trigger such anticipation with their burgeoning buds or bring such heartbreak when their buds fade to brown, taking the hope of headily fragrant blooms with them. In order to spare yourself from this fate, keep your roses' buds warm, dry and bug-free, and your rose bed clean. Depending on their variety, roses are hardy in U.S. Department of Agriculture plant hardiness zones 2 through 10.

Frost Damage
Where mild winters keep rose buds coming, a few hours of frost can shrivel and brown them. Even worse, frost-injured rose stems, or canes, may develop a canker fungus infection. Avert disaster by watering your roses as soon as the forecast calls for frost. Moist soil retains heat during the day and releases it to the plants after dark. Cocooning the plants in bedsheets before the temperature dips below 40 degrees Fahrenheit minimizes their frost injury. Uncover them in the morning before they overheat.
Gray Mold Infection
Rose buds deteriorating into brownish-gray mush have Botrytis blight, better known as gray mold. Moist, mild weather with temperatures are 62 to 72 F encourages the fungal disease. The drooping buds may not open; if they do, the blooms may resemble brown pulp. As the infection moves down the canes, cankers mark its progress.
Cultural Gray Mold Control
Mail-order, bare-root roses often arrive with stowaway gray mold spores. Remove such roses from their packaging sleeves immediately, and plant them far enough apart so they have good air circulation. Keeping their leaves dry when you water the plants helps because gray mold spores need moisture to germinate. Remove old or damaged blooms promptly, along with the diseased plant parts and soil debris. Disinfect your pruning tools in a solution that is one part household bleach and nine parts water between cuts and after you finish pruning. The infected plant material should be disposed of in sealed plastic bags.

Fungicide Option
Chronic gray mold in roses can be treated by spraying the plants with a premixed, ready-to-use chlorothalonil fungicide as soon as their buds break in spring. On a cool, overcast day with calm rather than breezy conditions, put on clothing that covers all of your skin, closed-toe shoes, a face mask, gloves and goggles, and spray the fungicide until it drips from the rose bushes. Repeat the application weekly while cool, damp conditions persist. Each time you use the spray, keep the area around your roses off-limits to people and pets during spraying and until the spray dries.
Sap-Thieving Thrips
Thrips insects invade rose buds with ease; placed end-to end, 25 of the yellowish-brown or black bugs stretch less than 1 inch. After overwintering as pupae in grass and soil debris, they ride spring breezes to plants, tunnel deep into developing buds and feed on sap or pollen. Brown-scarred bud sepals -- the narrow, green outer petals -- indicate the presence of thrips. The buds either remain closed or open with brown-streaked petals. In mild-winter locations, thrips may breed all year.
Thrips Control
Treating developing rose buds with ready-to-use insecticidal soap prevents damage from thrips. Unless the insecticidal soap's label indicates otherwise, spray the product every other day, coating only the buds until they drip. After drying, the soap won't harm lacewing larvae and other thrips predators. Flooding the soil around your plants periodically in late spring and summer drowns thrips pupae and interrupts the insects' breeding cycle.

Frost Damage
Where mild winters keep rose buds coming, a few hours of frost can shrivel and brown them. Even worse, frost-injured rose stems, or canes, may develop a canker fungus infection. Avert disaster by watering your roses as soon as the forecast calls for frost. Moist soil retains heat during the day and releases it to the plants after dark. Cocooning the plants in bedsheets before the temperature dips below 40 degrees Fahrenheit minimizes their frost injury. Uncover them in the morning before they overheat.
Gray Mold Infection
Rose buds deteriorating into brownish-gray mush have Botrytis blight, better known as gray mold. Moist, mild weather with temperatures are 62 to 72 F encourages the fungal disease. The drooping buds may not open; if they do, the blooms may resemble brown pulp. As the infection moves down the canes, cankers mark its progress.
Cultural Gray Mold Control
Mail-order, bare-root roses often arrive with stowaway gray mold spores. Remove such roses from their packaging sleeves immediately, and plant them far enough apart so they have good air circulation. Keeping their leaves dry when you water the plants helps because gray mold spores need moisture to germinate. Remove old or damaged blooms promptly, along with the diseased plant parts and soil debris. Disinfect your pruning tools in a solution that is one part household bleach and nine parts water between cuts and after you finish pruning. The infected plant material should be disposed of in sealed plastic bags.

Fungicide Option
Chronic gray mold in roses can be treated by spraying the plants with a premixed, ready-to-use chlorothalonil fungicide as soon as their buds break in spring. On a cool, overcast day with calm rather than breezy conditions, put on clothing that covers all of your skin, closed-toe shoes, a face mask, gloves and goggles, and spray the fungicide until it drips from the rose bushes. Repeat the application weekly while cool, damp conditions persist. Each time you use the spray, keep the area around your roses off-limits to people and pets during spraying and until the spray dries.
Sap-Thieving Thrips
Thrips insects invade rose buds with ease; placed end-to end, 25 of the yellowish-brown or black bugs stretch less than 1 inch. After overwintering as pupae in grass and soil debris, they ride spring breezes to plants, tunnel deep into developing buds and feed on sap or pollen. Brown-scarred bud sepals -- the narrow, green outer petals -- indicate the presence of thrips. The buds either remain closed or open with brown-streaked petals. In mild-winter locations, thrips may breed all year.
Thrips Control
Treating developing rose buds with ready-to-use insecticidal soap prevents damage from thrips. Unless the insecticidal soap's label indicates otherwise, spray the product every other day, coating only the buds until they drip. After drying, the soap won't harm lacewing larvae and other thrips predators. Flooding the soil around your plants periodically in late spring and summer drowns thrips pupae and interrupts the insects' breeding cycle.
0
0
文章
Dummer. ゛☀
2017年08月10日

The garden croton (Codiaeum variegatum) is a small shrub with big tropical-looking leaves. Crotons can grow outdoors in gardening zones 9 to 11, and some varieties also make great houseplants, though demanding ones. Their striking red, orange and yellow-striped leaves make the extra work worthwhile. Some varieties even have purple or white stripes and patches on the dark green leaves. But sometimes the bright colors on a croton fade, leaving them with ordinary-looking green leaves. It can be disappointing to notice a croton losing color because those vibrant leaves are this plant’s best feature.
Why is My Croton Losing its Color?
Color loss of croton is common in winter and in low light conditions. Croton plants are native to the tropics, growing wild in Indonesia and Malaysia, and they do best in full sun or bright indoor light. Most often, croton plants with faded leaves are simply not receiving enough light. Conversely, some colors may fade if crotons are exposed to excessive direct light. Each variety has its own light preferences, so check whether the variety you have does best in full sun or partial sun.
What to Do When Croton Leaves are Fading
If a croton’s colors fade in low light levels, you need to increase the amount of light it is receiving. Bring the croton outdoors during the warm part of the year to give it more light. Be sure to harden off the plant, bringing it outdoors for a few hours at a time and placing it in a shady spot at first, to allow the plant to adjust to the brighter light, wind, and less stable temperatures of the outdoors. Crotons are not cold hardy and shouldn’t be exposed to temperatures below 30 degrees F. (-1 degree C.). Bring your croton back indoors before the first frost in fall. If a croton develops fading leaves when it is exposed to excessively bright light, try moving it into the shade or farther away from the window. To keep your croton healthy during the winter when it has to be indoors, place it near the sunniest window in the house, within 3 to 5 feet (.91 to 1.52 m.) of the glass, or provide a grow light. Legginess is another sign that the plant is not getting enough light. To ward off other problems that could cause weak coloration in crotons, provide a balanced slow-release fertilizer two to three times a year, but avoid over fertilizing, especially during the winter when growth is slower. Keep soil evenly moist, but avoid waterlogged or poorly drained soil, which may cause leaves to turn yellow. Crotons should be misted to keep them healthy indoors, since they prefer more humidity than most houses provide.

Why is My Croton Losing its Color?
Color loss of croton is common in winter and in low light conditions. Croton plants are native to the tropics, growing wild in Indonesia and Malaysia, and they do best in full sun or bright indoor light. Most often, croton plants with faded leaves are simply not receiving enough light. Conversely, some colors may fade if crotons are exposed to excessive direct light. Each variety has its own light preferences, so check whether the variety you have does best in full sun or partial sun.

What to Do When Croton Leaves are Fading
If a croton’s colors fade in low light levels, you need to increase the amount of light it is receiving. Bring the croton outdoors during the warm part of the year to give it more light. Be sure to harden off the plant, bringing it outdoors for a few hours at a time and placing it in a shady spot at first, to allow the plant to adjust to the brighter light, wind, and less stable temperatures of the outdoors. Crotons are not cold hardy and shouldn’t be exposed to temperatures below 30 degrees F. (-1 degree C.). Bring your croton back indoors before the first frost in fall. If a croton develops fading leaves when it is exposed to excessively bright light, try moving it into the shade or farther away from the window. To keep your croton healthy during the winter when it has to be indoors, place it near the sunniest window in the house, within 3 to 5 feet (.91 to 1.52 m.) of the glass, or provide a grow light. Legginess is another sign that the plant is not getting enough light. To ward off other problems that could cause weak coloration in crotons, provide a balanced slow-release fertilizer two to three times a year, but avoid over fertilizing, especially during the winter when growth is slower. Keep soil evenly moist, but avoid waterlogged or poorly drained soil, which may cause leaves to turn yellow. Crotons should be misted to keep them healthy indoors, since they prefer more humidity than most houses provide.

0
0
文章
Dummer. ゛☀
2017年08月10日

I love a plant with a descriptive and evocative name. Cardboard palm plant (Zamia furfuracea) is one of those ancient plants with a lot of character that can grow inside or outside depending upon your gardening zone. What is a Zamia cardboard palm? In fact, it isn’t a palm at all but a cycad — like the sago palm plant. Knowing how to grow Zamia palms starts with knowing your USDA planting zone. This little guy is not winter hardy in the majority of North American regions, but it makes an excellent container or houseplant anywhere. Grow it outdoors in USDA zones 9 to 11 year round.
What is a Zamia Cardboard Palm?
We already ascertained that the plant is not a palm. Cycads, which have been around since the dinosaurs, form cones at the center of the plant. The cardboard palm plant is native to Mexico and has tropical tendencies in its preferred temperature and light levels. Zamia cardboard palm does have pinnate leaves like a palm tree, but they are rounded with a thick tuberous stem. The evergreen leaflets grow in opposing pairs of up to 12 per stem. It is a low growing plant that may spread 3 to 4 feet and an underground trunk. The trunk stores moisture in times of drought, which makes Zamia ideal for xeriscape gardens. Cardboard palm care requires enough moisture to keep the trunk fat and healthy. Never let it dry to the point that the trunk and stem are wrinkled or dry.
How to Grow Zamia Palms
Propagation of cardboard palm plants is inconsistent through seed. The plants come in male and female sexes. It may be difficult to tell which you have at first, but the male produces a large cone that protrudes from the core of the plant, while the female cone is smaller and flatter. Females may produce numerous bright red seeds when they are pollinated. They should be germinated in moist sand in flats indoors. Temperature range for germination is at least 65 F. (18 C.), but growing cardboard palms from seed is finicky business. Seeds should be sown immediately, as they are not viable for long. Once the seedling has emerged, it will look nothing like your adult plant. Young cardboard palm care includes moderate light until the second set of true leaves appears. Keep the sand moderately moist and transplant when the root base is robust.
Cardboard Palm Care
Maintenance is minimal when growing cardboard palms. Zamia thrives in moderate to bright light. It has a slow growth habit and does well in good potting soil as long as the container has excellent drainage. The plant is prone to some pests, such as spider mites, but its biggest problem is rot. Water deeply weekly in summer but reduce moisture in winter and fall by half. The thick underground trunk needs to be filled with stored water but over anxious growers may tend to overwater it and cause stem or crown rot. Once the crown is overtaken by fungal spores, it is nearly impossible to save. Prune off dead leaves as they occur and fertilize with a slow release palm food or a diluted household plant food once monthly during the growing season.

What is a Zamia Cardboard Palm?
We already ascertained that the plant is not a palm. Cycads, which have been around since the dinosaurs, form cones at the center of the plant. The cardboard palm plant is native to Mexico and has tropical tendencies in its preferred temperature and light levels. Zamia cardboard palm does have pinnate leaves like a palm tree, but they are rounded with a thick tuberous stem. The evergreen leaflets grow in opposing pairs of up to 12 per stem. It is a low growing plant that may spread 3 to 4 feet and an underground trunk. The trunk stores moisture in times of drought, which makes Zamia ideal for xeriscape gardens. Cardboard palm care requires enough moisture to keep the trunk fat and healthy. Never let it dry to the point that the trunk and stem are wrinkled or dry.

How to Grow Zamia Palms
Propagation of cardboard palm plants is inconsistent through seed. The plants come in male and female sexes. It may be difficult to tell which you have at first, but the male produces a large cone that protrudes from the core of the plant, while the female cone is smaller and flatter. Females may produce numerous bright red seeds when they are pollinated. They should be germinated in moist sand in flats indoors. Temperature range for germination is at least 65 F. (18 C.), but growing cardboard palms from seed is finicky business. Seeds should be sown immediately, as they are not viable for long. Once the seedling has emerged, it will look nothing like your adult plant. Young cardboard palm care includes moderate light until the second set of true leaves appears. Keep the sand moderately moist and transplant when the root base is robust.

Cardboard Palm Care
Maintenance is minimal when growing cardboard palms. Zamia thrives in moderate to bright light. It has a slow growth habit and does well in good potting soil as long as the container has excellent drainage. The plant is prone to some pests, such as spider mites, but its biggest problem is rot. Water deeply weekly in summer but reduce moisture in winter and fall by half. The thick underground trunk needs to be filled with stored water but over anxious growers may tend to overwater it and cause stem or crown rot. Once the crown is overtaken by fungal spores, it is nearly impossible to save. Prune off dead leaves as they occur and fertilize with a slow release palm food or a diluted household plant food once monthly during the growing season.
1
1
文章
Miss Chen
2017年08月10日

Pruning, fertilizing and winterizing are basic rose gardening chores that need to be followed to keep rose bushes healthy and thriving year after year. Shorter days and colder autumn temperatures are signs that rosarians look to when beginning to prepare their rose bushes for the freezing winter days ahead. With proper protection, however, roses can withstand extremely low subfreezing temperatures and still bloom hardily only a few months later.

Cold Hardiness
A rose bush's inherent hardiness contributes to its ability to withstand subfreezing temperatures. For example, old garden rose varieties can tolerate extremely cold winters, whereas more modern hybrid tea roses need considerable winter protection to survive the cold undamaged. Examples of hardy rose varieties include alba maxima, Maiden's Blush and Koenigen von Daenemark. Acclimation, midwinter hardiness and deacclimation also contribute to a rose's ability to survive freezing cold. Shorter days and decreasing temperatures trigger physiological and biochemical cues in rose bushes that prepare them for winter dormancy. Certain rose cultivars have maximum hardiness levels that allow them to withstand USDA zone 4a and 4b low temperatures of minus 20 to minus 30 degrees Fahrenheit.
Early Preparation
To begin to prepare roses for their winter dormancy, discontinue fertilizing in late summer or early fall, or more specifically, a minimum of one month before your local first-frost date. Continuing to fertilize rose bushes in autumn promotes new growth at a time when the objective is the opposite. Also refrain from deheading or cutting blooms, and allow the development of rose hips, which encourages the plant to harden for winter. Lastly, to reduce risk of disease the following year, remove all leaf debris from around the base of the bush.
Complete Winterization
Despite the fact that roses can freeze at temperatures below 32 F, only basic winter protection is needed in areas where subfreezing temperatures stay above 20 F. The reason for this is that proper rose winterization keeps the plants cold and frozen throughout winter. The severe damaging effects come not specifically from the cold but rather alternating freezing and thawing. Therefore, do not cover rose bushes until at least one hard frost occurs. Then remove all dropped leaves and cover the plant with a soil and compost mix approximately 10 to 12 inches deep. After this mound freezes, add further insulation, such as evergreen boughs or straw.

Other Considerations
In areas with severe winters, like Minnesota and Vermont, additional protection is needed for roses to survive. One popular winterization method uses plastic foam rose cones that fit over bushes. Add a couple ventilation holes, however, to keep air from heating up inside. Another winterization method to consider in Northern regions is the "Minnesota Tip," in which the bush is partially uprooted, pushed over into a trench and covered with soil. Healthy roses that are properly tended year-round have greater chance of surviving extremely low subfreezing temperatures than those suffering from pests or disease.

Cold Hardiness
A rose bush's inherent hardiness contributes to its ability to withstand subfreezing temperatures. For example, old garden rose varieties can tolerate extremely cold winters, whereas more modern hybrid tea roses need considerable winter protection to survive the cold undamaged. Examples of hardy rose varieties include alba maxima, Maiden's Blush and Koenigen von Daenemark. Acclimation, midwinter hardiness and deacclimation also contribute to a rose's ability to survive freezing cold. Shorter days and decreasing temperatures trigger physiological and biochemical cues in rose bushes that prepare them for winter dormancy. Certain rose cultivars have maximum hardiness levels that allow them to withstand USDA zone 4a and 4b low temperatures of minus 20 to minus 30 degrees Fahrenheit.
Early Preparation
To begin to prepare roses for their winter dormancy, discontinue fertilizing in late summer or early fall, or more specifically, a minimum of one month before your local first-frost date. Continuing to fertilize rose bushes in autumn promotes new growth at a time when the objective is the opposite. Also refrain from deheading or cutting blooms, and allow the development of rose hips, which encourages the plant to harden for winter. Lastly, to reduce risk of disease the following year, remove all leaf debris from around the base of the bush.
Complete Winterization
Despite the fact that roses can freeze at temperatures below 32 F, only basic winter protection is needed in areas where subfreezing temperatures stay above 20 F. The reason for this is that proper rose winterization keeps the plants cold and frozen throughout winter. The severe damaging effects come not specifically from the cold but rather alternating freezing and thawing. Therefore, do not cover rose bushes until at least one hard frost occurs. Then remove all dropped leaves and cover the plant with a soil and compost mix approximately 10 to 12 inches deep. After this mound freezes, add further insulation, such as evergreen boughs or straw.

Other Considerations
In areas with severe winters, like Minnesota and Vermont, additional protection is needed for roses to survive. One popular winterization method uses plastic foam rose cones that fit over bushes. Add a couple ventilation holes, however, to keep air from heating up inside. Another winterization method to consider in Northern regions is the "Minnesota Tip," in which the bush is partially uprooted, pushed over into a trench and covered with soil. Healthy roses that are properly tended year-round have greater chance of surviving extremely low subfreezing temperatures than those suffering from pests or disease.
0
0
文章
Miss Chen
2017年08月08日


Cactus plants comes in various shapes and sizes. This means that removing a cactus involves different steps depending on the overall size and growth of the cactus in question. While some cacti are too large to cut down with gardening tools, others can be removed by simply using a spade. When you are removing a cactus plant from your garden, be careful because the spines and needles can cause severe pain if lodged in the skin. Wear thick gloves as well as long clothing to prevent accidental contact with the spines.
Step 1
Cut the cactus plant into small pieces or pads using a chainsaw. Cut horizontally, so the pieces slide off the cactus plant and land beside the plant.
Step 2
Haul away the cactus pieces or cover them with a foot or more of fresh horse manure. The fertilizer will cause the cactus pads to rot away within six months.
Step 3
Return to the roots and remove them using a spade. Dig deep down before applying weight to the spade to lift up the roots, as the roots can be growing deep in the soil. If the roots break in the process, ensure that you go back with a hand shovel to remove the remaining roots, as cactus roots will continue to grow.
Step 4
Stir up the soil where the cactus was located, using a hand rake. Scatter some native grass seed into the soil and water it.
1
0
文章
Dummer. ゛☀
2017年08月08日

From indoor and outdoor gardeners alike, one of the most common gardening questions is, Why do my plants have spotted and brown leaves? And while there are many reasons for plain old brown spots, when those spots look like little brown bull’s-eyes, the answer my friends, is fairly simple , organism-wise that is. Those plant leaf spots are caused by one of nature’s most basic organisms: a fungus. Plants with Spotted Leaves Fungal leaf spot can be found in your outdoor garden as well as on your houseplant. Spotted leaves occur when fungal spores in the air find a warm, wet, plant surface to cling to. As soon as that microscopic spore gets comfortable in its new home, sporulation (the fungal method of reproduction) occurs and the tiny brown fungal leaf spot begins to grow. Soon the circle grows large enough to touch another circle and now the fungal leaf spot looks more like a blotch. Eventually the leaf turns brown and falls to the soil where the spores sit and wait for the next available warm, wet, plant surface so the fungal leaf spot process can begin again.
Preventing Plant Leaf Spots
There are a few easy steps you can take to prevent the problem in your garden or on your houseplant. Spotted leaves or the causal fungus need two things to flourish: moisture and poor air circulation. For your houseplant, spotted leaves can be prevented by watering the soil and not the foliage. Leave enough space between your pots for good air circulation. In the garden, water in the early morning so the moisture will evaporate from the leaves. Closely packed foliage should be thinned. Always treat pruning and cutting tools with a 1:10 bleach solution after each use. Rake and remove all debris from around your plants before leaf bud each spring.
How to Treat Leaf Spot Fungus
No matter how diligent you are, the day will come when those tiny brown circles on the leaves of your plant so it’s important to know how to treat leaf spot fungus. As soon as you see plant leaf spots, treatment begins. For houseplants, isolate the pot immediately to prevent the fungus from spreading. Remove any leaf that has been affected. Stop misting. In the garden, the plant’s leaf spot treatment depends on preference. For organic treatment, there are several safe and convenient treatments available. Most contain sulfur or copper octanate. Or you can try a more traditional treatment by spraying with a mild solution of bicarbonate of soda (baking soda), using ½ teaspoon per gallon of water. For those gardeners who have no objection, many all-purpose fungicides are available. Please read the label carefully before applying.

Preventing Plant Leaf Spots
There are a few easy steps you can take to prevent the problem in your garden or on your houseplant. Spotted leaves or the causal fungus need two things to flourish: moisture and poor air circulation. For your houseplant, spotted leaves can be prevented by watering the soil and not the foliage. Leave enough space between your pots for good air circulation. In the garden, water in the early morning so the moisture will evaporate from the leaves. Closely packed foliage should be thinned. Always treat pruning and cutting tools with a 1:10 bleach solution after each use. Rake and remove all debris from around your plants before leaf bud each spring.

How to Treat Leaf Spot Fungus
No matter how diligent you are, the day will come when those tiny brown circles on the leaves of your plant so it’s important to know how to treat leaf spot fungus. As soon as you see plant leaf spots, treatment begins. For houseplants, isolate the pot immediately to prevent the fungus from spreading. Remove any leaf that has been affected. Stop misting. In the garden, the plant’s leaf spot treatment depends on preference. For organic treatment, there are several safe and convenient treatments available. Most contain sulfur or copper octanate. Or you can try a more traditional treatment by spraying with a mild solution of bicarbonate of soda (baking soda), using ½ teaspoon per gallon of water. For those gardeners who have no objection, many all-purpose fungicides are available. Please read the label carefully before applying.

0
0
文章
Dummer. ゛☀
2017年08月04日

Fertilizer
All plants need fertilizer to live. In traditional gardening and farming, plants get their nutrients from soil and additive such as compost, manure, and chemical fertilizers. In hydroponics, plants are not grown in soil so nutrients must be delivered directly through the solution they are watered with.
These nutrients are divided into two categories – macronutrients and micronutrients. Macronutrients are those that plants need in large amounts, including carbon, phosphorous, hydrogen, nitrogen, oxygen, sulfur, potassium, magnesium and calcium.
Micronutrients are needed in tiny amounts but are essential. These include zinc, nickel, boron, copper, iron, manganese, molybdenum, boron, and chlorine.
Without these essential elements, plants are unable to build molecules, undergo enzymatic reactions, and complete the life cycle. For hydroponic gardeners, this means that without proper nutrients they cannot produce fruit or vegetables or that what they do produce would be sub par.

PH
PH is also an essential element to consider. The pH value of a nutrient solution has a huge impact on the amount of nutrition a plant can absorb. It is essential to check pH levels on a regular basis, preferably daily even if you are careful about measuring and mixing your nutrient solution correctly.
Different plants have slightly different requirements for pH value and nutrient concentration. If you are going to be growing a large variety of plants in your system make sure to research the requirements for each so that you can group them in terms of their needs.

Temperature
A single plant’s needs may also change under different environmental conditions such as weather, season, and temperature. This isn’t an issue for indoor setups that have a controlled environment but is something to consider if your system is located outside.
Nutrient solution must be kept at a steady temperature.
The ideal is at room temperature, between 70-78 degrees Fahrenheit. Again this is more of a concern for outdoor systems that are exposed to the weather. For winter, you can buy miniature water heaters that go inside of your reservoir to keep the nutrient solution warm. For summer, keeping the reservoir in a shaded area and periodically topping it off with cool water is generally sufficient to keep it from getting too hot.

Pre-Made Nutrient Solutions vs. Homemade
You can either buy a pre-made nutrient solution, or you can formulate your own. Small farms and hobbyists generally purchase pre-mixed liquid or powder concentrates that are added to water. Large-scale farms generally mix their own to the specific needs of whatever they are growing using bulk concentrates of the individual chemical compounds.
Pre-mixed concentrates usually come in two separate bottles, one for macro- and one for micro-nutrients. They are separated because some elements are incompatible with each other when concentrated and cause precipitation when they are combined. Once diluted, they do not form precipitates and can be used together without issue. Some manufacturers have managed to hold the incompatible nutrients in a chemical complex so that they do not mix –- these are sold in a single pack.
For hydroponics, twin or triple pack solutions are usually the best options. They are simple to mix and only require a few materials – a container to mix them in, a dedicated measuring cup and a stirrer. If your mixing container has a lid, you don’t even need a stirrer as you can just shake it up. The measurement is usually 3.5 mL of each concentrate per liter. Make sure to double-check the mixing instructions on the bottle, though.
Depending on the size of your system, for example with a large scale Ebb and Flow setup, you may want to mix your nutrient solution in very large quantities. 55-gallon drums make ideal mixing buckets for large systems and can store enough nutrient solution to replenish your reservoir for weeks. For smaller systems or if you do not have space for a large mixing container it is perfectly OK to mix your solution on an as-needed basis.
After mixing your solution let it sit for a few minutes and settle, then check the pH and adjust as necessary. Starting off with a perfect pH will make it easier to maintain. You can even measure the number of drops of pH Up or pH Down needed every time you mix your solution, and just add that amount to the water before mixing in your concentrate.
All plants need fertilizer to live. In traditional gardening and farming, plants get their nutrients from soil and additive such as compost, manure, and chemical fertilizers. In hydroponics, plants are not grown in soil so nutrients must be delivered directly through the solution they are watered with.
These nutrients are divided into two categories – macronutrients and micronutrients. Macronutrients are those that plants need in large amounts, including carbon, phosphorous, hydrogen, nitrogen, oxygen, sulfur, potassium, magnesium and calcium.
Micronutrients are needed in tiny amounts but are essential. These include zinc, nickel, boron, copper, iron, manganese, molybdenum, boron, and chlorine.
Without these essential elements, plants are unable to build molecules, undergo enzymatic reactions, and complete the life cycle. For hydroponic gardeners, this means that without proper nutrients they cannot produce fruit or vegetables or that what they do produce would be sub par.

PH
PH is also an essential element to consider. The pH value of a nutrient solution has a huge impact on the amount of nutrition a plant can absorb. It is essential to check pH levels on a regular basis, preferably daily even if you are careful about measuring and mixing your nutrient solution correctly.
Different plants have slightly different requirements for pH value and nutrient concentration. If you are going to be growing a large variety of plants in your system make sure to research the requirements for each so that you can group them in terms of their needs.

Temperature
A single plant’s needs may also change under different environmental conditions such as weather, season, and temperature. This isn’t an issue for indoor setups that have a controlled environment but is something to consider if your system is located outside.
Nutrient solution must be kept at a steady temperature.
The ideal is at room temperature, between 70-78 degrees Fahrenheit. Again this is more of a concern for outdoor systems that are exposed to the weather. For winter, you can buy miniature water heaters that go inside of your reservoir to keep the nutrient solution warm. For summer, keeping the reservoir in a shaded area and periodically topping it off with cool water is generally sufficient to keep it from getting too hot.

Pre-Made Nutrient Solutions vs. Homemade
You can either buy a pre-made nutrient solution, or you can formulate your own. Small farms and hobbyists generally purchase pre-mixed liquid or powder concentrates that are added to water. Large-scale farms generally mix their own to the specific needs of whatever they are growing using bulk concentrates of the individual chemical compounds.
Pre-mixed concentrates usually come in two separate bottles, one for macro- and one for micro-nutrients. They are separated because some elements are incompatible with each other when concentrated and cause precipitation when they are combined. Once diluted, they do not form precipitates and can be used together without issue. Some manufacturers have managed to hold the incompatible nutrients in a chemical complex so that they do not mix –- these are sold in a single pack.
For hydroponics, twin or triple pack solutions are usually the best options. They are simple to mix and only require a few materials – a container to mix them in, a dedicated measuring cup and a stirrer. If your mixing container has a lid, you don’t even need a stirrer as you can just shake it up. The measurement is usually 3.5 mL of each concentrate per liter. Make sure to double-check the mixing instructions on the bottle, though.
Depending on the size of your system, for example with a large scale Ebb and Flow setup, you may want to mix your nutrient solution in very large quantities. 55-gallon drums make ideal mixing buckets for large systems and can store enough nutrient solution to replenish your reservoir for weeks. For smaller systems or if you do not have space for a large mixing container it is perfectly OK to mix your solution on an as-needed basis.
After mixing your solution let it sit for a few minutes and settle, then check the pH and adjust as necessary. Starting off with a perfect pH will make it easier to maintain. You can even measure the number of drops of pH Up or pH Down needed every time you mix your solution, and just add that amount to the water before mixing in your concentrate.
1
0
文章
Dummer. ゛☀
2017年08月04日

Think Outside the Pot
If you've got a postage stamp for a yard or you're such an avid gardener that you've filled all your space, it's time to explore new gardening territory with vertical gardening. Follow the tips below for a few traditional and innovative ways to add new foliage to your small or plant-packed garden.

The Traditional Way: Grow Vines
Vines are growing machines. Some of them can grow to 50 feet in length. If you have a fence or wall in need of livening up, try vines. Clematis is tame, while trumpet vines are more adventurous and can tear up your siding, so be sure to pick a variety that's suitable to your setting. You can put up a trellis on your wall or fence for your vine to follow, or build an arbor or pergola. Either way, you can create a stunning assortment of flowers and greenery with vines alone, and attracts birds and butterflies to your yard.

Grow Down
With planters, you can create your own version of the Hanging Gardens of Babylon. Put containers along balconies or ledges and add trailing plants such as petunias or million bells, which will create a green and flowery curtain that sways in the breeze. Your hanging garden can also provide some much-needed shade during a hot summer.
Make a Living Wall
Grow plants on your interior or exterior walls using a hanging structure like ELT's living walls. You can use just about any kind of plant that has shallow roots to create beautiful designs that look more like a tapestry than a garden. ELT's vertical garden system is a 20 by 24 inch rectangular plastic structure that has 25 containers in which to place your plants. You can fasten any number of rectangles together to cover any surface you want. They also make a vertical garden for interiors, either on the floor or as a frame on the wall. If you have a sloped roof that's exposed to sun all day, you can put some rectangles up to create an inexpensive green roof. Green roofs are becoming popular in Europe as a means of slowing down runoff and cooling buildings without air conditioning.
If you've got a postage stamp for a yard or you're such an avid gardener that you've filled all your space, it's time to explore new gardening territory with vertical gardening. Follow the tips below for a few traditional and innovative ways to add new foliage to your small or plant-packed garden.

The Traditional Way: Grow Vines
Vines are growing machines. Some of them can grow to 50 feet in length. If you have a fence or wall in need of livening up, try vines. Clematis is tame, while trumpet vines are more adventurous and can tear up your siding, so be sure to pick a variety that's suitable to your setting. You can put up a trellis on your wall or fence for your vine to follow, or build an arbor or pergola. Either way, you can create a stunning assortment of flowers and greenery with vines alone, and attracts birds and butterflies to your yard.

Grow Down
With planters, you can create your own version of the Hanging Gardens of Babylon. Put containers along balconies or ledges and add trailing plants such as petunias or million bells, which will create a green and flowery curtain that sways in the breeze. Your hanging garden can also provide some much-needed shade during a hot summer.

Make a Living Wall
Grow plants on your interior or exterior walls using a hanging structure like ELT's living walls. You can use just about any kind of plant that has shallow roots to create beautiful designs that look more like a tapestry than a garden. ELT's vertical garden system is a 20 by 24 inch rectangular plastic structure that has 25 containers in which to place your plants. You can fasten any number of rectangles together to cover any surface you want. They also make a vertical garden for interiors, either on the floor or as a frame on the wall. If you have a sloped roof that's exposed to sun all day, you can put some rectangles up to create an inexpensive green roof. Green roofs are becoming popular in Europe as a means of slowing down runoff and cooling buildings without air conditioning.
0
1
成长记
sarajordan2993
2017年06月26日

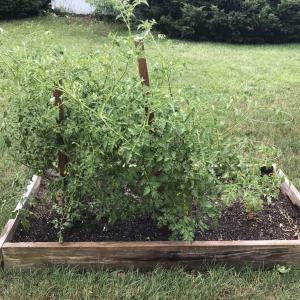
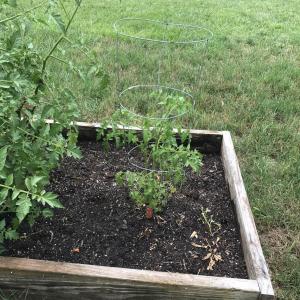
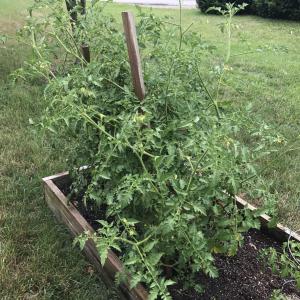
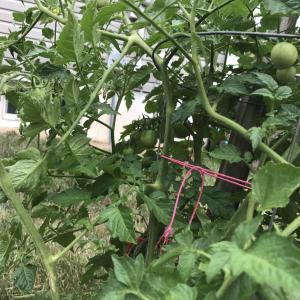
So many new tomatos . Just waiting for them to turn red .
#Tomato #gardening #easy #vegetables #bigred


#Tomato #gardening #easy #vegetables #bigred


1
0
Erin Rose
2017年05月28日

I just bought a house and know NOTHING about gardening or taking care of plants. I am trying really hard and would like help identifying these plants so i can research how to take care of them!


1
0
文章
Colorful
2017年05月23日
Whether you want to make an indoor garden or you already have one– Check out some of the best & most essential indoor gardening tips for help!
If you recently moved to a big city to get closer to your job or you still want to carry on farming in the dead of winter, do not fret; indoor gardening is a viable option for you. Aside from reaping a bounty harvest of your favorite vegetables, indoor gardening is suitable for growing seedlings for transplanting into a farm or continuing growth after transplanting.
Indoor plants do not require a lot of space and can survive in room corners, window sills or balconies, and they grow in containers in a process called potting. Plants emanate oxygen which in turn cleanses the air in your apartment. People who reside in industrial cities that experience constant smog rely on air conditioning to cleanse the air would appreciate a supply of natural fresh air in their apartments. Indoor plants such as a Bonsai tree provide aesthetic beauty to your home.
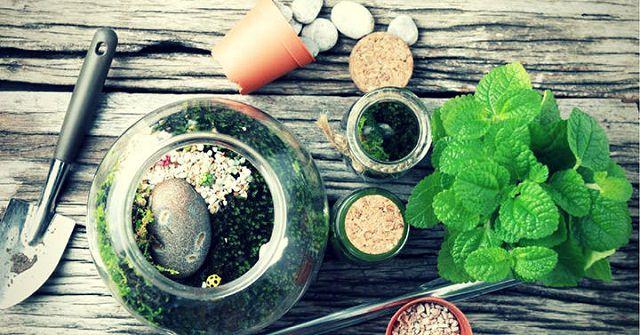
There are different species of Bonsai trees each thriving in various climatic conditions such as junipers, cedars, and pines. Bonsai trees need careful handling while styling the branches and therefore, you need to use an appropriate brush cutter to prune. For best results, seek expert advice on how to take the best care of a bonsai tree.
How do you get started?
There are some factors you need to consider before starting an indoor garden.
1. Available space
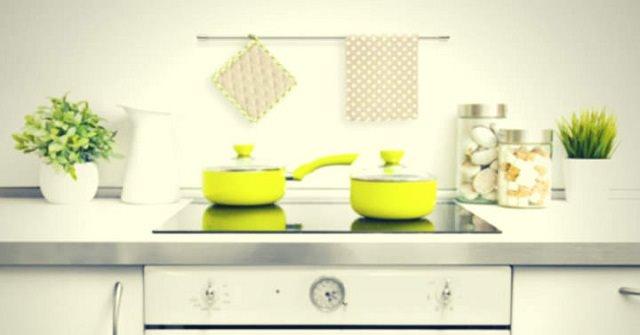
Rent in cities does not come cheap, and most city residents opt for smaller size apartments to keep living costs low. While deciding on a suitable space for indoor plants, consider access to natural light and avoid high traffic areas such as corridors or entryways. You do not want to keep bumping into potted plants or having to go around the garden each time you access the fridge. Find a reasonable place that does not hamper your movement or cause accidents especially if you have younger ones running around.
2. Growing Medium
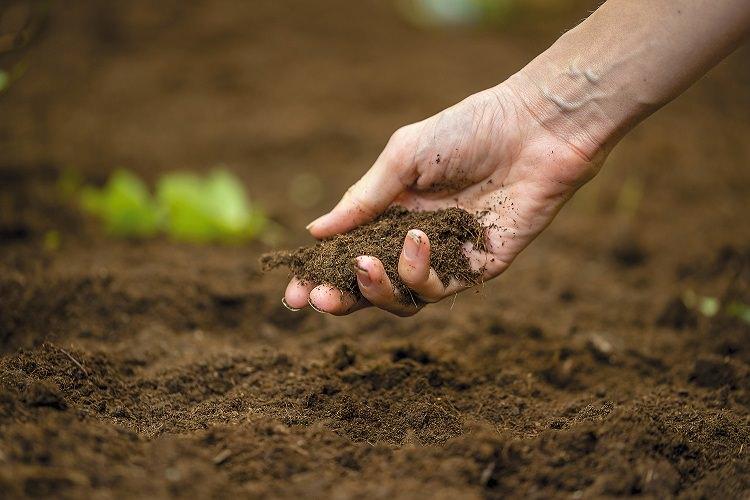
Regular garden soil is not suitable for indoor gardening as it comes with weed and all kinds of insects found on a farm. Farmland holds the plants’ roots together and provides a myriad of nutrients that are necessary for plants to thrive. You can choose to prepare a growing medium or buy a premade one at your local garden store. Potted plants dry out faster than plants growing in the soil and hence the need for a regular watering routine. Overwatering plants leads to wilting in the stems while under watering causes leaves to drop prematurely among other effects.
3. Organic nutrients
Since indoor plants do not grow in soil, you need to provide a natural boost of nutrients by applying organic fertilizer. Read the instructions on the bag to know how much fertilizer to use at a time and the frequency of application. If you are not keen on using fertilizer, you may choose to use Hydroponic nutrients or homemade compost instead.
4. Light
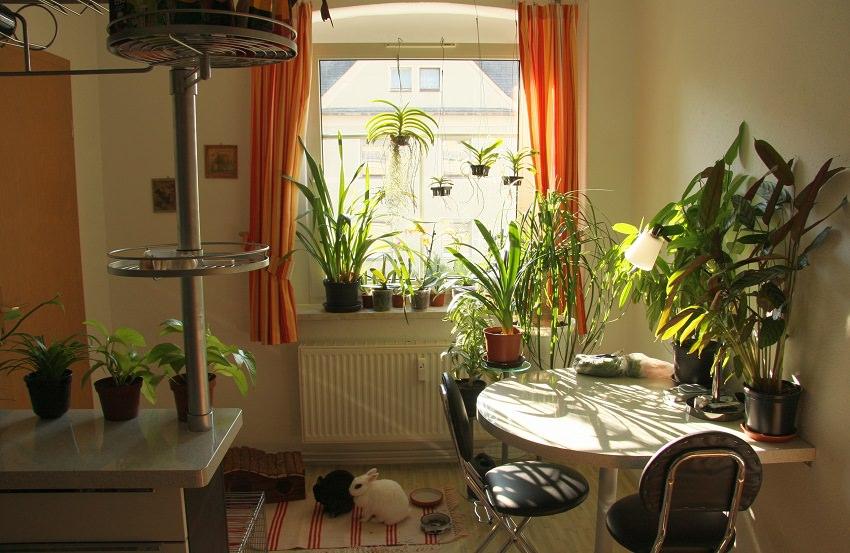
Just as nutrients are essential for the well-being of plants, so is light. Plants need light for photosynthesis which helps plants grow healthy foliage and bear fruits. Tall buildings near your apartment will obscure natural light from reaching your plants even if they are near a window. The winter season tends to be gloomy, and this means limited natural light. A grow light will solve this problem in one click of a switch. Ensure that your grow light has the same wavelength as the sun; it should not be too bright nor too dull.
5. Humidity

Lack of moisture may cause the plants to wither and lose their leaves. There are creative ways of providing enough moisture to indoor plants; try placing the plants together so they can get humidity from one another. Evaporation is an excellent source of moisture for plants. Putting a tray of water next to your plants has a similar humid effect to living near a massive water body like the sea or ocean. You can also place water next to the plants and if this does not work, invest in an environmental controller that shifts the levels of humidity as you wish.
6. Temperature
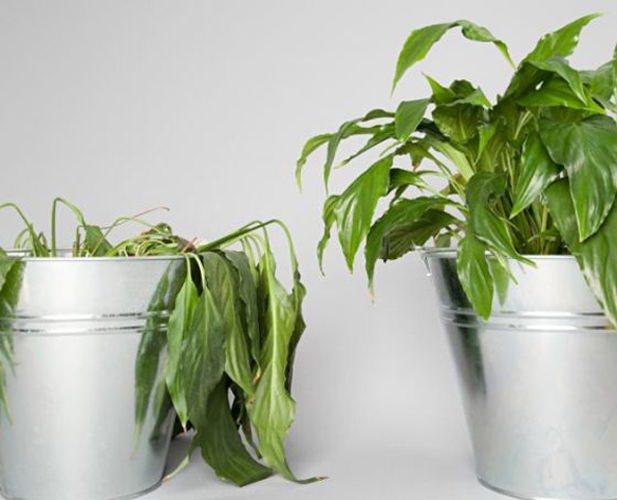
Temperatures vary from day and night and from one season to the next. Plants need correct temperatures to grow and mature. Cold temperatures may cause yellowing of leaves while hot temperatures may lead to stunted growth. Research on the right temperatures for the type of plants you want to grow in your indoor garden and adjust as required.
7. Selecting plants
After considering the fundamental elements of indoor gardening, you can now choose the type of plants you want to grow. Since space is likely to be an issue for apartment dwellers, avoid plants that grow too big as they will eat into your living space. You do not want a jungle in your home! Conventional plants for indoor gardening include flowers, herbs, fruits, bonsai trees, and vegetables.
Conclusion
Lack of land to garden should not thwart you from growing your favorite vegetables or fruit. Indoor gardening is possible in small quarters, and modern technology allows us to simulate environments that match those of a natural garden. This way, your indoor plants can have the same amount of the sunshine, water, and nutrients required to grow to maturity and harvest. Learning how to take the best care of Bonsai trees increases your chances of having these beauties grace your home.
If you recently moved to a big city to get closer to your job or you still want to carry on farming in the dead of winter, do not fret; indoor gardening is a viable option for you. Aside from reaping a bounty harvest of your favorite vegetables, indoor gardening is suitable for growing seedlings for transplanting into a farm or continuing growth after transplanting.
Indoor plants do not require a lot of space and can survive in room corners, window sills or balconies, and they grow in containers in a process called potting. Plants emanate oxygen which in turn cleanses the air in your apartment. People who reside in industrial cities that experience constant smog rely on air conditioning to cleanse the air would appreciate a supply of natural fresh air in their apartments. Indoor plants such as a Bonsai tree provide aesthetic beauty to your home.

There are different species of Bonsai trees each thriving in various climatic conditions such as junipers, cedars, and pines. Bonsai trees need careful handling while styling the branches and therefore, you need to use an appropriate brush cutter to prune. For best results, seek expert advice on how to take the best care of a bonsai tree.
How do you get started?
There are some factors you need to consider before starting an indoor garden.
1. Available space

Rent in cities does not come cheap, and most city residents opt for smaller size apartments to keep living costs low. While deciding on a suitable space for indoor plants, consider access to natural light and avoid high traffic areas such as corridors or entryways. You do not want to keep bumping into potted plants or having to go around the garden each time you access the fridge. Find a reasonable place that does not hamper your movement or cause accidents especially if you have younger ones running around.
2. Growing Medium

Regular garden soil is not suitable for indoor gardening as it comes with weed and all kinds of insects found on a farm. Farmland holds the plants’ roots together and provides a myriad of nutrients that are necessary for plants to thrive. You can choose to prepare a growing medium or buy a premade one at your local garden store. Potted plants dry out faster than plants growing in the soil and hence the need for a regular watering routine. Overwatering plants leads to wilting in the stems while under watering causes leaves to drop prematurely among other effects.
3. Organic nutrients
Since indoor plants do not grow in soil, you need to provide a natural boost of nutrients by applying organic fertilizer. Read the instructions on the bag to know how much fertilizer to use at a time and the frequency of application. If you are not keen on using fertilizer, you may choose to use Hydroponic nutrients or homemade compost instead.
4. Light

Just as nutrients are essential for the well-being of plants, so is light. Plants need light for photosynthesis which helps plants grow healthy foliage and bear fruits. Tall buildings near your apartment will obscure natural light from reaching your plants even if they are near a window. The winter season tends to be gloomy, and this means limited natural light. A grow light will solve this problem in one click of a switch. Ensure that your grow light has the same wavelength as the sun; it should not be too bright nor too dull.
5. Humidity

Lack of moisture may cause the plants to wither and lose their leaves. There are creative ways of providing enough moisture to indoor plants; try placing the plants together so they can get humidity from one another. Evaporation is an excellent source of moisture for plants. Putting a tray of water next to your plants has a similar humid effect to living near a massive water body like the sea or ocean. You can also place water next to the plants and if this does not work, invest in an environmental controller that shifts the levels of humidity as you wish.
6. Temperature

Temperatures vary from day and night and from one season to the next. Plants need correct temperatures to grow and mature. Cold temperatures may cause yellowing of leaves while hot temperatures may lead to stunted growth. Research on the right temperatures for the type of plants you want to grow in your indoor garden and adjust as required.
7. Selecting plants
After considering the fundamental elements of indoor gardening, you can now choose the type of plants you want to grow. Since space is likely to be an issue for apartment dwellers, avoid plants that grow too big as they will eat into your living space. You do not want a jungle in your home! Conventional plants for indoor gardening include flowers, herbs, fruits, bonsai trees, and vegetables.
Conclusion
Lack of land to garden should not thwart you from growing your favorite vegetables or fruit. Indoor gardening is possible in small quarters, and modern technology allows us to simulate environments that match those of a natural garden. This way, your indoor plants can have the same amount of the sunshine, water, and nutrients required to grow to maturity and harvest. Learning how to take the best care of Bonsai trees increases your chances of having these beauties grace your home.
2
2
文章
苍山洱海
2017年05月23日

Growing plants indoors can make your home look lively and lavish and if you too love that– Must see our 19 best DIY indoor garden decoration ideas!
If you too love indoor gardening (like we do!), learn about the arrangement ideas, DIY tricks and how you can maximize your planting space available indoors in this article.
1. Use Wall Mounted Storage to Keep Pots

The space between windows can also be prime real estate for growing, just like this one in the picture above. You can use wall mounted storage to keep the pots to decorate your home with plants.
2. DIY Pegboard Planter

This DIY pegboard planter project is simple, inexpensive, and easy to follow. If you want to see the step by step tutorial, visit brePURPOSED!
3. DIY Ladder Planter/Ladder Shelf

If you have got an old ladder, use it to keep pots in it. It can be made into an astonishing pot holder, perfect for growing indoor plants. A step by step tutorial is available on our site!
4. DIY Succulent Frame or Succulent Wall Planter

A DIY succulent frame or succulent wall planter is a great way to add a whim to your interior without spending a lot of money on materials you can make this. Here is the tutorial to follow.
5. Mason Jar Ideas

Upcycle mason jars can used to grow herbs. Here are some DIY ideas.
Mason jar can become adorable small pots and can be used to grow plants and herbs indoors. There are myriads of ideas available on the web to look for inspiration, you can look at one of our posts for more ideas!
6. Indoor Chair Planter

Not only outdoors, if you’ve got an old chair create an indoor chair planter and grow succulents or indoor plants on it to add a dramatic touch to your rooms. See more chair planter ideas!
7. Indoor Zen or Japanese Garden

An indoor Japanese or Zen garden can be a beautiful addition to your home when combined with a water feature, flowers of cool colors, stones, or succulents, a great way to add “calmness” to your home. You can also make a mini succulent zen garden in a pot, check out the tutorial here.
8. Flowering Houseplants

Decorate your indoor garden with flowering houseplants. They can add a bright touch to your home, growing them is similar to other indoor plants. Check out our article on best flowering houseplants here.
9. Use Plant Stands

Plant stand can not only increase your indoor planting space but also look elegant and decorate your home. The best thing about them is that you can also DIY them easily, here are some ideas.
10. Succulent Bookend
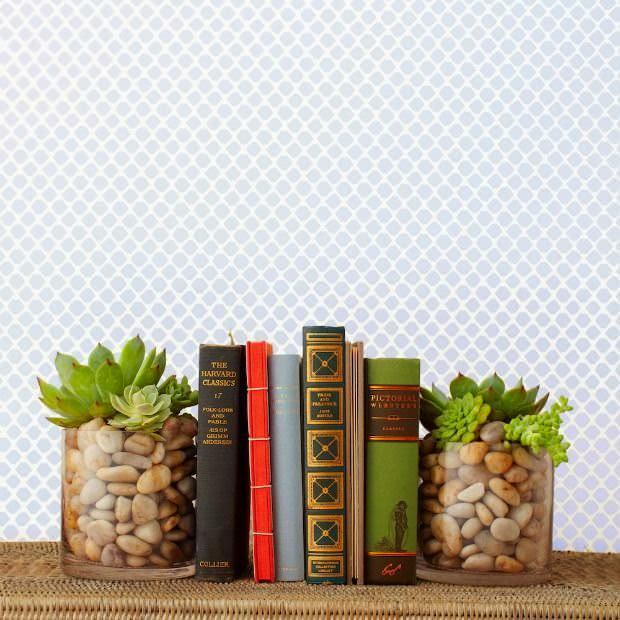
Prop up your favorite reads with this easy-to-make mini garden. Succulents are easy to grow. They add a welcome pop of greenery to any book collection when planted in clear vases filled with pretty river stones. See more of it here.
11. Hanging Coconut Planter
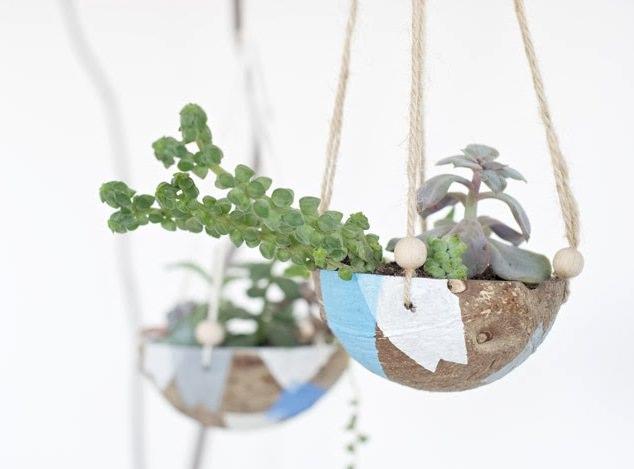
Use coconut shells after eating to create this super cute hanging indoor garden. This project is unique, still simple and doesn’t require much. Check out the tutorial here.
12. Sea Shell Planter
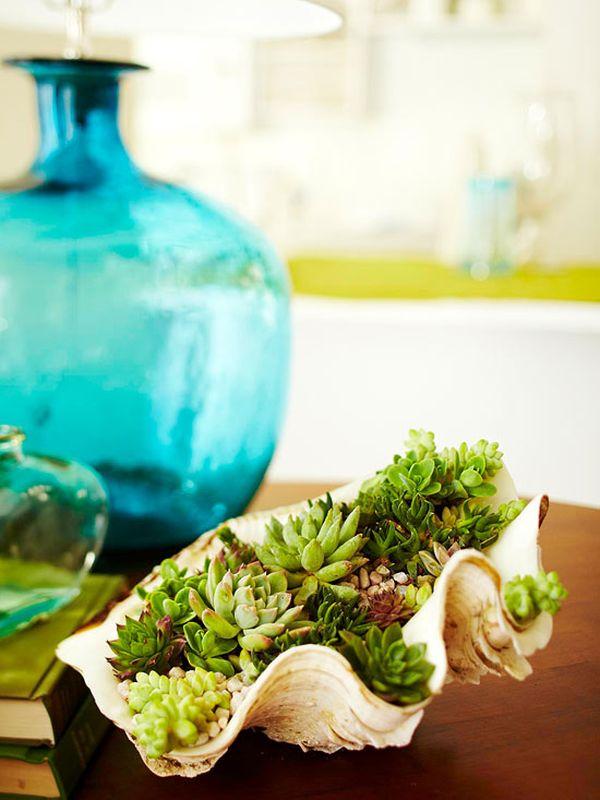
Sea-shell planters are creative ways to show off plants. You can tuck smaller succulents and use them as a centerpiece of your home. Check out these ideas!
13. Use Utility Cart to Hold Pots

Utility cart can be found in stores easily, it has many uses and one of them is this, especially if you’re short of space. Use it to hold planters.
14. Create an Indoor Fairy Garden

This well-planned fairy garden that resembles a gnome village (or many more other fairy garden ideas here) is looking amazing with colorful mushrooms, walkway, tiny houses, and banners.
15. Make a Succulent Dish Garden

Plant succulents in a dish and place it on the table top. It will make the focal point of the room. A complete DIY article on how to make a succulent dish garden is available here.
16. Plant Stand Room Dividers

Ikea plant stand (Socker series)
Plant stands can be used as room dividers, keeping cut beautiful cut flowers, herbs, and small plants. This way you’ll be able to maximize your growing space and create a division in a room too!
17. Keep a Plant Stand Near Window
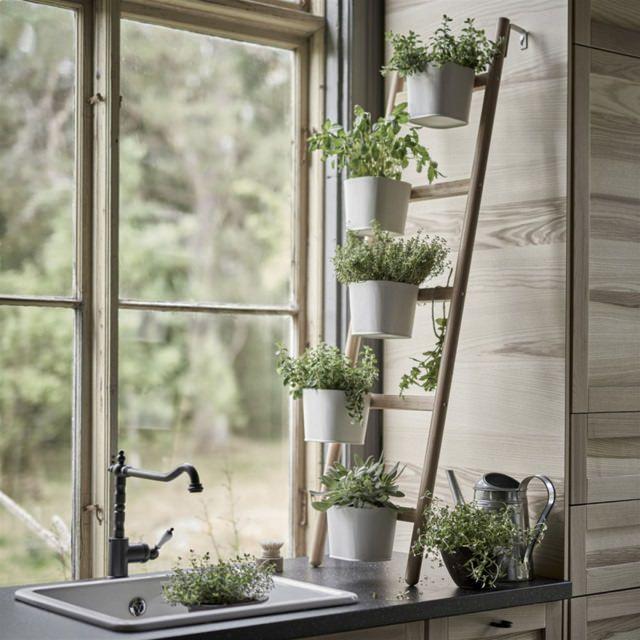
Why just keep plants on a windowsill, let the plants use the sunlight comes from the windows by keeping a plant stand like this.
18. Teacup Herb Garden

Grow a herb garden in vintage teacups that you no longer use. Not only it will look good but this way you will be able to grow your own herbs. If you want to make a teacup planter too, here is the tutorial.
Also Read: Indoor Herb Garden Ideas
19. DIY Mosaic Pots

Take some of your old clay pots and turn them into astonishing mosaic pots. It’s easy! You’ll need a terracotta pot, vase filler chips or alternatively use pot shard or broken tile pieces. You’ll also need glue and spray paint. The first step is to paint the pot in your favorite color and leave it to dry. Once done, lie the pot and glue the chips or shards one by one. See more mosaic ideas!
If you too love indoor gardening (like we do!), learn about the arrangement ideas, DIY tricks and how you can maximize your planting space available indoors in this article.
1. Use Wall Mounted Storage to Keep Pots

The space between windows can also be prime real estate for growing, just like this one in the picture above. You can use wall mounted storage to keep the pots to decorate your home with plants.
2. DIY Pegboard Planter

This DIY pegboard planter project is simple, inexpensive, and easy to follow. If you want to see the step by step tutorial, visit brePURPOSED!
3. DIY Ladder Planter/Ladder Shelf

If you have got an old ladder, use it to keep pots in it. It can be made into an astonishing pot holder, perfect for growing indoor plants. A step by step tutorial is available on our site!
4. DIY Succulent Frame or Succulent Wall Planter

A DIY succulent frame or succulent wall planter is a great way to add a whim to your interior without spending a lot of money on materials you can make this. Here is the tutorial to follow.
5. Mason Jar Ideas

Upcycle mason jars can used to grow herbs. Here are some DIY ideas.
Mason jar can become adorable small pots and can be used to grow plants and herbs indoors. There are myriads of ideas available on the web to look for inspiration, you can look at one of our posts for more ideas!
6. Indoor Chair Planter

Not only outdoors, if you’ve got an old chair create an indoor chair planter and grow succulents or indoor plants on it to add a dramatic touch to your rooms. See more chair planter ideas!
7. Indoor Zen or Japanese Garden

An indoor Japanese or Zen garden can be a beautiful addition to your home when combined with a water feature, flowers of cool colors, stones, or succulents, a great way to add “calmness” to your home. You can also make a mini succulent zen garden in a pot, check out the tutorial here.
8. Flowering Houseplants

Decorate your indoor garden with flowering houseplants. They can add a bright touch to your home, growing them is similar to other indoor plants. Check out our article on best flowering houseplants here.
9. Use Plant Stands

Plant stand can not only increase your indoor planting space but also look elegant and decorate your home. The best thing about them is that you can also DIY them easily, here are some ideas.
10. Succulent Bookend

Prop up your favorite reads with this easy-to-make mini garden. Succulents are easy to grow. They add a welcome pop of greenery to any book collection when planted in clear vases filled with pretty river stones. See more of it here.
11. Hanging Coconut Planter

Use coconut shells after eating to create this super cute hanging indoor garden. This project is unique, still simple and doesn’t require much. Check out the tutorial here.
12. Sea Shell Planter

Sea-shell planters are creative ways to show off plants. You can tuck smaller succulents and use them as a centerpiece of your home. Check out these ideas!
13. Use Utility Cart to Hold Pots

Utility cart can be found in stores easily, it has many uses and one of them is this, especially if you’re short of space. Use it to hold planters.
14. Create an Indoor Fairy Garden

This well-planned fairy garden that resembles a gnome village (or many more other fairy garden ideas here) is looking amazing with colorful mushrooms, walkway, tiny houses, and banners.
15. Make a Succulent Dish Garden

Plant succulents in a dish and place it on the table top. It will make the focal point of the room. A complete DIY article on how to make a succulent dish garden is available here.
16. Plant Stand Room Dividers

Ikea plant stand (Socker series)
Plant stands can be used as room dividers, keeping cut beautiful cut flowers, herbs, and small plants. This way you’ll be able to maximize your growing space and create a division in a room too!
17. Keep a Plant Stand Near Window

Why just keep plants on a windowsill, let the plants use the sunlight comes from the windows by keeping a plant stand like this.
18. Teacup Herb Garden

Grow a herb garden in vintage teacups that you no longer use. Not only it will look good but this way you will be able to grow your own herbs. If you want to make a teacup planter too, here is the tutorial.
Also Read: Indoor Herb Garden Ideas
19. DIY Mosaic Pots

Take some of your old clay pots and turn them into astonishing mosaic pots. It’s easy! You’ll need a terracotta pot, vase filler chips or alternatively use pot shard or broken tile pieces. You’ll also need glue and spray paint. The first step is to paint the pot in your favorite color and leave it to dry. Once done, lie the pot and glue the chips or shards one by one. See more mosaic ideas!
2
3
文章
扭扭
2017年05月23日

Indoor gardening can be a challenge if you’re short of space. And, for your help here’re the 15 Brilliant Vertical Indoor Garden Ideas, by applying a few of these you’ll be able to create more space!1. Vertical Pallet Planter
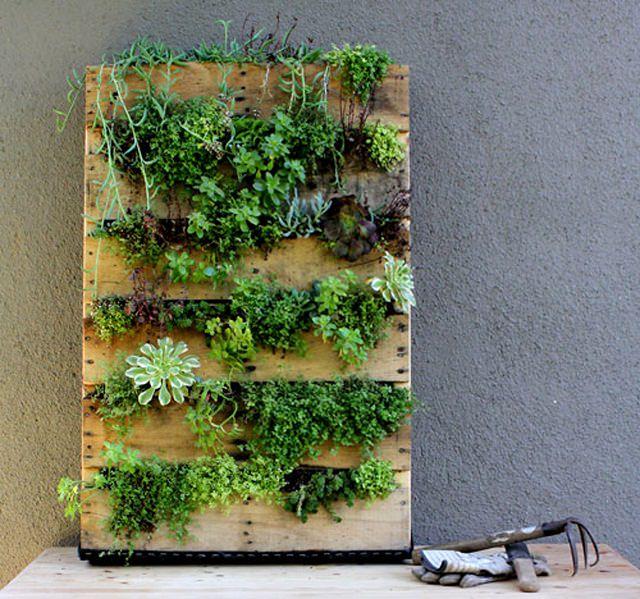
Make a vertical pallet planter to create an adorable indoor garden easily and inexpensively. They’ll provide enough space for growing herbs and succulents without taking a much of floor space. Check out how to make one.
2. Dresser Planter

A bit quirky idea! Use an old dresser to create a stunning indoor garden. Plant some ferns and succulents in its drawers and also place some on top to create a beautiful indoor garden.
3. Indoor Ladder Planter

Previously we wrote a lot about the use of ladder planter in a balcony or rooftop garden. A practical idea! You can apply it to your indoor garden too! An old ladder is perfect to grow multiple house plants in limited space. To make this, simply add several wood planks on ladder steps to create shelves. Then plants your houseplants on it but be sure to place houseplants that have similar light requirements. Here is more on it.
4. DIY Pot Hanger
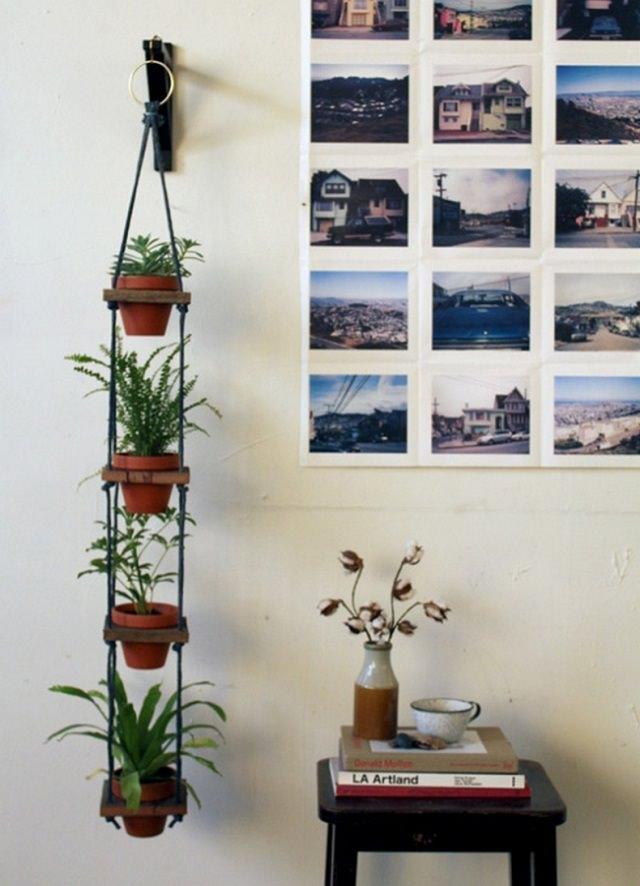
A unique (or say bizarre) way to display your favorite houseplants. This easy project only requires some scrap wood, rope, and a few basic woodworking tools. The best part is that the system makes watering a breeze. All the runoff from the previous pot drips into the plants below, so you only need to water the plant on top and be sure place a saucer under the bottom most pot. Here is the tutorial.
5. TV Stand Vertical Garden
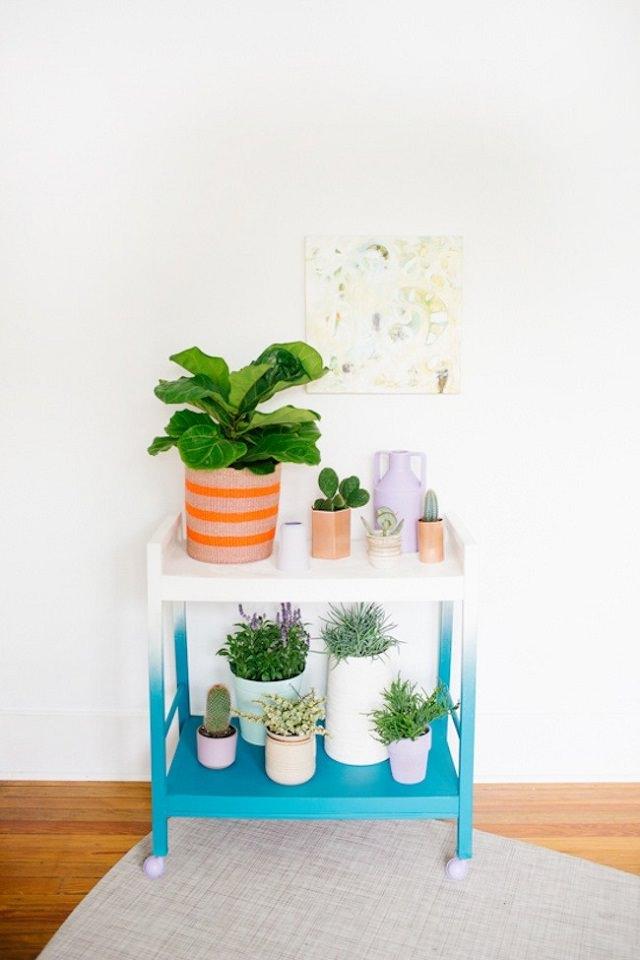
Got an old TV Stand? Make a vertical indoor garden out of it. This is a great way to recycle your old TV stand and transform it to a living beauty. You can either paint it for a fresh new look or use it as it is for a rustic look.
6. Hanging Plastic Bottle Cactus Garden
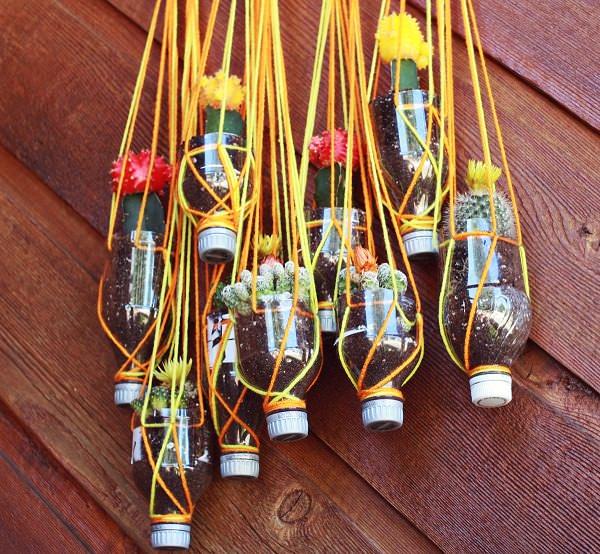
Do you want to create a vertical soda bottle garden? Follow this idea. All that is required is bottles cut in half, cactus plants or succulents, and many colorful threads to get a really cool decorative look. Here you can see the complete tutorial.
7. Shoe Organizer Vertical Garden
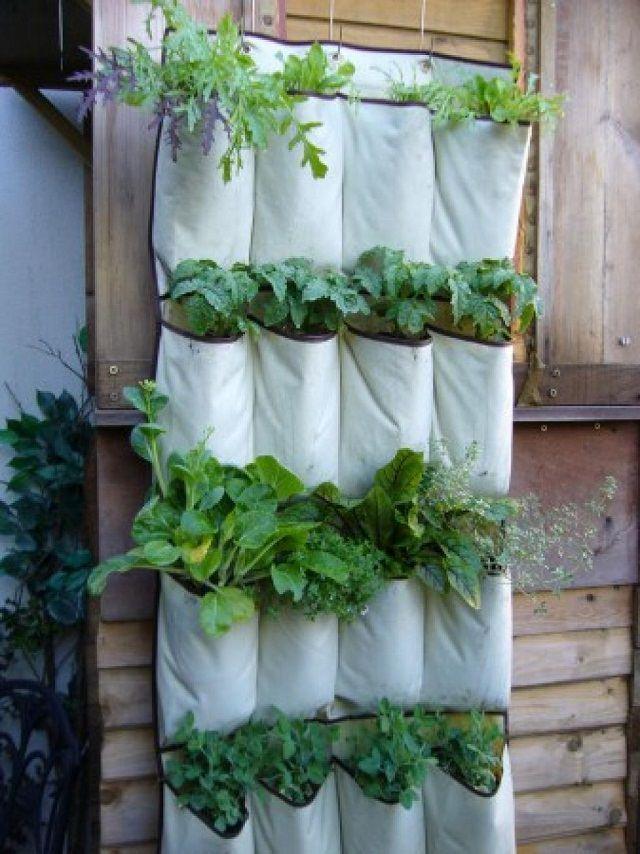
A hanging shoe organizer is perfect for your vertical INDOOR garden. Its pockets are the ideal size for growing individual plants and herbs. Get the DIY instructions here.
8. Vertical Herb Garden

Want to grow herbs but you don’t have space (short of budget too)? Well, even a wooden plank is enough. All you need is some plastic bottles, hooks, nails and hammer and you’re all set to grow your own herbs.
9. Mason Jar Vertical Garden

Don’t throw away those old mason jars, use them creatively to make an indoor herb wall garden. Metal bands and screws hold the jars in place against a scrap piece of wood that is mounted on the wall. Fill in the soil and plant your favorite herbs to use them all year round. Read about more Mason Jar Uses here!
10. Hanging Coconut Planter

Use coconut shells after eating to create this super cute hanging indoor garden. This project is unique, still simple and doesn’t require much. Check out the tutorial here.
11. Pallet Container Holder

Arrange a pallet board and hang several pots on it. It’s easy! And the best part is it will create plenty of vertical space.
12. Vertical Picture Frame Planter
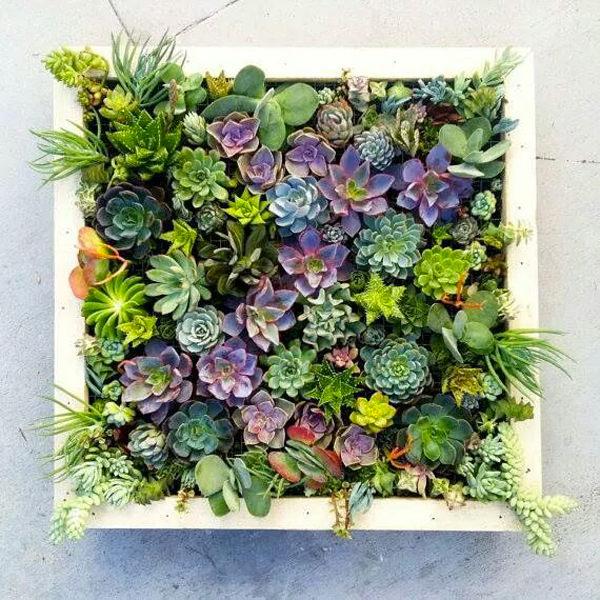
A cool idea for your room if it receives some sun to make it greener, you can hang a wall planter like this in your room. See the step by step tutorial on our website.
13. Vertical Pot Holder From Pallet Planks

Dismantle a pallet board and separate the pallet planks; nail them on to the wall and fix the pots. Simple!
14. Hanging Terracotta Planters

Vertical gardening is a boon for those who’re short of space. A tutorial is available here.
15. Iron Grid Pot Holder
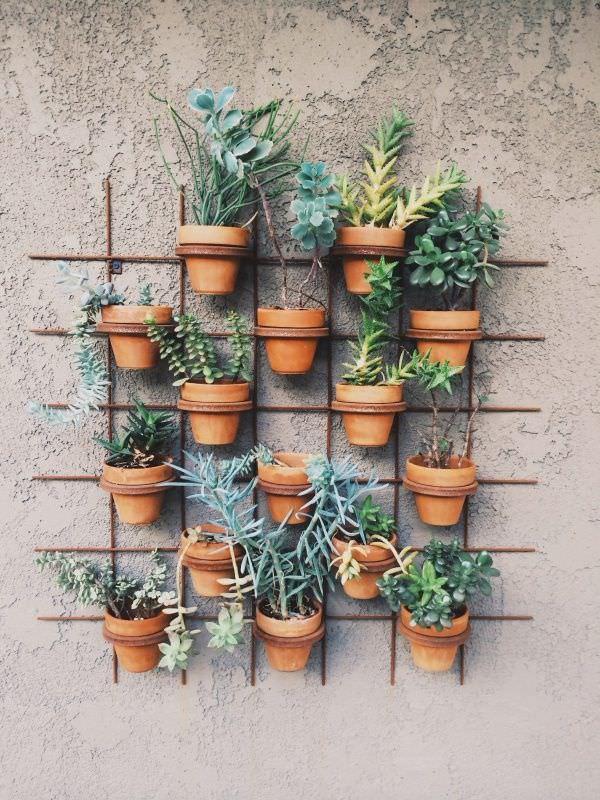
You can make a grid like this by welding the iron rods or weave them by any other method so that you’ll be able to hang the pots. You can paint that too in your favorite color. *The grid can also be made of wood.

Make a vertical pallet planter to create an adorable indoor garden easily and inexpensively. They’ll provide enough space for growing herbs and succulents without taking a much of floor space. Check out how to make one.
2. Dresser Planter

A bit quirky idea! Use an old dresser to create a stunning indoor garden. Plant some ferns and succulents in its drawers and also place some on top to create a beautiful indoor garden.
3. Indoor Ladder Planter

Previously we wrote a lot about the use of ladder planter in a balcony or rooftop garden. A practical idea! You can apply it to your indoor garden too! An old ladder is perfect to grow multiple house plants in limited space. To make this, simply add several wood planks on ladder steps to create shelves. Then plants your houseplants on it but be sure to place houseplants that have similar light requirements. Here is more on it.
4. DIY Pot Hanger

A unique (or say bizarre) way to display your favorite houseplants. This easy project only requires some scrap wood, rope, and a few basic woodworking tools. The best part is that the system makes watering a breeze. All the runoff from the previous pot drips into the plants below, so you only need to water the plant on top and be sure place a saucer under the bottom most pot. Here is the tutorial.
5. TV Stand Vertical Garden

Got an old TV Stand? Make a vertical indoor garden out of it. This is a great way to recycle your old TV stand and transform it to a living beauty. You can either paint it for a fresh new look or use it as it is for a rustic look.
6. Hanging Plastic Bottle Cactus Garden

Do you want to create a vertical soda bottle garden? Follow this idea. All that is required is bottles cut in half, cactus plants or succulents, and many colorful threads to get a really cool decorative look. Here you can see the complete tutorial.
7. Shoe Organizer Vertical Garden

A hanging shoe organizer is perfect for your vertical INDOOR garden. Its pockets are the ideal size for growing individual plants and herbs. Get the DIY instructions here.
8. Vertical Herb Garden

Want to grow herbs but you don’t have space (short of budget too)? Well, even a wooden plank is enough. All you need is some plastic bottles, hooks, nails and hammer and you’re all set to grow your own herbs.
9. Mason Jar Vertical Garden

Don’t throw away those old mason jars, use them creatively to make an indoor herb wall garden. Metal bands and screws hold the jars in place against a scrap piece of wood that is mounted on the wall. Fill in the soil and plant your favorite herbs to use them all year round. Read about more Mason Jar Uses here!
10. Hanging Coconut Planter

Use coconut shells after eating to create this super cute hanging indoor garden. This project is unique, still simple and doesn’t require much. Check out the tutorial here.
11. Pallet Container Holder

Arrange a pallet board and hang several pots on it. It’s easy! And the best part is it will create plenty of vertical space.
12. Vertical Picture Frame Planter

A cool idea for your room if it receives some sun to make it greener, you can hang a wall planter like this in your room. See the step by step tutorial on our website.
13. Vertical Pot Holder From Pallet Planks

Dismantle a pallet board and separate the pallet planks; nail them on to the wall and fix the pots. Simple!
14. Hanging Terracotta Planters

Vertical gardening is a boon for those who’re short of space. A tutorial is available here.
15. Iron Grid Pot Holder

You can make a grid like this by welding the iron rods or weave them by any other method so that you’ll be able to hang the pots. You can paint that too in your favorite color. *The grid can also be made of wood.
1
0
文章
扭扭
2017年05月23日

The correct selection of plants plays an important role in the design and functioning of vertical living wall gardens. In this article, we show a selection of the best plants for vertical gardening.
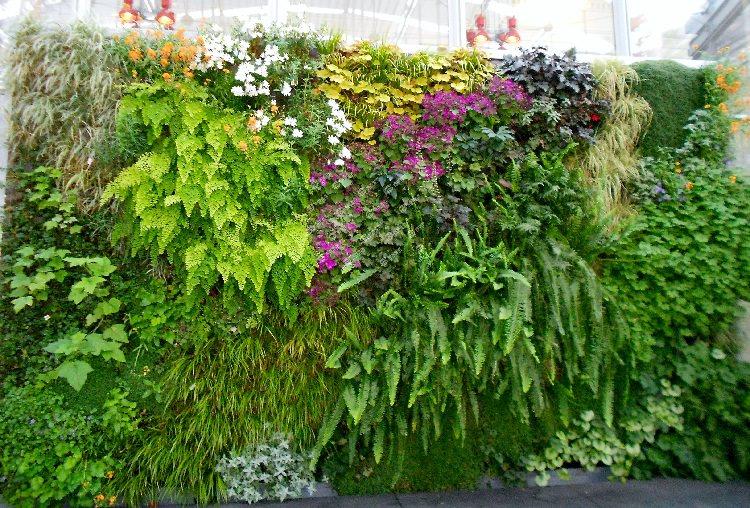
Best Plants For Vertical Garden
Not all plants adapt well to vertical gardening. They must have certain important characteristics for proper development and growth.
Ferns
They are one of the garden plants that are preferred for their adaptability and humidity resistance. Ferns are easy to grow and they cover the area quickly. You can grow sword fern, blue star fern, bird’s nest fern, they are easiest. Ferns will generally grow downward, so you’ll need to grow other covering plants with them too.
Bromeliads
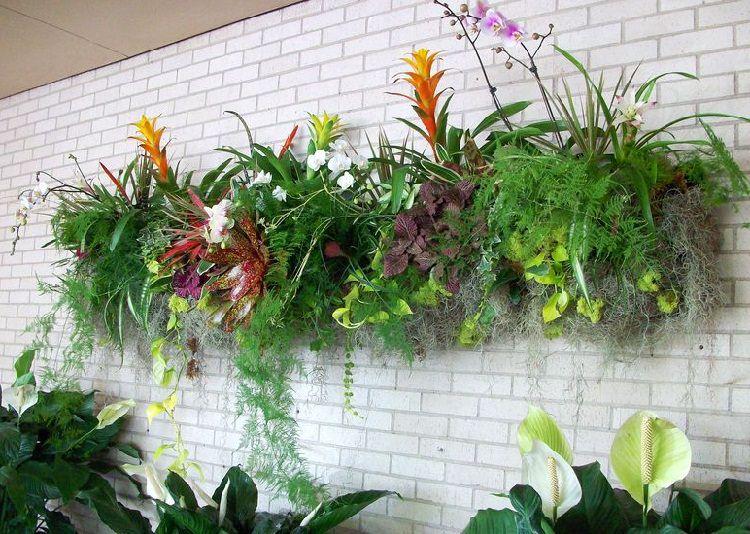
Most bromeliads have shallow roots and they need little space to grow this makes them ideal plants for vertical gardens. Their colorful leaves and long lasting flowers can be a good addition to your vertical garden.
Begonias
If you are hanging your living wall in a place that receives some sun then growing begonias is a good idea.
Hostas
This beautiful plant with variegated foliage is used as a groundcover in gardens. For a shady site, this evergreen plant is suitable for a vertical garden.
Lipstick Plant
Growing lipstick plant is easy. It doesn’t require deep soil to grow so it can thrive in a vertical wall. You can also grow it indoors.
Must Read: How to Make a Vertical Wall Planter
Succulents
Succulents are the most used plants for vertical gardens due to their incredible adaptability and resistance to fluctuation in temperatures and climatic variations. Plants like the string of pearls, echeveria, crassula and sedum can be considered.
Air Plants (Epiphyte)
Such plants do not need soil to thrive, they grow naturally on other plants, which makes them perfect for growing in vertical wall gardens. Tillandsias, aechmea, vriesea are a few examples.
Vines
Low maintenance vines such as pothos, ivies, philodendrons, rosary vine and wandering jew can be grown vertical planters easily. They are low maintenance and even thrive in indirect sunlight.

Best Plants For Vertical Garden
Not all plants adapt well to vertical gardening. They must have certain important characteristics for proper development and growth.
Ferns
They are one of the garden plants that are preferred for their adaptability and humidity resistance. Ferns are easy to grow and they cover the area quickly. You can grow sword fern, blue star fern, bird’s nest fern, they are easiest. Ferns will generally grow downward, so you’ll need to grow other covering plants with them too.
Bromeliads

Most bromeliads have shallow roots and they need little space to grow this makes them ideal plants for vertical gardens. Their colorful leaves and long lasting flowers can be a good addition to your vertical garden.
Begonias
If you are hanging your living wall in a place that receives some sun then growing begonias is a good idea.
Hostas
This beautiful plant with variegated foliage is used as a groundcover in gardens. For a shady site, this evergreen plant is suitable for a vertical garden.
Lipstick Plant
Growing lipstick plant is easy. It doesn’t require deep soil to grow so it can thrive in a vertical wall. You can also grow it indoors.
Must Read: How to Make a Vertical Wall Planter
Succulents
Succulents are the most used plants for vertical gardens due to their incredible adaptability and resistance to fluctuation in temperatures and climatic variations. Plants like the string of pearls, echeveria, crassula and sedum can be considered.
Air Plants (Epiphyte)
Such plants do not need soil to thrive, they grow naturally on other plants, which makes them perfect for growing in vertical wall gardens. Tillandsias, aechmea, vriesea are a few examples.
Vines
Low maintenance vines such as pothos, ivies, philodendrons, rosary vine and wandering jew can be grown vertical planters easily. They are low maintenance and even thrive in indirect sunlight.
1
0
文章
安小宝
2017年05月23日


Square foot gardening is most often used for growing veggies, herbs and greens in a small space. It’s a simple concept that cuts down on gardening chores, saves money, water and seed, and grows healthier plants that are easily harvested when you want. Basically, square foot gardening is the theory that instead of planting in rows, you build a grid of one foot squares, fill with lightweight soil, and manage crop rotation by simply replanting an empty square whenever you harvest. We love this take on square foot gardening (above & below) from ‘Art and Appetite‘.

Benefits of gardening this way?
You can grow a lot more in a much smaller space.
Instead of sowing seeds thickly though out a row, you only need 2-3 seeds per square to grow one plant that doesn’t need the thinning that rows require.
Watering is more direct, therefore you waste less.
Weeds are easy to control, as they are in a controlled space, lightweight soil and easily accessible.
Fertilizing becomes easier, and less is used, again because of the controlled space.
It looks more attractive, and less chaotic than the typical veggie garden.
The plants are healthier due to crop rotation that happens though the natural progression of the squares, and better air circulation.
Having the plants close together allows you to spot and treat pest infestations easily.
You can build and grow a square foot garden right on top of even hard clay soil.
Convinced? Here are the easy steps to share square foot garden success!
Build a bottomless box, 4×4 feet square.
Place the box onto any surface. Since this will be a raised garden technique and the plants grow quickly in a short season, you won’t need more than one foot square of soil per plant. Basically, that means it does not matter what kind of soil is below the box.
Fill the box with a lightweight planting mix. Hardcore square foot gardeners will suggest that a blend of 1/3 compost, 1/3 vermiculite and 1/3 peat is the best mix. However, I have had luck with any good quality planting mix. Do NOT use soil from your yard. It will compact, and not provide a healthy base for your plants
Mark out a one foot square grid system. You can do this with stakes and string, wood slats, or simply decorative stones to mark the “lines”. It is simply a guide for you to know where to plant.

Here is a view of how ‘Our Daily Legacy‘ marked out their grid. Great tips there as well!

Plant 2-3 seeds or one transplant into each grid space for larger plants, up to 6 plants or more each grid space for smaller plants, like leaf lettuce.. Remember to plant the taller plants on the north or east side of the box so they won’t shade all the shorter plants. Here is a chart from ‘Atlantis Hydroponics‘ that shows an idea of how many can fit into each grid space, based on what you are planting.

Water gently, and fertilize as you would any vegetables or herbs, according to their needs.
When plants are ready for harvest, replant into that grid space. However, always replant a different type of plant than what was there before. This creates a natural “Crop rotation” and helps prevent disease. ‘It’s on the Tip of My Tongue‘ created this 4′ x 10’ box with a planting diagram of what they planted where.

Enjoy fresh vegetables and herbs! A couple of things to note…
You can make a larger box than 4×4 feet, but make sure it is in one foot increments, and no deeper than 4 feet to make care of the plants easier. 4×8 and 4×12 are common.
Use a material to build the box that is safe to grow edibles in.
Do not walk in your square foot garden, as this will compact the soil, preventing air and water from freely getting to the roots. This is one of the keys of square foot gardening success!
You can plant pretty things in here too! Especially blooming companion plants, like marigolds. But really, sky is the limit, even cutting flowers can be grown in a square foot garden!
This garden is from ‘Jungle Taming‘, and shows decorative plants mixed with herbs and veggies in a 4×4 box.

That’s all there is to it! Have you grown a square foot garden? Share your experience in comments!
1
1


