文章
Dummer. ゛☀
2017年08月10日

Boston ferns (Nephrolepis exaltata) are popular houseplants and proper Boston fern care is essential to keeping this plant healthy. Learning how to take care of a Boston fern isn’t difficult, but it is specific. Below, we have listed a few care tips for a Boston fern so that you can provide everything your fern needs to be happy and beautiful.
How to Take Care of a Boston Fern
The first thing you need to do for proper Boston fern care is to make sure that it’s in the right kind of environment. Boston ferns need a cool place with high humidity and indirect light.
When you care for Boston fern plants indoors, it’s a good idea to provide additional humidity for them, especially in the winter. Most homes are rather dry, even more when heaters are running. For extra humidity care for Boston fern, try setting your fern’s pot on a tray of pebbles filled with water. You can also try lightly misting your fern once or twice a week to help it get the humidity it needs. Another step in how to take care of a Boston fern is to make sure that the fern’s soil remains damp. Dry soil is one of the number one reasons that Boston ferns die. Check the soil daily and make sure to give it some water if the soil feels at all dry. Because Boston ferns tend to be planted in potting mixtures that are high in peat moss, it is a good idea to soak the pot of the Boston fern once a month or so to make sure the peat moss is fully hydrated. Be sure to let it drain thoroughly after this.
Boston fern leaves will turn yellow if the humidity is not high enough. If your Boston fern’s fronds are turning yellow, make sure to increase the humidity around the plant One of the lesser known care tips for a Boston fern is that they do not need much fertilizer. Fertilizer should only be given to the plant a few times a year. Boston ferns are susceptible to some pests, especially spider mites and mealybugs. If your plant becomes infested, make sure to treat the plant as quickly as possible to keep it healthy.
Boston fern care is as simple as making sure the plant is in the right environment. If you make sure that your fern is getting the right care for Boston fern plant, your plant will live for many years to come.

How to Take Care of a Boston Fern
The first thing you need to do for proper Boston fern care is to make sure that it’s in the right kind of environment. Boston ferns need a cool place with high humidity and indirect light.
When you care for Boston fern plants indoors, it’s a good idea to provide additional humidity for them, especially in the winter. Most homes are rather dry, even more when heaters are running. For extra humidity care for Boston fern, try setting your fern’s pot on a tray of pebbles filled with water. You can also try lightly misting your fern once or twice a week to help it get the humidity it needs. Another step in how to take care of a Boston fern is to make sure that the fern’s soil remains damp. Dry soil is one of the number one reasons that Boston ferns die. Check the soil daily and make sure to give it some water if the soil feels at all dry. Because Boston ferns tend to be planted in potting mixtures that are high in peat moss, it is a good idea to soak the pot of the Boston fern once a month or so to make sure the peat moss is fully hydrated. Be sure to let it drain thoroughly after this.

Boston fern leaves will turn yellow if the humidity is not high enough. If your Boston fern’s fronds are turning yellow, make sure to increase the humidity around the plant One of the lesser known care tips for a Boston fern is that they do not need much fertilizer. Fertilizer should only be given to the plant a few times a year. Boston ferns are susceptible to some pests, especially spider mites and mealybugs. If your plant becomes infested, make sure to treat the plant as quickly as possible to keep it healthy.

Boston fern care is as simple as making sure the plant is in the right environment. If you make sure that your fern is getting the right care for Boston fern plant, your plant will live for many years to come.
0
0
文章
Dummer. ゛☀
2017年08月10日

When most people think of ferns, they think of feathery, airy fronds, but not all ferns actually look like this. The bird’s nest fern is an example of a fern that defies our preconceived ideas of what a fern should look like. Even better is the fact that a bird’s nest fern plant makes an excellent low light houseplant.
About the Bird’s Nest Fern Plant
The bird’s nest fern plant gets its name from the fact that the center of the plant resembles a bird’s nest. It is also occasionally called a crow’s nest fern. Bird’s nest ferns (Asplenium nidus) are identified by their flat, wavy or crinkly fronds. Their appearance can bring to mind a seaweed plant growing on dry land. Bird’s nest fern is an epiphytic fern, which means in the wild it typically grows on other things, like tree trunks or buildings. When you buy it as a houseplant, it will be planted in a container, but it can be affixed to planks and hung on a wall much like staghorn ferns.
How to Grow Bird’s Nest Fern
Bird’s nest ferns grow best in medium to low indirect light. These ferns are often grown for their crinkly leaves and the light they receive will affect how crinkled the leaves are. A bird’s nest fern that receives more light, for example, will have more crinkled leaves, while one that receives less light will have flatter leaves. Keep in mind that too much light or direct light will cause the fronds on bird’s nest fern to yellow and die.
Care for a Bird’s Nest Fern
In addition to light, another important aspect of bird’s nest fern care is its watering. Under ideal circumstances, all ferns would like to have consistently moist, but not wet, soil. However, part of the reason that bird’s nest fern makes an ideal houseplant is that it will tolerate soil that dries out from time to time.
Furthermore, this plant does not require the same level of humidity that many other kinds of ferns need, making the care for a bird’s nest fern far more forgiving to the occasionally forgetful houseplant owner than other ferns. Fertilizer should only be given to the plant two to three times a year. Even then, the fertilizer should only be applied at half strength and should only be given during the spring and summer months. Too much fertilizer will cause deformed leaves with brown or yellow spots or edges. Now that you know more about how to grow bird’s nest fern and how easy these plants are to grow, try giving them a place in your home. They make a wonderful and green addition to the less brightly lit rooms in your home.

About the Bird’s Nest Fern Plant
The bird’s nest fern plant gets its name from the fact that the center of the plant resembles a bird’s nest. It is also occasionally called a crow’s nest fern. Bird’s nest ferns (Asplenium nidus) are identified by their flat, wavy or crinkly fronds. Their appearance can bring to mind a seaweed plant growing on dry land. Bird’s nest fern is an epiphytic fern, which means in the wild it typically grows on other things, like tree trunks or buildings. When you buy it as a houseplant, it will be planted in a container, but it can be affixed to planks and hung on a wall much like staghorn ferns.

How to Grow Bird’s Nest Fern
Bird’s nest ferns grow best in medium to low indirect light. These ferns are often grown for their crinkly leaves and the light they receive will affect how crinkled the leaves are. A bird’s nest fern that receives more light, for example, will have more crinkled leaves, while one that receives less light will have flatter leaves. Keep in mind that too much light or direct light will cause the fronds on bird’s nest fern to yellow and die.
Care for a Bird’s Nest Fern
In addition to light, another important aspect of bird’s nest fern care is its watering. Under ideal circumstances, all ferns would like to have consistently moist, but not wet, soil. However, part of the reason that bird’s nest fern makes an ideal houseplant is that it will tolerate soil that dries out from time to time.

Furthermore, this plant does not require the same level of humidity that many other kinds of ferns need, making the care for a bird’s nest fern far more forgiving to the occasionally forgetful houseplant owner than other ferns. Fertilizer should only be given to the plant two to three times a year. Even then, the fertilizer should only be applied at half strength and should only be given during the spring and summer months. Too much fertilizer will cause deformed leaves with brown or yellow spots or edges. Now that you know more about how to grow bird’s nest fern and how easy these plants are to grow, try giving them a place in your home. They make a wonderful and green addition to the less brightly lit rooms in your home.
1
2
文章
Dummer. ゛☀
2017年08月10日

The bird’s nest fern is a popular, attractive fern that defies the usual fern preconceptions. Instead of the feathery, segmented foliage usually associated with ferns, this plant has long, solid fronds that have a crinkly appearance around their edges. It gets its name from the crown, or center of the plant, that resembles a bird’s nest. It’s an epiphyte, which means it grows clinging to other objects, like trees, rather than in the ground. So how do you go about propagating one of these ferns? Keep reading to learn more about how to collect spores from ferns and bird’s nest fern spore propagation.
Collecting Spores from Bird’s Nest Ferns
Bird’s nest ferns reproduce through spores, which appear as little brown spots on the undersides of the fronds. When the spores on a frond are fat and a little fuzzy looking, remove a frond and place it in a paper bag. Over the course of the next few days, the spores should fall from the frond and collect in the bottom of the bag.
Bird’s Nest Fern Spore Propagation
Bird’s nest spore propagation works best in sphagnum moss, or peat moss that has been supplemented with dolomite. Place the spores on top of the growing medium, leaving them uncovered. Water the pot by placing it in a dish of water and let the water soak up from the bottom.
It’s important to keep your bird’s nest fern spores moist. You can cover your pot with plastic wrap or a plastic bag, or leave it uncovered and mist it daily. If you do cover the pot, remove the cover after 4 to 6 weeks. Keep the pot in a shady spot. If kept at a temperature between 70 and 80 F. (21-27 C.), the spores should germinate in about two weeks. The ferns grow best in low light and high humidity at a temperature of 70 to 90 F. (21-32 C.).

Collecting Spores from Bird’s Nest Ferns
Bird’s nest ferns reproduce through spores, which appear as little brown spots on the undersides of the fronds. When the spores on a frond are fat and a little fuzzy looking, remove a frond and place it in a paper bag. Over the course of the next few days, the spores should fall from the frond and collect in the bottom of the bag.

Bird’s Nest Fern Spore Propagation
Bird’s nest spore propagation works best in sphagnum moss, or peat moss that has been supplemented with dolomite. Place the spores on top of the growing medium, leaving them uncovered. Water the pot by placing it in a dish of water and let the water soak up from the bottom.

It’s important to keep your bird’s nest fern spores moist. You can cover your pot with plastic wrap or a plastic bag, or leave it uncovered and mist it daily. If you do cover the pot, remove the cover after 4 to 6 weeks. Keep the pot in a shady spot. If kept at a temperature between 70 and 80 F. (21-27 C.), the spores should germinate in about two weeks. The ferns grow best in low light and high humidity at a temperature of 70 to 90 F. (21-32 C.).
0
0
Ueca
2017年07月19日

Fern sprouts have such an interesting shape.
How should I encourage their growth?

How should I encourage their growth?

0
0
求助
Ueca
2017年07月09日

What are their identities? The fern is native to Ontario, my province.


1
0
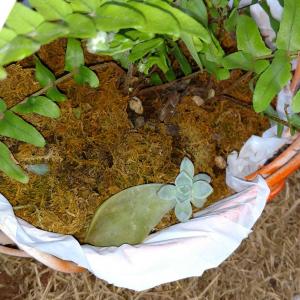
Abby Gill:The first one looks like some kind of sedum, and the second one I believe is an echeveria, maybe glauca.
Ueca:I have discovered that the "fern" is not actually a fern but a plant called "pineapple weed".
Ueca:Then that shall be its new name Turtle
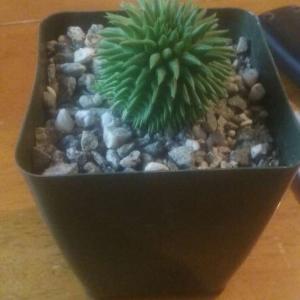
sarajordan2993:3 reminds me of a turtle 😂
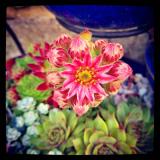
sarajordan2993:2 looks like a Sempervivum (hen & chicks)
显示更多
文章
Dummer. ゛☀
2017年07月01日

Davallia bullata
Polypodiales davalliaceae davalliaceae
Davallia bullata name for fern
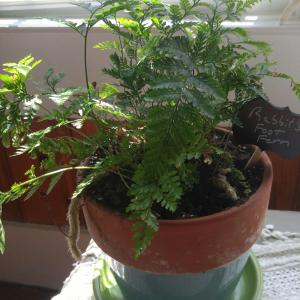
Talon fern, rabbit foot fern, Latin name: Dauallia bullata
Morphological characteristics of the
The fern is a small epiphytic fern with a height of about 20cm, a stout stem and a branch that delays the outside of the pot. The rhizomes are bare, with brown scales and hairs on the surface, like rabbit feet, and hence are called foot ferns. Leaves are broad ovate triangular, leathery, pinnate, glossy, smooth green.
The growth habit of the tail fern
The tail fern needs high temperature, neither high temperature nor low temperature. The suitable growth temperature is 20 degrees -26 DEG C, and it will grow slowly or stop under 30 or 15 DEG C, and can not be lower than 5 degrees in winter. The wolf fern likes warm and dry environment, not cold resistant. It likes loose, fertile and well drained sandy loam. It needs to be moved into the greenhouse in winter, and the greenhouse is kept at about 5 degrees, so as to protect against cold.
Use of the tail fern
The tail fern is planted with a high basin or a basket, and the stolon is pendulous. The whole shape is very elegant. It can also be planted as a landscape plant beside the rockery and rock. It is also a suitable plant for the lichen micro landscape. In addition, the rhizome can also be used as medicine, and has the effect of clearing away heat and toxic materials, dispelling wind and removing dampness.
Morphological characteristics of the tail fern
Ferns do not blossom and bear fruit. They breed by seed, but small families do not have to gather them and cut them. In the spring of 3 with 2 leaves or buds of the wolf tail brigade rhizomes, cut into 10 cm pieces, buried in the soil humus and keep humidity, about 40 days to produce new roots.
1: Light: the wolf tail fern is long green herbs, epiphytic fern, warm and semi Yin environment, suitable for scattered light, not direct sunlight, otherwise wilt, curl. Family culture can be placed in indoor sunshine to the bright place.
2, watering: Wolf tail fern should keep the basin soil moist, growth season water should be adequate supply, generally can be 2 to 3 days watering once. Although the soil should be kept moist, mild drying during watering intervals is no harm to the fern. The tail fern can not water too much, too much water can cause the leaves to fall off.
3: temperature: the tail fern originated in New Zealand and Japan, and is distributed in tropical and subtropical regions of Asia, Oceania, America and the Pacific islands.
4, air humidity: Hi humid environment, not resistant to drying, curing period should be ground to the plant growth environment and water spray humidification, suitable humidity is about 80%, will cause the blade edge is too dry and even whole leaf yellow, yellow.
5, soil and fertilizer: soil to loose breathable sandy loam is better, the demand for fertilizer is not high, not heavy fertilizer, in the process of conservation, you can apply a little thinner.


0
0


