文章
Miss Chen
2018年09月03日

Producing a new azalea (Rhododendron spp.) from cuttings creates a new plant with the same characteristics as its parent. Reproducing azaleas from cuttings is often the only way to duplicate the style of a particular plant, since many azaleas are hybridized plants that can't reproduce the same traits from seed. Azalea species such as flame azalea (Rhododendron calendulaceum) often have a narrow growing range. Flame azaleas grow in U.S. Department of Agriculture plant hardiness zones 5 to 7.

Best Azalea Cuttings
Growing evergreen azaleas from cuttings is typically much more successful than their deciduous counterparts. During the summer after the new growth from the spring season has just begun to harden and turn brown is the best time to take an azalea cutting. The most viable cuttings come from healthy plants that are not stressed by malnutrition, insect damage or disease. A growing azalea branch that is brown but still flexible 3 to 6 inches from its tip with several healthy leaves is an ideal candidate. Dipping the blades of your cutting shears in rubbing alcohol and air-drying them is an effective way to avoid introducing diseases to your azalea and the cutting.
Preparing the Container
The Clemson University Cooperative Extension recommends starting azalea cuttings in a mix of peat and perlite in equal parts. Wetting the soil before you insert an azalea cutting encourages rooting and helps keep the cutting hydrated. You can use any planting container large enough to hold the cuttings that is clean and has drainage holes. You can sterilize used containers by rinsing them with a solution of 1 part bleach to 10 parts water.
Preparing Azalea Cuttings
Removing the leaves from the bottom half of the cutting reduces the amount of nutrients and water it will lose before it can establish roots. Leave at least two leaves near the tip of the cutting. Trimming the stem just beneath the point where the first leaf attached to the cutting removes excess material that cannot form roots. Dipping the bottom third of the trimmed cutting in a powered rooting hormone improves its ability to generate new roots. Gently tap the cutting's stem to dislodge excess rooting hormone after dipping it.
Planting Azalea Cuttings
Cuttings often fail to take root, but planting several cuttings at the same time improves the odds that at least one will take. Azalea cuttings need 2 to 3 inches of space between the edge of the container and other cuttings to thrive. Insert each cutting into the soil until the bottom third of the stem is covered and gently firm the soil around the cutting's base to prevent it from falling over.

Caring for Azalea Cuttings
Cuttings can not replenish water they lose until they have formed new roots. Maintaining a high level of humidity around the leaves of the cuttings helps reduce water loss, preventing your cuttings from drying out. You can increase the humidity around an azalea cutting by misting its leaves with water and covering it with a clear plastic bag or the severed bottom half of a plastic 2-liter bottle. Once the cutting develops roots, the plastic cover can be removed. When the cutting develops resistance to a gentle tug, its roots have begun growing. Until the roots have had time to establish themselves fully, the cutting needs regular, light watering to keep the soil around the roots from drying out.
Safe Handling
Nearly all parts of azalea plants are toxic when consumed. Wearing gloves while working with cuttings and washing your tools and hands after you are finished helps prevent cases of accidental poisoning. Avoid eating or handling food while you are working with the cuttings.

Best Azalea Cuttings
Growing evergreen azaleas from cuttings is typically much more successful than their deciduous counterparts. During the summer after the new growth from the spring season has just begun to harden and turn brown is the best time to take an azalea cutting. The most viable cuttings come from healthy plants that are not stressed by malnutrition, insect damage or disease. A growing azalea branch that is brown but still flexible 3 to 6 inches from its tip with several healthy leaves is an ideal candidate. Dipping the blades of your cutting shears in rubbing alcohol and air-drying them is an effective way to avoid introducing diseases to your azalea and the cutting.
Preparing the Container
The Clemson University Cooperative Extension recommends starting azalea cuttings in a mix of peat and perlite in equal parts. Wetting the soil before you insert an azalea cutting encourages rooting and helps keep the cutting hydrated. You can use any planting container large enough to hold the cuttings that is clean and has drainage holes. You can sterilize used containers by rinsing them with a solution of 1 part bleach to 10 parts water.
Preparing Azalea Cuttings
Removing the leaves from the bottom half of the cutting reduces the amount of nutrients and water it will lose before it can establish roots. Leave at least two leaves near the tip of the cutting. Trimming the stem just beneath the point where the first leaf attached to the cutting removes excess material that cannot form roots. Dipping the bottom third of the trimmed cutting in a powered rooting hormone improves its ability to generate new roots. Gently tap the cutting's stem to dislodge excess rooting hormone after dipping it.
Planting Azalea Cuttings
Cuttings often fail to take root, but planting several cuttings at the same time improves the odds that at least one will take. Azalea cuttings need 2 to 3 inches of space between the edge of the container and other cuttings to thrive. Insert each cutting into the soil until the bottom third of the stem is covered and gently firm the soil around the cutting's base to prevent it from falling over.

Caring for Azalea Cuttings
Cuttings can not replenish water they lose until they have formed new roots. Maintaining a high level of humidity around the leaves of the cuttings helps reduce water loss, preventing your cuttings from drying out. You can increase the humidity around an azalea cutting by misting its leaves with water and covering it with a clear plastic bag or the severed bottom half of a plastic 2-liter bottle. Once the cutting develops roots, the plastic cover can be removed. When the cutting develops resistance to a gentle tug, its roots have begun growing. Until the roots have had time to establish themselves fully, the cutting needs regular, light watering to keep the soil around the roots from drying out.
Safe Handling
Nearly all parts of azalea plants are toxic when consumed. Wearing gloves while working with cuttings and washing your tools and hands after you are finished helps prevent cases of accidental poisoning. Avoid eating or handling food while you are working with the cuttings.
0
0
成长记
kensong
2018年09月02日

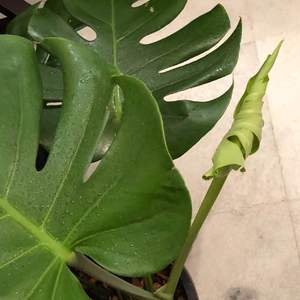
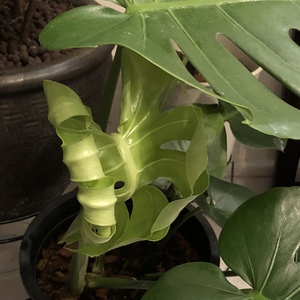
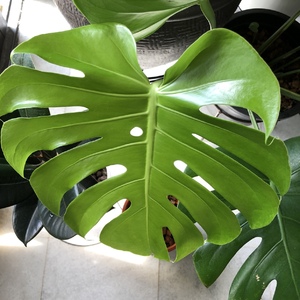
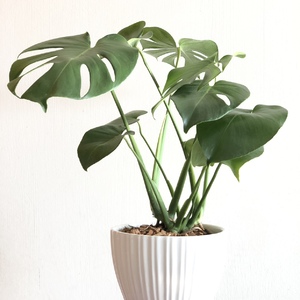
Added a handsome new Monstera intended for the office but looks like this is a keeper for the home.

0
0
文章
Miss Chen
2018年08月31日

Winterize both garden-grown and container-grown hostas in the fall to prevent root damage. They will reward this extra winter care with lush new foliage in the spring and showy flowers in the summer. There's only one way to winterize hostas growing in the ground, but a few options exist for container hostas.

Hostas and Winter Damage
Hostas (Hosta spp.) are hardy in U.S. Department of Agriculture plant hardiness zones 3 to 9. They can survive winter temperatures as low as -40 degrees Fahrenheit when planted in the ground. Damage occurs to the root system when temperatures fluctuate. This is a bigger problem for hostas planted in the fall because they have not had a chance to grow their roots deep into the ground, but damage can occur in established hostas, too. As the ground goes through thaws and freezes, it pushes or heaves the hostas up, exposing their roots to the elements.
Hostas in the Ground
Cover hostas with 2 to 3 inches of shredded bark mulch in the fall after the ground freezes to a depth of 3 inches. The mulch will help insulate the soil, reducing the severity of temperature fluctuations, and protect the crowns of the plants. Remove the mulch in the spring when the ground thaws and there is no longer any danger that it will freeze again.
The tops of the hostas must be uncovered right away if new shoots begin to poke through the mulch. It can be left covering the crowns of the plants, though, if there is a chance temperatures may plummet again. Remove mulch from the crowns of the plants and pull it back a few inches away from stems after the danger of freezing temperatures has passed.
Hostas in Containers
Protect container-grown hostas from extreme cold, temperature fluctuations and moisture. Hostas in containers will be subjected to wind-chill temperatures far below what they would experience in the ground, and fluctuations will be more extreme. In addition, moisture will gather in the pots on top of the frozen roots when the sun warms the container, which will cause root rot.

Move hostas into an unheated garage or shed when temperatures begin to drop below freezing. Water them if temperatures warm to above freezing and the soil thaws only if it is completely dry. Set them back outdoors in the spring when temperatures warm to above freezing. If new shoots appear before freezing temperatures are over for the year, move the hostas outdoors to get some sunshine during the day while it is warm then back into the enclosure at night.
Dig holes in the ground large enough to hold the containers and sink the hostas, containers and all, into the ground in the fall before it freezes. Cover them with 2 to 3 inches of shredded bark mulch after the ground freezes. Pile the mulch over the top of the soil within the containers beneath the leaves and add more until plants are covered. This will prevent water pooling on the soil in the containers. Remove mulch in the spring and move the containers back to their usual positions when the danger of freezing weather has passed.
Bunch the potted hostas close together in an area protected from the wind such as right up against the north side of a building or next to the foundation of the house underneath a deck. Pile shredded bark mulch or shredded leaves over the soil in the containers and then over all of the plants to a depth of 2 to 3 inches. Pack it along the outer edge of the group of containers to a thickness of 3 to 4 inches. Uncover them and move them back to their usual locations in the spring when temperatures are likely to stay above freezing.

Hostas and Winter Damage
Hostas (Hosta spp.) are hardy in U.S. Department of Agriculture plant hardiness zones 3 to 9. They can survive winter temperatures as low as -40 degrees Fahrenheit when planted in the ground. Damage occurs to the root system when temperatures fluctuate. This is a bigger problem for hostas planted in the fall because they have not had a chance to grow their roots deep into the ground, but damage can occur in established hostas, too. As the ground goes through thaws and freezes, it pushes or heaves the hostas up, exposing their roots to the elements.
Hostas in the Ground
Cover hostas with 2 to 3 inches of shredded bark mulch in the fall after the ground freezes to a depth of 3 inches. The mulch will help insulate the soil, reducing the severity of temperature fluctuations, and protect the crowns of the plants. Remove the mulch in the spring when the ground thaws and there is no longer any danger that it will freeze again.
The tops of the hostas must be uncovered right away if new shoots begin to poke through the mulch. It can be left covering the crowns of the plants, though, if there is a chance temperatures may plummet again. Remove mulch from the crowns of the plants and pull it back a few inches away from stems after the danger of freezing temperatures has passed.
Hostas in Containers
Protect container-grown hostas from extreme cold, temperature fluctuations and moisture. Hostas in containers will be subjected to wind-chill temperatures far below what they would experience in the ground, and fluctuations will be more extreme. In addition, moisture will gather in the pots on top of the frozen roots when the sun warms the container, which will cause root rot.

Move hostas into an unheated garage or shed when temperatures begin to drop below freezing. Water them if temperatures warm to above freezing and the soil thaws only if it is completely dry. Set them back outdoors in the spring when temperatures warm to above freezing. If new shoots appear before freezing temperatures are over for the year, move the hostas outdoors to get some sunshine during the day while it is warm then back into the enclosure at night.
Dig holes in the ground large enough to hold the containers and sink the hostas, containers and all, into the ground in the fall before it freezes. Cover them with 2 to 3 inches of shredded bark mulch after the ground freezes. Pile the mulch over the top of the soil within the containers beneath the leaves and add more until plants are covered. This will prevent water pooling on the soil in the containers. Remove mulch in the spring and move the containers back to their usual positions when the danger of freezing weather has passed.
Bunch the potted hostas close together in an area protected from the wind such as right up against the north side of a building or next to the foundation of the house underneath a deck. Pile shredded bark mulch or shredded leaves over the soil in the containers and then over all of the plants to a depth of 2 to 3 inches. Pack it along the outer edge of the group of containers to a thickness of 3 to 4 inches. Uncover them and move them back to their usual locations in the spring when temperatures are likely to stay above freezing.
0
0
文章
Miss Chen
2018年08月26日

When shopping for new plants, many gardeners keep an eye out for something pretty to grow in that shady area of the garden. Found in nature growing on the forest floor, horny goat weed (Epimedium spp) is worth considering, for its bronze and red-tipped foliage as well as its winter hardiness. Also known as bishop's hat and barrenwort, horny goat weed is a perennial flowering plant, hardy to U.S. Department of Agriculture zones 4 through 8.
Step 1
Add 2 inches of peat moss and 3 inches of compost to the planting soil and mix it into the top 10 inches. This will start your horny goat weed off right by giving it a rich soil in which to grow.
Step 2
Dig planting holes, 8 to 10 inches apart, that are the same depth and three times the width of the nursery pot in which the horny goat weed is growing. Gently remove the plants from the pots and place the roots in the hole. Backfill the hole with soil, pressing lightly around the base of the plants.
Step 3
Water the horny goat weed immediately after planting and keep the soil moist at all times. During hot, dry or windy weather, check the soil more frequently and water if needed.
Step 4
Apply 2 to 3 inches of compost to the top of the soil, completely surrounding the horny goat weed, in early spring.
Step 5
Cut off any winter-damaged foliage and stems in the spring. Don't be afraid to trim the entire plant back to the ground if needed, as it will grow right back.
0
0


