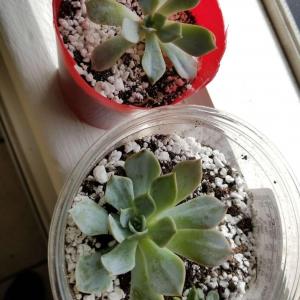
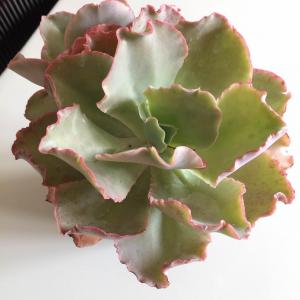
求助
Lucky Coyote
2018年04月26日

two things:
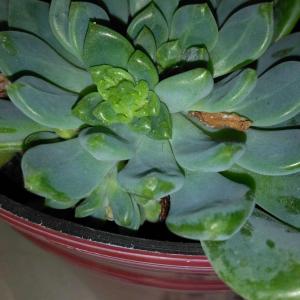
1 what is the white pocking on the leaves? it happened after I had to repot it from being water-logged
2 is this ready or near ready to propagate babies, and how do I get them off and start them?
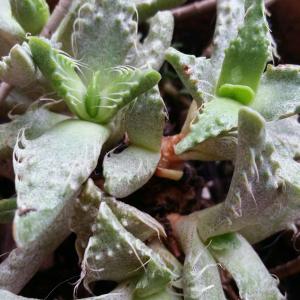
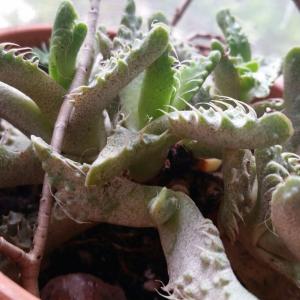
1 what is the white pocking on the leaves? it happened after I had to repot it from being water-logged
2 is this ready or near ready to propagate babies, and how do I get them off and start them?


0
0
成长记
riverrun
2017年09月27日

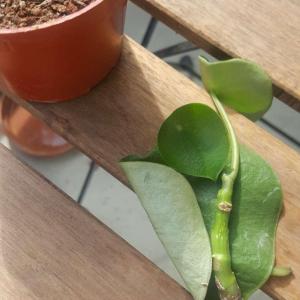
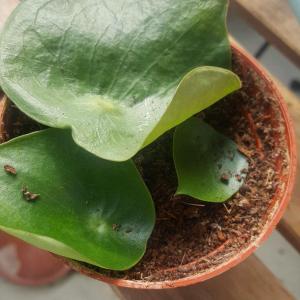
And omg this one died. im going to try to take some cuttings and repot it..


2
0
成长记
cclecombe
2017年09月25日

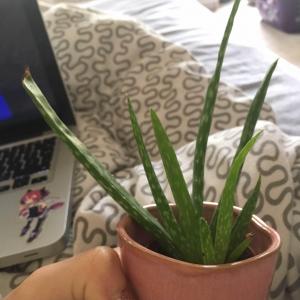
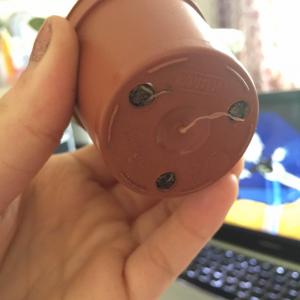
Wont be long before I have to repot this Aloe! Is it worth doing before winter hits?


0
0
文章
Dummer. ゛☀
2017年09月23日

Although many cacti and succulents actually like a tight pot, there will come a time when you need to repot, or maybe you just want to take it out of it’s placates pot and put it in something nicer. But how do you know when a succulent or cacti needs repotting? 
Here are a few signs:
If you can see that the roots are tightly packed or sticking out of the drainage holes
If when watered the water just sits at the top of the soil and doesn’t soak through
When the plant looks like it’s too big for the pot
Or if the soil has become poor quality, such as it dries out quickly or has come away from the sides of the pot.
A general rule of thumb is to repot every two years, at least as a way to provide fresh fertile soil. The best time to repot is at the beginning of a succulent’s growing season for the highest chance of survival. Early spring is the optimal period for most cases but take note, some do start growing in autumn or winter.
How to:
1. Remove the plant from its original pot. You’ll see that the root system is really packed and has probably been choking in that pot!
2. Open up the compacted soil and try to gently spread out the roots. Clear away the old soil but be careful not to pull too hard or break them. It’s helpful to use a stick like a chopstick or stick to remove the old soil. Also look out for dead roots, which should be pruned off. You’ll want to choose a pot that’s bigger than the current one, but not too big.
3. Place a few rocks at the bottom of the pot for drainage. Fill the pot about ½ full with potting mixture, put the plant on the mixture and add more of the potting mixture. You want to press the soil gently down so as to make it compact again. Do not water the succulents immediately after repotting. Wait a week to give them some time to adjust to the new soil.

Here are a few signs:
If you can see that the roots are tightly packed or sticking out of the drainage holes
If when watered the water just sits at the top of the soil and doesn’t soak through
When the plant looks like it’s too big for the pot
Or if the soil has become poor quality, such as it dries out quickly or has come away from the sides of the pot.

A general rule of thumb is to repot every two years, at least as a way to provide fresh fertile soil. The best time to repot is at the beginning of a succulent’s growing season for the highest chance of survival. Early spring is the optimal period for most cases but take note, some do start growing in autumn or winter.

How to:
1. Remove the plant from its original pot. You’ll see that the root system is really packed and has probably been choking in that pot!

2. Open up the compacted soil and try to gently spread out the roots. Clear away the old soil but be careful not to pull too hard or break them. It’s helpful to use a stick like a chopstick or stick to remove the old soil. Also look out for dead roots, which should be pruned off. You’ll want to choose a pot that’s bigger than the current one, but not too big.

3. Place a few rocks at the bottom of the pot for drainage. Fill the pot about ½ full with potting mixture, put the plant on the mixture and add more of the potting mixture. You want to press the soil gently down so as to make it compact again. Do not water the succulents immediately after repotting. Wait a week to give them some time to adjust to the new soil.

0
0
文章
Dummer. ゛☀
2017年09月22日

Cacti are low maintenance plants for the home with a ton of character and a vast array of form. They are relatively maintenance free except for infrequent watering and annual food. Many gardeners ask “should I repot my cactus?” They don’t need repotting often, but once in a while for soil replenishment and when the plant needs a larger pot. When to repot a cactus plant depends upon the plant and its condition. Read on for tips on how to repot a cactus and do it without spending the rest of the day picking spines out of your hands.
Tools for Repotting
Cacti are succulents and tend to favor dry, hot conditions. They store moisture in their pads and use their spines as both defense and to provide some protection from burning hot sun rays. Cactus grown in the home can almost be ignored but they do require light, warmth, water and repotting to refresh the soil. Cactus repotting requires a special soil mix, well-draining container and some tactical protection.
The first issue to deal with is the handling of a spiny plant. There are a couple of ways to go about this. You can wrap the plant in several layers of newspaper and secure lightly with tape or twine. You can also use a pair of leather gloves or, for smaller plants, just grab your oven mitts.
One of the safest repotting tips is to use kitchen tongs. You will also need a cactus mix which you may purchase or make. A good combination is equal parts sand or bird gravel, potting soil and leaf mold. Your container must have excellent drainage holes and preferably be unglazed so the clay can direct away and evaporate any excess moisture.
When to Repot
You will know when to repot a cactus if you see roots coming out the bottom of the container. This indicates it is overly root bound. Most cacti find small spaces very cozy and can stay in their container for years. The sight of roots will let you know it has expanded too much and will need repotting.
The next size up container will be appropriate since they like it snug. A general rule of thumb is to repot every 2 to 4 years. If you fertilize annually, the latter is more appropriate but if you don’t fertilize, repot in two years to replenish soil fertility. The best time is during active growth in January or February.
How to Repot
Once you have answered the question, “should I repot my cactus?”, it is time to gather your tools and trade in the old soil or container. Not every cactus needs a new container, but fresh soil is a good idea. Only pot bound plants need a larger pot.
Wrap, glove or tong the plant gently out of its pot. They usually come out readily if the soil is dry but you may have to run a trowel around the edges to loosen the soil. Shake off the old soil and plant the cactus at the same depth it was growing in the old soil. Fill in around the roots with your medium and place it in a sunny southeast or east window.
Among important repotting cactus tips is to not water the plant yet, as it is adjusting to being handled and new soil conditions. After a few weeks, you can water the plant and allow it to dry out before watering again.

Tools for Repotting
Cacti are succulents and tend to favor dry, hot conditions. They store moisture in their pads and use their spines as both defense and to provide some protection from burning hot sun rays. Cactus grown in the home can almost be ignored but they do require light, warmth, water and repotting to refresh the soil. Cactus repotting requires a special soil mix, well-draining container and some tactical protection.

The first issue to deal with is the handling of a spiny plant. There are a couple of ways to go about this. You can wrap the plant in several layers of newspaper and secure lightly with tape or twine. You can also use a pair of leather gloves or, for smaller plants, just grab your oven mitts.

One of the safest repotting tips is to use kitchen tongs. You will also need a cactus mix which you may purchase or make. A good combination is equal parts sand or bird gravel, potting soil and leaf mold. Your container must have excellent drainage holes and preferably be unglazed so the clay can direct away and evaporate any excess moisture.

When to Repot
You will know when to repot a cactus if you see roots coming out the bottom of the container. This indicates it is overly root bound. Most cacti find small spaces very cozy and can stay in their container for years. The sight of roots will let you know it has expanded too much and will need repotting.

The next size up container will be appropriate since they like it snug. A general rule of thumb is to repot every 2 to 4 years. If you fertilize annually, the latter is more appropriate but if you don’t fertilize, repot in two years to replenish soil fertility. The best time is during active growth in January or February.

How to Repot
Once you have answered the question, “should I repot my cactus?”, it is time to gather your tools and trade in the old soil or container. Not every cactus needs a new container, but fresh soil is a good idea. Only pot bound plants need a larger pot.

Wrap, glove or tong the plant gently out of its pot. They usually come out readily if the soil is dry but you may have to run a trowel around the edges to loosen the soil. Shake off the old soil and plant the cactus at the same depth it was growing in the old soil. Fill in around the roots with your medium and place it in a sunny southeast or east window.

Among important repotting cactus tips is to not water the plant yet, as it is adjusting to being handled and new soil conditions. After a few weeks, you can water the plant and allow it to dry out before watering again.
6
6
文章
Dummer. ゛☀
2017年09月22日

Although a cactus plant prefers slightly cramped growing conditions in a container, there may come a time when it outgrows its pot and needs a larger one. When the cactus roots reach the edge of the container, you must repot a large cactus. With attention to detail and by following expert recommendations, you can give your cactus fresh soil in a larger container so it can continue to thrive.
Instructions
Choose a container that is only 1 to 2 inches (2.5 to 5 cm) larger than the present container to ensure that you do not place the cactus in a pot that is too large. A cactus in a container too large may begin decaying because the soil will stay too wet. Fill the container approximately halfway with cactus potting soil.
Wear the leather gloves and long sleeves to protect your hands and arms from the cactus. Loosen the cactus from the container by inserting the trowel gently around the perimeter of the container. Wrap the cactus with newspaper so you can grasp it and work
Transfer the cactus from the old container to the new container. Set the cactus into the container so the plant will be at the same depth as it was growing in the old container. Fill additional soil in around the roots of the cactus and firm the soil down gently to finish repotting it.
Place the repotted cactus into its regular growing location with direct sunlight. Do not water the cactus for two to three days after repotting.
Tips and Warnings
Repot a cactus in the spring before the plant begins growing actively again.
Install a stake in the new container at the time you repot if your large cactus requires support. Choose a stake that is as tall as the cactus and place it into the container as you place the cactus into the container. Fill soil around both the cactus roots and the stake then tie the stake to the cactus with stretchy plant ties.

Instructions
Choose a container that is only 1 to 2 inches (2.5 to 5 cm) larger than the present container to ensure that you do not place the cactus in a pot that is too large. A cactus in a container too large may begin decaying because the soil will stay too wet. Fill the container approximately halfway with cactus potting soil.

Wear the leather gloves and long sleeves to protect your hands and arms from the cactus. Loosen the cactus from the container by inserting the trowel gently around the perimeter of the container. Wrap the cactus with newspaper so you can grasp it and work

Transfer the cactus from the old container to the new container. Set the cactus into the container so the plant will be at the same depth as it was growing in the old container. Fill additional soil in around the roots of the cactus and firm the soil down gently to finish repotting it.

Place the repotted cactus into its regular growing location with direct sunlight. Do not water the cactus for two to three days after repotting.
Tips and Warnings
Repot a cactus in the spring before the plant begins growing actively again.

Install a stake in the new container at the time you repot if your large cactus requires support. Choose a stake that is as tall as the cactus and place it into the container as you place the cactus into the container. Fill soil around both the cactus roots and the stake then tie the stake to the cactus with stretchy plant ties.
0
0
求助
Kierston Charles
2017年09月03日

bought an arrangement and I want to repot but before I move them around can anyone ID this beauty for me? 😉

0
0
求助
Kierston Charles
2017年09月03日

bought an arrangement and I want to repot but before I move them around can anyone ID this beauty for me? 😉


0
0
gudetama:it looks like a vera higgins
Kierston Charles
2017年09月03日

bought an arrangement and I want to repot but before I move them around can anyone ID this beauty for me? 😉


0
0
文章
Dummer. ゛☀
2017年08月21日

Spider plants (Chlorophytum comosum) are popular houseplants. Flexible about the level of care they receive and tolerant of abuse, they are perfect for gardening beginners. When should you repot a spider plant? These plants grow fast and the tuberous roots can crack open a flower pot. It’s important to start spider plant repotting before this happens. Read on for information on moving spider plants to larger pots.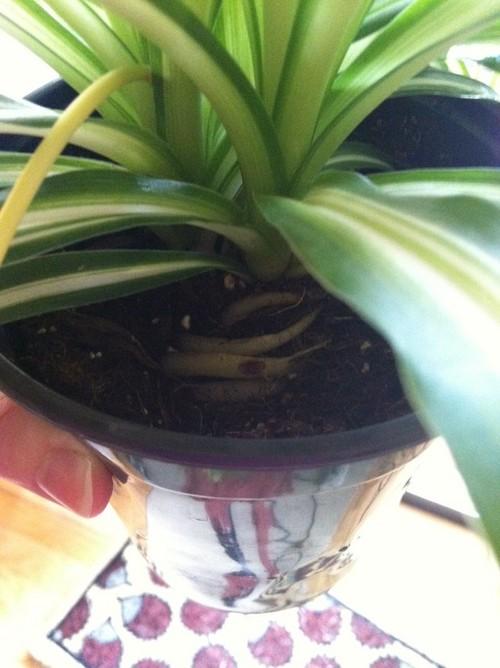
Spider Plant Repotting
Repotting spider plants simply means moving spider plants to larger pots. It is often necessary to repot houseplants as they outgrow their pots, and spider plants tend to grow faster than most. Spider plants are native to the coastal areas of South America. The plant’s tuberous roots allows the species to thrive despite varying levels of precipitation in the wild. These same water-storing tuberous roots assist your spider houseplant to survive when you forget to water it for a few weeks. The roots grow fast, however. At some point before the roots crack open the pot, it’s time to think about spider plant repotting.
When Should You Repot a Spider Plant?
Spider plants grow best when they are slightly pot bound. However, the plants, roots included, grow fast. You’ll want to think about repotting spider plants before the plants crack their pots. Plants get different cultural care, so their growth rates vary. You just have to keep an eye on your spider plant. When you see roots showing above the soil, it is time to start moving spider plants to larger pots.
How Do You Repot a Spider Plant?
How do you repot a spider plant? Repotting a spider plant is fairly easy. You gently remove the plant from its current pot, rinse and trim its roots, then replant it in a larger pot. When you are moving spider plants to larger pots, make sure the new pots have good drainage holes. Spider plants don’t tolerate wet soil for very long. Use a general-purpose potting soil or soilless medium for spider plant repotting. Fill the bottom of the pot with soil, then place the plant’s roots in the soil. Keep adding soil and tucking it around the roots until all the roots are covered. Water the plant well and care as usual.

Spider Plant Repotting
Repotting spider plants simply means moving spider plants to larger pots. It is often necessary to repot houseplants as they outgrow their pots, and spider plants tend to grow faster than most. Spider plants are native to the coastal areas of South America. The plant’s tuberous roots allows the species to thrive despite varying levels of precipitation in the wild. These same water-storing tuberous roots assist your spider houseplant to survive when you forget to water it for a few weeks. The roots grow fast, however. At some point before the roots crack open the pot, it’s time to think about spider plant repotting.

When Should You Repot a Spider Plant?
Spider plants grow best when they are slightly pot bound. However, the plants, roots included, grow fast. You’ll want to think about repotting spider plants before the plants crack their pots. Plants get different cultural care, so their growth rates vary. You just have to keep an eye on your spider plant. When you see roots showing above the soil, it is time to start moving spider plants to larger pots.

How Do You Repot a Spider Plant?
How do you repot a spider plant? Repotting a spider plant is fairly easy. You gently remove the plant from its current pot, rinse and trim its roots, then replant it in a larger pot. When you are moving spider plants to larger pots, make sure the new pots have good drainage holes. Spider plants don’t tolerate wet soil for very long. Use a general-purpose potting soil or soilless medium for spider plant repotting. Fill the bottom of the pot with soil, then place the plant’s roots in the soil. Keep adding soil and tucking it around the roots until all the roots are covered. Water the plant well and care as usual.
0
0
文章
Dummer. ゛☀
2017年08月20日

Cacti are low maintenance plants for the home with a ton of character and a vast array of form. They are relatively maintenance free except for infrequent watering and annual food. Many gardeners ask “should I repot my cactus?” They don’t need repotting often, but once in a while for soil replenishment and when the plant needs a larger pot. When to repot a cactus plant depends upon the plant and its condition. Read on for tips on how to repot a cactus and do it without spending the rest of the day picking spines out of your hands.

Tools for Cactus Repotting
Cacti are succulents and tend to favor dry, hot conditions. They store moisture in their pads and use their spines as both defense and to provide some protection from burning hot sun rays. Cactus grown in the home can almost be ignored but they do require light, warmth, water and repotting to refresh the soil. Cactus repotting requires a special soil mix, well-draining container and some tactical protection. The first issue to deal with is the handling of a spiny plant. There are a couple of ways to go about this. You can wrap the plant in several layers of newspaper and secure lightly with tape or twine. You can also use a pair of leather gloves or, for smaller plants, just grab your oven mitts. One of the safest repotting tips is to use kitchen tongs. You will also need a cactus mix which you may purchase or make. A good combination is equal parts sand or bird gravel, potting soil and leaf mold. Your container must have excellent drainage holes and preferably be unglazed so the clay can direct away and evaporate any excess moisture.

When to Repot a Cactus Plant
You will know when to repot a cactus plant if you see roots coming out the bottom of the container. This indicates it is overly root bound. Most cacti find small spaces very cozy and can stay in their container for years. The sight of roots will let you know it has expanded too much and will need repotting. The next size up container will be appropriate since they like it snug. A general rule of thumb is to repot every 2 to 4 years. If you fertilize annually, the latter is more appropriate but if you don’t fertilize, repot in two years to replenish soil fertility. The best time is during active growth in January or February.

How to Repot a Cactus
Once you have answered the question, “should I repot my cactus,” it is time to gather your tools and trade in the old soil or container. Not every cactus needs a new container, but fresh soil is a good idea. Only pot bound plants need a larger pot. Wrap, glove or tong the plant gently out of its pot. They usually come out readily if the soil is dry but you may have to run a trowel around the edges to loosen the soil. Shake off the old soil and plant the cactus at the same depth it was growing in the old soil. Fill in around the roots with your medium and place it in a sunny southeast or east window. Among important repotting cactus tips is to not water the plant yet, as it is adjusting to being handled and new soil conditions. After a few weeks, you can water the plant and allow it to dry out before watering again.

Tools for Cactus Repotting
Cacti are succulents and tend to favor dry, hot conditions. They store moisture in their pads and use their spines as both defense and to provide some protection from burning hot sun rays. Cactus grown in the home can almost be ignored but they do require light, warmth, water and repotting to refresh the soil. Cactus repotting requires a special soil mix, well-draining container and some tactical protection. The first issue to deal with is the handling of a spiny plant. There are a couple of ways to go about this. You can wrap the plant in several layers of newspaper and secure lightly with tape or twine. You can also use a pair of leather gloves or, for smaller plants, just grab your oven mitts. One of the safest repotting tips is to use kitchen tongs. You will also need a cactus mix which you may purchase or make. A good combination is equal parts sand or bird gravel, potting soil and leaf mold. Your container must have excellent drainage holes and preferably be unglazed so the clay can direct away and evaporate any excess moisture.

When to Repot a Cactus Plant
You will know when to repot a cactus plant if you see roots coming out the bottom of the container. This indicates it is overly root bound. Most cacti find small spaces very cozy and can stay in their container for years. The sight of roots will let you know it has expanded too much and will need repotting. The next size up container will be appropriate since they like it snug. A general rule of thumb is to repot every 2 to 4 years. If you fertilize annually, the latter is more appropriate but if you don’t fertilize, repot in two years to replenish soil fertility. The best time is during active growth in January or February.

How to Repot a Cactus
Once you have answered the question, “should I repot my cactus,” it is time to gather your tools and trade in the old soil or container. Not every cactus needs a new container, but fresh soil is a good idea. Only pot bound plants need a larger pot. Wrap, glove or tong the plant gently out of its pot. They usually come out readily if the soil is dry but you may have to run a trowel around the edges to loosen the soil. Shake off the old soil and plant the cactus at the same depth it was growing in the old soil. Fill in around the roots with your medium and place it in a sunny southeast or east window. Among important repotting cactus tips is to not water the plant yet, as it is adjusting to being handled and new soil conditions. After a few weeks, you can water the plant and allow it to dry out before watering again.
2
0
文章
Dummer. ゛☀
2017年08月20日

If you’re looking up how to repot rubber tree plants, you probably already have one. Whether you have the variety ‘Rubra,’ with dark green leaves and light-colored mid-veins, or ‘Tricolor,’ with variegated leaves, their needs are essentially the same. Rubber plants don’t mind being grown in pots because they originate in Southeast Asian rainforests where, like most rainforests, the soil layer is very thin and plants typically don’t root as deeply as those in temperate forests. Keep reading to learn more about rubber tree plant potting.
When Does Rubber Plant Need a New Pot?
If your rubber plant is still small and/or you don’t want it to grow much or to grow slowly, your plant may only need a little top dressing. If this is the case, simply scrape off the top half inch to inch (1.2 to 2.5 cm.) of soil and replace it with an equal layer of potting soil, compost, or another medium that contains slow-releasing nutrients. However, there will come a time when it is necessary to provide new space as well as nutrients to maintain the health and growth of your rubber tree plant. Potting it up is especially necessary if the rootball appears to be girdled, or growing around the sides of the pot. This tells you that you’re a bit past due for upgrading your plant to a bigger pot.
Repotting a Rubber Plant
Pick a pot that is somewhat larger than your current one without being excessively bigger. Usually increasing the pot size by 3 to 4 inches (8-10 cm.) in diameter is sufficient for a large potted plant. If you use a pot that is too much larger than the current rootball, the soil may stay wet for too long after watering because there are no roots in the added soil to draw out the water, which can lead to root rot. This is also a good time to consider the plant’s growth since the last time it was put in a pot. When repotting a rubber plant that has gained a lot of top growth, you may need to choose a heavier pot or weigh down the pot by adding some sand to the growing medium to prevent tipping over, especially if you have children or animals that may occasionally pull on the plant. If you do use sand, be sure to use a coarse builder’s sand and not a fine child’s play sand. You’ll need the mix to contain a good amount of fertility in order to support the growth of the rubber plant for the next few months. Compost and potting soil both contain a good mix of slow-releasing nutrients that will help your rubber plant to thrive.
How to Repot Rubber Tree Plants
Once you have everything you need for repotting your rubber plant, it’s time to change pots. Remove the plant from its current pot and tease the roots some. This is also a good time to inspect the roots and perform any necessary root pruning. Add a fair amount of your soil medium to the base of the new pot. Situate the rubber plant on top of this, adjusting as needed. You want the surface of the root ball just below the rim, and simply fill in around and over the root ball with soil. Be sure to leave about an inch (2.5 cm.) or so of space from the rim of the pot for watering.

When Does Rubber Plant Need a New Pot?
If your rubber plant is still small and/or you don’t want it to grow much or to grow slowly, your plant may only need a little top dressing. If this is the case, simply scrape off the top half inch to inch (1.2 to 2.5 cm.) of soil and replace it with an equal layer of potting soil, compost, or another medium that contains slow-releasing nutrients. However, there will come a time when it is necessary to provide new space as well as nutrients to maintain the health and growth of your rubber tree plant. Potting it up is especially necessary if the rootball appears to be girdled, or growing around the sides of the pot. This tells you that you’re a bit past due for upgrading your plant to a bigger pot.

Repotting a Rubber Plant
Pick a pot that is somewhat larger than your current one without being excessively bigger. Usually increasing the pot size by 3 to 4 inches (8-10 cm.) in diameter is sufficient for a large potted plant. If you use a pot that is too much larger than the current rootball, the soil may stay wet for too long after watering because there are no roots in the added soil to draw out the water, which can lead to root rot. This is also a good time to consider the plant’s growth since the last time it was put in a pot. When repotting a rubber plant that has gained a lot of top growth, you may need to choose a heavier pot or weigh down the pot by adding some sand to the growing medium to prevent tipping over, especially if you have children or animals that may occasionally pull on the plant. If you do use sand, be sure to use a coarse builder’s sand and not a fine child’s play sand. You’ll need the mix to contain a good amount of fertility in order to support the growth of the rubber plant for the next few months. Compost and potting soil both contain a good mix of slow-releasing nutrients that will help your rubber plant to thrive.

How to Repot Rubber Tree Plants
Once you have everything you need for repotting your rubber plant, it’s time to change pots. Remove the plant from its current pot and tease the roots some. This is also a good time to inspect the roots and perform any necessary root pruning. Add a fair amount of your soil medium to the base of the new pot. Situate the rubber plant on top of this, adjusting as needed. You want the surface of the root ball just below the rim, and simply fill in around and over the root ball with soil. Be sure to leave about an inch (2.5 cm.) or so of space from the rim of the pot for watering.
2
1
文章
Dummer. ゛☀
2017年08月17日

Christmas cactus is a popular gift and houseplant. Blooming specifically during periods with long nights, it’s a welcome flash of color in the dead of winter. If you’re looking to plant or repot a Christmas cactus, however, you should be aware of a few specific soil requirements to ensure a good bloom in the next season. Keep reading to learn about soil requirements for Christmas cactus.

Christmas Cactus Soil Requirements
In its native Brazil, the Christmas cactus has very specific growing conditions. It’s an epiphyte, meaning it grows on the trunks of larger trees and gains most of its moisture from the air. It sinks its roots into decomposing leaves and debris resting on the sides of trees. It also draws some moisture from this makeshift soil, but because of its small volume and position high in the air, this soil dries out easily even with daily rainfall. This means that the best soil for Christmas cactus is extremely well draining.

How to Make a Potting Mix for Christmas Cactus
You can buy commercial potting mixes for cacti that will ensure good drainage. With just a little effort, however, you can make your own. The easiest medium requires three parts regular potting soil mixed with two parts perlite. This will provide perfectly adequate drainage. If you’d like to take it a step further, mix equal parts compost, perlite, and milled peat. Water your Christmas cactus whenever the soil is dry – try not to let the soil dry out completely, but don’t let water stand in the pot or the saucer underneath. Drainage is much more important than water volume. Used to growing in small nooks on trees, the Christmas cactus likes being slightly root bound. Plant it in a pot that provides just a little room for growth, and transplant it no more frequently than every three years.


Christmas Cactus Soil Requirements
In its native Brazil, the Christmas cactus has very specific growing conditions. It’s an epiphyte, meaning it grows on the trunks of larger trees and gains most of its moisture from the air. It sinks its roots into decomposing leaves and debris resting on the sides of trees. It also draws some moisture from this makeshift soil, but because of its small volume and position high in the air, this soil dries out easily even with daily rainfall. This means that the best soil for Christmas cactus is extremely well draining.

How to Make a Potting Mix for Christmas Cactus
You can buy commercial potting mixes for cacti that will ensure good drainage. With just a little effort, however, you can make your own. The easiest medium requires three parts regular potting soil mixed with two parts perlite. This will provide perfectly adequate drainage. If you’d like to take it a step further, mix equal parts compost, perlite, and milled peat. Water your Christmas cactus whenever the soil is dry – try not to let the soil dry out completely, but don’t let water stand in the pot or the saucer underneath. Drainage is much more important than water volume. Used to growing in small nooks on trees, the Christmas cactus likes being slightly root bound. Plant it in a pot that provides just a little room for growth, and transplant it no more frequently than every three years.

0
0


