成长记
Foggy_Garden
2018年09月14日

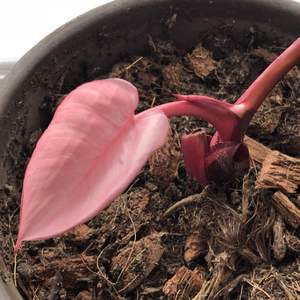
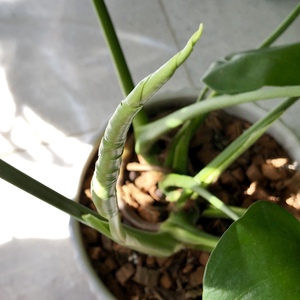
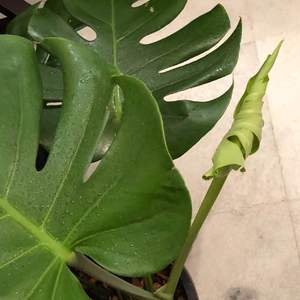
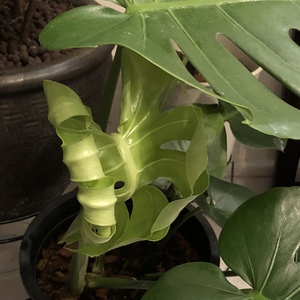
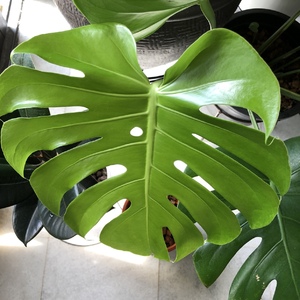
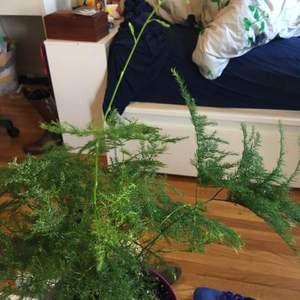
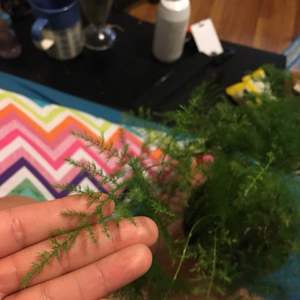
The new leaf has spead out and two new leafs below are growing too!

0
0
成长记
Plantlin
2018年09月12日

The leaf of the maidensblush which I planted ‘a while ago’ is making new leaves:) I can see about 1 mm;)


0
0
succulentlover11
2018年09月11日

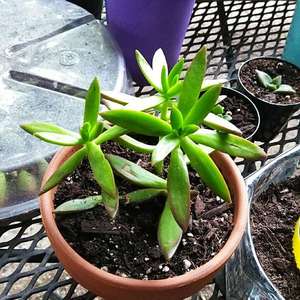
hello I'm new to this app I really need some help on my succulent my sedum firestorm its color is fading out it's supposed to be green with red tips around the leaf but it's turning all green and the leaves look really sad anybody please help me or give me some advice on the plan thank you

0
0
求助
cinbro
2018年09月10日

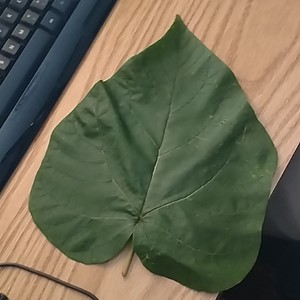
Can anyone identify this leaf? It is growing on the edge of a creek. It's a tree.

0
0
成长记
kensong
2018年09月08日

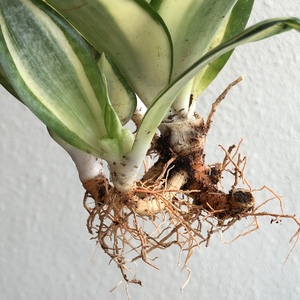
Had some leaf rot and possible bacteria infection, so removed to check roots and they were fine. Will air dry the roots, remove all affected leaves and repot.



0
0
成长记
Plantlin
2018年09月07日

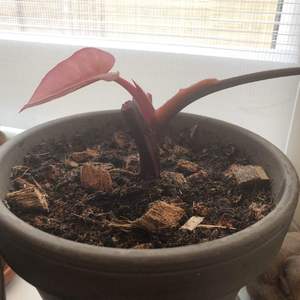
I’ve potted the princess in my last update and I think she is happy as there is a new leaf coming:) I also have just cut the two ‘sticks’ in the middle... so they are a little less obnoxious;)

1
0
文章
Miss Chen
2018年09月07日

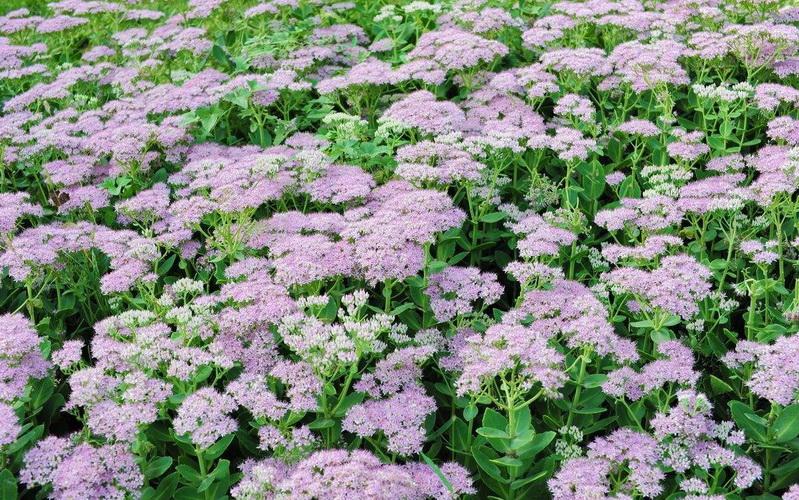
Considered one of the top perennials for fall color, "Autumn Joy" sedum (Sedum x "Autumn Joy") grows in U.S. Department of Agriculture plant hardiness zones 5 through 9. Once you have one sedum, it's easy to make more by taking stem and leaf cuttings or dividing the plant. Because "Autumn Joy" is a hybrid, seeds will not produce exact copies of the parent plant.
Cut Stems or Leaves
"Autumn Joy" sedum roots easily from stem or leaf cuttings. You can do this any time the plants are actively growing. Cuttings taken from new growth root more easily than cuttings from older stems.
Take cuttings in the early morning or late afternoon, and water the plants one hour before you take the cuttings. Make stem cuttings 2 to 6 inches long, with at least three sets of leaves. Cut the stem just below the node where a leaf joins the stem.
For leaf cuttings, remove the leaf along with the stalk that attaches the leaf to the stem. To keep them from drying out before planting, place stem and leaf cuttings in water or in a plastic bag with a damp paper towel.
Use sharp scissors or pruners to take the cuttings. Disinfect cutting tools by soaking them in a solution of 1 part bleach to 3 parts water for 5 minutes. Rinse them in clean water, and let them air-dry before use.
Plant Cuttings
Cuttings root best in a sterile, soilless potting mix. You can use a purchased seed-starting mix, or make your own for rooting cuttings by mixing equal parts river sand, perlite, and either vermiculite or peat moss. Use this mix to fill pots or planting trays with drainage holes. Water the potting mix so it is damp, and smooth the surface.
To avoid spreading disease, plant in new pots and planting trays or sterilize used pots before filling them with soil. Clean used pots and trays by scrubbing away any loose dirt, then soaking them in a solution of 1 part bleach to 9 parts water for 30 minutes. Wipe them dry before use. Always use pots and containers that have drainage holes.

For stem cuttings, use sterilized scissors or pruners to clip off the lowest set of leaves. If there are any flower buds on the cutting, remove those as well. Use a pencil to poke a hole in the potting mix, then place the cutting in the hole, firming the potting mix around the cutting so the place where you cut the leaves off is covered. For leaf cuttings, cover about 1/4 inch of the stem-end of the leaf with potting mix. There is no need to use a rooting hormone on "Autumn Joy" sedum cuttings.
Keep Them Moist
Cover the cuttings with clear plastic bags to help keep them from drying out. Some planting trays come with clear plastic domes which makes it easy to keep humidity levels high. The cuttings still need air circulation, though, so make sure there is space between the plastic and the pot or tray. Don't let the plastic touch the plant leaves.
Mist the cuttings as needed to keep the soil from drying out. You want the soil to stay moist, but not waterlogged. After two weeks, check if the stem cuttings are rooting by gently lifting the stem. If it comes free of the soil easily, replant it and check again in another week. Keep checking until the cuttings stay rooted in the soil when you gently tug at the stem.
You can tell leaf cuttings have rooted when new leaves start to emerge from the base of the leaf. Once the new stem or leaf cuttings have roots, gradually decrease the humidity by leaving the plastic off for several hours each day.
Move the Sedums Outside
The best time to plant new "Autumn Joy" sedum is in the spring after danger of frost has passed, but this plant is not picky about planting time. If you take cuttings in spring, the resulting plants can still be planted outdoors in the summer or fall. Mature plants reach 12 to 24 inches tall, and they should be spaced 12 to 18 inches apart.
A spot in full-sun is best, and "Autumn Joy" sedum will grow in any soil type as long as it drains well. Sedum is highly drought-tolerant, but water once a week for the first year if there is no rain. This encourages deep rooting.
Divide Established Plants
Once "Autumn Joy" sedum is established, divide the clumps every three to five years. This is an easy way to get new plants and to keep the sedum from becoming crowded. Divide the sedum in the spring, as soon as new growth starts to emerge from the soil. Choose an overcast day, preferably with light rain in the forecast. Water the plants the day before you plan to divide the plant.
Use a sharp spade to dig around the entire sedum clump, about 4 to 6 inches away from the base of the plant. Lift the entire clump, and shake off loose soil so you can see the root system better. Sedums form clumps, and you many need to use a sharp, large knife to divide the clump and cut through the roots. Sterilize this knife before use the same way you sterilized the pruning tools.
Replant the divisions as soon as possible. If you must delay planting, place the sedum in the shade and keep the soil moist. When you plant the new divisions, place them at the same depth they were previously growing. Firm the soil around the plants, and water thoroughly.

Cut Stems or Leaves
"Autumn Joy" sedum roots easily from stem or leaf cuttings. You can do this any time the plants are actively growing. Cuttings taken from new growth root more easily than cuttings from older stems.
Take cuttings in the early morning or late afternoon, and water the plants one hour before you take the cuttings. Make stem cuttings 2 to 6 inches long, with at least three sets of leaves. Cut the stem just below the node where a leaf joins the stem.
For leaf cuttings, remove the leaf along with the stalk that attaches the leaf to the stem. To keep them from drying out before planting, place stem and leaf cuttings in water or in a plastic bag with a damp paper towel.
Use sharp scissors or pruners to take the cuttings. Disinfect cutting tools by soaking them in a solution of 1 part bleach to 3 parts water for 5 minutes. Rinse them in clean water, and let them air-dry before use.
Plant Cuttings
Cuttings root best in a sterile, soilless potting mix. You can use a purchased seed-starting mix, or make your own for rooting cuttings by mixing equal parts river sand, perlite, and either vermiculite or peat moss. Use this mix to fill pots or planting trays with drainage holes. Water the potting mix so it is damp, and smooth the surface.
To avoid spreading disease, plant in new pots and planting trays or sterilize used pots before filling them with soil. Clean used pots and trays by scrubbing away any loose dirt, then soaking them in a solution of 1 part bleach to 9 parts water for 30 minutes. Wipe them dry before use. Always use pots and containers that have drainage holes.

For stem cuttings, use sterilized scissors or pruners to clip off the lowest set of leaves. If there are any flower buds on the cutting, remove those as well. Use a pencil to poke a hole in the potting mix, then place the cutting in the hole, firming the potting mix around the cutting so the place where you cut the leaves off is covered. For leaf cuttings, cover about 1/4 inch of the stem-end of the leaf with potting mix. There is no need to use a rooting hormone on "Autumn Joy" sedum cuttings.
Keep Them Moist
Cover the cuttings with clear plastic bags to help keep them from drying out. Some planting trays come with clear plastic domes which makes it easy to keep humidity levels high. The cuttings still need air circulation, though, so make sure there is space between the plastic and the pot or tray. Don't let the plastic touch the plant leaves.
Mist the cuttings as needed to keep the soil from drying out. You want the soil to stay moist, but not waterlogged. After two weeks, check if the stem cuttings are rooting by gently lifting the stem. If it comes free of the soil easily, replant it and check again in another week. Keep checking until the cuttings stay rooted in the soil when you gently tug at the stem.
You can tell leaf cuttings have rooted when new leaves start to emerge from the base of the leaf. Once the new stem or leaf cuttings have roots, gradually decrease the humidity by leaving the plastic off for several hours each day.
Move the Sedums Outside
The best time to plant new "Autumn Joy" sedum is in the spring after danger of frost has passed, but this plant is not picky about planting time. If you take cuttings in spring, the resulting plants can still be planted outdoors in the summer or fall. Mature plants reach 12 to 24 inches tall, and they should be spaced 12 to 18 inches apart.
A spot in full-sun is best, and "Autumn Joy" sedum will grow in any soil type as long as it drains well. Sedum is highly drought-tolerant, but water once a week for the first year if there is no rain. This encourages deep rooting.
Divide Established Plants
Once "Autumn Joy" sedum is established, divide the clumps every three to five years. This is an easy way to get new plants and to keep the sedum from becoming crowded. Divide the sedum in the spring, as soon as new growth starts to emerge from the soil. Choose an overcast day, preferably with light rain in the forecast. Water the plants the day before you plan to divide the plant.
Use a sharp spade to dig around the entire sedum clump, about 4 to 6 inches away from the base of the plant. Lift the entire clump, and shake off loose soil so you can see the root system better. Sedums form clumps, and you many need to use a sharp, large knife to divide the clump and cut through the roots. Sterilize this knife before use the same way you sterilized the pruning tools.
Replant the divisions as soon as possible. If you must delay planting, place the sedum in the shade and keep the soil moist. When you plant the new divisions, place them at the same depth they were previously growing. Firm the soil around the plants, and water thoroughly.
0
0
文章
Miss Chen
2018年09月05日

The Moses-in-the-cradle plant (Tradescantia spathacea) gets its interesting name from its flowers, which are small and white, and sit in a special leaf, called a bract, which resembles a dark purple boat. Also called boat lily, oyster plant, rhoeo tricolor and Moses-in-a-basket, this plant grows outdoors in U.S. Department of Agriculture plant hardiness zones 9 through 11 and also does well as a houseplant. Easy to grow and tolerant of most environments, it forms short clumps of radiating, sword-shaped leaves in sun or shade, and needs only basic care and consistent moisture to thrive.
Plant Wisely

This plant can cause an allergic skin reaction in some people and pets, and can be poisonous if eaten in large quantities, so it's not a good choice for an area where pets or children play.
It can also be invasive in some parts of the U.S., spreading into forested areas. Check before planting whether it's a good choice for your area. Manage its tendency to get out of control by removing spent flowers to prevent seed formation, and prevent spreading of the clump by surrounding it with a physical barrier that extends several inches into the soil.
Proper Lighting

Moses-in-the-cradle grows to about 1 foot tall, spreading to form a clump up to 2 feet wide. It tolerates most lighting conditions, but prefers filtered sun or partial shade. It can grow in full sun, but in areas with strong, hot summer sun, provide some shade in the afternoon to protect the leaves from scorching.
If you grow this plant indoors, it does best in bright, indirect light for at least six to eight hours each day. The windowsill of a lightly curtained, south- or west-facing window gives the plant good light without too much direct sun.
Water Needs

When grown in the garden, Moses-in-the-basket prefers consistently moist soil and requires good drainage. Although the plant can also tolerate dry spells once established, adding a 2- to 3-inch layer of organic mulch, such as straw or shredded bark, helps conserve soil moisture and also keeps down competing weeds. In warm climates, the plant continues growing slowly during cold weather, but needs less water while it takes a rest.
If you grow Moses-in-the-cradle as a container plant, water it whenever the top 1 to 2 inches of soil feel dry to your fingertip. Never leave the pot in a water-filled saucer, because this can encourage fungal problems. Always use a pot that has drainage holes. In fall and winter, allow the soil to dry slightly between waterings to give the plant a rest.
Fertilizer and Pruning

Moses-in-the-cradle doesn't need fertilizer when grown outdoors in fertile soil that's rich in organic content. You can give the plant a boost by mixing a 1- to 2-inch layer of compost into its soil each spring, but do this carefully to avoid disturbing the roots.
If you grow the plant indoors, fertilize it every three months with a balanced, 10-10-10 fertilizer, diluted at a rate of 1/4 teaspoon in 1 gallon of water, but check your product label for additional directions.
This plant doesn't require regular pruning, but you can trim back an outdoor-grown Moses-in-the-cradle each spring to keep it within bounds. Cut the plant back to a height of a few inches, wiping your blade with rubbing alcohol between cuts to prevent the spread of disease.
Avoiding Problems

Moses-in-the-cradle is usually free of diseases when grown in well-drained soil, but it can attract a few pests. These include mealybugs, which are fluffy white insects, or tiny, winged whiteflies; spider mites, which aren't visible, also could produce weblike coverings on young leaves. Control these by spraying with ready-to-use insecticidal soap. Repeat every week or two as needed. Wear long sleeves, long pants, gloves and eye protection when spraying plants.
Plant Wisely

This plant can cause an allergic skin reaction in some people and pets, and can be poisonous if eaten in large quantities, so it's not a good choice for an area where pets or children play.
It can also be invasive in some parts of the U.S., spreading into forested areas. Check before planting whether it's a good choice for your area. Manage its tendency to get out of control by removing spent flowers to prevent seed formation, and prevent spreading of the clump by surrounding it with a physical barrier that extends several inches into the soil.
Proper Lighting

Moses-in-the-cradle grows to about 1 foot tall, spreading to form a clump up to 2 feet wide. It tolerates most lighting conditions, but prefers filtered sun or partial shade. It can grow in full sun, but in areas with strong, hot summer sun, provide some shade in the afternoon to protect the leaves from scorching.
If you grow this plant indoors, it does best in bright, indirect light for at least six to eight hours each day. The windowsill of a lightly curtained, south- or west-facing window gives the plant good light without too much direct sun.
Water Needs

When grown in the garden, Moses-in-the-basket prefers consistently moist soil and requires good drainage. Although the plant can also tolerate dry spells once established, adding a 2- to 3-inch layer of organic mulch, such as straw or shredded bark, helps conserve soil moisture and also keeps down competing weeds. In warm climates, the plant continues growing slowly during cold weather, but needs less water while it takes a rest.
If you grow Moses-in-the-cradle as a container plant, water it whenever the top 1 to 2 inches of soil feel dry to your fingertip. Never leave the pot in a water-filled saucer, because this can encourage fungal problems. Always use a pot that has drainage holes. In fall and winter, allow the soil to dry slightly between waterings to give the plant a rest.
Fertilizer and Pruning

Moses-in-the-cradle doesn't need fertilizer when grown outdoors in fertile soil that's rich in organic content. You can give the plant a boost by mixing a 1- to 2-inch layer of compost into its soil each spring, but do this carefully to avoid disturbing the roots.
If you grow the plant indoors, fertilize it every three months with a balanced, 10-10-10 fertilizer, diluted at a rate of 1/4 teaspoon in 1 gallon of water, but check your product label for additional directions.
This plant doesn't require regular pruning, but you can trim back an outdoor-grown Moses-in-the-cradle each spring to keep it within bounds. Cut the plant back to a height of a few inches, wiping your blade with rubbing alcohol between cuts to prevent the spread of disease.
Avoiding Problems

Moses-in-the-cradle is usually free of diseases when grown in well-drained soil, but it can attract a few pests. These include mealybugs, which are fluffy white insects, or tiny, winged whiteflies; spider mites, which aren't visible, also could produce weblike coverings on young leaves. Control these by spraying with ready-to-use insecticidal soap. Repeat every week or two as needed. Wear long sleeves, long pants, gloves and eye protection when spraying plants.
0
1
求助
Vijeta Priya
2018年08月19日

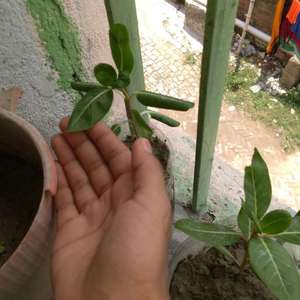
it's a flower of Sada Bahar and its leaf looking so pale and weak.i have given to much water to it but still it looking weak and pale

0
0
Priya:Did you plant it recently??? When you planted it, did you expose the roots to the air?? If yes, then sometimes it happens that the plant dries up after some days.. Same thing happened with me when I first potted this plant.. But it 's not always true. Sometimes it flourishes also... From next time remember to plant the plant with some soil always covering it's root like a small pot...


