文章
Dummer. ゛☀
2017年09月30日

Gazania is a genus of low-growing, trailing ground covers with daisy-like blooms that open on summer and fall days, closing at night. It only grows 0.5 to 1 foot (15 to 30 cm) tall and 1 to 2 feet (30 to 60 cm) wide, but its vivid flowers more than make up for its lack of height. Although grown as an annual in much of the country, this plant overwinters in U.S. Department of Agriculture plant hardiness zones 8b through 11. Plant this colorful, low-growing specimen outside in containers or directly into the ground to incorporate it into your landscape.
Growing Conditions and General Care
Plant Gazanias in early spring, in full sun and well-draining soil, spacing multiple plants 12 to 18 inches (30 to 45 cm) apart to form a ground cover mat. These flowers can tolerate almost any type of soil — alkaline, acidic, loam, clay and sand — as long as they have good drainage, though they prefer good, fertile loam.
Water the Gazania, keeping it moist after planting until you see new growth. Once growing on its own, this plant is quite drought tolerant, and only requires supplemental water during droughts of three weeks or more. Water in the morning, as Gazanias can succumb to stem and root rots, powdery mildew and leaf spot that can result from staying wet for too long.
Pinch off fading flowers with your fingers to encourage a longer bloom period.
Prune annually in late winter or early spring, beginning in the second season, cutting the foliage back to 2 or 3 inches above the ground with pruning shears. This will refresh the plant and encourage new growth.
Fertilize annually soon after pruning, beginning in the second season, with a teaspoon or two of 10-10-10 granular fertilizer, scattering it evenly around the edges of the plant and watering it into the ground. Gazanias can tolerate soils with low fertility, and actually do not do well with excess fertilizer. In even moderately fertile soil they do not require this application, but it can encourage healthy early season growth.
Plant different varieties of Gazanias in a bunch for a colorful mix.
Propagation
Gazanias are particularly suited for creating a fast-spreading garden spread. They self-seed and grow very quickly. However, you can fasten the propagation process. For this, systematic division of young Gazanias is needed. Choose Gazanias that are about 10 inches (25 cm) tall. Using gardening scissors, cut through the basal stem, dividing it into two halves. Each half will now grow as an individual plant.

Growing Conditions and General Care
Plant Gazanias in early spring, in full sun and well-draining soil, spacing multiple plants 12 to 18 inches (30 to 45 cm) apart to form a ground cover mat. These flowers can tolerate almost any type of soil — alkaline, acidic, loam, clay and sand — as long as they have good drainage, though they prefer good, fertile loam.

Water the Gazania, keeping it moist after planting until you see new growth. Once growing on its own, this plant is quite drought tolerant, and only requires supplemental water during droughts of three weeks or more. Water in the morning, as Gazanias can succumb to stem and root rots, powdery mildew and leaf spot that can result from staying wet for too long.
Pinch off fading flowers with your fingers to encourage a longer bloom period.

Prune annually in late winter or early spring, beginning in the second season, cutting the foliage back to 2 or 3 inches above the ground with pruning shears. This will refresh the plant and encourage new growth.
Fertilize annually soon after pruning, beginning in the second season, with a teaspoon or two of 10-10-10 granular fertilizer, scattering it evenly around the edges of the plant and watering it into the ground. Gazanias can tolerate soils with low fertility, and actually do not do well with excess fertilizer. In even moderately fertile soil they do not require this application, but it can encourage healthy early season growth.
Plant different varieties of Gazanias in a bunch for a colorful mix.

Propagation
Gazanias are particularly suited for creating a fast-spreading garden spread. They self-seed and grow very quickly. However, you can fasten the propagation process. For this, systematic division of young Gazanias is needed. Choose Gazanias that are about 10 inches (25 cm) tall. Using gardening scissors, cut through the basal stem, dividing it into two halves. Each half will now grow as an individual plant.
0
1
文章
Dummer. ゛☀
2017年09月28日

Corn Poppy, (Papaver rhoeas), also known as Flanders Poppy, Field Poppy or Shirley Poppy, is hardy annual with vividly colored, papery red, pink or white blooms that rise above lacy foliage. The fuzzy stems reach heights of 2 feet (60 cm) and more at maturity.
Easily grown by seed, Corn Poppies are often planted by state highway departments for spectacular displays of color along roadsides across the nation. Corn Poppies are beautiful as cut flowers and the dried seed pops add interest to dry floral arrangements.
Growing Conditions and General Cultivation
Plant Corn Poppy seeds directly on top of cultivated soil. In mild climates, plant the seeds in late fall or early spring when soil temperatures are between 60 and 70 ºF (15 and 21 ºC). Corn Poppies thrive in full sunlight and rich, well-drained soil. If the soil is poor, incorporate 2 to 3 inches (5 to 7.5 cm) of compost or manure prior to planting.
Water Corn Poppies when the top of the soil feels dry. Saturate the root zone thoroughly, as shallow waterings promote a shallow root system. For best results, water by hand with a hose or use a drip system to keep the foliage as dry as possible. If you use a sprinkler, water early in the day so the foliage has time to dry before evening. Soggy soil and damp foliage place the plant at risk of rot and fungal diseases.
Spread 1 to 2 inches (2.5 to 5 cm) of mulch around the plants in the spring. An organic mulch such as shredded leaves or dry grass clippings keeps the roots cool, conserves moisture and prevents the growth of weeds.
Apply a balanced liquid or granular fertilizer if newly emerging foliage has a yellowish appearance. Use the fertilizer in accordance with label recommendations. As a general rule, Poppies require no supplemental fertilization if granular fertilizer or compost are incorporated into the soil at planting time.
Pinch off flowers as soon as they begin to fade. This process, called deadheading, prevents the plants from setting seed too early. Remove the bloom, along with the stem, down to the next leaf.
Remove all seedpods at the end of the season if you don’t want the Poppy to self-seed. If you want Poppies next spring, allow a few pods to remain on the plants.

Easily grown by seed, Corn Poppies are often planted by state highway departments for spectacular displays of color along roadsides across the nation. Corn Poppies are beautiful as cut flowers and the dried seed pops add interest to dry floral arrangements.

Growing Conditions and General Cultivation
Plant Corn Poppy seeds directly on top of cultivated soil. In mild climates, plant the seeds in late fall or early spring when soil temperatures are between 60 and 70 ºF (15 and 21 ºC). Corn Poppies thrive in full sunlight and rich, well-drained soil. If the soil is poor, incorporate 2 to 3 inches (5 to 7.5 cm) of compost or manure prior to planting.

Water Corn Poppies when the top of the soil feels dry. Saturate the root zone thoroughly, as shallow waterings promote a shallow root system. For best results, water by hand with a hose or use a drip system to keep the foliage as dry as possible. If you use a sprinkler, water early in the day so the foliage has time to dry before evening. Soggy soil and damp foliage place the plant at risk of rot and fungal diseases.
Spread 1 to 2 inches (2.5 to 5 cm) of mulch around the plants in the spring. An organic mulch such as shredded leaves or dry grass clippings keeps the roots cool, conserves moisture and prevents the growth of weeds.

Apply a balanced liquid or granular fertilizer if newly emerging foliage has a yellowish appearance. Use the fertilizer in accordance with label recommendations. As a general rule, Poppies require no supplemental fertilization if granular fertilizer or compost are incorporated into the soil at planting time.
Pinch off flowers as soon as they begin to fade. This process, called deadheading, prevents the plants from setting seed too early. Remove the bloom, along with the stem, down to the next leaf.

Remove all seedpods at the end of the season if you don’t want the Poppy to self-seed. If you want Poppies next spring, allow a few pods to remain on the plants.
0
0
文章
权问薇
2017年09月28日

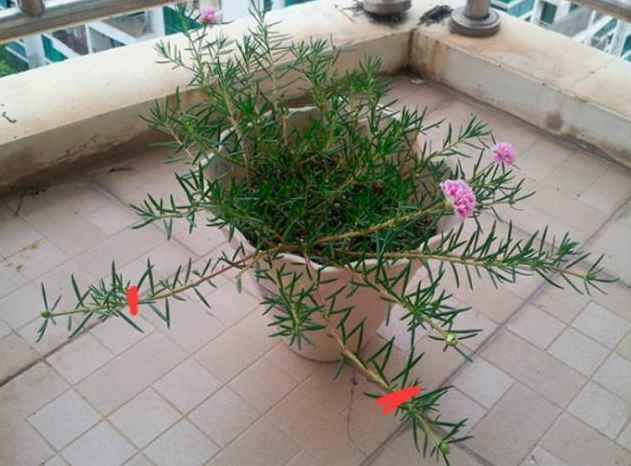
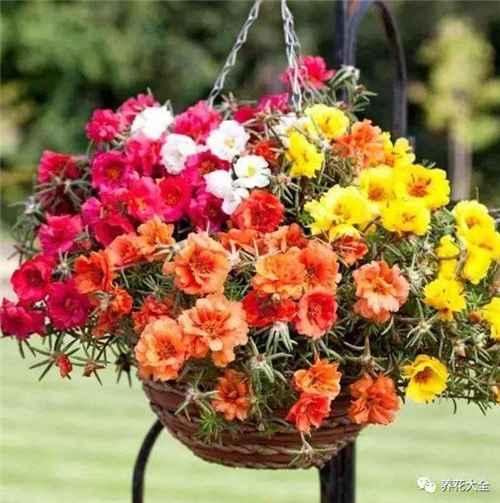
#松叶牡丹
1、剪取10cm左右枝条,要选择比较健壮的那种。
2、准备好干净的珍珠岩,没有的话,也可以用蛭石、河沙等颗粒土进行代替。用水打湿。
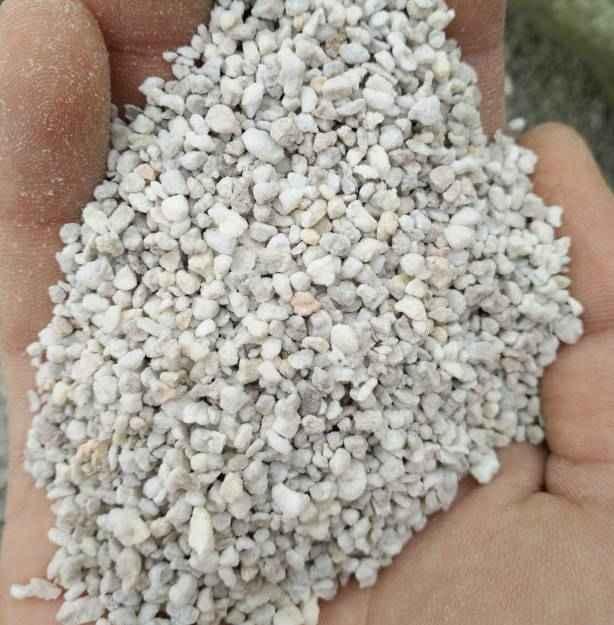
3、把插条先放在阴凉的地方1~2天的时间,进行阴干。
4、把插进珍珠岩中,浇透水,这几天保持湿润。
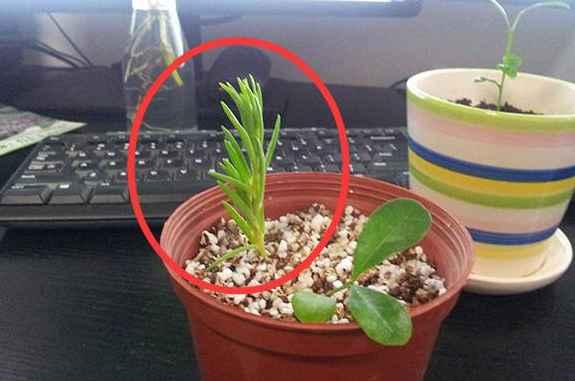
5、大约2~3天,就能看见茎上冒出来白白的小东西,这就是正式生根了~等根系长地更加健壮一些之后,就可以移栽了~
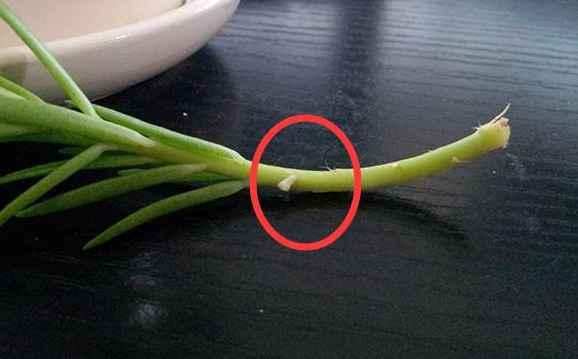
6、移栽之后,先放在阴凉通风的地方缓上2~3天的时间,之后再拿出去露养就好~
长春花
1、选取长春花顶部嫩芽,去掉花朵以及最底部的叶子,将枝条放在多菌灵溶液中进行消毒,然后阴干即可。
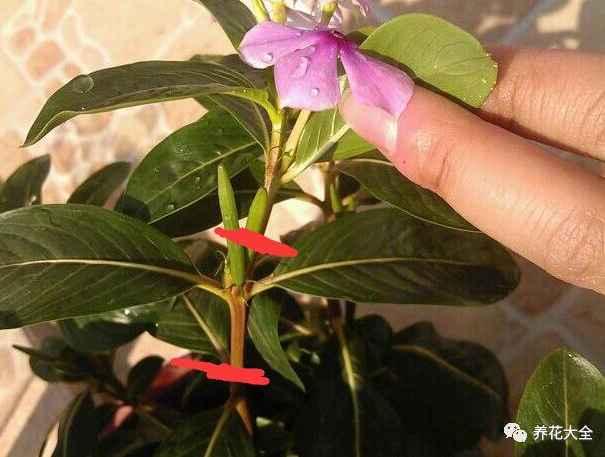
2、准备好几个瓶子,然后按照比瓶口大一圈的大小,用纸壳剪出来几个圆板,在圆板的中间戳个洞,能把长春花的枝条插进去即可。

3、把长春花的枝条顺着洞插进去,瓶子里加一半的水,把纸板盖上去即可。然后放到阴凉通风的地方进行养护,一般7~10天左右就能生根哦~
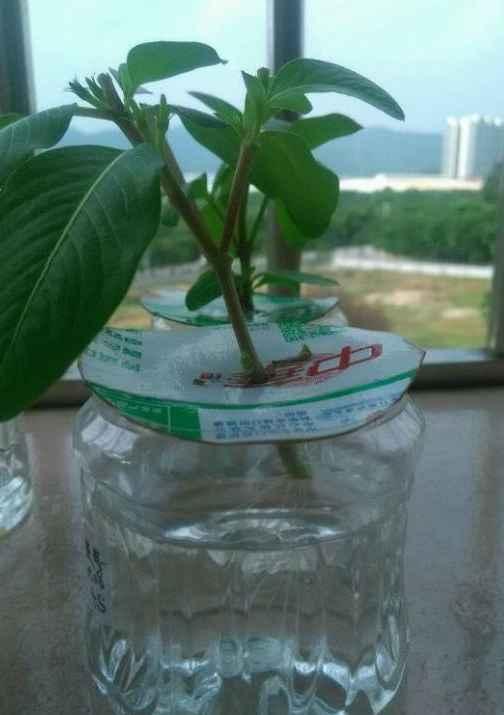
生根图
▼
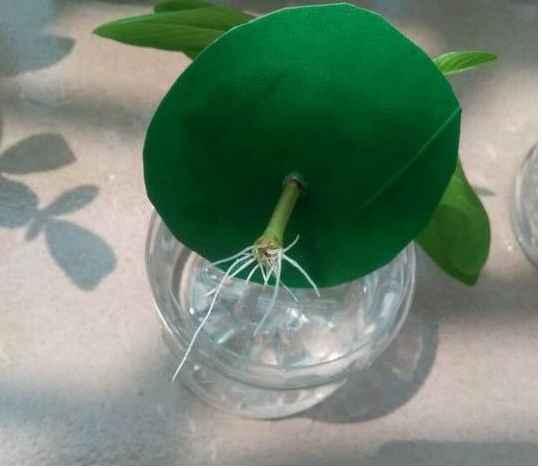
4、等移栽之后,先缓苗2~3天,之后保持土壤湿润,多晒太阳就好了~
多肉
1、将多肉拦腰剪断!
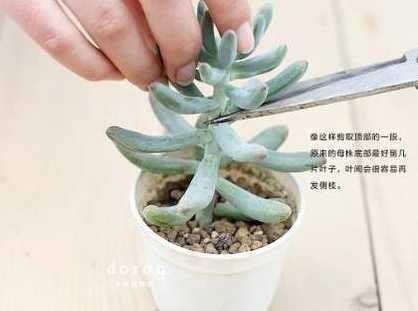
2、把多肉下面的叶子都去掉,只留最顶部的几片。然后放在阴凉的地方晾干。
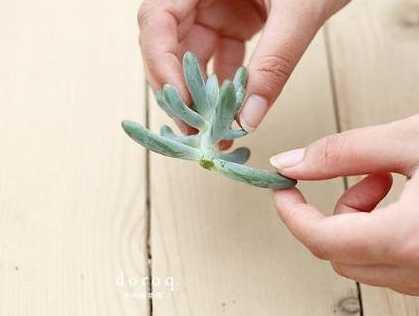
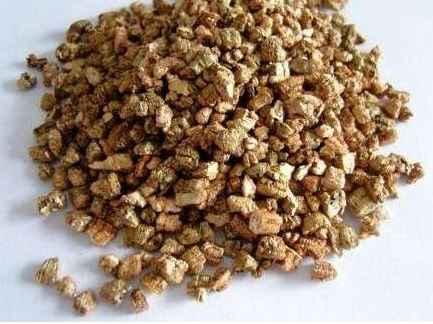
3、准备好干净的蛭石或者是珍珠岩,都没有的话,也可以用其他的颗粒土进行替代。
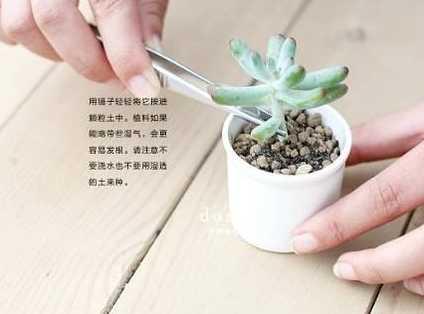
4、将多肉植物插进去即可,大约5天就能生根,注意,多肉植物在生根之前先不要浇水,干旱能够让多肉生根更快。
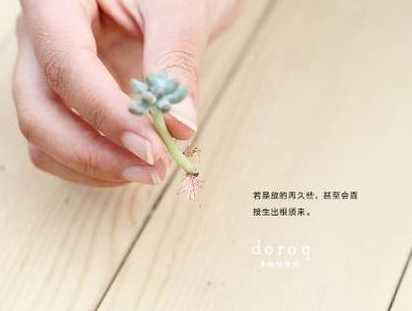
生根图
▼
5、等生根之后,就一次性浇透水,在阴处放1~2天,然后多晒太阳,浇水见干见湿即可~
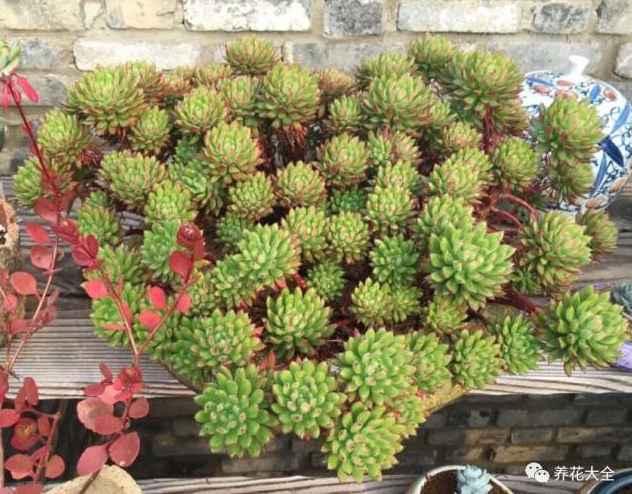
菊花
1、选取菊花顶端的嫩芽10cm左右,掐下来。
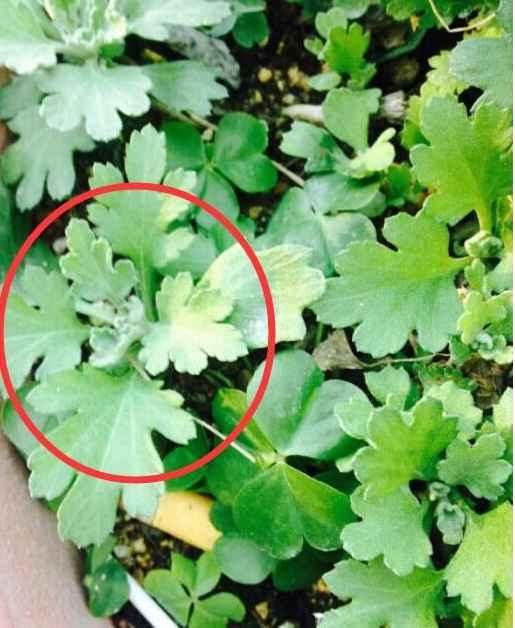
2、放在多菌灵溶液中进行消毒,然后阴干。
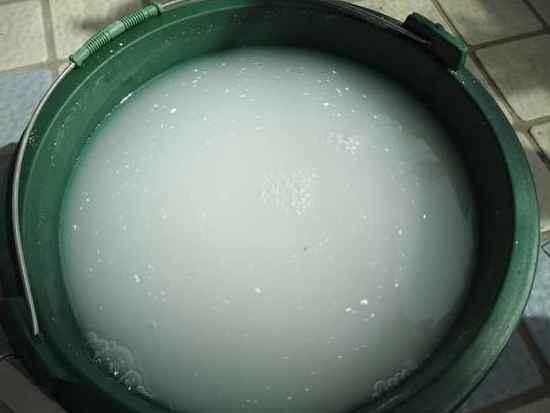
3、准备好干净的营养土,放进容器里,浇透水。
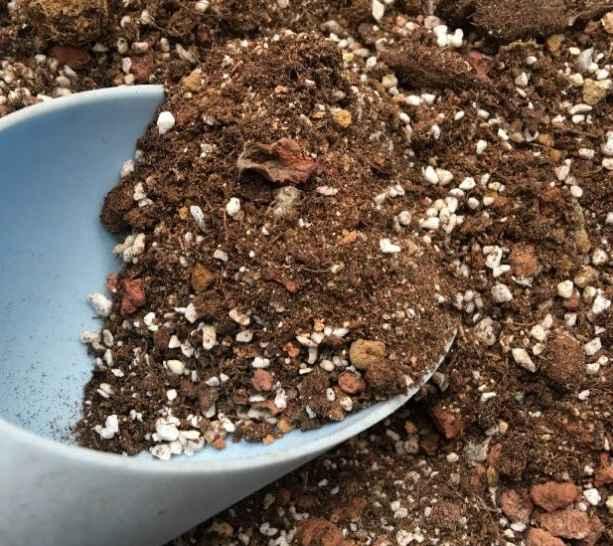
4、将枝条插进去即可,之后的一周时间都要保持土壤湿润,它才能快快长根哦~
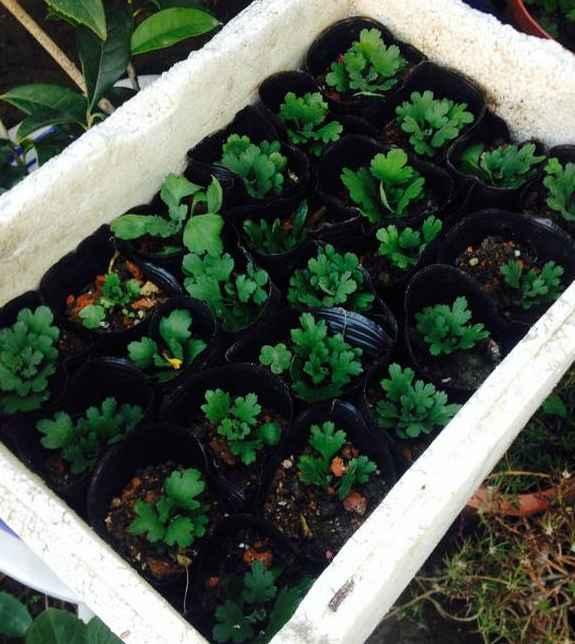
生根图
▼

5、生根之后就可以移栽啦~等缓盆之后,一定要多晒太阳,保持土壤湿润哦~这样才能开花多!

薄荷
1、选取健壮的枝条,在薄荷末端嫩枝和木质化之间选取,枝条上至少要有三个芽眼点哦~
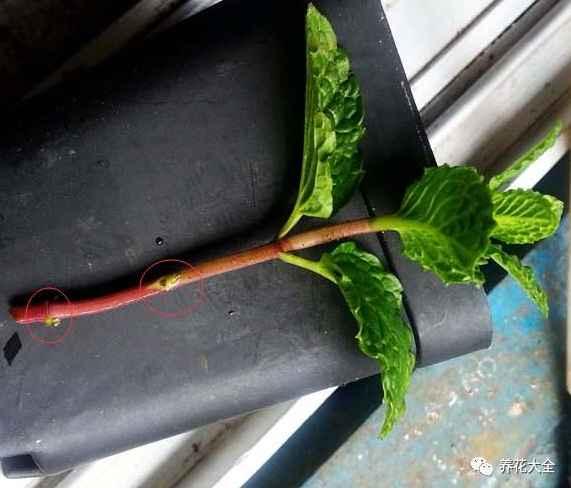
2、把薄荷底部的叶片摘除,为了减少水分的蒸发。

3、准备好干净的土壤,园土或者是营养土都是可以的哦~

4、把薄荷茎节上的芽点埋进土壤里即可。
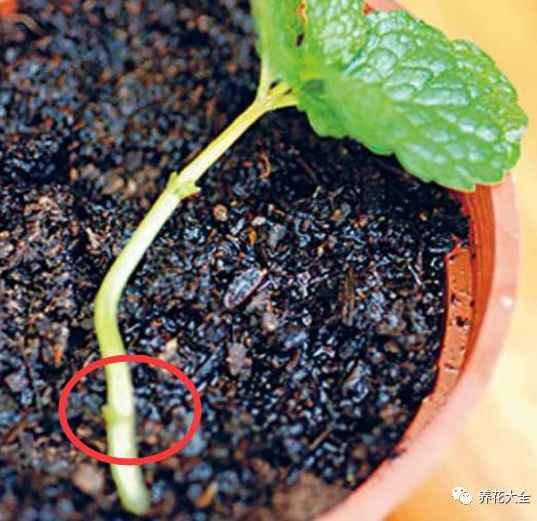
5、在种好之后,就用喷雾器把表面的土壤打湿。

6、放到阴凉通风,有散射光的地方,大约4~5天的时间,白嫩的根系就会长出来了~
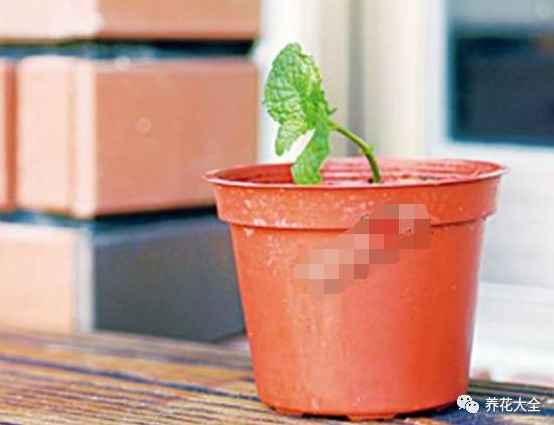
生根图
▼

7、等根系长好了以后,就要放到南阳台上进行养护,多晒太阳多通风,保持土壤湿润~

铜钱草
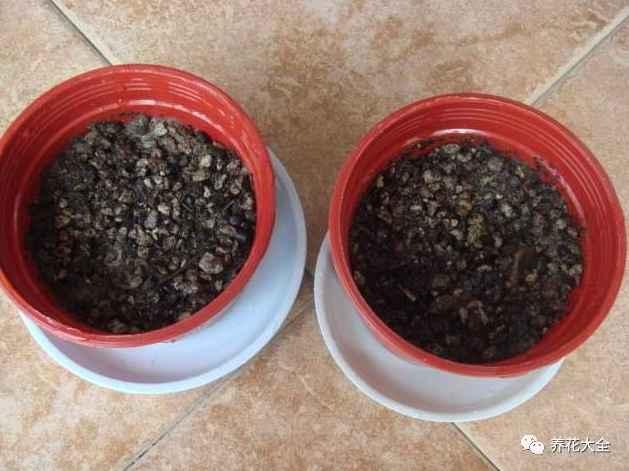
1、铜钱草真的很好活的,先找一个不透水的容器,放进去一些泥浆。
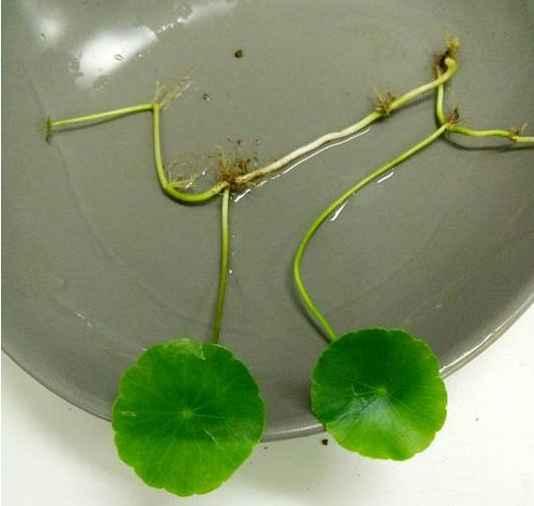
2、把选好的铜钱草从根部分开,把它的匍匐茎插进去。
3、加水,九分满的程度就可以了。

4、放在光照超级好的地方,记得及时加水就行了!3~5天的时间,铜钱草就能长出根系哦~
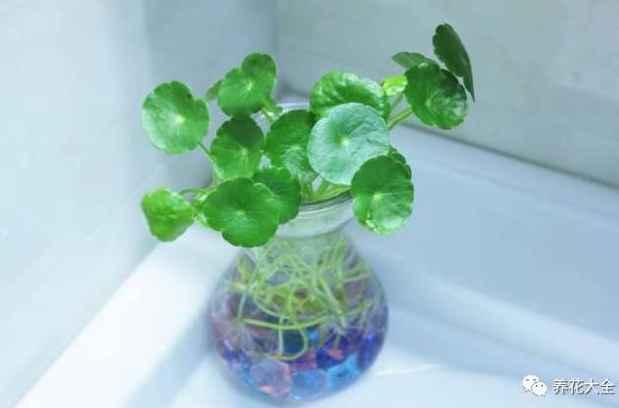
5、之后养护按照大肥大水大太阳来,很快铜钱草就能爆盆了~

百万小玲(矮牵牛)
1、选择干净的营养土,放进育苗盒里,轻轻用手压实,然后用小棍子在中间戳出来一个孔。

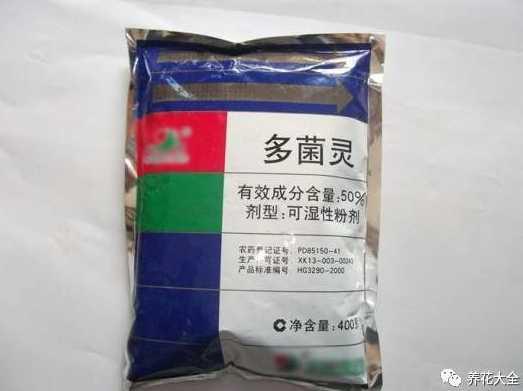
2、用兑了多菌灵的水浇透。
3、用百万小玲摘心打顶下来的芽扦插即可扦插,插条的长度控制在4~5cm之间即可。
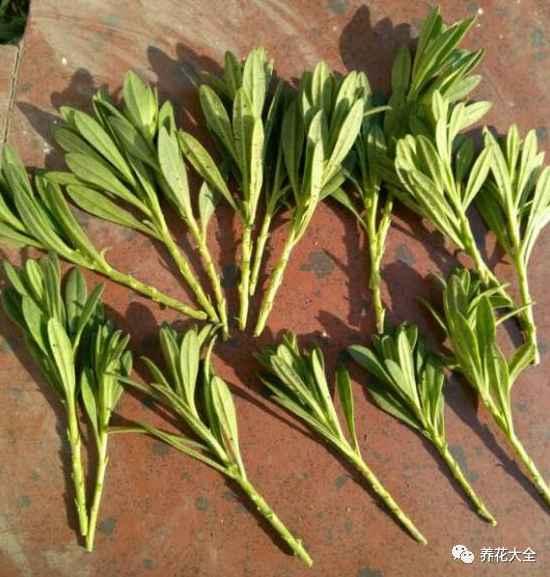
4、将插条的伤口处放在多菌灵溶液中浸泡20分钟左右,然后抹上点儿生根粉,放在阴凉通风的地方阴干。
5、把插条插进土壤里,喷水后放在阴凉通风的地方养护。
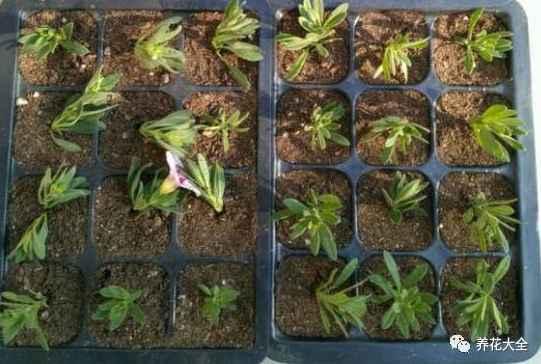
6、大概5~7天就能生根,生根之后先不要急着移栽,再等上1周左右的时间,等根系长的健壮一些之后,再移栽到花盆里去。
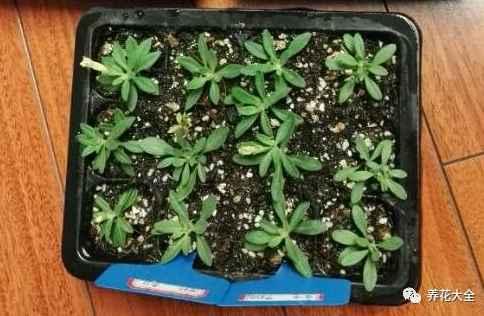
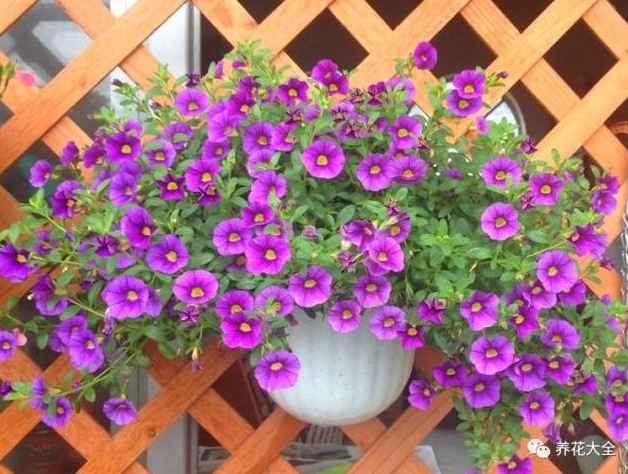
7、移栽之后,先放在阴凉通风的地方缓根2~3天,之后再放到光照良好的地方养护即可~等1个月过去,就能爆盆了~
天竺葵
1、从顶稍开始,截取长7~10厘米一段茎干即可~

2、茎干下面的叶子和小芽之类的要全都去掉。
3、将天竺葵的伤口处放在多菌灵溶液中浸泡15分钟左右进行消毒,然后放在阴凉处阴干即可。
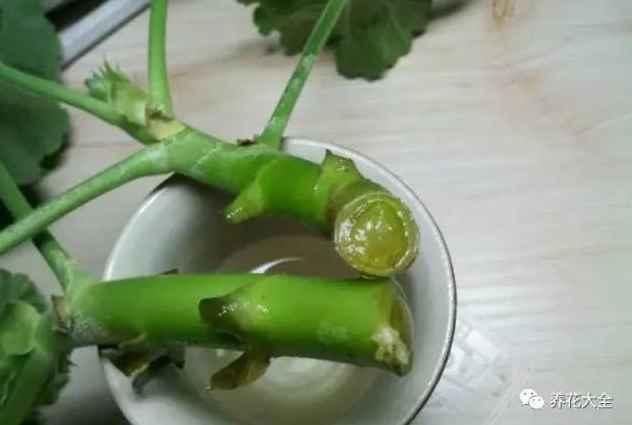
4、准备好育苗块,用水泡开,把天竺葵插入育苗块中即可。没有的话也可以使用海绵,包裹住插条伤口处的部分。

5、大约5~7天的时间,天竺葵就能生根,再等1周左右的时间,就可以上盆了。
6、上盆之后,先放到阴凉通风的地方缓根2~3天,然后再放到光照良好的地方养护即可~

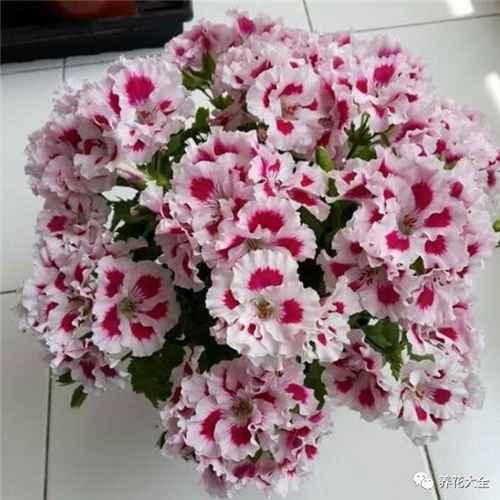
7、天竺葵日常养护要记住大肥大水大太阳这七个字哦,只有这样才能开花多!
绿萝
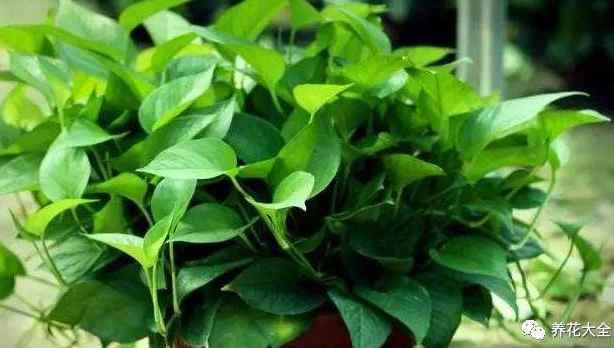
1、剪取绿萝健壮的枝条,选的时候要注意,仔细看一下是否有节点。

2、准备一个干净的容器,装上水,自来水就行~
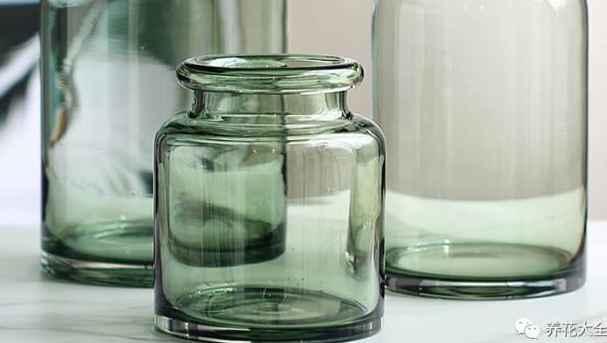
3、将绿萝枝条先放在阴凉通风的地方阴干,然后插进水里即可~

4、夏天大概1~2天的时间换一次水间。大约7天左右,绿萝就会生根了,可以接着水培哦~
必活的上盆步骤(以天竺葵为例)
很多花友扦插的花倒是生根了,但是却失败在了上盆这个步骤上,接下来,花花就介绍一个百分百成活的上盆方法。
1、准备2个杯子,一个大,一个小。
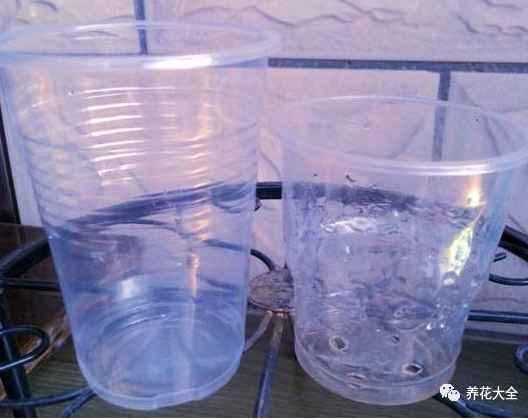
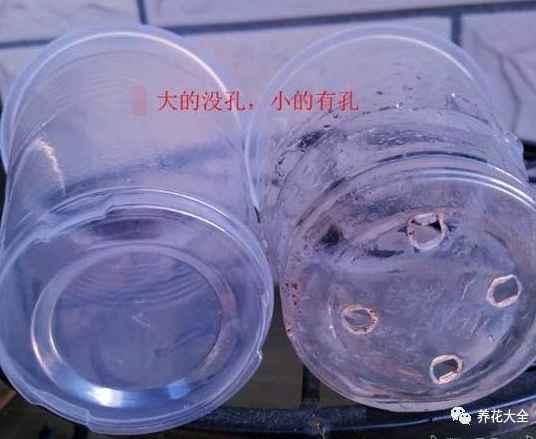
2、在比较小的那个一次性杯子的底部弄几个孔,可以用烟头烫,也可以用剪刀戳。
3、往有孔的杯子里放进去一些土壤

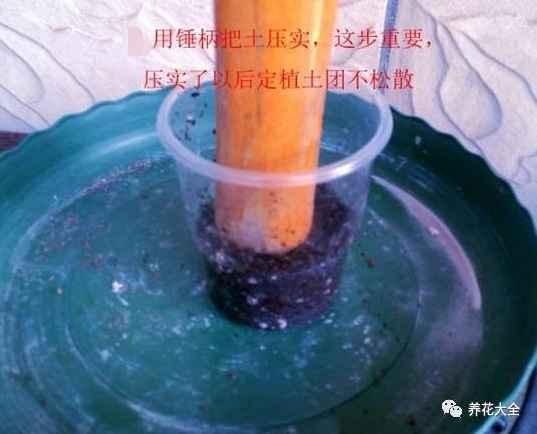
4、用锤柄或者是其他的东西,把杯子里的土壤压实。
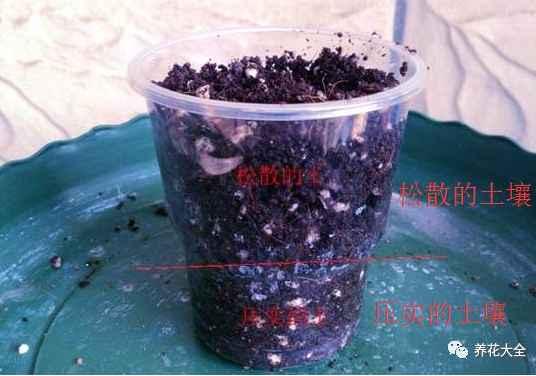
5、然后再次往小杯子里加土,这次要松散的土壤才行。
6、找个盆,装满水,把装满土的杯子放进去浸水。
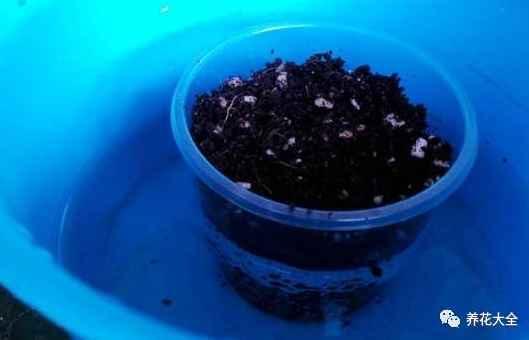
7、用高锰酸钾溶液浇透土壤,进行消毒。

8、取出来已经生根的天竺葵小苗。
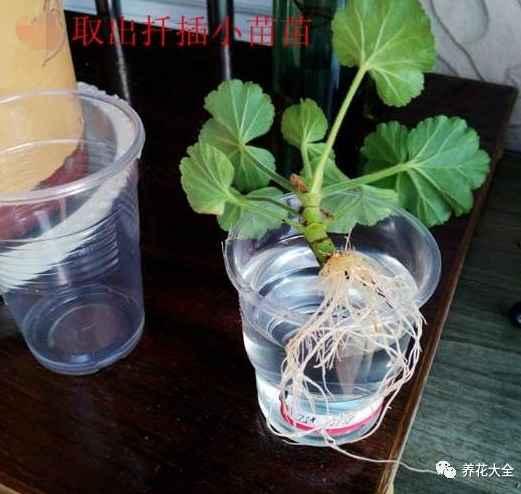
9、放进杯子里,用塑料小棍的之类的,轻轻地把天竺葵的根系都埋进土壤里。
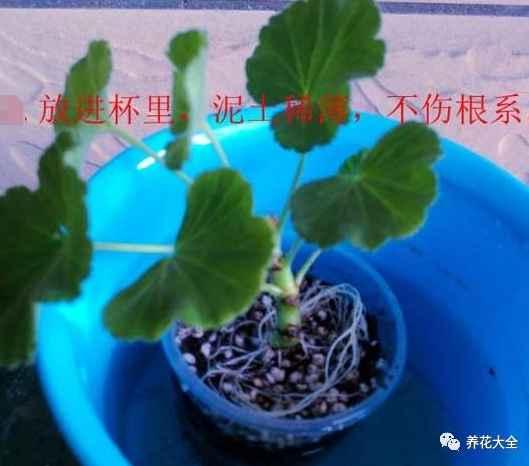
10、根系埋好之后,就把杯子拿出来,然后套进大的杯子里,悬空透水。

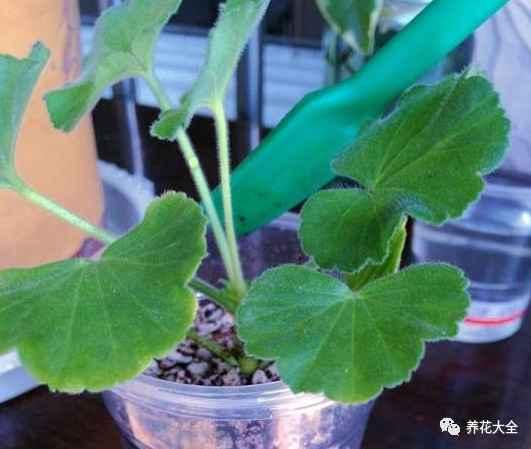
11、最后,将小杯子里的土壤稍微压实一下即可。
1、剪取10cm左右枝条,要选择比较健壮的那种。

2、准备好干净的珍珠岩,没有的话,也可以用蛭石、河沙等颗粒土进行代替。用水打湿。

3、把插条先放在阴凉的地方1~2天的时间,进行阴干。
4、把插进珍珠岩中,浇透水,这几天保持湿润。

5、大约2~3天,就能看见茎上冒出来白白的小东西,这就是正式生根了~等根系长地更加健壮一些之后,就可以移栽了~

6、移栽之后,先放在阴凉通风的地方缓上2~3天的时间,之后再拿出去露养就好~

长春花
1、选取长春花顶部嫩芽,去掉花朵以及最底部的叶子,将枝条放在多菌灵溶液中进行消毒,然后阴干即可。

2、准备好几个瓶子,然后按照比瓶口大一圈的大小,用纸壳剪出来几个圆板,在圆板的中间戳个洞,能把长春花的枝条插进去即可。

3、把长春花的枝条顺着洞插进去,瓶子里加一半的水,把纸板盖上去即可。然后放到阴凉通风的地方进行养护,一般7~10天左右就能生根哦~

生根图
▼

4、等移栽之后,先缓苗2~3天,之后保持土壤湿润,多晒太阳就好了~
多肉
1、将多肉拦腰剪断!

2、把多肉下面的叶子都去掉,只留最顶部的几片。然后放在阴凉的地方晾干。

3、准备好干净的蛭石或者是珍珠岩,都没有的话,也可以用其他的颗粒土进行替代。

4、将多肉植物插进去即可,大约5天就能生根,注意,多肉植物在生根之前先不要浇水,干旱能够让多肉生根更快。

生根图
▼

5、等生根之后,就一次性浇透水,在阴处放1~2天,然后多晒太阳,浇水见干见湿即可~

菊花
1、选取菊花顶端的嫩芽10cm左右,掐下来。

2、放在多菌灵溶液中进行消毒,然后阴干。

3、准备好干净的营养土,放进容器里,浇透水。

4、将枝条插进去即可,之后的一周时间都要保持土壤湿润,它才能快快长根哦~

生根图
▼

5、生根之后就可以移栽啦~等缓盆之后,一定要多晒太阳,保持土壤湿润哦~这样才能开花多!

薄荷
1、选取健壮的枝条,在薄荷末端嫩枝和木质化之间选取,枝条上至少要有三个芽眼点哦~

2、把薄荷底部的叶片摘除,为了减少水分的蒸发。

3、准备好干净的土壤,园土或者是营养土都是可以的哦~

4、把薄荷茎节上的芽点埋进土壤里即可。

5、在种好之后,就用喷雾器把表面的土壤打湿。

6、放到阴凉通风,有散射光的地方,大约4~5天的时间,白嫩的根系就会长出来了~

生根图
▼

7、等根系长好了以后,就要放到南阳台上进行养护,多晒太阳多通风,保持土壤湿润~

铜钱草
1、铜钱草真的很好活的,先找一个不透水的容器,放进去一些泥浆。

2、把选好的铜钱草从根部分开,把它的匍匐茎插进去。

3、加水,九分满的程度就可以了。

4、放在光照超级好的地方,记得及时加水就行了!3~5天的时间,铜钱草就能长出根系哦~

5、之后养护按照大肥大水大太阳来,很快铜钱草就能爆盆了~

百万小玲(矮牵牛)
1、选择干净的营养土,放进育苗盒里,轻轻用手压实,然后用小棍子在中间戳出来一个孔。

2、用兑了多菌灵的水浇透。

3、用百万小玲摘心打顶下来的芽扦插即可扦插,插条的长度控制在4~5cm之间即可。

4、将插条的伤口处放在多菌灵溶液中浸泡20分钟左右,然后抹上点儿生根粉,放在阴凉通风的地方阴干。
5、把插条插进土壤里,喷水后放在阴凉通风的地方养护。

6、大概5~7天就能生根,生根之后先不要急着移栽,再等上1周左右的时间,等根系长的健壮一些之后,再移栽到花盆里去。

7、移栽之后,先放在阴凉通风的地方缓根2~3天,之后再放到光照良好的地方养护即可~等1个月过去,就能爆盆了~

天竺葵
1、从顶稍开始,截取长7~10厘米一段茎干即可~

2、茎干下面的叶子和小芽之类的要全都去掉。
3、将天竺葵的伤口处放在多菌灵溶液中浸泡15分钟左右进行消毒,然后放在阴凉处阴干即可。

4、准备好育苗块,用水泡开,把天竺葵插入育苗块中即可。没有的话也可以使用海绵,包裹住插条伤口处的部分。

5、大约5~7天的时间,天竺葵就能生根,再等1周左右的时间,就可以上盆了。
6、上盆之后,先放到阴凉通风的地方缓根2~3天,然后再放到光照良好的地方养护即可~

7、天竺葵日常养护要记住大肥大水大太阳这七个字哦,只有这样才能开花多!

绿萝
1、剪取绿萝健壮的枝条,选的时候要注意,仔细看一下是否有节点。

2、准备一个干净的容器,装上水,自来水就行~

3、将绿萝枝条先放在阴凉通风的地方阴干,然后插进水里即可~

4、夏天大概1~2天的时间换一次水间。大约7天左右,绿萝就会生根了,可以接着水培哦~

必活的上盆步骤(以天竺葵为例)
很多花友扦插的花倒是生根了,但是却失败在了上盆这个步骤上,接下来,花花就介绍一个百分百成活的上盆方法。
1、准备2个杯子,一个大,一个小。

2、在比较小的那个一次性杯子的底部弄几个孔,可以用烟头烫,也可以用剪刀戳。

3、往有孔的杯子里放进去一些土壤

4、用锤柄或者是其他的东西,把杯子里的土壤压实。

5、然后再次往小杯子里加土,这次要松散的土壤才行。

6、找个盆,装满水,把装满土的杯子放进去浸水。

7、用高锰酸钾溶液浇透土壤,进行消毒。

8、取出来已经生根的天竺葵小苗。

9、放进杯子里,用塑料小棍的之类的,轻轻地把天竺葵的根系都埋进土壤里。

10、根系埋好之后,就把杯子拿出来,然后套进大的杯子里,悬空透水。

11、最后,将小杯子里的土壤稍微压实一下即可。

2
4
文章
小九
2017年09月28日

1,脱土之后的多肉更加方便运输,脱土晾根之后,#多肉 10几天都不会出问题,也死不了,但是如果潮湿的话,3天左右就会出问题,所以大部分店都会选择前者,最最保险的办法。
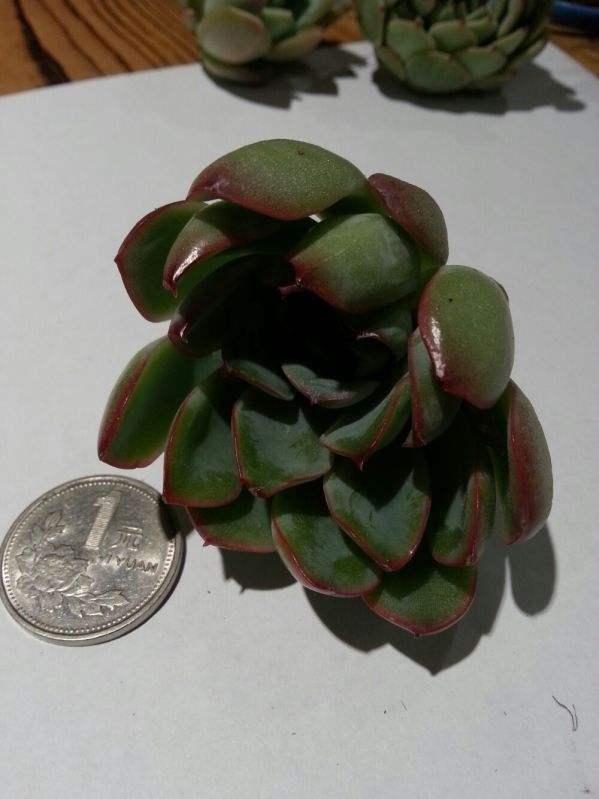
2,脱土发比较方便一点,反之带着盆带着土,发起来有一点点费劲,在运输的过程中容易出现各种问题,比方说颠簸土壤出来,多肉植物摔坏等各种问题。所以脱土发起来更加轻松一点。
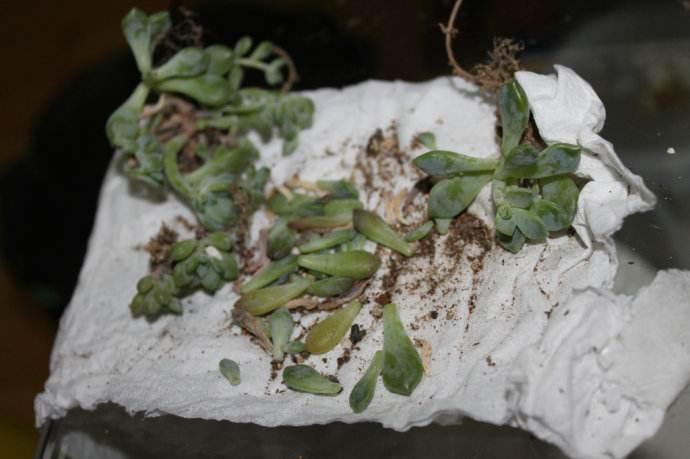
3,就是配土的问题,一般的店都会让你直接选购多肉配土,顺便增加销售。所以会选择脱土给大家发,这也很正常,毕竟多肉植物本身价格很低。
对于多肉店来说,脱土的优势有很多,降低成本,增加周边产品销售,提高安全系数,节省上盆时间,这些都是脱土的优势。所以绝大部分都是这样脱土发的。多肉植物脱土发货不一定是最优的选择,却一定是最保险、经济的选择。

2,脱土发比较方便一点,反之带着盆带着土,发起来有一点点费劲,在运输的过程中容易出现各种问题,比方说颠簸土壤出来,多肉植物摔坏等各种问题。所以脱土发起来更加轻松一点。

3,就是配土的问题,一般的店都会让你直接选购多肉配土,顺便增加销售。所以会选择脱土给大家发,这也很正常,毕竟多肉植物本身价格很低。
对于多肉店来说,脱土的优势有很多,降低成本,增加周边产品销售,提高安全系数,节省上盆时间,这些都是脱土的优势。所以绝大部分都是这样脱土发的。多肉植物脱土发货不一定是最优的选择,却一定是最保险、经济的选择。
1
0


