文章
Miss Chen
2017年09月29日

Create gorgeous displays while protecting tulip (Tulipa) bulbs from predators and the elements by growing them in containers. Tulips are perennial in U.S. Department of Agriculture plant hardiness zones 3 through 8, although they don't always come back year after year. Container-grown plants can be interspersed with other in-ground landscaping or used as a focal point in the garden or an entryway. The same technique also works for forcing tulip bulbs to bloom indoors to give a bright, spring-like flair to winter decor.
Choosing a Pot

One of the most important factors when choosing a pot is to make sure it has drainage holes in the bottom to prevent the soil from becoming waterlogged. Size is also crucial. Look for containers at least 15 inches high with a diameter of 18 inches or more. The container can be simple or ornate. Choose your favorite type of pot, whether it's made of terra cotta, stone, clay or plastic. As long as it is big enough to accommodate the bulbs, any flowerpot can work.
Choosing Bulbs

Stay with one hue or intersperse tulips with different flower colors, depending on your preference. Maximize the visual impact of blooms by planting tulip varieties that have similar bloom times such as Single Early and Fosteriana, both early bloomers. For a longer blooming season, plant varieties with staggering bloom times. For example, pair early-bloomers such as Double Early with mid-season bloomers such as Triumph and late bloomers such as Parrot and Viridiflora. If you're choosing tulips to force indoors, select shorter varieties such as Tulipa humilis, which tend to force more easily, according to the National Gardening Association. Start the forcing process in October for flowers in late December or start in late fall for flowers in mid-winter.
Planting Tulip Bulbs

Mix a general granular fertilizer, such as a 5-10-10 formula, into potting soil. Plant each bulb two to three times as deep as the bulb's height, placing them close together in a circular pattern without letting the bulbs touch. Cover the bulbs with potting mix and water the pot thoroughly. Place the pot in a protected, unheated spot such as an unheated garage to chill the bulbs while keeping them above freezing. In early spring, water the pots lightly. Move the potted tulips to their intended location once the bulbs begin sprouting above the soil's surface. Maintain even soil moisture during the growing season. If you're forcing the bulbs, plant them right below the soil's surface so you can still see the tips of the bulbs.
Forcing Tulips

To force potted tulips to flower, first chill the unplanted bulbs for six weeks in a paper bag placed in the crisper drawer of the refrigerator. Then, plant them in the pot and place it in a dark room that's approximately 55 F for one month before moving them to a warmer, sunny spot to bloom. Alternatively, place potted bulbs in a dark room for eight to 16 weeks, maintaining temperatures of 32 to 50 F. Once the bulbs start growing sprouts, move the pots into a room that has bright, indirect light and temperatures of 50 to 65 F for two weeks. Once the shoots reach heights of 2 inches, move the pot to flower in a sunny area with temperatures of approximately 68 F during the day and 60 F at night.
Choosing a Pot

One of the most important factors when choosing a pot is to make sure it has drainage holes in the bottom to prevent the soil from becoming waterlogged. Size is also crucial. Look for containers at least 15 inches high with a diameter of 18 inches or more. The container can be simple or ornate. Choose your favorite type of pot, whether it's made of terra cotta, stone, clay or plastic. As long as it is big enough to accommodate the bulbs, any flowerpot can work.
Choosing Bulbs

Stay with one hue or intersperse tulips with different flower colors, depending on your preference. Maximize the visual impact of blooms by planting tulip varieties that have similar bloom times such as Single Early and Fosteriana, both early bloomers. For a longer blooming season, plant varieties with staggering bloom times. For example, pair early-bloomers such as Double Early with mid-season bloomers such as Triumph and late bloomers such as Parrot and Viridiflora. If you're choosing tulips to force indoors, select shorter varieties such as Tulipa humilis, which tend to force more easily, according to the National Gardening Association. Start the forcing process in October for flowers in late December or start in late fall for flowers in mid-winter.
Planting Tulip Bulbs

Mix a general granular fertilizer, such as a 5-10-10 formula, into potting soil. Plant each bulb two to three times as deep as the bulb's height, placing them close together in a circular pattern without letting the bulbs touch. Cover the bulbs with potting mix and water the pot thoroughly. Place the pot in a protected, unheated spot such as an unheated garage to chill the bulbs while keeping them above freezing. In early spring, water the pots lightly. Move the potted tulips to their intended location once the bulbs begin sprouting above the soil's surface. Maintain even soil moisture during the growing season. If you're forcing the bulbs, plant them right below the soil's surface so you can still see the tips of the bulbs.
Forcing Tulips

To force potted tulips to flower, first chill the unplanted bulbs for six weeks in a paper bag placed in the crisper drawer of the refrigerator. Then, plant them in the pot and place it in a dark room that's approximately 55 F for one month before moving them to a warmer, sunny spot to bloom. Alternatively, place potted bulbs in a dark room for eight to 16 weeks, maintaining temperatures of 32 to 50 F. Once the bulbs start growing sprouts, move the pots into a room that has bright, indirect light and temperatures of 50 to 65 F for two weeks. Once the shoots reach heights of 2 inches, move the pot to flower in a sunny area with temperatures of approximately 68 F during the day and 60 F at night.
0
0
文章
Miss Chen
2017年09月29日

During the winter and early spring months many people buy or are given potted tulip plants (Tulipa spp.), which are hardy in U.S. Department of Agriculture plant hardiness zones 3 through 8. These tulips have been "forced" in nurseries, made to bloom out of season by careful manipulation of light, temperature and growing conditions. After forcing, the plant's energy, stored in the tulip bulb, is depleted. The key to successful aftercare of forced bulbs is building up the plant's energy supply once again. Forced tulips can be planted outside and will bloom again, though possibly not for a year or two.

After Bloom Care
Begin preparing potted tulips for outdoor planting as soon as the petals fade. Keep plants inside, preferably in a south- or east-facing window, at normal room temperature. Remove dead flowers, clipping the stem close to the base of the plant. Disinfect clippers before and after cutting by soaking for 5 minutes in a 50-50 solution of rubbing alcohol and water. Removing spent flowers allows the plant to put energy into the bulb, rather than seed production. Continue watering when the surface of the soil feels dry and monitor the plant's leaves. Fertilize with an all-purpose product, like 24-8-16, mixing 1/2 teaspoon per gallon of water, applied every two weeks. Do not remove the leaves until they have turned brown and brittle.
Planting in Spring
Plant the tulips outdoors any time in spring, beginning when the soil is workable. If the leaves are still green, wait until they turn brown and remove them. Choose a sunny location, preferably one that receives relatively little water in summer.
Carefully dig the bulbs out of the pot and dig a hole 8 inches deep for each bulb. Mix dirt from the holes with an equal measure of compost. Plant bulbs pointed-side up, at least 5 inches apart. Fill the holes with the amended soil, and water.
Fertilize with the same all-purpose product, using 1 tablespoon per gallon of water, applied every 14 days until the soil cools to 60 degrees Fahrenheit.

Planting in Fall
If it is not convenient to plant your tulips outdoors in the spring, you can wait until fall with an equal chance of success. After the leaves have died, remove the tulip bulbs from the soil. Place the bulbs in a brown paper bag and store in a cool, dry spot. In the fall, after the soil cools to about 60 degrees Fahrenheit, plant the tulips outdoors. Water after planting, but don't water again until after leaves appear.
Forced Tulip Considerations
Not all tulip varieties rebloom as readily as others, even with the best of care. Generally Darwin hybrids, single early and single late tulips are the best rebloomers. However, the tulips sold in pots during the winter are often not labeled as to type. Potted tulips that rebloom after being transplanted outside may bear smaller flowers than those borne in the first year inside. When planting outside, position previously potted bulbs within plantings of new tulip bulbs to ensure a good floral display even if the potted bulb never reblooms or waits until the second year after planting.

After Bloom Care
Begin preparing potted tulips for outdoor planting as soon as the petals fade. Keep plants inside, preferably in a south- or east-facing window, at normal room temperature. Remove dead flowers, clipping the stem close to the base of the plant. Disinfect clippers before and after cutting by soaking for 5 minutes in a 50-50 solution of rubbing alcohol and water. Removing spent flowers allows the plant to put energy into the bulb, rather than seed production. Continue watering when the surface of the soil feels dry and monitor the plant's leaves. Fertilize with an all-purpose product, like 24-8-16, mixing 1/2 teaspoon per gallon of water, applied every two weeks. Do not remove the leaves until they have turned brown and brittle.
Planting in Spring
Plant the tulips outdoors any time in spring, beginning when the soil is workable. If the leaves are still green, wait until they turn brown and remove them. Choose a sunny location, preferably one that receives relatively little water in summer.
Carefully dig the bulbs out of the pot and dig a hole 8 inches deep for each bulb. Mix dirt from the holes with an equal measure of compost. Plant bulbs pointed-side up, at least 5 inches apart. Fill the holes with the amended soil, and water.
Fertilize with the same all-purpose product, using 1 tablespoon per gallon of water, applied every 14 days until the soil cools to 60 degrees Fahrenheit.

Planting in Fall
If it is not convenient to plant your tulips outdoors in the spring, you can wait until fall with an equal chance of success. After the leaves have died, remove the tulip bulbs from the soil. Place the bulbs in a brown paper bag and store in a cool, dry spot. In the fall, after the soil cools to about 60 degrees Fahrenheit, plant the tulips outdoors. Water after planting, but don't water again until after leaves appear.
Forced Tulip Considerations
Not all tulip varieties rebloom as readily as others, even with the best of care. Generally Darwin hybrids, single early and single late tulips are the best rebloomers. However, the tulips sold in pots during the winter are often not labeled as to type. Potted tulips that rebloom after being transplanted outside may bear smaller flowers than those borne in the first year inside. When planting outside, position previously potted bulbs within plantings of new tulip bulbs to ensure a good floral display even if the potted bulb never reblooms or waits until the second year after planting.
0
0
文章
Miss Chen
2017年09月29日

Cool-season bulb plants, tulips (Tulipa spp.) were first discovered in eastern Turkey. Although tulips grow in U.S. Department of Agriculture plant hardiness zones 3 through 8, they don't bloom reliably in mild-winter climates unless you dig them up and refrigerate them. In regions where temperatures rarely drop below 25 degrees Fahrenheit, you'll need to chill the bulbs if you want to see flowers each year.

Prepare Bulbs for Digging
Tulips spend their energy while they're flowering, and they need to replenish this energy after their spring show. If you plan to dig, store and replant your tulip bulbs, leave them in the ground until the leaves yellow and wither. As long as the leaves are green, they're photosynthesizing -- building energy stores for the next season's flowers. Clip the spent flower off the stalk to prevent seed formation. Setting seed takes energy and weakens the bulb.
Dig and Store Tulip Bulbs
If you live in USDA zone 8 or cooler and your bulbs are planted in an area of your yard that remains relatively dry, you can leave the bulbs in the ground until June or July. If you live in a warmer climate or your soil will stay moist, dig the bulbs as soon as the leaves wither. Use a garden fork to dig under the bulbs and lift them from the ground. Separate the bulbs. Remove roots and loose soil from the bulbs and store them in a dry place with good air circulation in mesh bags or shallow wooden crates, with bulbs no more than 5 inches deep in the container. Avoid storing bulbs where temperatures exceed 90 degrees Fahrenheit.
Allow Tulips to Chill
If you live in USDA zones 8 through 10, plant tulips between early November and early January. In colder climates, plant tulips in early fall.

Count back 16 to 18 weeks before planting time for your area, and place the bulbs in ventilated bags or dry peat moss and put them in your refrigerator, an unheated building or other spot where temperatures remain between 35 and 45 F. Keep the bulbs chilled until it's time to plant.
Prepare the Bed
Fertilize the tulip bed at planting time by digging in a 2-inch layer of compost or well-rotted cow manure, or use a 10-10-10 or 10-15-10 commercial fertilizer after planting. Apply commercial fertilizer at the rate of 2 pounds per 100 square feet, or follow label instructions. Spread the fertilizer on top of the bed after planting, then water the area.
Set bulbs 6 to 8 inches deep, with the pointed end facing up. If you plan to mulch, add the mulch depth to your calculation. For example, if you plan to add 2 inches of mulch, plant the bulbs 4 to 6 inches deep. After green shoots emerge, apply a balanced, slow-release fertilizer such as 10-10-10 or 10-15-10 at the same rate you used at planting time.

Prepare Bulbs for Digging
Tulips spend their energy while they're flowering, and they need to replenish this energy after their spring show. If you plan to dig, store and replant your tulip bulbs, leave them in the ground until the leaves yellow and wither. As long as the leaves are green, they're photosynthesizing -- building energy stores for the next season's flowers. Clip the spent flower off the stalk to prevent seed formation. Setting seed takes energy and weakens the bulb.
Dig and Store Tulip Bulbs
If you live in USDA zone 8 or cooler and your bulbs are planted in an area of your yard that remains relatively dry, you can leave the bulbs in the ground until June or July. If you live in a warmer climate or your soil will stay moist, dig the bulbs as soon as the leaves wither. Use a garden fork to dig under the bulbs and lift them from the ground. Separate the bulbs. Remove roots and loose soil from the bulbs and store them in a dry place with good air circulation in mesh bags or shallow wooden crates, with bulbs no more than 5 inches deep in the container. Avoid storing bulbs where temperatures exceed 90 degrees Fahrenheit.
Allow Tulips to Chill
If you live in USDA zones 8 through 10, plant tulips between early November and early January. In colder climates, plant tulips in early fall.

Count back 16 to 18 weeks before planting time for your area, and place the bulbs in ventilated bags or dry peat moss and put them in your refrigerator, an unheated building or other spot where temperatures remain between 35 and 45 F. Keep the bulbs chilled until it's time to plant.
Prepare the Bed
Fertilize the tulip bed at planting time by digging in a 2-inch layer of compost or well-rotted cow manure, or use a 10-10-10 or 10-15-10 commercial fertilizer after planting. Apply commercial fertilizer at the rate of 2 pounds per 100 square feet, or follow label instructions. Spread the fertilizer on top of the bed after planting, then water the area.
Set bulbs 6 to 8 inches deep, with the pointed end facing up. If you plan to mulch, add the mulch depth to your calculation. For example, if you plan to add 2 inches of mulch, plant the bulbs 4 to 6 inches deep. After green shoots emerge, apply a balanced, slow-release fertilizer such as 10-10-10 or 10-15-10 at the same rate you used at planting time.
0
0
super.is1
2017年09月28日

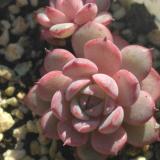
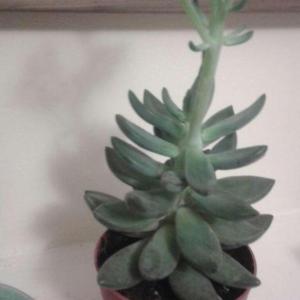
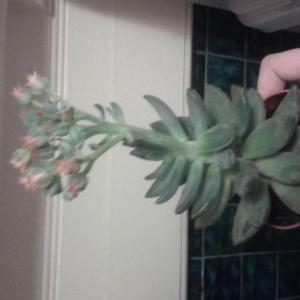
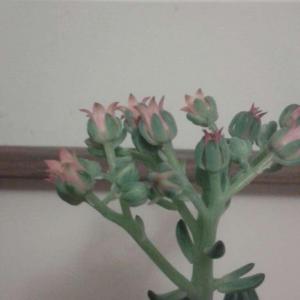
I need help identifying this succulent. I've had it for half a year and it has recently made a cluster of coral coloured bell-shaped flowers. I bought it in a set of 3 and none had tags. If you have any idea I'd love to know as I'd quite like to propagate but I don't know if pulling leaves will work :) thx


2
0
文章
权问薇
2017年09月28日

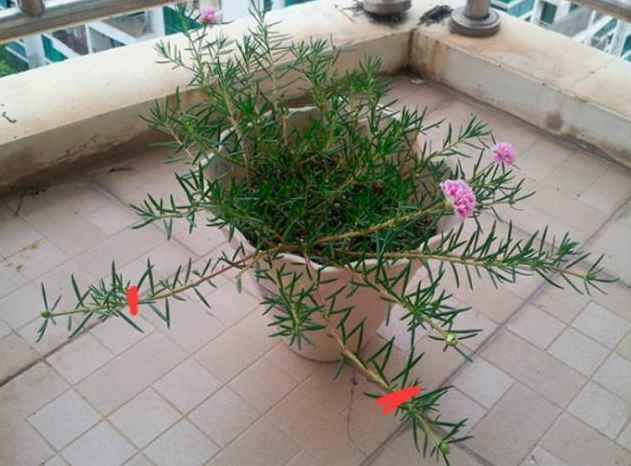
#松叶牡丹
1、剪取10cm左右枝条,要选择比较健壮的那种。
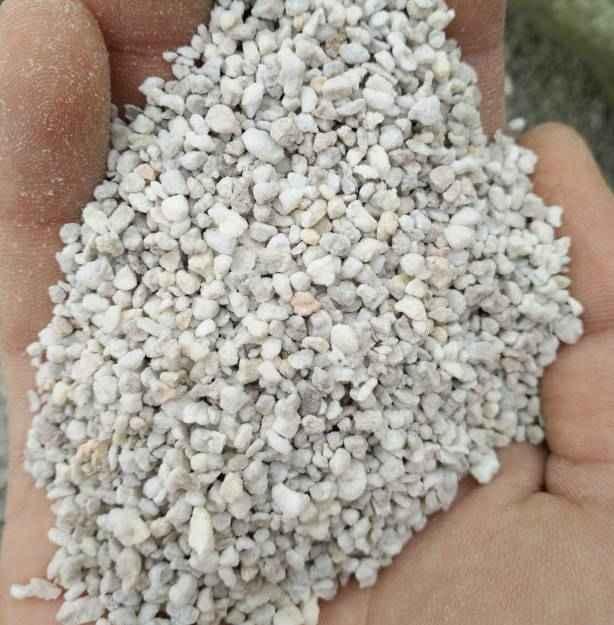
2、准备好干净的珍珠岩,没有的话,也可以用蛭石、河沙等颗粒土进行代替。用水打湿。
3、把插条先放在阴凉的地方1~2天的时间,进行阴干。
4、把插进珍珠岩中,浇透水,这几天保持湿润。
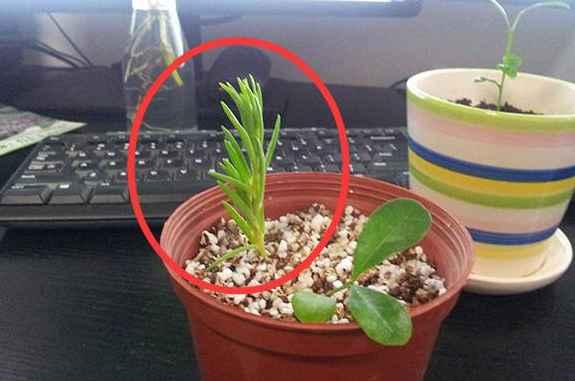
5、大约2~3天,就能看见茎上冒出来白白的小东西,这就是正式生根了~等根系长地更加健壮一些之后,就可以移栽了~
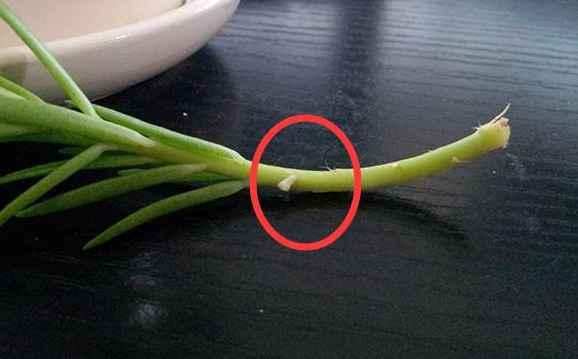
6、移栽之后,先放在阴凉通风的地方缓上2~3天的时间,之后再拿出去露养就好~

长春花
1、选取长春花顶部嫩芽,去掉花朵以及最底部的叶子,将枝条放在多菌灵溶液中进行消毒,然后阴干即可。
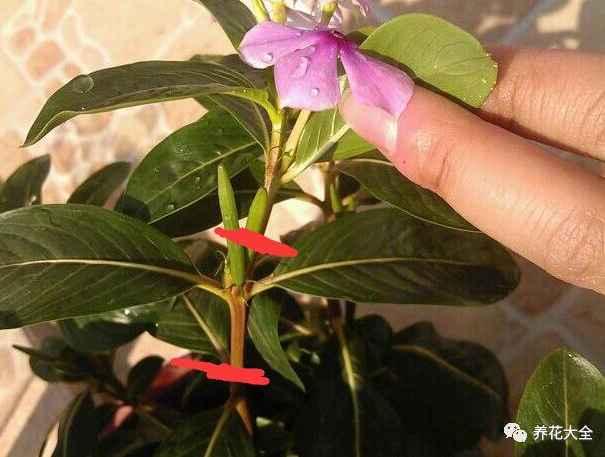
2、准备好几个瓶子,然后按照比瓶口大一圈的大小,用纸壳剪出来几个圆板,在圆板的中间戳个洞,能把长春花的枝条插进去即可。

3、把长春花的枝条顺着洞插进去,瓶子里加一半的水,把纸板盖上去即可。然后放到阴凉通风的地方进行养护,一般7~10天左右就能生根哦~
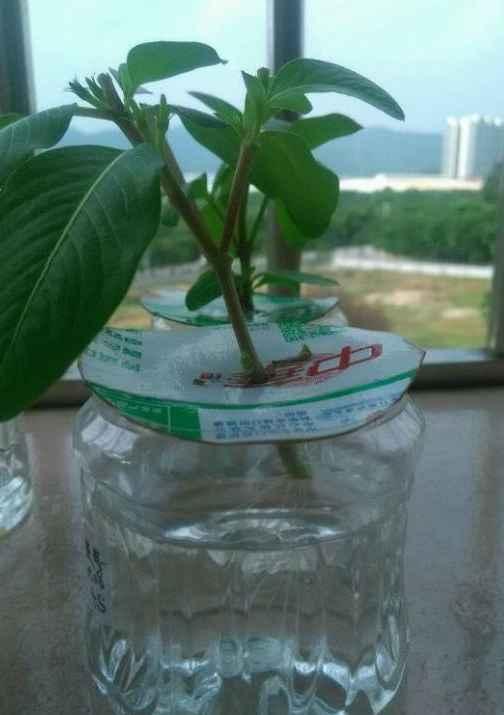
生根图
▼
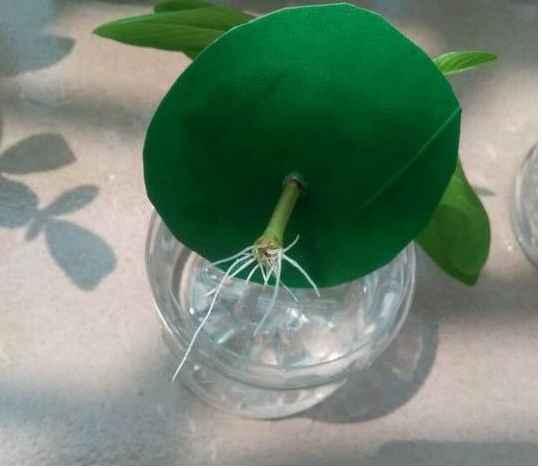
4、等移栽之后,先缓苗2~3天,之后保持土壤湿润,多晒太阳就好了~
多肉
1、将多肉拦腰剪断!
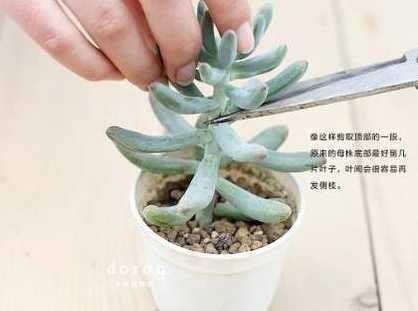
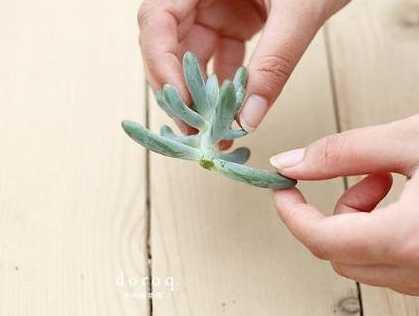
2、把多肉下面的叶子都去掉,只留最顶部的几片。然后放在阴凉的地方晾干。
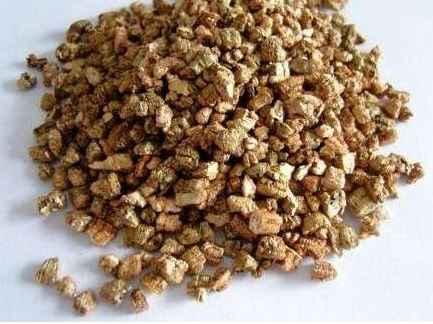
3、准备好干净的蛭石或者是珍珠岩,都没有的话,也可以用其他的颗粒土进行替代。
4、将多肉植物插进去即可,大约5天就能生根,注意,多肉植物在生根之前先不要浇水,干旱能够让多肉生根更快。
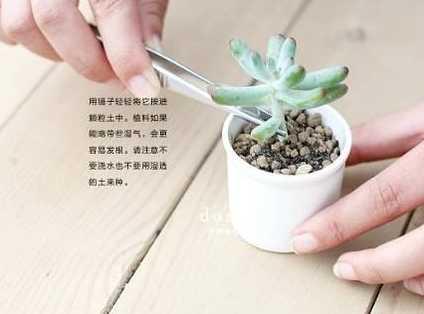
生根图
▼
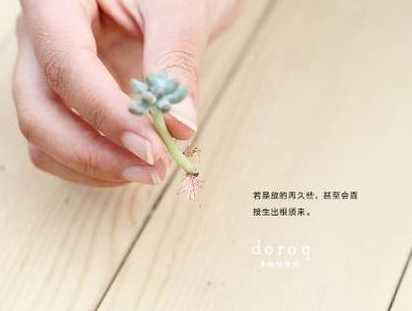
5、等生根之后,就一次性浇透水,在阴处放1~2天,然后多晒太阳,浇水见干见湿即可~
菊花
1、选取菊花顶端的嫩芽10cm左右,掐下来。
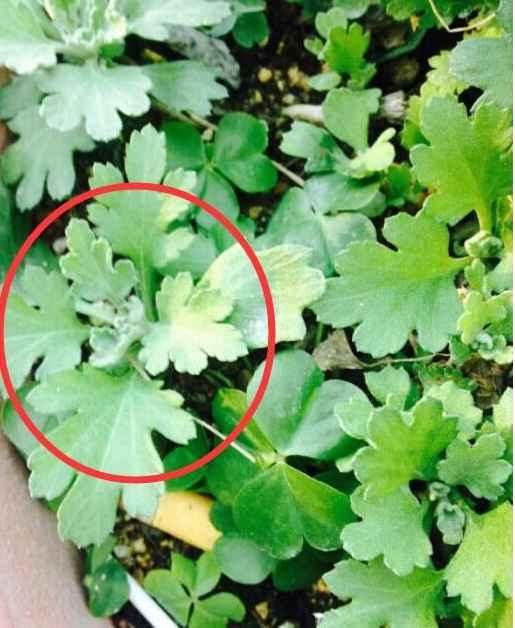
2、放在多菌灵溶液中进行消毒,然后阴干。
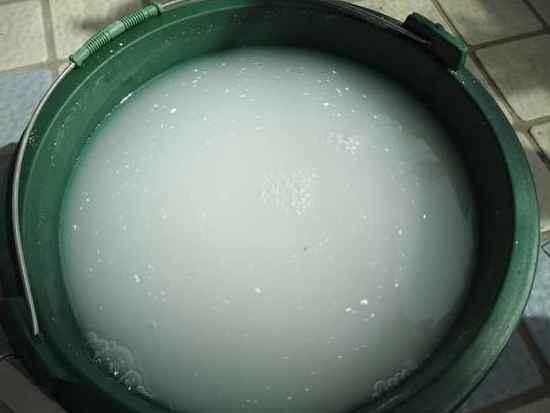
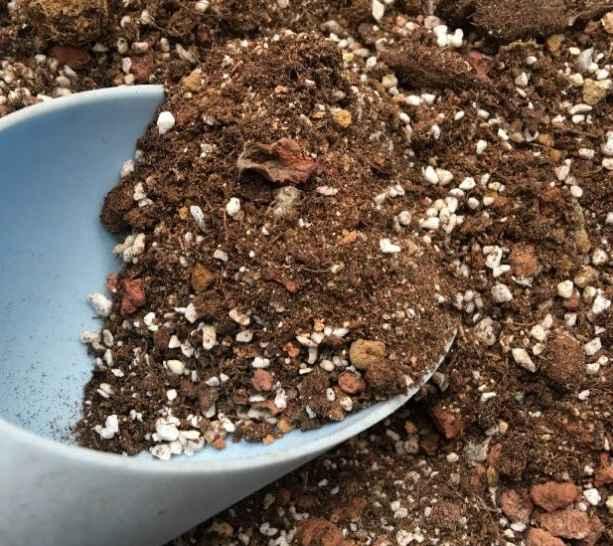
3、准备好干净的营养土,放进容器里,浇透水。
4、将枝条插进去即可,之后的一周时间都要保持土壤湿润,它才能快快长根哦~
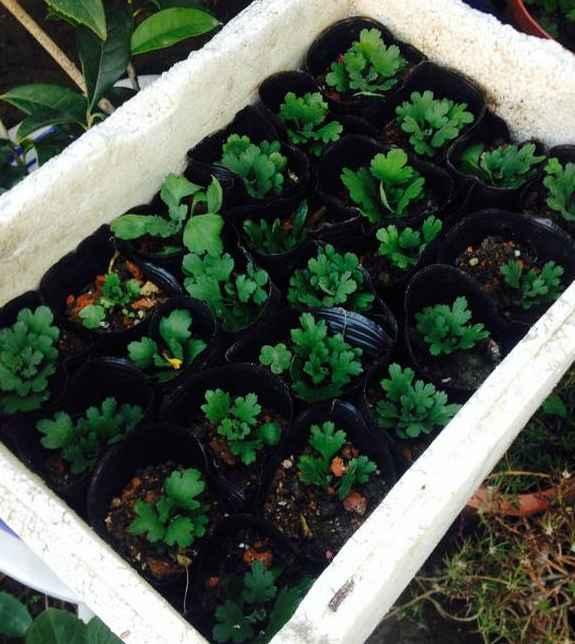
生根图
▼

5、生根之后就可以移栽啦~等缓盆之后,一定要多晒太阳,保持土壤湿润哦~这样才能开花多!

薄荷
1、选取健壮的枝条,在薄荷末端嫩枝和木质化之间选取,枝条上至少要有三个芽眼点哦~
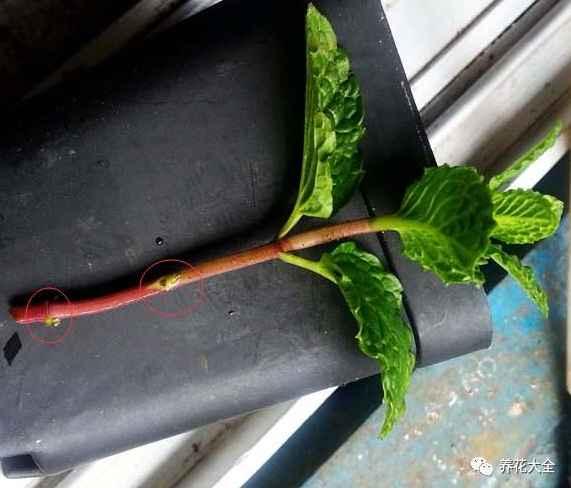
2、把薄荷底部的叶片摘除,为了减少水分的蒸发。

3、准备好干净的土壤,园土或者是营养土都是可以的哦~

4、把薄荷茎节上的芽点埋进土壤里即可。
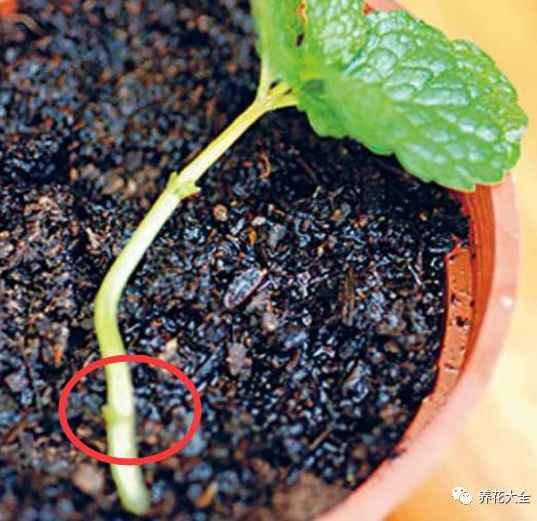
5、在种好之后,就用喷雾器把表面的土壤打湿。

6、放到阴凉通风,有散射光的地方,大约4~5天的时间,白嫩的根系就会长出来了~
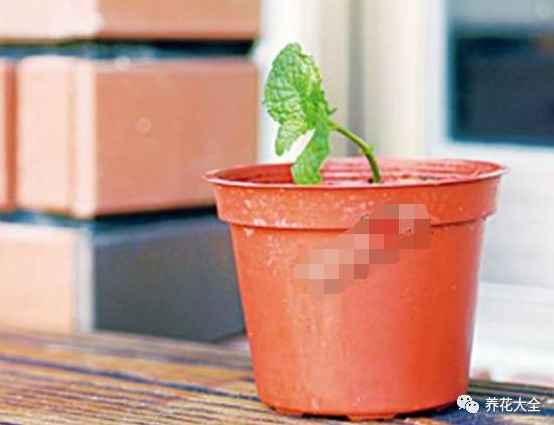
生根图
▼

7、等根系长好了以后,就要放到南阳台上进行养护,多晒太阳多通风,保持土壤湿润~

铜钱草
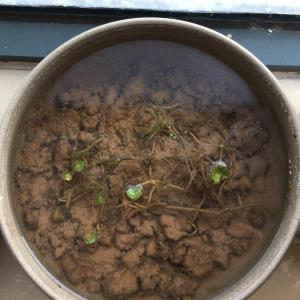
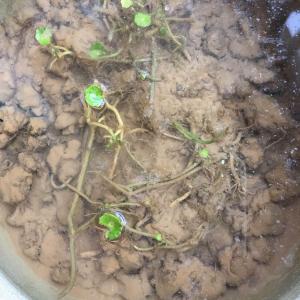
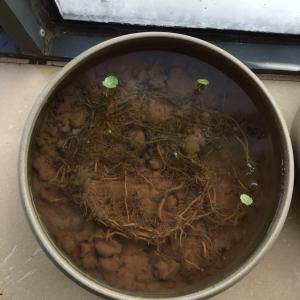
1、铜钱草真的很好活的,先找一个不透水的容器,放进去一些泥浆。
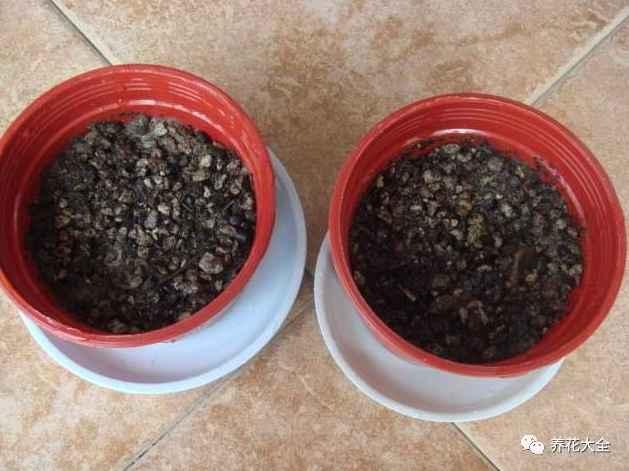
2、把选好的铜钱草从根部分开,把它的匍匐茎插进去。
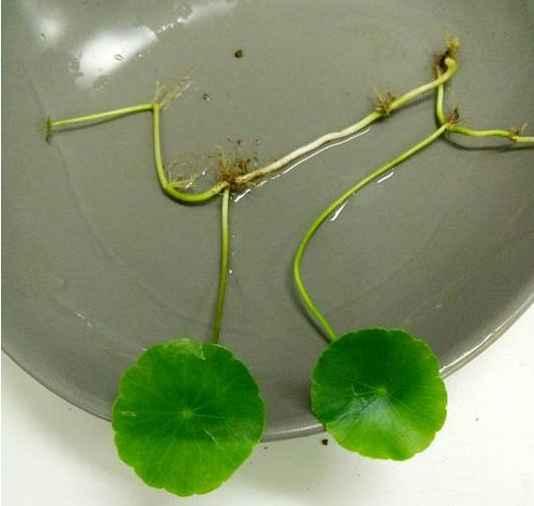
3、加水,九分满的程度就可以了。

4、放在光照超级好的地方,记得及时加水就行了!3~5天的时间,铜钱草就能长出根系哦~
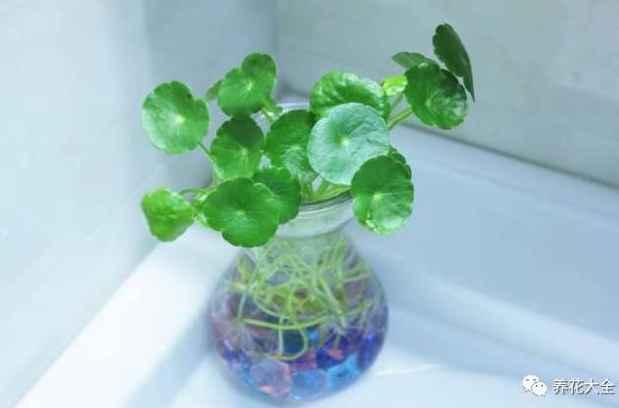
5、之后养护按照大肥大水大太阳来,很快铜钱草就能爆盆了~

百万小玲(矮牵牛)
1、选择干净的营养土,放进育苗盒里,轻轻用手压实,然后用小棍子在中间戳出来一个孔。

2、用兑了多菌灵的水浇透。

3、用百万小玲摘心打顶下来的芽扦插即可扦插,插条的长度控制在4~5cm之间即可。
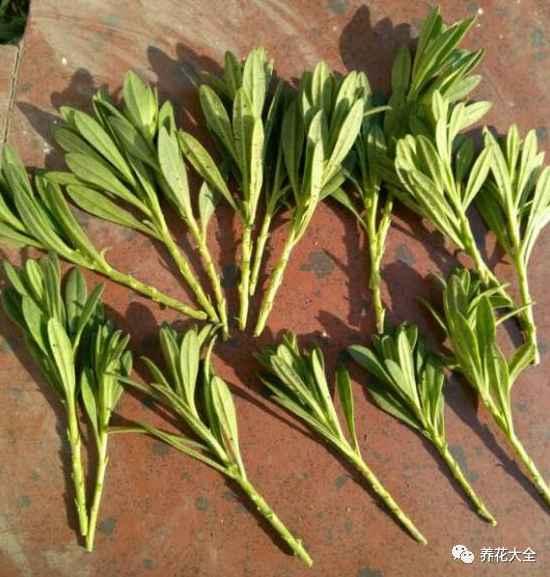
4、将插条的伤口处放在多菌灵溶液中浸泡20分钟左右,然后抹上点儿生根粉,放在阴凉通风的地方阴干。
5、把插条插进土壤里,喷水后放在阴凉通风的地方养护。
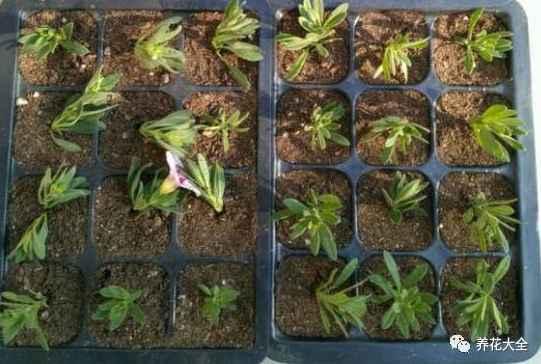
6、大概5~7天就能生根,生根之后先不要急着移栽,再等上1周左右的时间,等根系长的健壮一些之后,再移栽到花盆里去。
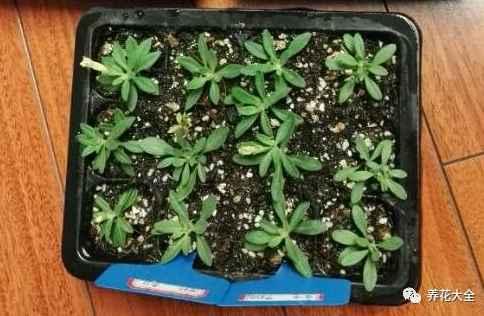
7、移栽之后,先放在阴凉通风的地方缓根2~3天,之后再放到光照良好的地方养护即可~等1个月过去,就能爆盆了~
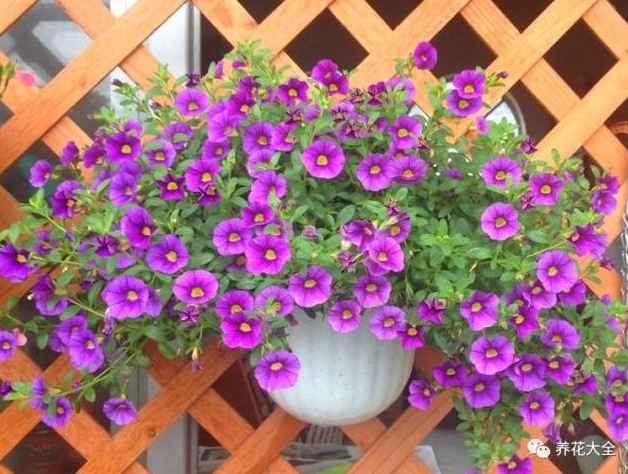
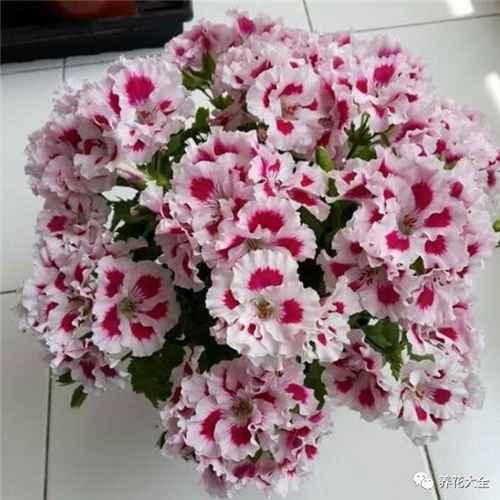
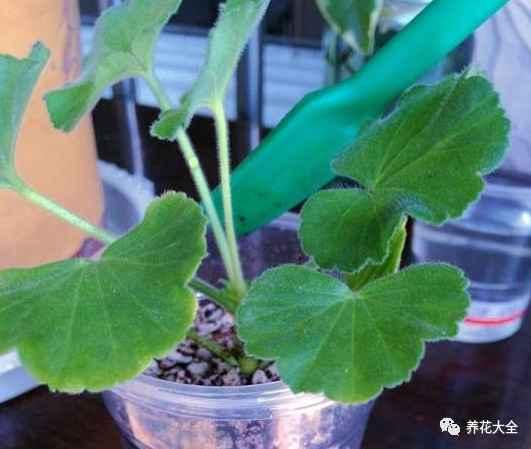
天竺葵
1、从顶稍开始,截取长7~10厘米一段茎干即可~

2、茎干下面的叶子和小芽之类的要全都去掉。
3、将天竺葵的伤口处放在多菌灵溶液中浸泡15分钟左右进行消毒,然后放在阴凉处阴干即可。
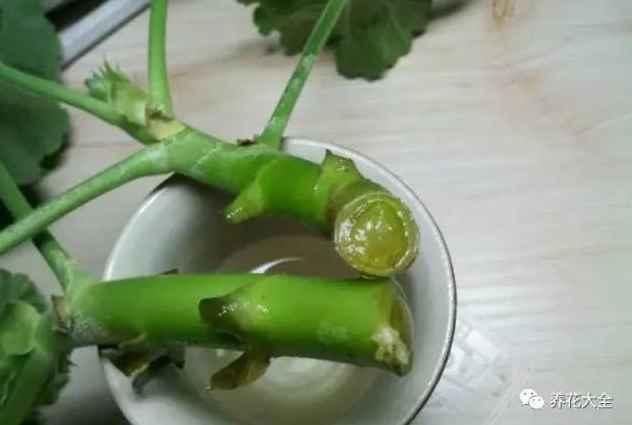
4、准备好育苗块,用水泡开,把天竺葵插入育苗块中即可。没有的话也可以使用海绵,包裹住插条伤口处的部分。

5、大约5~7天的时间,天竺葵就能生根,再等1周左右的时间,就可以上盆了。
6、上盆之后,先放到阴凉通风的地方缓根2~3天,然后再放到光照良好的地方养护即可~

7、天竺葵日常养护要记住大肥大水大太阳这七个字哦,只有这样才能开花多!
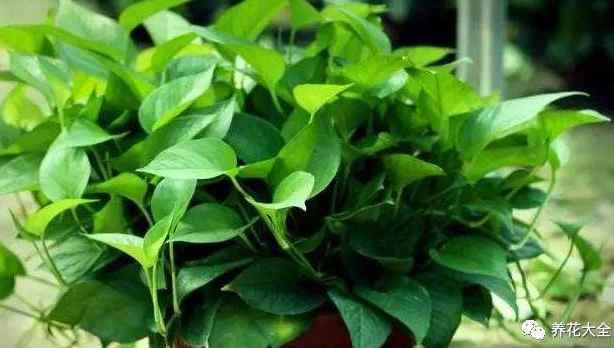
绿萝
1、剪取绿萝健壮的枝条,选的时候要注意,仔细看一下是否有节点。

2、准备一个干净的容器,装上水,自来水就行~
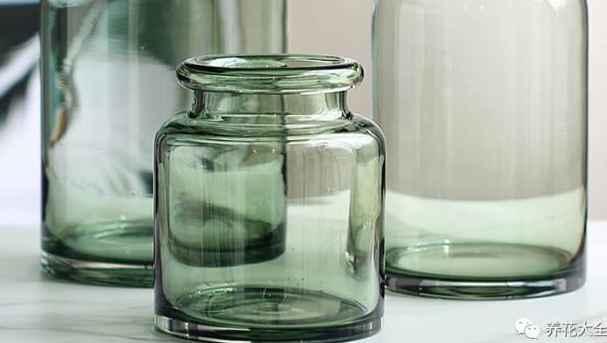
3、将绿萝枝条先放在阴凉通风的地方阴干,然后插进水里即可~

4、夏天大概1~2天的时间换一次水间。大约7天左右,绿萝就会生根了,可以接着水培哦~
必活的上盆步骤(以天竺葵为例)
很多花友扦插的花倒是生根了,但是却失败在了上盆这个步骤上,接下来,花花就介绍一个百分百成活的上盆方法。
1、准备2个杯子,一个大,一个小。
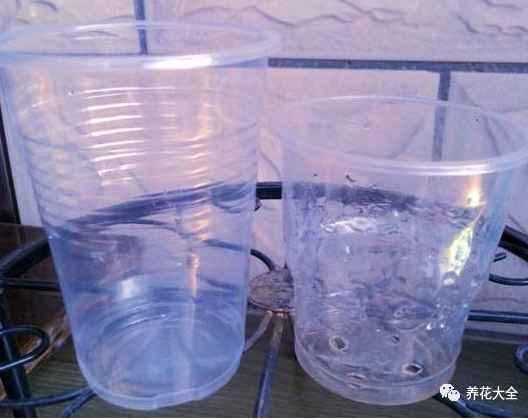
2、在比较小的那个一次性杯子的底部弄几个孔,可以用烟头烫,也可以用剪刀戳。
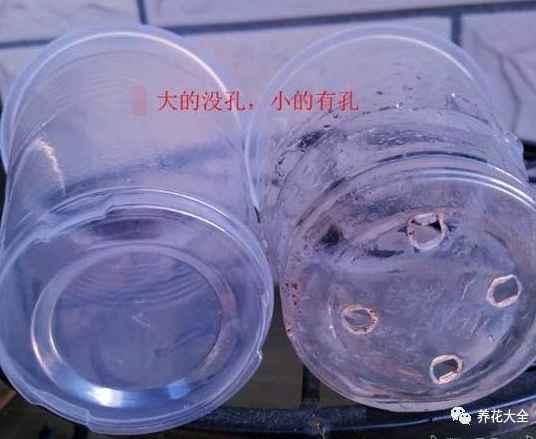
3、往有孔的杯子里放进去一些土壤

4、用锤柄或者是其他的东西,把杯子里的土壤压实。
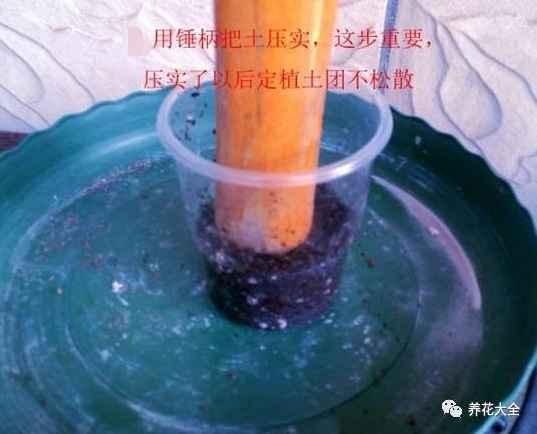
5、然后再次往小杯子里加土,这次要松散的土壤才行。
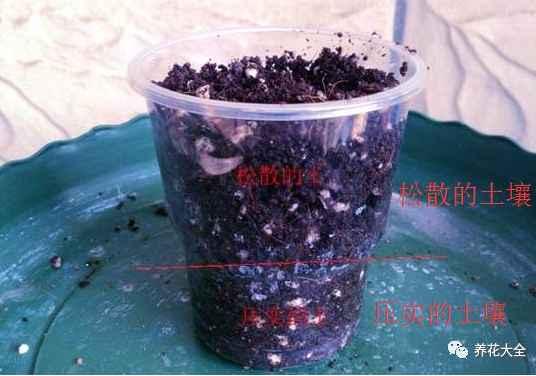
6、找个盆,装满水,把装满土的杯子放进去浸水。
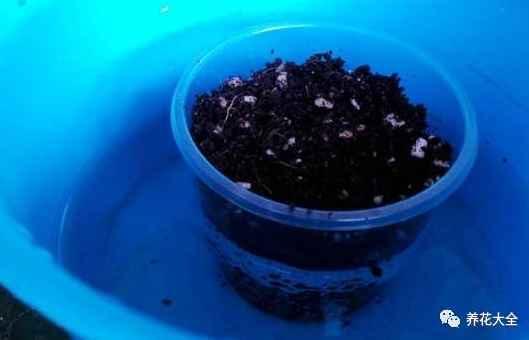
7、用高锰酸钾溶液浇透土壤,进行消毒。

8、取出来已经生根的天竺葵小苗。
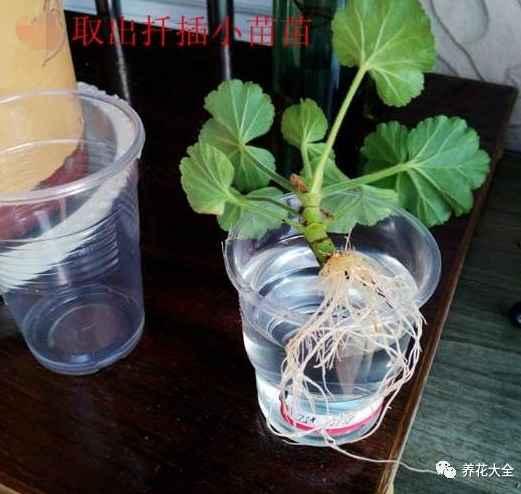
9、放进杯子里,用塑料小棍的之类的,轻轻地把天竺葵的根系都埋进土壤里。
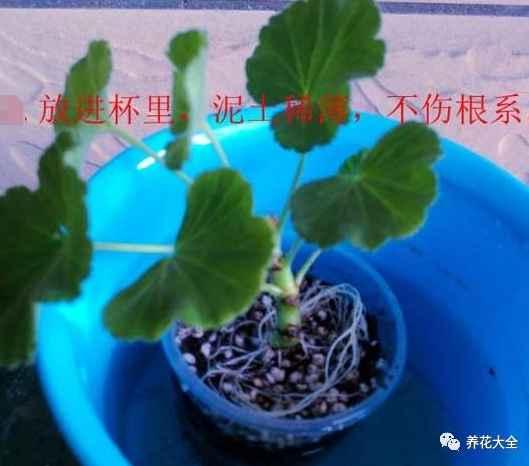
10、根系埋好之后,就把杯子拿出来,然后套进大的杯子里,悬空透水。

11、最后,将小杯子里的土壤稍微压实一下即可。
1、剪取10cm左右枝条,要选择比较健壮的那种。

2、准备好干净的珍珠岩,没有的话,也可以用蛭石、河沙等颗粒土进行代替。用水打湿。

3、把插条先放在阴凉的地方1~2天的时间,进行阴干。
4、把插进珍珠岩中,浇透水,这几天保持湿润。

5、大约2~3天,就能看见茎上冒出来白白的小东西,这就是正式生根了~等根系长地更加健壮一些之后,就可以移栽了~

6、移栽之后,先放在阴凉通风的地方缓上2~3天的时间,之后再拿出去露养就好~

长春花
1、选取长春花顶部嫩芽,去掉花朵以及最底部的叶子,将枝条放在多菌灵溶液中进行消毒,然后阴干即可。

2、准备好几个瓶子,然后按照比瓶口大一圈的大小,用纸壳剪出来几个圆板,在圆板的中间戳个洞,能把长春花的枝条插进去即可。

3、把长春花的枝条顺着洞插进去,瓶子里加一半的水,把纸板盖上去即可。然后放到阴凉通风的地方进行养护,一般7~10天左右就能生根哦~

生根图
▼

4、等移栽之后,先缓苗2~3天,之后保持土壤湿润,多晒太阳就好了~
多肉
1、将多肉拦腰剪断!

2、把多肉下面的叶子都去掉,只留最顶部的几片。然后放在阴凉的地方晾干。

3、准备好干净的蛭石或者是珍珠岩,都没有的话,也可以用其他的颗粒土进行替代。

4、将多肉植物插进去即可,大约5天就能生根,注意,多肉植物在生根之前先不要浇水,干旱能够让多肉生根更快。

生根图
▼

5、等生根之后,就一次性浇透水,在阴处放1~2天,然后多晒太阳,浇水见干见湿即可~

菊花
1、选取菊花顶端的嫩芽10cm左右,掐下来。

2、放在多菌灵溶液中进行消毒,然后阴干。

3、准备好干净的营养土,放进容器里,浇透水。

4、将枝条插进去即可,之后的一周时间都要保持土壤湿润,它才能快快长根哦~

生根图
▼

5、生根之后就可以移栽啦~等缓盆之后,一定要多晒太阳,保持土壤湿润哦~这样才能开花多!

薄荷
1、选取健壮的枝条,在薄荷末端嫩枝和木质化之间选取,枝条上至少要有三个芽眼点哦~

2、把薄荷底部的叶片摘除,为了减少水分的蒸发。

3、准备好干净的土壤,园土或者是营养土都是可以的哦~

4、把薄荷茎节上的芽点埋进土壤里即可。

5、在种好之后,就用喷雾器把表面的土壤打湿。

6、放到阴凉通风,有散射光的地方,大约4~5天的时间,白嫩的根系就会长出来了~

生根图
▼

7、等根系长好了以后,就要放到南阳台上进行养护,多晒太阳多通风,保持土壤湿润~

铜钱草
1、铜钱草真的很好活的,先找一个不透水的容器,放进去一些泥浆。

2、把选好的铜钱草从根部分开,把它的匍匐茎插进去。

3、加水,九分满的程度就可以了。

4、放在光照超级好的地方,记得及时加水就行了!3~5天的时间,铜钱草就能长出根系哦~

5、之后养护按照大肥大水大太阳来,很快铜钱草就能爆盆了~

百万小玲(矮牵牛)
1、选择干净的营养土,放进育苗盒里,轻轻用手压实,然后用小棍子在中间戳出来一个孔。

2、用兑了多菌灵的水浇透。

3、用百万小玲摘心打顶下来的芽扦插即可扦插,插条的长度控制在4~5cm之间即可。

4、将插条的伤口处放在多菌灵溶液中浸泡20分钟左右,然后抹上点儿生根粉,放在阴凉通风的地方阴干。
5、把插条插进土壤里,喷水后放在阴凉通风的地方养护。

6、大概5~7天就能生根,生根之后先不要急着移栽,再等上1周左右的时间,等根系长的健壮一些之后,再移栽到花盆里去。

7、移栽之后,先放在阴凉通风的地方缓根2~3天,之后再放到光照良好的地方养护即可~等1个月过去,就能爆盆了~

天竺葵
1、从顶稍开始,截取长7~10厘米一段茎干即可~

2、茎干下面的叶子和小芽之类的要全都去掉。
3、将天竺葵的伤口处放在多菌灵溶液中浸泡15分钟左右进行消毒,然后放在阴凉处阴干即可。

4、准备好育苗块,用水泡开,把天竺葵插入育苗块中即可。没有的话也可以使用海绵,包裹住插条伤口处的部分。

5、大约5~7天的时间,天竺葵就能生根,再等1周左右的时间,就可以上盆了。
6、上盆之后,先放到阴凉通风的地方缓根2~3天,然后再放到光照良好的地方养护即可~

7、天竺葵日常养护要记住大肥大水大太阳这七个字哦,只有这样才能开花多!

绿萝
1、剪取绿萝健壮的枝条,选的时候要注意,仔细看一下是否有节点。

2、准备一个干净的容器,装上水,自来水就行~

3、将绿萝枝条先放在阴凉通风的地方阴干,然后插进水里即可~

4、夏天大概1~2天的时间换一次水间。大约7天左右,绿萝就会生根了,可以接着水培哦~

必活的上盆步骤(以天竺葵为例)
很多花友扦插的花倒是生根了,但是却失败在了上盆这个步骤上,接下来,花花就介绍一个百分百成活的上盆方法。
1、准备2个杯子,一个大,一个小。

2、在比较小的那个一次性杯子的底部弄几个孔,可以用烟头烫,也可以用剪刀戳。

3、往有孔的杯子里放进去一些土壤

4、用锤柄或者是其他的东西,把杯子里的土壤压实。

5、然后再次往小杯子里加土,这次要松散的土壤才行。

6、找个盆,装满水,把装满土的杯子放进去浸水。

7、用高锰酸钾溶液浇透土壤,进行消毒。

8、取出来已经生根的天竺葵小苗。

9、放进杯子里,用塑料小棍的之类的,轻轻地把天竺葵的根系都埋进土壤里。

10、根系埋好之后,就把杯子拿出来,然后套进大的杯子里,悬空透水。

11、最后,将小杯子里的土壤稍微压实一下即可。

2
4
文章
我说肉肉你说萌!
2017年09月28日
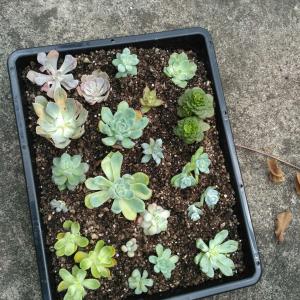
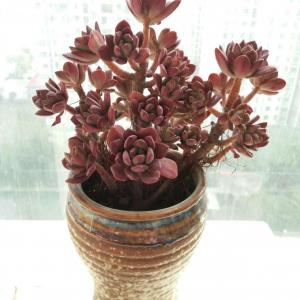
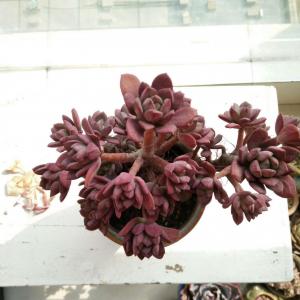
一般来说选用的盆,要比多肉的冠幅(直径),大个1-2cm,或1/3-1/4,更利于多肉长大,或群生。盆的高度可比盆宽度略高,或略矮(瓦苇系的盆可高点),通常不建议细筒高盆,不利于空气流通,也不利于把握浇水的分量。
#多肉 种下后,盆留有一定间隙,方便多肉生长,也方便自己浇水。


如果植株本身是生长较快的品种,如仙女之舞、玉蝶,选择的盆可以再大点,如植株的2-3倍宽,盆太大,浇水的时机会较难把握。不清楚长得快不快,则参考上一点,可以等长大了,再换盆。
盆过大的情况下,浇水要多用点心。


如果,不想多肉长太大,保持多肉娇小的体型,则可以用跟多肉大小差不多,或比多肉还小的盆,以达到控型的目的。
已经半木质化的老桩也没必要换更大的盆,已经长不动了。


#多肉 种下后,盆留有一定间隙,方便多肉生长,也方便自己浇水。


如果植株本身是生长较快的品种,如仙女之舞、玉蝶,选择的盆可以再大点,如植株的2-3倍宽,盆太大,浇水的时机会较难把握。不清楚长得快不快,则参考上一点,可以等长大了,再换盆。
盆过大的情况下,浇水要多用点心。


如果,不想多肉长太大,保持多肉娇小的体型,则可以用跟多肉大小差不多,或比多肉还小的盆,以达到控型的目的。
已经半木质化的老桩也没必要换更大的盆,已经长不动了。


5
3


