文章
小九
2017年09月28日

1,脱土之后的多肉更加方便运输,脱土晾根之后,#多肉 10几天都不会出问题,也死不了,但是如果潮湿的话,3天左右就会出问题,所以大部分店都会选择前者,最最保险的办法。
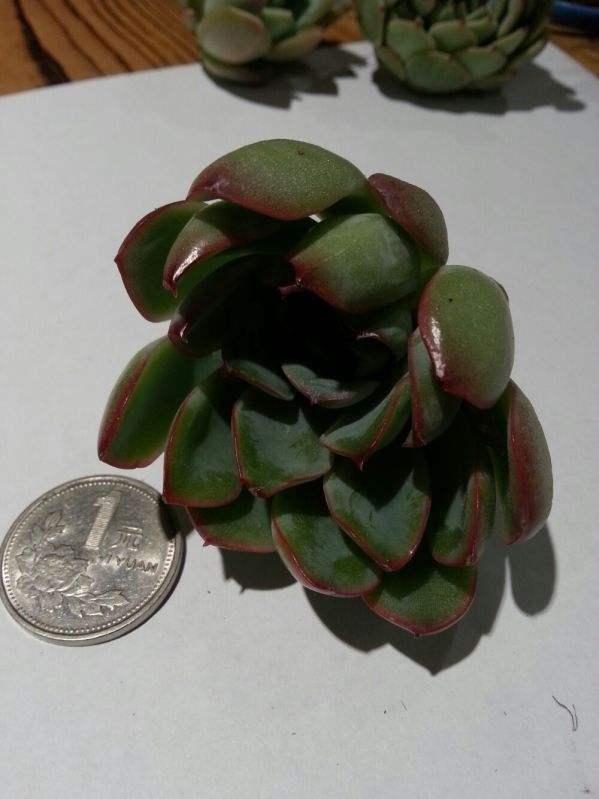
2,脱土发比较方便一点,反之带着盆带着土,发起来有一点点费劲,在运输的过程中容易出现各种问题,比方说颠簸土壤出来,多肉植物摔坏等各种问题。所以脱土发起来更加轻松一点。
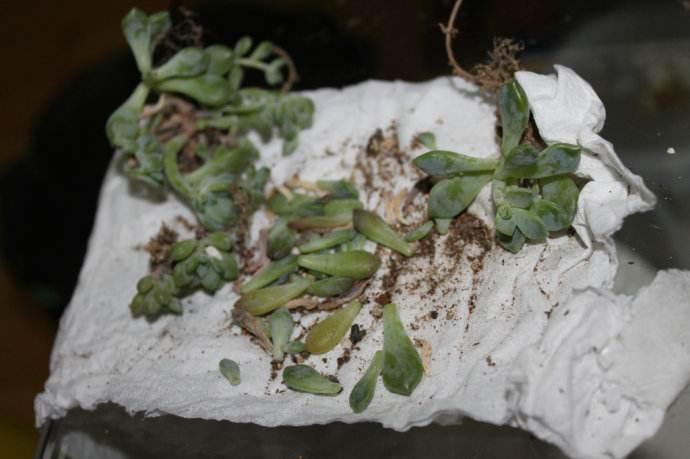
3,就是配土的问题,一般的店都会让你直接选购多肉配土,顺便增加销售。所以会选择脱土给大家发,这也很正常,毕竟多肉植物本身价格很低。
对于多肉店来说,脱土的优势有很多,降低成本,增加周边产品销售,提高安全系数,节省上盆时间,这些都是脱土的优势。所以绝大部分都是这样脱土发的。多肉植物脱土发货不一定是最优的选择,却一定是最保险、经济的选择。

2,脱土发比较方便一点,反之带着盆带着土,发起来有一点点费劲,在运输的过程中容易出现各种问题,比方说颠簸土壤出来,多肉植物摔坏等各种问题。所以脱土发起来更加轻松一点。

3,就是配土的问题,一般的店都会让你直接选购多肉配土,顺便增加销售。所以会选择脱土给大家发,这也很正常,毕竟多肉植物本身价格很低。
对于多肉店来说,脱土的优势有很多,降低成本,增加周边产品销售,提高安全系数,节省上盆时间,这些都是脱土的优势。所以绝大部分都是这样脱土发的。多肉植物脱土发货不一定是最优的选择,却一定是最保险、经济的选择。
1
0
文章
小九
2017年09月27日

秋天到了,花卉的施肥也应该因材施教,因植施肥,下面就跟大家介绍秋季常见花卉的施肥技巧!

对于一年开一次花的秋菊、桂花、山茶、杜鹃等,应及时追施2-3次以磷肥为主的液肥,否则不仅花少又小,而且还会出现落蕾现象。
对于一年开花多次的月季、米兰、茉莉、扶桑、四季秋海棠以及金橘、石榴等观果植物,除保证氮肥供应外,还应追施适量的磷钾肥,如磷酸二氢钾、过磷酸钙等。
对菊花、月季、木槿等秋季现蕾的花卉,除保留顶端一个长势良好的主蕾外,侧蕾均应及时摘除;对于长时间开花的种类,如月季、扶桑、茉莉、天竺葵等,应及时摘除已开过花的残花败梗,并修剪已开过花的枝梢,促使下部侧梢生长,以持续不断开花。对文竹、吊兰、绿萝等观叶植物,每隔半月施一次稀薄的液肥,以保持叶片青翠,提高御寒能力。
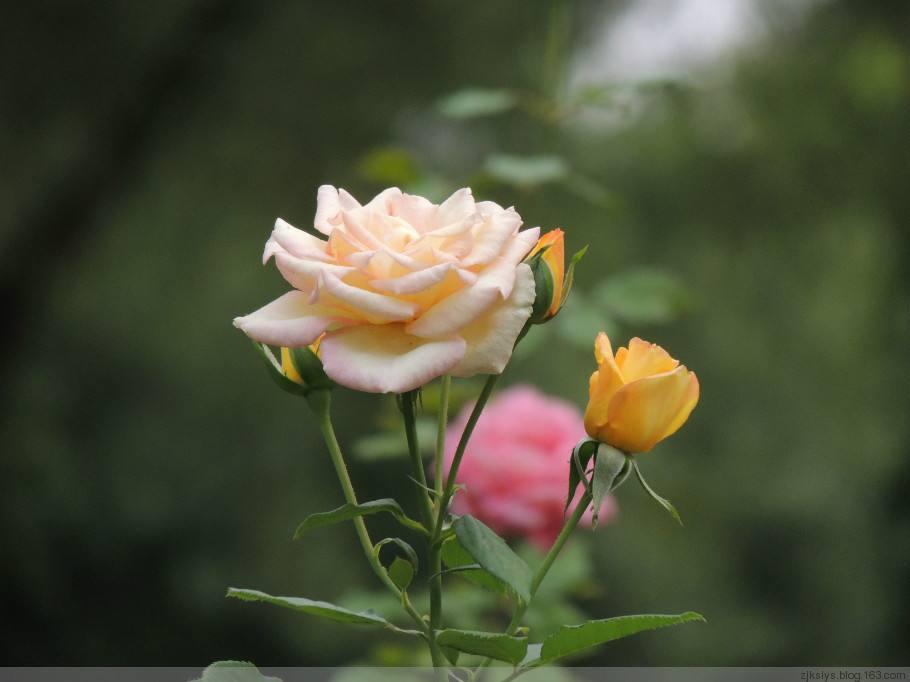
对观叶植物龟背竹、巴西木等可追施低浓度的含氮液肥,促使叶片葱郁翠绿。花卉施肥需要把握好施肥量,并且按照一定的周期进行。秋季施肥,要按照薄肥勤施的原则,每次的施肥量要少,但可以多施几次。

对于一年开一次花的秋菊、桂花、山茶、杜鹃等,应及时追施2-3次以磷肥为主的液肥,否则不仅花少又小,而且还会出现落蕾现象。
对于一年开花多次的月季、米兰、茉莉、扶桑、四季秋海棠以及金橘、石榴等观果植物,除保证氮肥供应外,还应追施适量的磷钾肥,如磷酸二氢钾、过磷酸钙等。
对菊花、月季、木槿等秋季现蕾的花卉,除保留顶端一个长势良好的主蕾外,侧蕾均应及时摘除;对于长时间开花的种类,如月季、扶桑、茉莉、天竺葵等,应及时摘除已开过花的残花败梗,并修剪已开过花的枝梢,促使下部侧梢生长,以持续不断开花。对文竹、吊兰、绿萝等观叶植物,每隔半月施一次稀薄的液肥,以保持叶片青翠,提高御寒能力。

对观叶植物龟背竹、巴西木等可追施低浓度的含氮液肥,促使叶片葱郁翠绿。花卉施肥需要把握好施肥量,并且按照一定的周期进行。秋季施肥,要按照薄肥勤施的原则,每次的施肥量要少,但可以多施几次。
2
2
文章
Dummer. ゛☀
2017年09月27日

The Rafflesia, a parasitic plant, lives only on the tetrastigma vine in the jungles of Sumatra and Borneo. It produces the world’s largest flower, which measures up to 3 feet (90 cm) across and weighs 15 pounds (6.8 kg), according to the Library of Congress. Approximately 17 species of Rafflesia exist. It produces no roots, stems or leaves.
Nutrients and Water
The Rafflesia grows within its host plant by sending out tiny threadlike filaments that twine into the very cells of the host. From the threadlike filaments the Rafflesia gains all the nutrients and water it requires for survival. Even though the Rafflesia is considered a plant it does not produce chlorophyll, which renders it incapable of receiving nutrients through photosynthesis as other plants do.
Damage and Life
The plant spends the majority of its life embedded within its host with no visible parts to the naked eye on the outer part of the plant until the Rafflesia buds and blooms. It does very little damage to the host plant despite the fact that it constantly sucks nutrients and water.
Flowering and Pollination
The Rafflesia produces a tiny bud on the host tetrastigma vine. The bud erupts near the plants roots or twining tendrils. The bud takes 12 months to swell before it blossoms. It blooms around midnight on a rainy night, according to the Oracle Education Foundation. The blossom lasts only 5 to 7 days. Flowers are either male or female and produce a pungent unpleasant aroma that many say smells similar to rotting flesh. The unpleasant smell attracts flies to help ensure pollination. The flowers appear with 5 large petals and a reddish-orange coloration. White speckling adorns each petal.
Pollination is rare because most locations contain only male flowers or female flowers. In order for pollination to occur, the fly must land on the male flower and then take the pollen to the female flower. If pollination occurs, the flower produces a globular, smooth-skinned fruit measuring up to 5 inches (13 cm) in diameter. It contains thousands of seeds. Birds and squirrels enjoy eating the fruit and help to spread the Rafflesia seeds through their eliminations.
Endanger
The Rafflesia is in serious danger of extinction as the rain forest is burned and cleared for crop production and urban growth. The buds are also harvested and sold because locals believe they have medicinal properties if consumed. The plant has never been cultivated in captivity and it only grows on the tetrastigma vine, so its survival is seriously threatened.

Nutrients and Water
The Rafflesia grows within its host plant by sending out tiny threadlike filaments that twine into the very cells of the host. From the threadlike filaments the Rafflesia gains all the nutrients and water it requires for survival. Even though the Rafflesia is considered a plant it does not produce chlorophyll, which renders it incapable of receiving nutrients through photosynthesis as other plants do.

Damage and Life
The plant spends the majority of its life embedded within its host with no visible parts to the naked eye on the outer part of the plant until the Rafflesia buds and blooms. It does very little damage to the host plant despite the fact that it constantly sucks nutrients and water.

Flowering and Pollination
The Rafflesia produces a tiny bud on the host tetrastigma vine. The bud erupts near the plants roots or twining tendrils. The bud takes 12 months to swell before it blossoms. It blooms around midnight on a rainy night, according to the Oracle Education Foundation. The blossom lasts only 5 to 7 days. Flowers are either male or female and produce a pungent unpleasant aroma that many say smells similar to rotting flesh. The unpleasant smell attracts flies to help ensure pollination. The flowers appear with 5 large petals and a reddish-orange coloration. White speckling adorns each petal.
Pollination is rare because most locations contain only male flowers or female flowers. In order for pollination to occur, the fly must land on the male flower and then take the pollen to the female flower. If pollination occurs, the flower produces a globular, smooth-skinned fruit measuring up to 5 inches (13 cm) in diameter. It contains thousands of seeds. Birds and squirrels enjoy eating the fruit and help to spread the Rafflesia seeds through their eliminations.

Endanger
The Rafflesia is in serious danger of extinction as the rain forest is burned and cleared for crop production and urban growth. The buds are also harvested and sold because locals believe they have medicinal properties if consumed. The plant has never been cultivated in captivity and it only grows on the tetrastigma vine, so its survival is seriously threatened.
0
0
文章
Dummer. ゛☀
2017年09月27日

Ten-foot giant Sunflowers (Helianthus annuus) really can be grown in plant containers (even in small 3-gallon nursery pots). These beautiful native American flowers must be planted in full sun, or they can topple over while trying to reach sun. But growing these beauties in your balcony container garden will attract attention from the people in your neighborhood, as well as a lot of wildlife. The Sunflower’s floret patterns (what eventually turn into seeds) are displayed on the circular flower head in an amazing spiral pattern. This, in addition to making a beautiful flower display, ensures that the most seeds are crammed into the Sunflower’s flower head as possible.
Sunflowers bloom from mid-summer to early fall, and their flower heads are heliotropic, meaning they follow the sun across the sky. But once the Sunflower plant’s stem stiffens and becomes woody (around the time of its bloom), the flower stops following the sun. Although most Sunflowers grow to about 10 feet (3 m), the tallest Sunflower grew to 40 feet (12 m). After planting seeds, expect Sunflowers to be full-grown and blooming within about 3 months. Sunflowers attract wild birds, butterflies and beneficial insects to the balcony garden.
Growing Conditions and General Care
Light: Sunflowers need full sun for 6 to 8 hours each day.
Water: When it comes to watering the Sunflower plant, add one inch of water per week. Compensate if the potting soil dries out from heat or sun.
Fertilizer: Fertilize your Sunflowers regularly with a high-nitrogen liquid plant fertilizer. When a flower head begins to form, switch to a liquid fertilizer with more phosphorous to promote a more spectacular Sunflower bloom.
Temperature: The Sunflower is an annual plant, so you do not need to worry about overwintering this plant indoors. The most important thing to remember with Sunflowers and temperature is to not plant them outdoors until the last frost has passed. If you experience a very hot, dry day, make sure to give extra water to your Sunflower so it does not dry out too much and die.
Pests and Diseases
While Sunflower plants are generally very healthy and immune to common garden pests and diseases, you will find wild birds and squirrels snacking on Sunflower seeds. When you harvest the giant Sunflower heads, make sure to keep them in an area where animals cannot eat the seeds. You may want to leave the heads on the stalk to attract birds to your garden.
Propagation
Collect seeds after allowing the Sunflower to completely dry out (but beware, the flowers won’t look very appealing at this point). Then cut the Sunflower head off and hang it upside down until the seeds dry out. Eat the Sunflower seeds yourself, feed them to wild birds or save them for the next gardening season. Plant Sunflower seeds 1 inch (2.5 cm) deep into the potting soil, and they should germinate within 5 to 10 days.

Sunflowers bloom from mid-summer to early fall, and their flower heads are heliotropic, meaning they follow the sun across the sky. But once the Sunflower plant’s stem stiffens and becomes woody (around the time of its bloom), the flower stops following the sun. Although most Sunflowers grow to about 10 feet (3 m), the tallest Sunflower grew to 40 feet (12 m). After planting seeds, expect Sunflowers to be full-grown and blooming within about 3 months. Sunflowers attract wild birds, butterflies and beneficial insects to the balcony garden.

Growing Conditions and General Care
Light: Sunflowers need full sun for 6 to 8 hours each day.
Water: When it comes to watering the Sunflower plant, add one inch of water per week. Compensate if the potting soil dries out from heat or sun.
Fertilizer: Fertilize your Sunflowers regularly with a high-nitrogen liquid plant fertilizer. When a flower head begins to form, switch to a liquid fertilizer with more phosphorous to promote a more spectacular Sunflower bloom.

Temperature: The Sunflower is an annual plant, so you do not need to worry about overwintering this plant indoors. The most important thing to remember with Sunflowers and temperature is to not plant them outdoors until the last frost has passed. If you experience a very hot, dry day, make sure to give extra water to your Sunflower so it does not dry out too much and die.
Pests and Diseases
While Sunflower plants are generally very healthy and immune to common garden pests and diseases, you will find wild birds and squirrels snacking on Sunflower seeds. When you harvest the giant Sunflower heads, make sure to keep them in an area where animals cannot eat the seeds. You may want to leave the heads on the stalk to attract birds to your garden.

Propagation
Collect seeds after allowing the Sunflower to completely dry out (but beware, the flowers won’t look very appealing at this point). Then cut the Sunflower head off and hang it upside down until the seeds dry out. Eat the Sunflower seeds yourself, feed them to wild birds or save them for the next gardening season. Plant Sunflower seeds 1 inch (2.5 cm) deep into the potting soil, and they should germinate within 5 to 10 days.
0
0
文章
Dummer. ゛☀
2017年09月27日

Tulips (genus Tulipa) and Daffodils (genus Narcissus) are often the first flowers of spring. Tulips are available for U.S. Department of Agriculture plant hardiness zones 3 through 9, while daffodils grow in USDA zones 3 through 11. Most daffodils feature bright yellow tubular flowers, while tulips come in a rainbow of colors. Mixing the two bulbs in a single bed creates a colorful spring display and can increase the flowering period if you mix early-flowering daffodils with midseason or late-blooming tulips. Both flowers grow best with full, all-day sunlight and have similar care needs, making them amiable companions.
1. Spread a 2-inch (5 cm) thick layer of compost and 1 pound (450 g) of 10-10-10 fertilizer over every 50 square feet (4.6 square meters) of garden bed in the fall. Dig the compost and fertilizer into the top 6 inches (15 cm) of soil with a shovel.
2. Arrange the tulip and daffodil bulbs on the soil surface. Generally, cluster 5 to 7 bulbs together, spacing the bulbs 4 to 6 inches (10 to 15 cm) apart within the cluster but setting clusters 12 inches (30 cm) apart. Alternate the bulbs in the cluster between tulips and daffodils so that each cluster contains both flowers for an informal look. For a more formal look, alternate clusters only containing daffodils with clusters only containing tulips.
3. Dig a planting hole for each bulb using a trowel. Make the hole deep enough that the flat bottom of the bulb is at a depth equal to about three times the bulb’s width. Set the bulbs in their holes, and fill the holes in with soil.
4. Water the bulb bed immediately after planting to help settle the soil. The tulips daffodils require no further care until growth begins in spring.
5. Resume watering when the bulbs send up shoots in spring. Provide about 1 inch (2.5 cm) of water weekly, or enough to moisten the top 6 inches (15 cm) of soil, if spring rain doesn’t keep the soil moist.
6. Sprinkle 1 pound (450 g) of 10-10-10 fertilizer over every 50 square feet (4.6 square meters) of bed, applying the fertilizer to the soil between bulb clusters, after shoots appear. Water the fertilizer into the soil so that the roots can access the nutrients.
7. Cut off the flowers as soon as they begin to wilt. Depending on the variety, daffodils may bloom earlier than tulips, so removing the old daffodils prevents them from detracting from the tulips’ beauty. Cut back the foliage after it dies back naturally, usually about six weeks after flowering.
Tips
Most tulip and daffodil bulbs require no further maintenance after they go dormant in summer as long as winters drop below 45°F (7°C) for at least 8 weeks. If a cold-enough winter isn’t expected, dig up the bulbs after the foliage dies and store them between 40 and 45 °F (4.5 and 7 °C) to provide this cold treatment. Replant the bulbs in late winter for spring flowering.
You can apply a 2- to 3-inch (5 to 7.5 cm) layer of mulch to prevent weeds from invading the dormant bulb bed, if desired.

1. Spread a 2-inch (5 cm) thick layer of compost and 1 pound (450 g) of 10-10-10 fertilizer over every 50 square feet (4.6 square meters) of garden bed in the fall. Dig the compost and fertilizer into the top 6 inches (15 cm) of soil with a shovel.
2. Arrange the tulip and daffodil bulbs on the soil surface. Generally, cluster 5 to 7 bulbs together, spacing the bulbs 4 to 6 inches (10 to 15 cm) apart within the cluster but setting clusters 12 inches (30 cm) apart. Alternate the bulbs in the cluster between tulips and daffodils so that each cluster contains both flowers for an informal look. For a more formal look, alternate clusters only containing daffodils with clusters only containing tulips.

3. Dig a planting hole for each bulb using a trowel. Make the hole deep enough that the flat bottom of the bulb is at a depth equal to about three times the bulb’s width. Set the bulbs in their holes, and fill the holes in with soil.
4. Water the bulb bed immediately after planting to help settle the soil. The tulips daffodils require no further care until growth begins in spring.
5. Resume watering when the bulbs send up shoots in spring. Provide about 1 inch (2.5 cm) of water weekly, or enough to moisten the top 6 inches (15 cm) of soil, if spring rain doesn’t keep the soil moist.

6. Sprinkle 1 pound (450 g) of 10-10-10 fertilizer over every 50 square feet (4.6 square meters) of bed, applying the fertilizer to the soil between bulb clusters, after shoots appear. Water the fertilizer into the soil so that the roots can access the nutrients.
7. Cut off the flowers as soon as they begin to wilt. Depending on the variety, daffodils may bloom earlier than tulips, so removing the old daffodils prevents them from detracting from the tulips’ beauty. Cut back the foliage after it dies back naturally, usually about six weeks after flowering.

Tips
Most tulip and daffodil bulbs require no further maintenance after they go dormant in summer as long as winters drop below 45°F (7°C) for at least 8 weeks. If a cold-enough winter isn’t expected, dig up the bulbs after the foliage dies and store them between 40 and 45 °F (4.5 and 7 °C) to provide this cold treatment. Replant the bulbs in late winter for spring flowering.

You can apply a 2- to 3-inch (5 to 7.5 cm) layer of mulch to prevent weeds from invading the dormant bulb bed, if desired.
0
0
文章
小九
2017年09月25日

1、吃完的#桃子 ,将桃核留下,然后将外面的壳夹开,将里面的果仁取出来。
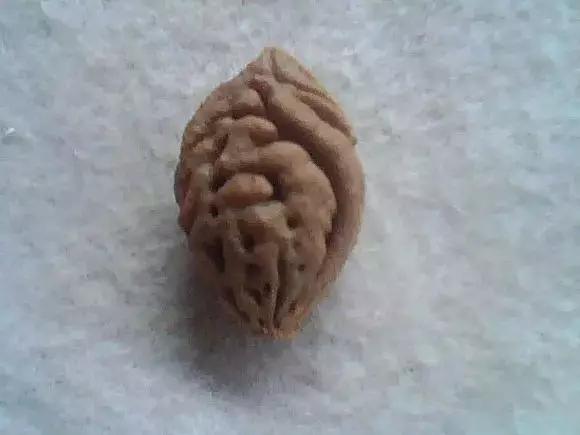
2、把桃核仁放在水里面浸泡,等到外面那一层膜泡软了之后,把尖的那一头膜撕下来一半。
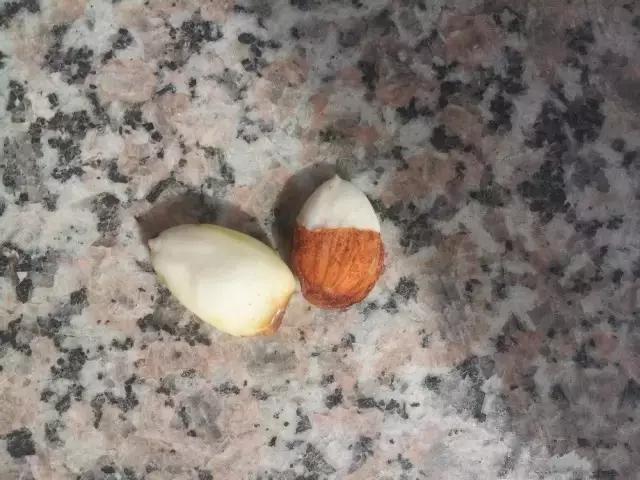
3、准备一张纸巾和一个盘子。
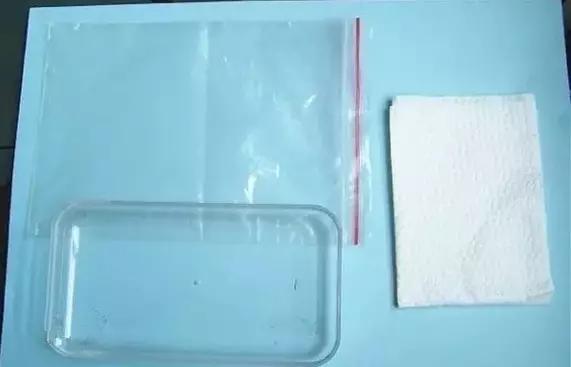
4、朝着盘子里面倒水,然后把纸巾放进去,等到纸巾完全湿透了之后,再将盘子中多余的水分倒出去。

5、把桃核仁放在纸巾上,将纸巾折起一点褶皱,把尖端的那一部分放进去一点。
6、把薄膜盖在盘子上,然后放在散射光能够照射到的通风处进行观察。
7、桃核仁会慢慢长出了小芽。
8、把长芽之后的桃核仁移栽到沙子或者营养土中进行养护,注意每天要喷水保持空气湿度。
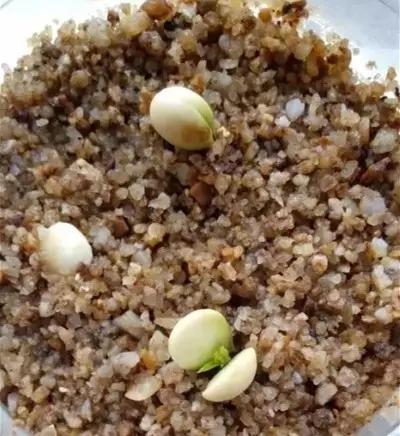
9、桃核仁会慢慢长大,很快就能够变成美丽的盆栽了。
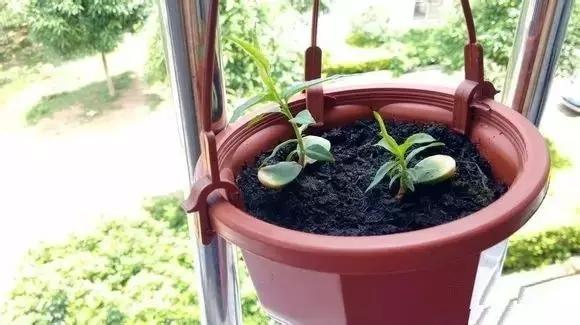
10、几年之后,就能够吃上桃子了!
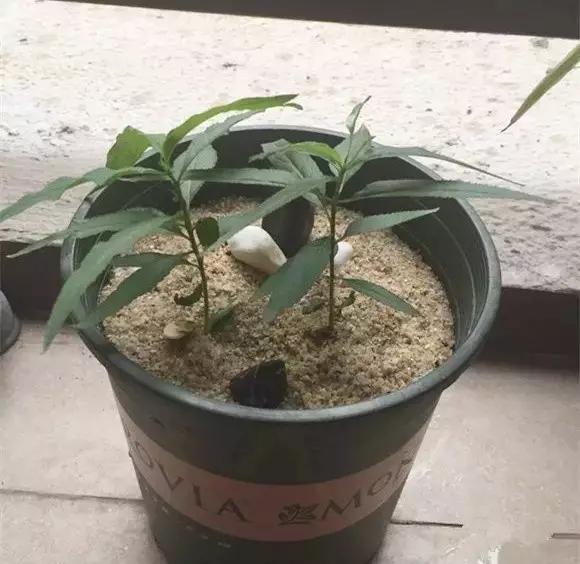
小提示:桃子果树可以不用嫁接即可结果。

2、把桃核仁放在水里面浸泡,等到外面那一层膜泡软了之后,把尖的那一头膜撕下来一半。

3、准备一张纸巾和一个盘子。

4、朝着盘子里面倒水,然后把纸巾放进去,等到纸巾完全湿透了之后,再将盘子中多余的水分倒出去。

5、把桃核仁放在纸巾上,将纸巾折起一点褶皱,把尖端的那一部分放进去一点。
6、把薄膜盖在盘子上,然后放在散射光能够照射到的通风处进行观察。
7、桃核仁会慢慢长出了小芽。
8、把长芽之后的桃核仁移栽到沙子或者营养土中进行养护,注意每天要喷水保持空气湿度。

9、桃核仁会慢慢长大,很快就能够变成美丽的盆栽了。

10、几年之后,就能够吃上桃子了!

小提示:桃子果树可以不用嫁接即可结果。
4
3
文章
玲儿
2017年09月24日

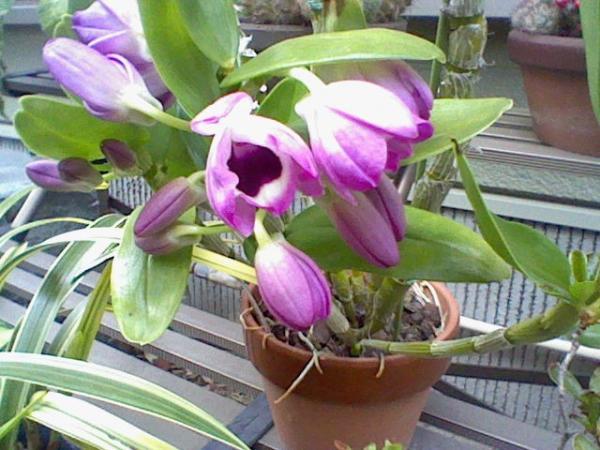
デンドロビウム・ノビル系の育て方・栽培方法
育て方のポイント
栽培環境・日当たり・置き場
3月下旬から11月上旬までは戸外で管理し、冬の間は室内の日当たりのよい窓辺に置きます。
1年を通し十分日光に当てることが大切で、特に長い時間日に当てるようにするとよく開花します。5月初めから9月初めまでは弱めの遮光をして葉焼けを防止します。庭木の下などはやや暗すぎる場合が多いので注意が必要です。また、できるだけ株どうしの間隔をあけ、風通しがよくなるようにします。
水やり
もともと樹木に着生するランですから、根がびっしょりとぬれたままになるのは嫌います。水をたっぷりと与えたあとは、植え込み材料がやや乾いてくるまで次の水やりは行いません。初夏から9月ごろまでは生育が旺盛になるので、この期間のみ、ややぬれていてもたっぷりと水を与えます。10月からは乾かし気味にし、ややバルブがやせてくる程度の水やりとします。その後節々から花芽が見え始めたら水をやや多めにして、開花まで同様の水やりをします。

肥料
ノビル系は肥料を施す期間が限られているため、長期間にわたり肥料効果がある緩効性化成肥料は避けます。4月から7月末まで月1回固形の油かす系肥料を施し、さらに週に1回液体肥料も施します。8月以降も株は成長を続けますが、肥料は施しません。
病気と害虫
病気:葉に黒い斑点
夏にバルブが大きく育ち、みずみずしい葉がつくころから秋にかけ、葉に黒い斑点が出ることがありますが、生育に大きな影響はありません。
害虫:ナメクジ
新芽や花芽はナメクジの食害を受けやすいため、春の新芽の時期と冬から春の花芽の時期は特に注意します。
用土(鉢植え)
水ゴケと素焼き鉢の組み合わせか、細かめの洋ラン用バークとプラスチック鉢との組み合わせで植え込みます。
植えつけ、 植え替え
植え替えは2年に1回程度、春の花後に行うのが標準。春遅くに開花した場合は、早めに花を切って植え替えを行います。
ふやし方
バルブの上部に高芽を比較的多く出します。高芽が小さなバルブになり、根を伸ばしたころを見計らって指で摘み取り、水ゴケで小さな鉢に植えつけます。また、株が大きくなった場合はバルブを4本程度ずつつけて株分けも可能です。

主な作業
花がら摘み:節々に咲く花は1輪ずつしぼんでくるので、しぼんできた花から順次指で摘み取る。半分以上の花が終わってきたら、節から伸びる短い花茎をハサミで切り取る。バルブを根元から切らないように注意しましょう。バルブを切ってしまうとその後生育しなくなってしまいます。
支柱立て:秋、バルブがほぼ伸びたころに、支柱を立て株の姿を整えておきます。ただし、小型の品種はバルブがしっかりと立ち支柱が不要のものも多くなっています。
育て方のポイント
栽培環境・日当たり・置き場
3月下旬から11月上旬までは戸外で管理し、冬の間は室内の日当たりのよい窓辺に置きます。
1年を通し十分日光に当てることが大切で、特に長い時間日に当てるようにするとよく開花します。5月初めから9月初めまでは弱めの遮光をして葉焼けを防止します。庭木の下などはやや暗すぎる場合が多いので注意が必要です。また、できるだけ株どうしの間隔をあけ、風通しがよくなるようにします。
水やり
もともと樹木に着生するランですから、根がびっしょりとぬれたままになるのは嫌います。水をたっぷりと与えたあとは、植え込み材料がやや乾いてくるまで次の水やりは行いません。初夏から9月ごろまでは生育が旺盛になるので、この期間のみ、ややぬれていてもたっぷりと水を与えます。10月からは乾かし気味にし、ややバルブがやせてくる程度の水やりとします。その後節々から花芽が見え始めたら水をやや多めにして、開花まで同様の水やりをします。

肥料
ノビル系は肥料を施す期間が限られているため、長期間にわたり肥料効果がある緩効性化成肥料は避けます。4月から7月末まで月1回固形の油かす系肥料を施し、さらに週に1回液体肥料も施します。8月以降も株は成長を続けますが、肥料は施しません。
病気と害虫
病気:葉に黒い斑点
夏にバルブが大きく育ち、みずみずしい葉がつくころから秋にかけ、葉に黒い斑点が出ることがありますが、生育に大きな影響はありません。
害虫:ナメクジ
新芽や花芽はナメクジの食害を受けやすいため、春の新芽の時期と冬から春の花芽の時期は特に注意します。
用土(鉢植え)
水ゴケと素焼き鉢の組み合わせか、細かめの洋ラン用バークとプラスチック鉢との組み合わせで植え込みます。

植えつけ、 植え替え
植え替えは2年に1回程度、春の花後に行うのが標準。春遅くに開花した場合は、早めに花を切って植え替えを行います。
ふやし方
バルブの上部に高芽を比較的多く出します。高芽が小さなバルブになり、根を伸ばしたころを見計らって指で摘み取り、水ゴケで小さな鉢に植えつけます。また、株が大きくなった場合はバルブを4本程度ずつつけて株分けも可能です。

主な作業
花がら摘み:節々に咲く花は1輪ずつしぼんでくるので、しぼんできた花から順次指で摘み取る。半分以上の花が終わってきたら、節から伸びる短い花茎をハサミで切り取る。バルブを根元から切らないように注意しましょう。バルブを切ってしまうとその後生育しなくなってしまいます。
支柱立て:秋、バルブがほぼ伸びたころに、支柱を立て株の姿を整えておきます。ただし、小型の品種はバルブがしっかりと立ち支柱が不要のものも多くなっています。
0
0
文章
玲儿
2017年09月24日

ディサの基本情報
学名:Disa
科名 / 属名:ラン科 / ディサ属
特徴
ディサの花は、萼が大きく発達し、太くまっすぐに伸びた花茎に、三角の花を3~5輪ほど咲かせます。南部アフリカを中心とした地域に自生する地生ランで、園芸的に魅力がある色彩が鮮やかで大輪の種類は、南アフリカの一部に自生する種に限られています。この種をもとに、各種園芸品種がつくられています。
栽培はきわめて難しく、日本では、夏が涼しく、新鮮な水がある地域でないと、栽培はできません。鉢物として、冬の終わりごろから春にかけて見かけることがありますが、日本での生産量は非常に限られ、本州ではほとんど目にすることがありません。海外から切り花として輸入されることもあり、珍しい花材として人気がありますが、栽培は非常に難しいものです。
種類(原種、園芸品種)
ディサ・ユニフローラ
Disa uniflora
ディサの中ではひときわ大きく、鮮やかな色彩の花を咲かせる原種。南アフリカのケープ州原産で、オレンジ色を基本とするが、ピンク、黄色、白の花もある。多くの交配種の元となっている原種でもある。

ディサ・フォーム
Disa Foam
ユニフローラの特徴を色濃く残す交配種。ユニフローラよりも大輪で、太い花茎をもつ。花色はオレンジ色。鉢物として販売されるのはこの品種か、もしくはこの品種を元にした交配種。

学名:Disa
科名 / 属名:ラン科 / ディサ属
特徴
ディサの花は、萼が大きく発達し、太くまっすぐに伸びた花茎に、三角の花を3~5輪ほど咲かせます。南部アフリカを中心とした地域に自生する地生ランで、園芸的に魅力がある色彩が鮮やかで大輪の種類は、南アフリカの一部に自生する種に限られています。この種をもとに、各種園芸品種がつくられています。
栽培はきわめて難しく、日本では、夏が涼しく、新鮮な水がある地域でないと、栽培はできません。鉢物として、冬の終わりごろから春にかけて見かけることがありますが、日本での生産量は非常に限られ、本州ではほとんど目にすることがありません。海外から切り花として輸入されることもあり、珍しい花材として人気がありますが、栽培は非常に難しいものです。
種類(原種、園芸品種)
ディサ・ユニフローラ
Disa uniflora
ディサの中ではひときわ大きく、鮮やかな色彩の花を咲かせる原種。南アフリカのケープ州原産で、オレンジ色を基本とするが、ピンク、黄色、白の花もある。多くの交配種の元となっている原種でもある。

ディサ・フォーム
Disa Foam
ユニフローラの特徴を色濃く残す交配種。ユニフローラよりも大輪で、太い花茎をもつ。花色はオレンジ色。鉢物として販売されるのはこの品種か、もしくはこの品種を元にした交配種。

0
0
文章
小九
2017年09月24日

1、浇水
#虎刺梅 生性耐旱,最怕渍涝,浇水不宜过多。春秋两季浇水要见干见湿,根据“不干不浇,浇则浇透”的原则,每隔3-4天浇水一次,即盆土稍干后再浇。夏季生长期需充足水分,可每天浇水一次,雨季注意防渍水。冬季进入休眠期,应保持盆土干燥,一般每隔1周左右浇水一次,盆内不宜长期湿润。虎刺梅花期也要控制水分,以达到控制营养生长,促进花芽分化。水多还会引起落花烂根,易倒伏,易受病菌侵害。3-12月开花期,土壤湿度保持适中能花开不断,如果冬季室温在15℃以上,可继续开花。虎刺梅在高温少水的环境下,只是叶片生长变小,不会萎蔫,水分过多会导致植株只长叶不开花,或开花不明显。

2、施肥
盆栽虎刺梅用腐叶土、园土、河沙等量混合作培养土,用培养土垫蹄角片作底肥,生长期不需要浓肥,一般每3周至4周施一次稀薄液肥即可,开花前催施两到三次无机肥,第一次以氮肥为主,第二、三次以钾肥为主,可使花繁色艳。立秋后停止施肥,忌用带油脂的肥料,防根腐烂。
3、换盆
虽然虎刺梅生长慢,但由于是盆栽,植株生长空间有限,而虎刺梅的根系很发达,生长旺盛,所以盆栽虎刺梅应在每年春季翻盆换土1次。换盆时将植株整盆取出,如果生长过密,可分成2-3盆种植,同时将杂乱的根系进行修剪,只留2-3厘米长的根即可,剪去上面的凌乱枝条再种植。

4、修整
虎刺梅有枝顶开花的习性,顶端优势较强,叶生于枝条顶端,枝条不易分枝,容易徒长,开花少,姿态凌乱,影响观赏,所以修剪是一项重要的工作。植株长到十几厘米高时进行第一次修剪,剪掉枝顶部分,促发侧枝。以后可根据需要再进行一到两次修剪,植株才丰满花多,株型美观。当年种植的新苗在八九月份时就能花繁叶茂,作盆景摆设很具观赏价值。为进一步控制植株高度,也可以使用植物生长调节剂进行化学调控,使用植物生长抑制剂可以破坏顶端优势,使植株侧枝增多,株型紧凑,根系发达,从而达到抑制徒长,调整株型。例如可用浓度为500毫克/升的多效唑溶液喷洒植株,达到矮化整形的效果。
5、光照
虎刺梅是喜光照怕阴冷植物,全年都应给予充足光照。强光下紫外线多,能促进花青素的形成,花前阳光越充足,花越鲜艳夺目,经久不谢,强光还有抑制植物生长的作用,使花卉节密,矮化。若光照不足,则花色暗淡,茎易徒长,甚至引起落叶。长期置荫处,则不开花。就是已开花的植株,一旦放在光照不充足的地方,花朵也会马上萎蔫。另外,还需注意保持空气流通,防止细菌和病虫害的滋生。

6、温度
虎刺梅性喜温暖,能耐高温,不耐寒,白天22℃左右,夜间15℃左右生长最好,温度保持在15℃至20℃,可终年开花不断,叶绿花鲜,如下降至10℃则转入半休眠状态,至次春吐露新叶,继续开花。低温使花卉生理活性停止,低于5℃以下很容易冻死,因此在冬季要将其移至室内或温棚中,待温度回升时再搬出室外。
7、病虫害
虎刺梅主要发生茎枯病和腐烂病危害,用50%克菌丹800倍液,每半月喷洒1次。虫害有粉虱虫和介壳虫危害,用50%杀螟松乳油1500倍液喷杀。
#虎刺梅 生性耐旱,最怕渍涝,浇水不宜过多。春秋两季浇水要见干见湿,根据“不干不浇,浇则浇透”的原则,每隔3-4天浇水一次,即盆土稍干后再浇。夏季生长期需充足水分,可每天浇水一次,雨季注意防渍水。冬季进入休眠期,应保持盆土干燥,一般每隔1周左右浇水一次,盆内不宜长期湿润。虎刺梅花期也要控制水分,以达到控制营养生长,促进花芽分化。水多还会引起落花烂根,易倒伏,易受病菌侵害。3-12月开花期,土壤湿度保持适中能花开不断,如果冬季室温在15℃以上,可继续开花。虎刺梅在高温少水的环境下,只是叶片生长变小,不会萎蔫,水分过多会导致植株只长叶不开花,或开花不明显。

2、施肥
盆栽虎刺梅用腐叶土、园土、河沙等量混合作培养土,用培养土垫蹄角片作底肥,生长期不需要浓肥,一般每3周至4周施一次稀薄液肥即可,开花前催施两到三次无机肥,第一次以氮肥为主,第二、三次以钾肥为主,可使花繁色艳。立秋后停止施肥,忌用带油脂的肥料,防根腐烂。
3、换盆
虽然虎刺梅生长慢,但由于是盆栽,植株生长空间有限,而虎刺梅的根系很发达,生长旺盛,所以盆栽虎刺梅应在每年春季翻盆换土1次。换盆时将植株整盆取出,如果生长过密,可分成2-3盆种植,同时将杂乱的根系进行修剪,只留2-3厘米长的根即可,剪去上面的凌乱枝条再种植。

4、修整
虎刺梅有枝顶开花的习性,顶端优势较强,叶生于枝条顶端,枝条不易分枝,容易徒长,开花少,姿态凌乱,影响观赏,所以修剪是一项重要的工作。植株长到十几厘米高时进行第一次修剪,剪掉枝顶部分,促发侧枝。以后可根据需要再进行一到两次修剪,植株才丰满花多,株型美观。当年种植的新苗在八九月份时就能花繁叶茂,作盆景摆设很具观赏价值。为进一步控制植株高度,也可以使用植物生长调节剂进行化学调控,使用植物生长抑制剂可以破坏顶端优势,使植株侧枝增多,株型紧凑,根系发达,从而达到抑制徒长,调整株型。例如可用浓度为500毫克/升的多效唑溶液喷洒植株,达到矮化整形的效果。
5、光照
虎刺梅是喜光照怕阴冷植物,全年都应给予充足光照。强光下紫外线多,能促进花青素的形成,花前阳光越充足,花越鲜艳夺目,经久不谢,强光还有抑制植物生长的作用,使花卉节密,矮化。若光照不足,则花色暗淡,茎易徒长,甚至引起落叶。长期置荫处,则不开花。就是已开花的植株,一旦放在光照不充足的地方,花朵也会马上萎蔫。另外,还需注意保持空气流通,防止细菌和病虫害的滋生。

6、温度
虎刺梅性喜温暖,能耐高温,不耐寒,白天22℃左右,夜间15℃左右生长最好,温度保持在15℃至20℃,可终年开花不断,叶绿花鲜,如下降至10℃则转入半休眠状态,至次春吐露新叶,继续开花。低温使花卉生理活性停止,低于5℃以下很容易冻死,因此在冬季要将其移至室内或温棚中,待温度回升时再搬出室外。
7、病虫害
虎刺梅主要发生茎枯病和腐烂病危害,用50%克菌丹800倍液,每半月喷洒1次。虫害有粉虱虫和介壳虫危害,用50%杀螟松乳油1500倍液喷杀。
0
2
文章
弄啥嘞
2017年09月23日


#富贵竹
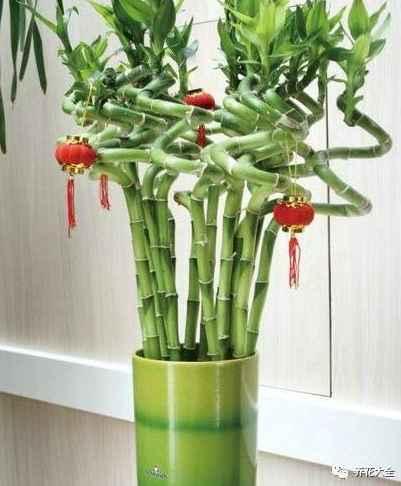
生根前养护:
1、自来水在使用之前,要先晾晒1天之后才能用。
2、隔1天换水1次,换水的时候要观察一下,已经生出来短短的白色根系的,换水的时候一定要非常轻柔。

3、放在室内阴凉通风的地方,比如室内客厅,或者是被阳台,不要让阳光直射哦~
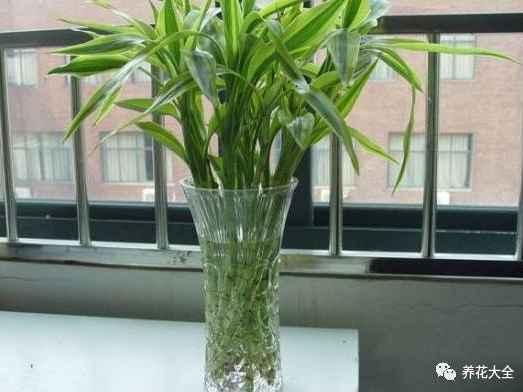
生根后养护:
1、始终将水位保持咋三分之一的位置,少了添水就可以。

2、大约1周换水1次,换水的时候,最好是将玻璃瓶里外重新清洗一遍,把内部瓶壁上的各种水垢污垢给清理干净。

3、富贵竹的根系也要放在流动的水流下清洗,水流不可过快,避免损伤富贵竹的根系哦~

4、也是要放在室内阴凉通风的地方哦~

腐烂后如何解决?
1、先把腐烂的根系,连同茎干一起剪掉,切口处要削成斜面的哦,面积大,容易生根。

2、把富贵竹的伤口浸泡在多菌灵溶液中30分钟左右,然后拿出来阴干。
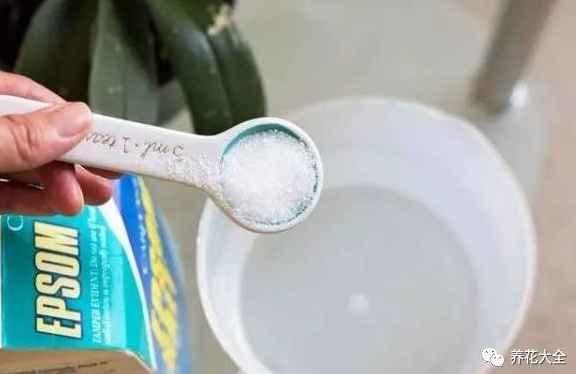
3、把容器清洗干净,然后用酒精啊,高锰酸钾啊之类的进行消毒,然后晒干。

4、把已经晾晒了1天左右的自来水倒进容器里,再把富贵竹放进去即可,然后放到阴凉通风的地方,之后的养护请参考生根前哦~

白掌
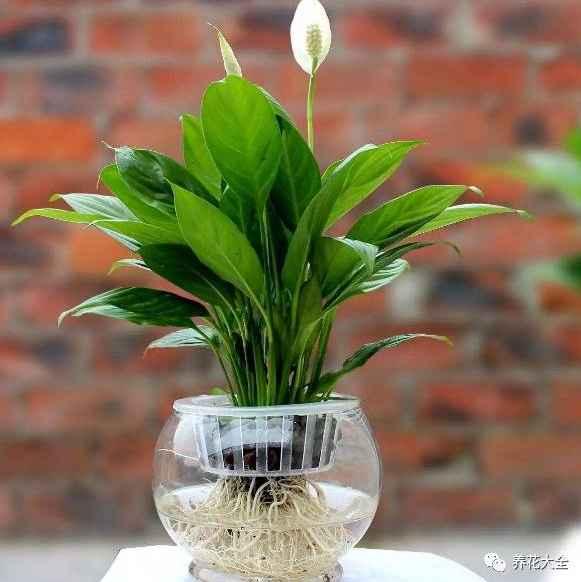
日常养护要点:
1、放在阴凉通风的地方,避免阳光直射。

2、夏天7天换水1次,冬天10~15天换水1次。换水的同时要把水培器皿清洗一遍,如果有条件的话,还可以用多菌灵呀,酒精呀之类的进行消毒。

3、换水的同时,也要把根系清洗一遍,很简单的,把根系放在平缓的水流下冲洗就可以啦~然后把根系中的老根、枯根之类的全都剪除就可以了~

4、换水的时候,水的界面以淹没根系的1/2~2/3为标准哦~

5、换水的时候可以滴进去1~2滴的营养液。

烂根了怎么办?
1、先把白掌取出来,根部的粘液清洗干净,然后用剪刀把腐烂的地方全都剪除。
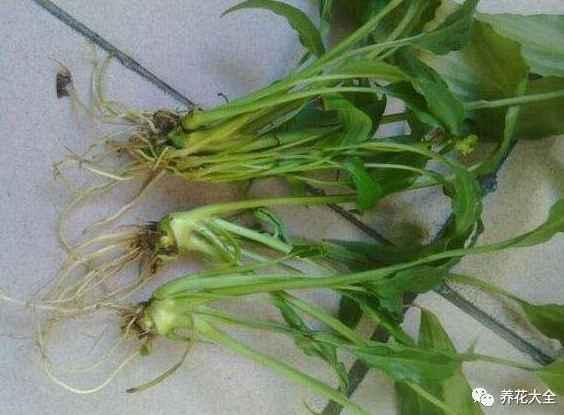
2、把根部的伤口放在多菌灵溶液中进行消毒,然后阴干。

3、把容器清洗干净并且消毒,把自来水静置1天,去除氯气。
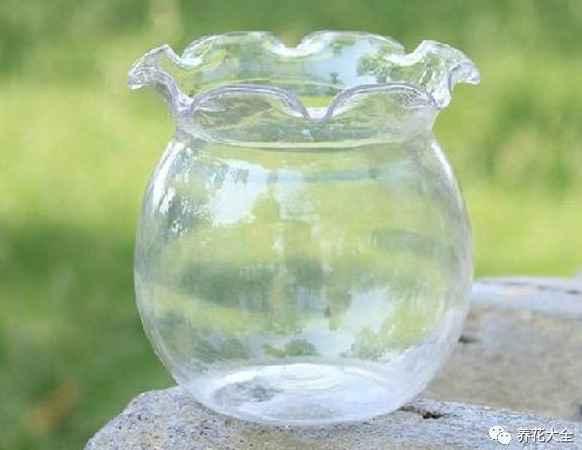
4、重新水培即可~

铜钱草
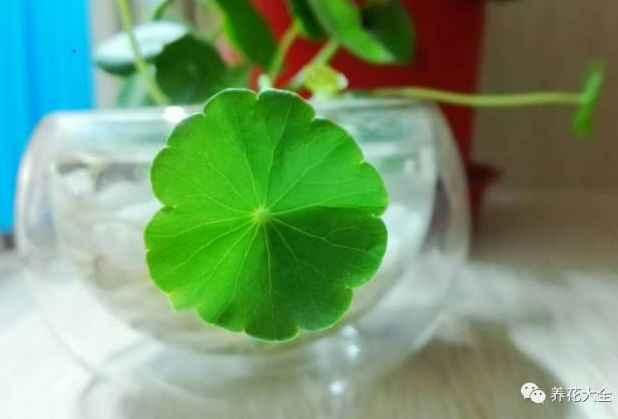
日常养护要点:
1、多晒太阳,能露养就最好了,不能露养的话,也请放在南阳台上哦~

2、加强通风,最好是放在窗台或者是阳台上,多开窗通风。

3、一定要及时补水,始终保持水位在2/3左右。

4、一般10~15天左右换一次水,其他的时间只要添水就可以了。

烂根如何处理?
1、先把铜钱草拿出来清洗干净,看看根系是不是全都腐烂了,如果全都烂了,那就是没救了,如果还没有全烂,那就把腐烂的地方切掉。

2、伤口处在多菌灵溶液里泡一下,杀菌,然后拿出来阴干。
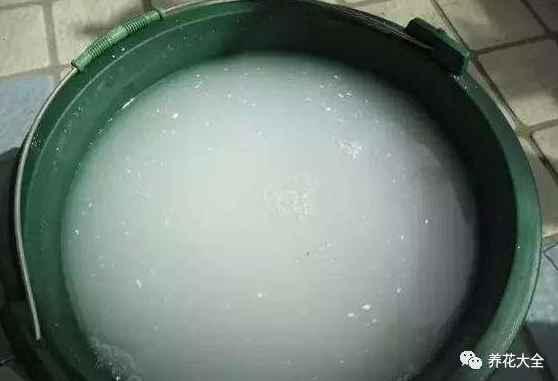
3、换一个新的已经消过毒的容器,重新水培即可。

4、注意了,重新水培的话,一定要多晒太阳,根系才能长的快。

龟背竹

生根前养护方法:
1、刚水培之后的龟背竹,暂时不要换水,等1周左右,看看有没有生根,如果有新根发出来,就说明水培成功了,等过上1~2天再换水,同时要小心不要弄断根系哦~
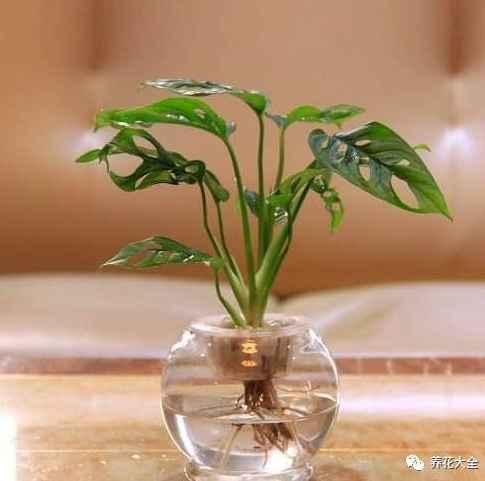
2、要放在阴凉通风的地方进行缓根哦~

日常养护方法:
1、龟背竹的根系不能全都浸泡在水里,要留1/2在空气中,好进行呼吸作用。

2、放在阴凉通风的地方,龟背竹不能阳光直射哦,很容易晒伤的。

3、大约10~15天左右换一次水就可以了。

4、在换水的时候,要把龟背竹根系上的粘液用清水冲洗干净,要用轻缓的水流哦~
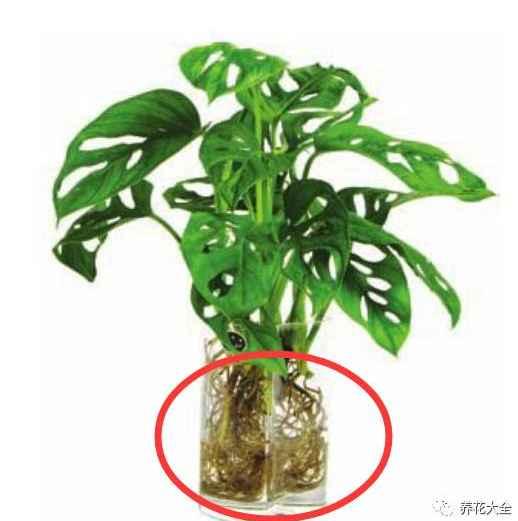
5、容器也要清洗干净并且消毒,能够避免黑腐等问题的出现哦~

烂根了怎么办?
1、将龟背竹的从水培瓶里拿出来,用清水冲洗干净,然后把腐烂的根系全都剪除。
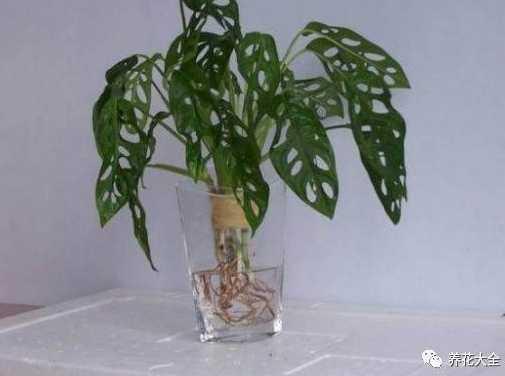
2、把容器清理干净,用酒精或者是多菌灵进行消毒。

3、把自来水晾1~2天的时间之后,再倒进容器里,重新给龟背竹水培。

1
6
文章
Dummer. ゛☀
2017年09月23日

The Prickly Pear Cactus (Opuntia sp.) thrives in hot, dry desert areas, growing 3 to 20 feet (0.9 to 6 m) tall, depending on the variety and growing conditions. It spreads to cover 3 to 15 feet (0.9 to 4.5 m). The leaves and fruit are edible once the spines are removed. Leaf pads are eaten as a vegetable. Fruit are eaten raw and used to make juice, jelly and candy.
Prickly Pear Cactus is hardy in U.S. Department of Agriculture hardiness zones 3b through 11. Once established, Prickly Pear Cactus are easy to care for and tolerate drought for two or three weeks.
Fill small pots or a seed tray with cactus soil. Break up any lumps in soil. Water the soil thoroughly and allow to drain.
Sow the seeds in the late spring when night temperatures consistently reach above 45 degrees Fahrenheit (7 degrees Celsius). Rub the Prickly Pear Cactus seeds against a piece of sandpaper to scratch the seed coat. Scratched seeds germinate faster and more reliably than untreated seeds.
Plant one seed per pot or plant seeds 1 inch (2.5 cm) apart in seed trays. Press the seed into the soil and cover with a fine layer of soil, barely 1/8 inch (3 mm) thick.
Mist the soil surface with a fine spray of water. Cover the tray with the plastic lid or put individual pots in plastic bags. Cut a small hole in the plastic to create a vent.
Place the pots or tray in a sunny window or under artificial lights. Check the soil daily for moisture and temperature. Ideal soil and air temperatures for prickly pear cactus is 70 degrees Fahrenheit (21 degrees Celsius). If heat builds up under the plastic, move the container or open the vent further to release excess heat. Water the soil as needed with a fine mist, keeping the soil moist but not wet.
Inspect the seedlings daily. Cactus that turn yellow need more light. Brown or red cactus are receiving too much light.
Transplant the seedlings into larger pots or outside once the roots are well-developed. Place the transplants in full sun spaced 24 to 36 inches (60 to 90 cm) apart. Keep the soil moist for the first two weeks or until the plant has adjusted to its new location. Increase the time between watering once the cactus are established, allowing the soil to dry out slightly.
Fertilize with a balanced fertilizer such as 10-10-10 to encourage pad growth. If you prefer to encourage flowers and fruit, use a low-nitrogen fertilizer such as 0-10-10.
Tips
Harvest Prickly Pear Cactus seeds from the ripe fruit of a Prickly Pear Cactus. Wash the seeds to remove all pulp, and dry them on a paper towel in a warm place for a week or two until completely dry. Store seeds in an air-tight container in a cool, dark place until ready to plant the following spring.
Warning
Prickly Pear Cactus earn their name. Wear gloves and handle the plants carefully, the spines are sharp and cause painful irritation.

Prickly Pear Cactus is hardy in U.S. Department of Agriculture hardiness zones 3b through 11. Once established, Prickly Pear Cactus are easy to care for and tolerate drought for two or three weeks.

Fill small pots or a seed tray with cactus soil. Break up any lumps in soil. Water the soil thoroughly and allow to drain.
Sow the seeds in the late spring when night temperatures consistently reach above 45 degrees Fahrenheit (7 degrees Celsius). Rub the Prickly Pear Cactus seeds against a piece of sandpaper to scratch the seed coat. Scratched seeds germinate faster and more reliably than untreated seeds.

Plant one seed per pot or plant seeds 1 inch (2.5 cm) apart in seed trays. Press the seed into the soil and cover with a fine layer of soil, barely 1/8 inch (3 mm) thick.
Mist the soil surface with a fine spray of water. Cover the tray with the plastic lid or put individual pots in plastic bags. Cut a small hole in the plastic to create a vent.

Place the pots or tray in a sunny window or under artificial lights. Check the soil daily for moisture and temperature. Ideal soil and air temperatures for prickly pear cactus is 70 degrees Fahrenheit (21 degrees Celsius). If heat builds up under the plastic, move the container or open the vent further to release excess heat. Water the soil as needed with a fine mist, keeping the soil moist but not wet.

Inspect the seedlings daily. Cactus that turn yellow need more light. Brown or red cactus are receiving too much light.
Transplant the seedlings into larger pots or outside once the roots are well-developed. Place the transplants in full sun spaced 24 to 36 inches (60 to 90 cm) apart. Keep the soil moist for the first two weeks or until the plant has adjusted to its new location. Increase the time between watering once the cactus are established, allowing the soil to dry out slightly.

Fertilize with a balanced fertilizer such as 10-10-10 to encourage pad growth. If you prefer to encourage flowers and fruit, use a low-nitrogen fertilizer such as 0-10-10.
Tips
Harvest Prickly Pear Cactus seeds from the ripe fruit of a Prickly Pear Cactus. Wash the seeds to remove all pulp, and dry them on a paper towel in a warm place for a week or two until completely dry. Store seeds in an air-tight container in a cool, dark place until ready to plant the following spring.

Warning
Prickly Pear Cactus earn their name. Wear gloves and handle the plants carefully, the spines are sharp and cause painful irritation.
0
0
文章
Dummer. ゛☀
2017年09月23日

Portulacaria afra, (known as Elephant Bush) is a perennial succulent native to South Africa. It thrives in Sunset Climate Zones 8 through 9 and 12 through 24. This plant reaches heights of 3 feet (90 cm) with a spread of 4 feet (1.2 m) and adapts to either full sun or shade. Elephant Bush also adapts to a range of soil and is not particular about the pH, but does require well-drained soil.
1. Cut a 4- to 6-inches (10- to 15-cm) cutting from the growing tip of your Elephant Bush with a clean sterilized razor blade. Pruning shears or scissors can bruise the stem causing delayed healing.
2. Remove the bottom leaves from the stem cutting, leaving a 2- to 4-inches (5- to 10-cm) section of the stem bare.
3. Dip the bottom 2 inches (5 cm) of the stem of your Elephant Bush cutting in rooting compound. Tap the stem against the container to remove excess powder. Many prefer to pour the rooting powder into a paper cup and then dispose of the excess powder and cup together. This prevents contaminating the container of rooting powder.
4. Place the cutting in a warm well-ventilated area to heal and form a callous. Healing time varies, but typically ranges from a few days to a week for Elephant Bush.
5. Mix four parts sand or perlite with one part potting soil and fill a 4-inch (10-cm) pot with the mixture. Firm the soil down with your hands to level the surface. This creates soil that drains well and provides good aeration for your cuttings.
6. Insert the stem of your Elephant Bush into the mixture to a depth of 2 inches (5 cm). Firm the soil around the stem of your cutting with your hands to secure it in the soil.
7. Add a 1/4- to 1/2-inch (0.6- to 1.2-cm) layer of gravel over the top of the pot to conserve water and prevent soil from spilling over the edges when watering.
8. Water to moisten the soil. Although Elephant Bush does not typically require frequent watering, it needs even moisture for young roots to grow.
9. Place your cutting in a sunny, warm, well-ventilated area. Move your Elephant Bush to its permanent location once roots have formed and the plant shows new growth.

1. Cut a 4- to 6-inches (10- to 15-cm) cutting from the growing tip of your Elephant Bush with a clean sterilized razor blade. Pruning shears or scissors can bruise the stem causing delayed healing.
2. Remove the bottom leaves from the stem cutting, leaving a 2- to 4-inches (5- to 10-cm) section of the stem bare.

3. Dip the bottom 2 inches (5 cm) of the stem of your Elephant Bush cutting in rooting compound. Tap the stem against the container to remove excess powder. Many prefer to pour the rooting powder into a paper cup and then dispose of the excess powder and cup together. This prevents contaminating the container of rooting powder.
4. Place the cutting in a warm well-ventilated area to heal and form a callous. Healing time varies, but typically ranges from a few days to a week for Elephant Bush.

5. Mix four parts sand or perlite with one part potting soil and fill a 4-inch (10-cm) pot with the mixture. Firm the soil down with your hands to level the surface. This creates soil that drains well and provides good aeration for your cuttings.
6. Insert the stem of your Elephant Bush into the mixture to a depth of 2 inches (5 cm). Firm the soil around the stem of your cutting with your hands to secure it in the soil.

7. Add a 1/4- to 1/2-inch (0.6- to 1.2-cm) layer of gravel over the top of the pot to conserve water and prevent soil from spilling over the edges when watering.
8. Water to moisten the soil. Although Elephant Bush does not typically require frequent watering, it needs even moisture for young roots to grow.

9. Place your cutting in a sunny, warm, well-ventilated area. Move your Elephant Bush to its permanent location once roots have formed and the plant shows new growth.
1
2


