文章
Mirella
2017年05月22日

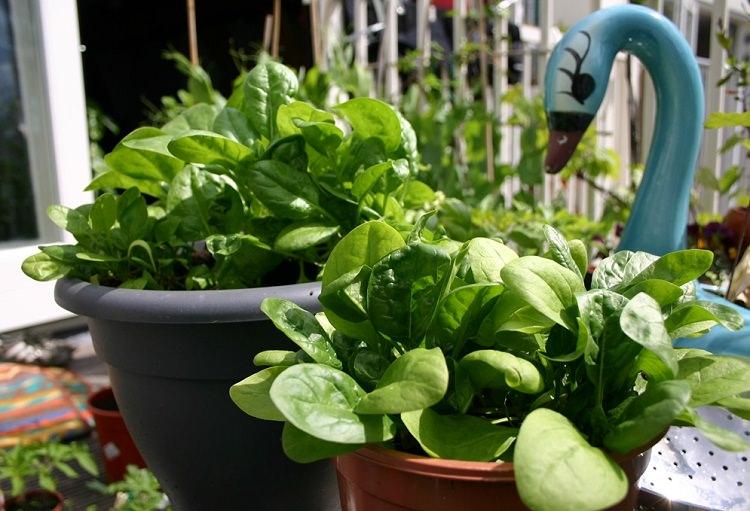
Learn how to spinach in pots, it is one of the vegetables that you can grow in some shade and in any kind of space. Growing spinach in containers is easy too you can even grow it indoors on a windowsill.
USDA Zones— 3 – 11
Difficulty— Easy
Other Names— Spinacia oleracea (Scientific Name), Persian vegetable, palak, bōsī cài, 波斯菜, leafy greens
How to Grow Spinach in Pots
Growing Spinach in Pots from Seeds
Sow seeds 1/2 inches deep directly in containers or in a seed tray. Seedlings will germinate in 5-14 days depending on the variety and growing conditions. If you have sown seeds in a seed tray wait until 2-3 true leaves appear in each plant and then transplant them into the original pots carefully.
Choosing a pot
For growing spinach in pots, choose a pot that is least 6-8 inches deep. You don’t need a very deep pot rather use a wide pot. You can either use so many small pots and grow one plant in each or select large window boxes, wooden boxes or crates.
Spacing
Provide each spinach plant a space of 3 inches, if you want to pick large leaves give more space to each plant, 5 inches. If you want to harvest leaves at very young age, then this area can be reduced to 2 inches only. Divide the planter box into squares, and see how many plants will feel comfortable in it.
Requirements for Growing Spinach in ContainersPosition
If you are growing spinach in fall (autumn), keep the plant in a sunny spot (in mild climates) due to shorter days and less intensity of the sun. For spring and summer planting keep your potted plants in a location where it receives some shade, especially in the afternoon. In subtropical or tropical climate, place the containers in a spot that receives plenty of shade.
Soil
For growing spinach in containers, use quality potting mix rich in organic matter. The texture of soil must be crumbly and loamy. Avoid soil that clogs the drainage and remains waterlogged. Well-draining soil is most important factor for the optimum growth of spinach in containers. Soil pH must be neutral.
Watering
When growing spinach in containers avoid water stagnation because it will lead to the development of rot and various fungal diseases. Also, avoid wetting the foliage. Keep the soil moist but not soggy or wet. It is necessary to take care of good drainage in the pot.
Temperature
Spinach seeds germinate in temperatures as low as 40 F (4 C) and in high temperatures too. The best soil temperature for growing spinach falls in the range of 50-80 F (10-27 C). Many spinach cultivars can tolerate temperature down to 20 F (-6) and up to 90 F (32 C) easily. Once the temperature starts to soar high you may need to provide shade to your plants.
Growing Spinach Indoors

Growing spinach indoors on a windowsill is a great idea (as it doesn’t require a lot of sunlight) if you’re short of outdoor space. For this, buy a few 6 inches deep small pots and grow spinach in them. You can also grow herbs and annual flowers there.
Also Read: How to Make a Windowsill Herb Garden
Spinach Care
Growing spinach in pots doesn’t need special care. Regular watering, fertilizing and the right soil is the key to the great harvest.
Fertilizing
For growing healthy green spinach, you have to provide nitrogen. At the time of planting, you can mix time-based fertilizer or you can add a lot of compost or well-rotted manure, this will provide nutrients slowly. Feeding the plant with fish emulsion, compost or manure tea in the middle of the growth and so on is a nice organic way to promote the plants. If you have not done added time-based fertilizer, you can also feed the plant with balanced liquid fertilizer at regular intervals.
Mulching
Do mulching, even if you’re growing spinach in pots. Mulching plants with organic matter will help in retaining moisture.
Pests and Diseases
You don’t need to worry much about pests as you’re growing spinach in containers, in a small space and you can easily control them. However, keeping an eye on leaf-eating insects like slugs and caterpillars and other common garden pests like aphids will help you in eliminating them in time.
A Few Tips for Growing Spinach in Tropics
It is a cool season crop but growing spinach in tropics and subtropics is extremely easy, moreover, you can grow it successively as a bi-annual crop, except in hot summer months. You’ll need to provide it shade and enough water to keep the soil temperature cool and moist.
In warm weather, vegetables like lettuce and spinach begin to bolt early and start to set seeds. One of the most important thing you need to consider when growing spinach in tropics is to grow heat tolerant varieties (there are a lot of Asian varieties that are suitable for tropical climate) that grow slowly and do not bolt quickly. These varieties easily tolerate the heat and humidity.
Harvesting
The spinach plant will be ready for harvest 37-50 days after germination depending on the growing conditions and cultivar.
Harvesting can be done when the plant has formed at least 5-6 healthy leaves and they are at least 3-4 inches long. Pick outer leaves first and leave the new inner leaves so that they continue to grow or cut the whole plant off at the base with a knife or scissor, the plant will resprout again.
When the weather becomes humid and hot (in warm climates) the plant tends to form an erect stem, on which you can see some small yellow or green flowers developing. To coincide with the flowering and the subsequent production of flowers, the foliage of the plant thickens and changes in flavor (more bitter), which is called bolting so it is convenient to harvest the plant before it starts flowering for better taste.
USDA Zones— 3 – 11
Difficulty— Easy
Other Names— Spinacia oleracea (Scientific Name), Persian vegetable, palak, bōsī cài, 波斯菜, leafy greens
How to Grow Spinach in Pots

Growing Spinach in Pots from Seeds
Sow seeds 1/2 inches deep directly in containers or in a seed tray. Seedlings will germinate in 5-14 days depending on the variety and growing conditions. If you have sown seeds in a seed tray wait until 2-3 true leaves appear in each plant and then transplant them into the original pots carefully.
Choosing a pot
For growing spinach in pots, choose a pot that is least 6-8 inches deep. You don’t need a very deep pot rather use a wide pot. You can either use so many small pots and grow one plant in each or select large window boxes, wooden boxes or crates.
Spacing
Provide each spinach plant a space of 3 inches, if you want to pick large leaves give more space to each plant, 5 inches. If you want to harvest leaves at very young age, then this area can be reduced to 2 inches only. Divide the planter box into squares, and see how many plants will feel comfortable in it.
Requirements for Growing Spinach in ContainersPosition
If you are growing spinach in fall (autumn), keep the plant in a sunny spot (in mild climates) due to shorter days and less intensity of the sun. For spring and summer planting keep your potted plants in a location where it receives some shade, especially in the afternoon. In subtropical or tropical climate, place the containers in a spot that receives plenty of shade.
Soil
For growing spinach in containers, use quality potting mix rich in organic matter. The texture of soil must be crumbly and loamy. Avoid soil that clogs the drainage and remains waterlogged. Well-draining soil is most important factor for the optimum growth of spinach in containers. Soil pH must be neutral.
Watering
When growing spinach in containers avoid water stagnation because it will lead to the development of rot and various fungal diseases. Also, avoid wetting the foliage. Keep the soil moist but not soggy or wet. It is necessary to take care of good drainage in the pot.
Temperature
Spinach seeds germinate in temperatures as low as 40 F (4 C) and in high temperatures too. The best soil temperature for growing spinach falls in the range of 50-80 F (10-27 C). Many spinach cultivars can tolerate temperature down to 20 F (-6) and up to 90 F (32 C) easily. Once the temperature starts to soar high you may need to provide shade to your plants.
Growing Spinach Indoors

Growing spinach indoors on a windowsill is a great idea (as it doesn’t require a lot of sunlight) if you’re short of outdoor space. For this, buy a few 6 inches deep small pots and grow spinach in them. You can also grow herbs and annual flowers there.
Also Read: How to Make a Windowsill Herb Garden
Spinach Care
Growing spinach in pots doesn’t need special care. Regular watering, fertilizing and the right soil is the key to the great harvest.
Fertilizing
For growing healthy green spinach, you have to provide nitrogen. At the time of planting, you can mix time-based fertilizer or you can add a lot of compost or well-rotted manure, this will provide nutrients slowly. Feeding the plant with fish emulsion, compost or manure tea in the middle of the growth and so on is a nice organic way to promote the plants. If you have not done added time-based fertilizer, you can also feed the plant with balanced liquid fertilizer at regular intervals.
Mulching
Do mulching, even if you’re growing spinach in pots. Mulching plants with organic matter will help in retaining moisture.
Pests and Diseases
You don’t need to worry much about pests as you’re growing spinach in containers, in a small space and you can easily control them. However, keeping an eye on leaf-eating insects like slugs and caterpillars and other common garden pests like aphids will help you in eliminating them in time.
A Few Tips for Growing Spinach in Tropics
It is a cool season crop but growing spinach in tropics and subtropics is extremely easy, moreover, you can grow it successively as a bi-annual crop, except in hot summer months. You’ll need to provide it shade and enough water to keep the soil temperature cool and moist.
In warm weather, vegetables like lettuce and spinach begin to bolt early and start to set seeds. One of the most important thing you need to consider when growing spinach in tropics is to grow heat tolerant varieties (there are a lot of Asian varieties that are suitable for tropical climate) that grow slowly and do not bolt quickly. These varieties easily tolerate the heat and humidity.
Harvesting
The spinach plant will be ready for harvest 37-50 days after germination depending on the growing conditions and cultivar.
Harvesting can be done when the plant has formed at least 5-6 healthy leaves and they are at least 3-4 inches long. Pick outer leaves first and leave the new inner leaves so that they continue to grow or cut the whole plant off at the base with a knife or scissor, the plant will resprout again.
When the weather becomes humid and hot (in warm climates) the plant tends to form an erect stem, on which you can see some small yellow or green flowers developing. To coincide with the flowering and the subsequent production of flowers, the foliage of the plant thickens and changes in flavor (more bitter), which is called bolting so it is convenient to harvest the plant before it starts flowering for better taste.
0
0
文章
Juze
2017年05月22日

Learn how to grow grapes in pots. Growing grapes in containers is not very complicated though it requires slight care and maintenance. Check out below!
USDA Zones— 3 – 10
Difficulty— Moderate
Soil pH— Slightly acidic to neutral

Choosing a Pot
For growing grapes in containers, choose a large and sturdy container that can support this vigorous vine. A 15-20 gallon pot that is at least 16-18 inches deep and 18-24 inches wide is sufficient. Start with a smaller sized pot and then repot the plant in a larger one.
Choosing varieties
The best option is to go to a garden center and ask for a variety that can grow well in pots and in your climate. There are many varieties of grapevine you can choose from. Choosing a variety that is resistant to diseases and can grow well in your zone is most essential. However, you can grow almost any variety in the container but growing a dwarf grape cultivar like ‘pixie’ can save you from the hassle of training a grape vine in a pot.
Planting
The best time to plant grapevine is spring or early summer, planting on this time helps the plant to grow all season without the exposure to frost. But if you live in a frost-free hot tropical climate the best time for planting grape vine is winters.
Requirements for Growing Grapes in Pots

Position
Choose a location that is sunny, warm and dry. If your spot receives shade in an afternoon the plant will still do well, but at least 6 hours of sunlight is required. Avoid keeping the plant in wet, shady and less windy spot with less or no air circulation as it promotes fungal diseases and grapevine requires good air circulation around it.
Support and Training

Grapevine needs training and support to grow. When growing grapes in a pot, it is best to opt for a tall lightweight trellis, of wood or plastic. You can also DIY trellis for it. A grape vine grows long and requires support, it will be much better if you have an arbor or pergola like structure. Besides that, there are many other techniques to train the grape vine (See the picture above). Train the vine on a stake or something like a fan trellis. You can also support the vine on a stake with the help of “Umbrella Kniffen Training Method”. To learn more about this method, read this helpful article on pallensmith.com. Growing grapes in pots by the standard vine training method on a regular trellis is an easy and hassle free idea too.
Soil
Don’t use heavy garden soil when growing grapes in containers. Instead, use a light potting mix that is loose, rich in organic matter and most importantly drains well.
Watering
Water regularly and deeply to keep the soil slightly moist but avoid overwatering. Soggy, damp soil can be detrimental to the plant.
Fertilization
Side dress the plant periodically with aged manure or compost. In the first year, you can fertilize the plant with a general purpose fertilizer in spring and summer. From the next year, start to fertilize the plant with the fertilizer that is low in nitrogen but high in potassium and phosphorus from the spring when flower buds appear.
Growing Grapes in Tropics
Grapes are actually temperate fruits but the best thing about them is they can be grown in both temperate and tropical regions. Temperate climate zones without very harsh summers or humidity are optimum for growing grapevines. However, the two tropical countries India and Brazil are one of the largest producers of grapes in the world. Other tropical countries like Yemen, Thailand, Peru and Tanzania also produces grapes but to a smaller extent. This means if you live in a tropical climate you can still grow grapevine. You’ll only need to find a right variety that grows successfully in your area.
Still in tropics, areas with very high humidity or with heavy rainfall are less suitable for growing grapevine and if you’re living in an unfavorable climate like this, your plant will going to suffer from fungal diseases regularly and you’ll have to look after it more. Besides this, there is a possibility that fruits you’ll obtain will be of lesser quality and mild taste.
Grape Vine Care in Pots
Grape vine care in the pot is not so difficult if you follow the tips given below.

Pollination
When growing grapes in containers you must know most grape varieties are self-fertile and produce fruits on their own. However, shaking the plant gently at the time of flowering results in better yield.
Mulching
Grapevine requires mulching when grown on the ground. You can also mulch in the pot with pine bark, compost or with pebbles (this way it will look great too) to prevent excessive water evaporation from the soil and to protect roots from temperature fluctuations.
Overwintering
In climates with harsh winters, you have to protect the plant. For this, you’ll need to remove the dormant grapevine from its support and start to keep it indoors in warm space. Also, reduce watering and avoid the application of any fertilizer during this period.
Pruning
During the first few months after planting until the end of the growing season, do not prune the plant and allow it to grow freely to let the plant establish well in a pot and allow it to develop a strong root system.
Grapevine woods that are more than two years old do not produce fruits so you’ll have to remove all the old branches.
Prune the growth in late winter to early spring during the dormancy so that only two buds will remain. Buds are little protrusions on the trunk. This heavy pruning may seem too much to do but in the spring and summer, each of these buds will grow into a new branch. Dedicate the first year for training the vine to follow your trellis or stack with pruning and tying. Due to the limited space of the container, try to keep only 1 or 2 branches growing from the main trunk. Also, prune away any runners that creep away from the trellis.
The most important pruning will be one that you will perform in late winter when the plant shed its leaves, it is the one on which the fruiting depends. You will need to do the summer pruning too. Though it should have to be light and unobtrusive, just pinching and pruning.
To learn and read more pruning grapevines check out this article on freeplants.com and this one on RHS.
Growing grapevine as a tree is also possible. Check out this step by step article on eHow.
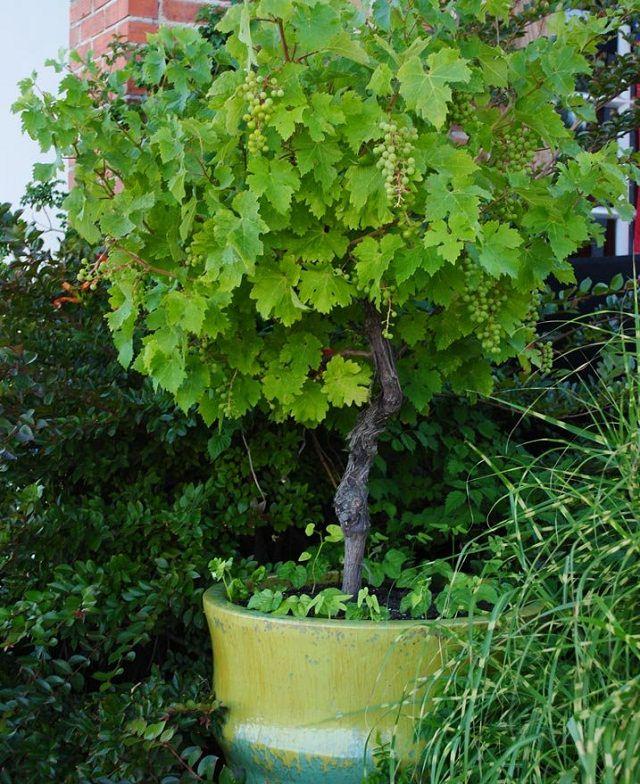
Diseases and Pests
In diseases, fungal diseases like black spot and powdery mildew, especially in dry and warm weather are possible. In pests, keep an eye on common garden insects like aphids. Japanese beetles, moths, caterpillars can also be a problem.
Harvesting
Harvesting should be done when your grape plant is at least 2-3 years old. Generally, grapes ripen anytime between late August to late October. Exactly when it depends on the variety and the type of climate you’re growing them in.
To find out whether your grapes are ready for harvesting or not is to taste them. If they taste sweet and nice, pick them. If they don’t, then leave them for a few more days. Once the grapes start to change their color they usually take anywhere between 1 to 3 weeks to become properly ripe (how long, depends on the variety and how good the climate is. For example, green grapes normally turn slightly translucent and their skins become yellow once they are ripe. Ripe grapes also feel soft to the touch. Eventually, taste is all that matters. If you like the taste, then pick them.
USDA Zones— 3 – 10
Difficulty— Moderate
Soil pH— Slightly acidic to neutral

Choosing a Pot
For growing grapes in containers, choose a large and sturdy container that can support this vigorous vine. A 15-20 gallon pot that is at least 16-18 inches deep and 18-24 inches wide is sufficient. Start with a smaller sized pot and then repot the plant in a larger one.
Choosing varieties
The best option is to go to a garden center and ask for a variety that can grow well in pots and in your climate. There are many varieties of grapevine you can choose from. Choosing a variety that is resistant to diseases and can grow well in your zone is most essential. However, you can grow almost any variety in the container but growing a dwarf grape cultivar like ‘pixie’ can save you from the hassle of training a grape vine in a pot.
Planting
The best time to plant grapevine is spring or early summer, planting on this time helps the plant to grow all season without the exposure to frost. But if you live in a frost-free hot tropical climate the best time for planting grape vine is winters.
Requirements for Growing Grapes in Pots

Position
Choose a location that is sunny, warm and dry. If your spot receives shade in an afternoon the plant will still do well, but at least 6 hours of sunlight is required. Avoid keeping the plant in wet, shady and less windy spot with less or no air circulation as it promotes fungal diseases and grapevine requires good air circulation around it.
Support and Training


Grapevine needs training and support to grow. When growing grapes in a pot, it is best to opt for a tall lightweight trellis, of wood or plastic. You can also DIY trellis for it. A grape vine grows long and requires support, it will be much better if you have an arbor or pergola like structure. Besides that, there are many other techniques to train the grape vine (See the picture above). Train the vine on a stake or something like a fan trellis. You can also support the vine on a stake with the help of “Umbrella Kniffen Training Method”. To learn more about this method, read this helpful article on pallensmith.com. Growing grapes in pots by the standard vine training method on a regular trellis is an easy and hassle free idea too.
Soil
Don’t use heavy garden soil when growing grapes in containers. Instead, use a light potting mix that is loose, rich in organic matter and most importantly drains well.
Watering
Water regularly and deeply to keep the soil slightly moist but avoid overwatering. Soggy, damp soil can be detrimental to the plant.
Fertilization
Side dress the plant periodically with aged manure or compost. In the first year, you can fertilize the plant with a general purpose fertilizer in spring and summer. From the next year, start to fertilize the plant with the fertilizer that is low in nitrogen but high in potassium and phosphorus from the spring when flower buds appear.
Growing Grapes in Tropics
Grapes are actually temperate fruits but the best thing about them is they can be grown in both temperate and tropical regions. Temperate climate zones without very harsh summers or humidity are optimum for growing grapevines. However, the two tropical countries India and Brazil are one of the largest producers of grapes in the world. Other tropical countries like Yemen, Thailand, Peru and Tanzania also produces grapes but to a smaller extent. This means if you live in a tropical climate you can still grow grapevine. You’ll only need to find a right variety that grows successfully in your area.
Still in tropics, areas with very high humidity or with heavy rainfall are less suitable for growing grapevine and if you’re living in an unfavorable climate like this, your plant will going to suffer from fungal diseases regularly and you’ll have to look after it more. Besides this, there is a possibility that fruits you’ll obtain will be of lesser quality and mild taste.
Grape Vine Care in Pots
Grape vine care in the pot is not so difficult if you follow the tips given below.

Pollination
When growing grapes in containers you must know most grape varieties are self-fertile and produce fruits on their own. However, shaking the plant gently at the time of flowering results in better yield.
Mulching
Grapevine requires mulching when grown on the ground. You can also mulch in the pot with pine bark, compost or with pebbles (this way it will look great too) to prevent excessive water evaporation from the soil and to protect roots from temperature fluctuations.
Overwintering
In climates with harsh winters, you have to protect the plant. For this, you’ll need to remove the dormant grapevine from its support and start to keep it indoors in warm space. Also, reduce watering and avoid the application of any fertilizer during this period.
Pruning
During the first few months after planting until the end of the growing season, do not prune the plant and allow it to grow freely to let the plant establish well in a pot and allow it to develop a strong root system.
Grapevine woods that are more than two years old do not produce fruits so you’ll have to remove all the old branches.
Prune the growth in late winter to early spring during the dormancy so that only two buds will remain. Buds are little protrusions on the trunk. This heavy pruning may seem too much to do but in the spring and summer, each of these buds will grow into a new branch. Dedicate the first year for training the vine to follow your trellis or stack with pruning and tying. Due to the limited space of the container, try to keep only 1 or 2 branches growing from the main trunk. Also, prune away any runners that creep away from the trellis.
The most important pruning will be one that you will perform in late winter when the plant shed its leaves, it is the one on which the fruiting depends. You will need to do the summer pruning too. Though it should have to be light and unobtrusive, just pinching and pruning.
To learn and read more pruning grapevines check out this article on freeplants.com and this one on RHS.
Growing grapevine as a tree is also possible. Check out this step by step article on eHow.

Diseases and Pests
In diseases, fungal diseases like black spot and powdery mildew, especially in dry and warm weather are possible. In pests, keep an eye on common garden insects like aphids. Japanese beetles, moths, caterpillars can also be a problem.
Harvesting
Harvesting should be done when your grape plant is at least 2-3 years old. Generally, grapes ripen anytime between late August to late October. Exactly when it depends on the variety and the type of climate you’re growing them in.
To find out whether your grapes are ready for harvesting or not is to taste them. If they taste sweet and nice, pick them. If they don’t, then leave them for a few more days. Once the grapes start to change their color they usually take anywhere between 1 to 3 weeks to become properly ripe (how long, depends on the variety and how good the climate is. For example, green grapes normally turn slightly translucent and their skins become yellow once they are ripe. Ripe grapes also feel soft to the touch. Eventually, taste is all that matters. If you like the taste, then pick them.
1
0
文章
司平松
2017年05月22日

#三角梅 ,别名:九重葛、三叶梅、毛宝巾、?杜鹃、三角花、叶子花、叶子梅、纸花、南美紫茉莉等。为常绿攀援状灌木。喜温暖湿润气候,不耐寒,在3℃以上才可安全越冬,15℃以上方可开花。喜充足光照。

叶子花花期较长,花多且美丽,在南方一般花期为当年的 10月份至翌年的6月初。如何使盆栽叶子花多开花呢?笔者认为须做好以下几方面工作:
一、培养土的选择
叶子花对土壤要求不严,但怕积水,不耐涝,因此,必须选择疏松、排水良好的培养土。一般可选用腐殖土4份、园土4份、沙2份配制的培养土,也可使用晒干塘泥掺些煤饼渣作盆土。
二、合理施肥
要使叶子花多开花,必须保证充足的养分,同时施肥要适时适量,合理使用。一般4月至7月份生长旺期,每隔7天至10天施液肥一次,以促进植株生长健壮,肥料可用10%至20%腐熟豆饼、菜籽饼水或人粪水等。8月份开始,为了促使花蕾的孕育,施以磷肥为主的肥料,每10 天施肥一次,可用20%的腐熟鸡鸭鸽粪和鱼杂等液肥。自10月份开始进入开花期,从此时起到11月中旬,每隔半个月需要施一次以磷肥为主的肥料,肥水浓度为30%至40%。以后每次开花后都要加施追肥一次,这样使叶子花在开花期不断得到养分补充。
三、开花前要控水
叶子花的平时浇水掌握“不干不浇,浇则要透”的原则。但要使叶子花开花整齐、多花,开花前必须进行控水。从9月份开始对叶子花的浇水进行控制,每次浇水要等到盆土干燥、枝叶软垂后方可进行,如此反复连续半个月时间,半个月后恢复平时正常浇水。控水期间切忌施肥,以免肥料烧伤根系。这样约一个月时间,叶子花即可显蕾开花,而且花开放整齐、繁盛。
四、松土除草和换盆
叶子花由于长期浇水、施肥和雨水冲刷,盆土容易板结,因此,必须定期松土,同时清除盆土杂草,以利于叶子花生长。否则盆土板结、积水,容易造成叶子花根系腐烂或生长不良。另外,叶子花生长速度较快,根系发达,须根甚多,每年需换盆一次。
五、修剪要得当
叶子花生长迅速,生长期要注意整形修剪,以促进侧枝生长,多生花枝。修剪次数一般为1次至3次,不宜过多,否则会影响开花次数。每次开花后,要及时清除残花,以减少养分消耗。花期过后要对过密枝条、内膛枝、徒长枝、弱势枝条进行疏剪,对其他枝条一般不修剪或只对枝头稍作修剪,不宜重剪,以缩短下一轮的生长期,促其早开花、多次开花。
六、注意光照和通风
叶子花是一种阳性植物,为了使枝叶生长正常,增加开花次数,必须把叶子花摆放在光线充足、通风良好的位置,让它每天光照8小时至12小时。如果摆放位置经常荫蔽,会使植株徒长,而减少开花数量。如果摆放位置不通风或盆与盆之间摆放过密,会使叶子脱落,特别是炎热夏天,忽热忽雨,容易造成大面积叶子脱落,从而影响植株的生长和开花。
七、加强病虫害防治
叶子花常见的害虫主要有叶甲和蚜虫,常见病害主要有枯梢病。平时要加强松土除草,及时清除枯枝、病叶,注意通气,以减少病源的传播。加强病情检查,发现病情及时处理,可用乐果、托布津等溶液防治。
1
2
文章
Rainbow
2017年05月22日

品种特性
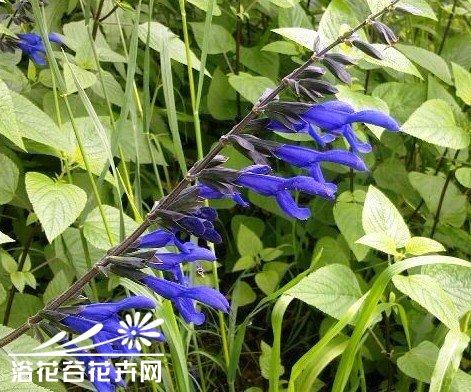
原产地北美南部科属唇形花科#鼠尾草 属特征多年生草本花卉,常作一年生花卉;植株呈丛生状;茎为四角柱状,且有毛,下部略木质化,呈亚低木状;叶对生,为长椭圆形,长3厘米至5厘米,灰绿色,叶表有凹凸状织纹,且有褶皱,灰白色,香味刺鼻浓郁;具长穗状花序,花量大;喜温暖、湿润和阳光充足的环境,耐寒性强,但怕炎热、干燥。
系列特征“鸵鸟”盆栽株高为20厘米,地栽株高为30厘米至35厘米,株形紧凑矮生,整个花穗为深蓝色;“发现者”盆栽株高为35厘米,地栽株高为45厘米至60厘米,花穗为蓝紫色。
播种育苗
种子每克920粒左右,一般选择200或者288穴盘进行播种,介质一般选择进口育苗草炭土或者经过消毒的国产育苗草炭土,其pH值应为5.5至5.8。播种后,需覆盖一层薄薄的蛭石,然后用薄膜覆盖,发芽适温为20℃至23℃,发芽天数为5至8天。
发芽第一阶段胚根出现,并且根开始形成。此阶段不用施肥,但保持育苗介质的湿润非常重要,需要一定的光照。出苗后逐渐撤掉薄膜。每周用1000倍百菌清或甲托防猝倒病,连续喷施2至3次。
发芽第二阶段继续生根,出现茎,且子叶已展开。保持适当湿度,防止过湿,可适当施用氮磷钾比例为20-10-20的水溶肥。
发芽第三阶段根部可以插入穴盘的孔穴中,并出现几片真叶。加大肥料浓度,控制湿度和温度,温度降低至20℃左右,需要一定光照,防止此阶段幼苗徒长。
发芽第四阶段根系成团,有2至3对真叶。继续增大肥料浓度,温度和湿度与第三阶段相同,适当控制水分,加强通风,仍需防止徒长,为移栽做好准备。
移栽上盆
植株真叶达到2至3片时开始移栽上盆,一般选择12厘米至13厘米的营养钵进行移栽,基质选择疏松通气性好的园土加有机肥和复合肥。
摘心处理植株长出4对真叶时留2对真叶摘心,促发侧枝。
栽培要点
温度上盆后温度降低至18℃,过一个月可降至15℃。如果温度在15℃以下,叶片就会发黄或脱落;温度在30℃以上时,则会出现花叶小、植株停止生长的现象。
施肥生长期施用稀释1500倍的硫铵,以改变叶色,效果较好。低温下不要施用尿素。为使植株根系健壮和枝叶茂盛,不断施肥非常重要,半月施用一次用含钙镁的复合肥料100ppm。
光照喜阳光充足的环境,炎热的夏季需要进行适当遮阴,幼苗期加强光照防止徒长。
病虫害管理
虫害鼠尾草常见虫害有粉虱、蚜虫等,需积极防治。
病害鼠尾草常见病害有霜霉博、叶斑病等。病害发生时,可喷洒50%托布津可湿性粉剂500倍液进行防治。
原产地北美南部科属唇形花科#鼠尾草 属特征多年生草本花卉,常作一年生花卉;植株呈丛生状;茎为四角柱状,且有毛,下部略木质化,呈亚低木状;叶对生,为长椭圆形,长3厘米至5厘米,灰绿色,叶表有凹凸状织纹,且有褶皱,灰白色,香味刺鼻浓郁;具长穗状花序,花量大;喜温暖、湿润和阳光充足的环境,耐寒性强,但怕炎热、干燥。
系列特征“鸵鸟”盆栽株高为20厘米,地栽株高为30厘米至35厘米,株形紧凑矮生,整个花穗为深蓝色;“发现者”盆栽株高为35厘米,地栽株高为45厘米至60厘米,花穗为蓝紫色。

播种育苗
种子每克920粒左右,一般选择200或者288穴盘进行播种,介质一般选择进口育苗草炭土或者经过消毒的国产育苗草炭土,其pH值应为5.5至5.8。播种后,需覆盖一层薄薄的蛭石,然后用薄膜覆盖,发芽适温为20℃至23℃,发芽天数为5至8天。
发芽第一阶段胚根出现,并且根开始形成。此阶段不用施肥,但保持育苗介质的湿润非常重要,需要一定的光照。出苗后逐渐撤掉薄膜。每周用1000倍百菌清或甲托防猝倒病,连续喷施2至3次。
发芽第二阶段继续生根,出现茎,且子叶已展开。保持适当湿度,防止过湿,可适当施用氮磷钾比例为20-10-20的水溶肥。
发芽第三阶段根部可以插入穴盘的孔穴中,并出现几片真叶。加大肥料浓度,控制湿度和温度,温度降低至20℃左右,需要一定光照,防止此阶段幼苗徒长。
发芽第四阶段根系成团,有2至3对真叶。继续增大肥料浓度,温度和湿度与第三阶段相同,适当控制水分,加强通风,仍需防止徒长,为移栽做好准备。
移栽上盆
植株真叶达到2至3片时开始移栽上盆,一般选择12厘米至13厘米的营养钵进行移栽,基质选择疏松通气性好的园土加有机肥和复合肥。
摘心处理植株长出4对真叶时留2对真叶摘心,促发侧枝。
栽培要点
温度上盆后温度降低至18℃,过一个月可降至15℃。如果温度在15℃以下,叶片就会发黄或脱落;温度在30℃以上时,则会出现花叶小、植株停止生长的现象。
施肥生长期施用稀释1500倍的硫铵,以改变叶色,效果较好。低温下不要施用尿素。为使植株根系健壮和枝叶茂盛,不断施肥非常重要,半月施用一次用含钙镁的复合肥料100ppm。
光照喜阳光充足的环境,炎热的夏季需要进行适当遮阴,幼苗期加强光照防止徒长。
病虫害管理
虫害鼠尾草常见虫害有粉虱、蚜虫等,需积极防治。
病害鼠尾草常见病害有霜霉博、叶斑病等。病害发生时,可喷洒50%托布津可湿性粉剂500倍液进行防治。
0
4
文章
Rainbow
2017年05月22日

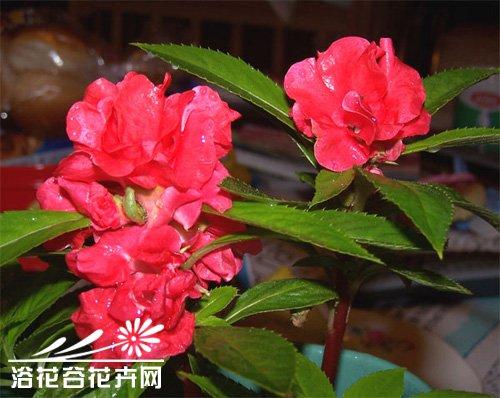
茶花凤仙发芽适温:22-30℃,生长适温:15-32℃,种子撒播在培养土上,轻加覆土约0.3公分,5-6天后发芽,真叶3-4片时即可定植于花盆或花坛,株距30公分。栽培土质以肥沃而排水良好的沙质土壤为佳,日照充足,定植后株高约10公分时摘心,生育期适当增施复合肥、有机肥等。
具体种植方法如下:
#茶花凤仙 播种四季都能进行,可以撒播或点播,点播用128穴的穴盘,播种适温为20℃左右,约1周出苗。播种苗高5厘米时进行第一次移植,移于8厘米的营养钵中,12厘米左右时定植于15厘米的盆中,用土为草炭土2、蛭石或河沙1、炉渣1混合,可加入适量的羊粪等做底肥。
对于分枝性不佳的个别种及品种,如新几内亚凤仙,苗期应适当掐尖。高温干燥会使凤仙花叶质变厚并且不舒展,节间变短,影响株形严重时会停止生长,因此越夏时要保持环境凉爽,并适当遮荫,过强的阳光会灼伤叶片,而光线过弱则植株徒长,叶质变薄,叶色浅绿。
为了“十一”用花,除选择较耐热的品种外,也可以于六月播种,七八月将小苗放在海拔800米左右的山上越夏。而冬春季节凤仙花需充足的光照,因此不需遮荫。
生长期间保证水分的供应,尤其夏季浇水要及时并充足,保持盆土湿润但不能积水,盆土干燥植株极易萎蔫,待表现出萎蔫时再浇水很容易引起腐烂。积水容易烂根。整个生长季节要保持一定的空气湿度,夏季可以向叶面和地面喷水,以增加空气湿度。每10天浇施一次薄肥,为控制株高和株形,除前期多施氮肥外,开花前后应控制氮肥的施用。
茶花凤仙扦插也可全年进行,选取生长健壮的枝条,剪下8厘米左右作插穗,保持温度20℃,约20天生根,夏季水插亦容易生根。
具体种植方法如下:
#茶花凤仙 播种四季都能进行,可以撒播或点播,点播用128穴的穴盘,播种适温为20℃左右,约1周出苗。播种苗高5厘米时进行第一次移植,移于8厘米的营养钵中,12厘米左右时定植于15厘米的盆中,用土为草炭土2、蛭石或河沙1、炉渣1混合,可加入适量的羊粪等做底肥。
对于分枝性不佳的个别种及品种,如新几内亚凤仙,苗期应适当掐尖。高温干燥会使凤仙花叶质变厚并且不舒展,节间变短,影响株形严重时会停止生长,因此越夏时要保持环境凉爽,并适当遮荫,过强的阳光会灼伤叶片,而光线过弱则植株徒长,叶质变薄,叶色浅绿。

为了“十一”用花,除选择较耐热的品种外,也可以于六月播种,七八月将小苗放在海拔800米左右的山上越夏。而冬春季节凤仙花需充足的光照,因此不需遮荫。
生长期间保证水分的供应,尤其夏季浇水要及时并充足,保持盆土湿润但不能积水,盆土干燥植株极易萎蔫,待表现出萎蔫时再浇水很容易引起腐烂。积水容易烂根。整个生长季节要保持一定的空气湿度,夏季可以向叶面和地面喷水,以增加空气湿度。每10天浇施一次薄肥,为控制株高和株形,除前期多施氮肥外,开花前后应控制氮肥的施用。
茶花凤仙扦插也可全年进行,选取生长健壮的枝条,剪下8厘米左右作插穗,保持温度20℃,约20天生根,夏季水插亦容易生根。
0
1
文章
Micky
2017年05月22日

Learn how to grow timothy hay, growing timothy hay is easy but requires a few basic conditions which you can read below.
USDA Zones — 3-9
Difficulty — Easy
Other names — Herd grass, Herd’s grass, Meadow cat’s-tail, Phleum pratense, Timothy, Timothy grass, Meadow cat’s-tail and common cat’s tail.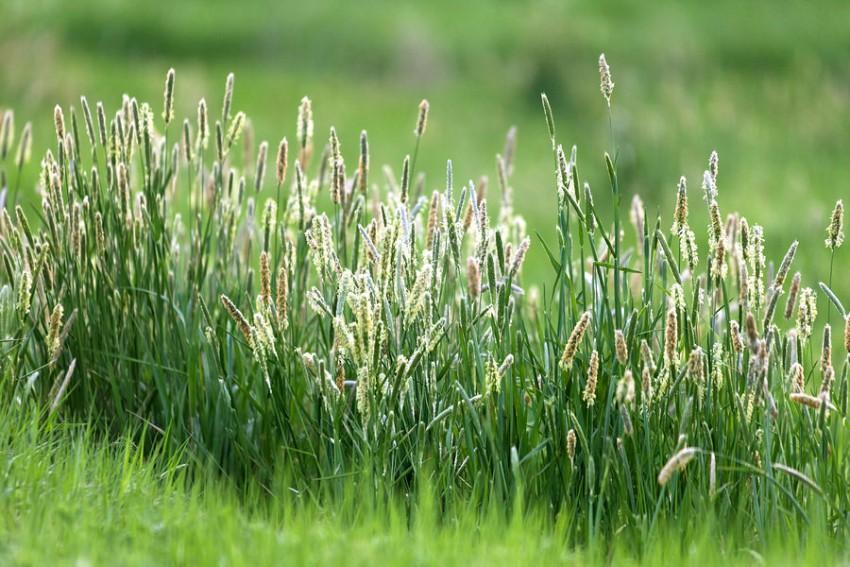
Timothy (Phleum pratense) is a perennial grass that grows of itself in some places, especially in the north, in the east and on the mountains. The leaves of timothy grass are quite pale green. Young leaves are rolled into the sleeve and then they grow in spirals. The base of the plant is often bulged and bulbous.
Timothy grass is generally used as hay to feed horses and that’s why is it also called Timothy hay. Apart from being used as hay it also produces a durable and attractive lawn. Growing timothy hay is relatively an easier task.
How to Grow Timothy HayPropagation and Planting Timothy GrassPrepare a place to sow seeds. Remove all weeds from the planting site with a hoe.Sprinkle the seeds on the planting site. The seeds must cover about one half of the total surface area of the soil.Rake to incorporate the planting site of the seeds in the soil. Sow the seeds no more than 1/2 inches deep.Slowly moisten the soil and keep it moist until the seeds germinate.For growing timothy hay, sow seeds in spring or late summer, you can also plant seeds in early fall.Requirements for Growing Timothy HayLocation
Timothy hay growing should be done on a flat area that receives partial shade. This cool season grass is undemanding and doesn’t require any special care.
Soil
Timothy grass grows well in both sandy or clay rich soil. It tolerates the wet conditions and thrives in slightly dry state for a short time too.
Watering
Keep the soil moist all the time. For growing timothy hay, regular watering is required as the plant has shallow roots that are not able to provide water under the surface of the soil, so even a short drought period can be detrimental for plant.
Timothy Hay Care
The timothy hay field should not be trampled on during drought periods because the grass has very shallow and fine roots that are sensitive at these times.
Fertilizer
Feed it with fertilizer rich in nitrogen in spring and again after harvesting. If you’re growing timothy hay with legumes, skip the nitrogen fertilizer. For accuracy in fertilization soil testing is recommended.
Harvesting
USDA Zones — 3-9
Difficulty — Easy
Other names — Herd grass, Herd’s grass, Meadow cat’s-tail, Phleum pratense, Timothy, Timothy grass, Meadow cat’s-tail and common cat’s tail.

Timothy (Phleum pratense) is a perennial grass that grows of itself in some places, especially in the north, in the east and on the mountains. The leaves of timothy grass are quite pale green. Young leaves are rolled into the sleeve and then they grow in spirals. The base of the plant is often bulged and bulbous.
Timothy grass is generally used as hay to feed horses and that’s why is it also called Timothy hay. Apart from being used as hay it also produces a durable and attractive lawn. Growing timothy hay is relatively an easier task.
How to Grow Timothy HayPropagation and Planting Timothy GrassPrepare a place to sow seeds. Remove all weeds from the planting site with a hoe.Sprinkle the seeds on the planting site. The seeds must cover about one half of the total surface area of the soil.Rake to incorporate the planting site of the seeds in the soil. Sow the seeds no more than 1/2 inches deep.Slowly moisten the soil and keep it moist until the seeds germinate.For growing timothy hay, sow seeds in spring or late summer, you can also plant seeds in early fall.Requirements for Growing Timothy HayLocation
Timothy hay growing should be done on a flat area that receives partial shade. This cool season grass is undemanding and doesn’t require any special care.
Soil
Timothy grass grows well in both sandy or clay rich soil. It tolerates the wet conditions and thrives in slightly dry state for a short time too.
Watering
Keep the soil moist all the time. For growing timothy hay, regular watering is required as the plant has shallow roots that are not able to provide water under the surface of the soil, so even a short drought period can be detrimental for plant.
Timothy Hay Care
The timothy hay field should not be trampled on during drought periods because the grass has very shallow and fine roots that are sensitive at these times.
Fertilizer
Feed it with fertilizer rich in nitrogen in spring and again after harvesting. If you’re growing timothy hay with legumes, skip the nitrogen fertilizer. For accuracy in fertilization soil testing is recommended.
Harvesting
0
0
文章
曹秋柳
2017年05月22日

#大金鸡菊 为宿根草本,株高30~70cm,花黄金色。花期6~10月。瘦果具膜质翅,种子可保存3年。发芽率达95%。有大花重瓣、半重瓣等多种园艺品种。

大金鸡菊适应性强,不择土壤,但是在肥沃深厚的土壤中长势更佳。可于旱春将植株掘出,把大墩根芽分成数份,切割后,挖穴深25~30cm栽入,培土、踏实、浇透水即可。在7~8月间,要特别注意排水,防止倒状,并及时摘叶,剪掉枯枝和花梗,以减少不必要的养分消耗,促使植株开花。
大金鸡菊采用播种及分株繁殖。由于可以自播繁衍,播种繁殖大多在种子成熟之后,即在8月进行,也可以于4月露地直播,当年7~8月开花。分株繁殖于4~5月进行。

大金鸡菊适应性强,不择土壤,但是在肥沃深厚的土壤中长势更佳。可于旱春将植株掘出,把大墩根芽分成数份,切割后,挖穴深25~30cm栽入,培土、踏实、浇透水即可。在7~8月间,要特别注意排水,防止倒状,并及时摘叶,剪掉枯枝和花梗,以减少不必要的养分消耗,促使植株开花。
大金鸡菊采用播种及分株繁殖。由于可以自播繁衍,播种繁殖大多在种子成熟之后,即在8月进行,也可以于4月露地直播,当年7~8月开花。分株繁殖于4~5月进行。
0
0
文章
曹秋柳
2017年05月22日

#洋甘菊 主要是种子播种,因为洋甘菊喜欢冷凉环境,所以比较适合秋播,洋甘菊为二年生草花,秋天播种,翌年的3~5月为开花期,繁殖主要靠种子播种。
洋甘菊需日照充足通风良好,排水良好的沙质壤土或土质深厚、疏松壤土为佳,耐寒性较强,9月秋播,发芽适温15-18℃,播后7—10天发芽,发芽整齐(由于洋甘菊种子非常细小,所以播种的时候可以不用覆土)。

洋甘菊幼苗期温度不宜过高,以13℃-16℃为宜,否则易徒长罹病。并注意及时间苗,苗高10cm时定植于10cm盆。生长期每月施肥1次,控制用量,否则花期推迟,平常要多维持通风良好,以免滋生蚜虫,花后剪除地上部,有利基生叶的萌发。
洋甘菊常有叶斑病和茎腐病为害,可用65%代森锌可湿性粉剂600倍液喷洒。虫害有盲蝽和潜叶蝇,用25%西维因可湿性粉剂500倍液喷杀。
洋甘菊需日照充足通风良好,排水良好的沙质壤土或土质深厚、疏松壤土为佳,耐寒性较强,9月秋播,发芽适温15-18℃,播后7—10天发芽,发芽整齐(由于洋甘菊种子非常细小,所以播种的时候可以不用覆土)。

洋甘菊幼苗期温度不宜过高,以13℃-16℃为宜,否则易徒长罹病。并注意及时间苗,苗高10cm时定植于10cm盆。生长期每月施肥1次,控制用量,否则花期推迟,平常要多维持通风良好,以免滋生蚜虫,花后剪除地上部,有利基生叶的萌发。
洋甘菊常有叶斑病和茎腐病为害,可用65%代森锌可湿性粉剂600倍液喷洒。虫害有盲蝽和潜叶蝇,用25%西维因可湿性粉剂500倍液喷杀。
1
4
成长记
五花肉jia鱼
2017年05月22日

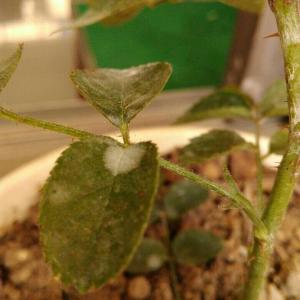
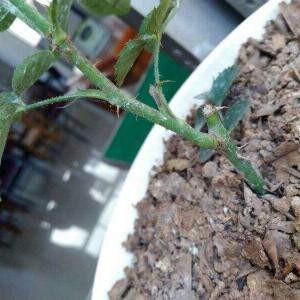
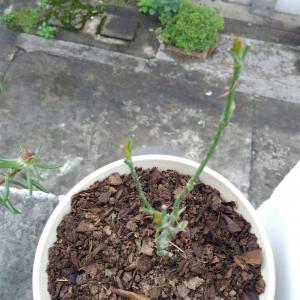
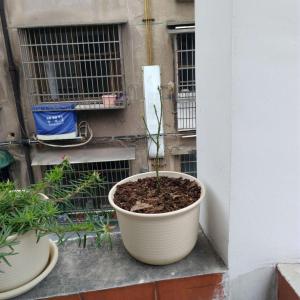
5.14爆发大虫灾,喷药。。当时就下决心,此生绝不再买月季(别人送的不算,扦插的不算)。18号把青空叶子剪干净,一片都不剩。杆子用毛笔刷过,喷药。今天发现冒出3个新芽。






0
0
文章
Rainbow
2017年05月21日

#蜈蚣草 常地生和附生于溪边林下的石缝中和树干上。喜温暖潮润和半阴环境。生长适温3~9月为16~24℃,9月至翌年3月为13~16℃。冬季温度不低干8℃,但短时间能耐0℃低温。也能耐30℃以上高温。

由于蜈蚣草喜湿润土壤和较高的空气湿度。春、秋季需充足浇水,保持盆土不干,但浇水不宜太多,否则叶片易枯黄脱落。夏季除浇水外,每天还需喷水数次,特别悬挂栽培需空气湿度更大些,否则空气干燥,羽状小叶易发生卷边、焦枯现象。蜈蚣草喜明亮的散射光,但也能耐较低的光照,切忌阳光直射。规模性栽培应设遮阳网,以50%~60%遮光率为合适。
盆栽蜈蚣草宜用疏松、肥沃,透气的中性或微酸性土壤。常用腐叶土或泥炭土、培养土或粗沙的混合基质。盆底多垫碎瓦片和碎砖,有利于排水、透气。生长期每旬施肥1次,又
可用”卉友”20-20-20通用肥或20-8-20四季用高硝酸钾肥。同时,生长期要随时摘除枯叶和黄叶,保持叶片清新翠绿。吊钵栽培时要多喷水,多根外追肥和修剪调整株态,并注意通风。
病虫害防治:室内栽培时,如通风不好,易遭受蚜虫和红蜘蛛危害,可用肥皂水或40%氧化乐果乳油1000倍液喷洒防治。在浇水过多或空气湿度过大时,肾蕨易发生生理性叶枯病,注意盆土不宜太湿并用65%代森锌可湿性粉剂600倍液喷洒。
0
0
文章
绮丽
2017年05月21日

#大丽花
花期:6-12月
大丽花又叫地瓜花,墨西哥人把它当做大方、富贵的象征,因此被封为墨西哥的国花。大丽花的品种超过了3万多种,是世界上花卉品种最多的物种之一。
种植方法
大丽花的繁殖有三种方法:扦插、分根和播种。其中最主要还是采用分根的方法进行繁殖。
在3-4月的时候进行大丽花球根的分根。这个时候,气温回升,大丽花的球根经过催芽已经长出了一些小芽。
2.用锋利的剪刀,从根茎处把带着嫩芽的球根和整个大丽花球根剪开。
3.分离出来带芽的小球,切割斜面需要蘸取硫磺粉或者是草木灰,以防止伤口腐烂,然后晾干,再移植到盆土中就可以了。
#百合花
花期:4-10月
喜欢百合花的小伙伴们,很多都会选择在春天亲手种上一盆。百合花有“百年好合”的寓意,平常拿来送人,或者是放在家中观赏,都是很不错的一个选择。
种植方法
1.对百合种球下端不好的根系进行修剪,将其中已经烂根或者是不好的根系剪掉,注意只是将不好的根剪掉,不要剪多了。
2.对种球进行消毒,可以将种球放入80倍的40%福尔马林溶液中进行浸泡,也可以将种球放入千分之一的多菌灵、高锰酸钾或者是百菌清中浸泡,然后取出来用清水将种球上的残留溶液清洗干净。
3.种植百合需要的土壤可以用腐叶土:砂土:园土按照1:1:1的比例混合。盆土用充分腐熟的堆肥和少量的骨粉作为基肥。
4.将消毒好的种球放进花盆中。
5.将土放入盆中,把种球盖住。为了能够出芽顺利,需要让芽尖露出土面大概0.5cm左右。
#荷花
花期:6-9月
荷花又叫水芙蓉,历来深受人们的喜爱,是中国传统的十大名花之一。它清新艳丽,艳而不妖,因此被认为是纯洁美好的象征。
种植方法
1.在水桶底下铺上枯枝烂叶等东西作为肥料。
2.加入水和塘泥。
3.将鸡粪和玉米皮放在水桶内。
4.在郊外挖一些田土。
5.将莲藕种到水桶里。
6.过一段时间,莲藕就会长叶子了。
#牡丹花
花期:4-5月
牡丹花色泽艳丽,富丽堂皇,素来有“花中之王”的美誉。牡丹的颜色特别多,其中以黄、绿、肉红、深红和银红色最佳,而最尊贵的颜色是黄色和绿色。
养护方法
1.牡丹花的盆土要求排水性良好,肥沃的沙质土壤。可以用腐叶土:田园土:细河沙按照2:1:1的比例混合,喷洒上多菌灵之后配置成栽培土。
2.牡丹喜欢干燥,不喜欢湿润的环境,浇水的时候要遵循“不干不浇,浇则浇透”的原则,春季保持盆土略微湿润就可以了。
3.牡丹是喜肥植物,要注意及时施肥。大概一年2-3次就可以了。施肥时间主要集中在春天的花蕾期、开花期和秋季施肥。肥料用传统有机肥就可以了。
4.牡丹花的主枝顶芽如果不是花蕾,而是叶芽的话,就需要及时摘去, 以免徒长影响开花。牡丹的枝条比较脆弱,在开花初期,经常因为花朵太重导致枝条弯曲,可以用细竹片捆绑扶持住。
好了,今天的介绍就到这里了。
看到这些开花这么大的植物,你是不是也想赶紧种一盆?
毕竟这样才能够显得小仙女们脸小呀。
0
0


