文章
ritau
2020年08月02日

1. Purchase a mint seedling. Mint plants are notoriously difficult to begin from seed. Instead, visit your local nursery (or even sometimes your local grocery store) and purchase a mint seedling. Look for a seeding that is already at least 3–4 inches (7.6–10.2 cm) tall.
-Some varieties of mint include sweet mint, chocolate mint, spearmint, lemon mint, apple mint, and peppermint.
-Spearmint and peppermint are the most common. Spearmint is often used in baking and cooking. Peppermint is used more often for drinks, like mojitos and hot chocolate.
2. Propagate a new mint plant from a cutting. Trim a 4 in (10 cm) sprig from an existing mint plant, about 0.5 inches (1.3 cm) above a junction. Place the trimming in a glass of water, and wait about 1 week. Small white roots should begin appearing under water. Wait another 2-7 days to allow the roots to develop.
-Add water to the glass as necessary.
-Change the water every 4-5 days to keeping your trimming healthy.
3. Use a “runner” from an existing outdoor mint plant. If you have a friend with an existing outdoor mint plant, you may be able to use one of their runners. “Runners” are long stems that grow away from a mint plant. Runners set their own roots in the ground, which means they can be carefully removed and transplanted into a new pot. Look for a runner, and use a trowel to gently remove it from the ground.
4. Find a container with a wide surface. Mint plants needs a lot of width to grow effectively, but they don’t need a great deal of depth. For each mint plant, look for a container at least 8–12 inches (20–30 cm) wide.
-Ceramic planters are porous and lose moisture easily. Your mint might be happier in a plastic container.
-You can repurpose a plastic container by drilling a hole in the bottom for drainage.
5. Fill your container with potting soil. You can pick up some potting soil from a local nursery, home improvement store, or big box store. Mint plants enjoy soil that drains well, so don’t pack the soil too tight.
6. Test your soil for a pH of 6-7.5. Mint plants are not super finicky, so they will accept a relatively wide pH range. Use a test kit to make sure your soil falls within this optimal range.
-To lower the pH of your soil, add some compost, composted manure, or acidic mulch.
-To raise the pH of your soil, add pelletized lime or wood ash.

7. Place your mint seedling in the container. Using a small trowel and/or your fingers, make a small opening in the soil. Carefully place your mint seedling into this opening. Move the soil around your seedling so that the roots are no longer exposed, and your seedling can stand up.
-Indoor mint plants do not require fertilizer or mulch.
8. Water your seedling immediately after planting. Once you've gotten your mint plant in the soil, give your seedling a generous watering. For one mint plant, offer around 6–8 fluid ounces (180–240 ml) of water.
Caring for:
1. Place your mint plant so it receives indirect sunlight. Choose an area that receives morning sun and partial afternoon shade. You want the plant to get some light without drying it out completely. Rotate your plant every 3-4 days. Mint plants will grow in the direction of sunlight, and rotating the plant helps to keep it from growing unevenly.
Some good options include:
-A windowsill that faces north.
-A shelf across the room from a south-facing window.
2. Water your mint frequently. Water your mint at least every 2-3 days, or more if you live in a very dry climate or your mint is getting a lot of direct sunlight. Check the soil with a finger each day to ensure that the soil is moist.
-Add around 1–2 cups (240–470 ml) to your mint plant at each watering.
-Humidity can be important to the growing process, so consider misting your plant with water in between waterings.
3. Use water soluble fertilizer if desired. Mint plants do not often require fertilizer, but it can help improve your plant's growth if used occasionally. The best time to use fertilizer is in the spring when plants first start the new growing season.
-Choose a water soluble, time-release fertilizer.
-Too much fertilizer can alter the taste of your mint.

4. Harvest your mint leaves. Give your new mint plant anywhere from 2-6 weeks to get established. Then begin plucking off leaves as you need them. Avoid harvesting more than ⅓ of the plant at one time, as this can prevent proper regrowth.
-Hang mint stems upside down to dry them.
-Save mint leaves in an airtight container, like a jar or a small plastic bag.
5. Remove any flower buds before they open. Although the flowers that appear at the top of your mint plant are pretty, you’ll need to trim them off as soon as they appear. Use a pair of sharp scissors to clip the flowers off at the stem to prevent fewer, blander mint leaves.
This prevents the plant from “going to seed.” When a mint plant starts producing seeds, it puts less energy toward leaf production.
-Some varieties of mint include sweet mint, chocolate mint, spearmint, lemon mint, apple mint, and peppermint.
-Spearmint and peppermint are the most common. Spearmint is often used in baking and cooking. Peppermint is used more often for drinks, like mojitos and hot chocolate.
2. Propagate a new mint plant from a cutting. Trim a 4 in (10 cm) sprig from an existing mint plant, about 0.5 inches (1.3 cm) above a junction. Place the trimming in a glass of water, and wait about 1 week. Small white roots should begin appearing under water. Wait another 2-7 days to allow the roots to develop.
-Add water to the glass as necessary.
-Change the water every 4-5 days to keeping your trimming healthy.
3. Use a “runner” from an existing outdoor mint plant. If you have a friend with an existing outdoor mint plant, you may be able to use one of their runners. “Runners” are long stems that grow away from a mint plant. Runners set their own roots in the ground, which means they can be carefully removed and transplanted into a new pot. Look for a runner, and use a trowel to gently remove it from the ground.
4. Find a container with a wide surface. Mint plants needs a lot of width to grow effectively, but they don’t need a great deal of depth. For each mint plant, look for a container at least 8–12 inches (20–30 cm) wide.
-Ceramic planters are porous and lose moisture easily. Your mint might be happier in a plastic container.
-You can repurpose a plastic container by drilling a hole in the bottom for drainage.
5. Fill your container with potting soil. You can pick up some potting soil from a local nursery, home improvement store, or big box store. Mint plants enjoy soil that drains well, so don’t pack the soil too tight.
6. Test your soil for a pH of 6-7.5. Mint plants are not super finicky, so they will accept a relatively wide pH range. Use a test kit to make sure your soil falls within this optimal range.
-To lower the pH of your soil, add some compost, composted manure, or acidic mulch.
-To raise the pH of your soil, add pelletized lime or wood ash.

7. Place your mint seedling in the container. Using a small trowel and/or your fingers, make a small opening in the soil. Carefully place your mint seedling into this opening. Move the soil around your seedling so that the roots are no longer exposed, and your seedling can stand up.
-Indoor mint plants do not require fertilizer or mulch.
8. Water your seedling immediately after planting. Once you've gotten your mint plant in the soil, give your seedling a generous watering. For one mint plant, offer around 6–8 fluid ounces (180–240 ml) of water.
Caring for:
1. Place your mint plant so it receives indirect sunlight. Choose an area that receives morning sun and partial afternoon shade. You want the plant to get some light without drying it out completely. Rotate your plant every 3-4 days. Mint plants will grow in the direction of sunlight, and rotating the plant helps to keep it from growing unevenly.
Some good options include:
-A windowsill that faces north.
-A shelf across the room from a south-facing window.
2. Water your mint frequently. Water your mint at least every 2-3 days, or more if you live in a very dry climate or your mint is getting a lot of direct sunlight. Check the soil with a finger each day to ensure that the soil is moist.
-Add around 1–2 cups (240–470 ml) to your mint plant at each watering.
-Humidity can be important to the growing process, so consider misting your plant with water in between waterings.
3. Use water soluble fertilizer if desired. Mint plants do not often require fertilizer, but it can help improve your plant's growth if used occasionally. The best time to use fertilizer is in the spring when plants first start the new growing season.
-Choose a water soluble, time-release fertilizer.
-Too much fertilizer can alter the taste of your mint.

4. Harvest your mint leaves. Give your new mint plant anywhere from 2-6 weeks to get established. Then begin plucking off leaves as you need them. Avoid harvesting more than ⅓ of the plant at one time, as this can prevent proper regrowth.
-Hang mint stems upside down to dry them.
-Save mint leaves in an airtight container, like a jar or a small plastic bag.
5. Remove any flower buds before they open. Although the flowers that appear at the top of your mint plant are pretty, you’ll need to trim them off as soon as they appear. Use a pair of sharp scissors to clip the flowers off at the stem to prevent fewer, blander mint leaves.
This prevents the plant from “going to seed.” When a mint plant starts producing seeds, it puts less energy toward leaf production.
0
0
文章
ritau
2020年07月30日

1. Dampen a paper towel and smooth it out on a flat surface. Start by soaking a paper towel with water, then squeeze out the excess water. Place the damp paper towel on a flat surface and smooth out any wrinkles.
- The paper towel should fit inside your plastic zippered or resealable bag. If the paper towel is too big, then fold it in half or into quarters.
2. Pick out 5 to 10 plump seeds from an organic lemon. Seeds from non-organic lemons will not always sprout, so it is a good idea to prepare at least 10 seeds to ensure you have a healthy selection. Look for seeds that are large and plump. Skip the ones that look shriveled or like tiny, white specks. These will either not sprout, or they won't grow into a healthy seedling.
- Even if you only plan on growing one lemon tree, it is a good idea to start with several seeds. Not all seeds will sprout, and not all seedlings will survive.
- Take care to not crowd the seeds. They should be at least three inches apart, so that they have room for their roots as they germinate.
3. Consider keeping the seeds in a cup of water overnight. This will keep the seeds from drying out while you work. The seeds must stay moist. If they dry out, they will not sprout.
4. You can also peel the other white layer off to reveal a brown-colored seed. Start peeling from the pointy end. You can use your finger nail or a craft knife to nick the tip, and then peel the outer shell down. This will make it easier for the seeds to sprout and speed up the process, but is not necessary for germination to occur.
5. Peel the brown seed cover off as well. You may notice that your seed is covered with a thin, brown film. Use your fingernail to scratch this coating off.
6. Place the seeds onto the damp paper towel. Try to spread the seeds out as evenly as you can, so that the roots don't become tangled when they sprout.
7. Repeat the peeling process for the rest of the seeds and place them down onto the towel. Once the seeds are on the paper towel, they should stay damp. If you notice them starting to get dry out, consider covering the paper towel with another damp paper towel, or folding the first one overtop of them.
8. Repeat the peeling process for the rest of the seeds and place them down onto the towel. Once the seeds are on the paper towel, they should stay damp. If you notice them starting to get dry out, consider covering the paper towel with another damp paper towel, or folding the first one overtop of them.
9. Slip the paper towel into a plastic zippered or resealable bag, and close the bag tightly. Don't use a plastic grocery bag. You want the bag to be zippered or resealable; this will help trap the moisture and retain heat. Your seeds will need both in order to sprout.
10. Keep the plastic bag in a dark, warm location until the seeds sprout. Keep the temperature between 68 and 72 degrees Fahrenheit. It will take one to two weeks. Some seedlings will need up to three weeks to sprout.

11. Transplant the seedlings when the tails are about 3.15 inches (8 centimeters) long. Make a shallow hole (a half inch deep) in a pot of damp, well-drained soil, and tuck the seedling, tail-side-down into the hole. Gently pat the soil around the seedling.
12. Move the pot to a warm, sunny location. Remember to water the plant and to keep the soil damp; do not allow the soil to become soggy or dry. Click here to learn how to take care of your seedling.
- The paper towel should fit inside your plastic zippered or resealable bag. If the paper towel is too big, then fold it in half or into quarters.
2. Pick out 5 to 10 plump seeds from an organic lemon. Seeds from non-organic lemons will not always sprout, so it is a good idea to prepare at least 10 seeds to ensure you have a healthy selection. Look for seeds that are large and plump. Skip the ones that look shriveled or like tiny, white specks. These will either not sprout, or they won't grow into a healthy seedling.
- Even if you only plan on growing one lemon tree, it is a good idea to start with several seeds. Not all seeds will sprout, and not all seedlings will survive.
- Take care to not crowd the seeds. They should be at least three inches apart, so that they have room for their roots as they germinate.
3. Consider keeping the seeds in a cup of water overnight. This will keep the seeds from drying out while you work. The seeds must stay moist. If they dry out, they will not sprout.

4. You can also peel the other white layer off to reveal a brown-colored seed. Start peeling from the pointy end. You can use your finger nail or a craft knife to nick the tip, and then peel the outer shell down. This will make it easier for the seeds to sprout and speed up the process, but is not necessary for germination to occur.
5. Peel the brown seed cover off as well. You may notice that your seed is covered with a thin, brown film. Use your fingernail to scratch this coating off.
6. Place the seeds onto the damp paper towel. Try to spread the seeds out as evenly as you can, so that the roots don't become tangled when they sprout.
7. Repeat the peeling process for the rest of the seeds and place them down onto the towel. Once the seeds are on the paper towel, they should stay damp. If you notice them starting to get dry out, consider covering the paper towel with another damp paper towel, or folding the first one overtop of them.
8. Repeat the peeling process for the rest of the seeds and place them down onto the towel. Once the seeds are on the paper towel, they should stay damp. If you notice them starting to get dry out, consider covering the paper towel with another damp paper towel, or folding the first one overtop of them.
9. Slip the paper towel into a plastic zippered or resealable bag, and close the bag tightly. Don't use a plastic grocery bag. You want the bag to be zippered or resealable; this will help trap the moisture and retain heat. Your seeds will need both in order to sprout.
10. Keep the plastic bag in a dark, warm location until the seeds sprout. Keep the temperature between 68 and 72 degrees Fahrenheit. It will take one to two weeks. Some seedlings will need up to three weeks to sprout.

11. Transplant the seedlings when the tails are about 3.15 inches (8 centimeters) long. Make a shallow hole (a half inch deep) in a pot of damp, well-drained soil, and tuck the seedling, tail-side-down into the hole. Gently pat the soil around the seedling.
12. Move the pot to a warm, sunny location. Remember to water the plant and to keep the soil damp; do not allow the soil to become soggy or dry. Click here to learn how to take care of your seedling.
0
0
文章
ritau
2020年07月29日

1. Prepare your potting soil in a separate bucket. Pour some soil into a large bucket and add water to it until it is damp. Mix the soil with your hand or a trowel until it is evenly damp. Do not allow the soil to become soggy, or the seeds will rot. You will need a well-draining soil. Lemon trees love water, but they hate to sit in it.
-Try to get a pasteurized soil mix. Pasteurization gets rid of any bacteria that can kill seeds.
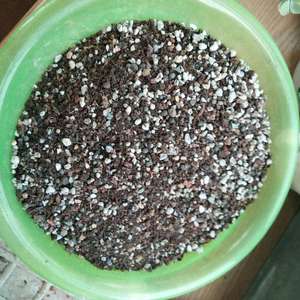
-Consider getting a soil that is a blend of peat, perlite, vermiculite, and organic fertilizer. This will give your seedling proper drainage and nutrients.
2. Choose a small pot with drainage holes. The pot should be about 3 to 4 inches (7.62 to 10.16 centimeters) wide, and 5 to 6 inches (12.7 to 15.24 centimeters) deep.This pot will be enough for one seed. Some people like to plant several seeds in one pot at a time. If you want to do this too, choose a larger pot.
Your pot must have drainage holes. If your pot does not have any, you will need to drill some.
3. Fill the pot with soil. Stop when the top of the soil is about 1 inch (2.54 centimeters) from the rim.
4. Make a ½ inch (1.27 centimeter) deep hole in the soil. You can do this using your finger or a pencil.
5. Choose a plump-looking seed from a lemon. It may be necessary to use an organic lemon because seeds from a non-organic lemon may not sprout. Also, avoid taking any seeds that look too tiny (like a grain of rice) or that look shriveled (like a raisin). These seeds either won't sprout or won't grow into healthy seedlings.
Consider planting 5 to 10 lemon seeds at one time, in case some of the seeds don't sprout or don't make it past seedling-hood.
Keep in mind that trees that come from seeds are not identical to the parent tree that they came from. Sometimes, the fruit that the new saplings produce is of a lesser quality. Other times, they do not produce edible fruit at all. This does not prevent the young tree from being visually pleasing. Keep this in mind when growing your tree.

6. Wash the seed to get rid of the slimy coating. You can do this by washing the lemon seed or by sucking on it until the coating is gone. This is important. The gel-like coating contains sugars, which can cause the seed to rot.
Consider leaving the lemon seeds in a cup of warm water overnight. This will help them sprout faster.
7. Drop the seed into the hole and cover it up. Make sure that the pointy tip is pointing downward into the soil, and the rounded part is pointing upward towards you. The roots will come out of the pointy part.
8. Cover the pot with a piece of breathable plastic to trap warmth and moisture. Begin by placing a sheet of clear plastic cling wrap over the pot. Wrap a rubber band around the plastic wrap to secure it to the pot. Poke a few holes into the plastic wrap. You can use a pencil, a toothpick, or even a fork. These holes will allow the plant to breathe.
9. Place the pot in a warm location. You can place the pot in a sunny location too, but sunlight is not vital at this point. In fact, too much sunlight can "cook" the young, delicate seedlings. You should see a sprout emerge in about two weeks.
The ideal temperature is between 68°F and 82.4°F (20°C and 28°C).

10. Water the soil when you see it become dry. The plastic wrap should trap the moisture, and the condensation should rain down onto the soil, making it damp again. In very dry environments, this may not happen. If you see the soil start to become dry, remove the plastic wrap and water the plant. Be sure to re-cover the pot with the plastic wrap when you are done watering.
11. Remove the plastic covering once the sprout appears and transfer the pot to a warm, sunny location. Remember to keep the soil damp, but do not let it become soggy. Click here to learn how to take care of your seedling.
-Try to get a pasteurized soil mix. Pasteurization gets rid of any bacteria that can kill seeds.
-Consider getting a soil that is a blend of peat, perlite, vermiculite, and organic fertilizer. This will give your seedling proper drainage and nutrients.
2. Choose a small pot with drainage holes. The pot should be about 3 to 4 inches (7.62 to 10.16 centimeters) wide, and 5 to 6 inches (12.7 to 15.24 centimeters) deep.This pot will be enough for one seed. Some people like to plant several seeds in one pot at a time. If you want to do this too, choose a larger pot.
Your pot must have drainage holes. If your pot does not have any, you will need to drill some.
3. Fill the pot with soil. Stop when the top of the soil is about 1 inch (2.54 centimeters) from the rim.
4. Make a ½ inch (1.27 centimeter) deep hole in the soil. You can do this using your finger or a pencil.
5. Choose a plump-looking seed from a lemon. It may be necessary to use an organic lemon because seeds from a non-organic lemon may not sprout. Also, avoid taking any seeds that look too tiny (like a grain of rice) or that look shriveled (like a raisin). These seeds either won't sprout or won't grow into healthy seedlings.
Consider planting 5 to 10 lemon seeds at one time, in case some of the seeds don't sprout or don't make it past seedling-hood.
Keep in mind that trees that come from seeds are not identical to the parent tree that they came from. Sometimes, the fruit that the new saplings produce is of a lesser quality. Other times, they do not produce edible fruit at all. This does not prevent the young tree from being visually pleasing. Keep this in mind when growing your tree.

6. Wash the seed to get rid of the slimy coating. You can do this by washing the lemon seed or by sucking on it until the coating is gone. This is important. The gel-like coating contains sugars, which can cause the seed to rot.
Consider leaving the lemon seeds in a cup of warm water overnight. This will help them sprout faster.
7. Drop the seed into the hole and cover it up. Make sure that the pointy tip is pointing downward into the soil, and the rounded part is pointing upward towards you. The roots will come out of the pointy part.
8. Cover the pot with a piece of breathable plastic to trap warmth and moisture. Begin by placing a sheet of clear plastic cling wrap over the pot. Wrap a rubber band around the plastic wrap to secure it to the pot. Poke a few holes into the plastic wrap. You can use a pencil, a toothpick, or even a fork. These holes will allow the plant to breathe.
9. Place the pot in a warm location. You can place the pot in a sunny location too, but sunlight is not vital at this point. In fact, too much sunlight can "cook" the young, delicate seedlings. You should see a sprout emerge in about two weeks.
The ideal temperature is between 68°F and 82.4°F (20°C and 28°C).

10. Water the soil when you see it become dry. The plastic wrap should trap the moisture, and the condensation should rain down onto the soil, making it damp again. In very dry environments, this may not happen. If you see the soil start to become dry, remove the plastic wrap and water the plant. Be sure to re-cover the pot with the plastic wrap when you are done watering.
11. Remove the plastic covering once the sprout appears and transfer the pot to a warm, sunny location. Remember to keep the soil damp, but do not let it become soggy. Click here to learn how to take care of your seedling.
0
0
文章
ritau
2020年07月27日

1. Obtain coffee grounds. Growing mushrooms from coffee grounds is a fun project which helps to use up coffee grounds that would otherwise go to waste. Coffee grounds are a fantastic growing medium for mushrooms (oyster mushrooms in particular) as they are already sterilized thanks to the coffee brewing process and are full of nutrients.
For 500 g (17.6 oz) of mushroom spawn, you will need 2.5 kg (88 oz) of fresh coffee grounds. The best way to get this amount of fresh coffee grounds (brewed that day) is to go to a cafe and ask nicely. They're usually more than happy to give it away.
2. Find a container for the mushrooms. The best thing to use is a filter patch grow bag, which can usually be purchased along with the mushroom spawn. Otherwise you can use a large, sealable freezer bag or a sterilized milk carton or ice cream tub, with four small holes poked into the sides.
3. Transfer the spawn into the container. Wash your hands thoroughly with anti-bacterial soap, then mix the mushroom spawn into the coffee grounds, breaking them up with your hands to ensure that they are evenly distributed. Place the inoculated coffee grinds into the plastic bag or container and seal tightly.
4. Put the mushrooms in the right environment. Place the bag or container in a warm, dark location, somewhere between 64 and 77°F (18 to 25°C), like in an airing cupboard or under the sink. Leave it here for two to four weeks or until it turns entirely white — this due to the mycelia colonizing the coffee grinds.
-Again, cut out any dark spots of green or brown that develop on the colonizing substrate, as this can make you sick.
5. Relocate the mushrooms. Once the bag or container's contents have turned completely white, move it to a bright area (but not into direct sunlight) and cut a 2" by 2" hole at the top. Mist the contents of the container with water twice daily to prevent it from drying out — the mushrooms won't grow in too-dry conditions.
6. Harvest the mushrooms. Over the next five to seven days, tiny mushrooms will begin to sprout. Continue to mist them with water and they should double in size each day. When the cups of the mushrooms have started to turn slightly upwards, they are ready to harvest.
When the mushrooms have stopped sprouting, plant the coffee grinds outdoors under bark mulch or compost and new mushrooms may develop, depending on the weather.
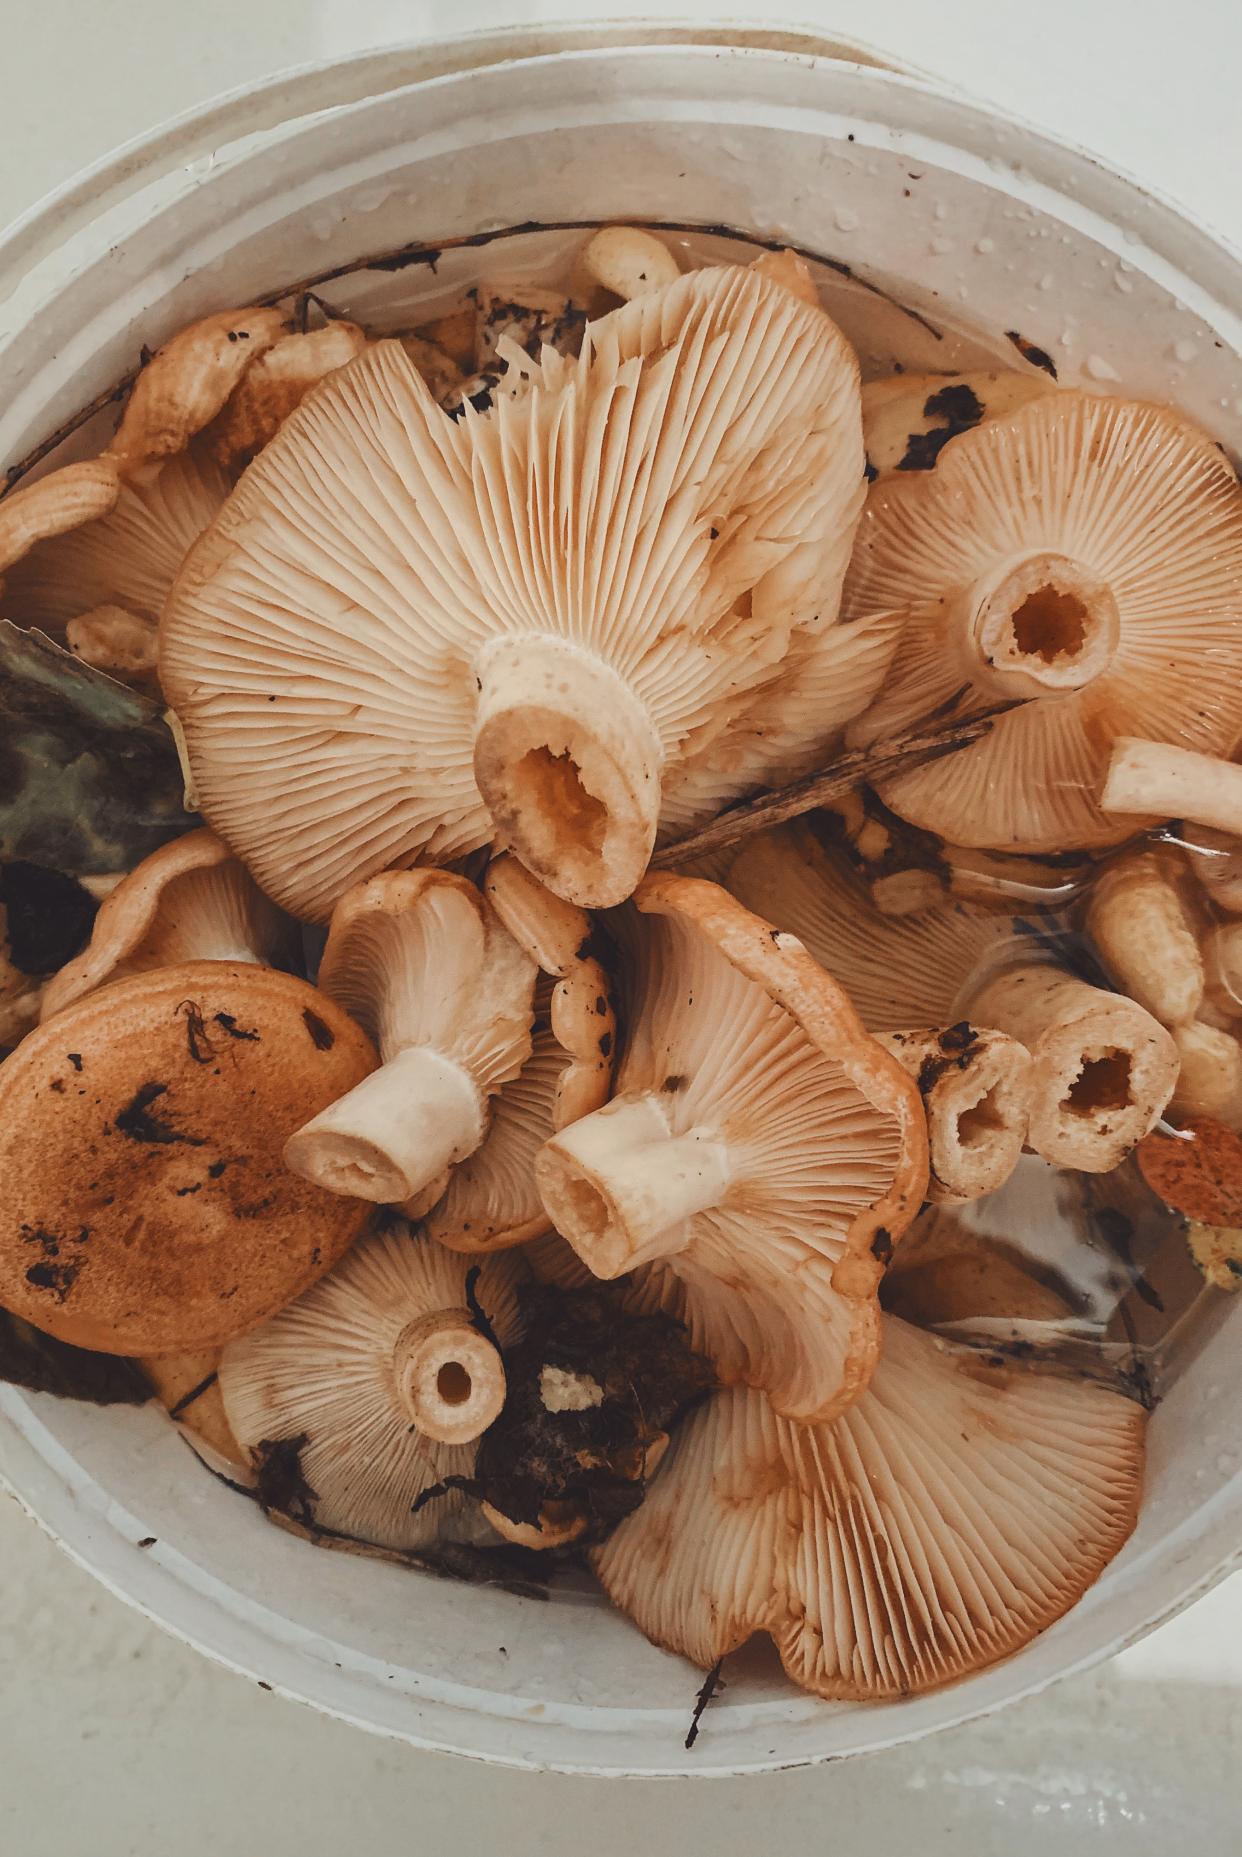
For 500 g (17.6 oz) of mushroom spawn, you will need 2.5 kg (88 oz) of fresh coffee grounds. The best way to get this amount of fresh coffee grounds (brewed that day) is to go to a cafe and ask nicely. They're usually more than happy to give it away.
2. Find a container for the mushrooms. The best thing to use is a filter patch grow bag, which can usually be purchased along with the mushroom spawn. Otherwise you can use a large, sealable freezer bag or a sterilized milk carton or ice cream tub, with four small holes poked into the sides.

3. Transfer the spawn into the container. Wash your hands thoroughly with anti-bacterial soap, then mix the mushroom spawn into the coffee grounds, breaking them up with your hands to ensure that they are evenly distributed. Place the inoculated coffee grinds into the plastic bag or container and seal tightly.
4. Put the mushrooms in the right environment. Place the bag or container in a warm, dark location, somewhere between 64 and 77°F (18 to 25°C), like in an airing cupboard or under the sink. Leave it here for two to four weeks or until it turns entirely white — this due to the mycelia colonizing the coffee grinds.
-Again, cut out any dark spots of green or brown that develop on the colonizing substrate, as this can make you sick.
5. Relocate the mushrooms. Once the bag or container's contents have turned completely white, move it to a bright area (but not into direct sunlight) and cut a 2" by 2" hole at the top. Mist the contents of the container with water twice daily to prevent it from drying out — the mushrooms won't grow in too-dry conditions.
6. Harvest the mushrooms. Over the next five to seven days, tiny mushrooms will begin to sprout. Continue to mist them with water and they should double in size each day. When the cups of the mushrooms have started to turn slightly upwards, they are ready to harvest.
When the mushrooms have stopped sprouting, plant the coffee grinds outdoors under bark mulch or compost and new mushrooms may develop, depending on the weather.

0
0
文章
ritau
2020年06月28日

*Handling an Infestation*
1. Rinse plants that have a minor infestation. If you only notice a few lace bugs per leaf, you might be able to use a hose to get rid of them. Make sure your hose has a strong stream of water, and spray down the plant to wash the bugs away.
2. Spray insecticides onto the bottom of leaves. Lace bugs and their larva often feed on the bottom of leaves, so you will need to spray the insecticide directly onto the undersides of the leaves. Start in late spring when the eggs first hatch, and reapply every ten to fourteen days.
-You can use an insecticidal soap, but make sure you spray the bugs directly with it. Pesticides, such as pyrethrin or neem oil, also work.
-Insecticides will kill nymphs and adults but not eggs.
3. Apply horticultural oil in the fall to kill eggs. The eggs appear as black spots along the veins of the leaf. These cannot be killed with insecticides, but they can be killed with horticultural oil. Spray it along the underside of each leaf in the fall.
4. Apply neonicotinoids to the soil if other methods haven't worked. Neonicotinoids include imidacloprid and dinotefuran. When added to the soil, the plant may absorb the substances, which can keep the plant bug free for a whole season. These typically come as a granule or as a concentration.
If you have a granule version, sprinkle it around the base of the plant. Water the plant afterwards.
If you have a concentration, follow the instructions on the label to mix it with water. Pour it evenly around the base, and water the plant afterwards.
Keep in mind that neonicotinoids may also kill off beneficial bugs.

*Assessing the Damage*
1. Examine the leaves. You only need to treat plants that are currently infested with lace bugs. Lace bugs cause white spots to appear on the leaf. The larger your infestation, the paler your leaves will become. A few white dots may mean a small infestation while leaves that are almost completely white indicate a much larger problem.
-The underside of the leaf may be covered in dark excrement.
-Do this every two weeks, starting in early spring and ending in late summer.
2. Check the undersides of leaves to look for the bugs. There are three different stages of a lace bug’s life. If you can reduce their numbers in early spring while they are still nymphs, you may be able to prevent an infestation in summer.
-Eggs are small, black, and oval. Three generations of eggs can be laid in one year, beginning in spring and ending in fall. Fall eggs will hatch next spring.
-Nymphs are small. They may have black, spotted markings, and they have not developed wings yet. Nymphs can hatch as early as April and as late as September.
-Adults have large wings with a lacy pattern. They may start appearing in early summer.
3. Monitor for early leaf drop. Severe infestations may cause the plant's leaves to drop early. At this point, you should use heavier pesticides to eliminate the lace bugs. New leaves should grow back as long as the infestation is handled.

1. Rinse plants that have a minor infestation. If you only notice a few lace bugs per leaf, you might be able to use a hose to get rid of them. Make sure your hose has a strong stream of water, and spray down the plant to wash the bugs away.
2. Spray insecticides onto the bottom of leaves. Lace bugs and their larva often feed on the bottom of leaves, so you will need to spray the insecticide directly onto the undersides of the leaves. Start in late spring when the eggs first hatch, and reapply every ten to fourteen days.
-You can use an insecticidal soap, but make sure you spray the bugs directly with it. Pesticides, such as pyrethrin or neem oil, also work.
-Insecticides will kill nymphs and adults but not eggs.
3. Apply horticultural oil in the fall to kill eggs. The eggs appear as black spots along the veins of the leaf. These cannot be killed with insecticides, but they can be killed with horticultural oil. Spray it along the underside of each leaf in the fall.
4. Apply neonicotinoids to the soil if other methods haven't worked. Neonicotinoids include imidacloprid and dinotefuran. When added to the soil, the plant may absorb the substances, which can keep the plant bug free for a whole season. These typically come as a granule or as a concentration.
If you have a granule version, sprinkle it around the base of the plant. Water the plant afterwards.
If you have a concentration, follow the instructions on the label to mix it with water. Pour it evenly around the base, and water the plant afterwards.
Keep in mind that neonicotinoids may also kill off beneficial bugs.

*Assessing the Damage*
1. Examine the leaves. You only need to treat plants that are currently infested with lace bugs. Lace bugs cause white spots to appear on the leaf. The larger your infestation, the paler your leaves will become. A few white dots may mean a small infestation while leaves that are almost completely white indicate a much larger problem.
-The underside of the leaf may be covered in dark excrement.
-Do this every two weeks, starting in early spring and ending in late summer.
2. Check the undersides of leaves to look for the bugs. There are three different stages of a lace bug’s life. If you can reduce their numbers in early spring while they are still nymphs, you may be able to prevent an infestation in summer.
-Eggs are small, black, and oval. Three generations of eggs can be laid in one year, beginning in spring and ending in fall. Fall eggs will hatch next spring.
-Nymphs are small. They may have black, spotted markings, and they have not developed wings yet. Nymphs can hatch as early as April and as late as September.
-Adults have large wings with a lacy pattern. They may start appearing in early summer.
3. Monitor for early leaf drop. Severe infestations may cause the plant's leaves to drop early. At this point, you should use heavier pesticides to eliminate the lace bugs. New leaves should grow back as long as the infestation is handled.

0
0


