文章
莹723
2020年09月06日

1. Decide what type of garden to grow. What purpose do you want your garden to serve? Some gardens are functional and produce fruit and vegetables you can use to feed your family or give away to neighbors. Others are more ornamental in purpose, serving to beautify your property and provide a pleasing sight to people passing by. If you're not sure what type of garden you want, consider the following options:
- Vegetable gardens can include peppers, tomatoes, cabbages and lettuces, potatoes, squash, carrots, and many other vegetables. If vegetables can grow in your climate, you can find a way to grow them in your yard.
-In flower gardens, different types of flowers may be strategically planted so that something is in bloom almost all year long. Some flower gardens are structured with plantings in neat rows and patterns; others are wilder in appearance. Your personal style and yard size will determine what type of flower garden you might plant.
-Herb gardens often complement both flower and vegetable gardens, since they tend to bloom beautifully while serving the functional purpose of adding flavor to your food. Herb gardens might include rosemary, thyme, dill, cilantro and a variety of other herbs you may want to use to make dried spices and teas.
-In general, vegetable gardens require fertile soil and regular maintenance. Flowers and herbs can tolerate more neglect and poorer soil.
2. Decide what specific plants to include in your garden. Find out what grows well in your area by using this zone finder to determine what zone you are in. Then research which plants do well in your region. As you find out more about your options, make a list of the plants you want to buy and the best time of year to plant them.
- Some plants don't grow well in certain zones. If you live in a place with mild winters and hot summers, you may have trouble growing plants that require a cold snap to grow properly.
- Unless you plan to make your garden relatively large, try to choose varieties that need similar growing conditions. Do they need the same soil type and sun exposure? If not, you may have to create a garden with several types of growing conditions, which can be challenging in a small garden.
- Visit a farmers market or plant sale in the spring. Often you can learn useful information from vendors and buy healthy plants that grow well in your area.

3. Choose a spot for your garden. Take a look around your yard to decide where you want the garden to be. The location you choose should help the garden serve its purpose while producing strong, healthy plants.
- No matter what type of garden you're planting, most plants will grow better in rich, well-drained soil. Avoid spots in your yard where water seems to stand for awhile after a heavy rain, as this could indicate the soil there is too soggy or clay-based for healthy plant growth.
- Most vegetables grow best with a lot of sunlight, so if you're planting a vegetable garden, choose a spot that isn't shaded by trees, fences or buildings. Flowers are more versatile, and if you'd like a flower plot next to your house, you can choose flowers that grow best in partial or full shade.
- If your soil isn't especially fertile, you can make a raised bed or beds and grow flowers or vegetables there. Raised beds are planting beds that are built on top of the ground within wooden frames that are filled with enriched soil.
- If you don't have a yard, you can still have a garden. Plant flowers, herbs and certain vegetables in large pots on your patio. You can move them around according to the amount of sun the plants need.
4. Make a garden design. Draw an outline of your garden or yard space. Map out different options where you want to plant various items in the location you chose. Tailor the design to fit the needs of your plants, making sure the ones that need shade will be planted in a shady spot and the ones that need full sun are in an area that isn't shaded during the day.
- Take into account the space each mature plant will need. Make sure everything you want to plant will fit in your garden and have enough space to spread out while leaving you room to move around between rows or beds.
- Take timing into account. Planting dates vary with climate zones. If you live in a region with mild winters and hot summers, for example, you'll be able to plant earlier in the year than you would if you lived in a region with cold winters and shorter summers.
- If you're planting a vegetable garden, design it so that it's convenient for you to walk into the garden and harvest vegetables as they ripen. You may want to make a path through the garden for this purpose.
- Flower gardens should be designed with aesthetics in mind. Choose colors that look pretty together, and make patterns that are pleasing to the eye. As you plan keep in mind when different varieties will begin to bloom.
Take your lifestyle into account. Do you have children or pets who might run through the area? Is the garden within reach of your water hose? Is it too close to or too far from your home?

- Vegetable gardens can include peppers, tomatoes, cabbages and lettuces, potatoes, squash, carrots, and many other vegetables. If vegetables can grow in your climate, you can find a way to grow them in your yard.
-In flower gardens, different types of flowers may be strategically planted so that something is in bloom almost all year long. Some flower gardens are structured with plantings in neat rows and patterns; others are wilder in appearance. Your personal style and yard size will determine what type of flower garden you might plant.
-Herb gardens often complement both flower and vegetable gardens, since they tend to bloom beautifully while serving the functional purpose of adding flavor to your food. Herb gardens might include rosemary, thyme, dill, cilantro and a variety of other herbs you may want to use to make dried spices and teas.
-In general, vegetable gardens require fertile soil and regular maintenance. Flowers and herbs can tolerate more neglect and poorer soil.
2. Decide what specific plants to include in your garden. Find out what grows well in your area by using this zone finder to determine what zone you are in. Then research which plants do well in your region. As you find out more about your options, make a list of the plants you want to buy and the best time of year to plant them.
- Some plants don't grow well in certain zones. If you live in a place with mild winters and hot summers, you may have trouble growing plants that require a cold snap to grow properly.
- Unless you plan to make your garden relatively large, try to choose varieties that need similar growing conditions. Do they need the same soil type and sun exposure? If not, you may have to create a garden with several types of growing conditions, which can be challenging in a small garden.
- Visit a farmers market or plant sale in the spring. Often you can learn useful information from vendors and buy healthy plants that grow well in your area.

3. Choose a spot for your garden. Take a look around your yard to decide where you want the garden to be. The location you choose should help the garden serve its purpose while producing strong, healthy plants.
- No matter what type of garden you're planting, most plants will grow better in rich, well-drained soil. Avoid spots in your yard where water seems to stand for awhile after a heavy rain, as this could indicate the soil there is too soggy or clay-based for healthy plant growth.
- Most vegetables grow best with a lot of sunlight, so if you're planting a vegetable garden, choose a spot that isn't shaded by trees, fences or buildings. Flowers are more versatile, and if you'd like a flower plot next to your house, you can choose flowers that grow best in partial or full shade.
- If your soil isn't especially fertile, you can make a raised bed or beds and grow flowers or vegetables there. Raised beds are planting beds that are built on top of the ground within wooden frames that are filled with enriched soil.
- If you don't have a yard, you can still have a garden. Plant flowers, herbs and certain vegetables in large pots on your patio. You can move them around according to the amount of sun the plants need.
4. Make a garden design. Draw an outline of your garden or yard space. Map out different options where you want to plant various items in the location you chose. Tailor the design to fit the needs of your plants, making sure the ones that need shade will be planted in a shady spot and the ones that need full sun are in an area that isn't shaded during the day.
- Take into account the space each mature plant will need. Make sure everything you want to plant will fit in your garden and have enough space to spread out while leaving you room to move around between rows or beds.
- Take timing into account. Planting dates vary with climate zones. If you live in a region with mild winters and hot summers, for example, you'll be able to plant earlier in the year than you would if you lived in a region with cold winters and shorter summers.
- If you're planting a vegetable garden, design it so that it's convenient for you to walk into the garden and harvest vegetables as they ripen. You may want to make a path through the garden for this purpose.
- Flower gardens should be designed with aesthetics in mind. Choose colors that look pretty together, and make patterns that are pleasing to the eye. As you plan keep in mind when different varieties will begin to bloom.
Take your lifestyle into account. Do you have children or pets who might run through the area? Is the garden within reach of your water hose? Is it too close to or too far from your home?

0
0
文章
ritau
2020年08月30日

1. Plant produce that you and your family enjoy. To save the most money gardening, select vegetables that you like to eat and would normally buy at the grocery store. Do not plant vegetables that you would not purchase on a regular basis.
2. Choose vegetables that can be preserved, stored or frozen. By selecting vegetables that can be easily canned or frozen, you stretch your garden investment and may consume produce from your garden throughout the year.
- Plant cool-weather vegetables like onions, potatoes, carrots, sweet potatoes and winter squash that can be easily stored.
- Plant tomatoes, cucumbers, beans, corn, peas and beets that can be canned or frozen.
3. Grow vegetables that provide a high return on investment. Plant vegetables that are expensive to buy in the store, or that you consume in large quantities. Consider options like tomatoes, green beans, onions, peppers, squash, potatoes, peas, lettuce, beets, spinach, carrots, broccoli, cucumbers and Swiss chard.
4. Plant herbs for a high return on investment. In most areas, you can purchase a packet of seeds or a small herb pot for about $1.50, which will produce leaves for an entire growing season. In contrast, fresh herbs at the grocery story typically cost about $3 for a single-use packet.
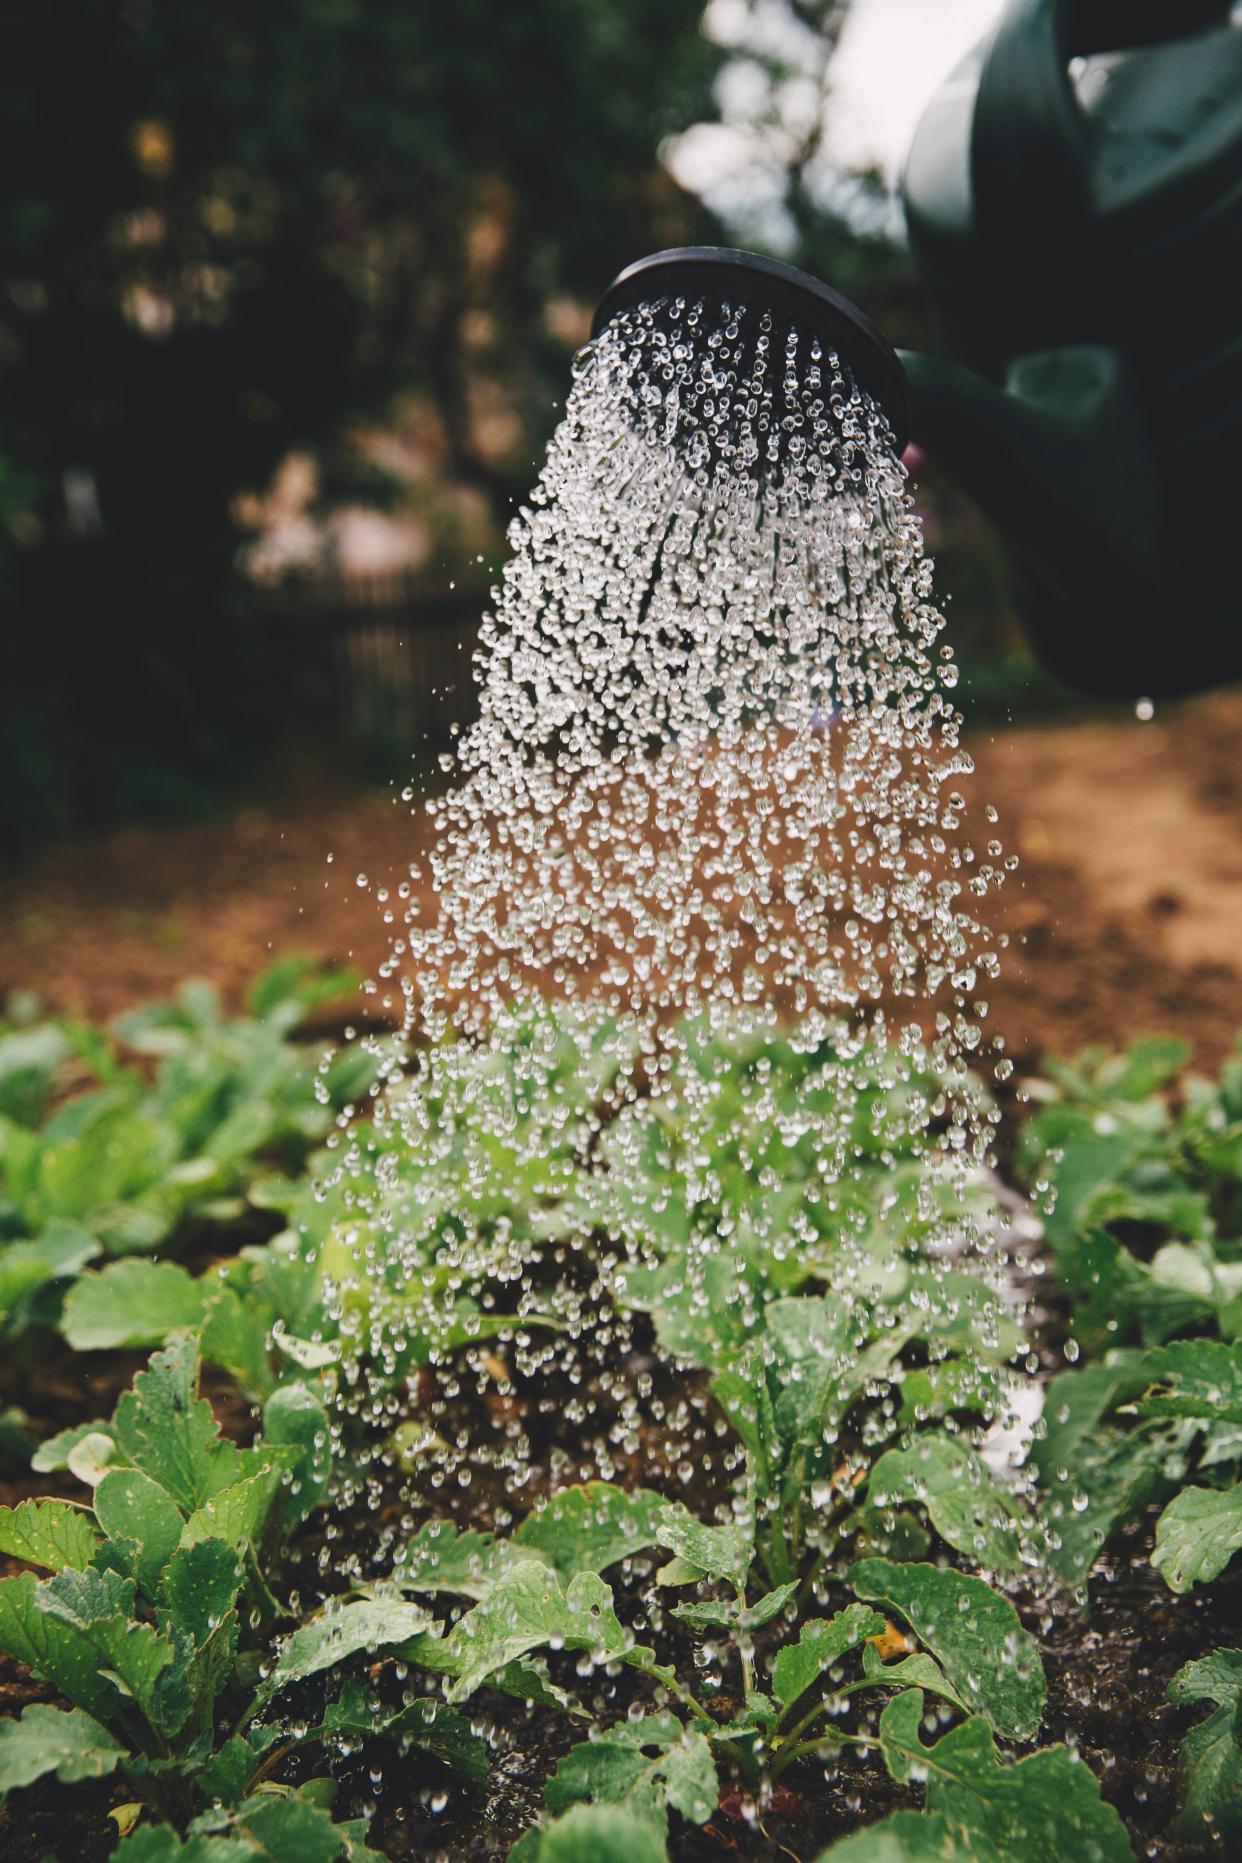
5. Select herbs that you use for culinary or household purposes.
- Plant herbs that you frequently use in the kitchen, such as basil, rosemary, oregano or parsley. You can use the fresh herbs throughout the growing season, and you can dry the herbs for future use.
- Plant herbs that you use for household purposes. Herbs like lavender or lemon verbena can be used as air fresheners, added to soaps or infused in oils.
6. Plant seeds for a higher return on investment. A packet of seeds is less expensive than a plant, and the yield is much greater. A seed packet can produce dozens of plants for less than a single established plant or a cell pack of seedlings.
7. Exchange seeds with friends. Because seed packets typically provide more seeds than you need for a single growing season, exchange seeds with gardening friends. By exchanging seeds, you get more varieties of produce and lower your seed costs.
8. Plant produce in stages. Rather than planting an entire crop of seeds at once, plant them in stages over the course of several weeks. This enables you to harvest in stages, and therefore consume the produce over time, rather than all at once. Succession planting allows a constant harvest in your garden, reducing the chance of produce waste.
9. Collect rainwater for irrigation. Purchase a commercially manufactured rain barrel, or modify an existing barrel to collect rain. The collected water can be used to water your garden, reducing your household water bill.

10. Create compost from yard, garden and kitchen waste. Starting a compost pile is an easy way to make free fertilizer. The compost will improve the soil and eliminate the need to purchase commercial fertilizers for your garden.
- Collect grass clippings, fallen leaves and kitchen waste like egg shells, coffee grounds, banana peels and leftover vegetables in a corner of your yard.
- Rotate the compost using a pitchfork periodically.
- Apply the compost to your garden as a free fertilizer.
2. Choose vegetables that can be preserved, stored or frozen. By selecting vegetables that can be easily canned or frozen, you stretch your garden investment and may consume produce from your garden throughout the year.
- Plant cool-weather vegetables like onions, potatoes, carrots, sweet potatoes and winter squash that can be easily stored.
- Plant tomatoes, cucumbers, beans, corn, peas and beets that can be canned or frozen.
3. Grow vegetables that provide a high return on investment. Plant vegetables that are expensive to buy in the store, or that you consume in large quantities. Consider options like tomatoes, green beans, onions, peppers, squash, potatoes, peas, lettuce, beets, spinach, carrots, broccoli, cucumbers and Swiss chard.
4. Plant herbs for a high return on investment. In most areas, you can purchase a packet of seeds or a small herb pot for about $1.50, which will produce leaves for an entire growing season. In contrast, fresh herbs at the grocery story typically cost about $3 for a single-use packet.

5. Select herbs that you use for culinary or household purposes.
- Plant herbs that you frequently use in the kitchen, such as basil, rosemary, oregano or parsley. You can use the fresh herbs throughout the growing season, and you can dry the herbs for future use.
- Plant herbs that you use for household purposes. Herbs like lavender or lemon verbena can be used as air fresheners, added to soaps or infused in oils.
6. Plant seeds for a higher return on investment. A packet of seeds is less expensive than a plant, and the yield is much greater. A seed packet can produce dozens of plants for less than a single established plant or a cell pack of seedlings.
7. Exchange seeds with friends. Because seed packets typically provide more seeds than you need for a single growing season, exchange seeds with gardening friends. By exchanging seeds, you get more varieties of produce and lower your seed costs.
8. Plant produce in stages. Rather than planting an entire crop of seeds at once, plant them in stages over the course of several weeks. This enables you to harvest in stages, and therefore consume the produce over time, rather than all at once. Succession planting allows a constant harvest in your garden, reducing the chance of produce waste.
9. Collect rainwater for irrigation. Purchase a commercially manufactured rain barrel, or modify an existing barrel to collect rain. The collected water can be used to water your garden, reducing your household water bill.

10. Create compost from yard, garden and kitchen waste. Starting a compost pile is an easy way to make free fertilizer. The compost will improve the soil and eliminate the need to purchase commercial fertilizers for your garden.
- Collect grass clippings, fallen leaves and kitchen waste like egg shells, coffee grounds, banana peels and leftover vegetables in a corner of your yard.
- Rotate the compost using a pitchfork periodically.
- Apply the compost to your garden as a free fertilizer.
0
0
文章
ritau
2020年08月25日

1. Spray the plants with a strong stream of water. Use a hose to spray the plants affected by aphids with cold water—this should knock the aphids right off. A hard rainstorm can also wash the aphids off of the plant.
- While you want there to be water pressure, make sure you don’t damage the plants by setting the pressure too high.
- Repeat as needed to remove aphids when they crop up.
2. Remove the aphids using your hands. If you see a cluster of aphids on a plant, you can swipe them off using your fingers. When you brush the aphids off, drop them into a soapy bucket of water to kill them.
- If the aphids have infested an entire leaf or stem, snip off the section using scissors or pruning shears and drop it in the soapy bucket of water.
- Wear gloves to protect your hands.
3. Dust the plants with flour to help deal with an aphid invasion. Take a cupful of flour from your pantry or kitchen and bring it out to your garden. Use your hands to evenly sprinkle the plants affected by aphids, giving them a fine layer of flour.
- You don't have to coat the entire plant in flour, just the spot where the aphids are gathering.
- Ingesting the flour will constipate the aphids.
4. Wipe the plants down with a mild soap and water. Mix together a few drops of a mild dish detergent with a cup of water. Dip a rag or paper towel into the mixture, using it to gently wipe down the stem and leaves of the plant affected by the aphids.
- Make sure you wipe both sides of the leaves.
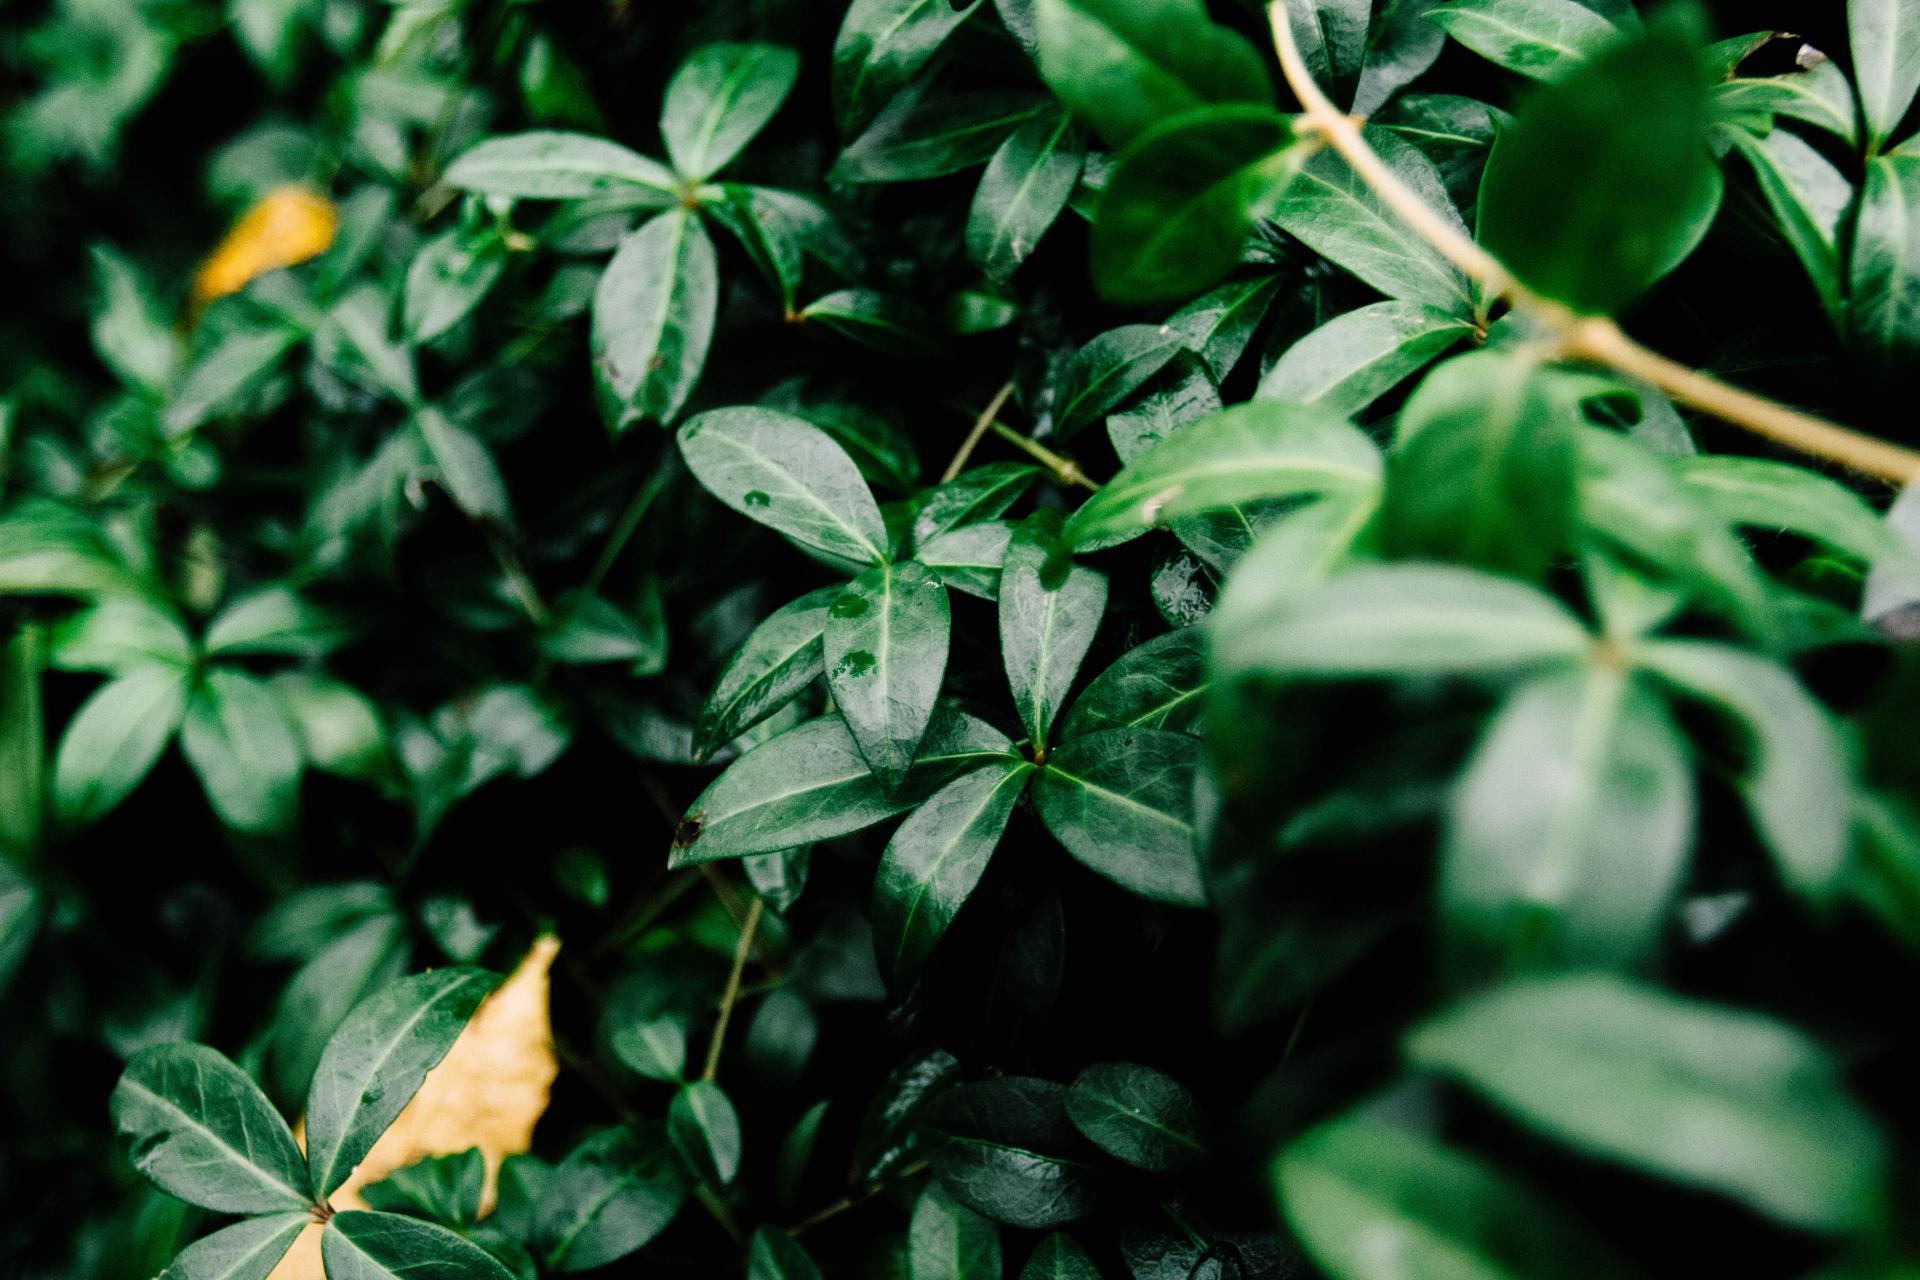
5. Mix together essential oils to use on the plants. Combine peppermint, rosemary, thyme, and clove oils in a bowl or cup, using 4-5 drops of each one. Pour the mixture into a spray bottle with water in it before shaking it all together. Spray the water and oil mixture onto plants that aphids have been eating.
- Designate 1 spray bottle as your essential oil sprayer. The oils tend to perfume and permeate the plastic, making them less than ideal for other uses going forward.
6. Create a homemade garlic spray to use on the aphids. Do this by chopping up 3-4 cloves of garlic before mixing them with 2 teaspoons (9.9 ml) of mineral oil. Leave the mixture alone for 24 hours before straining out the garlic chunks. Pour the mixture into a spray bottle with 16 ounces (450 g) of regular water and 1 teaspoon (4.9 ml) of dish soap before spraying the garlic concoction onto the plants.
- You can also make a tomato leaf spray to use on the plants.
7. Spray neem oil onto plants affected by aphids. By mixing neem oil with a little bit of water, you’ll create an organic concoction that helps repel aphids. Pour the water and neem oil into a spray bottle and apply it to sections of the plant that are affected by aphids.
- Find neem oil at a home and garden store, some big box stores, or online. Note that neem oil will perfume any sprayers for a long time. It’s best to designate a particular bottle for this use.
- You can also use horticultural oil to spray onto the plants.

8. Enlist an insecticidal soap to help control aphids. These soaps can be bought from a gardening supplier or online. Read the instructions to find out how much of the soap to mix with water before spraying it on the plants to help fend off aphids.
- These soaps are designed to kill the aphids.
- Insecticidal soaps are less toxic to mammals (humans and pets) than chemical insecticides. That said, follow the manufacturer’s directions about any safety precautions or gear you should wear when using them.
- While you want there to be water pressure, make sure you don’t damage the plants by setting the pressure too high.
- Repeat as needed to remove aphids when they crop up.
2. Remove the aphids using your hands. If you see a cluster of aphids on a plant, you can swipe them off using your fingers. When you brush the aphids off, drop them into a soapy bucket of water to kill them.
- If the aphids have infested an entire leaf or stem, snip off the section using scissors or pruning shears and drop it in the soapy bucket of water.
- Wear gloves to protect your hands.
3. Dust the plants with flour to help deal with an aphid invasion. Take a cupful of flour from your pantry or kitchen and bring it out to your garden. Use your hands to evenly sprinkle the plants affected by aphids, giving them a fine layer of flour.
- You don't have to coat the entire plant in flour, just the spot where the aphids are gathering.
- Ingesting the flour will constipate the aphids.
4. Wipe the plants down with a mild soap and water. Mix together a few drops of a mild dish detergent with a cup of water. Dip a rag or paper towel into the mixture, using it to gently wipe down the stem and leaves of the plant affected by the aphids.
- Make sure you wipe both sides of the leaves.

5. Mix together essential oils to use on the plants. Combine peppermint, rosemary, thyme, and clove oils in a bowl or cup, using 4-5 drops of each one. Pour the mixture into a spray bottle with water in it before shaking it all together. Spray the water and oil mixture onto plants that aphids have been eating.
- Designate 1 spray bottle as your essential oil sprayer. The oils tend to perfume and permeate the plastic, making them less than ideal for other uses going forward.
6. Create a homemade garlic spray to use on the aphids. Do this by chopping up 3-4 cloves of garlic before mixing them with 2 teaspoons (9.9 ml) of mineral oil. Leave the mixture alone for 24 hours before straining out the garlic chunks. Pour the mixture into a spray bottle with 16 ounces (450 g) of regular water and 1 teaspoon (4.9 ml) of dish soap before spraying the garlic concoction onto the plants.
- You can also make a tomato leaf spray to use on the plants.
7. Spray neem oil onto plants affected by aphids. By mixing neem oil with a little bit of water, you’ll create an organic concoction that helps repel aphids. Pour the water and neem oil into a spray bottle and apply it to sections of the plant that are affected by aphids.
- Find neem oil at a home and garden store, some big box stores, or online. Note that neem oil will perfume any sprayers for a long time. It’s best to designate a particular bottle for this use.
- You can also use horticultural oil to spray onto the plants.

8. Enlist an insecticidal soap to help control aphids. These soaps can be bought from a gardening supplier or online. Read the instructions to find out how much of the soap to mix with water before spraying it on the plants to help fend off aphids.
- These soaps are designed to kill the aphids.
- Insecticidal soaps are less toxic to mammals (humans and pets) than chemical insecticides. That said, follow the manufacturer’s directions about any safety precautions or gear you should wear when using them.
0
0
文章
ritau
2020年08月23日

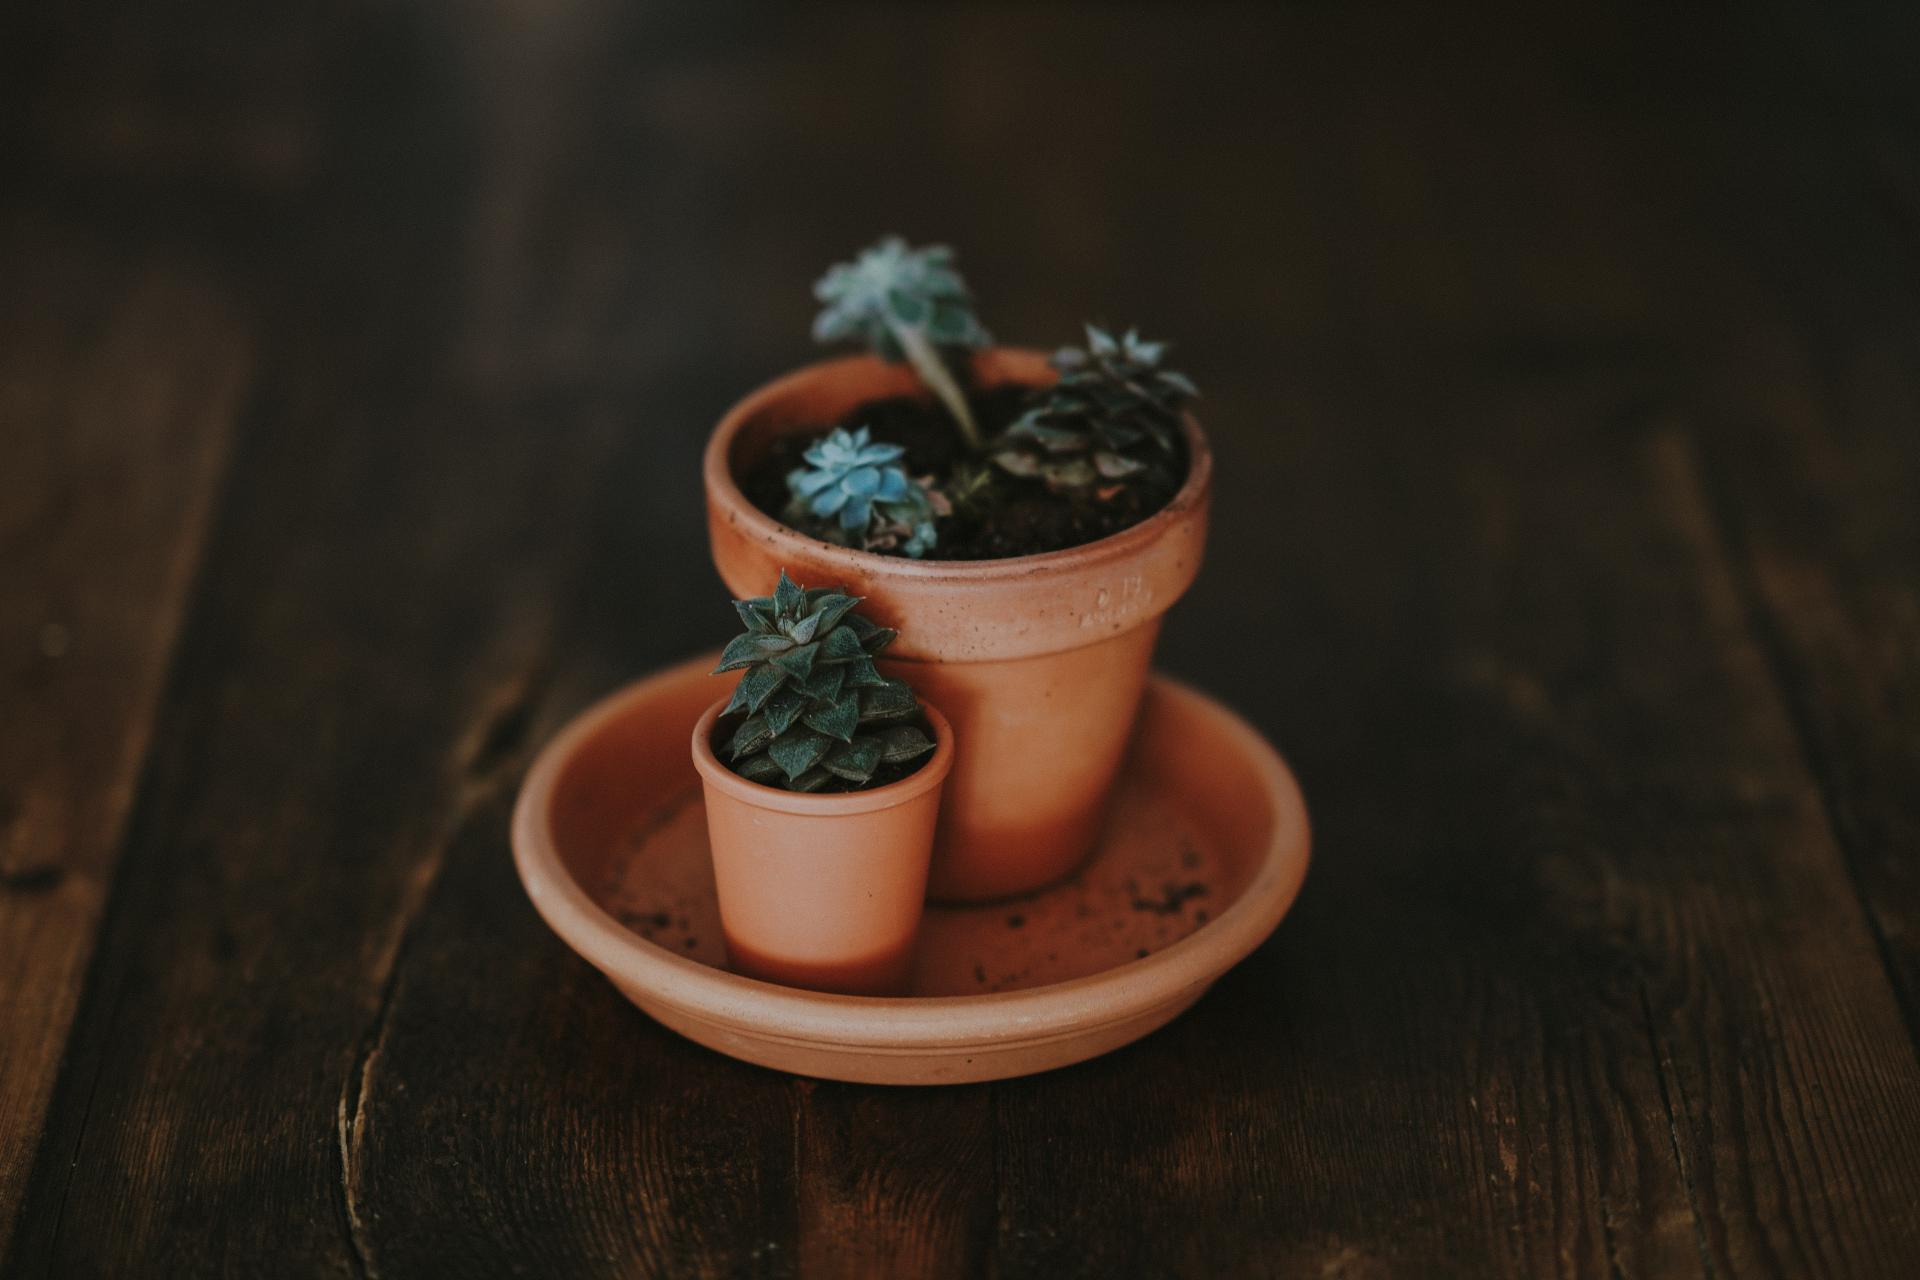
1. Decide how much money you want to spend. Various types of pots will cost different amounts of money. Terracotta pots and plastic pots are typically the most affordable types of pots that you can get. Cast iron, concrete, and glazed ceramic pots are often the most expensive. Determine how much money you have in your budget, and look for pots that you can afford.
2. Consider purchasing terracotta pots. Many terracotta pots are ornate and can add to your interior decor. The subtle colors of the material match well with many different plant types. On the downside, the material is also somewhat more fragile than other pots and has to be brought indoors during the winter.
3. Get glazed ceramic pots to add a splash of color. If your primary goal is to add to your decor, you should choose a ceramic pot that matches with the scenery. Glazed ceramic pots come in a wide variety of colors and shapes. Select a container that matches the aesthetic of your apartment, garden, or house.
4. Purchase concrete or cast iron pots for durability. If you are housing plants that are meant to be permanent outdoor fixtures in your landscaping, concrete and cast iron pots are the best options. These pots will be able to withstand harsh weather and won't degrade or break down quickly.
5. Get a pot with proper drainage. Regardless of the type of plant, improper drainage or overwatering can cause water to build on the bottom of the pot which can lead to rot or mold. To avoid this, look for pots that have drainage holes and remember to buy a saucer with the pot at the time of purchase. This will ensure that your plant receives the right amount of drainage.

6. Get a larger pot for bigger plants. The larger your plant, the bigger the pot that you'll need. Getting a pot that's too big for the plant you are growing is a waste of money while getting a pot that's too small could result in an unhealthy plant.
- If you are growing eggplant, broccoli, or peppers, you should get 18-inch (45.7 cm) 14 or 15-gallon (53-56.8 L) pots.
- Some fruits and vegetables, including raspberries, cucumbers, and summer squash, require larger 24-inch (61 cm) 24 or 25-gallon (90.8-94.6 L) pots.
- Get a very large pot for trees and big shrubs.
7. Get a smaller pot for smaller fruits and herbs. Smaller fruits and herbs, including strawberries, chives, and parsley, only need 10-inch (25.4 cm) 2.5 or 3-gallon (9.5-11.4 L) pots in order to thrive. Other vegetables like collards, spinach, and arugula require slightly bigger 14-inch (35.6 cm) 6 or 7-gallon (22.7-26.5 L) pots.
8. Use a pot that matches the needs of the plant. Some plants, like succulents or some vegetables and fruits, require better drainage than other plants in order to thrive.Other, larger shrubs and trees require larger pots because their root systems are bigger. Think of what your plant needs in order to survive and choose a pot that will encourage growth.
- Herbs like rosemary, sage, and thyme thrive in terracotta pots because they do well in dry environment.
9. Imagine how the plant will look in the pot. Large shrubs look bad in narrow pots while low-growing plants often look bad in larger or wider pots. Think about how your plant will grow out, and get a pot that matches the size and shape of the plant.
10. Pick a pot that matches the garden's style. Determine what kind of look you are going for in your garden. If you are going for a more traditional look, you should select a pot with earth tones or natural colors. If you are going for a sleek look, a black glazed ceramic pot might work best. Think of your garden and pick a pot that suits the design there.
11. Choose a subtle color. Bright colors can be jarring and bring attention off your plant and onto the pot. Avoid brightly colored pots or neon color pots, unless you want your garden to be eccentric. If you want to add contrast in your garden, go with more muted colors like buttermilk, dark chocolate, or white.
12. Measure your backyard. Some larger pots may not even fit in the space that you intend them to, so make sure you measure the area with a yardstick or measuring tape before purchasing your pot. A lot of small pots may make your garden look cluttered if you have a smaller garden. If you are working with a larger sized garden, choose a larger centerpiece to bring attention to it.
13. Select a textured pot to fill in a small space. A textured pot can give the illusion of space in a smaller, flatter area. You can also get a pot that has interesting textures to add a splash of personality to your garden.
- There are cement, ceramic pots, and terracotta pots that are created with different textures.
- Look for pots that have ornate designs for a more refined or chic garden.
- Pots with simple textures, like stippling, are also an option.
2. Consider purchasing terracotta pots. Many terracotta pots are ornate and can add to your interior decor. The subtle colors of the material match well with many different plant types. On the downside, the material is also somewhat more fragile than other pots and has to be brought indoors during the winter.
3. Get glazed ceramic pots to add a splash of color. If your primary goal is to add to your decor, you should choose a ceramic pot that matches with the scenery. Glazed ceramic pots come in a wide variety of colors and shapes. Select a container that matches the aesthetic of your apartment, garden, or house.
4. Purchase concrete or cast iron pots for durability. If you are housing plants that are meant to be permanent outdoor fixtures in your landscaping, concrete and cast iron pots are the best options. These pots will be able to withstand harsh weather and won't degrade or break down quickly.
5. Get a pot with proper drainage. Regardless of the type of plant, improper drainage or overwatering can cause water to build on the bottom of the pot which can lead to rot or mold. To avoid this, look for pots that have drainage holes and remember to buy a saucer with the pot at the time of purchase. This will ensure that your plant receives the right amount of drainage.

6. Get a larger pot for bigger plants. The larger your plant, the bigger the pot that you'll need. Getting a pot that's too big for the plant you are growing is a waste of money while getting a pot that's too small could result in an unhealthy plant.
- If you are growing eggplant, broccoli, or peppers, you should get 18-inch (45.7 cm) 14 or 15-gallon (53-56.8 L) pots.
- Some fruits and vegetables, including raspberries, cucumbers, and summer squash, require larger 24-inch (61 cm) 24 or 25-gallon (90.8-94.6 L) pots.
- Get a very large pot for trees and big shrubs.
7. Get a smaller pot for smaller fruits and herbs. Smaller fruits and herbs, including strawberries, chives, and parsley, only need 10-inch (25.4 cm) 2.5 or 3-gallon (9.5-11.4 L) pots in order to thrive. Other vegetables like collards, spinach, and arugula require slightly bigger 14-inch (35.6 cm) 6 or 7-gallon (22.7-26.5 L) pots.
8. Use a pot that matches the needs of the plant. Some plants, like succulents or some vegetables and fruits, require better drainage than other plants in order to thrive.Other, larger shrubs and trees require larger pots because their root systems are bigger. Think of what your plant needs in order to survive and choose a pot that will encourage growth.
- Herbs like rosemary, sage, and thyme thrive in terracotta pots because they do well in dry environment.
9. Imagine how the plant will look in the pot. Large shrubs look bad in narrow pots while low-growing plants often look bad in larger or wider pots. Think about how your plant will grow out, and get a pot that matches the size and shape of the plant.
10. Pick a pot that matches the garden's style. Determine what kind of look you are going for in your garden. If you are going for a more traditional look, you should select a pot with earth tones or natural colors. If you are going for a sleek look, a black glazed ceramic pot might work best. Think of your garden and pick a pot that suits the design there.
11. Choose a subtle color. Bright colors can be jarring and bring attention off your plant and onto the pot. Avoid brightly colored pots or neon color pots, unless you want your garden to be eccentric. If you want to add contrast in your garden, go with more muted colors like buttermilk, dark chocolate, or white.
12. Measure your backyard. Some larger pots may not even fit in the space that you intend them to, so make sure you measure the area with a yardstick or measuring tape before purchasing your pot. A lot of small pots may make your garden look cluttered if you have a smaller garden. If you are working with a larger sized garden, choose a larger centerpiece to bring attention to it.

13. Select a textured pot to fill in a small space. A textured pot can give the illusion of space in a smaller, flatter area. You can also get a pot that has interesting textures to add a splash of personality to your garden.
- There are cement, ceramic pots, and terracotta pots that are created with different textures.
- Look for pots that have ornate designs for a more refined or chic garden.
- Pots with simple textures, like stippling, are also an option.
0
0
文章
Miss Chen
2020年08月17日

多肉灯泡是一种非常好养的多肉,它属于冬种型,冬季生长。因此,灯泡夏季休眠期间的养护尤为重要,下面一起来看一下多肉灯泡夏天怎么养?
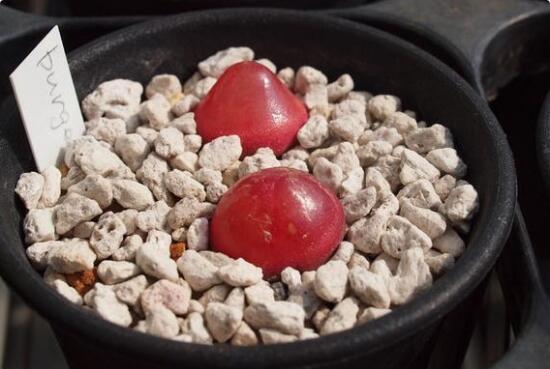
多肉灯泡夏天养殖方法
1、光照充足
灯泡虽然喜欢阳光充足的环境,及时在休眠期也要保证有充足的阳光。但夏季阳光强度大,灯泡处于休眠期生长受限,整个夏季应遮阳养护。
2、适量浇水
灯泡面积表面会有一层老叶,可以吸收水分,所以夏季不需要浇太多的水,避免盆土过干过湿。浇水通常选用浸盆法,或用滴浇的方式,不要用花洒直接喷在植株上,以免影响植株正常呼吸。
3、土壤选择及换盆
换盆在夏末秋初进行,盆土要求疏松,透气,排水良好,具一定的颗粒度,含适量的石灰质,可用腐叶土掺蛭石或粗沙混台配制,并掺人少量骨粉等石灰质材料。为美观及防止植株腐烂。也可在盆土表面铺一层石子或陶粒。近年有爱好者用赤玉土、植金石等材料种植,清洁卫生,不易腐烂,效果非常好。换盆后一两天浇水,使根部和盆土结合紧密。也可将表层河沙更换,加强其透水性。
4、适时繁殖
通常情况下秋季进行播种繁殖,9月中旬左右。当然若灯泡长势较好,可以在夏末进行分株。
灯泡的繁殖常用播种的方法,由于种子细小,播后须覆盖玻璃片。浇水时应采用“洇水”的方法,将花盆放在盛有水的盆中,使水从盆底的排水孔中慢慢洇湿土壤,苗期管理也用此法浇水。出苗不久的灯泡常常会东倒西歪,根部也裸露在土壤外面,可用牙签、镊子或其他小工具用土将露在外面的根部覆盖,并将歪倒的植株扶正。
多肉灯泡的特色
灯泡株型奇特,色泽光亮。开花娇艳、可爱,是多肉植物中较珍贵的品种,适用小盆载种。陈没于窗台,阳台等处,细细观赏,自然清新,别有特色。此外,还有一种被爱好者称为"红灯泡"的品种。其表皮呈红色,非常漂亮,但比普通的灯泡较难养。
0
0
文章
ritau
2020年08月16日

1. Choose a lettuce variety that thrives indoors. Although most lettuce plants can stay healthy indoors, you'll have better success with some varieties over others. Buy any of these lettuce varieties, which are known for growing well inside, from a garden center or plant nursery:
-Garden Babies
-Merlot
-Baby Oakleaf
-Salad Bowl
-Lollo Rosa
-Black-Seeded Simpson
-Tom Thumb
-Red Deer Tongue
2. Fill a pot with a seed starting soil mix. Seed starting mixes are lightweight, they help your plants’ roots grow, and they're well-draining to prevent overwatering. If you cannot find a seed starting mix, you can also create a soil made from equal parts peat moss or coir, vermiculite, and sand.
-Each lettuce plant requires 4–6 in (10–15 cm) of space and a depth of about 8 inches (20 cm). Choose a pot that can accommodate these measurements.
-Purchase pots with drainage holes on the bottom. Place a saucer underneath the pot to catch draining water.
-You can buy seed starting soil mixes from most plant nurseries or garden centers.
3. Plant your seeds approximately 1 in (2.5 cm) apart. Dig a 4–6 in (10–15 cm) deep hole and place your seeds inside at about 1 in (2.5 cm) apart. Limit your seeds to 4 per pot to avoid overcrowding the lettuce as it grows. If you want to plant more than 4 seeds, prepare several pots ahead of time.
4. Sprinkle your seeds lightly with potting soil and water. Take a handful of potting soil and gently sprinkle it over the newly-planted seeds. Fill a spray bottle with water and gently mist the seeds to avoid washing them away.
5. Plant lettuce seedlings if you don't want to wait for seeds to sprout. If you don't want to wait for seeds to sprout, you can plant lettuce seedlings instead. Use the same technique as you would for lettuce seedlings, planting no more than 4 per pot.
-You can buy lettuce seedlings at many plant nurseries or garden centers

6. Mist your seeds daily until they sprout into seedlings. When they sprout, give your lettuce at least 1 in (2.5 cm) of water per week. Poke your finger in the soil once or twice a day and water your lettuce whenever the soil feels dry.
-The soil should be moist but not waterlogged.
-Another way to test the moisture level of soil is lifting up the pot. If it feels heavy, the soil is saturated with water.
7. Grow your lettuce in room temperature conditions. Lettuce grows best at temperatures around 65–70 °F (18–21 °C). Turn on the air conditioner or heater as needed to keep your plants at an even, sustainable temperature.
-If the weather is warm or cool enough outside, you can move your plants outdoors periodically to get fresh air.
8. Place your lettuce plant near a sunny window or a fluorescent grow light. Lettuce plants grow best with direct sunlight. If you're in a climate with very little sun, purchase a grow light from a plant nursery and position it about 12 inches (30 cm) overhead.
Lettuce plants need at least 12 hours of direct sunlight a day, with 14-16 hours the preferred amount.
Keep in mind that plants grown under a grow light generally need more time under the light than they would with natural sunlight. Aim closer to 14-16 hours instead of 12+ hours if you're using a grow light.
9. Water your lettuce whenever the leaves wilt. Lettuce plant leaves visibly wilt when they are thirsty. If your plant's leaves droop, water the lettuce until its soil is moist, but not soaking wet or waterlogged.
-The hotter the temperatures, the more often you will need to water your lettuce
10. Fertilize your lettuce 3 weeks after planting it. Lettuce needs nitrogen-rich soil to grow, so spray a liquid fertilizer on the plant 3 weeks after you planted it, or when the first leaves grow on the plant. Spray the fertilizer mainly near the soil, avoiding the lettuce leaves to prevent burning them.
-Use a liquid fertilizer. Granular fertilizers need to be mixed into the soil.
-Organic alfalfa meal or a nitrogen-rich, slow-release fertilizer both work well with lettuce.
-You can also use fish or seaweed emulsion fertilizers but they can emit a strong odor and are less recommended for indoor lettuce plants
11. Begin harvesting your lettuce 30-45 days after planting. On average, lettuce takes about 30-45 days after you plant the seeds to mature. Make a note on your calendar to begin harvesting after about 30 days has passed.
-Indoor lettuce plants grow and mature continually, so you can continue harvesting your plant after you've picked it for the first time.
-Mature indoor lettuce usually grows to about 4 inches (10 cm) tall.
-See How to Harvest Romaine Lettuce for specific instructions relating to this type of lettuce.
12. Harvest your lettuce in the morning. Morning is when your plant's most hydrated and at its strongest. If possible, harvest your plant before the late morning or afternoon to attain a healthier yield.
-If you can't harvest in the morning, avoid mid-to-late afternoon, which is when your plant's least hydrated.
13. Cut off the outer leaves. Do not harvest your indoor lettuce plant all at once. As long as you continue taking care of it, you can harvest it for several months. Cut 3-4 of the outer leaves at a time with garden shears or scissors, leaving the rest of the plant to heal and grow back later on.
-Avoid picking the lettuce's crown or center. Limit yourself to the outer leaves to boost its overall harvesting yield.

14. Refrigerate your lettuce for 5-8 days after harvesting. Depending on the variety, lettuce can last anywhere between 3-10 days in the refrigerator. Check how long your specific variety lasts for and, after placing the lettuce in the fridge, plan to use it by its expiration date.
-If you don't think you'll use your lettuce in 5-8 days, wait a few days before harvesting your plant.
15. Harvest your lettuce again in about 2 weeks. Your plant requires about 2 weeks to heal and grow more leaves before it is ready to harvest again. After your first time harvesting, wait 2 weeks in-between harvesting to keep your plant healthy and able to grow more leaves.
-Wait at least 2 weeks before harvesting young plants, which may take time to grow strong after being harvested.
-Sow additional seeds every 2 weeks to extend your harvest.
-Garden Babies
-Merlot
-Baby Oakleaf
-Salad Bowl
-Lollo Rosa
-Black-Seeded Simpson
-Tom Thumb
-Red Deer Tongue
2. Fill a pot with a seed starting soil mix. Seed starting mixes are lightweight, they help your plants’ roots grow, and they're well-draining to prevent overwatering. If you cannot find a seed starting mix, you can also create a soil made from equal parts peat moss or coir, vermiculite, and sand.
-Each lettuce plant requires 4–6 in (10–15 cm) of space and a depth of about 8 inches (20 cm). Choose a pot that can accommodate these measurements.
-Purchase pots with drainage holes on the bottom. Place a saucer underneath the pot to catch draining water.
-You can buy seed starting soil mixes from most plant nurseries or garden centers.
3. Plant your seeds approximately 1 in (2.5 cm) apart. Dig a 4–6 in (10–15 cm) deep hole and place your seeds inside at about 1 in (2.5 cm) apart. Limit your seeds to 4 per pot to avoid overcrowding the lettuce as it grows. If you want to plant more than 4 seeds, prepare several pots ahead of time.
4. Sprinkle your seeds lightly with potting soil and water. Take a handful of potting soil and gently sprinkle it over the newly-planted seeds. Fill a spray bottle with water and gently mist the seeds to avoid washing them away.
5. Plant lettuce seedlings if you don't want to wait for seeds to sprout. If you don't want to wait for seeds to sprout, you can plant lettuce seedlings instead. Use the same technique as you would for lettuce seedlings, planting no more than 4 per pot.
-You can buy lettuce seedlings at many plant nurseries or garden centers

6. Mist your seeds daily until they sprout into seedlings. When they sprout, give your lettuce at least 1 in (2.5 cm) of water per week. Poke your finger in the soil once or twice a day and water your lettuce whenever the soil feels dry.
-The soil should be moist but not waterlogged.
-Another way to test the moisture level of soil is lifting up the pot. If it feels heavy, the soil is saturated with water.
7. Grow your lettuce in room temperature conditions. Lettuce grows best at temperatures around 65–70 °F (18–21 °C). Turn on the air conditioner or heater as needed to keep your plants at an even, sustainable temperature.
-If the weather is warm or cool enough outside, you can move your plants outdoors periodically to get fresh air.
8. Place your lettuce plant near a sunny window or a fluorescent grow light. Lettuce plants grow best with direct sunlight. If you're in a climate with very little sun, purchase a grow light from a plant nursery and position it about 12 inches (30 cm) overhead.
Lettuce plants need at least 12 hours of direct sunlight a day, with 14-16 hours the preferred amount.
Keep in mind that plants grown under a grow light generally need more time under the light than they would with natural sunlight. Aim closer to 14-16 hours instead of 12+ hours if you're using a grow light.
9. Water your lettuce whenever the leaves wilt. Lettuce plant leaves visibly wilt when they are thirsty. If your plant's leaves droop, water the lettuce until its soil is moist, but not soaking wet or waterlogged.
-The hotter the temperatures, the more often you will need to water your lettuce
10. Fertilize your lettuce 3 weeks after planting it. Lettuce needs nitrogen-rich soil to grow, so spray a liquid fertilizer on the plant 3 weeks after you planted it, or when the first leaves grow on the plant. Spray the fertilizer mainly near the soil, avoiding the lettuce leaves to prevent burning them.
-Use a liquid fertilizer. Granular fertilizers need to be mixed into the soil.
-Organic alfalfa meal or a nitrogen-rich, slow-release fertilizer both work well with lettuce.
-You can also use fish or seaweed emulsion fertilizers but they can emit a strong odor and are less recommended for indoor lettuce plants
11. Begin harvesting your lettuce 30-45 days after planting. On average, lettuce takes about 30-45 days after you plant the seeds to mature. Make a note on your calendar to begin harvesting after about 30 days has passed.
-Indoor lettuce plants grow and mature continually, so you can continue harvesting your plant after you've picked it for the first time.
-Mature indoor lettuce usually grows to about 4 inches (10 cm) tall.
-See How to Harvest Romaine Lettuce for specific instructions relating to this type of lettuce.
12. Harvest your lettuce in the morning. Morning is when your plant's most hydrated and at its strongest. If possible, harvest your plant before the late morning or afternoon to attain a healthier yield.
-If you can't harvest in the morning, avoid mid-to-late afternoon, which is when your plant's least hydrated.
13. Cut off the outer leaves. Do not harvest your indoor lettuce plant all at once. As long as you continue taking care of it, you can harvest it for several months. Cut 3-4 of the outer leaves at a time with garden shears or scissors, leaving the rest of the plant to heal and grow back later on.
-Avoid picking the lettuce's crown or center. Limit yourself to the outer leaves to boost its overall harvesting yield.

14. Refrigerate your lettuce for 5-8 days after harvesting. Depending on the variety, lettuce can last anywhere between 3-10 days in the refrigerator. Check how long your specific variety lasts for and, after placing the lettuce in the fridge, plan to use it by its expiration date.
-If you don't think you'll use your lettuce in 5-8 days, wait a few days before harvesting your plant.
15. Harvest your lettuce again in about 2 weeks. Your plant requires about 2 weeks to heal and grow more leaves before it is ready to harvest again. After your first time harvesting, wait 2 weeks in-between harvesting to keep your plant healthy and able to grow more leaves.
-Wait at least 2 weeks before harvesting young plants, which may take time to grow strong after being harvested.
-Sow additional seeds every 2 weeks to extend your harvest.
0
0
文章
ritau
2020年08月12日

1. Test the soil every day before you water the plant. Stick your finger 1 inch (2.5 cm) into the soil to feel for moisture. If it feels dry or if you rub your fingers together and see bits of dry soil flaking off, it's time for a good watering.
-If it's damp, wait 12 to 24 hours before checking the soil again.
-Daily watering is especially important during hot summer months.
-Most fuchsias like to be watered every day, but under or over-watering can cause the leaves to wilt so it's wise to check the soil first.
-Hanging baskets dry out faster than standing pots, so you may need to test the soil twice a day (especially on hot or dry days).
2. Pour water onto the soil until it drains from the bottom of the pot. Start by pouring water onto the base of the plant and then water the entire surface of the soil. Keeping pouring until you notice water dribbling out of the bottom of the pot.
-The goal is to keep the soil evenly moist but not sopping wet.
-If you don't see water coming out of the drainage holes, they may be clogged or the soil may not be draining properly (in which case, you should re-pot the plant).
3. Water the plant 2 to 3 times a week in the fall. Once summer is over, start watering your fuchsia plant every other day or just twice a week. Always test the soil with your finger first—if it's bone dry, go ahead and water it. If it's even the slightest bit damp, wait another day and check again.
Withholding water in the fall will prepare the plant for winter dormancy so it can reenergize and grow beautiful blooms in the spring!
4. Limit your waterings to 8 fl oz (240 mL) every 3 to 4 weeks in the winter. Let the soil get relatively dry starting in mid-November to early March (the exact months will vary depending on where you live). A good rule of thumb is to water it with 8 fluid ounces (240 mL) of water every 3 weeks or each month, but you can also feel the soil with your finger to see if it's bone dry. If it is, go ahead and water it and wait another 3 to 4 weeks before watering it again.
The plant will be in its dormant phase during the winter and your job is to make sure the soil doesn't get dusty-dry—a little dry is okay.

5. Fertilize the plant once a week during spring and summer months. Use a fertilizer with equal parts nitrogen, phosphorus, and potassium—a 20-20-20 or 16-16-16 blend is perfect. The amount of fertilizer you need to use depends on the size of the pot, but you should always read the instructions on the package.
-For instance, if you're fertilizing a 12 in (30 cm) pot, you might use 7 drops of liquid fertilizer for each 33 fluid ounces (980 mL) of water or sprinkle 3 to 4 tsp (15 to 20 g) of granular fertilizer on top of the soil.
If your plant is outside, stop fertilizing it 2 weeks before you bring it inside for the colder months.
Bone meal also makes an excellent fertilizer for fuchsia. You can buy it at any garden supply store.
-If it's damp, wait 12 to 24 hours before checking the soil again.
-Daily watering is especially important during hot summer months.
-Most fuchsias like to be watered every day, but under or over-watering can cause the leaves to wilt so it's wise to check the soil first.
-Hanging baskets dry out faster than standing pots, so you may need to test the soil twice a day (especially on hot or dry days).
2. Pour water onto the soil until it drains from the bottom of the pot. Start by pouring water onto the base of the plant and then water the entire surface of the soil. Keeping pouring until you notice water dribbling out of the bottom of the pot.
-The goal is to keep the soil evenly moist but not sopping wet.
-If you don't see water coming out of the drainage holes, they may be clogged or the soil may not be draining properly (in which case, you should re-pot the plant).
3. Water the plant 2 to 3 times a week in the fall. Once summer is over, start watering your fuchsia plant every other day or just twice a week. Always test the soil with your finger first—if it's bone dry, go ahead and water it. If it's even the slightest bit damp, wait another day and check again.
Withholding water in the fall will prepare the plant for winter dormancy so it can reenergize and grow beautiful blooms in the spring!
4. Limit your waterings to 8 fl oz (240 mL) every 3 to 4 weeks in the winter. Let the soil get relatively dry starting in mid-November to early March (the exact months will vary depending on where you live). A good rule of thumb is to water it with 8 fluid ounces (240 mL) of water every 3 weeks or each month, but you can also feel the soil with your finger to see if it's bone dry. If it is, go ahead and water it and wait another 3 to 4 weeks before watering it again.
The plant will be in its dormant phase during the winter and your job is to make sure the soil doesn't get dusty-dry—a little dry is okay.

5. Fertilize the plant once a week during spring and summer months. Use a fertilizer with equal parts nitrogen, phosphorus, and potassium—a 20-20-20 or 16-16-16 blend is perfect. The amount of fertilizer you need to use depends on the size of the pot, but you should always read the instructions on the package.
-For instance, if you're fertilizing a 12 in (30 cm) pot, you might use 7 drops of liquid fertilizer for each 33 fluid ounces (980 mL) of water or sprinkle 3 to 4 tsp (15 to 20 g) of granular fertilizer on top of the soil.
If your plant is outside, stop fertilizing it 2 weeks before you bring it inside for the colder months.
Bone meal also makes an excellent fertilizer for fuchsia. You can buy it at any garden supply store.
0
0
文章
ritau
2020年08月09日

1. Purchase whole, untreated mung beans. Do not use beans packaged in gardening packets, which have probably been chemically treated. Check the label to make sure you’re purchasing whole and untreated beans which are made for sprouting and eating.
2. Measure out your desired amount of mung beans. Consider the size of the bowl or jar you plan to soak them in—the beans should fill about ¼ of the container. Mung beans get much bigger once they sprout, so be careful not to use too much.
-The yield for sprouting mung beans is about 2 to 1, meaning if you use 1 pound of seeds you’ll end up with 2 pounds of sprouts.
3. Rinse your mung beans using a colander or strainer. Run clean water over the beans until it runs clear. They may be dusty, since the majority of mung beans are grown in China and are often left to dry on gravel roads.
-This will help protect you from anything which might have been in the soil, like metals and toxins.
-It will also wash away things like mites that may have made their way into the dried beans.
4. Place the beans in a clear, wide-mouth jar. Mason canning jars are a great option, but you can also reuse jars that held peanut butter or pasta sauce, for instance. The beans should fill up about a quarter of your container.
5. Submerge the beans in water and cover the jar with a mesh lid. Fill the jar partway with cool water, roughly 2-3 times the volume of the beans. Then, cover your jar with some type of breathable lid.
-For a homemade option, you can use a piece of cheesecloth secured with rubber band. You could also punch holes into an existing metal or glass lid.
-You could also purchase a specialized sprouting jar, which is sold with a pre-made strainer lid.
-If you don’t have cheesecloth or a mesh lid, you can also soak your beans uncovered in a bowl or jar.
6. Soak the beans for 8-12 hours until they swell up. How long they have to soak will depend on the beans. Generally, larger beans will require a longer soak. You can place the jar on the countertop or in a cabinet—just make sure it’s not positioned in direct sunlight.
-The beans should be soaking at room temperature, not in the fridge.
7. Drain and rinse the beans through the mesh lid. Drain away the excess water through the lid of your jar by flipping it over in the sink. Then, rinse the swollen beans with fresh water and drain it again.
-If you don’t have a mesh lid or cheesecloth, you can also hold a strainer against the opening of your jar to drain the water.

8. Put the jar in a cool, dark place for 12 hours. Find a place that gets little to no sunlight where the beans will not be disturbed. Place the jar upside down and at an angle on a dish rack or cooling rack so the moisture can continue to be released.
-Although the beans should not be exposed to direct sunlight, there’s no need for the storage location to be completely dark. A shadowy corner of your countertop would work well.
9. Repeat this process every 12 hours for 2-5 days. Rinse and drain the beans through the mesh lid approximately every 12 hours (or twice a day). Return them to their dark storage spot after each rinse session.
-The beans should continue to grow in size and sprout thin white tails.
10. Give the sprouts a rinse once they’ve reached your desired length. Pour the sprouted beans into a colander and give them one last rinse before draining them thoroughly. Generally, mung beans taste good when they’re about 1⁄2 in (1.3 cm) long—but it’s mostly a matter of personal preference.
-he green shells may have started to come off the white bean sprouts at this point. You can remove some of these empty shells from the mix with your hands if you like.
11. Spread the sprouted beans across a baking sheet lined in paper towels. Cover a baking sheet with two layers of dry paper towels, then pour the rinsed and drained beans on top. Spread them out in a thin layer with your hand and press gently to absorb any excess water. Once you’ve patted them dry, they are ready to be stored.
-Pick out any unsprouted beans and throw them away.
-To dry the beans even more thoroughly, cover them with another paper towel and press gently.
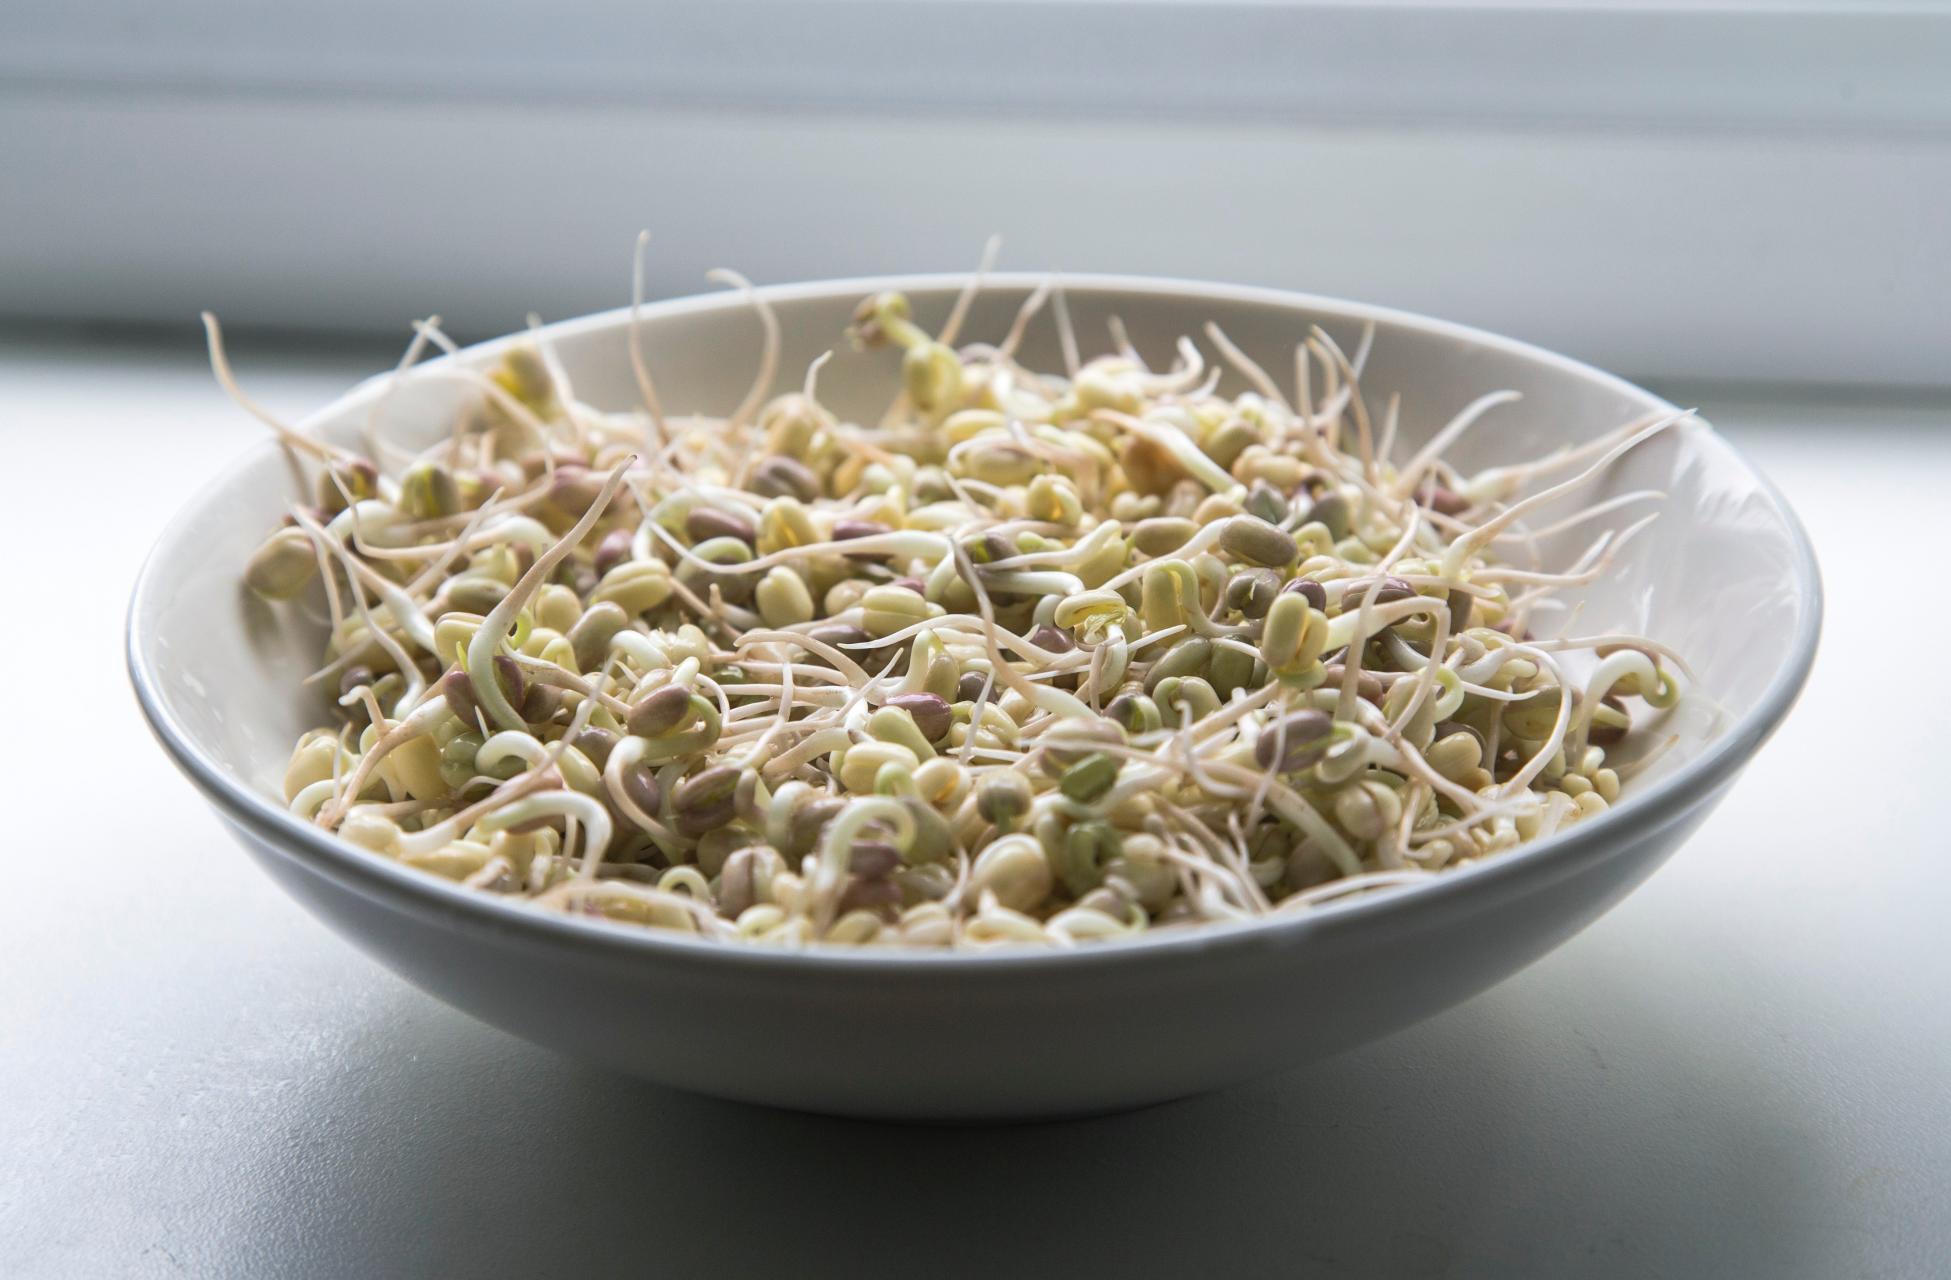
12. Place the sprouts into a bowl and store in the fridge for up to 2 weeks. Line the bowl with paper towels, then use your hands to transfer handfuls of sprouts into the container. Plan to eat the sprouts within 2 weeks.
-Mung bean sprouts are a great base for a chilled salad, or a classic addition to a stir-fry.
2. Measure out your desired amount of mung beans. Consider the size of the bowl or jar you plan to soak them in—the beans should fill about ¼ of the container. Mung beans get much bigger once they sprout, so be careful not to use too much.
-The yield for sprouting mung beans is about 2 to 1, meaning if you use 1 pound of seeds you’ll end up with 2 pounds of sprouts.
3. Rinse your mung beans using a colander or strainer. Run clean water over the beans until it runs clear. They may be dusty, since the majority of mung beans are grown in China and are often left to dry on gravel roads.
-This will help protect you from anything which might have been in the soil, like metals and toxins.
-It will also wash away things like mites that may have made their way into the dried beans.
4. Place the beans in a clear, wide-mouth jar. Mason canning jars are a great option, but you can also reuse jars that held peanut butter or pasta sauce, for instance. The beans should fill up about a quarter of your container.
5. Submerge the beans in water and cover the jar with a mesh lid. Fill the jar partway with cool water, roughly 2-3 times the volume of the beans. Then, cover your jar with some type of breathable lid.
-For a homemade option, you can use a piece of cheesecloth secured with rubber band. You could also punch holes into an existing metal or glass lid.
-You could also purchase a specialized sprouting jar, which is sold with a pre-made strainer lid.
-If you don’t have cheesecloth or a mesh lid, you can also soak your beans uncovered in a bowl or jar.
6. Soak the beans for 8-12 hours until they swell up. How long they have to soak will depend on the beans. Generally, larger beans will require a longer soak. You can place the jar on the countertop or in a cabinet—just make sure it’s not positioned in direct sunlight.
-The beans should be soaking at room temperature, not in the fridge.
7. Drain and rinse the beans through the mesh lid. Drain away the excess water through the lid of your jar by flipping it over in the sink. Then, rinse the swollen beans with fresh water and drain it again.
-If you don’t have a mesh lid or cheesecloth, you can also hold a strainer against the opening of your jar to drain the water.

8. Put the jar in a cool, dark place for 12 hours. Find a place that gets little to no sunlight where the beans will not be disturbed. Place the jar upside down and at an angle on a dish rack or cooling rack so the moisture can continue to be released.
-Although the beans should not be exposed to direct sunlight, there’s no need for the storage location to be completely dark. A shadowy corner of your countertop would work well.
9. Repeat this process every 12 hours for 2-5 days. Rinse and drain the beans through the mesh lid approximately every 12 hours (or twice a day). Return them to their dark storage spot after each rinse session.
-The beans should continue to grow in size and sprout thin white tails.
10. Give the sprouts a rinse once they’ve reached your desired length. Pour the sprouted beans into a colander and give them one last rinse before draining them thoroughly. Generally, mung beans taste good when they’re about 1⁄2 in (1.3 cm) long—but it’s mostly a matter of personal preference.
-he green shells may have started to come off the white bean sprouts at this point. You can remove some of these empty shells from the mix with your hands if you like.
11. Spread the sprouted beans across a baking sheet lined in paper towels. Cover a baking sheet with two layers of dry paper towels, then pour the rinsed and drained beans on top. Spread them out in a thin layer with your hand and press gently to absorb any excess water. Once you’ve patted them dry, they are ready to be stored.
-Pick out any unsprouted beans and throw them away.
-To dry the beans even more thoroughly, cover them with another paper towel and press gently.

12. Place the sprouts into a bowl and store in the fridge for up to 2 weeks. Line the bowl with paper towels, then use your hands to transfer handfuls of sprouts into the container. Plan to eat the sprouts within 2 weeks.
-Mung bean sprouts are a great base for a chilled salad, or a classic addition to a stir-fry.
0
0
文章
Miss Chen
2020年08月09日

养多肉,大家最担心就是肉肉出现各种意外状况,今天小编就为大家分享一篇精彩文章,简短但是非常实用哦!建议大家赶紧收藏!

多肉植物急救方法
1、多肉植物突然黑腐了如何急救?
首先,大家要明白多肉的真正黑腐是由细菌造成的,比如土壤未消毒。尤其用了野地里挖来的土,这可万万不可使用。下面说说遇到黑腐如何急救。
先要看黑腐的范围到哪了?黑腐的多不多。俗话说早发现早治疗,如果黑腐的不严重可以先泡泡多菌灵。不过要说的是这只能对付非常非常轻微的黑腐。如果黑腐的很彻底了怎么办?
我告诉你另外一种简单的办法,就是肢解多肉,说好听点叫做给多肉做外科手术,意思就是把黑腐的地方割掉扔了!例如根茎黑腐了,就把叶子用刀片割下来叶插,叶子黑腐了就把没黑腐的叶子割下来叶插,基本上就是哪部分坏掉就丢弃哪部分。
这里要注意的是,大多数多肉只留根部是不会长新花冠的。如果花冠已经黑腐,只能保没有黑腐的叶子进行叶插了。不管保那个,最后都要换土并且泡多菌灵。
2、一个月没浇水肉快干死了如何急救?
外出游玩或者出差回来发现多肉一个月没浇水!一看快成肉干了怎么办?注意这时千万不要浇水,一浇水就会死翘翘了。因为这时的植物根系是非常脆弱,长时间缺水有可能根本已经完全坏死了。这时候首先挖出来看看。例如根部已经像风干的人参基本就没救了…
大家回去可以买一颗人参摸一下手感,一旦手感一致基本就坏死了。如果你此刻浇水,到下午的时候估计多肉就会像中了化骨绵掌一样成水了。
遇到上述情况就是出土去根,如果是景天老桩并且茎部也干枯了,就连茎部也去掉只保留有水分的部分,重新入土发根尚有一线生机。

3、多肉突然被虫子围攻了如何急救?
例如,你回家后发现多肉附近出现各种小飞黑,活着小白虫。只需完成以下几步即可:
第一步:出土泡多菌灵,或者直接泡水也可,虫虫很快会浮出水面。
第二步:之后在多肉花盆附近点蚊香,各种“飞机”就会迅速被杀死,不过土下的虫卵不会,等虫卵变成成虫之后再开蚊香周而复始即可。
第三步:如果感觉麻烦,用护花神喷灌,然后用薄膜袋套一晚上,虫子神马的基本都会给药闷死。但是虫卵可能还没死,隔三天再杀一次,一般三次基本可以杀光,最好家里多备几盒护花神,平常一个月预防喷一次。

多肉植物急救方法
1、多肉植物突然黑腐了如何急救?
首先,大家要明白多肉的真正黑腐是由细菌造成的,比如土壤未消毒。尤其用了野地里挖来的土,这可万万不可使用。下面说说遇到黑腐如何急救。
先要看黑腐的范围到哪了?黑腐的多不多。俗话说早发现早治疗,如果黑腐的不严重可以先泡泡多菌灵。不过要说的是这只能对付非常非常轻微的黑腐。如果黑腐的很彻底了怎么办?
我告诉你另外一种简单的办法,就是肢解多肉,说好听点叫做给多肉做外科手术,意思就是把黑腐的地方割掉扔了!例如根茎黑腐了,就把叶子用刀片割下来叶插,叶子黑腐了就把没黑腐的叶子割下来叶插,基本上就是哪部分坏掉就丢弃哪部分。
这里要注意的是,大多数多肉只留根部是不会长新花冠的。如果花冠已经黑腐,只能保没有黑腐的叶子进行叶插了。不管保那个,最后都要换土并且泡多菌灵。
2、一个月没浇水肉快干死了如何急救?
外出游玩或者出差回来发现多肉一个月没浇水!一看快成肉干了怎么办?注意这时千万不要浇水,一浇水就会死翘翘了。因为这时的植物根系是非常脆弱,长时间缺水有可能根本已经完全坏死了。这时候首先挖出来看看。例如根部已经像风干的人参基本就没救了…
大家回去可以买一颗人参摸一下手感,一旦手感一致基本就坏死了。如果你此刻浇水,到下午的时候估计多肉就会像中了化骨绵掌一样成水了。
遇到上述情况就是出土去根,如果是景天老桩并且茎部也干枯了,就连茎部也去掉只保留有水分的部分,重新入土发根尚有一线生机。

3、多肉突然被虫子围攻了如何急救?
例如,你回家后发现多肉附近出现各种小飞黑,活着小白虫。只需完成以下几步即可:
第一步:出土泡多菌灵,或者直接泡水也可,虫虫很快会浮出水面。
第二步:之后在多肉花盆附近点蚊香,各种“飞机”就会迅速被杀死,不过土下的虫卵不会,等虫卵变成成虫之后再开蚊香周而复始即可。
第三步:如果感觉麻烦,用护花神喷灌,然后用薄膜袋套一晚上,虫子神马的基本都会给药闷死。但是虫卵可能还没死,隔三天再杀一次,一般三次基本可以杀光,最好家里多备几盒护花神,平常一个月预防喷一次。
0
1


