文章
lenny
2017年05月23日

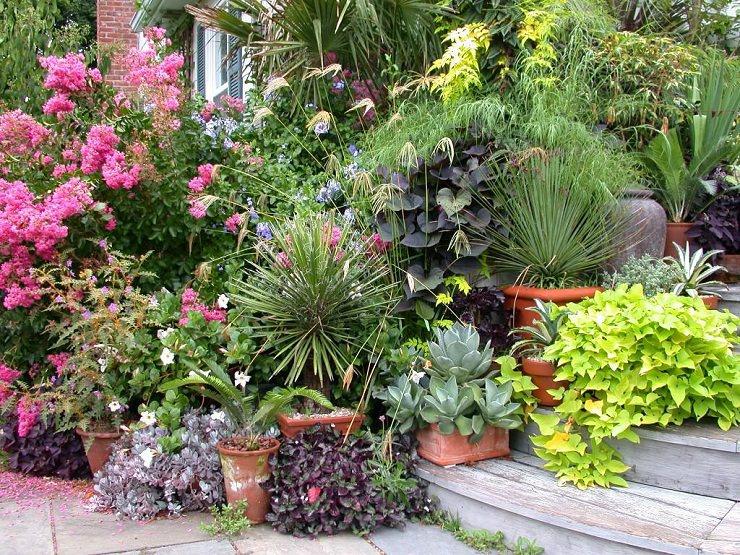
Growing ornamental grasses is fun. You can decorate your house, garden, balcony or patio with them. So, what are the best ornamental grasses for containers? We named a few, check out.
Grasses are not only for lawn or ground cover. They can add a visual charm at any place if you grow them in containers.

Growing and care for ornamental grasses is relatively easy. You can start to grow them from seeds.
Before you head on to see the list of best ornamental grasses below, learn how to care for them here!
Growing ornamental grasses in containers is an excellent way to feature grasses without letting them branch out and taking over your whole garden. Container grown grasses are also easier to control, and they look stunning when grown with flowers.
Growing Ornamental Grasses in Pots
Ornamental grasses are an excellent way to create privacy in the garden, especially on a patio, balcony or rooftop. Some of the grasses are extremely resistant to drought and grow rapidly. And there are those that love moisture; you can choose according to the growing conditions you’re providing.
Also read: Balcony Privacy Ideas
Growing Position
Decide where you want to grow the ornamental grass. Ornamental grasses thrive in a spot that gets at least five to six hours of sunlight daily.
Choosing Right Pot
Choosing a right pot is also necessary for growing ornamental grasses in containers. Ensure proper drainage and see if it is wide enough to let the grass spread and deep enough to support the root system. You should also care about the looks of a container.
Also Read: Container Ideas for Patio and Balcony
RequirementsSoil
Use a mix of one part compost, one part top soil and one part perlite for making an excellent growing medium for grass.
Watering
A general rule is to water your plants only when the top two inch of soil is dry. However, different grass varieties have different needs, and some even like to sit in water so make sure to do a proper research about the grass variety you’re growing.
Also Read: How to Water Container Plants
FertilizerFertilize annually in spring with slow-release 3 – 1 – 2 fertilizer. For tropics, feed your plants in fall and winter. Take care not to over-fertilize grass and strictly follow the manufacturer’s instructions.11 Best Ornamental grasses for containers1. Bamboo Muhly

Almost fern-like but super fine in texture, bamboo muhly grass grows easily in USDA Zones 8 to 11. It takes its name from its notched stems and feathery foliage. It thrives in the tropical climate, loves sun and heat and grows well in containers.
2. Japanese Sweet Flag

This low growing (12″) ornamental grass is good to grow in containers if you don’t want to grow a tall variety. Japanese sweet flag is low maintenance and grows in moist and soggy soil and semi-shade to full sun in USDA zones 6 to 9.
You can grow this ornamental grass with other moisture loving plants or with aquatic plants.
Also Read: How to make a water pond in container
3. Red Fountain Grass

USDA Zones 9 to 11. Beautiful red fountain grass looks stunning; it’s an arching upright plant. Fill the pot with its rich burgundy color of foliage, and you’ll see how beautiful it looks.
4. Japanese Forest Grass

USDA Zones 5 to 9. Once you see Japanese forest grass growing in a nearby, nursery, you’ll love to pick it. It’s the plant you can grow in the shade, its foliage comes in yellow-green stripes and grows in a clump. Grow this ornamental grass in a dark ceramic pot for an absolutely stunning look.
5. Blue Lyme Grass

Blue lyme grass grows aggressively in all kinds of soil. It grows in both tropical and nontropical climate under USDA Zones 4 to 10. The sword-like foliage grows up to 3 – 4 feet that fold as they grow tall. This bold and spiky grass forms beige colored flower heads usually in summer.
6. Fiber Optic Grass

Image Credit: Cocoon Home
USDA Zones 10, 11. Fiber optic grass grows well in tropics, in a colder climate, you can grow it as annual. It hangs down gently in a curve and creates an unusual effect. It’s one of the best ornamental grasses you would like to grow in containers.
Fiber optic is a low growing, fine textured grass that can be planted in full to partial sun. It loves moist soil. You can also grow it indoors; we also added it in our list of most BEAUTIFUL HOUSEPLANTS!7. New Zealand flax

USDA Zones 9 to 11. New Zealand flax is perennial in frost-free areas, excellent for tropical regions. You can grow it in containers, it looks beautiful and gives a tropical feel. This grass like beautiful foliage plant comes in colors of green, copper, red and gold.
8. Sedge

Sedge looks like grass, but it is not. When grown in containers, its leaves glow in the sun and look fantastic while the blades rustle in the slightest breeze. Sedge grows well in warm sunny conditions.
Also Read: Container Garden Design Tips
9. Miscanthus

USDA Zones 6 to 9. One of the most popular ornamental grasses, it grows well in the container. Available in many varieties, it looks picturesque in the morning sun.
10. Blue Oat Grass

USDA Zones 4 to 9 Grow this cool blue – gray grass in a pot with bright flowers to create an aesthetic look on your patio, terrace or balcony garden. Blue oat grass is low maintenance and grows well in partial shade.
11. Feather Reed Grass

Feather reed grass can be grown in the sun and partial shade both. It grows well in USDA Zones 4 to 9. Feather reed grass looks attractive as a focal point– on a patio if grown in a container.
Also Read: Best Shrubs to Grow in Containers
Grasses are not only for lawn or ground cover. They can add a visual charm at any place if you grow them in containers.
Growing and care for ornamental grasses is relatively easy. You can start to grow them from seeds.
Before you head on to see the list of best ornamental grasses below, learn how to care for them here!
Growing ornamental grasses in containers is an excellent way to feature grasses without letting them branch out and taking over your whole garden. Container grown grasses are also easier to control, and they look stunning when grown with flowers.
Growing Ornamental Grasses in Pots
Ornamental grasses are an excellent way to create privacy in the garden, especially on a patio, balcony or rooftop. Some of the grasses are extremely resistant to drought and grow rapidly. And there are those that love moisture; you can choose according to the growing conditions you’re providing.
Also read: Balcony Privacy Ideas
Growing Position
Decide where you want to grow the ornamental grass. Ornamental grasses thrive in a spot that gets at least five to six hours of sunlight daily.
Choosing Right Pot
Choosing a right pot is also necessary for growing ornamental grasses in containers. Ensure proper drainage and see if it is wide enough to let the grass spread and deep enough to support the root system. You should also care about the looks of a container.
Also Read: Container Ideas for Patio and Balcony
RequirementsSoil
Use a mix of one part compost, one part top soil and one part perlite for making an excellent growing medium for grass.
Watering
A general rule is to water your plants only when the top two inch of soil is dry. However, different grass varieties have different needs, and some even like to sit in water so make sure to do a proper research about the grass variety you’re growing.
Also Read: How to Water Container Plants
FertilizerFertilize annually in spring with slow-release 3 – 1 – 2 fertilizer. For tropics, feed your plants in fall and winter. Take care not to over-fertilize grass and strictly follow the manufacturer’s instructions.11 Best Ornamental grasses for containers1. Bamboo Muhly
Almost fern-like but super fine in texture, bamboo muhly grass grows easily in USDA Zones 8 to 11. It takes its name from its notched stems and feathery foliage. It thrives in the tropical climate, loves sun and heat and grows well in containers.
2. Japanese Sweet Flag
This low growing (12″) ornamental grass is good to grow in containers if you don’t want to grow a tall variety. Japanese sweet flag is low maintenance and grows in moist and soggy soil and semi-shade to full sun in USDA zones 6 to 9.
You can grow this ornamental grass with other moisture loving plants or with aquatic plants.
Also Read: How to make a water pond in container
3. Red Fountain Grass
USDA Zones 9 to 11. Beautiful red fountain grass looks stunning; it’s an arching upright plant. Fill the pot with its rich burgundy color of foliage, and you’ll see how beautiful it looks.
4. Japanese Forest Grass
USDA Zones 5 to 9. Once you see Japanese forest grass growing in a nearby, nursery, you’ll love to pick it. It’s the plant you can grow in the shade, its foliage comes in yellow-green stripes and grows in a clump. Grow this ornamental grass in a dark ceramic pot for an absolutely stunning look.
5. Blue Lyme Grass
Blue lyme grass grows aggressively in all kinds of soil. It grows in both tropical and nontropical climate under USDA Zones 4 to 10. The sword-like foliage grows up to 3 – 4 feet that fold as they grow tall. This bold and spiky grass forms beige colored flower heads usually in summer.
6. Fiber Optic Grass
Image Credit: Cocoon Home
USDA Zones 10, 11. Fiber optic grass grows well in tropics, in a colder climate, you can grow it as annual. It hangs down gently in a curve and creates an unusual effect. It’s one of the best ornamental grasses you would like to grow in containers.
Fiber optic is a low growing, fine textured grass that can be planted in full to partial sun. It loves moist soil. You can also grow it indoors; we also added it in our list of most BEAUTIFUL HOUSEPLANTS!7. New Zealand flax
USDA Zones 9 to 11. New Zealand flax is perennial in frost-free areas, excellent for tropical regions. You can grow it in containers, it looks beautiful and gives a tropical feel. This grass like beautiful foliage plant comes in colors of green, copper, red and gold.
8. Sedge
Sedge looks like grass, but it is not. When grown in containers, its leaves glow in the sun and look fantastic while the blades rustle in the slightest breeze. Sedge grows well in warm sunny conditions.
Also Read: Container Garden Design Tips
9. Miscanthus
USDA Zones 6 to 9. One of the most popular ornamental grasses, it grows well in the container. Available in many varieties, it looks picturesque in the morning sun.
10. Blue Oat Grass
USDA Zones 4 to 9 Grow this cool blue – gray grass in a pot with bright flowers to create an aesthetic look on your patio, terrace or balcony garden. Blue oat grass is low maintenance and grows well in partial shade.
11. Feather Reed Grass
Feather reed grass can be grown in the sun and partial shade both. It grows well in USDA Zones 4 to 9. Feather reed grass looks attractive as a focal point– on a patio if grown in a container.
Also Read: Best Shrubs to Grow in Containers
0
0
文章
lenny
2017年05月23日
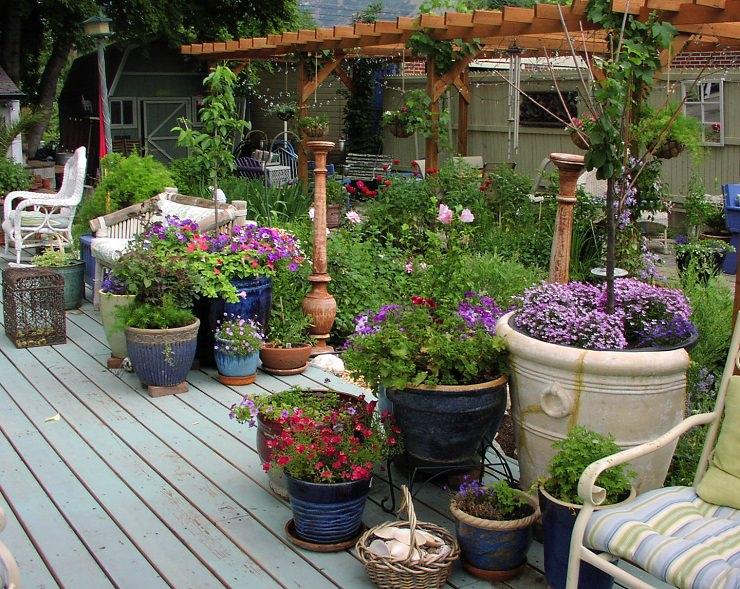
Are you growing a Terrace Garden? If yes then this informational guide on ‘Terrace/Roof Garden Plants’ will surely help you in choosing the plants for terrace garden.

First, assess these characteristics of your terrace accurately: Do you want to grow plants on its floor, in raised beds or in pots? Do you have large or small terrace? Is it shady or sunny?
Selection of terrace garden plants completely depends up on the factors listed above.
In general, better to choose large containers when growing plants for terrace garden because in large containers, plants grow more easily: better moisture conservation and nutrient supply, room for ample root development.
Terrace Garden Vegetables
Well sized pots or raised beds, an ideal exposure to sun, water, slightly acidic and fertile soil and sufficient drainage, this is all you need to have your own vegetable garden.
Vegetables need more care then herbs, so if you’re growing them for first time, start by salads: tomatoes, especially cherry tomatoes, radishes and cucumbers are easy to grow.
You can also grow vegetables such as eggplant, peppers, okras (lady finger) and chilies and strawberries (fruit of course). If you’ll dedicate at least half an hour in a day to some regular gardening chores like pinching, pruning, watering and fertilizing every couple of week or in a month according to your plants’ needs, you’ll get success.
Terrace Garden Flowers
If you feel an urge to grow different, exotic and beautiful flowers on your terrace to make a roof flower garden then grow lot of annuals.
You can plant some tulip bulbs and hyacinths, colorful primroses are also easy to grow.
In summer, grow petunias, pansies and begonias and some exotic flowers depending on your climate.
Hibiscus comes in variety of colors, grow it, you can plant roses, too.
If you live in warm climate, grow these flowers in fall and winter.
Plants for Terrace Herb Garden

The first way to get into the gardener’s skin is often begins with a pot of basil that arises near the edge of the kitchen window.
Gradually, try various herbs to enhance taste of your dishes and salads. Herbs are quickest and easy to grow plants.
Thyme, rosemary, lavender and sage require less watering and grows well on a sunny terrace. Basil, chive, parsley or cilantro need moderate sun and watering. Do not forget the lemon grass and mint which can be used in many cuisines and in preparation of teas.
Depending on your climate and needs, you can try other herbs too on your terrace garden.
Also Read: How to Grow Curry Tree
Low Maintenance Succulents and Perennials
There are a multitude of succulents and perennials, that push themselves to one year to another.
In full sun to partial shade, most of the succulents are grown on well drained and dried growing medium, so they require little maintenance.
Aloes and various cacti are low maintenance. You can grow them in small pots too.
Certain grasses, sage and plants of the composite family like asters, daisies, zinnia, black eyed susan or chamomile and marigolds are possible.
If you have a shady terrace facing north, look for varieties of ferns, and other shade loving plants like English ivy, impatiens and balsams.
Shrubs, Dwarf Trees and Vines

If the size of your terrace garden allows, make the choice of small trees, evergreen shrubs and vines.
In less sunny spot, grow camellias and rhododendrons, Japanese maples and honeysuckles, sweet autumn clematis.
In full sun, grow the lemon tree, the oleanders, olive tree, a flowering virbunum, some dwarf fruits trees like apple, pomegranates, guavas, figs and even mangoes in pot (if your climate allows).
Don’t forget to care about the water requirements, humidity levels and sensitivity of each plant and the rapid development of some vigorous plants, whose exuberance lead you to their too severe pruning or disposal.
Pay attention to the choice of containers
Pots or trays should be chosen in harmony with each plant: combining the beauty and requirements both.
Traditional Terracotta pots are timeless, they retain their charm in all seasons, but it must be remembered that these pots are expensive, heavier and frost susceptible.
If you do a little research and visit your nearby garden centers, you’ll find many frugal and possibilities: containers made of wood, metal, concrete and polyester resins, some flashy colored pots for darker areas.
First, assess these characteristics of your terrace accurately: Do you want to grow plants on its floor, in raised beds or in pots? Do you have large or small terrace? Is it shady or sunny?
Selection of terrace garden plants completely depends up on the factors listed above.
In general, better to choose large containers when growing plants for terrace garden because in large containers, plants grow more easily: better moisture conservation and nutrient supply, room for ample root development.
Terrace Garden Vegetables
Well sized pots or raised beds, an ideal exposure to sun, water, slightly acidic and fertile soil and sufficient drainage, this is all you need to have your own vegetable garden.
Vegetables need more care then herbs, so if you’re growing them for first time, start by salads: tomatoes, especially cherry tomatoes, radishes and cucumbers are easy to grow.
You can also grow vegetables such as eggplant, peppers, okras (lady finger) and chilies and strawberries (fruit of course). If you’ll dedicate at least half an hour in a day to some regular gardening chores like pinching, pruning, watering and fertilizing every couple of week or in a month according to your plants’ needs, you’ll get success.
Terrace Garden Flowers
If you feel an urge to grow different, exotic and beautiful flowers on your terrace to make a roof flower garden then grow lot of annuals.
You can plant some tulip bulbs and hyacinths, colorful primroses are also easy to grow.
In summer, grow petunias, pansies and begonias and some exotic flowers depending on your climate.
Hibiscus comes in variety of colors, grow it, you can plant roses, too.
If you live in warm climate, grow these flowers in fall and winter.
Plants for Terrace Herb Garden
The first way to get into the gardener’s skin is often begins with a pot of basil that arises near the edge of the kitchen window.
Gradually, try various herbs to enhance taste of your dishes and salads. Herbs are quickest and easy to grow plants.
Thyme, rosemary, lavender and sage require less watering and grows well on a sunny terrace. Basil, chive, parsley or cilantro need moderate sun and watering. Do not forget the lemon grass and mint which can be used in many cuisines and in preparation of teas.
Depending on your climate and needs, you can try other herbs too on your terrace garden.
Also Read: How to Grow Curry Tree
Low Maintenance Succulents and Perennials
There are a multitude of succulents and perennials, that push themselves to one year to another.
In full sun to partial shade, most of the succulents are grown on well drained and dried growing medium, so they require little maintenance.
Aloes and various cacti are low maintenance. You can grow them in small pots too.
Certain grasses, sage and plants of the composite family like asters, daisies, zinnia, black eyed susan or chamomile and marigolds are possible.
If you have a shady terrace facing north, look for varieties of ferns, and other shade loving plants like English ivy, impatiens and balsams.
Shrubs, Dwarf Trees and Vines
If the size of your terrace garden allows, make the choice of small trees, evergreen shrubs and vines.
In less sunny spot, grow camellias and rhododendrons, Japanese maples and honeysuckles, sweet autumn clematis.
In full sun, grow the lemon tree, the oleanders, olive tree, a flowering virbunum, some dwarf fruits trees like apple, pomegranates, guavas, figs and even mangoes in pot (if your climate allows).
Don’t forget to care about the water requirements, humidity levels and sensitivity of each plant and the rapid development of some vigorous plants, whose exuberance lead you to their too severe pruning or disposal.
Pay attention to the choice of containers
Pots or trays should be chosen in harmony with each plant: combining the beauty and requirements both.
Traditional Terracotta pots are timeless, they retain their charm in all seasons, but it must be remembered that these pots are expensive, heavier and frost susceptible.
If you do a little research and visit your nearby garden centers, you’ll find many frugal and possibilities: containers made of wood, metal, concrete and polyester resins, some flashy colored pots for darker areas.
0
0
文章
Eyin Thor
2017年05月23日

Do you kill your plants often? Well here’re 13 things you must avoid to make your container plants keep growing.

1. Overwatering
Many new gardener believes that the more they water the better. All plants (including non-potted plants) have the different watering needs and *those needs may also vary depending upon the time of the year or season, the amount of light and ambient temperature. The easiest solution to avoid this problem is knowing the moisture level required by each plant.
The majority of plants (except moisture loving plants) loves when the top surface of the substrate dries out between the watering spells, others require the soil to be kept slightly moist. A good method is to usually poke your finger into the soil about an inch deep and feel if it is wet or rather dry.
2. Underwatering
It is equally harmful to the plants. Back to the same point, it is essential to know the moisture requirements of each plant to keep them healthy. Also, it is obvious, in summer all the plants require more water and you should double the amount of water. When you water your plants, do it thoroughly, so that the entire substrate moisten well and the slight amount of water seeps out from the bottom holes of the pots and then wait for it to dry (with the method of poking your finger) and then water again.
3. You do not know everything about the plant
No two plants are identical. The number one thing you should do is read the instructions that come with the plant you have acquired. Always, when you purchase plants in the nursery ask them about the growing requirements. Whenever you get a new plant search about it thoroughly on the web. There are many gardening websites (ours too) and blogs of enthusiastic gardeners who have excellent information about plants.
4. Too little or too much sunlight
Yo might be wrong if you think all plants love the sun, there are some that require shade or part shade. According to experts, the plants themselves can tell us if they are getting the right amount of light or not. For example, the leaves may change color or become scorched or brownish if they are getting too much sunlight. On the other hand, if you notice that your plant is “stretching its neck” toward the light or the leaves are excessively bigger then they definitely need more light. One thing to be noted is that when the warm climate plants are grown in colder zones (whether they are grown there in full or part sun) they require full sun. Similarly, the temperate plants in warm tropics grow best in part sun or shade.
5. Moving or changing position of plants
Plants get used to the place they are placed on and do not like being moved constanly. If one of your plants is thriving correctly under certain temperatures and conditions, avoid moving it to another place as it could make difficult for the plant to adapt to its new place.
6. Incorrect soil
Each plant species has different planting needs and soil requirements. It is recommended that you do proper research about the soil type before planting any plant. However, in containers, well-draining soil is used to avoid root rot. You can make your own light and crumbly soilless mix or buy an organic potting mix of good quality.
7. No transplanting
Potted plants may feel “subjected” to their containers. The majority of them outgrow their pots over a period of about one to two years (depending on how quickly they grow), so it is important that you transplant them into a larger container with fresh and well-nourished potting soil. You can prune the roots of your plants if you don’t want to change their existing pot.
One of the signs to know when to transplant is when the leaves turn yellow, the plant stops growing or seems thirsty and requires water again and again. Even in some cases, you can see that the roots are coming out from the drainage holes.
8. Ignoring the pests
Some of the most common pests that can affect your potted plants are aphids, spider mites, scales, whiteflies and mealybugs. You can prevent pests from attacking your container garden with some techniques. Whenever you buy a new plant scrutinize it to see any sign of pests or diseases. Keep an eye on diseased or weak plants or the ones that are in stress; pests prefer to attack such plants. Look at the inside of leaves and tips of the plants, these are the parts that pests infest most. If pests are already damaging your plants, first identify what type of pests they are and then treat them appropriately, prefer organic pesticides.
9. Carelessness
Are you going on a vacation? It is good for you but not for your potted plants. Be sure to make arrangements for them. Ask someone to come and water the plants when you are away. Another option is to use self-watering containers, they are great especially if you’re a busy person and often forget about watering your plants.
10. Less or no fertilizer
Potted plants depend on soil nutrients and can often require supplements to grow better and healthy besides improving the production of flowers and fruits. Using a balanced fertilizer (easily available) regularly and according to the package instructions, you can ensure that your plants are getting all the nutrients they need. While most of your plants do well with balanced fertilizer, there may be some that require specific combination of nutrients.
11. Overfertilization
Overfertilization can also harm your plants. It can even kill them. Fertilizers when used in excess can damage the roots. If you see the symptoms like yellowing and wilting of lower leaves, browning leaf tips and its margins, defoliation, slow or no growth then it is possible that your plant is suffering from overfertilization.
12. No pinching, deadheading, and pruning
If you want bushier growth, pinch the tips of young plants. Also, many flowering plants require “deadheading”, which means picking and removing the old flowers to promote new ones. You will know when to remove them once the flowers start to fade or wilt or turn brownish.
Potted plants require pruning too and on time, some of the fruits and flowering plants produce only on new branches, so if you must not ignore pruning.
13. Exposing to extreme temperatures
If you research carefully about the plants you’ll find how much temperature (maximum or minimum) they tolerate best. In winters, if require, it is good if you protect such plants by keeping them indoors or in a greenhouse.
If you’re living in a warm climate where summers are hot, protect your plants from the intense sun in summer.
4
5
文章
Gina
2017年05月23日

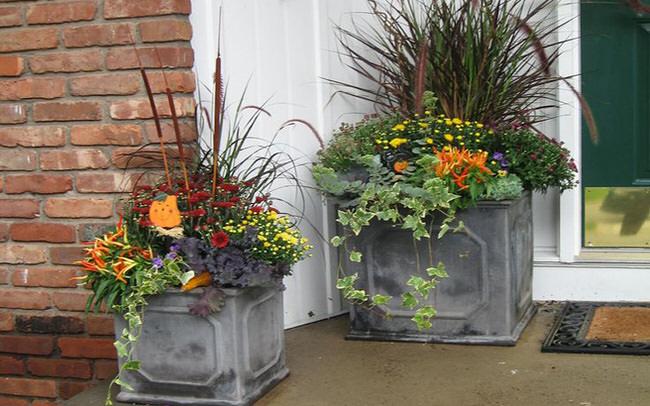
The growing session isn’t over just because summer is winding down… one of the best ways to keep your garden space vibrant is to use fall containers. And most of you who have been reading TGG awhile know that I like to do things just a little different from the crowd, so our choices here are not the average pot o’ mums! So with inspiring combinations and plant suggestions, let’s let the photos (ok, and a few suggestions from us!) do the talking! Fabulous fall containers!
First, some tips…
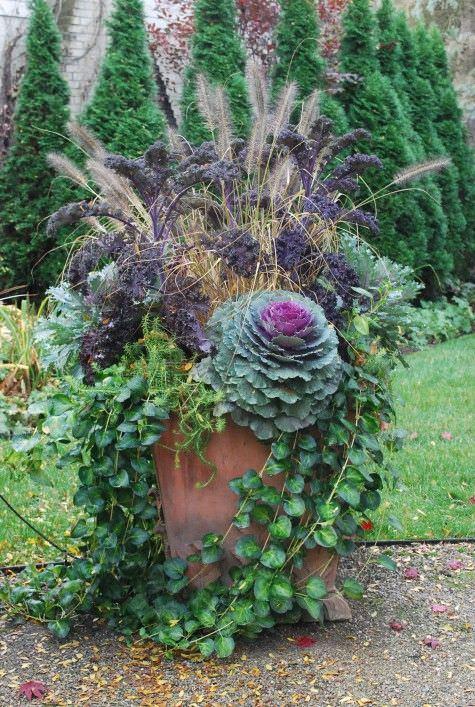
1. Use grasses. Height, texture, movement… and they look great all winter. (Before you ask, this one is ‘Pennisetum’ “Fireworks”.)

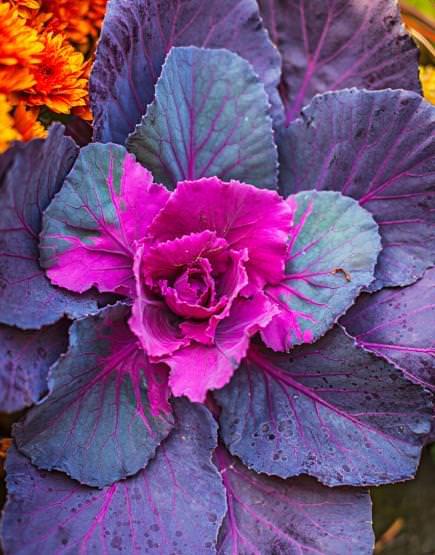
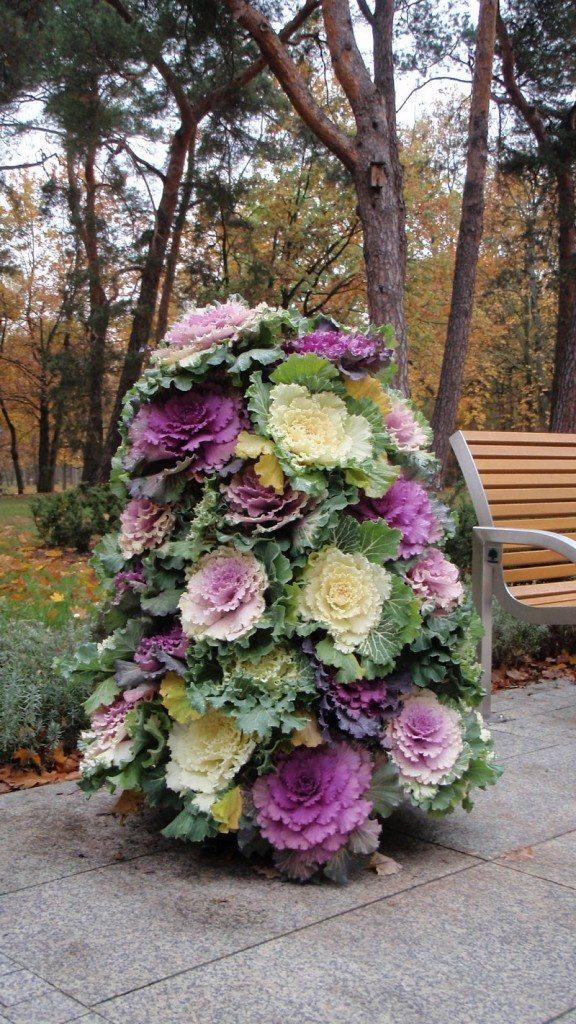
2. Use Kale. Pretty! And, it lasts right through frost, and even snow! Look for larger, colorful varieties at your nursery. Don’t buy the 4 inch pots from the grocery store nursery section. Big difference.
3. Use something other than plants to take it out of the “snooze” zone. An unusual container, adding pumpkins or squash to the container, using branches or other natural items as “accessories”… This also allows you to buy far fewer plants by filling space with other things of interest.
4. Don’t stop watering/ fertilizing…
5. Pack ’em in tight, because they won’t have a long, warm season of fast growth to fill in.Now, on with the inspiration!
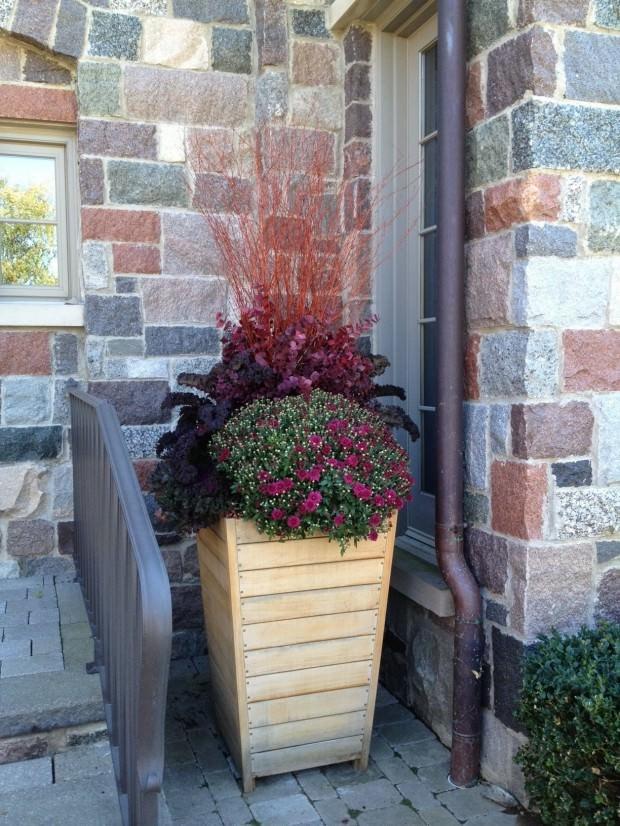
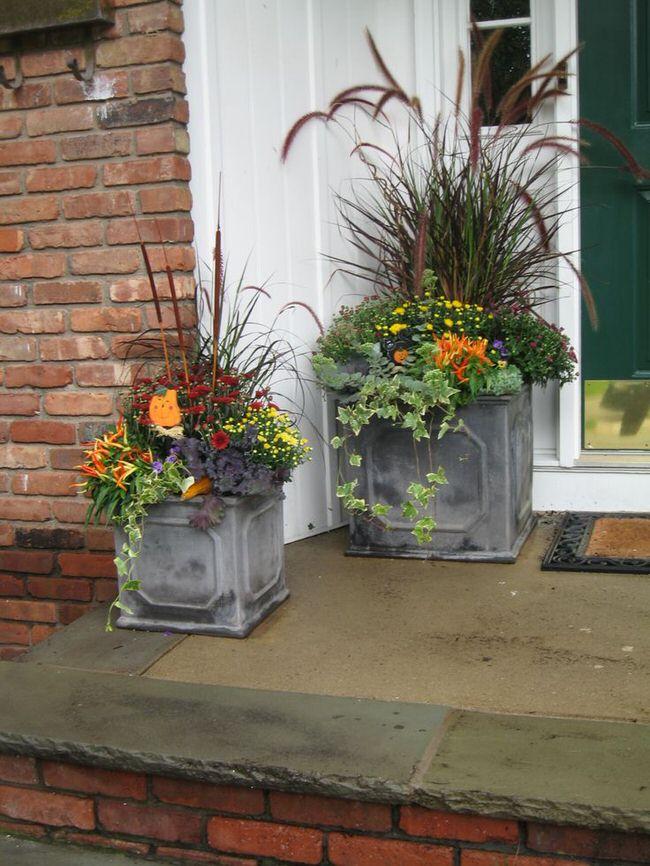
From landscape designer Deborah Silver, and her blog ‘Dirt Simple‘, these two fall containers epitomize the use of grasses, kale and unusual containers… Check out her blog, they do amazing work! A bunch of inspiring photos!

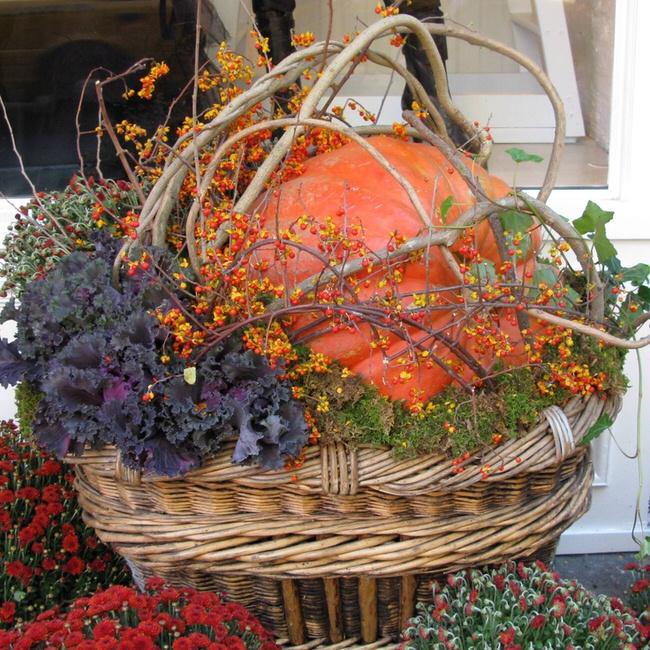
From ‘VSF, New York‘, this florist created basket container is the coolest thing around. Branches, moss and a pumpkin keep company with Kale and Mums… anything but ordinary!
From ‘BHG’, three plants, simple container, easy to duplicate!
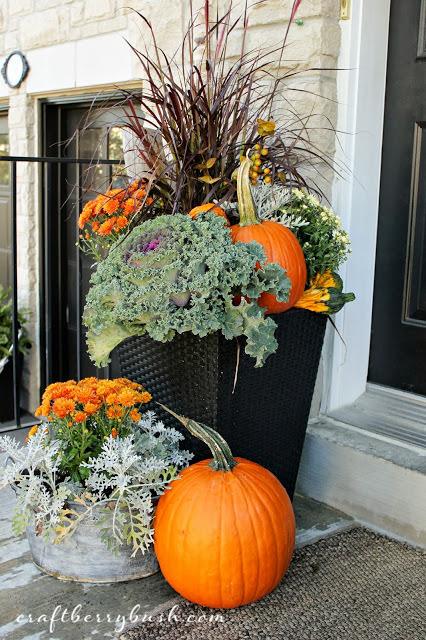
Lucy at ‘Craftberry Bush‘ did an amazing job on her fall front porch! Check out her use of grasses, containers, Kale and pumpkins… Really professional job!
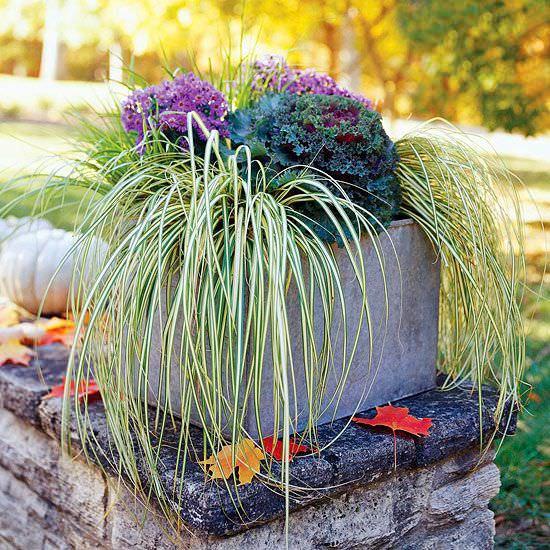
Another simple design, by ‘Midwest Living’…

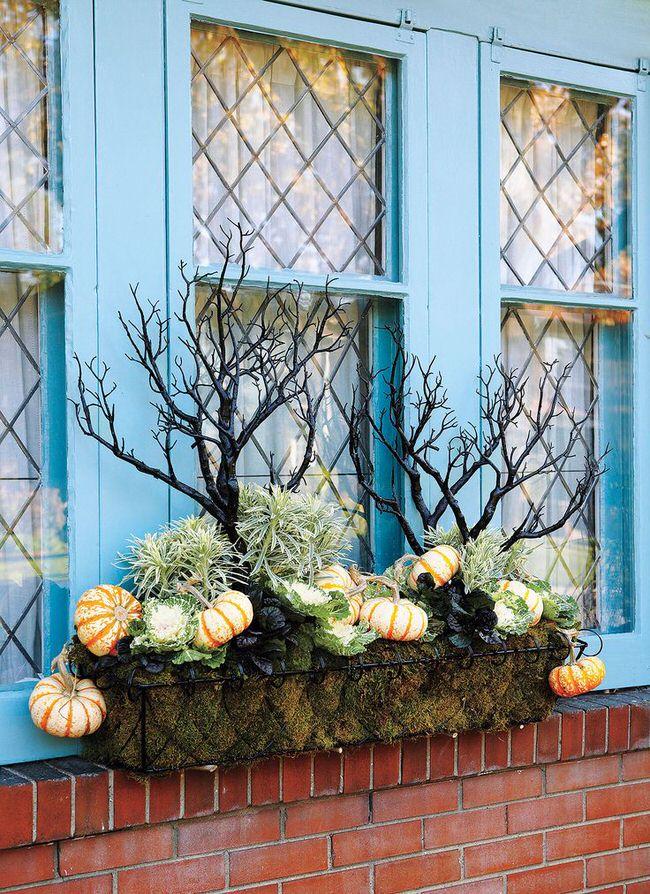
From ‘Canadian Gardening‘, this unusual fall window box has my vote for one of a kind! Love the eerie branches!
Use a “Flower Tower” planter, (or DIY one from this video by Home Depot) to grow Kale! Creative!
This homeowner used a tall branch to add height and substance, one licorice plant, and a pumpkin… Love the simpleness, yet so interesting!
Finally, from ‘Pocket Full of Posies Design‘, this planting uses unusual containers to make this mum and grasses front door container really wow.
1
0
文章
Juze
2017年05月23日

Learn how to grow papaya tree. Growing papaya is perfect for gardeners who like to grow easy to grow fruit trees. Papaya tree care is simple, it is low maintenance and productive.
USDA Zones— 9 – 11
Difficulty— Easy
Other Names— Banane de Prairie, Caricae Papayae Folium, Carica papaya, Carica peltata, Carica posoposa, Chirbhita, Erandachirbhita, Erand Karkati, Green Papaya, Mamaerie, Melonenbaumblaetter, Melon Tree, Papaw, Pawpaw, Papaya Fruit, Papayas, Papaye, Papaye Verte, Papayer, Papita.

Papaya (Carica papaya L.) is native to the tropics of Mexico and Central America. This fruit for high nutritional value, great taste and medicinal properties.
Papaya is mainly consumed as a fruit, but it is also used for making soft drinks, juices, pickles, jams, and curries. It produces latex that is extracted from the green fruit and stem, which contains an enzyme called papain that helps in digestion of proteins.
Plant Characteristics
Papaya is a herbaceous plant of relatively rapid growth and short life (not profitable to cultivate mature plants for longer than 3 years because the fruit yield gets low). It has a hollow, segmented and erect single stem and no branches. It presents a many large, lobed leaves. The plant height can reach up to several meters.
The fruit has a wide variety of forms, its shape and size vary depending on the variety and type of flower.
Pollination
If you’re growing papaya you must know that papayas come in three sexes: Male, female and hermaphrodite (bisexual). Male papaya trees must be eliminated as they don’t produce fruits. Female papaya trees require male tree for pollination. In orchards and papaya plantations, generally, 1 male tree per 10 female trees is grown. Bisexual papaya trees are self-pollinating and don’t require male trees for pollination. Commercial growers plant them. You will need to plant either female or bisexual papaya tree.
To learn how to identify male or female papaya, tree read this informative discussion on helpful gardener
Our recommendation for you is to buy seeds from quality source so that you know what you’re buying and to get a self-fertile bisexual tree. Most of the hybrid varieties that are coming are either bisexual or female, it is better to buy them. If you’re sowing seeds obtained from the fruits, choose seeds from elongated fruits instead of rounded fruits. Elongated fruits have 66% probability of hermaphrodite (bisexual) seeds and 33% female seeds.
Cross pollination from hand is required for pollination of female papaya trees.
How to Grow Papaya in Pots
Growing papaya in pots is not difficult, considering it is short living small tree. You can grow any papaya variety in pots but it is better to choose a dwarf variety.

Choosing a container
Choose a large 15-20 gallon size container for growing papaya in pots, also, ensure there are enough drainage holes in the bottom before planting. A pot that is around 18-22 inches in diameter and 12-15 inches deep would be sufficient.
Sow the seeds directly in the pot you wish to use for growing papaya tree as papayas don’t transplant well. All the other growing requirements are given below in the article.
Growing Papaya from Seeds
Seeds must be given treatment before sowing for germination. The first method is to simply wash the seeds to remove gelatinous coating before sowing. Another method is to immerse them in a container full of neutral water for the period of 4 days. Change the water twice in a day. After 2 days of soaking, separate the seeds that are floating on the surface from those that have settled down.
Leave the seeds that are settled down for another day. After this time, the seeds that float up again must be removed. This way only the viable papaya seeds are left. On the last day when changing the water, add fungicides in it.
After this process, keep the seeds on cotton cloth for 2 to 3 days, keeping up the seeds wet. Once the white dot in them can be observed they are ready for sowing.
Proceed to sow the seeds directly on the ground or in the pot or seed tray but remember that papaya trees don’t transplant well and you’ll have a low success rate. Seeds will germinate in 2-3 weeks. Optimum germination temperature is around 70 F (20 C).
Planting Papaya Tree
Once the seedlings germinate sow them directly in a spot as papayas have less success rate when transplanted.
Prepare the ground well before planting. Make a hole in soil that is of the same depth as of rootball of the plant but twice wide. Apply slow release 16-48-0, 18-46-0 or balanced 15-15-15 fertilizer according to the product instruction at the base of the hole, fill it with a thin layer of soil to prevent the plant roots from coming in direct contact with the fertilizer.
The base of each plant should be 1 cm above ground level, to prevent rot at the stem base. After transplanting, a fungicide can be applied to ensure greater protection especially if planting during the rainy season.
How to Grow Papaya Tree in Cold Climate
Papaya is a tropical fruit tree but if you are thinking to plant it in a temperate climate plant it in a large pot and try to overwinter it in a well-protected area, like a greenhouse. Another way is to start the seeds in fall, or in early spring indoors. Once the temperature soars up to plant the seedlings outside. The tree will grow until the frost comes and get killed but there is a possibility that you’ll get some juicy papayas.
Requirements for Growing Papaya TreeTemperature
It is also an important factor that determines if the plant will grow or not. Papaya is one of the easiest fruit trees you can grow the optimum temperature for growing papaya ranges between 68 – 86 F (20 to 30 C).
Low temperatures lead to a slow growth of the plant and higher temperatures cause low production. However, papaya tree can bear cold temperature down to 32 F (0 C) for a short period of time. In extremely high tropical temperatures and in heat waves and droughts, flower buds fall and the plant suspends its growth.
Location
The papaya needs plenty of sun due to its high photosynthetic activity. It is impossible to grow it in the lack of sunlight. One more thing you need to keep in mind when choosing a location for growing papaya trees that they are not strongest and must not be planted in a too windy spot.
Spacing
Papaya trees must be spaced 8-10 feet apart from each other.
Soil
The main characteristics of soil for growing a papaya tree are following:
Loose and moist.With good drainage.High organic matter content.A pH level around 5.5 to 7 (Neutral).Fertile and deep.
The ideal growing medium must be loamy and have adequate content of organic matter with good moisture retention and efficient drainage. Soil depth is also an important factor for root development. The soil that is more than a meter deep is suitable. Compact soil must be avoided, also, clean the rocks or other debris that is limiting the development of roots till the following depth.
Drainage is crucial in papaya cultivation. The proportion of sand, silt and clay determines the texture and soil structure.
Sandy soils have better drainage than clay. But too sandy soils that are low in organic matter have reduced water retention capacity, which must be avoided.
In clay-rich soils, water movement is slow and this can lead to root rot, slow development of plant and inhibit nutrition uptake. In very alkaline soils (above pH level 8.0) Zinc, iron, and other micro-element deficiency can occur.
Excess water causes yellowing of young leaves, premature fall of flowers and contribute to root rot. Low moisture in the soil can lead to slow growth, accelerated aging and premature leaf and fruit drop.
Good soil preparation practices are key to growing papaya, such as deep plowing and mixing organic matter.
Watering
Water is the main contributor of the plant (the plant is composed about 85% of water). In the process of germination, and first few months after planting, papaya needs a lot of water, so at this stage water regularly.
In the dry season, to get the good results in production, watering must be increased again. Keep the soil slightly moist but not wet. As a rule of thumb, water papaya plant deeply when top 1 inch of soil dries out.
Papaya Tree Care
Papaya tree care is easy if you grow it in the warm conditions in full sun.
Mulching
Mulching papaya tree with organic matter helps in retaining moisture, which is essential.
Fertilizer
Papayas are heavy feeders. Apply plenty of manure or compost regularly near the base of your plant.
You can also apply complete fertilizer 15-15-15, 0.1 kg or a similar mixture at intervals of two weeks during the first six months and 0.2 kg thereafter.
Pruning
No pruning is required.
Pests and Diseases
Pests that can attack it are fruit flies, mites, black vine weevil, aphids, leafhoppers, and whitefly. In diseases, it suffers from soil fungi, powdery mildew, fruit rot, papaya ringspot virus, and nematodes.
Harvesting Papayas
Papaya fruit set occurs 10-12 months after planting. The fruit is sensitive to sunburn and it must be separated from the tree carefully using plastic gloves or something similar, pick it lightly with a twist or use a short knife, leaving 0.5 cm stalk.
Harvesting should be done according to the following maturity indices:
1. 0% Ripe: Completely green, but well developed.
2. 10-15% Ripe: Color change, one or two yellow stripes with 10-15% yellow surface shell surrounded by a bright green color.
3. 25% Ripe: 25% of the surface of the shell is yellow surrounded by the clear green color.
4. 75% Ripe: 75% of the surface is yellow.
5. 76-100% Ripe: The surface of the shell have yellow to orange color.
Papaya is a fruit that after being cut continues its maturation without stopping. Papayas that are harvested for selling in the market are harvested green with two or three yellow stripes as fruits that reach 75 to 100% maturity are difficult to transport. Fruits must be harvested in the early hours of the day and must not be exposed to the sun.
USDA Zones— 9 – 11
Difficulty— Easy
Other Names— Banane de Prairie, Caricae Papayae Folium, Carica papaya, Carica peltata, Carica posoposa, Chirbhita, Erandachirbhita, Erand Karkati, Green Papaya, Mamaerie, Melonenbaumblaetter, Melon Tree, Papaw, Pawpaw, Papaya Fruit, Papayas, Papaye, Papaye Verte, Papayer, Papita.
Papaya (Carica papaya L.) is native to the tropics of Mexico and Central America. This fruit for high nutritional value, great taste and medicinal properties.
Papaya is mainly consumed as a fruit, but it is also used for making soft drinks, juices, pickles, jams, and curries. It produces latex that is extracted from the green fruit and stem, which contains an enzyme called papain that helps in digestion of proteins.
Plant Characteristics
Papaya is a herbaceous plant of relatively rapid growth and short life (not profitable to cultivate mature plants for longer than 3 years because the fruit yield gets low). It has a hollow, segmented and erect single stem and no branches. It presents a many large, lobed leaves. The plant height can reach up to several meters.
The fruit has a wide variety of forms, its shape and size vary depending on the variety and type of flower.
Pollination
If you’re growing papaya you must know that papayas come in three sexes: Male, female and hermaphrodite (bisexual). Male papaya trees must be eliminated as they don’t produce fruits. Female papaya trees require male tree for pollination. In orchards and papaya plantations, generally, 1 male tree per 10 female trees is grown. Bisexual papaya trees are self-pollinating and don’t require male trees for pollination. Commercial growers plant them. You will need to plant either female or bisexual papaya tree.
To learn how to identify male or female papaya, tree read this informative discussion on helpful gardener
Our recommendation for you is to buy seeds from quality source so that you know what you’re buying and to get a self-fertile bisexual tree. Most of the hybrid varieties that are coming are either bisexual or female, it is better to buy them. If you’re sowing seeds obtained from the fruits, choose seeds from elongated fruits instead of rounded fruits. Elongated fruits have 66% probability of hermaphrodite (bisexual) seeds and 33% female seeds.
Cross pollination from hand is required for pollination of female papaya trees.
How to Grow Papaya in Pots
Growing papaya in pots is not difficult, considering it is short living small tree. You can grow any papaya variety in pots but it is better to choose a dwarf variety.
Choosing a container
Choose a large 15-20 gallon size container for growing papaya in pots, also, ensure there are enough drainage holes in the bottom before planting. A pot that is around 18-22 inches in diameter and 12-15 inches deep would be sufficient.
Sow the seeds directly in the pot you wish to use for growing papaya tree as papayas don’t transplant well. All the other growing requirements are given below in the article.
Growing Papaya from Seeds
Seeds must be given treatment before sowing for germination. The first method is to simply wash the seeds to remove gelatinous coating before sowing. Another method is to immerse them in a container full of neutral water for the period of 4 days. Change the water twice in a day. After 2 days of soaking, separate the seeds that are floating on the surface from those that have settled down.
Leave the seeds that are settled down for another day. After this time, the seeds that float up again must be removed. This way only the viable papaya seeds are left. On the last day when changing the water, add fungicides in it.
After this process, keep the seeds on cotton cloth for 2 to 3 days, keeping up the seeds wet. Once the white dot in them can be observed they are ready for sowing.
Proceed to sow the seeds directly on the ground or in the pot or seed tray but remember that papaya trees don’t transplant well and you’ll have a low success rate. Seeds will germinate in 2-3 weeks. Optimum germination temperature is around 70 F (20 C).
Planting Papaya Tree
Once the seedlings germinate sow them directly in a spot as papayas have less success rate when transplanted.
Prepare the ground well before planting. Make a hole in soil that is of the same depth as of rootball of the plant but twice wide. Apply slow release 16-48-0, 18-46-0 or balanced 15-15-15 fertilizer according to the product instruction at the base of the hole, fill it with a thin layer of soil to prevent the plant roots from coming in direct contact with the fertilizer.
The base of each plant should be 1 cm above ground level, to prevent rot at the stem base. After transplanting, a fungicide can be applied to ensure greater protection especially if planting during the rainy season.
How to Grow Papaya Tree in Cold Climate
Papaya is a tropical fruit tree but if you are thinking to plant it in a temperate climate plant it in a large pot and try to overwinter it in a well-protected area, like a greenhouse. Another way is to start the seeds in fall, or in early spring indoors. Once the temperature soars up to plant the seedlings outside. The tree will grow until the frost comes and get killed but there is a possibility that you’ll get some juicy papayas.
Requirements for Growing Papaya TreeTemperature
It is also an important factor that determines if the plant will grow or not. Papaya is one of the easiest fruit trees you can grow the optimum temperature for growing papaya ranges between 68 – 86 F (20 to 30 C).
Low temperatures lead to a slow growth of the plant and higher temperatures cause low production. However, papaya tree can bear cold temperature down to 32 F (0 C) for a short period of time. In extremely high tropical temperatures and in heat waves and droughts, flower buds fall and the plant suspends its growth.
Location
The papaya needs plenty of sun due to its high photosynthetic activity. It is impossible to grow it in the lack of sunlight. One more thing you need to keep in mind when choosing a location for growing papaya trees that they are not strongest and must not be planted in a too windy spot.
Spacing
Papaya trees must be spaced 8-10 feet apart from each other.
Soil
The main characteristics of soil for growing a papaya tree are following:
Loose and moist.With good drainage.High organic matter content.A pH level around 5.5 to 7 (Neutral).Fertile and deep.
The ideal growing medium must be loamy and have adequate content of organic matter with good moisture retention and efficient drainage. Soil depth is also an important factor for root development. The soil that is more than a meter deep is suitable. Compact soil must be avoided, also, clean the rocks or other debris that is limiting the development of roots till the following depth.
Drainage is crucial in papaya cultivation. The proportion of sand, silt and clay determines the texture and soil structure.
Sandy soils have better drainage than clay. But too sandy soils that are low in organic matter have reduced water retention capacity, which must be avoided.
In clay-rich soils, water movement is slow and this can lead to root rot, slow development of plant and inhibit nutrition uptake. In very alkaline soils (above pH level 8.0) Zinc, iron, and other micro-element deficiency can occur.
Excess water causes yellowing of young leaves, premature fall of flowers and contribute to root rot. Low moisture in the soil can lead to slow growth, accelerated aging and premature leaf and fruit drop.
Good soil preparation practices are key to growing papaya, such as deep plowing and mixing organic matter.
Watering
Water is the main contributor of the plant (the plant is composed about 85% of water). In the process of germination, and first few months after planting, papaya needs a lot of water, so at this stage water regularly.
In the dry season, to get the good results in production, watering must be increased again. Keep the soil slightly moist but not wet. As a rule of thumb, water papaya plant deeply when top 1 inch of soil dries out.
Papaya Tree Care
Papaya tree care is easy if you grow it in the warm conditions in full sun.
Mulching
Mulching papaya tree with organic matter helps in retaining moisture, which is essential.
Fertilizer
Papayas are heavy feeders. Apply plenty of manure or compost regularly near the base of your plant.
You can also apply complete fertilizer 15-15-15, 0.1 kg or a similar mixture at intervals of two weeks during the first six months and 0.2 kg thereafter.
Pruning
No pruning is required.
Pests and Diseases
Pests that can attack it are fruit flies, mites, black vine weevil, aphids, leafhoppers, and whitefly. In diseases, it suffers from soil fungi, powdery mildew, fruit rot, papaya ringspot virus, and nematodes.
Harvesting Papayas
Papaya fruit set occurs 10-12 months after planting. The fruit is sensitive to sunburn and it must be separated from the tree carefully using plastic gloves or something similar, pick it lightly with a twist or use a short knife, leaving 0.5 cm stalk.
Harvesting should be done according to the following maturity indices:
1. 0% Ripe: Completely green, but well developed.
2. 10-15% Ripe: Color change, one or two yellow stripes with 10-15% yellow surface shell surrounded by a bright green color.
3. 25% Ripe: 25% of the surface of the shell is yellow surrounded by the clear green color.
4. 75% Ripe: 75% of the surface is yellow.
5. 76-100% Ripe: The surface of the shell have yellow to orange color.
Papaya is a fruit that after being cut continues its maturation without stopping. Papayas that are harvested for selling in the market are harvested green with two or three yellow stripes as fruits that reach 75 to 100% maturity are difficult to transport. Fruits must be harvested in the early hours of the day and must not be exposed to the sun.
3
0
文章
小马奥
2017年05月23日

If you’re looking for some OFFBEAT ideas for growing plants indoors or outdoors, these DIY hanging planter ideas are worth looking at!To give your garden a playful look, you need to be creative and what’s better than some offbeat planters made from unused home items hanging in line and beautiful plants trailing from them.1. DIY Hanging Terrarium

The DIY hanging terrarium planter is perfect for keeping indoors, and it looks awesome. With a few supplies and plants, you can do this without any difficulty following the steps. Visit this website and this ONE too, to learn everything.
2. DIY Birdcage Planter

Add a little whim to your garden by adding a birdcage planter. You can also hang it on your balcony. The step by step article is available here!
3. Hanging Purse Garden

Repurpose old and damaged purses into a beautiful hanging garden. Keep the plants in their pots so you can easily slip them out to drain excess moisture. You can also line the purse with plastic to keep the purse from getting wet.
4. Hanging Seashell Planter

You’ll need some big conch shells, threads to tie, soil, trailing succulents or you can also use air plants. See more INCREDIBLE SEASHELL planter ideas here!
5. DIY Mason Jar Hanging Planter

The Mason jars are so versatile; we also added a few ideas here! This DIY mason jar planter is not hanging but actually clamped, a wonderful idea. We found it on Allison Patrick’s blog. Here’s an another link to a different DIY post!
6. Hanging Hat Planter

If you have a few old hats, use them for this bizarre idea. Hang your planters from a wall, cut a hole into the top of the hat of the size of plant stems. Now slide the stems out through the hole so that it’ll look like plants are growing in hats, your planter is ready. Allow a few days for plants to grow around the hat to see the natural display.
7. Hanging Plastic Bottle Planter

Simple idea for upcycling old plastic bottles and turn them into beautiful hanging plant pots. Check out the tutorial here.
8. Creative Hanging Planter

We found this DIY tutorial on Bloglovin and loved it. Although the tutorial is not available in English, you can translate it using Google translate.
9. DIY Hanging Air Plant Holder

Impressive DIY for indoors. This unique plant holder is cool to display air plants. The step by step tutorial is available on Squirrelly Minds.
10. Tin Can Hanging Planter

If you have tin cans in your homes that you’re about to throw, make use of them to grow annuals, succulents or herbs and hang them. So many DIY tutorials available if you search the web. One of its kind is here!
11. Hanging Gloves Planters

If you love to surprise your visitors, this idea is for you. Just plant the plants in small pots and place them in gloves. Hang the gloves on a wall, on a tree or a rope.
12. DIY Hanging Planters Out of Metal Bowls

These hanging planters are so unique and made of metal bowls. It’s a sexy idea, to learn step by step– Visit A Beautiful Mess
13. Ice Cream Cone DIY Hanging Planter

A fun DIY hanging planter idea for Ice cream lovers. You can make a planter like this for under 10$. The complete tutorial is available on Brit.co.
14. Hanging Tire Planter

Old Tire Uses in the garden are popular, and one of the best ways to use an old tire in the garden is to make it a hanging tire planter. See the DIY tutorial here!
15. DIY Plastic Bottle Hanging Planter

If you love recycling projects, take a look at this DIY at PopSugar! You can also look at 13 Plastic Bottle Recycling Ideas here.
16. Hanging Tray Planter

Make this easy hanging succulent planter with a tray or shallow pot, succulents, threads, and candles. To make it, just plant the succulents in a tray that has holes on sides to hang (or drill a few holes). Hang the tray with the help of threads. You can also put some candles, burn those candles in the night to create an astonishing effect. Ensure you do not hang this in a windy spot.
The DIY hanging terrarium planter is perfect for keeping indoors, and it looks awesome. With a few supplies and plants, you can do this without any difficulty following the steps. Visit this website and this ONE too, to learn everything.
2. DIY Birdcage Planter
Add a little whim to your garden by adding a birdcage planter. You can also hang it on your balcony. The step by step article is available here!
3. Hanging Purse Garden
Repurpose old and damaged purses into a beautiful hanging garden. Keep the plants in their pots so you can easily slip them out to drain excess moisture. You can also line the purse with plastic to keep the purse from getting wet.
4. Hanging Seashell Planter
You’ll need some big conch shells, threads to tie, soil, trailing succulents or you can also use air plants. See more INCREDIBLE SEASHELL planter ideas here!
5. DIY Mason Jar Hanging Planter
The Mason jars are so versatile; we also added a few ideas here! This DIY mason jar planter is not hanging but actually clamped, a wonderful idea. We found it on Allison Patrick’s blog. Here’s an another link to a different DIY post!
6. Hanging Hat Planter
If you have a few old hats, use them for this bizarre idea. Hang your planters from a wall, cut a hole into the top of the hat of the size of plant stems. Now slide the stems out through the hole so that it’ll look like plants are growing in hats, your planter is ready. Allow a few days for plants to grow around the hat to see the natural display.
7. Hanging Plastic Bottle Planter
Simple idea for upcycling old plastic bottles and turn them into beautiful hanging plant pots. Check out the tutorial here.
8. Creative Hanging Planter
We found this DIY tutorial on Bloglovin and loved it. Although the tutorial is not available in English, you can translate it using Google translate.
9. DIY Hanging Air Plant Holder
Impressive DIY for indoors. This unique plant holder is cool to display air plants. The step by step tutorial is available on Squirrelly Minds.
10. Tin Can Hanging Planter
If you have tin cans in your homes that you’re about to throw, make use of them to grow annuals, succulents or herbs and hang them. So many DIY tutorials available if you search the web. One of its kind is here!
11. Hanging Gloves Planters
If you love to surprise your visitors, this idea is for you. Just plant the plants in small pots and place them in gloves. Hang the gloves on a wall, on a tree or a rope.
12. DIY Hanging Planters Out of Metal Bowls
These hanging planters are so unique and made of metal bowls. It’s a sexy idea, to learn step by step– Visit A Beautiful Mess
13. Ice Cream Cone DIY Hanging Planter
A fun DIY hanging planter idea for Ice cream lovers. You can make a planter like this for under 10$. The complete tutorial is available on Brit.co.
14. Hanging Tire Planter
Old Tire Uses in the garden are popular, and one of the best ways to use an old tire in the garden is to make it a hanging tire planter. See the DIY tutorial here!
15. DIY Plastic Bottle Hanging Planter
If you love recycling projects, take a look at this DIY at PopSugar! You can also look at 13 Plastic Bottle Recycling Ideas here.
16. Hanging Tray Planter
Make this easy hanging succulent planter with a tray or shallow pot, succulents, threads, and candles. To make it, just plant the succulents in a tray that has holes on sides to hang (or drill a few holes). Hang the tray with the help of threads. You can also put some candles, burn those candles in the night to create an astonishing effect. Ensure you do not hang this in a windy spot.
1
1
文章
Eyin Thor
2017年05月23日
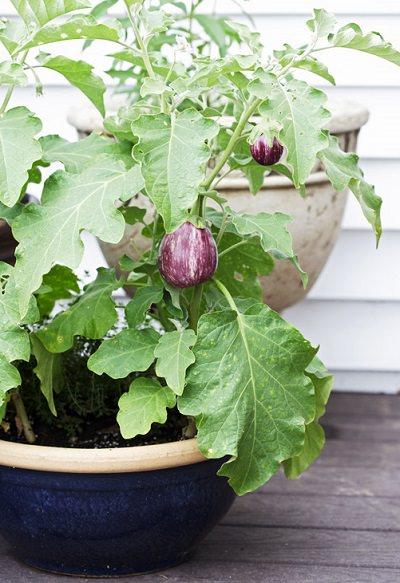
Growing eggplants in containers is not complicated, and if you’re a fan of grilling and oven broiling, you should grow this delicious and PRODUCTIVE vegetable.
Eggplant is a perennial tropical vegetable plant native to South and East Asia (namely, China and India) and a member of the tomato family. The plant loves heat and full sun and requires evenly moist soil in its native environment to thrive and fruit heavily.
These are the medium sized bushes, and nowadays a much more dwarf and compact cultivars are available for limited space gardeners. Similar to the other cousins of nightshade family e.g. tomatoes and peppers, it is possible to grow this vegetable in a container.
How to Grow Eggplants in Pots
Growing eggplants in pots is possible in two ways– Either start them using seeds or buy the seedlings from a nearby nursery or garden center. If you’re new to growing plants and have not grown them much– buy a few seedlings of your favorite eggplant variety. This will make things hassle free! If you’ve decided to germinate them from seeds, then that is also relatively easy.
Planting Time
Usually, in the spring, it’s the season when eggplant seedlings are transplanted on the ground when all the dangers of frost are passed. BUT container grown eggplants can be planted in summer and even in early fall, if you’re ready to move the pots here and there to control the temperature, especially during the nighttime when the temperature dips down. If you’re growing eggplants in a hot and warm frost-free climate, planting in winter is also possible.
Note that; this vegetable plant is more sensitive to low temperatures than tomatoes and peppers.Starting Eggplants from Seeds
Ensure you plant up to two seeds in each cell of a seedling tray or directly sow two seeds in each container. Remember, the eggplants require a lot of warmth for germination, more than tomatoes and peppers. Therefore, if you think the outdoors is not warm enough (temperature above 68 F (20 C) is good enough for eggplant seeds to germinate), you can place them indoors to kick start their growth, that’s the best of container gardening. Once they have sprouted and had up to four leaves, they can be transplanted into the desired containers.
Choosing a Pot
You’ll need a large container, depending on the cultivar, the larger the variety you’re growing, the larger the pot! Usually, the eggplant is relatively large, similar to a pepper plant or tomato so it requires a large pot which should be big enough for the capacity of five gallons, at least. In other words, use a pot that is at least 12 inches deep in size for each plant. If growing in a cooler region, choose a pot that retains heat. Here’s an informative article on choosing the best pot type for your container garden!
Requirements for Growing Eggplants in Containers
Position
Place the pots in a spot which has good air circulation and gets direct sunlight and some wind. This is because the eggplant requires a lot of warmth and sun exposure when growing. West or south facing direction is appropriate.
Soil
The eggplants require a lot of nutrients for growth and a neutral or slightly acidic soil in pH. Use soil that is rich in nutrients, most preferably loamy soilless potting mix. Eggplants thrive in the soil which has adequate and sufficient moisture so think about the moisture retaining capability of soil too. Therefore, you should also add a lot of compost or aged manure to the soil to enhance its capacity to retain water.
Watering
Eggplants love to grow in evenly moist soil, ensure you provide adequate moisture for them. Make sure the drainage is good to avoid root rot. Also, take care not to saturate the soil with too much water making it soggy.
Fertilizer
To provide ample nutrients for more productivity, you should apply fertilizer following the recommendations on the fertilizer bag. As eggplants are heavy feeders and need the fertilizer high in phosphorous, use the 5-10-5 fertilizer or other in a similar ratio, you can apply the balanced fertilizer, too. If required, spray on the leaves of your plants with liquid plant food, typically known as the foliar feeding.
Temperature
Once the plants are germinated and transplanted into the pots, provide them heat and try to keep them in the temperature above 50-54 F (10-12 C). If you’re growing eggplants in a warm climate, you don’t need to worry about temperature requirements much.
Eggplant Care
Pruning and Removing Suckers
Growing eggplant in a pot is not different than tomatoes, however, pruning it and picking the suckers is not necessary unlike TOMATOES but to improve productivity you can do this. When the plants are mature, you’ll need to look out for suckers to remove them. Yellowing or diseased leaves or branches growing tall and lanky and hindering the growth and productivity should be removed too.
Staking
As eggplant bush grows tall and its fruits are plump and heavy, you’ll need to tie your plants to the stake to support them. The most simple thing you can do is to thrust a stick in the pot and tie your plant to it, you can also use a cage to help the plant from falling.
Pests and Diseases
The most common pests for the eggplant is the black flea beetle, which feeds on the leaves of the plant, these insects are the common sight but if the plant is healthy, they won’t do any harm and also the aphids. One more common pest is the cutworm. This worm, as its name suggests, usually cuts the plant at its base. This can be prevented by using a cutworm collar or you can easily eliminate them by yourself. These pests can also be controlled using CHEMICAL pesticides, which we don’t recommend.
Eggplants grown in pots don’t get affected by diseases often. However, if you want, check out the list of eggplant diseases here!
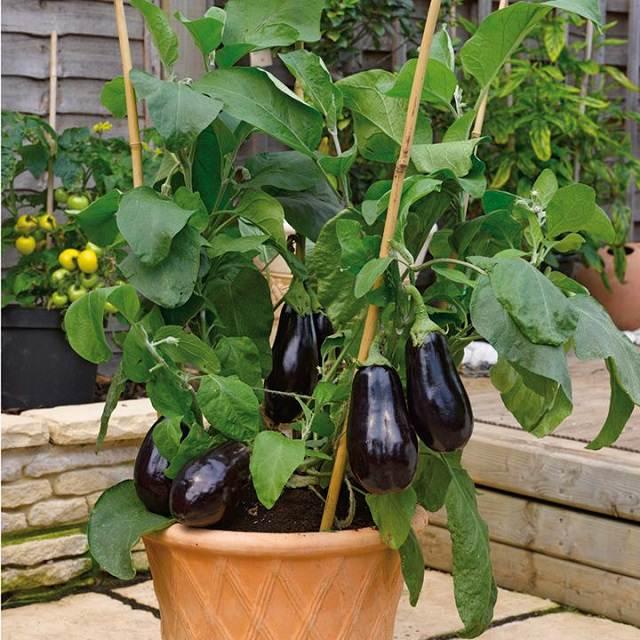
Harvesting
The eggplant usually reaches maturity after two to three months after planting, to say more clearly, in 60-80 days, depending more the type of variety you’re growing and the climate. At around this time, the plant starts to produce fruits which grow to become glossy when fully mature.
Eggplant is a perennial tropical vegetable plant native to South and East Asia (namely, China and India) and a member of the tomato family. The plant loves heat and full sun and requires evenly moist soil in its native environment to thrive and fruit heavily.
These are the medium sized bushes, and nowadays a much more dwarf and compact cultivars are available for limited space gardeners. Similar to the other cousins of nightshade family e.g. tomatoes and peppers, it is possible to grow this vegetable in a container.
How to Grow Eggplants in Pots
Growing eggplants in pots is possible in two ways– Either start them using seeds or buy the seedlings from a nearby nursery or garden center. If you’re new to growing plants and have not grown them much– buy a few seedlings of your favorite eggplant variety. This will make things hassle free! If you’ve decided to germinate them from seeds, then that is also relatively easy.
Planting Time
Usually, in the spring, it’s the season when eggplant seedlings are transplanted on the ground when all the dangers of frost are passed. BUT container grown eggplants can be planted in summer and even in early fall, if you’re ready to move the pots here and there to control the temperature, especially during the nighttime when the temperature dips down. If you’re growing eggplants in a hot and warm frost-free climate, planting in winter is also possible.
Note that; this vegetable plant is more sensitive to low temperatures than tomatoes and peppers.Starting Eggplants from Seeds
Ensure you plant up to two seeds in each cell of a seedling tray or directly sow two seeds in each container. Remember, the eggplants require a lot of warmth for germination, more than tomatoes and peppers. Therefore, if you think the outdoors is not warm enough (temperature above 68 F (20 C) is good enough for eggplant seeds to germinate), you can place them indoors to kick start their growth, that’s the best of container gardening. Once they have sprouted and had up to four leaves, they can be transplanted into the desired containers.
Choosing a Pot
You’ll need a large container, depending on the cultivar, the larger the variety you’re growing, the larger the pot! Usually, the eggplant is relatively large, similar to a pepper plant or tomato so it requires a large pot which should be big enough for the capacity of five gallons, at least. In other words, use a pot that is at least 12 inches deep in size for each plant. If growing in a cooler region, choose a pot that retains heat. Here’s an informative article on choosing the best pot type for your container garden!
Requirements for Growing Eggplants in Containers
Position
Place the pots in a spot which has good air circulation and gets direct sunlight and some wind. This is because the eggplant requires a lot of warmth and sun exposure when growing. West or south facing direction is appropriate.
Soil
The eggplants require a lot of nutrients for growth and a neutral or slightly acidic soil in pH. Use soil that is rich in nutrients, most preferably loamy soilless potting mix. Eggplants thrive in the soil which has adequate and sufficient moisture so think about the moisture retaining capability of soil too. Therefore, you should also add a lot of compost or aged manure to the soil to enhance its capacity to retain water.
Watering
Eggplants love to grow in evenly moist soil, ensure you provide adequate moisture for them. Make sure the drainage is good to avoid root rot. Also, take care not to saturate the soil with too much water making it soggy.
Fertilizer
To provide ample nutrients for more productivity, you should apply fertilizer following the recommendations on the fertilizer bag. As eggplants are heavy feeders and need the fertilizer high in phosphorous, use the 5-10-5 fertilizer or other in a similar ratio, you can apply the balanced fertilizer, too. If required, spray on the leaves of your plants with liquid plant food, typically known as the foliar feeding.
Temperature
Once the plants are germinated and transplanted into the pots, provide them heat and try to keep them in the temperature above 50-54 F (10-12 C). If you’re growing eggplants in a warm climate, you don’t need to worry about temperature requirements much.
Eggplant Care
Pruning and Removing Suckers
Growing eggplant in a pot is not different than tomatoes, however, pruning it and picking the suckers is not necessary unlike TOMATOES but to improve productivity you can do this. When the plants are mature, you’ll need to look out for suckers to remove them. Yellowing or diseased leaves or branches growing tall and lanky and hindering the growth and productivity should be removed too.
Staking
As eggplant bush grows tall and its fruits are plump and heavy, you’ll need to tie your plants to the stake to support them. The most simple thing you can do is to thrust a stick in the pot and tie your plant to it, you can also use a cage to help the plant from falling.
Pests and Diseases
The most common pests for the eggplant is the black flea beetle, which feeds on the leaves of the plant, these insects are the common sight but if the plant is healthy, they won’t do any harm and also the aphids. One more common pest is the cutworm. This worm, as its name suggests, usually cuts the plant at its base. This can be prevented by using a cutworm collar or you can easily eliminate them by yourself. These pests can also be controlled using CHEMICAL pesticides, which we don’t recommend.
Eggplants grown in pots don’t get affected by diseases often. However, if you want, check out the list of eggplant diseases here!
Harvesting
The eggplant usually reaches maturity after two to three months after planting, to say more clearly, in 60-80 days, depending more the type of variety you’re growing and the climate. At around this time, the plant starts to produce fruits which grow to become glossy when fully mature.
0
0
文章
扭扭
2017年05月23日

Learn growing tomatoes in hanging basket if you have a balcony garden, this way they’ll not take much space.

Tomatoes require lot of space to grow and if you have a small garden, growing them in hanging basket is an apt way to use vertical space, plus they adapt easily unlike other vegetables.
Juicy, plump, small, big, round and colorful tomatoes are one of the most favorite crops, whether you have a garden or not you can grow them in hanging baskets.
Growing Tomatoes in Hanging Baskets
Your success in growing tomatoes depends on three factors— yours choosing right variety, basket and providing it appropriate conditions, if you satisfy all of the three, you’ll get rich home grown tomatoes in harvesting season.
Choosing Right Tomato Variety
You can’t grow regular tomato plants. Varieties of cherry tomatoes do well in hanging baskets— ‘hundreds and thousands’ (UK variety) is highly productive and its mini tomatoes taste great, plant grows bush like and spread well. Other varieties like Tumbling Tom (both red and yellow) provides classic tomato taste and most recommended, whereas deep red Maskotka gives juicy flavor and fruit heavily.
Choosing a Basket
Take a *deep basket of diameter 12” as these varieties don’t need bigger pots. Line your basket with plastic or coconut fiber liners. However, it’s better to line it with plastic. For this, make some drainage holes in plastic and place it inside the basket, make sure to spread it properly. As hanging baskets dry out quickly, lining them helps to keep the moisture in soil.
Check out this self watering hanging basket on amazon. Its unique wick system draws the moisture up into the soil, allowing the plant to feed at its’ own rate. The best thing is, it is of only $14.7.
1
0
文章
lenny
2017年05月23日
Growing vegetables in containers is possible but there are some that grow easily and produce heavily in containers. Due to this we’ve added 20 Best and Most Productive Vegetables to grow in pots.
The productivity of a small garden also improves when you utilize the vertical space. Using trellis to provide support to trailing plants and vines always helps.
Best Vegetables to Grow in Pots1. Tomatoes

Without a doubt, tomatoes are the most productive vegetables you can grow in pots. Tomatoes need ample sun (5-6 hours minimum). The pot size depends on the type of tomatoes you are growing. In containers, growing dwarf varieties of determinate type is best. You should also try cherry tomatoes for higher yield.
2. Beans

Most of the beans are climbers or bushier type and they grow upward. They are productive in pots and are easy to grow. You can grow them on a trellis near a wall and within weeks, you will get a green wall of beans running across the trellis. For growing beans you need a sunny place, and a pot that is minimum 12 inches deep (the bigger the better) and a strong trellis like structure for support. Since beans fix the nitrogen most of the vegetables that require more nitrogen are good to grow underneath them. If you’re growing beans in a very large pot you can grow summer savory, kale, or celery with them.
3. Lettuce

Lettuce grows up quickly and you will have the opportunity to harvest them multiple times throughout the growing season. As lettuce is a cool season crop, you’ll have to decide what is the right time for its growth according to your climate, usually, seeds are started in spring. But if you live in a warm climate, grow lettuce in winter.
For growing lettuce, choose a wide planter rather than deep (6″ deep is enough). When planting, make sure to leave space of at least 4 inches between each plant. Remember, leaf lettuces can be grown more closely than head lettuces. Use well draining soil and do shallow and frequent watering to keep the soil slightly moist always.
4. Peppers and Chillies

Peppers and chillies are super productive and excellent candidates for growing in containers. They look great in pots and need a sunny and warm place to thrive. If you keep the pot in a sunny spot and provide right soil and fertilize the plant time to time it will fruit heavily. A large pot that is atleast 12 inches deep is optimum.
5. Radishes

Radishes are one of the quickest growing vegetables and suitable for container vegetable gardening as you can also grow them in small and wide pots. A planter that is just 6 inches deep is enough but if you want to grow larger varieties use 8-10 inches deep pot. Allow 3 inches of space between each plant.
6. Asian Greens

Asian greens are great crops to grow in pots as they grow fast and don’t need a lot of sun. You can grow them in shade in a spot that receives 3-4 hours of morning sun. Providing them plenty of moisture and organic fertilizer is important so that they thrive.
7. Spinach

Spinach is one of the best vegetables for containers. It grows well in partial shade and in any kind of space. Growing spinach in containers is easy too you can even grow it indoors on a windowsill. For growing spinach in pots, choose a pot that is least 6-8 inches deep. You don’t need a very deep pot rather use a wide one. Learn how to grow spinach in pots here.
8. Peas

Peas prefer moderate conditions, they are a perfect crop for container gardening and don’t require a large pot. They grow quickly without attention. You can even grow peas on a balcony. Choose a dwarf or bushier type varieties and do regular and frequent watering as peas prefer slightly moist soil. Keep the plants in a spot that receives full sun to part sun (especially in warm climates).
9. Carrots

Carrots grow best in cool weather. Carrot plants need regular watering, otherwise the roots dry out and crack. Growing this plant in containers is easy and it doesn’t take much space too.
10. Cucumber

Cucumbers are heavy feeders and require regular watering too. Grow them in a medium to large sized pot (depending on the variety) and in full sun. You can have your homegrown successful crunchy cucumbers within a few months. To learn more about growing cucumbers read this article.
11. Eggplant
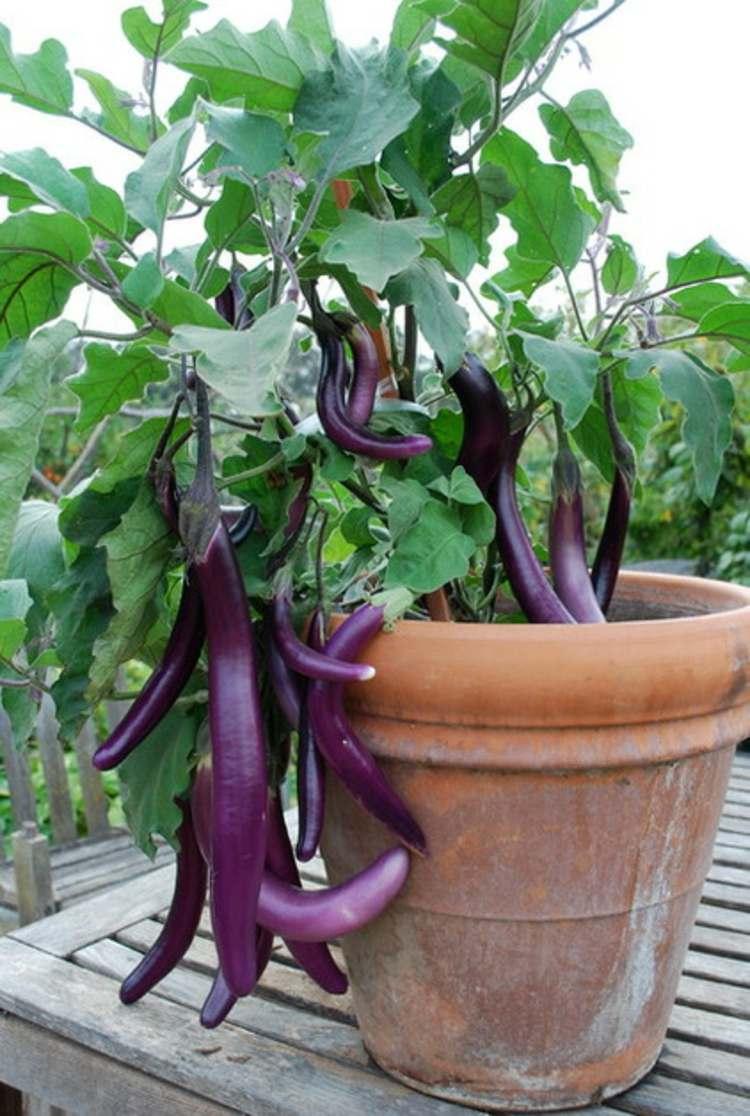
Although eggplants are susceptible to many garden pests, still growing them is easy. They are heat-loving plants and need high temperatures both day and night, thus a suitable summer crop. But if you live in a warm climate you can grow it year round.
Also, it is easier to maintain them in containers than in a large vegetable garden. It is necessary that you keep the pots in a full sun and feed heavily (like all other plants from tomato family– peppers, tomatoes, potatoes; eggplants are heavy feeders too).
12. Squash
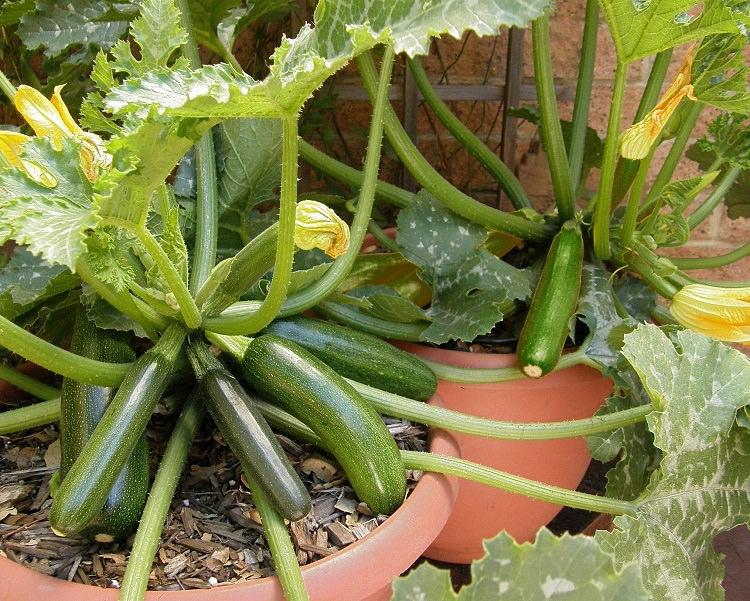
Squashes are easy to grow plants. Summer squashes (Zucchini) are more productive than winter squashes. You can harvest bountiful even in containers. It is one of the most suitable crops for rooftop, balcony or patio gardeners.
The productivity of a small garden also improves when you utilize the vertical space. Using trellis to provide support to trailing plants and vines always helps.
Best Vegetables to Grow in Pots1. Tomatoes
Without a doubt, tomatoes are the most productive vegetables you can grow in pots. Tomatoes need ample sun (5-6 hours minimum). The pot size depends on the type of tomatoes you are growing. In containers, growing dwarf varieties of determinate type is best. You should also try cherry tomatoes for higher yield.
2. Beans
Most of the beans are climbers or bushier type and they grow upward. They are productive in pots and are easy to grow. You can grow them on a trellis near a wall and within weeks, you will get a green wall of beans running across the trellis. For growing beans you need a sunny place, and a pot that is minimum 12 inches deep (the bigger the better) and a strong trellis like structure for support. Since beans fix the nitrogen most of the vegetables that require more nitrogen are good to grow underneath them. If you’re growing beans in a very large pot you can grow summer savory, kale, or celery with them.
3. Lettuce
Lettuce grows up quickly and you will have the opportunity to harvest them multiple times throughout the growing season. As lettuce is a cool season crop, you’ll have to decide what is the right time for its growth according to your climate, usually, seeds are started in spring. But if you live in a warm climate, grow lettuce in winter.
For growing lettuce, choose a wide planter rather than deep (6″ deep is enough). When planting, make sure to leave space of at least 4 inches between each plant. Remember, leaf lettuces can be grown more closely than head lettuces. Use well draining soil and do shallow and frequent watering to keep the soil slightly moist always.
4. Peppers and Chillies
Peppers and chillies are super productive and excellent candidates for growing in containers. They look great in pots and need a sunny and warm place to thrive. If you keep the pot in a sunny spot and provide right soil and fertilize the plant time to time it will fruit heavily. A large pot that is atleast 12 inches deep is optimum.
5. Radishes
Radishes are one of the quickest growing vegetables and suitable for container vegetable gardening as you can also grow them in small and wide pots. A planter that is just 6 inches deep is enough but if you want to grow larger varieties use 8-10 inches deep pot. Allow 3 inches of space between each plant.
6. Asian Greens
Asian greens are great crops to grow in pots as they grow fast and don’t need a lot of sun. You can grow them in shade in a spot that receives 3-4 hours of morning sun. Providing them plenty of moisture and organic fertilizer is important so that they thrive.
7. Spinach
Spinach is one of the best vegetables for containers. It grows well in partial shade and in any kind of space. Growing spinach in containers is easy too you can even grow it indoors on a windowsill. For growing spinach in pots, choose a pot that is least 6-8 inches deep. You don’t need a very deep pot rather use a wide one. Learn how to grow spinach in pots here.
8. Peas
Peas prefer moderate conditions, they are a perfect crop for container gardening and don’t require a large pot. They grow quickly without attention. You can even grow peas on a balcony. Choose a dwarf or bushier type varieties and do regular and frequent watering as peas prefer slightly moist soil. Keep the plants in a spot that receives full sun to part sun (especially in warm climates).
9. Carrots
Carrots grow best in cool weather. Carrot plants need regular watering, otherwise the roots dry out and crack. Growing this plant in containers is easy and it doesn’t take much space too.
10. Cucumber
Cucumbers are heavy feeders and require regular watering too. Grow them in a medium to large sized pot (depending on the variety) and in full sun. You can have your homegrown successful crunchy cucumbers within a few months. To learn more about growing cucumbers read this article.
11. Eggplant
Although eggplants are susceptible to many garden pests, still growing them is easy. They are heat-loving plants and need high temperatures both day and night, thus a suitable summer crop. But if you live in a warm climate you can grow it year round.
Also, it is easier to maintain them in containers than in a large vegetable garden. It is necessary that you keep the pots in a full sun and feed heavily (like all other plants from tomato family– peppers, tomatoes, potatoes; eggplants are heavy feeders too).
12. Squash
Squashes are easy to grow plants. Summer squashes (Zucchini) are more productive than winter squashes. You can harvest bountiful even in containers. It is one of the most suitable crops for rooftop, balcony or patio gardeners.
1
1
文章
Eyin Thor
2017年05月23日
Learn how to grow poppies in this article. Even if you don’t have a space for large flower beds, by growing poppies in pots you can still enjoy the colorful blooms of this stately flowering plant.

Beautiful and seemingly delicate, the poppies are the plants not particularly very easy to grow but the beauty of the flowering plant makes it a popular classic. Those who want to enjoy the intense blooms in their container gardens must grow poppies in pots.
Best Poppy Varieties
There are some of the varieties of poppies that are popular and can grow well in a pot:
Oriental poppy
Most of the oriental poppy cultivars have large strikingly beautiful flowers that usually appears in late spring to early summer in bright colors like orange and red. There are also softer colors of this perennial flowering plant: pink, white and purple, with or without a central spot.
Height: 0.40 to 1.20 m.
USDA Hardiness Zones: 2-9
Iceland poppy
Usually grown as an annual or biennial.This short living perennial is self-seeding and come year after year, does not like the hot summers. Lightly perfumed flowers appear from mid spring to mid summer in colors like yellow, orange, red, pink and white. Flowers of this cultivar fade slowly than other poppies.
Height: 0.30 to 0.6 m.
USDA Hardiness zones: 3-9
California poppy
The showy state flower of California is a short-lived perennial in warm temperate and subtropical climates (USDA Zone 8-10). If you want to grow poppy in a tropical climate, try California poppy, keeping the plant in partial shade in summer.
Height: 0.15 to 0.45 m.
USDA Zones: 6-10b
Shirley poppy
One of the most beautiful and delicate poppies. Shirley Poppy is the name given to an ornamental cultivar group derived from the European wild field poppy (Papaver rhoeas).
Height: up to 0.6 m
USDA Zones: 3-9, can be grown in zones 10 & 11 as annual but doesn’t tolerate tropical heat well.
Choosing a Pot
Growing poppies in pots is easy, the plant is best grown in a medium sized pot. As poppies don’t tolerate waterlogged soil, ensure the pot has sufficient drainage holes in the bottom so that the water will drain freely.
How to Grow PoppiesSowing Seeds and Planting
1. Poppy grows well from seeds. Make sure that you place the pot in a bright position after planting seeds as poppy seeds require light to germinate. Also, most of the poppies do not like being transplanted, so either choose a pot that biodegradable or plant seeds in the exact pot in which you wish to grow poppy plants later.
2. Disperse seeds by hand in the pot. As the poppy seeds are very small, gardeners often mix them with sand to achieve a more equitable distribution. This also helps to see where the seeds were sown.
3. Tamp the seeds lightly down on the soil so that they are covered by a very thin layer of soil or sand. This keeps the seeds in place and they’ll also get plenty of light for germination. Once the seeds are planted moisten the soil making sure you don’t move the seeds.
4. Keep the soil constantly moist until germination. Germination depends on the climate and species but usually occurs within 25 days.
5. Poppies have a very delicate root system in the beginning so once the seedlings sprout water them gently. Thin out the seedlings 4-6 inches apart, when they reach a height of 5 inches. If you are planting in a medium to the large sized pot you can easily keep more than one plant per pot.
Requirements for Growing Poppies in Pots

Location
Poppies love the sun, so place your pots in a spot that receives ample sunlight, at least 6-7 hours daily. However, if you live in a warm climate where the sun is intense, grow poppies in partial sun.
Soil
Poppies can thrive on a variety of soils unless it is clay rich and blocks the drainage, the best is to use humus rich, loamy potting mix. The substrate should be neither too loose, nor prone to compaction and must be well draining. Slightly acidic to neutral soil pH is recommended.
Watering
When the poppies are in bloom or about to bloom in warm season, watering must be moderate and regular. On the contrary, once you get past the period of flowering, best to leave the soil dry as much as possible and watering must be done only when the top one inch surface of soil seems dry.
Poppy Plant Care
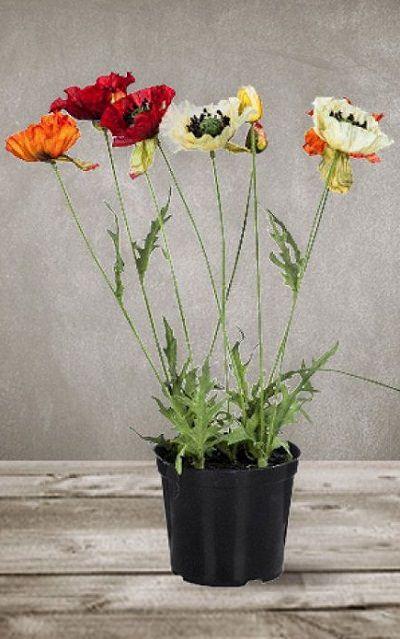
Fertilizer
Poppies are not heavy feeders; on the ground, they tolerate poor soil and thrive on their own but when growing poppies in pots you’ll need to fertilize the plant. At the time of planting or at the beginning of growing season, usually, spring (fall in warm frost-free climates), add a slow-release fertilizer to provide a steady supply of nutrition to plant during the whole season.
If you haven’t added a slow release fertilizer start to feed the plant with balanced liquid fertilizer on a bi-weekly basis once the plant has exceeded the height of 5 inches or when new growth emerges in spring. You can also feed the plant with flower fertilizer during the flowering period. Cease the application of fertilizer once the growing period ends.
Also, poppies are prone to magnesium and iron deficiency, application of Epsom salt is recommended.
Deadheading
Cut off the faded flowers to encourage more blooms.
Pests and Diseases
If the pot is not well draining or if you overwater the plant, it may die due to root rot. It also suffers from powdery mildew. In pests, keep an eye on aphids and spider mites.
Beautiful and seemingly delicate, the poppies are the plants not particularly very easy to grow but the beauty of the flowering plant makes it a popular classic. Those who want to enjoy the intense blooms in their container gardens must grow poppies in pots.
Best Poppy Varieties
There are some of the varieties of poppies that are popular and can grow well in a pot:
Oriental poppy
Most of the oriental poppy cultivars have large strikingly beautiful flowers that usually appears in late spring to early summer in bright colors like orange and red. There are also softer colors of this perennial flowering plant: pink, white and purple, with or without a central spot.
Height: 0.40 to 1.20 m.
USDA Hardiness Zones: 2-9
Iceland poppy
Usually grown as an annual or biennial.This short living perennial is self-seeding and come year after year, does not like the hot summers. Lightly perfumed flowers appear from mid spring to mid summer in colors like yellow, orange, red, pink and white. Flowers of this cultivar fade slowly than other poppies.
Height: 0.30 to 0.6 m.
USDA Hardiness zones: 3-9
California poppy
The showy state flower of California is a short-lived perennial in warm temperate and subtropical climates (USDA Zone 8-10). If you want to grow poppy in a tropical climate, try California poppy, keeping the plant in partial shade in summer.
Height: 0.15 to 0.45 m.
USDA Zones: 6-10b
Shirley poppy
One of the most beautiful and delicate poppies. Shirley Poppy is the name given to an ornamental cultivar group derived from the European wild field poppy (Papaver rhoeas).
Height: up to 0.6 m
USDA Zones: 3-9, can be grown in zones 10 & 11 as annual but doesn’t tolerate tropical heat well.
Choosing a Pot
Growing poppies in pots is easy, the plant is best grown in a medium sized pot. As poppies don’t tolerate waterlogged soil, ensure the pot has sufficient drainage holes in the bottom so that the water will drain freely.
How to Grow PoppiesSowing Seeds and Planting
1. Poppy grows well from seeds. Make sure that you place the pot in a bright position after planting seeds as poppy seeds require light to germinate. Also, most of the poppies do not like being transplanted, so either choose a pot that biodegradable or plant seeds in the exact pot in which you wish to grow poppy plants later.
2. Disperse seeds by hand in the pot. As the poppy seeds are very small, gardeners often mix them with sand to achieve a more equitable distribution. This also helps to see where the seeds were sown.
3. Tamp the seeds lightly down on the soil so that they are covered by a very thin layer of soil or sand. This keeps the seeds in place and they’ll also get plenty of light for germination. Once the seeds are planted moisten the soil making sure you don’t move the seeds.
4. Keep the soil constantly moist until germination. Germination depends on the climate and species but usually occurs within 25 days.
5. Poppies have a very delicate root system in the beginning so once the seedlings sprout water them gently. Thin out the seedlings 4-6 inches apart, when they reach a height of 5 inches. If you are planting in a medium to the large sized pot you can easily keep more than one plant per pot.
Requirements for Growing Poppies in Pots
Location
Poppies love the sun, so place your pots in a spot that receives ample sunlight, at least 6-7 hours daily. However, if you live in a warm climate where the sun is intense, grow poppies in partial sun.
Soil
Poppies can thrive on a variety of soils unless it is clay rich and blocks the drainage, the best is to use humus rich, loamy potting mix. The substrate should be neither too loose, nor prone to compaction and must be well draining. Slightly acidic to neutral soil pH is recommended.
Watering
When the poppies are in bloom or about to bloom in warm season, watering must be moderate and regular. On the contrary, once you get past the period of flowering, best to leave the soil dry as much as possible and watering must be done only when the top one inch surface of soil seems dry.
Poppy Plant Care
Fertilizer
Poppies are not heavy feeders; on the ground, they tolerate poor soil and thrive on their own but when growing poppies in pots you’ll need to fertilize the plant. At the time of planting or at the beginning of growing season, usually, spring (fall in warm frost-free climates), add a slow-release fertilizer to provide a steady supply of nutrition to plant during the whole season.
If you haven’t added a slow release fertilizer start to feed the plant with balanced liquid fertilizer on a bi-weekly basis once the plant has exceeded the height of 5 inches or when new growth emerges in spring. You can also feed the plant with flower fertilizer during the flowering period. Cease the application of fertilizer once the growing period ends.
Also, poppies are prone to magnesium and iron deficiency, application of Epsom salt is recommended.
Deadheading
Cut off the faded flowers to encourage more blooms.
Pests and Diseases
If the pot is not well draining or if you overwater the plant, it may die due to root rot. It also suffers from powdery mildew. In pests, keep an eye on aphids and spider mites.
4
1
文章
Mirella
2017年05月23日

Learn how to grow bell peppers in containers. Growing bell peppers in pots is a great idea if you’re short of space or live in a cold temperate climate as it requires warm soil to thrive.
USDA Zones— Pepper plants are short-lived perennials in tropics but in cold temperate regions, they are grown as annual.
Difficulty— Easy
Soil pH— Slightly acidic to neutral
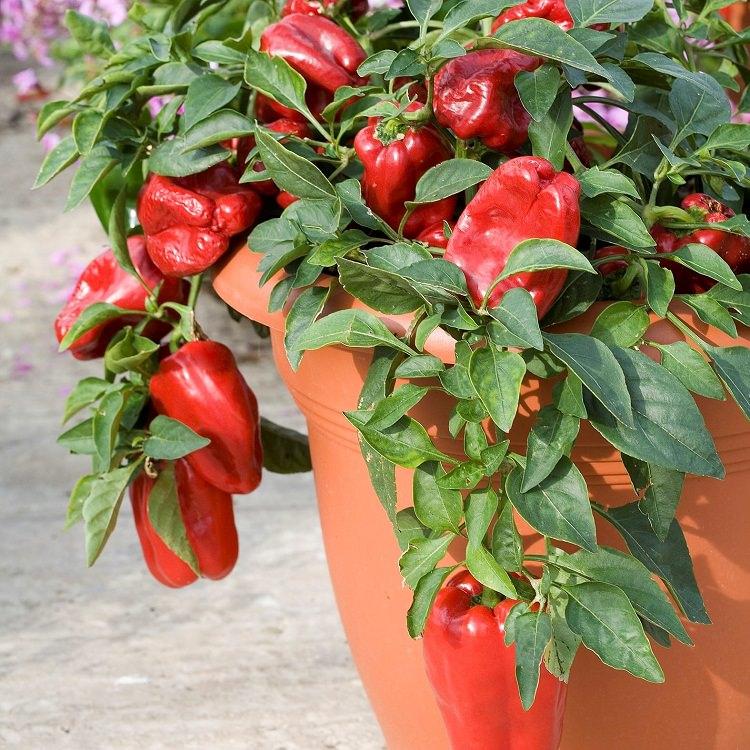
Due to the fact that the pepper is a warm weather vegetable crop and requires considerably more heat than cucumbers and tomatoes, growing bell peppers in pots is a great idea if you live in a cold climate.
How to Grow Bell Peppers in Containers
Growing bell pepper in the pot is easy. The first thing you have to do is to buy the plant from a nursery or propagate it from seeds.
Choosing a Pot
Planting bell pepper in containers requires a pot that is at least 10-12 inches deep and wide and has sufficient drainage holes. You can grow up to 2-3 plants (smaller varieties) in such a pot. Avoid using the black color container if you’re growing bell pepper in a tropical climate.
Propagation
Buy good quality seeds from a local garden store or buy them online. Also, buy seed starting mix or make yourself. Fill small pots or seedling tray with the seed mix and plant two seeds in each pot, 2-3 cm deep.
Start seeds 6-10 weeks before last spring frost date. Usually, in subtropical and tropical climate, you can start seeds anytime except in harsh summer.
The seeds will germinate in 1 to 3 weeks depending on the weather conditions and seed quality. After they germinate thin out and only keep one plant per pot. When seedlings have 2 true leaves they are ready to be transplanted into the desired containers.
Requirements for Growing Bell Pepper in Containers
Position
Peppers love the sun. The most productive pepper plants are grown in warmth and heat. When you’re growing bell peppers in pots, keep them in a position that receives at least 6 hours of sunlight daily. That place should be sheltered from strong wind.
Soil
Good soil is the key to productive pepper plants. Buy best quality potting mix that is well drained, loose and fertile or make your own potting mix. Potting mix must be rich in organic matter. Add well-rotted manure or compost in the combination of peat moss/coco peat and vermiculite or perlite (alternatively, sand). You can also add 5-10 gm neem cake at the time of soil preparation, it will protect the young plant from soil-borne diseases and pests.
Watering
Growing bell peppers require regular watering to keep the soil slightly moist, soil should never dry out completely. In any case, avoid wetting the foliage, overhead watering may cause fungal infection. Water at the foot of the plant. Also, pepper plants suffer from overwatering so be careful that your plants don’t sit in water.
Temperature
Growing bell peppers require soil temperature above 60 F (15 C) for best growth. The optimum seed germination temperature is above 68 F (20 C). It can tolerate temperature up to 95 F (35 C) and down to 50 F (10 C) easily. The ideal growing temperature is between 70-90 F (21-32C).
Bell Pepper CareMulching
For your convenience and to reduce the evaporation of water, do mulching. Cover the base of the plant with organic matter such as leaves, pine barks, straws, paper or whatever that is readily available to you.
Fertilizer
Pepper plants like tomatoes are heavy feeders and you’ll need to fertilize the plant in every 15 days or so. When fertilizing, remember too much nitrogen-rich fertilizer can promote foliage growth. You can also feed the plant with tomato fertilizer. Also, once in a month feed the plant with compost or manure tea. Use of Epsom salt (2tsp/gallon water at the time of watering, you can also spray the plants with this solution) each month improves the health and increases the yield of tomato and pepper plants so it must be applied too.
Pinching and Pruning
In the early stage, when the plant is young pinch growing tips regularly to make it bushier. Pruning is not necessary but can be carried out if required.
Deadheading
If your pepper plant is flowering too early deadhead the flowers, it is important. This will direct the plant’s energy into growing and becoming healthy. You can also stop the formation of new fruits if you want to speed up the maturation of pepper fruits that are already growing on the plant by pinching off emerging flowers.
Pollination
Pepper plants are self-fertile so you don’t need to care about pollination but to get better fruits and to improve productivity you can gently shake the plants when they’re in bloom.

Support
You may need to support the plants. For this, either use tomato cages or simply poke a stick near the main stem and tie the plant to it.
Pests and Diseases
Growing bell peppers in pots require care from aphids as they are the number one enemy of pepper plants. In hot and dry weather you’ll also need to keep an eye on spider mites.
Harvesting
Bell peppers are ready for harvesting in 60-90 days after transplanting. You can harvest them green when they reach full size and remain firm. If left to ripen, the color will change into orange, yellow or red.
A Fact: Pepper is one of the richest sources of Vitamin C (more than the oranges).
USDA Zones— Pepper plants are short-lived perennials in tropics but in cold temperate regions, they are grown as annual.
Difficulty— Easy
Soil pH— Slightly acidic to neutral
Due to the fact that the pepper is a warm weather vegetable crop and requires considerably more heat than cucumbers and tomatoes, growing bell peppers in pots is a great idea if you live in a cold climate.
How to Grow Bell Peppers in Containers
Growing bell pepper in the pot is easy. The first thing you have to do is to buy the plant from a nursery or propagate it from seeds.
Choosing a Pot
Planting bell pepper in containers requires a pot that is at least 10-12 inches deep and wide and has sufficient drainage holes. You can grow up to 2-3 plants (smaller varieties) in such a pot. Avoid using the black color container if you’re growing bell pepper in a tropical climate.
Propagation
Buy good quality seeds from a local garden store or buy them online. Also, buy seed starting mix or make yourself. Fill small pots or seedling tray with the seed mix and plant two seeds in each pot, 2-3 cm deep.
Start seeds 6-10 weeks before last spring frost date. Usually, in subtropical and tropical climate, you can start seeds anytime except in harsh summer.
The seeds will germinate in 1 to 3 weeks depending on the weather conditions and seed quality. After they germinate thin out and only keep one plant per pot. When seedlings have 2 true leaves they are ready to be transplanted into the desired containers.
Requirements for Growing Bell Pepper in Containers
Position
Peppers love the sun. The most productive pepper plants are grown in warmth and heat. When you’re growing bell peppers in pots, keep them in a position that receives at least 6 hours of sunlight daily. That place should be sheltered from strong wind.
Soil
Good soil is the key to productive pepper plants. Buy best quality potting mix that is well drained, loose and fertile or make your own potting mix. Potting mix must be rich in organic matter. Add well-rotted manure or compost in the combination of peat moss/coco peat and vermiculite or perlite (alternatively, sand). You can also add 5-10 gm neem cake at the time of soil preparation, it will protect the young plant from soil-borne diseases and pests.
Watering
Growing bell peppers require regular watering to keep the soil slightly moist, soil should never dry out completely. In any case, avoid wetting the foliage, overhead watering may cause fungal infection. Water at the foot of the plant. Also, pepper plants suffer from overwatering so be careful that your plants don’t sit in water.
Temperature
Growing bell peppers require soil temperature above 60 F (15 C) for best growth. The optimum seed germination temperature is above 68 F (20 C). It can tolerate temperature up to 95 F (35 C) and down to 50 F (10 C) easily. The ideal growing temperature is between 70-90 F (21-32C).
Bell Pepper CareMulching
For your convenience and to reduce the evaporation of water, do mulching. Cover the base of the plant with organic matter such as leaves, pine barks, straws, paper or whatever that is readily available to you.
Fertilizer
Pepper plants like tomatoes are heavy feeders and you’ll need to fertilize the plant in every 15 days or so. When fertilizing, remember too much nitrogen-rich fertilizer can promote foliage growth. You can also feed the plant with tomato fertilizer. Also, once in a month feed the plant with compost or manure tea. Use of Epsom salt (2tsp/gallon water at the time of watering, you can also spray the plants with this solution) each month improves the health and increases the yield of tomato and pepper plants so it must be applied too.
Pinching and Pruning
In the early stage, when the plant is young pinch growing tips regularly to make it bushier. Pruning is not necessary but can be carried out if required.
Deadheading
If your pepper plant is flowering too early deadhead the flowers, it is important. This will direct the plant’s energy into growing and becoming healthy. You can also stop the formation of new fruits if you want to speed up the maturation of pepper fruits that are already growing on the plant by pinching off emerging flowers.
Pollination
Pepper plants are self-fertile so you don’t need to care about pollination but to get better fruits and to improve productivity you can gently shake the plants when they’re in bloom.
Support
You may need to support the plants. For this, either use tomato cages or simply poke a stick near the main stem and tie the plant to it.
Pests and Diseases
Growing bell peppers in pots require care from aphids as they are the number one enemy of pepper plants. In hot and dry weather you’ll also need to keep an eye on spider mites.
Harvesting
Bell peppers are ready for harvesting in 60-90 days after transplanting. You can harvest them green when they reach full size and remain firm. If left to ripen, the color will change into orange, yellow or red.
A Fact: Pepper is one of the richest sources of Vitamin C (more than the oranges).
3
0
求助
Tabitha Farmer
2017年05月22日

Can someone help me identify this plant? It had accidently taken root in a combo pot my mother bought at our local greenhouse. I put it in a glass of water and its growing quickly. It reminds me of a succulent in appearance but the fact that it is thriving in water has me questioning if it is a succulent or not and, if so, what kind.

0
0
Tabitha Farmer:Thank you!!
sunnyzou:Portulaca oleracea L. var. granatus
文章
粉团
2017年05月22日

Aspirin tablets can be used for growing healthy and productive plants, and it really WORKS. Here’re some of the best ASPIRIN uses in the garden!
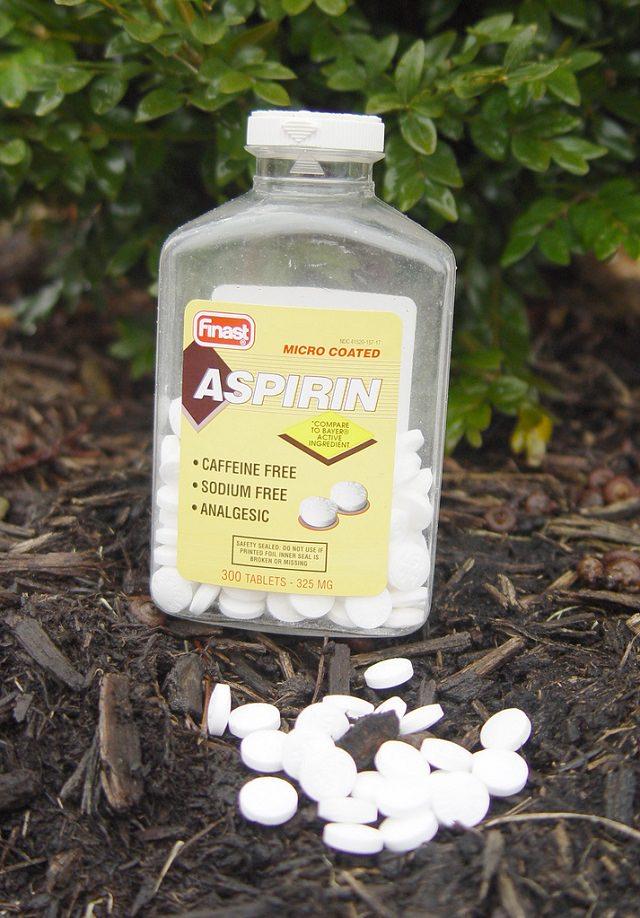
1. Increases the growth and productivity of plants
At the University of Rhode Island, gardeners made a solution containing 4 crushed aspirin tablets and 4 gallons of water and then sprayed the solution on their vegetable gardens every three weeks throughout the growing season. At the end of the season, they found that the treated plants grew more quickly and were more fruitful than the group that was left untreated.
They concluded that aspirin leads to increased vitamin C content and greater growth in plants.The science behind this claim
Aspirin contains an active ingredient known as salicylic acid. It is derived from willow bark. This acid enhances the immune system of plants (Plants prepare it naturally but in lower amounts) especially those in the nightshade family. Plants subjected to it get the boost in immunity power, which helps them in combating with pests and microbial attack and prevents the formation of fungus leading to increased growth rate of plants. Visit the New Scientist to learn more about this in detail.
2. It helps plants combating fungal diseases

Verticillium and fusarium wilt are common fungal diseases widely distributed in soil and can wipe out an entire crop in a matter of days. Fortunately, according to a recent study by the US Department of Agriculture, the use of aspirin spray can significantly reduce the spread of fungus on the plant. It is also helpful in blight. Visit the Dailymail to learn to learn how Aspirin helps tomatoes!
The science behind this claim
Apparently, plants produce small amounts of salicylic acid naturally especially when they are stressed. The salicylic acid creates a systematically acquired resistance protecting the plants against microbial attack, drought, and even insect attack. Since salicylic acid is the active ingredient in aspirin, when a solution of aspirin is sprayed on the plants, the amount of salicylic acid in the plants is increased which in turn boosts their immune system protecting the seedlings and plants from soil-borne diseases, bacteria, and fungi.
Gardeners can spray their plants with a solution of aspirin tablet mixed in distilled water. The drug is especially effective in warding off diseases in the nightshade family which include tomatoes or potatoes. You can also soak the seeds in the aspirin solution just before sowing to improve germination.
3. Help cut plants and flowers to last longer

Are you wondering how you can keep your cut flowers looking fresh for a long time? It is possible by adding aspirin to the vase water. To achieve this, crush an aspirin tablet, dissolve it in water and add the solution to a vase. Visit Lifehacker to learn more!
The science behind this claim
According to Judy Jernstedt, the professor in plant and soil department at the University of California, Davis, the salicylic acid reduces the production of ethylene. With reduced ethylene present, floral wilting is delayed, and the cut plants can last longer.
Also, the anti-fungal properties of salicylic acid that dissolve into the vase water slows down the growth of mold which if it enters the flower stem can clog the vascular tissue leading to the death of the flower. For longer lasting fresh flowers, be sure to change the water regularly.
4. Propagate plants from cuttings successfully
Rooting hormone helps in propagating plants from cuttings and using it improves the success rate. Take a cup of distilled water and dissolve one uncoated aspirin tablet and then keep the cut end of the plant in this rooting solution for a few hours before planting. It’ll work!
The science behind this claim
Instead of using willow bark, which contains growth hormones, you can use aspirin to prepare your own rooting solution. It contains the same salicylic acid that is found in willows and works the same.
How to Use Aspirin in the Garden
You should be careful when using aspirin in the garden as too much can burn or damage the plants. Improper use may lead to the development of brown spots that makes them appear to have burnt foliage. This guide on how to properly use aspirin in the garden can help prevent any damage to the plants.
The Right Dosage
The right dosage of aspirin should not be more than a tablet for each liter of water. Begin by crushing the tablet and ensure it is well dissolved before spraying. *It has been observed by gardeners that aspirin dissolves well in distilled water!
When spraying, do it in the morning as plants tend to absorb best at this time. Also, spraying in the morning helps to avoid harming the beneficial insects such as bees and other pollinators, which are active later and it gives the plants a chance to dry too.
You should also pay attention to the response of the plants to the treatment as not all plants are suitable for aspirin treatment. Plants in the nightshade family, of course, such as tomatoes, peppers, potatoes and eggplants benefit greatly from aspirin regimen.
1. Increases the growth and productivity of plants
At the University of Rhode Island, gardeners made a solution containing 4 crushed aspirin tablets and 4 gallons of water and then sprayed the solution on their vegetable gardens every three weeks throughout the growing season. At the end of the season, they found that the treated plants grew more quickly and were more fruitful than the group that was left untreated.
They concluded that aspirin leads to increased vitamin C content and greater growth in plants.The science behind this claim
Aspirin contains an active ingredient known as salicylic acid. It is derived from willow bark. This acid enhances the immune system of plants (Plants prepare it naturally but in lower amounts) especially those in the nightshade family. Plants subjected to it get the boost in immunity power, which helps them in combating with pests and microbial attack and prevents the formation of fungus leading to increased growth rate of plants. Visit the New Scientist to learn more about this in detail.
2. It helps plants combating fungal diseases
Verticillium and fusarium wilt are common fungal diseases widely distributed in soil and can wipe out an entire crop in a matter of days. Fortunately, according to a recent study by the US Department of Agriculture, the use of aspirin spray can significantly reduce the spread of fungus on the plant. It is also helpful in blight. Visit the Dailymail to learn to learn how Aspirin helps tomatoes!
The science behind this claim
Apparently, plants produce small amounts of salicylic acid naturally especially when they are stressed. The salicylic acid creates a systematically acquired resistance protecting the plants against microbial attack, drought, and even insect attack. Since salicylic acid is the active ingredient in aspirin, when a solution of aspirin is sprayed on the plants, the amount of salicylic acid in the plants is increased which in turn boosts their immune system protecting the seedlings and plants from soil-borne diseases, bacteria, and fungi.
Gardeners can spray their plants with a solution of aspirin tablet mixed in distilled water. The drug is especially effective in warding off diseases in the nightshade family which include tomatoes or potatoes. You can also soak the seeds in the aspirin solution just before sowing to improve germination.
3. Help cut plants and flowers to last longer
Are you wondering how you can keep your cut flowers looking fresh for a long time? It is possible by adding aspirin to the vase water. To achieve this, crush an aspirin tablet, dissolve it in water and add the solution to a vase. Visit Lifehacker to learn more!
The science behind this claim
According to Judy Jernstedt, the professor in plant and soil department at the University of California, Davis, the salicylic acid reduces the production of ethylene. With reduced ethylene present, floral wilting is delayed, and the cut plants can last longer.
Also, the anti-fungal properties of salicylic acid that dissolve into the vase water slows down the growth of mold which if it enters the flower stem can clog the vascular tissue leading to the death of the flower. For longer lasting fresh flowers, be sure to change the water regularly.
4. Propagate plants from cuttings successfully
Rooting hormone helps in propagating plants from cuttings and using it improves the success rate. Take a cup of distilled water and dissolve one uncoated aspirin tablet and then keep the cut end of the plant in this rooting solution for a few hours before planting. It’ll work!
The science behind this claim
Instead of using willow bark, which contains growth hormones, you can use aspirin to prepare your own rooting solution. It contains the same salicylic acid that is found in willows and works the same.
How to Use Aspirin in the Garden
You should be careful when using aspirin in the garden as too much can burn or damage the plants. Improper use may lead to the development of brown spots that makes them appear to have burnt foliage. This guide on how to properly use aspirin in the garden can help prevent any damage to the plants.
The Right Dosage
The right dosage of aspirin should not be more than a tablet for each liter of water. Begin by crushing the tablet and ensure it is well dissolved before spraying. *It has been observed by gardeners that aspirin dissolves well in distilled water!
When spraying, do it in the morning as plants tend to absorb best at this time. Also, spraying in the morning helps to avoid harming the beneficial insects such as bees and other pollinators, which are active later and it gives the plants a chance to dry too.
You should also pay attention to the response of the plants to the treatment as not all plants are suitable for aspirin treatment. Plants in the nightshade family, of course, such as tomatoes, peppers, potatoes and eggplants benefit greatly from aspirin regimen.
2
0
文章
Alicia
2017年05月22日

Learn about the companion plants for tomatoes. Tomato companion plants are those that help it in growing more productively.
The key of getting most productive tomato plants is to plant right companions with it. Read this article to find out which are the best companion plants for tomatoes.

Companion planting is a sustainable way to grow healthy tomatoes without the use of toxic pesticides. Many good companion plant for tomatoes are herbs and flowers like marigold.
Also Read: How to Grow Tomatoes in Hanging Baskets
Tomato Companion Plants: Herbs
Basil and tomatoes in the garden go as well together as they do in the kitchen. Plant two or three basil plants near tomatoes. They not only enhances the flavor of each other and improves growth but also keep the pests away.
Plant garlic between each tomato plant to discourage red spider mites and plant parsley to improve the taste of tomatoes. Chives and mint are pungent herbs that also deter away the pests and are compatible with tomatoes.
Plant borage near tomatoes as it protects tomato plants from tomato hornworm.
Tomato Companion Plants: Vegetables
Tomatoes also do well with beans, peas, peppers, onions and lettuce. Carrots and tomatoes also go well together, although carrots grow little stunned if planted too close to the tomato plants but their flavor will be higher.
Also Read: Carrot Companion Plants
Tomato Companion Plants: Flowers
Flowers planted with tomatoes add variety in the garden. Plant marigolds along with tomatoes – they keep the soil healthy, prevent nematodes and discourage many common garden pests. This bright annual flower also adds color to the garden and attract beneficial insects to your tomato patch.
Calendula also keeps the pests away. As an added bonus, its flowers are edible and added in salads and desserts. Nasturtiums too are good companion plants for tomatoes.
Unsuitable Plants for Tomatoes
While some companion plants improve or do not affect the tomatoes, some plants are best avoided to be planted near them. Generally tomatoes are heavy feeders, they require lots of sun, water and nutrients so you should avoid plants that have higher growing requirements or have pests and diseases like tomatoes. Don’t pare tomatoes with cabbage, broccoli, kohlrabi and other members of brassica genus, as they slow up the growth and development of tomatoes.
Tomatoes and potatoes are also not a good match – both suffer from the same pests and diseases and once it hits one plant, quickly affect the other. Corn is another plant that needs to be avoided as both are vulnerable to a worm that can be transferred between the two plants.
Plants that Do well with Tomatoes
Tomatoes when planted with some plants also help them. A bed of asparagus with a few tomato plants will be more resistant to asparagus beetle. When planted with roses, tomatoes prevent black spot in roses, a fungal disease that attacks the roses.
The key of getting most productive tomato plants is to plant right companions with it. Read this article to find out which are the best companion plants for tomatoes.
Companion planting is a sustainable way to grow healthy tomatoes without the use of toxic pesticides. Many good companion plant for tomatoes are herbs and flowers like marigold.
Also Read: How to Grow Tomatoes in Hanging Baskets
Tomato Companion Plants: Herbs
Basil and tomatoes in the garden go as well together as they do in the kitchen. Plant two or three basil plants near tomatoes. They not only enhances the flavor of each other and improves growth but also keep the pests away.
Plant garlic between each tomato plant to discourage red spider mites and plant parsley to improve the taste of tomatoes. Chives and mint are pungent herbs that also deter away the pests and are compatible with tomatoes.
Plant borage near tomatoes as it protects tomato plants from tomato hornworm.
Tomato Companion Plants: Vegetables
Tomatoes also do well with beans, peas, peppers, onions and lettuce. Carrots and tomatoes also go well together, although carrots grow little stunned if planted too close to the tomato plants but their flavor will be higher.
Also Read: Carrot Companion Plants
Tomato Companion Plants: Flowers
Flowers planted with tomatoes add variety in the garden. Plant marigolds along with tomatoes – they keep the soil healthy, prevent nematodes and discourage many common garden pests. This bright annual flower also adds color to the garden and attract beneficial insects to your tomato patch.
Calendula also keeps the pests away. As an added bonus, its flowers are edible and added in salads and desserts. Nasturtiums too are good companion plants for tomatoes.
Unsuitable Plants for Tomatoes
While some companion plants improve or do not affect the tomatoes, some plants are best avoided to be planted near them. Generally tomatoes are heavy feeders, they require lots of sun, water and nutrients so you should avoid plants that have higher growing requirements or have pests and diseases like tomatoes. Don’t pare tomatoes with cabbage, broccoli, kohlrabi and other members of brassica genus, as they slow up the growth and development of tomatoes.
Tomatoes and potatoes are also not a good match – both suffer from the same pests and diseases and once it hits one plant, quickly affect the other. Corn is another plant that needs to be avoided as both are vulnerable to a worm that can be transferred between the two plants.
Plants that Do well with Tomatoes
Tomatoes when planted with some plants also help them. A bed of asparagus with a few tomato plants will be more resistant to asparagus beetle. When planted with roses, tomatoes prevent black spot in roses, a fungal disease that attacks the roses.
3
3
文章
Alicia
2017年05月22日
Iris are one of the most beautiful and low care flowers that is why they are gardener’s favorite and if you are growing them, learn about the iris companion plants.
There are hundreds of Iris species with different growing needs and if you want to plant iris and its companion plants, first you’ll need to know about the requirements of specific iris species you are growing.
Companion Plants for Iris
While choosing iris companion plants, experiment. Instead of focusing only on the plant’s health, consider about the plants that require similar growing conditions and complement the color and texture of irises you are growing.
Bearded Iris Companion Plants
Companion plants for tall, dwarf and other bearded iris are Columbine, sweet rocket, pyrethrum, blue salvia, coralbells and Narcissus. Lilies, hemerocallis hybrids, penstemons, phlox and chrysanthemums are also used in combination with irises. Some gardeners grow forsythia in poor soil with iris.
Japanese Iris Companion Plants
Japanese iris grows in moist soil, their soil requirement is similar to impatiens. You can grow them in moist to boggy soil. Grow moisture loving plants with Japanese iris like soft rush, tropical sage and impatiens if there is shade, you can also ferns and plants like hosta near it.
Siberian Iris Companion Plants
Siberian irises are cold hardy and low maintenance. They grow in full sun to part shade and thrive in wide range of soil, preferably moist. Grow siberian iris plants in clumps to create a beautiful color contrast with daylilies, marsh spurge, ornamental poppy, lady’s mantle and cranesbill.
Other Iris Companion Plants
Peonies are traditionally companions for irises. If you plant a garden with irises, peonies and roses it will look wonderful. One more plant is forsythia, forsythia not only helps the irises grow, but also provides the beautiful contrast of color. Forsythia flowers herald the arrival of spring and their yellow colored blooms are perfect match for reticulated iris that flowers in the spring as well.
0
1

