文章
Mirella
2017年05月22日

Learn how to grow bitter melon. Growing bitter gourd is easy. This healthy vegetable grows up quickly and fruits productively. You can also grow it in pots.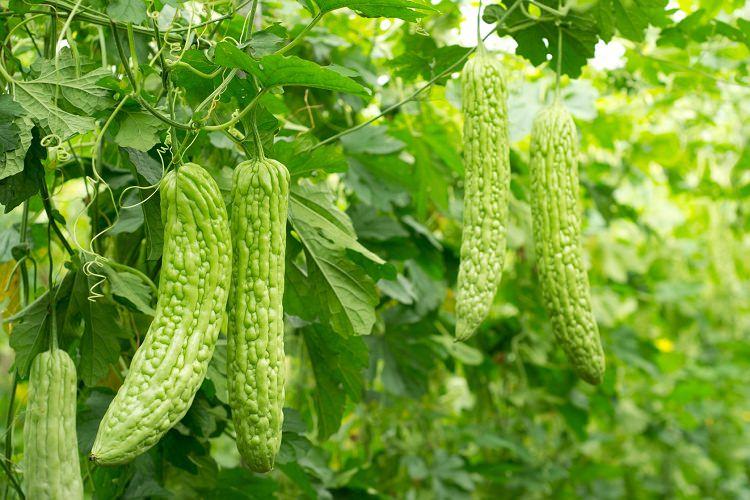
USDA Zones— 6-11
Difficulty— Easy
Other Names— African Cucumber, Ampalaya, Balsam Pear, Balsam-Apple, Balsambirne, Balsamo, Bitter Apple, Bitter Cucumber, Bitter Gourd, Bittergurke, Carilla Fruit, Carilla Gourd, Cerasee, Balsam Pear, Balsam-Apple, Balsambirne, Balsamo, Bitter Apple, Bitter Cucumber, Bitter Gourd, Bittergurke, Carilla Fruit, Carilla Gourd, Cerasee, Chinli-Chih, Cundeamor, Fructus Mormordicae Grosvenori, Karavella, Kathilla, Karela, Kareli, Kerala, Kuguazi, K’u-Kua, Lai Margose, Melón Amargo, Melon Amer, Momordica, Momordica charantia, Momordica murcata, Momordique, Pepino Montero, P’u-T’ao, Sorosi, Sushavi, Vegetable insulin, Wild Cucumber
Bitter Melon is one of the most popular vegetables grown in South-East Asia. Like cucumber, melon or pumpkin it belongs to the gourd family. A native of Indian subcontinent it is used in Asian delicacies. It one of the healthiest vegetables and has many medicinal uses. It has a uniquely bitter and crunchy taste.
Bitter Melon (Bitter Gourd) Information
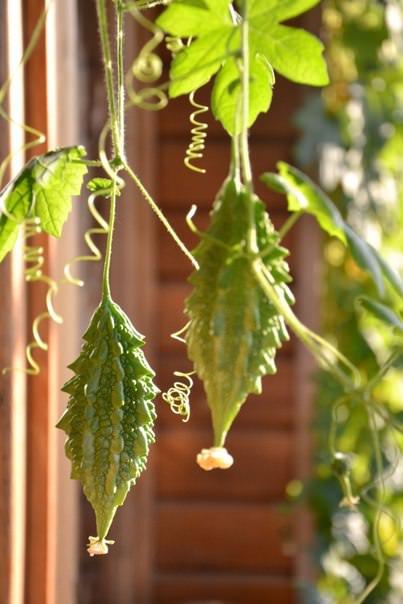
This very short living tropical perennial climber with thin stems can grow up to 5 m in length. Like other plants of this family, it needs support. Both the stem and lobed leaves are hairy. Bitter melon produces yellow flowers, male or female, which are pollinated by insects.
Bitter taste fruits are eaten unripe when they are still green or slightly pale. They have delicate skin and can be eaten after cooking. Inside there are large seeds. The flesh somewhat resembles a cucumber and is watery and crusty.
How to Grow Bitter MelonPropagation
Seeds can be purchased online or in garden shops. You can also use seeds you get from ripe yellow fruits. Ripe seeds have a crimson red color coat. Germination is not difficult, but there are some tricks to make it faster.
Seeds will germinate slowly in 3-4 weeks if you directly sow them without pre-treatment, especially in low temperatures. But to increase germination rate and for the faster germination, you have to scarify them to remove seed coat. For this, rub the seeds from one side without making any damage to endosperm inside the seed coat. Soaking seeds for 24 hours in water before sowing will also help.
Planting Bitter Melon
Sow seeds 2 cm deep. Seeds can be sown directly into the ground or in the containers but only when the risk of frost has passed and the soil warms up enough. Seeds require the temperature above 70 F (20 C) for germination.
In temperate regions best seed sowing time is summer, usually between late April to May. Whereas in tropics (USDA Zone 10, 11), you can start seeds anytime.
Types and Varieties
There are two types of bitter melons. One from India, which is smaller in size and has spiny skin and the other one is from China. Chinese bitter melons are milder in taste, generally large and smoothly ridged. If you want the higher yield, choose hybrid variety.
How to Grow Bitter Gourd in Pots
Growing bitter gourd (bitter melon) in pots is easy. Similar to squashes, cucumbers, and melons. You’ll need a 12 inches deep pot and a sturdy trellis. However, the bitter melon vine can grow more than 5 m (16 feet) long. A trellis or any other support structure that is at least 5-6 feet tall is required. Once the vine has reached that height you’ll have to redirect it.
Requirements for Growing Bitter Melon
This plant is cultivated in the same way like squashes, melons or cucumbers.
Position
Provide full sun to this vine and it will produce heavily. Also, as it is a tall vine you will need to provide it a support. A tall trellis or a garden fence. If you want to grow it on your patio, terrace or balcony grow it near the wall so that it can go up along with it.
Soil
It tolerates a wide range of soils, but prefers permeable, sandy loam soil that is very rich in organic matter. Bitter melon grows in slightly acidic to slightly alkaline soil. The pH range around 6 to 7.1 is ideal.
Watering
It can tolerate drought like conditions for a short time but regular watering to keep the soil evenly moist is essential to ensure a good yield.
Temperature
In the initial phase of growth, growing bitter gourds require a temperature more than 70 F (20 C). Humid and warm temperature accelerate the growth of the plant. It is more resistant to low temperatures than other plants of this family but requires the hot temperature and humidity to grow.
Bitter Melon Plant CareFertilizer
Overuse of nitrogen-rich fertilizers should be avoided, which could encourage the development of foliage at the expense of fruits. At the time of planting, you can mix slow-release complete fertilizer in the soil. Enriching the soil with compost or well-rotted aged manure and regular inputs of organic matter will be enough later. Still, if your plant is not growing well, you can feed it with liquid vegetable fertilizer once in a month.
Trellising
Bitter gourd perks up very quickly and within two weeks after planting you must arrange something to support it. You can also grow this vine on pergolas, arches or arbor.
Growing bitter gourd vertically increases the yield and fruit size, moreover, in the case of growing horizontally on the ground, there is a high risk of fruit rot and fungal infection to the plant.
Pruning
The plant produces numerous side shoots, which must be removed to improve yield, remove the side shoots (lateral branches) until the runner reaches the top of the trellis. Leave only 4–6 laterals and cut the tip of the main runner to improve the productivity of the plant.
Overwintering
In cooler climates bitter gourds are grown as annual so you may not need to care about overwintering.
Pollination
Pollinators like bees will do the pollination for you so be good to them. If you don’t find pollinators around the flowers you may need to hand pollinate them in the morning.
Pests and Diseases
It is prone to diseases like watermelon mosaic virus, other cucurbit diseases, and powdery mildew. In pests, it gets affected by aphids and spider mites.
Harvesting
Bitter melon starts to fruit quickly in 2 months. Harvest fruits when they are green, little pale and unripe and about the size of 3 to 6 inches (depending more on the variety and type). Within 6 to 8 weeks after the germination, you’ll see the blossoms and in the next 2-3 weeks, fruits will appear and are ready to be picked.
USDA Zones— 6-11
Difficulty— Easy
Other Names— African Cucumber, Ampalaya, Balsam Pear, Balsam-Apple, Balsambirne, Balsamo, Bitter Apple, Bitter Cucumber, Bitter Gourd, Bittergurke, Carilla Fruit, Carilla Gourd, Cerasee, Balsam Pear, Balsam-Apple, Balsambirne, Balsamo, Bitter Apple, Bitter Cucumber, Bitter Gourd, Bittergurke, Carilla Fruit, Carilla Gourd, Cerasee, Chinli-Chih, Cundeamor, Fructus Mormordicae Grosvenori, Karavella, Kathilla, Karela, Kareli, Kerala, Kuguazi, K’u-Kua, Lai Margose, Melón Amargo, Melon Amer, Momordica, Momordica charantia, Momordica murcata, Momordique, Pepino Montero, P’u-T’ao, Sorosi, Sushavi, Vegetable insulin, Wild Cucumber
Bitter Melon is one of the most popular vegetables grown in South-East Asia. Like cucumber, melon or pumpkin it belongs to the gourd family. A native of Indian subcontinent it is used in Asian delicacies. It one of the healthiest vegetables and has many medicinal uses. It has a uniquely bitter and crunchy taste.
Bitter Melon (Bitter Gourd) Information
This very short living tropical perennial climber with thin stems can grow up to 5 m in length. Like other plants of this family, it needs support. Both the stem and lobed leaves are hairy. Bitter melon produces yellow flowers, male or female, which are pollinated by insects.
Bitter taste fruits are eaten unripe when they are still green or slightly pale. They have delicate skin and can be eaten after cooking. Inside there are large seeds. The flesh somewhat resembles a cucumber and is watery and crusty.
How to Grow Bitter MelonPropagation
Seeds can be purchased online or in garden shops. You can also use seeds you get from ripe yellow fruits. Ripe seeds have a crimson red color coat. Germination is not difficult, but there are some tricks to make it faster.
Seeds will germinate slowly in 3-4 weeks if you directly sow them without pre-treatment, especially in low temperatures. But to increase germination rate and for the faster germination, you have to scarify them to remove seed coat. For this, rub the seeds from one side without making any damage to endosperm inside the seed coat. Soaking seeds for 24 hours in water before sowing will also help.
Planting Bitter Melon
Sow seeds 2 cm deep. Seeds can be sown directly into the ground or in the containers but only when the risk of frost has passed and the soil warms up enough. Seeds require the temperature above 70 F (20 C) for germination.
In temperate regions best seed sowing time is summer, usually between late April to May. Whereas in tropics (USDA Zone 10, 11), you can start seeds anytime.
Types and Varieties
There are two types of bitter melons. One from India, which is smaller in size and has spiny skin and the other one is from China. Chinese bitter melons are milder in taste, generally large and smoothly ridged. If you want the higher yield, choose hybrid variety.
How to Grow Bitter Gourd in Pots
Growing bitter gourd (bitter melon) in pots is easy. Similar to squashes, cucumbers, and melons. You’ll need a 12 inches deep pot and a sturdy trellis. However, the bitter melon vine can grow more than 5 m (16 feet) long. A trellis or any other support structure that is at least 5-6 feet tall is required. Once the vine has reached that height you’ll have to redirect it.
Requirements for Growing Bitter Melon
This plant is cultivated in the same way like squashes, melons or cucumbers.
Position
Provide full sun to this vine and it will produce heavily. Also, as it is a tall vine you will need to provide it a support. A tall trellis or a garden fence. If you want to grow it on your patio, terrace or balcony grow it near the wall so that it can go up along with it.
Soil
It tolerates a wide range of soils, but prefers permeable, sandy loam soil that is very rich in organic matter. Bitter melon grows in slightly acidic to slightly alkaline soil. The pH range around 6 to 7.1 is ideal.
Watering
It can tolerate drought like conditions for a short time but regular watering to keep the soil evenly moist is essential to ensure a good yield.
Temperature
In the initial phase of growth, growing bitter gourds require a temperature more than 70 F (20 C). Humid and warm temperature accelerate the growth of the plant. It is more resistant to low temperatures than other plants of this family but requires the hot temperature and humidity to grow.
Bitter Melon Plant CareFertilizer
Overuse of nitrogen-rich fertilizers should be avoided, which could encourage the development of foliage at the expense of fruits. At the time of planting, you can mix slow-release complete fertilizer in the soil. Enriching the soil with compost or well-rotted aged manure and regular inputs of organic matter will be enough later. Still, if your plant is not growing well, you can feed it with liquid vegetable fertilizer once in a month.
Trellising
Bitter gourd perks up very quickly and within two weeks after planting you must arrange something to support it. You can also grow this vine on pergolas, arches or arbor.
Growing bitter gourd vertically increases the yield and fruit size, moreover, in the case of growing horizontally on the ground, there is a high risk of fruit rot and fungal infection to the plant.
Pruning
The plant produces numerous side shoots, which must be removed to improve yield, remove the side shoots (lateral branches) until the runner reaches the top of the trellis. Leave only 4–6 laterals and cut the tip of the main runner to improve the productivity of the plant.
Overwintering
In cooler climates bitter gourds are grown as annual so you may not need to care about overwintering.
Pollination
Pollinators like bees will do the pollination for you so be good to them. If you don’t find pollinators around the flowers you may need to hand pollinate them in the morning.
Pests and Diseases
It is prone to diseases like watermelon mosaic virus, other cucurbit diseases, and powdery mildew. In pests, it gets affected by aphids and spider mites.
Harvesting
Bitter melon starts to fruit quickly in 2 months. Harvest fruits when they are green, little pale and unripe and about the size of 3 to 6 inches (depending more on the variety and type). Within 6 to 8 weeks after the germination, you’ll see the blossoms and in the next 2-3 weeks, fruits will appear and are ready to be picked.
0
0
文章
Martha
2017年05月22日

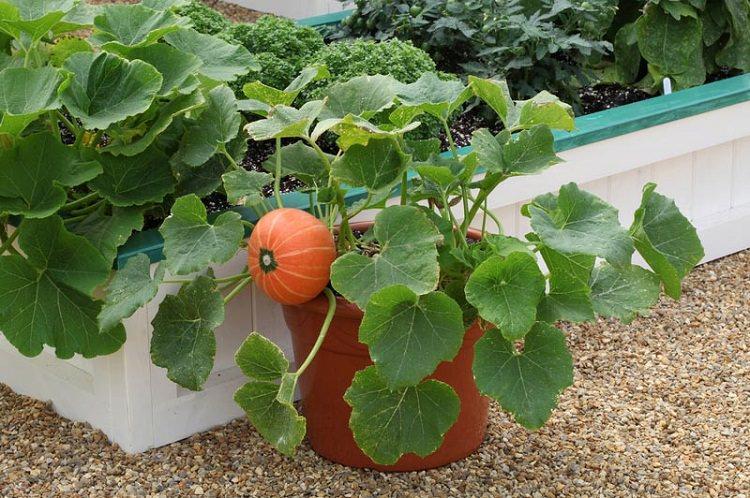
Learn how to grow pumpkins in pots, growing pumpkins in containers and pots is not difficult though it requires large containers and space. Check out!

Pumpkin is valued for its flavor and decorative appearance. Growing pumpkin in pots is not so difficult and does not require special care and in fact, it is a less demanding vegetable that adapts to any climate. Basically, an annual plant in the temperate zones, perennial in tropical ones.
Must Read: Growing Cucumbers
Planting
You can grow pumpkins from seeds or else buy seedlings from a nursery. Best planting time for growing pumpkins is when the temperature exceeds above 65 F. In cooler climates it can be planted from April to late May. Whereas, in much warmer climates, it can be done until July. Moreover, if you live in a frost-free subtropical or tropical climate, you can grow it almost all the year.
Choosing a pot
Choose a large pot that is 10 gallons in size (for small pumpkin varieties), if you’re growing pumpkins in pots. For large cultivars, the bigger the pot the better, a 15-25-gallon pot that is 20-24 inches deep and wide is required. Also, ensure there is adequate drainage available to your pumpkin plants.
Small Pumpkin Varieties
Small pumpkin varieties like ‘Jack be little’, ‘Wee be little’, ‘Baby boo’, ‘Munchkin’, Pumpkin Hooligan’, ‘Mini-jack’, ‘Lil pump ke mon’ are most suitable for container gardening. However, you can also grow giant pumpkin varieties.
Requirements for Growing Pumpkins in Pots
Position
Place it in the sunniest location possible; remember that even the smallest pumpkin varieties need lots of sunlight to grow. Your plant should receive at least six hours of sunlight per day. The shadow will slow their growth and moisture will remain on the plant, thus resulting the mildew.
Also, pumpkin needs a warm climate and plenty of room for growth. Still, you can even try growing dwarf pumpkins on a balcony or roof garden. Even if growing in a limited space, provide proper air circulation around the plant.
Soil
In cold climates, pumpkins grow best in a soil that heats up easily. Potting mix you use must be well-draining, have high humus content and slight water retaining capacity, too. Also, pumpkins require a lot of compost or manure, so additionally at the time of planting, you can add a lot of organic content. The ideal soil pH for growing pumpkins should be around 6 – 7.2.
Watering
Like all the gourds and melons, pumpkins require plenty of water and moist soil, so deep and regular watering is essential. Always, at the time of watering, avoid wetting the foliage.
Must Read: How to Grow Watermelon in Pot
Support
You’ll need to install a strong and big trellis to support pumpkins vines. An A-shape trellis is good one. Make sure to keep the trellis away from the wall to avoid diseases. As the pumpkin vine begins to grow, train it to climb on the structure by carefully moving it through it.
Pumpkin Plant Care

Mulching
Do mulching, once your plants are grown a few inches tall. Mulching will reduce the amount of water evaporate and helps in retaining the soil moisture.
Fertilizer
Pumpkin plants are heavy feeders, they require a lot of fertilization. First of all, it’s important to have rich and fertile soil to get bigger and more meaty pumpkins. Best to use 10-10-10 balanced fertilizer in the early stage of growth. Later, the amount of nitrogen to be applied must be reduced. Switching to a low nitrogen fertilizer that is rich in potassium and phosphorus like 5-15-15 fertilizer in every other week (when the plant has grown and big enough to produce flowers) is a good idea.
Pests and Diseases
Pumpkin is a robust plant still it suffers from a few diseases, especially powdery mildew. In pests, you should keep eyes on common garden pests like aphids, flea beetles, and worms.
Harvesting
Pumpkins are ready for harvest within 90-120 days after planting (depending on the varieties and growing conditions). Green and unripe pumpkins are also picked to use in recipes and in many cuisines. But to pick matured pumpkins, see if it hardens and takes on a uniform and intense color (orange for most common varieties). Press the pumpkin with your thumb; If the bark is hard and it sounds hollow, it is the time to pick the fruit. The bark should also resist the nail pressure. Roughly speaking, one must count about 100 days between planting pumpkin and harvest at full maturity.
To pick the pumpkin, remove it carefully from the branch using pruning shears or a sharp knife. Do not cut too close to the fruit, however; to extend the shelf life, leave a long stem (about 10 cm). Store your pumpkin in a dry, cool and dark area.
A Few TipsIt is better if you’ll plant pumpkins directly in pots. If sowing seeds indoors, choose biodegradable pots, this way you’ll be able to transplant the seedlings without disturbing the roots.Male flowers start to bloom first, they attract pollinators and last one day. After that female flowers open, these have a small swelling at the base of the bloom.If there are no bees or other pollinators, to allow the plant to set fruits and to get the ample harvest, you may need to hand pollinate the male and female flowers.Don’t allow the plant to set too many fruits.As the fruits are heavy you’ll need to support them from netting or old stockings.
Pumpkin is valued for its flavor and decorative appearance. Growing pumpkin in pots is not so difficult and does not require special care and in fact, it is a less demanding vegetable that adapts to any climate. Basically, an annual plant in the temperate zones, perennial in tropical ones.
Must Read: Growing Cucumbers
Planting
You can grow pumpkins from seeds or else buy seedlings from a nursery. Best planting time for growing pumpkins is when the temperature exceeds above 65 F. In cooler climates it can be planted from April to late May. Whereas, in much warmer climates, it can be done until July. Moreover, if you live in a frost-free subtropical or tropical climate, you can grow it almost all the year.
Choosing a pot
Choose a large pot that is 10 gallons in size (for small pumpkin varieties), if you’re growing pumpkins in pots. For large cultivars, the bigger the pot the better, a 15-25-gallon pot that is 20-24 inches deep and wide is required. Also, ensure there is adequate drainage available to your pumpkin plants.
Small Pumpkin Varieties
Small pumpkin varieties like ‘Jack be little’, ‘Wee be little’, ‘Baby boo’, ‘Munchkin’, Pumpkin Hooligan’, ‘Mini-jack’, ‘Lil pump ke mon’ are most suitable for container gardening. However, you can also grow giant pumpkin varieties.
Requirements for Growing Pumpkins in Pots
Position
Place it in the sunniest location possible; remember that even the smallest pumpkin varieties need lots of sunlight to grow. Your plant should receive at least six hours of sunlight per day. The shadow will slow their growth and moisture will remain on the plant, thus resulting the mildew.
Also, pumpkin needs a warm climate and plenty of room for growth. Still, you can even try growing dwarf pumpkins on a balcony or roof garden. Even if growing in a limited space, provide proper air circulation around the plant.
Soil
In cold climates, pumpkins grow best in a soil that heats up easily. Potting mix you use must be well-draining, have high humus content and slight water retaining capacity, too. Also, pumpkins require a lot of compost or manure, so additionally at the time of planting, you can add a lot of organic content. The ideal soil pH for growing pumpkins should be around 6 – 7.2.
Watering
Like all the gourds and melons, pumpkins require plenty of water and moist soil, so deep and regular watering is essential. Always, at the time of watering, avoid wetting the foliage.
Must Read: How to Grow Watermelon in Pot
Support
You’ll need to install a strong and big trellis to support pumpkins vines. An A-shape trellis is good one. Make sure to keep the trellis away from the wall to avoid diseases. As the pumpkin vine begins to grow, train it to climb on the structure by carefully moving it through it.
Pumpkin Plant Care
Mulching
Do mulching, once your plants are grown a few inches tall. Mulching will reduce the amount of water evaporate and helps in retaining the soil moisture.
Fertilizer
Pumpkin plants are heavy feeders, they require a lot of fertilization. First of all, it’s important to have rich and fertile soil to get bigger and more meaty pumpkins. Best to use 10-10-10 balanced fertilizer in the early stage of growth. Later, the amount of nitrogen to be applied must be reduced. Switching to a low nitrogen fertilizer that is rich in potassium and phosphorus like 5-15-15 fertilizer in every other week (when the plant has grown and big enough to produce flowers) is a good idea.
Pests and Diseases
Pumpkin is a robust plant still it suffers from a few diseases, especially powdery mildew. In pests, you should keep eyes on common garden pests like aphids, flea beetles, and worms.
Harvesting
Pumpkins are ready for harvest within 90-120 days after planting (depending on the varieties and growing conditions). Green and unripe pumpkins are also picked to use in recipes and in many cuisines. But to pick matured pumpkins, see if it hardens and takes on a uniform and intense color (orange for most common varieties). Press the pumpkin with your thumb; If the bark is hard and it sounds hollow, it is the time to pick the fruit. The bark should also resist the nail pressure. Roughly speaking, one must count about 100 days between planting pumpkin and harvest at full maturity.
To pick the pumpkin, remove it carefully from the branch using pruning shears or a sharp knife. Do not cut too close to the fruit, however; to extend the shelf life, leave a long stem (about 10 cm). Store your pumpkin in a dry, cool and dark area.
A Few TipsIt is better if you’ll plant pumpkins directly in pots. If sowing seeds indoors, choose biodegradable pots, this way you’ll be able to transplant the seedlings without disturbing the roots.Male flowers start to bloom first, they attract pollinators and last one day. After that female flowers open, these have a small swelling at the base of the bloom.If there are no bees or other pollinators, to allow the plant to set fruits and to get the ample harvest, you may need to hand pollinate the male and female flowers.Don’t allow the plant to set too many fruits.As the fruits are heavy you’ll need to support them from netting or old stockings.
1
0
文章
Mirella
2017年05月22日
Growing ginger in a pot is easy! It’s a great idea if you live in a cool temperate climate or you don’t have a plenty of space.
If you live in USDA Zone 9b and above or any other subtropical or tropical climates around the globe you can easily grow ginger as a perennial both on the ground and in a container year round. If you live below Zone 9b and down to USDA Zone 7b, please note that the leaves of the ginger plants growing outside on the ground will die but come back again after the winter. Below the Zone 7 or in any other cooler part you live, you may need to grow ginger in pots to keep the plant indoors in winters.
Ginger is a warm climate spice or herb, like garlic or turmeric, it is termed as SUPERFOOD. It has anti-inflammatory and anti-biotic properties. It’s ability to expedite the digestion power is well-known.

Growing Ginger in Pots
Growing ginger roots is easy, find or purchase fresh ginger rhizomes (roots), measuring almost 3 to 5 inches. Look for pieces with growth buds or eyes. These little green buds look similar to that of potatoes. Store-bought ginger is sometimes treated with growth retardant chemicals so it’s a good idea that you keep the rhizomes in water overnight or for a few hours.
Planting and Propagation
The best time to start growing ginger is spring, however, if you live in a frost-free warm climate you can try to grow ginger in container anytime but the best time is an early wet season.
Plant the rhizomes (2-3 cm) 1 inch deep in the potting soil with the buds facing upwards. Ginger plants will start to emerge in a couple of weeks. It is noted that the ginger plants gets up to four to five feet tall.
Choosing a Pot
For growing ginger, choose a medium sized 14-15 inches pot that is deep rather than shallow to provide the ample space to roots to grow.
Requirements for Growing Ginger in PotPosition
In its natural climate, ginger is known to be gro
wn in partial sun, so it’s a good idea that you keep your pot in a spot that receives full sun but shade in afternoon. However, if you live in a really cold climate keep the plant in a sunny spot.
Soil
Loose, well drained, and sandy-loamy soil that is rich in compost is best for growing ginger indoors or outdoors in a pot. Soil that blocks the moisture must be avoided.
Watering
The ginger plant requires deep and regular watering as it prefers slightly moist soil. However, it should be noted that overwatering and waterlogging may thwart the growth and cause the root rot. Also, watering should be reduced in winter.
Temperature
As ginger prefers a warm climate it can’t tolerate drafts and cold temperature, it is advised to keep your ginger plants indoors when the temperature starts to dip below the level of 50 F (10 C).
Plant Care

It requires to cut off a finger and ensure that the section is at least 2 inches in length. Then the cut pieces are dried for a couple of days in a warm place before putting them in ground.
Fertilizer
Ginger requires soil that is rich in organic matter, you can top the pot with compost or well-rotted manure. Additionally, you can apply all-purpose fertilizer during the growing season.
Pests and Diseases
Pests including white grub, shoot borer, shoot boring weevil attack the ginger plant. It is also attacked by bacterial wilt, soft rot, dry rot and leaf spot viruses. It is highly recommended to keep the plant safe from these diseases and pests.
Harvesting
Your ginger roots are going to get ready for harvest within 8-10 months, once the leaves start to become yellow.
If you live in USDA Zone 9b and above or any other subtropical or tropical climates around the globe you can easily grow ginger as a perennial both on the ground and in a container year round. If you live below Zone 9b and down to USDA Zone 7b, please note that the leaves of the ginger plants growing outside on the ground will die but come back again after the winter. Below the Zone 7 or in any other cooler part you live, you may need to grow ginger in pots to keep the plant indoors in winters.
Ginger is a warm climate spice or herb, like garlic or turmeric, it is termed as SUPERFOOD. It has anti-inflammatory and anti-biotic properties. It’s ability to expedite the digestion power is well-known.
Growing Ginger in Pots
Growing ginger roots is easy, find or purchase fresh ginger rhizomes (roots), measuring almost 3 to 5 inches. Look for pieces with growth buds or eyes. These little green buds look similar to that of potatoes. Store-bought ginger is sometimes treated with growth retardant chemicals so it’s a good idea that you keep the rhizomes in water overnight or for a few hours.
Planting and Propagation
The best time to start growing ginger is spring, however, if you live in a frost-free warm climate you can try to grow ginger in container anytime but the best time is an early wet season.
Plant the rhizomes (2-3 cm) 1 inch deep in the potting soil with the buds facing upwards. Ginger plants will start to emerge in a couple of weeks. It is noted that the ginger plants gets up to four to five feet tall.
Choosing a Pot
For growing ginger, choose a medium sized 14-15 inches pot that is deep rather than shallow to provide the ample space to roots to grow.
Requirements for Growing Ginger in PotPosition
In its natural climate, ginger is known to be gro
wn in partial sun, so it’s a good idea that you keep your pot in a spot that receives full sun but shade in afternoon. However, if you live in a really cold climate keep the plant in a sunny spot.
Soil
Loose, well drained, and sandy-loamy soil that is rich in compost is best for growing ginger indoors or outdoors in a pot. Soil that blocks the moisture must be avoided.
Watering
The ginger plant requires deep and regular watering as it prefers slightly moist soil. However, it should be noted that overwatering and waterlogging may thwart the growth and cause the root rot. Also, watering should be reduced in winter.
Temperature
As ginger prefers a warm climate it can’t tolerate drafts and cold temperature, it is advised to keep your ginger plants indoors when the temperature starts to dip below the level of 50 F (10 C).
Plant Care
It requires to cut off a finger and ensure that the section is at least 2 inches in length. Then the cut pieces are dried for a couple of days in a warm place before putting them in ground.
Fertilizer
Ginger requires soil that is rich in organic matter, you can top the pot with compost or well-rotted manure. Additionally, you can apply all-purpose fertilizer during the growing season.
Pests and Diseases
Pests including white grub, shoot borer, shoot boring weevil attack the ginger plant. It is also attacked by bacterial wilt, soft rot, dry rot and leaf spot viruses. It is highly recommended to keep the plant safe from these diseases and pests.
Harvesting
Your ginger roots are going to get ready for harvest within 8-10 months, once the leaves start to become yellow.
0
0
文章
Martha
2017年05月22日
In this article, learn how to grow pinto beans. The easy growing pinto beans are nutrient rich and eating them can reduce the cholesterol level and risk of heart disease.
USDA Zones— 5 – 11
Difficulty— Easy
Other names — Phaseolus vulgaris var. pinto (Scientific Name)Frijol pinto, Speckled bean, Poroto frutilla, Strawberry bean, Carioca bean, Mottled bean, Phaseolus vulgaris and Common beans.
Pinto beans are annual plants that grow best in areas with long hot summers as they take three to five months to mature for harvest.
How to Grow Pinto BeansVarieties
Pinto beans grow on both vine (pole) and bush. Pole bean varieties produce more yield than bush beans. But bushier varieties are relatively easy to grow.
Propagation
Sow seeds 1 inches deep in the soil when all the dangers of frost are passed. *Pinto beans require direct seed sowing as they are not easy to transplant. Also, remember that it is a subtropical plant and needs a temperature around 60 – 70 F (16 – 21 C) for germination. Space pinto bean seeds 3-4 inches apart in rows that are 2 to 3 feet apart. *Soak the seeds for 24 hours before planting to accelerate germination.
Location
Choose the sunniest spot in the garden that is less windy. For optimum growth, growing pinto beans in full sun is important. It needs at least six hours of direct sun a day but grows better if receive more sun.
Also Read: How to Grow Cluster Beans
Requirements for Growing Pinto BeansSoil
Pinto Beans do best in well-drained soil that is loamy, avoid clay-rich, heavy or soggy soil. Soil that is waterlogging causes root rot.
Watering
Water the plant only when top one inch of surface seems dry. Avoid overwatering because it does not tolerate excessive moisture but handle a bit of drought. Also, try not to wet the foliage while watering as it may promote fungal diseases.
Weeding
Keep the location weed free by gently pulling out the weeds around the plants by hand. Better not to use a tool as pinto beans have shallow roots that can be damaged by weeding with the help of tools.
Mulching
Since pinto beans have shallow feeder roots, it is best to do mulching to stop weeds from growing. Mulching also protects the plants from the cold.
Fertilizer
For growing pinto beans you’ll require low nitrogen fertilizer, legumes produce their own nitrogen and applying too much nitrogen can also result in comparatively more vegetative growth than fruits.
It needs fertilizer application twice for better yield. Admix 5-10-10 slow release fertilizer in the first 6 inches of the planting bed after the germination. Make sure not to apply fertilizer in 2 inches radius around the seedlings as it may damage them. Make a second application of 10-20-20 fertilizer when the plant begins to flowers.
Pests and Diseases
Its main problem is root rot, which you can easily prevent by moderate watering.
Pinto beans are sometimes attacked by aphids, spider mites, whiteflies, leafhoppers, and beetles. Use organic sprays to get rid of them or handpick if the infection is small. You can also invite beneficial insects into your garden to get rid of them.
Also Read: Plants that Attract Ladybugs
Harvesting
Pinto beans are ready for harvest within 90 to 120 days after planting. Harvest pinto beans by cutting the pods using clean scissors or pruning shear when they turn brown and become brittle and dry. You can also harvest the beans early if you want to use them green.
0
0
文章
Martha
2017年05月22日
Learn how to grow romanesco, growing romanesco broccoli is rewarding. It is a very decorative and ornamental cauliflower with exotic taste.
USDA Zones — 3 – 11
Propagation Method — Seeds
Difficulty — Moderate
Other Names — Brassica oleracea botrytis (latin name), Romanesco broccoli Romanesco Cauliflower, Romanesque cauliflower, Buzzy Broc
Romanesco broccoli is also called “Broccoli Apple” and “Cauliflower with Turrets”. It is a Mediterranean plant, native to Italy, especially of Rome and is an Italian cousin of broccoli and cauliflower.
It is a very decorative and ornamental cauliflower with exotic taste. You can even grow it in the flower garden and admire it.
Romanesco is rich in vitamin C and minerals. It has a mild taste than other cauliflowers and slightly sweet flavor.
Planting
Seed sowing is done in spring and summer. If growing romanesco in cooler zones, sow the seeds 4 – 6 weeks prior to planting outside. Sow the seeds 2 cm deep. While planting the seedlings outside leave 50 cm (2 feet) of space in all directions.
If growing in subtropical and tropical zones you can plant it in fall or in winter.
Companion Plants
Dill, artichokes, chard, beet, borage, chamomile, nasturtium, carrot, celery, cucumber, spinach, beans, hyssop, lettuce, mint, marigold, oregano, peas, potatoes, rosemary, sage, thyme.
Incompatible Plants
Garlic, chives, shallots, strawberries, turnip, onion, parsnip, leek, radish, rutabaga, tomatoes.
Requirements for Growing RomanescoSoil
Humus and compost rich soil that is well drained is recommended.
Sun
Growing romanesco in sunny spot for more yield.
Watering
Like most of the brassicas it enjoys frequent and regular watering.
Romanesco Care
Romanesco broccoli care is similar to other cauliflowers and cabbages.
Fertilizer
Mix compost and 10 – 10 – 10 slow release fertilizer at the time of planting. Fertilize it with high in nitrogen fertilizer one month after planting.
Mulching
Do mulching to keep the soil weed free and conserve moisture.
Pests and Diseases
Flea beetles, gall weevil, whiteflie, aphids and moths. Snails and slugs are fond of seedlings. Besides this it is infected by blight, clubroot and mildew.
Harvesting
Generally, romanesco is ready to harvest in 75 – 100 days after planting. Pick the head when they are tight and dense and use fresh as soon as possible.
Crop rotation
0
0
文章
Martha
2017年05月22日
Growing Beets in Containers is easy. This quick growing vegetable doesn’t require much care and perfect for beginner container gardeners.

Beets are one of the fast growing vegetables and if you’ve grown other root vegetables like radishes or carrots, then growing beets in containers is not much different.
Choosing a pot
Use any type of container you find best with SUFFICIENT drainage holes. However, clay pots are an excellent choice. Growing beets is possible in small pots but ensure they are minimum 8 inches deep. 10 to 12 inches deep pots are IDEAL as they will encourage roots to develop! You can choose as much wide container as you want. The wider it would be the more plants you can grow together. Window boxes or large rectangular containers with the recommended depth are good choices.
When to begin planting
As a best practice, you can start planting beets in the spring, three-two weeks before the last (average) frost date in your area. You can continue to sow seeds every 3 to 4 weeks until when the temperature start to reach above 80 F (27 C). Again, you can begin planting in the late summer and early fall (autumn) when the temperature starts to come under the range of 85 F (29 C).
For warm tropical climate
As beets is a cool weather crop, those who live in warm subtropical or tropical areas (USDA Zones 9b-11) should grow it in late fall, winter and early spring.
Planting Beets in Pots

First thing first– Beets don’t like to be transplanted, so no role of seed trays! Pick desired pots and sow seeds 1/4 inch deep. Once they germinate and reach the significant height, you can select the healthiest seedlings and thin others apart to maintain the recommended 3 inches distance spacing. To speed up the germination, you can also soak the seeds overnight in nonchlorinated water before planting. However, if seeds are treated with fungicide, avoid this.
The seedlings will emerge anytime between 5 to 15 days, depending on the growing conditions. Until then keep the pots in a spot that is warm and receive mild sun and maintain the moisture in the soil. Once germinated, place the baby plants in the desired position and later when seedlings grow up to 3 inches tall, thin them. To maintain the spacing recommendation mentioned below.
Varieties
If you know how to grow beets in containers, you can try any variety. A few of them we’ve listed here are the Detroit Dark Red, Early Wonder, Sangria, and Sweetheart.
Requirements for Growing Beets in Containers

Position
Beets can be grown in full sun to part shade but for optimum growth choose a spot that receives full sun, at least 6 hours of sunlight is necessary. Also, make sure the spot you place your containers have good air circulation.
Soil
Soil that is loamy, penetrable and promotes the development of large roots is best for growing beet in a pot. Make sure your soil is rich in nutrients, you can also add a lot of compost. Also, avoid adding pebbles or stones in the soil or the bottom layer when growing this root vegetable.
If you’re not using commercial soil packet for growing beets, prepare your own potting mix by adding 1 part soil, 1 part compost or well-rotted manure, and 1 part perlite. If you want to make a soilless mix, add 1 part peat moss or coco peat, 1 part compost or well-rotted manure, and 1 part perlite, vermiculite or sand. You can also add time-based fertilizer that is low in nitrogen at the time of mixing the soil.Watering
If you don’t want hard and sinewy beetroots, water regularly and evenly. To keep the soil slightly moist all the time. Ensure you not let the soil dry out completely between the growing process and also avoid OVERWATERING.
Spacing
Maintain the 3 inches of distance between each plant from all direction for growing beets in pots successfully. You can grow each plant 2 inches apart, but this will hamper the growth of roots. For reference, the 12 inches wide rectangular pot can support around 4-5 plants.
Temperature
Keep in mind, the optimum temperature for growing beets in containers require a temperature around 50 F – 85 F (10 C – 29 C), but it can be grown in temperature as low as 40 F (4.5 C) and as high as 90 F (32 C) with difficulty.
Beet Care

Fertilizer
It’s a good idea to use time-based (slow release) fertilizer to add into the potting soil. As beets is a root vegetable and you may like to increase its root development, use a fertilizer that is low in nitrogen but high in phosphorous and potassium. For example, a formula of NPK 5-10-10.
Once the beetroots growing in pots become one month and doing well, you can switch to a water-soluble fertilizer. With the same 5-10-10 formula. And if you see Nitrogen deficiency in soil, use the complete fertilizer with NPK in 20-20-20 ratio.
If you want to grow beets organically, side dress plants with compost or manure and feed the plants with compost tea every other week. As beets usually suffer from boron deficiency, you can add seaweed (an excellent source of boron) fertilizer in compost tea for optimum growth.Pests and Diseases
When growing beets in pots, you don’t have to worry about pests and diseases much. You can avoid most of the problems by not overwatering and avoiding overhead watering. The common culprits are root rot and scab. Leaf miners and common pests like aphids can affect the foliage growth.
Harvesting
Beets on average require anywhere from 6-8 weeks to get ready for harvest after germination. You can also harvest beet green to use in salads; the tender leaves taste delicious. You can start harvesting greens when leaves are a few inches long by cutting the outer leaves only and leaving the small inner foliage to grow, which you can harvest later.
Beets are one of the fast growing vegetables and if you’ve grown other root vegetables like radishes or carrots, then growing beets in containers is not much different.
Choosing a pot
Use any type of container you find best with SUFFICIENT drainage holes. However, clay pots are an excellent choice. Growing beets is possible in small pots but ensure they are minimum 8 inches deep. 10 to 12 inches deep pots are IDEAL as they will encourage roots to develop! You can choose as much wide container as you want. The wider it would be the more plants you can grow together. Window boxes or large rectangular containers with the recommended depth are good choices.
When to begin planting
As a best practice, you can start planting beets in the spring, three-two weeks before the last (average) frost date in your area. You can continue to sow seeds every 3 to 4 weeks until when the temperature start to reach above 80 F (27 C). Again, you can begin planting in the late summer and early fall (autumn) when the temperature starts to come under the range of 85 F (29 C).
For warm tropical climate
As beets is a cool weather crop, those who live in warm subtropical or tropical areas (USDA Zones 9b-11) should grow it in late fall, winter and early spring.
Planting Beets in Pots
First thing first– Beets don’t like to be transplanted, so no role of seed trays! Pick desired pots and sow seeds 1/4 inch deep. Once they germinate and reach the significant height, you can select the healthiest seedlings and thin others apart to maintain the recommended 3 inches distance spacing. To speed up the germination, you can also soak the seeds overnight in nonchlorinated water before planting. However, if seeds are treated with fungicide, avoid this.
The seedlings will emerge anytime between 5 to 15 days, depending on the growing conditions. Until then keep the pots in a spot that is warm and receive mild sun and maintain the moisture in the soil. Once germinated, place the baby plants in the desired position and later when seedlings grow up to 3 inches tall, thin them. To maintain the spacing recommendation mentioned below.
Varieties
If you know how to grow beets in containers, you can try any variety. A few of them we’ve listed here are the Detroit Dark Red, Early Wonder, Sangria, and Sweetheart.
Requirements for Growing Beets in Containers
Position
Beets can be grown in full sun to part shade but for optimum growth choose a spot that receives full sun, at least 6 hours of sunlight is necessary. Also, make sure the spot you place your containers have good air circulation.
Soil
Soil that is loamy, penetrable and promotes the development of large roots is best for growing beet in a pot. Make sure your soil is rich in nutrients, you can also add a lot of compost. Also, avoid adding pebbles or stones in the soil or the bottom layer when growing this root vegetable.
If you’re not using commercial soil packet for growing beets, prepare your own potting mix by adding 1 part soil, 1 part compost or well-rotted manure, and 1 part perlite. If you want to make a soilless mix, add 1 part peat moss or coco peat, 1 part compost or well-rotted manure, and 1 part perlite, vermiculite or sand. You can also add time-based fertilizer that is low in nitrogen at the time of mixing the soil.Watering
If you don’t want hard and sinewy beetroots, water regularly and evenly. To keep the soil slightly moist all the time. Ensure you not let the soil dry out completely between the growing process and also avoid OVERWATERING.
Spacing
Maintain the 3 inches of distance between each plant from all direction for growing beets in pots successfully. You can grow each plant 2 inches apart, but this will hamper the growth of roots. For reference, the 12 inches wide rectangular pot can support around 4-5 plants.
Temperature
Keep in mind, the optimum temperature for growing beets in containers require a temperature around 50 F – 85 F (10 C – 29 C), but it can be grown in temperature as low as 40 F (4.5 C) and as high as 90 F (32 C) with difficulty.
Beet Care
Fertilizer
It’s a good idea to use time-based (slow release) fertilizer to add into the potting soil. As beets is a root vegetable and you may like to increase its root development, use a fertilizer that is low in nitrogen but high in phosphorous and potassium. For example, a formula of NPK 5-10-10.
Once the beetroots growing in pots become one month and doing well, you can switch to a water-soluble fertilizer. With the same 5-10-10 formula. And if you see Nitrogen deficiency in soil, use the complete fertilizer with NPK in 20-20-20 ratio.
If you want to grow beets organically, side dress plants with compost or manure and feed the plants with compost tea every other week. As beets usually suffer from boron deficiency, you can add seaweed (an excellent source of boron) fertilizer in compost tea for optimum growth.Pests and Diseases
When growing beets in pots, you don’t have to worry about pests and diseases much. You can avoid most of the problems by not overwatering and avoiding overhead watering. The common culprits are root rot and scab. Leaf miners and common pests like aphids can affect the foliage growth.
Harvesting
Beets on average require anywhere from 6-8 weeks to get ready for harvest after germination. You can also harvest beet green to use in salads; the tender leaves taste delicious. You can start harvesting greens when leaves are a few inches long by cutting the outer leaves only and leaving the small inner foliage to grow, which you can harvest later.
2
0
文章
Mirella
2017年05月22日
If you are new to gardening or get little impatient when growing vegetables– Must see this list of Fast Growing Vegetables. All vegetables in this list can be grown in containers and harvested in 2 months or quicker.
These vegetables are ready to eat in just a few days and the best thing is all of these grows easily in pots.
1. Lettuce

When it comes to fast growing vegetables, lettuce is our favorite. Healthy and continuously productive, this crispy salad green has many qualities that make it a blessing for health. Growing lettuce is easy and fun too, to read more about this click here!
2. Arugula (Rocket)
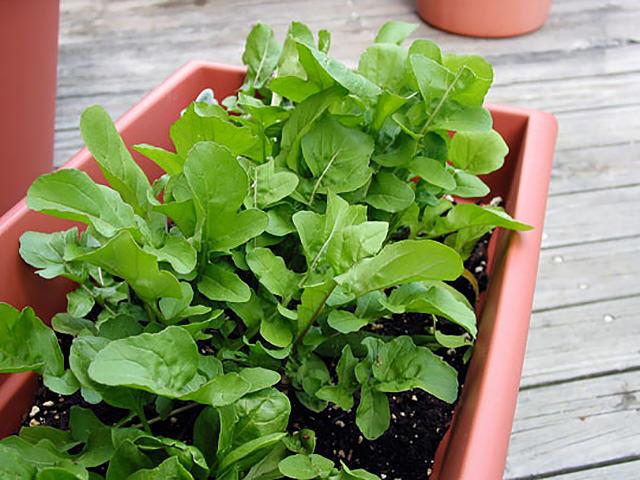
Arugula is an aromatic, peppery-flavored salad green. This easy to grow veggie is fast growing and you can start to harvest it in just 20-21 days for baby leaves. You can easily grow it in places where space is premium. Window boxes or other shallow wide containers are suitable, you can place this edible where it will receive a fair amount of sun and plenty of moisture.
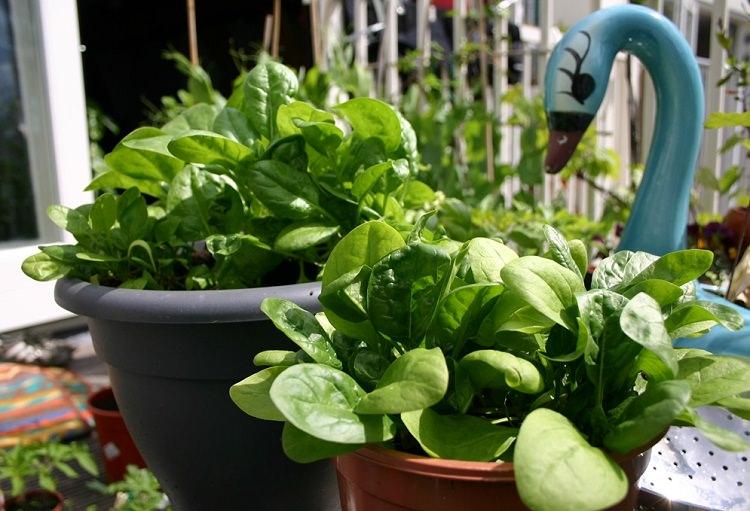
3. Spinach

Spinach is one of the vegetables that can be grown in both shade and sun. It grows easily in containers and you can even plant it indoors on a windowsill. For growing spinach in pots, choose a pot that is least 6-8 inches deep and use a quality potting mix that is rich in organic matter. Check out this article to learn how to grow it in pots.
4. Beets

Growing beets in containers is quick and easy and you don’t need a large container for planting it, too. A container that is 6-8 inches deep and soil that is rich in compost is all you need. Its roots get ready to harvest in as little as 45 days although you can harvest the greens within two to three weeks.
5. Radish
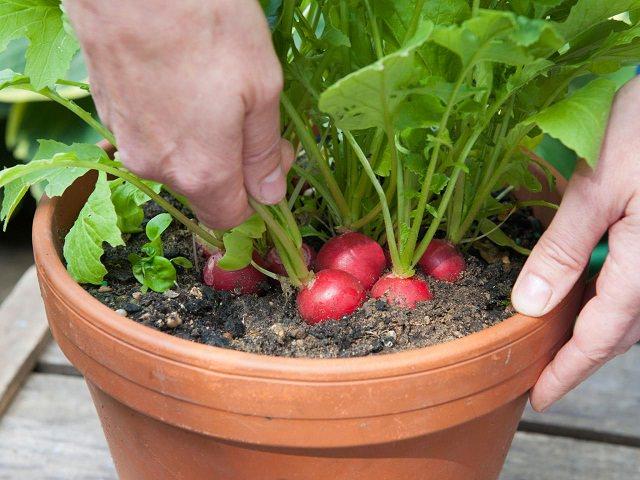
Radishes are one of the quickest growing vegetables and suitable for container vegetable gardening as you can also grow them in small pots. A planter that is 6 inches deep is enough as they have a shallow root system. Radishes are ready for the harvest within 24-60 days, depending more on the variety.
6. Asian Greens
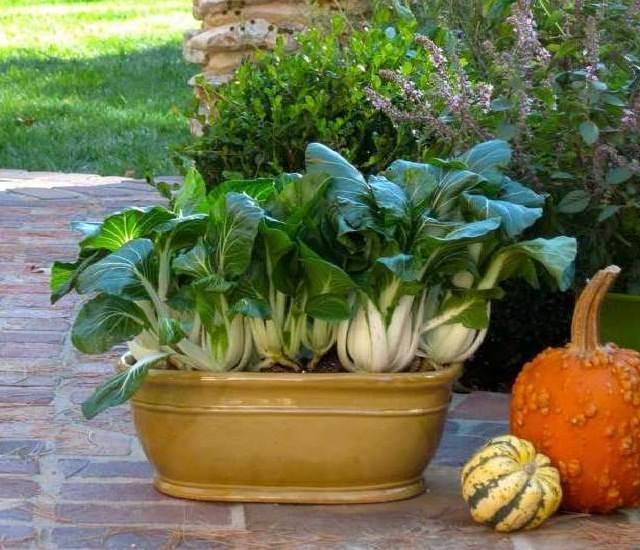
Asian greens are great to grow in pots in shady spaces, they grow fast and don’t need a lot of sun. You can grow them in a spot that receives only 3-4 hours of sun. Providing them plenty of moisture and organic fertilizer is important so that they thrive.
Bok choy of one of the Asian greens that get ready to harvest as soon as about 30 days for baby varieties.
7. Green Onion
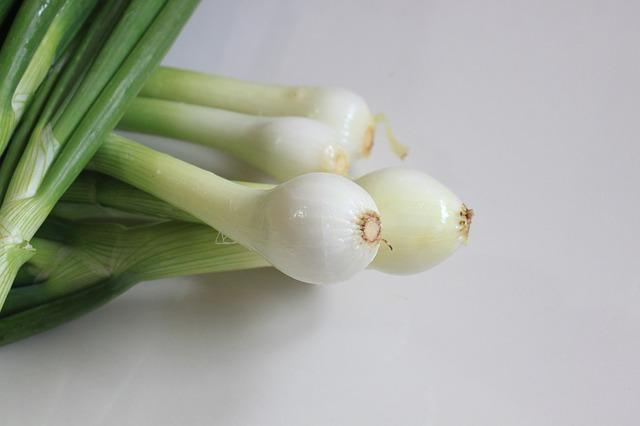
Green onions can be a crispy and delicious addition to your salad bowls and sandwiches. Even in a limited space like a windowsill, you can get enough harvest. Green onion stalks can be picked after 3 or 4 weeks.
8. Sprouts
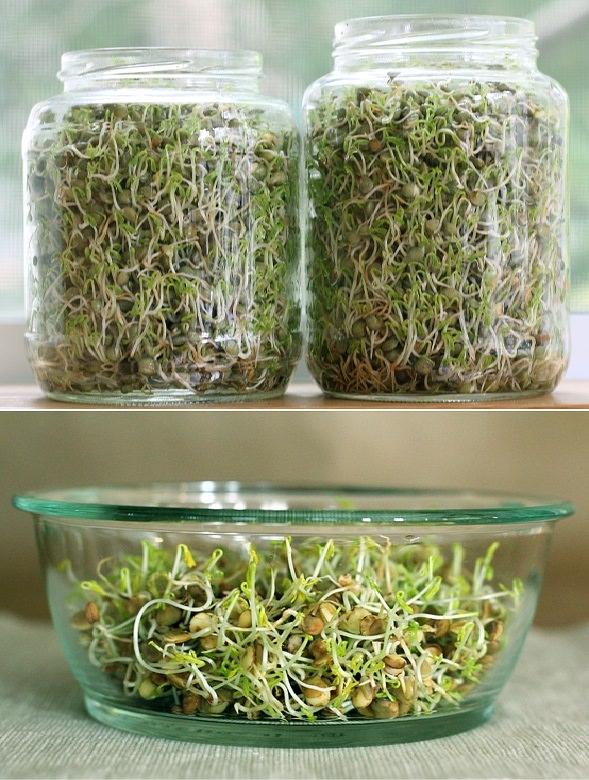
If you are little impatient for harvesting, grow sprouts. Sprouts can grow almost anywhere in your home. It is such a rewarding experience as they grow easily and quickly. All you need is a quart jar, a few tablespoons of sprouting seeds and water. In a week, you’ll have a jar full of healthy delicate sprouts that can be sprinkled on salads, added to sandwiches or tossed into soups for a delicious and healthful twist on your favorite recipes.
9. Fenugreek

Fenugreek is a lesser known annual Asian vegetable (popularly used in the Indian subcontinent), it grows quickly if the temperature is warm in summer. You can start this plant from seeds just like spinach. Check out more here!
10. Peas

Within 2 months after planting peas can be harvested. If you choose a right variety and growing conditions are optimal, growing peas is super easy, even in containers. Also, check out our article on BEST CONTAINER VEGETABLES!
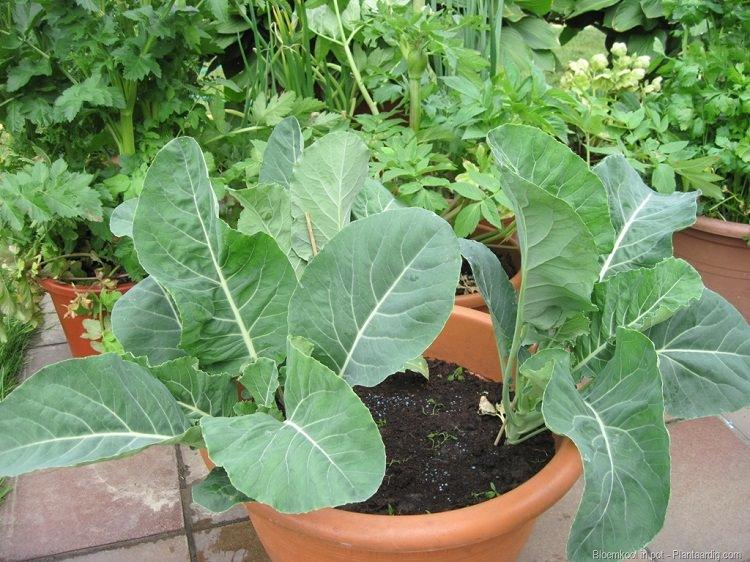
11. Kale

Kale can tolerate some heat but the best flavor comes when the weather cools down, especially in spring and fall. You can plant kale from early spring to late summer and if you want to try this green in subtropical or tropical climate, winter is the right time for its growth.
12. Okra
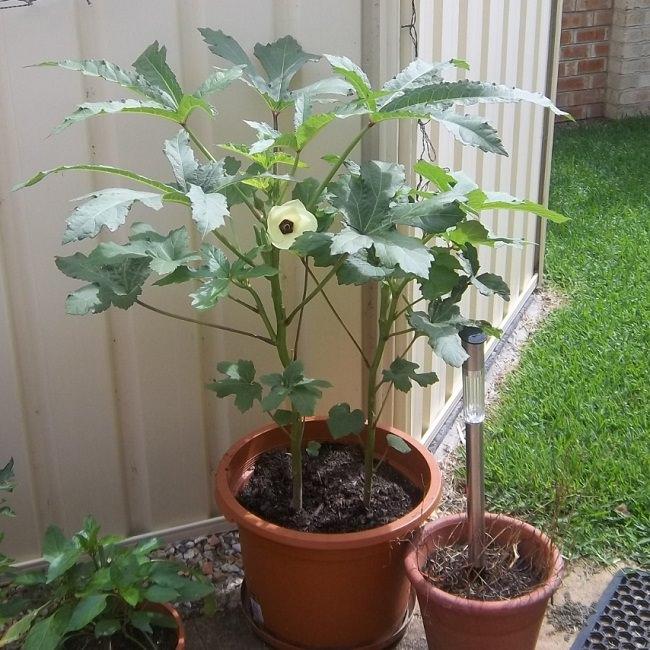
Also known as “Lady Finger”, this slimy-sweet, warm weather vegetable is favorite of many Southerners and in other parts in the world. It’s true that no other vegetable can taste like okra! Many okra varieties start to produce pods in just 50 days, not only this– it’s flowers look beautiful too.
Also Read: How To Grow Okra In Pots
13. Mustard Green

Like other greens, mustard is one of the fast growing vegetables. It is easy to grow and prefers warm weather. You can use its tender leaves in salads, or use it like spinach. There are also many curry recipes that require mustard leaves.
These vegetables are ready to eat in just a few days and the best thing is all of these grows easily in pots.
1. Lettuce
When it comes to fast growing vegetables, lettuce is our favorite. Healthy and continuously productive, this crispy salad green has many qualities that make it a blessing for health. Growing lettuce is easy and fun too, to read more about this click here!
2. Arugula (Rocket)
Arugula is an aromatic, peppery-flavored salad green. This easy to grow veggie is fast growing and you can start to harvest it in just 20-21 days for baby leaves. You can easily grow it in places where space is premium. Window boxes or other shallow wide containers are suitable, you can place this edible where it will receive a fair amount of sun and plenty of moisture.
3. Spinach
Spinach is one of the vegetables that can be grown in both shade and sun. It grows easily in containers and you can even plant it indoors on a windowsill. For growing spinach in pots, choose a pot that is least 6-8 inches deep and use a quality potting mix that is rich in organic matter. Check out this article to learn how to grow it in pots.
4. Beets
Growing beets in containers is quick and easy and you don’t need a large container for planting it, too. A container that is 6-8 inches deep and soil that is rich in compost is all you need. Its roots get ready to harvest in as little as 45 days although you can harvest the greens within two to three weeks.
5. Radish
Radishes are one of the quickest growing vegetables and suitable for container vegetable gardening as you can also grow them in small pots. A planter that is 6 inches deep is enough as they have a shallow root system. Radishes are ready for the harvest within 24-60 days, depending more on the variety.
6. Asian Greens
Asian greens are great to grow in pots in shady spaces, they grow fast and don’t need a lot of sun. You can grow them in a spot that receives only 3-4 hours of sun. Providing them plenty of moisture and organic fertilizer is important so that they thrive.
Bok choy of one of the Asian greens that get ready to harvest as soon as about 30 days for baby varieties.
7. Green Onion
Green onions can be a crispy and delicious addition to your salad bowls and sandwiches. Even in a limited space like a windowsill, you can get enough harvest. Green onion stalks can be picked after 3 or 4 weeks.
8. Sprouts
If you are little impatient for harvesting, grow sprouts. Sprouts can grow almost anywhere in your home. It is such a rewarding experience as they grow easily and quickly. All you need is a quart jar, a few tablespoons of sprouting seeds and water. In a week, you’ll have a jar full of healthy delicate sprouts that can be sprinkled on salads, added to sandwiches or tossed into soups for a delicious and healthful twist on your favorite recipes.
9. Fenugreek
Fenugreek is a lesser known annual Asian vegetable (popularly used in the Indian subcontinent), it grows quickly if the temperature is warm in summer. You can start this plant from seeds just like spinach. Check out more here!
10. Peas
Within 2 months after planting peas can be harvested. If you choose a right variety and growing conditions are optimal, growing peas is super easy, even in containers. Also, check out our article on BEST CONTAINER VEGETABLES!
11. Kale
Kale can tolerate some heat but the best flavor comes when the weather cools down, especially in spring and fall. You can plant kale from early spring to late summer and if you want to try this green in subtropical or tropical climate, winter is the right time for its growth.
12. Okra
Also known as “Lady Finger”, this slimy-sweet, warm weather vegetable is favorite of many Southerners and in other parts in the world. It’s true that no other vegetable can taste like okra! Many okra varieties start to produce pods in just 50 days, not only this– it’s flowers look beautiful too.
Also Read: How To Grow Okra In Pots
13. Mustard Green
Like other greens, mustard is one of the fast growing vegetables. It is easy to grow and prefers warm weather. You can use its tender leaves in salads, or use it like spinach. There are also many curry recipes that require mustard leaves.
1
1
文章
Mirella
2017年05月22日
Learn how to spinach in pots, it is one of the vegetables that you can grow in some shade and in any kind of space. Growing spinach in containers is easy too you can even grow it indoors on a windowsill.
USDA Zones— 3 – 11
Difficulty— Easy
Other Names— Spinacia oleracea (Scientific Name), Persian vegetable, palak, bōsī cài, 波斯菜, leafy greens
How to Grow Spinach in Pots
Growing Spinach in Pots from Seeds
Sow seeds 1/2 inches deep directly in containers or in a seed tray. Seedlings will germinate in 5-14 days depending on the variety and growing conditions. If you have sown seeds in a seed tray wait until 2-3 true leaves appear in each plant and then transplant them into the original pots carefully.
Choosing a pot
For growing spinach in pots, choose a pot that is least 6-8 inches deep. You don’t need a very deep pot rather use a wide pot. You can either use so many small pots and grow one plant in each or select large window boxes, wooden boxes or crates.
Spacing
Provide each spinach plant a space of 3 inches, if you want to pick large leaves give more space to each plant, 5 inches. If you want to harvest leaves at very young age, then this area can be reduced to 2 inches only. Divide the planter box into squares, and see how many plants will feel comfortable in it.
Requirements for Growing Spinach in ContainersPosition
If you are growing spinach in fall (autumn), keep the plant in a sunny spot (in mild climates) due to shorter days and less intensity of the sun. For spring and summer planting keep your potted plants in a location where it receives some shade, especially in the afternoon. In subtropical or tropical climate, place the containers in a spot that receives plenty of shade.
Soil
For growing spinach in containers, use quality potting mix rich in organic matter. The texture of soil must be crumbly and loamy. Avoid soil that clogs the drainage and remains waterlogged. Well-draining soil is most important factor for the optimum growth of spinach in containers. Soil pH must be neutral.
Watering
When growing spinach in containers avoid water stagnation because it will lead to the development of rot and various fungal diseases. Also, avoid wetting the foliage. Keep the soil moist but not soggy or wet. It is necessary to take care of good drainage in the pot.
Temperature
Spinach seeds germinate in temperatures as low as 40 F (4 C) and in high temperatures too. The best soil temperature for growing spinach falls in the range of 50-80 F (10-27 C). Many spinach cultivars can tolerate temperature down to 20 F (-6) and up to 90 F (32 C) easily. Once the temperature starts to soar high you may need to provide shade to your plants.
Growing Spinach Indoors

Growing spinach indoors on a windowsill is a great idea (as it doesn’t require a lot of sunlight) if you’re short of outdoor space. For this, buy a few 6 inches deep small pots and grow spinach in them. You can also grow herbs and annual flowers there.
Also Read: How to Make a Windowsill Herb Garden
Spinach Care
Growing spinach in pots doesn’t need special care. Regular watering, fertilizing and the right soil is the key to the great harvest.
Fertilizing
For growing healthy green spinach, you have to provide nitrogen. At the time of planting, you can mix time-based fertilizer or you can add a lot of compost or well-rotted manure, this will provide nutrients slowly. Feeding the plant with fish emulsion, compost or manure tea in the middle of the growth and so on is a nice organic way to promote the plants. If you have not done added time-based fertilizer, you can also feed the plant with balanced liquid fertilizer at regular intervals.
Mulching
Do mulching, even if you’re growing spinach in pots. Mulching plants with organic matter will help in retaining moisture.
Pests and Diseases
You don’t need to worry much about pests as you’re growing spinach in containers, in a small space and you can easily control them. However, keeping an eye on leaf-eating insects like slugs and caterpillars and other common garden pests like aphids will help you in eliminating them in time.
A Few Tips for Growing Spinach in Tropics
It is a cool season crop but growing spinach in tropics and subtropics is extremely easy, moreover, you can grow it successively as a bi-annual crop, except in hot summer months. You’ll need to provide it shade and enough water to keep the soil temperature cool and moist.
In warm weather, vegetables like lettuce and spinach begin to bolt early and start to set seeds. One of the most important thing you need to consider when growing spinach in tropics is to grow heat tolerant varieties (there are a lot of Asian varieties that are suitable for tropical climate) that grow slowly and do not bolt quickly. These varieties easily tolerate the heat and humidity.
Harvesting
The spinach plant will be ready for harvest 37-50 days after germination depending on the growing conditions and cultivar.
Harvesting can be done when the plant has formed at least 5-6 healthy leaves and they are at least 3-4 inches long. Pick outer leaves first and leave the new inner leaves so that they continue to grow or cut the whole plant off at the base with a knife or scissor, the plant will resprout again.
When the weather becomes humid and hot (in warm climates) the plant tends to form an erect stem, on which you can see some small yellow or green flowers developing. To coincide with the flowering and the subsequent production of flowers, the foliage of the plant thickens and changes in flavor (more bitter), which is called bolting so it is convenient to harvest the plant before it starts flowering for better taste.
USDA Zones— 3 – 11
Difficulty— Easy
Other Names— Spinacia oleracea (Scientific Name), Persian vegetable, palak, bōsī cài, 波斯菜, leafy greens
How to Grow Spinach in Pots
Growing Spinach in Pots from Seeds
Sow seeds 1/2 inches deep directly in containers or in a seed tray. Seedlings will germinate in 5-14 days depending on the variety and growing conditions. If you have sown seeds in a seed tray wait until 2-3 true leaves appear in each plant and then transplant them into the original pots carefully.
Choosing a pot
For growing spinach in pots, choose a pot that is least 6-8 inches deep. You don’t need a very deep pot rather use a wide pot. You can either use so many small pots and grow one plant in each or select large window boxes, wooden boxes or crates.
Spacing
Provide each spinach plant a space of 3 inches, if you want to pick large leaves give more space to each plant, 5 inches. If you want to harvest leaves at very young age, then this area can be reduced to 2 inches only. Divide the planter box into squares, and see how many plants will feel comfortable in it.
Requirements for Growing Spinach in ContainersPosition
If you are growing spinach in fall (autumn), keep the plant in a sunny spot (in mild climates) due to shorter days and less intensity of the sun. For spring and summer planting keep your potted plants in a location where it receives some shade, especially in the afternoon. In subtropical or tropical climate, place the containers in a spot that receives plenty of shade.
Soil
For growing spinach in containers, use quality potting mix rich in organic matter. The texture of soil must be crumbly and loamy. Avoid soil that clogs the drainage and remains waterlogged. Well-draining soil is most important factor for the optimum growth of spinach in containers. Soil pH must be neutral.
Watering
When growing spinach in containers avoid water stagnation because it will lead to the development of rot and various fungal diseases. Also, avoid wetting the foliage. Keep the soil moist but not soggy or wet. It is necessary to take care of good drainage in the pot.
Temperature
Spinach seeds germinate in temperatures as low as 40 F (4 C) and in high temperatures too. The best soil temperature for growing spinach falls in the range of 50-80 F (10-27 C). Many spinach cultivars can tolerate temperature down to 20 F (-6) and up to 90 F (32 C) easily. Once the temperature starts to soar high you may need to provide shade to your plants.
Growing Spinach Indoors
Growing spinach indoors on a windowsill is a great idea (as it doesn’t require a lot of sunlight) if you’re short of outdoor space. For this, buy a few 6 inches deep small pots and grow spinach in them. You can also grow herbs and annual flowers there.
Also Read: How to Make a Windowsill Herb Garden
Spinach Care
Growing spinach in pots doesn’t need special care. Regular watering, fertilizing and the right soil is the key to the great harvest.
Fertilizing
For growing healthy green spinach, you have to provide nitrogen. At the time of planting, you can mix time-based fertilizer or you can add a lot of compost or well-rotted manure, this will provide nutrients slowly. Feeding the plant with fish emulsion, compost or manure tea in the middle of the growth and so on is a nice organic way to promote the plants. If you have not done added time-based fertilizer, you can also feed the plant with balanced liquid fertilizer at regular intervals.
Mulching
Do mulching, even if you’re growing spinach in pots. Mulching plants with organic matter will help in retaining moisture.
Pests and Diseases
You don’t need to worry much about pests as you’re growing spinach in containers, in a small space and you can easily control them. However, keeping an eye on leaf-eating insects like slugs and caterpillars and other common garden pests like aphids will help you in eliminating them in time.
A Few Tips for Growing Spinach in Tropics
It is a cool season crop but growing spinach in tropics and subtropics is extremely easy, moreover, you can grow it successively as a bi-annual crop, except in hot summer months. You’ll need to provide it shade and enough water to keep the soil temperature cool and moist.
In warm weather, vegetables like lettuce and spinach begin to bolt early and start to set seeds. One of the most important thing you need to consider when growing spinach in tropics is to grow heat tolerant varieties (there are a lot of Asian varieties that are suitable for tropical climate) that grow slowly and do not bolt quickly. These varieties easily tolerate the heat and humidity.
Harvesting
The spinach plant will be ready for harvest 37-50 days after germination depending on the growing conditions and cultivar.
Harvesting can be done when the plant has formed at least 5-6 healthy leaves and they are at least 3-4 inches long. Pick outer leaves first and leave the new inner leaves so that they continue to grow or cut the whole plant off at the base with a knife or scissor, the plant will resprout again.
When the weather becomes humid and hot (in warm climates) the plant tends to form an erect stem, on which you can see some small yellow or green flowers developing. To coincide with the flowering and the subsequent production of flowers, the foliage of the plant thickens and changes in flavor (more bitter), which is called bolting so it is convenient to harvest the plant before it starts flowering for better taste.
0
0
文章
Mirella
2017年05月22日
Learn how to grow cauliflower in containers in this article. Growing cauliflowers in containers is not very difficult if you know its proper requirements and ideal growing conditions.

However, cauliflower is a cool season crop but there are many hybrid cultivars available for both temperate and tropical weather, which means it can be grown diversely in a variety of climates.
How to Grow Cauliflower in ContainersPlanting cauliflower in containers
It is important to plant the variety that fits the season and climate you are living in. Cauliflowers can be planted anytime in frost free climate when the temperature is in the range of 50-85 F (10 C to 30 C). At the time when heads are maturing, the ideal temperature is around 60-70 F (15-20 C).
Generally, in warmer regions (USDA Zone 9 – 11), you can start to sow cauliflower seeds in fall and continue to sow the seeds until the end of winter. In cooler zones, it is better to sow the seeds until late winter and up to spring to get summer or fall harvest.
Propagation
Sowing, transplanting, and planting is same as for the cabbages. Sow the seeds in a seed starting mix, 1 or 2 cm deep and 4 cm apart. Once the seedlings germinated and plants have 3 or 4 leaves, you can start growing cauliflower in containers.
Choosing a Container
Choose a pot that is 12 inches deep and at least 10 inches wide to allow enough room for a plant to grow. Also, make sure it has enough drainage holes in the bottom. In such a pot you can grow one plant.
You can also grow 2-3 cauliflower plants together in large buckets, half whiskey barrels and even in sacks.
Requirements for Growing Cauliflower in Containers
Position
Prefer to keep the pot in a sunny spot that receives at least 6 hours of sun. In tropics, grow the plant in a partial sun.
Soil
Like all brassicas, cauliflowers are quite demanding on the soil. Fill the pot with a quality potting soil that is light, deep, humus-rich and slightly clayey. As cauliflower grows best in moist soil choose the substrate that holds some moisture but also drains well.
Watering
Because growing cauliflower requires moist soil, you’ll need to water it regularly. It is important to prevent the drying of the soil in the period when the seedling is maturing and at the time of head formation. Drought-like conditions lead to the formation of smaller or separate heads or even to a complete loss of them. Overwatering also impede its growth, which must be avoided.
Cauliflower Plant Care
When the head or flower (curd) of cauliflower becomes 2-3 inches in diameter (this is unnecessary for colored varieties), cover it with the inner leaves by breaking or tying them over the head. It is called blanching. This will protect the head from the sun and you’ll get healthy white colored and more flavorsome cauliflower after harvest.
Fertilizer
Cauliflower plant is a heavy feeder. You can mix compost or well-rotted manure into the soil at the time of planting. Besides this, fertilize it with 10-10-10 water soluble fertilizer monthly.
Mulching
Mulching can be skipped when you’re growing cauliflower in containers. But you can do it to keep the soil cool and preserve moisture in the soil. In winter, mulching will keep the soil warm and insulate the roots from cold.
Pests and Diseases
Pests that damage the leaves, such as flea beetles, the larva of cabbage butterfly and moths love to feed on this plant. It can also be attacked by aphids and white flies.
In diseases, it is infected by clubroot, which can be checked if quality soil is used. It also gets affected by powdery mildew. To prevent it, avoid wetting the foliage.
Harvesting
The harvesting of cauliflower takes place virtually throughout the year, depending on the variety and sowing period. Generally, harvesting takes place about 3-4 months after planting.
You can check if cauliflower is ready for harvest when the head (curd) is fully developed (6 to 12 inches in diameter, depending on the variety) and still compact. Once the blanching is done you can harvest the cauliflower in 7-12 days.
Things to RememberCauliflower heads (flowers) become ready for harvest in 3-5 months.Cauliflower requires moderate temperature, around 60 – 75 F is ideal.Too high or too cold temperature leads to premature heading.Cauliflower requires constant nutrient supply and slightly moist soil with ideal pH around 6.5-6.8.Right watering is the key to growing cauliflowers. For the best result, water carefully. Both underwatering or overwatering must be avoided.
1
0
文章
Andrea
2017年05月22日


I’ve always loved having edibles in my garden. It isn’t a new idea, cottage gardens in Europe traditionally combined growing vegetables for the family along with table flowers, due to the small spaces most people had in those times. And cottage gardening continues to be one of the most popular gardening styles, because of the charm and possibilities that those type of gardens hold. I suppose there is something satisfying about an ornamental edible garden that touches on our needs for survival, but acknowledges our need for beauty. And so it perseveres, but edible gardens for beauty lost their appeal in the new century. Fortunately, with the new awareness of “green” living, and the DIY movement in design, gardeners are looking at their spaces in new ways. We don’t plant any longer within a structure of “rules”. We plant, and design, for that matter, leaning towards trying things that are new, pushing the envelope a bit, and being unique.
Ornamental edible gardens are becoming hot… with small spaces common and the desire to grow at least some of our own food, we need to see this more!
Some easy guidelines for growing ornamental edibles?
Remember to balance edibles that have a short growing season with edibles that are evergreen, or at least last all season. You don’t want a big hole in your garden when the lettuce is down for the summer.
Edibles can include herbs, veggies, fruits and some flowers too!
Remember texture is very important in an edible garden.
Don’t forget that the color of fruit or veggies affect the design as well. Hot peppers look great in glossy green, but add a pop of red when they mature!
Remember the basics… shade plants in shade gardens, sun in sun gardens. That having been said, most edible gardens will do better with 6 hours or more of sun a day. Some edibles, such as lettuce and some herbs, prefer afternoon shade. Plan accordingly.
Watch for pests, and treat as necessary. However, integrating herbs into your edible design can actually help minimize some pest problems.
Some ideas for ornamental edible plants?
Red and green leaf lettuce.
Cabbages
Other greens, such as red swiss chard and celery.
Herbs
Artichokes
Edible flowers such as roses, day lilies, pansies, nasturtiums and honeysuckle
Fruit trees and bushes. Blueberry blushes are especially handsome plants.
Still not convinced an ornamental edible garden can be beautiful?

Cabbage and tulips!

A pretty lettuce border.

Herbs used in a formal design.

Cabbage in a boxwood border.

Herbs in a beautiful combination border by Rosalind Creasy.
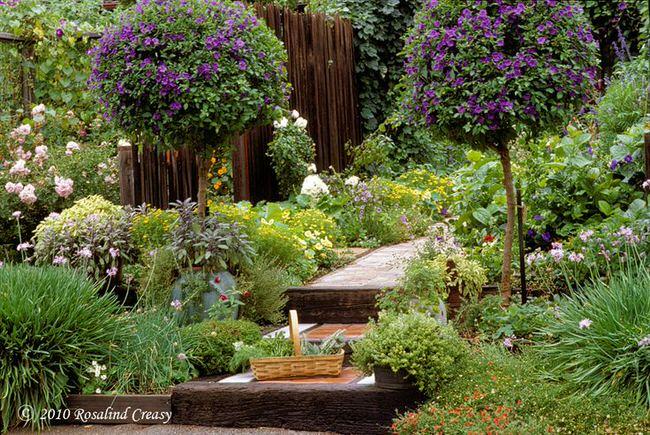
0
0
文章
Andy
2017年05月22日

Learn how to grow dill in tropics. In warm, tropical climate you require a different approach to grow this herb. Growing dill in containers is also possible, which is given in this educative guide.
Dill is an aromatic annual herb grown for its use in various cuisines. It is a wild plant that attracts butterflies and bees and other beneficial insects.
Difficulty — Easy
Soil pH — slightly acidic to neutral
Scientific Name-– Anethum graveolens
Growing Habit

Dill is an upright plant that can grow up to 75 cm tall, it has slightly bluish and green colored scented finely cut leaves and mustard colored umbel flowers. Dill grows well in garden beds and vegetable patches. Growing dill in pots and indoors is also possible.
You can grow dill at anytime when the temperature is around 50 – 80 F (10 – 27 C). In cooler climates, it is grown in spring, summer and up to fall in warm temperate zones. But if you live in tropics, grow dill in fall and winter.
Planting dill
Sow seeds 1/4 inches deep on a bright spot that receive morning sun. One thing you should note that dill hates to be transplanted later, so make sure you’ll sow seeds at exact place or in container where you would like to plant them later. Seeds will germinate in between 7 – 21 days. When seedlings are 2 – 3 inches high, thin them to 10 inches apart.
Growing dill in Containers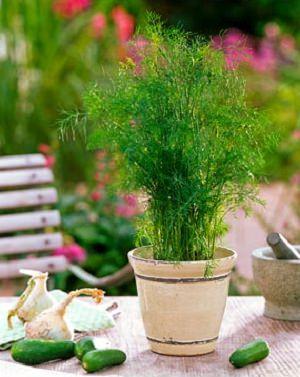
Dill can grow up to 3 feet high, unlike other herbs it has long tap root so it requires deep pot. Choose at least 12 inches deep container that has sufficient drainage. In a single container you can grow 2 -3 plants together.
Location
Dill, in order to grow healthy and lush, needs a Mediterranean climate. It prefers full sun. You also need to protect the plant from extreme tropical conditions, only then can you grow it successfully. Whether in pots on the balcony, patio or terrace or in the garden, ensure the plant remains on a less windy position, that is sunny. Keep the plant in afternoon shade if temperature rises up.
Watering
Dill tolerates drought and its flavor increases if it is allowed to be slightly “thirsty”. But in tropics you’ll need to keep the soil relatively moist. Avoid overwatering in any case.
Also Read: How to Make Balcony Herb Garden
Soil
It can tolerate poor soil, but in fertile soil rich tasting dill is produced. Amend the soil by mixing plenty of aged manure or compost and sand, if needed.
Fertilizer
Generally, dill does not require frequent fertilizer but to give boost to plant you can feed 5-10-5 fertilizer lightly. If you’re growing dill in containers fertilize the plant every month with half strength liquid fertilizer.
Mulching
Cover the plant with a 2-inch layer of organic mulch once the plants are 4 inches high. Mulch gives plant stability, suppresses weeds and keeps the soil moist.
Pinching and Deadheading
Pinch the plant when it grows above 6 inches tall for bushier growth. Nip off the tips regularly. Do not allow the plant to flower and seed, if you want a longer growing period.
Harvest
Harvest the leaves when the plant is 6 inches high. Once dill brings to flower, it will stop growing leaves, so if you want to keep harvesting the leaves, pinch flower buds when they are small. If you want seeds, stop deadheading. To harvest the seeds, cut the seed heads once they have turned brown.
Dill is an aromatic annual herb grown for its use in various cuisines. It is a wild plant that attracts butterflies and bees and other beneficial insects.
Difficulty — Easy
Soil pH — slightly acidic to neutral
Scientific Name-– Anethum graveolens
Growing Habit
Dill is an upright plant that can grow up to 75 cm tall, it has slightly bluish and green colored scented finely cut leaves and mustard colored umbel flowers. Dill grows well in garden beds and vegetable patches. Growing dill in pots and indoors is also possible.
You can grow dill at anytime when the temperature is around 50 – 80 F (10 – 27 C). In cooler climates, it is grown in spring, summer and up to fall in warm temperate zones. But if you live in tropics, grow dill in fall and winter.
Planting dill
Sow seeds 1/4 inches deep on a bright spot that receive morning sun. One thing you should note that dill hates to be transplanted later, so make sure you’ll sow seeds at exact place or in container where you would like to plant them later. Seeds will germinate in between 7 – 21 days. When seedlings are 2 – 3 inches high, thin them to 10 inches apart.
Growing dill in Containers
Dill can grow up to 3 feet high, unlike other herbs it has long tap root so it requires deep pot. Choose at least 12 inches deep container that has sufficient drainage. In a single container you can grow 2 -3 plants together.
Location
Dill, in order to grow healthy and lush, needs a Mediterranean climate. It prefers full sun. You also need to protect the plant from extreme tropical conditions, only then can you grow it successfully. Whether in pots on the balcony, patio or terrace or in the garden, ensure the plant remains on a less windy position, that is sunny. Keep the plant in afternoon shade if temperature rises up.
Watering
Dill tolerates drought and its flavor increases if it is allowed to be slightly “thirsty”. But in tropics you’ll need to keep the soil relatively moist. Avoid overwatering in any case.
Also Read: How to Make Balcony Herb Garden
Soil
It can tolerate poor soil, but in fertile soil rich tasting dill is produced. Amend the soil by mixing plenty of aged manure or compost and sand, if needed.
Fertilizer
Generally, dill does not require frequent fertilizer but to give boost to plant you can feed 5-10-5 fertilizer lightly. If you’re growing dill in containers fertilize the plant every month with half strength liquid fertilizer.
Mulching
Cover the plant with a 2-inch layer of organic mulch once the plants are 4 inches high. Mulch gives plant stability, suppresses weeds and keeps the soil moist.
Pinching and Deadheading
Pinch the plant when it grows above 6 inches tall for bushier growth. Nip off the tips regularly. Do not allow the plant to flower and seed, if you want a longer growing period.
Harvest
Harvest the leaves when the plant is 6 inches high. Once dill brings to flower, it will stop growing leaves, so if you want to keep harvesting the leaves, pinch flower buds when they are small. If you want seeds, stop deadheading. To harvest the seeds, cut the seed heads once they have turned brown.
0
0
文章
Hande Salcan
2017年05月22日

Learn how to grow prickly pear cactus in this article. Growing prickly pear cactus and its care is not difficult, if you grow it in right growing conditions.
USDA Zones— 9 – 11
Difficulty— Easy

Other Names— Barbary-fig Cactus, Cactus Pear Fruit, Gracemere-Pear, Indian-fig, Indian fig, Nopal Cactus, Oponce, Opuntia, Opuntia cardona, Opuntia ficus, Opuntia ficus-indica, Opuntia fuliginosa, Opuntia hyptiacantha, Opuntia lasciacantha, Opuntia macrocentra, Opuntia megacantha, Opuntia puberula, Opuntia streptacantha, Opuntia velutina, Opuntia violacea, Tuna Cardona, Westwood-Pear.
Also known as Indian fig, prickly pear is a common succulent plant in Mediterranean and subtropical regions. It is grown as an ornamental plant and for its juicy fruits. Prickly pear cactus is undemanding and easy to grow. It grows about 1 – 2.5 m high. The flowers are very showy, colors ranging from white, yellow, to orange, depending more on the variety.How to Grow Prickly Pear CactusPropagation
Prickly pear cactus can be propagated from seeds or pads. Growing prickly pear from the pad is comparatively easy than seeds. To facilitate the rooting, it is preferable to wait until the cuts are perfectly healed (about 1 – 2 week) before planting. Tuck them an inch deep on the ground or in containers. The rooting takes place in a short time, usually in a month. Save the rooting pad from afternoon sun and water it when top one inch of soil seems dry.
Location
Growing prickly pear cactus in a sunny location allows the plant to thrive and fruit. Prickly pear cactus is a tropical or subtropical plant, so it loves the warm exposure. However, it can withstand temperatures down to 14 F (-10 C), but in areas, with harsh winters it is best to plant it in a sheltered spot, near a wall or tall tree to protect it from cold drafts and fluctuation in temperature. If you’re living in a cooler climate, growing prickly pear cactus in a container is the better option for you as it can only be grown on the ground where winter temperature remains above 14 F (- 10 C).
Requirements for Growing Prickly Pear CactusSoil
Grow it in well-drained, sandy and loamy soil, avoid clay-rich soil that is not well draining and remains moist. For growing prickly pear cactus in a container use potting mix or 1/3 part each of compost, soil, and coarse sand or perlite.
Watering
Watering should be done only when the surface looks dry. On average, during the spring and summer, water it once or twice a week and during the fall and winter once or twice a month. If you’re living in tropics more frequent watering will be required.
Repotting
If growing in a pot, the plant must be repotted once it is root bound. Whenever you identify that the plant is growing slowly, repot it. The best repotting time is spring.
Prickly Pear Cactus Care
Prickly pear cactus care involves several steps that are given below.
Fertilizer
From spring to fall, fertilize every month with a liquid 5-10-10 fertilizer to promote flowering and fruiting. For the young plant, fertilize with 10-10-10 fertilizer. Do not feed in winter in cooler zones when plant stops to grow.
Pruning
Pruning is done in spring or late summer by removing the pads that come into contact with each other or those that are damaged or poorly formed.
Overwintering
Prickly pear cactus care in winter is essential. If you’re growing prickly pear cactus in a pot, protect it in winter by keeping it indoors. If growing outside, do mulching to insulate the plant from temperature drop.
Fruit thinning
Fruit thinning is done to get a better harvest. It is necessary to remove extra fruits and flowers to get lower production but of improved quality. It is recommended that thinning must be done two weeks before the formation of the fruits, leaving approximately up to 10 fruits per stalk.
Pests and Diseases
Mealybugs, spider mites, and cochineal might attack it. It is also attacked by fruit flies and moths.
Too much water or cold causes rotting. As soon as you detect the softening of tissues, remove the rotten part and treat the infected part with fungicide.
Harvesting
USDA Zones— 9 – 11
Difficulty— Easy
Other Names— Barbary-fig Cactus, Cactus Pear Fruit, Gracemere-Pear, Indian-fig, Indian fig, Nopal Cactus, Oponce, Opuntia, Opuntia cardona, Opuntia ficus, Opuntia ficus-indica, Opuntia fuliginosa, Opuntia hyptiacantha, Opuntia lasciacantha, Opuntia macrocentra, Opuntia megacantha, Opuntia puberula, Opuntia streptacantha, Opuntia velutina, Opuntia violacea, Tuna Cardona, Westwood-Pear.
Also known as Indian fig, prickly pear is a common succulent plant in Mediterranean and subtropical regions. It is grown as an ornamental plant and for its juicy fruits. Prickly pear cactus is undemanding and easy to grow. It grows about 1 – 2.5 m high. The flowers are very showy, colors ranging from white, yellow, to orange, depending more on the variety.How to Grow Prickly Pear CactusPropagation
Prickly pear cactus can be propagated from seeds or pads. Growing prickly pear from the pad is comparatively easy than seeds. To facilitate the rooting, it is preferable to wait until the cuts are perfectly healed (about 1 – 2 week) before planting. Tuck them an inch deep on the ground or in containers. The rooting takes place in a short time, usually in a month. Save the rooting pad from afternoon sun and water it when top one inch of soil seems dry.
Location
Growing prickly pear cactus in a sunny location allows the plant to thrive and fruit. Prickly pear cactus is a tropical or subtropical plant, so it loves the warm exposure. However, it can withstand temperatures down to 14 F (-10 C), but in areas, with harsh winters it is best to plant it in a sheltered spot, near a wall or tall tree to protect it from cold drafts and fluctuation in temperature. If you’re living in a cooler climate, growing prickly pear cactus in a container is the better option for you as it can only be grown on the ground where winter temperature remains above 14 F (- 10 C).
Requirements for Growing Prickly Pear CactusSoil
Grow it in well-drained, sandy and loamy soil, avoid clay-rich soil that is not well draining and remains moist. For growing prickly pear cactus in a container use potting mix or 1/3 part each of compost, soil, and coarse sand or perlite.
Watering
Watering should be done only when the surface looks dry. On average, during the spring and summer, water it once or twice a week and during the fall and winter once or twice a month. If you’re living in tropics more frequent watering will be required.
Repotting
If growing in a pot, the plant must be repotted once it is root bound. Whenever you identify that the plant is growing slowly, repot it. The best repotting time is spring.
Prickly Pear Cactus Care
Prickly pear cactus care involves several steps that are given below.
Fertilizer
From spring to fall, fertilize every month with a liquid 5-10-10 fertilizer to promote flowering and fruiting. For the young plant, fertilize with 10-10-10 fertilizer. Do not feed in winter in cooler zones when plant stops to grow.
Pruning
Pruning is done in spring or late summer by removing the pads that come into contact with each other or those that are damaged or poorly formed.
Overwintering
Prickly pear cactus care in winter is essential. If you’re growing prickly pear cactus in a pot, protect it in winter by keeping it indoors. If growing outside, do mulching to insulate the plant from temperature drop.
Fruit thinning
Fruit thinning is done to get a better harvest. It is necessary to remove extra fruits and flowers to get lower production but of improved quality. It is recommended that thinning must be done two weeks before the formation of the fruits, leaving approximately up to 10 fruits per stalk.
Pests and Diseases
Mealybugs, spider mites, and cochineal might attack it. It is also attacked by fruit flies and moths.
Too much water or cold causes rotting. As soon as you detect the softening of tissues, remove the rotten part and treat the infected part with fungicide.
Harvesting
0
0
文章
Hande Salcan
2017年05月22日
Juiciest and largest fruit from citrus family learn how to grow pomelo. Growing pomelo is not so difficult if you follow the directions given below.

Family– Rutaceae
Genus– Citrus
Other names– Citrus maxima, shaddock, pomelo, pummelo, pommelo, pamplemousse, or shaddok) jeruk besar, jeruk bali, jambua, limau betawi, limau bali, muli, som-o, ma-o, shouk-ton-oh, suha, lukban, kabugaw and buongon.
USDA Zones — 9 to 11
Propagation — Seed, Rootstock
Difficulty — Easy
Bloom Color — White
Height — 15 feet to 40 feet
About Pomelo
Pomelo or Pummelo is largest fruit of citrus family having up to 10 inches fruits, which are sweet and tart in taste with easily removable orange like thick pale yellow skin.
Growing condition for Pomelo
As pomelo is a subtropical evergreen tree, it grows best in warm and humid climate. It does not like cold. If you’re growing pomelo in cold weather grow it in a pot.
RequirementsSun
Like all citrus varieties, pomelo needs full sun to produce its large juicy fruits. It can also be grown in partial sun, but it will produce less fruits.
Soil
Pomelo can be grown in many types of soil, however in grows best in medium textured soil of pH around 5.5 to 7. *Soil must be well draining to prevent root rot.
Watering
Pomelo likes moist soil. If grown on ground it should be watered at least once a week. Watering should be consistent and deep. Over-watering, under-watering or inconsistent watering can lead to blossom drop and fruit drop.
CareFertilizer
Feed with citrus fertilizer according to the product instruction given on the packet.
Harvest
Like most citrus fruits, pomelo may appear fully ripe weeks before it is actually ripe. The best method to check if the fruit is ripe is to taste it.
Pests and diseases
0
0
文章
Hande Salcan
2017年05月22日
Learn how to grow calamansi in this guide. Growing calamansi is rewarding. Its exotic citrus like fragrance and mix of tangy, sweet flavor of lime and tangerine of its fruit makes it a worth fruit tree.

USDA Hardiness Zones — 9 – 11, *can be grown in containers in cooler zones
Difficulty — Moderate
Other Names — calamonding, calamondin orange, calamansi, calamandarin, golden lime, kalamunding, kalamansi, Philippine lime, Panama orange, Chinese orange, musk orange and acid orange.
Family — Rutaceae
Genus — Citrofortunella
Temperature— 60 – 90 F is optimum growing temperature
Propagation Method — Seeds, cuttings
About Calamansi
Calamansi is a tropical fruit of citrus variety, sized between orange and lime. This small fruit tree grows mostly in South East Asia. It is mostly grown for ornamental purposes in other parts of the world. Calamansi bears smaller fruits than orange which are sour, a little bit sweeter and juicy in taste.
Growing Condition
Calamansi tree grows in warm tropical and subtropical climate. The growing conditions are similar to that of other citrus trees.
Requirements for Growing CalamansiSun
Growing calamansi in full sun is required for healthy growth. Proper exposure to sun and temperature improves productivity.
Soil
Calamansi grows well in dry soil that doesn’t retain moisture and remains waterlogged.
Watering
Water deeply but only when the top layer of soil dries out, calamansi plant doesn’t like wet feet.
How to Plant Calamansi
If your climate is frost free and remains warm throughout the year, plant it outside. If you live below USDA Zone 9b, it is better to plant it in a container.
Calamnsi CareFertilizer
Fertilize your calamansi plant every other month during the growing period with liquid fertilizer that is rich in nitrogen and potassium.
Harvest
It starts to bear fruits after two-three years of growing calamansi plant and produce them throughout the year intermittently (*in tropics). You can either harvest them young when the color of peel looks variegated pale green or wait until they fully ripen and resemble orange like color.
Pests and Diseases
1
0
文章
Juze
2017年05月22日

Learn how to grow grapes in pots. Growing grapes in containers is not very complicated though it requires slight care and maintenance. Check out below!
USDA Zones— 3 – 10
Difficulty— Moderate
Soil pH— Slightly acidic to neutral

Choosing a Pot
For growing grapes in containers, choose a large and sturdy container that can support this vigorous vine. A 15-20 gallon pot that is at least 16-18 inches deep and 18-24 inches wide is sufficient. Start with a smaller sized pot and then repot the plant in a larger one.
Choosing varieties
The best option is to go to a garden center and ask for a variety that can grow well in pots and in your climate. There are many varieties of grapevine you can choose from. Choosing a variety that is resistant to diseases and can grow well in your zone is most essential. However, you can grow almost any variety in the container but growing a dwarf grape cultivar like ‘pixie’ can save you from the hassle of training a grape vine in a pot.
Planting
The best time to plant grapevine is spring or early summer, planting on this time helps the plant to grow all season without the exposure to frost. But if you live in a frost-free hot tropical climate the best time for planting grape vine is winters.
Requirements for Growing Grapes in Pots

Position
Choose a location that is sunny, warm and dry. If your spot receives shade in an afternoon the plant will still do well, but at least 6 hours of sunlight is required. Avoid keeping the plant in wet, shady and less windy spot with less or no air circulation as it promotes fungal diseases and grapevine requires good air circulation around it.
Support and Training

Grapevine needs training and support to grow. When growing grapes in a pot, it is best to opt for a tall lightweight trellis, of wood or plastic. You can also DIY trellis for it. A grape vine grows long and requires support, it will be much better if you have an arbor or pergola like structure. Besides that, there are many other techniques to train the grape vine (See the picture above). Train the vine on a stake or something like a fan trellis. You can also support the vine on a stake with the help of “Umbrella Kniffen Training Method”. To learn more about this method, read this helpful article on pallensmith.com. Growing grapes in pots by the standard vine training method on a regular trellis is an easy and hassle free idea too.
Soil
Don’t use heavy garden soil when growing grapes in containers. Instead, use a light potting mix that is loose, rich in organic matter and most importantly drains well.
Watering
Water regularly and deeply to keep the soil slightly moist but avoid overwatering. Soggy, damp soil can be detrimental to the plant.
Fertilization
Side dress the plant periodically with aged manure or compost. In the first year, you can fertilize the plant with a general purpose fertilizer in spring and summer. From the next year, start to fertilize the plant with the fertilizer that is low in nitrogen but high in potassium and phosphorus from the spring when flower buds appear.
Growing Grapes in Tropics
Grapes are actually temperate fruits but the best thing about them is they can be grown in both temperate and tropical regions. Temperate climate zones without very harsh summers or humidity are optimum for growing grapevines. However, the two tropical countries India and Brazil are one of the largest producers of grapes in the world. Other tropical countries like Yemen, Thailand, Peru and Tanzania also produces grapes but to a smaller extent. This means if you live in a tropical climate you can still grow grapevine. You’ll only need to find a right variety that grows successfully in your area.
Still in tropics, areas with very high humidity or with heavy rainfall are less suitable for growing grapevine and if you’re living in an unfavorable climate like this, your plant will going to suffer from fungal diseases regularly and you’ll have to look after it more. Besides this, there is a possibility that fruits you’ll obtain will be of lesser quality and mild taste.
Grape Vine Care in Pots
Grape vine care in the pot is not so difficult if you follow the tips given below.

Pollination
When growing grapes in containers you must know most grape varieties are self-fertile and produce fruits on their own. However, shaking the plant gently at the time of flowering results in better yield.
Mulching
Grapevine requires mulching when grown on the ground. You can also mulch in the pot with pine bark, compost or with pebbles (this way it will look great too) to prevent excessive water evaporation from the soil and to protect roots from temperature fluctuations.
Overwintering
In climates with harsh winters, you have to protect the plant. For this, you’ll need to remove the dormant grapevine from its support and start to keep it indoors in warm space. Also, reduce watering and avoid the application of any fertilizer during this period.
Pruning
During the first few months after planting until the end of the growing season, do not prune the plant and allow it to grow freely to let the plant establish well in a pot and allow it to develop a strong root system.
Grapevine woods that are more than two years old do not produce fruits so you’ll have to remove all the old branches.
Prune the growth in late winter to early spring during the dormancy so that only two buds will remain. Buds are little protrusions on the trunk. This heavy pruning may seem too much to do but in the spring and summer, each of these buds will grow into a new branch. Dedicate the first year for training the vine to follow your trellis or stack with pruning and tying. Due to the limited space of the container, try to keep only 1 or 2 branches growing from the main trunk. Also, prune away any runners that creep away from the trellis.
The most important pruning will be one that you will perform in late winter when the plant shed its leaves, it is the one on which the fruiting depends. You will need to do the summer pruning too. Though it should have to be light and unobtrusive, just pinching and pruning.
To learn and read more pruning grapevines check out this article on freeplants.com and this one on RHS.
Growing grapevine as a tree is also possible. Check out this step by step article on eHow.
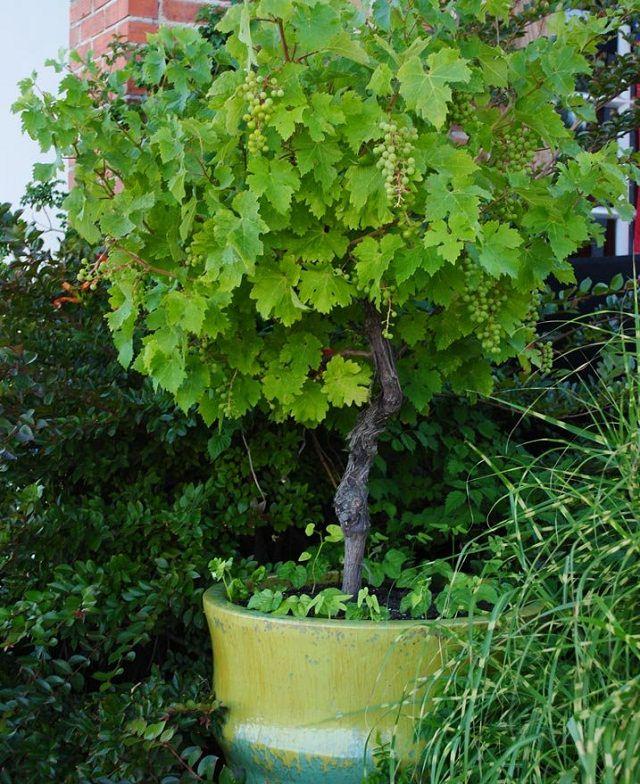
Diseases and Pests
In diseases, fungal diseases like black spot and powdery mildew, especially in dry and warm weather are possible. In pests, keep an eye on common garden insects like aphids. Japanese beetles, moths, caterpillars can also be a problem.
Harvesting
Harvesting should be done when your grape plant is at least 2-3 years old. Generally, grapes ripen anytime between late August to late October. Exactly when it depends on the variety and the type of climate you’re growing them in.
To find out whether your grapes are ready for harvesting or not is to taste them. If they taste sweet and nice, pick them. If they don’t, then leave them for a few more days. Once the grapes start to change their color they usually take anywhere between 1 to 3 weeks to become properly ripe (how long, depends on the variety and how good the climate is. For example, green grapes normally turn slightly translucent and their skins become yellow once they are ripe. Ripe grapes also feel soft to the touch. Eventually, taste is all that matters. If you like the taste, then pick them.
USDA Zones— 3 – 10
Difficulty— Moderate
Soil pH— Slightly acidic to neutral
Choosing a Pot
For growing grapes in containers, choose a large and sturdy container that can support this vigorous vine. A 15-20 gallon pot that is at least 16-18 inches deep and 18-24 inches wide is sufficient. Start with a smaller sized pot and then repot the plant in a larger one.
Choosing varieties
The best option is to go to a garden center and ask for a variety that can grow well in pots and in your climate. There are many varieties of grapevine you can choose from. Choosing a variety that is resistant to diseases and can grow well in your zone is most essential. However, you can grow almost any variety in the container but growing a dwarf grape cultivar like ‘pixie’ can save you from the hassle of training a grape vine in a pot.
Planting
The best time to plant grapevine is spring or early summer, planting on this time helps the plant to grow all season without the exposure to frost. But if you live in a frost-free hot tropical climate the best time for planting grape vine is winters.
Requirements for Growing Grapes in Pots
Position
Choose a location that is sunny, warm and dry. If your spot receives shade in an afternoon the plant will still do well, but at least 6 hours of sunlight is required. Avoid keeping the plant in wet, shady and less windy spot with less or no air circulation as it promotes fungal diseases and grapevine requires good air circulation around it.
Support and Training
Grapevine needs training and support to grow. When growing grapes in a pot, it is best to opt for a tall lightweight trellis, of wood or plastic. You can also DIY trellis for it. A grape vine grows long and requires support, it will be much better if you have an arbor or pergola like structure. Besides that, there are many other techniques to train the grape vine (See the picture above). Train the vine on a stake or something like a fan trellis. You can also support the vine on a stake with the help of “Umbrella Kniffen Training Method”. To learn more about this method, read this helpful article on pallensmith.com. Growing grapes in pots by the standard vine training method on a regular trellis is an easy and hassle free idea too.
Soil
Don’t use heavy garden soil when growing grapes in containers. Instead, use a light potting mix that is loose, rich in organic matter and most importantly drains well.
Watering
Water regularly and deeply to keep the soil slightly moist but avoid overwatering. Soggy, damp soil can be detrimental to the plant.
Fertilization
Side dress the plant periodically with aged manure or compost. In the first year, you can fertilize the plant with a general purpose fertilizer in spring and summer. From the next year, start to fertilize the plant with the fertilizer that is low in nitrogen but high in potassium and phosphorus from the spring when flower buds appear.
Growing Grapes in Tropics
Grapes are actually temperate fruits but the best thing about them is they can be grown in both temperate and tropical regions. Temperate climate zones without very harsh summers or humidity are optimum for growing grapevines. However, the two tropical countries India and Brazil are one of the largest producers of grapes in the world. Other tropical countries like Yemen, Thailand, Peru and Tanzania also produces grapes but to a smaller extent. This means if you live in a tropical climate you can still grow grapevine. You’ll only need to find a right variety that grows successfully in your area.
Still in tropics, areas with very high humidity or with heavy rainfall are less suitable for growing grapevine and if you’re living in an unfavorable climate like this, your plant will going to suffer from fungal diseases regularly and you’ll have to look after it more. Besides this, there is a possibility that fruits you’ll obtain will be of lesser quality and mild taste.
Grape Vine Care in Pots
Grape vine care in the pot is not so difficult if you follow the tips given below.
Pollination
When growing grapes in containers you must know most grape varieties are self-fertile and produce fruits on their own. However, shaking the plant gently at the time of flowering results in better yield.
Mulching
Grapevine requires mulching when grown on the ground. You can also mulch in the pot with pine bark, compost or with pebbles (this way it will look great too) to prevent excessive water evaporation from the soil and to protect roots from temperature fluctuations.
Overwintering
In climates with harsh winters, you have to protect the plant. For this, you’ll need to remove the dormant grapevine from its support and start to keep it indoors in warm space. Also, reduce watering and avoid the application of any fertilizer during this period.
Pruning
During the first few months after planting until the end of the growing season, do not prune the plant and allow it to grow freely to let the plant establish well in a pot and allow it to develop a strong root system.
Grapevine woods that are more than two years old do not produce fruits so you’ll have to remove all the old branches.
Prune the growth in late winter to early spring during the dormancy so that only two buds will remain. Buds are little protrusions on the trunk. This heavy pruning may seem too much to do but in the spring and summer, each of these buds will grow into a new branch. Dedicate the first year for training the vine to follow your trellis or stack with pruning and tying. Due to the limited space of the container, try to keep only 1 or 2 branches growing from the main trunk. Also, prune away any runners that creep away from the trellis.
The most important pruning will be one that you will perform in late winter when the plant shed its leaves, it is the one on which the fruiting depends. You will need to do the summer pruning too. Though it should have to be light and unobtrusive, just pinching and pruning.
To learn and read more pruning grapevines check out this article on freeplants.com and this one on RHS.
Growing grapevine as a tree is also possible. Check out this step by step article on eHow.
Diseases and Pests
In diseases, fungal diseases like black spot and powdery mildew, especially in dry and warm weather are possible. In pests, keep an eye on common garden insects like aphids. Japanese beetles, moths, caterpillars can also be a problem.
Harvesting
Harvesting should be done when your grape plant is at least 2-3 years old. Generally, grapes ripen anytime between late August to late October. Exactly when it depends on the variety and the type of climate you’re growing them in.
To find out whether your grapes are ready for harvesting or not is to taste them. If they taste sweet and nice, pick them. If they don’t, then leave them for a few more days. Once the grapes start to change their color they usually take anywhere between 1 to 3 weeks to become properly ripe (how long, depends on the variety and how good the climate is. For example, green grapes normally turn slightly translucent and their skins become yellow once they are ripe. Ripe grapes also feel soft to the touch. Eventually, taste is all that matters. If you like the taste, then pick them.
1
0

