文章
扭扭
2017年05月23日

Learn how to make a vertical succulent wall planter in a few steps without spending money. You don’t need to be a great DIYer to have this DIY succulent frame in your home.

Succulents are easiest plants to grow on earth. They are not demanding and most of them grow in severe conditions, plus they come in different colors, sizes, and shapes. All this makes them perfect for vertical gardening.
Things you’ll need to make DIY succulent wall planter

SucculentA tape to measureChicken wireA hammerNailsA pencil or MarkerGlueSpecial potting mix for cacti and succulentsMore succulents4 equal size thick sticks or frame moulding to make frameMoss (Optional)A piece of board (plywood or something else) to adhere behind the frame.Staple gun or whatever you find easily to attach the chicken wire to the frame.Pincer or wire cutter to cut wiresSteps to Follow
Step 1
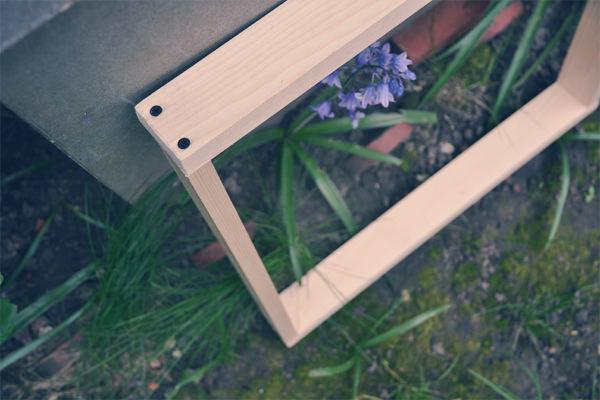
Make a frame by joining the pieces of wood. (See the photo above)
Step 2

Measure and cut the plyboard or picture frame board to cover the frame from behind according to the dimensions of the frame. Once you join it to the frame with nails and glue, stick a plastic bag or film over it. To make your vertical succulent wall waterproof.
Step 3
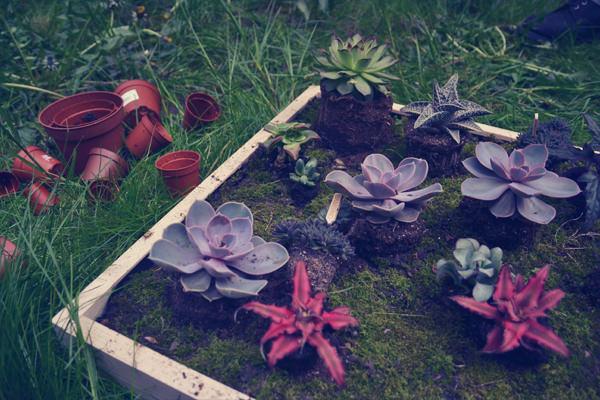
Evenly spread the soil in your frame. Stop filling just before the soil reaches the edge of the frame.
Step 4
Before fixing the chicken wire on your succulent wall planter, distribute moss over the soil (optional) and put succulents to see and adjust them according to colors, shapes and sizes. This is fun! Once you have found the ideal location for your small plants, remove them again.
Step 5
Attach the chicken wire using a staple gun on the edges of the frame. You can skip this step if you want but chicken wire is used to support the succulents and soil.
Step 6
Now plant the succulents. Skip this step if you are planting them from cuttings but if you are planting potted succulents you may need to cut chicken wire mesh to create a few small planting holes to transplant succulents with the help of a pincer or wire cutter.
Step 7
Poke holes in the soil and then gently tuck the plants in and close the hole and mist the soil to moisten it.
Wait a few days before hanging your DIY succulent wall planter or putting it vertically until the plants recover and establish well.
How to Care for Succulent Wall PlanterPosition
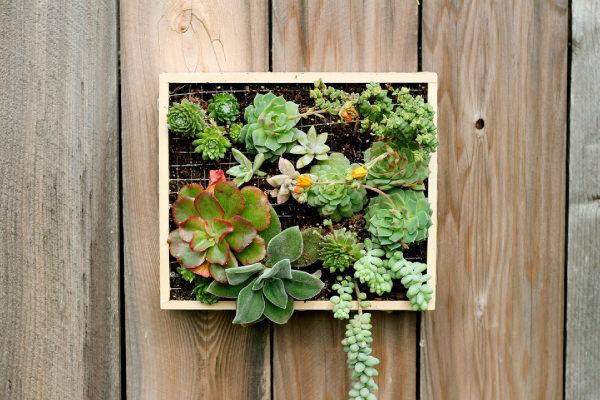
Keep the succulent wall planter on a table, near a windowsill, in your living room, somewhere where it will receive some sun or indirect sunlight. You can also hang it on the wall but for this, you’ll need to attach a picture hanger to your frame.
Watering
Spray water on your vertical succulent wall to keep the soil slightly moist in the next few days. Once established water only when the substrate is slightly dry. Be attentive to it and observe when the plants need water.
Soil
Right kind of soil is the key as you’re growing plants vertically in a too small space. Use succulent potting mix for this.

Succulents are easiest plants to grow on earth. They are not demanding and most of them grow in severe conditions, plus they come in different colors, sizes, and shapes. All this makes them perfect for vertical gardening.
Things you’ll need to make DIY succulent wall planter

SucculentA tape to measureChicken wireA hammerNailsA pencil or MarkerGlueSpecial potting mix for cacti and succulentsMore succulents4 equal size thick sticks or frame moulding to make frameMoss (Optional)A piece of board (plywood or something else) to adhere behind the frame.Staple gun or whatever you find easily to attach the chicken wire to the frame.Pincer or wire cutter to cut wiresSteps to Follow
Step 1

Make a frame by joining the pieces of wood. (See the photo above)
Step 2

Measure and cut the plyboard or picture frame board to cover the frame from behind according to the dimensions of the frame. Once you join it to the frame with nails and glue, stick a plastic bag or film over it. To make your vertical succulent wall waterproof.
Step 3

Evenly spread the soil in your frame. Stop filling just before the soil reaches the edge of the frame.
Step 4
Before fixing the chicken wire on your succulent wall planter, distribute moss over the soil (optional) and put succulents to see and adjust them according to colors, shapes and sizes. This is fun! Once you have found the ideal location for your small plants, remove them again.
Step 5
Attach the chicken wire using a staple gun on the edges of the frame. You can skip this step if you want but chicken wire is used to support the succulents and soil.
Step 6
Now plant the succulents. Skip this step if you are planting them from cuttings but if you are planting potted succulents you may need to cut chicken wire mesh to create a few small planting holes to transplant succulents with the help of a pincer or wire cutter.
Step 7
Poke holes in the soil and then gently tuck the plants in and close the hole and mist the soil to moisten it.
Wait a few days before hanging your DIY succulent wall planter or putting it vertically until the plants recover and establish well.
How to Care for Succulent Wall PlanterPosition

Keep the succulent wall planter on a table, near a windowsill, in your living room, somewhere where it will receive some sun or indirect sunlight. You can also hang it on the wall but for this, you’ll need to attach a picture hanger to your frame.
Watering
Spray water on your vertical succulent wall to keep the soil slightly moist in the next few days. Once established water only when the substrate is slightly dry. Be attentive to it and observe when the plants need water.
Soil
Right kind of soil is the key as you’re growing plants vertically in a too small space. Use succulent potting mix for this.
1
0
文章
Carol
2017年05月23日

Add a unique touch of color and drama to your garden by adding black flowers and plants. These plants can also be grown in containers.
First thing first, black plants are not really black, but dark purple, deep burgundy, maroon or red. These type of flowers and plants of black color can transform any garden or container garden in an exquisite way, they add a tropical touch and look exceptional when grown with other bright colored plants.
1. Tulip ‘Queen of Night’
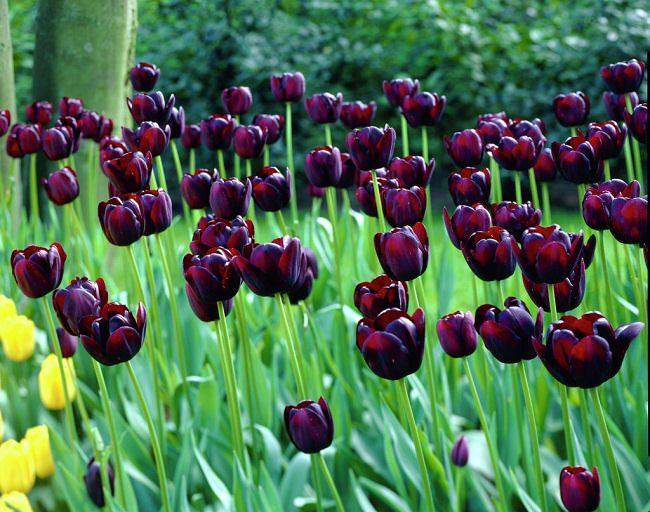
Beautiful and dramatic, this tremendous closest to black flower appears in deep maroon color in spring. This variety can be mixed with white or pink tulips or other bright colored flower to create an astonishing view.
Good thing is that it is a low maintenance plant and usually easy to grow, that makes it a good plant for beginners. This fairly cold hardy plant blooms in mid or late spring under USDA Zones 3 to 8.
2. Petunia, Sophistica Blackberry Hybrid
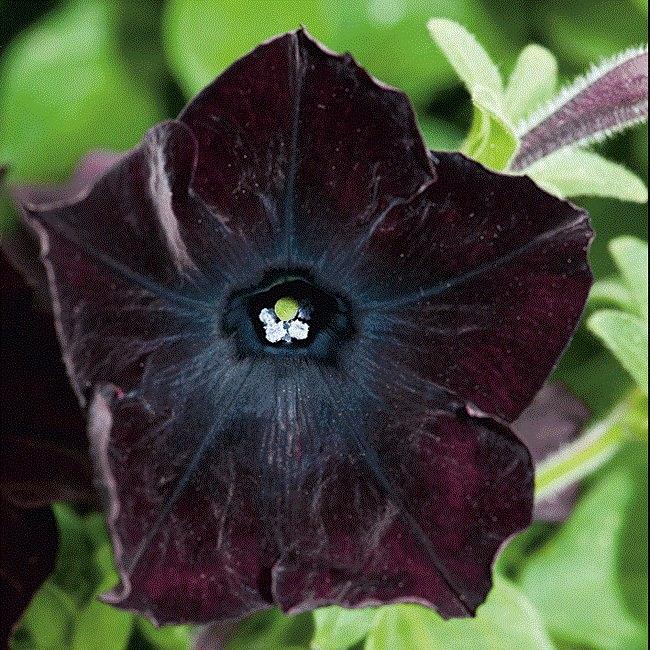
Newly engendered varieties like ‘Black Velvet Petunia’ or ‘Black Cat Petunia’ look almost black but it may be hard and expensive to find their seeds. However, beautiful petunia, ‘Sophistica blackberry’ is an easier option. The dark flowers of this annual are actually deep reddish or burgundy in color and can be grown in window boxes, pots, beds and borders.
3. Helleborus ‘Onyx Odyssey’

The dark burgundy or nearly black hellebores are highly appreciated for their color. This lovely perennial can easily be grown in containers in part to full sun. Provide good air circulation around the plant and keep the soil well moist. Grows best in USDA zones 5-9 hellebores are early bloomers and flower in spring.
4. Viola ‘Molly Sanderson’

Violas ‘Molly Sanderson’ are another excellent option to enjoy flowers in black color, can be grown in both on the ground or in containers, flowers appear from spring to fall. They are very good around pale yellow primroses or multicolor pansies.
5. Iris ‘Before the Storm’
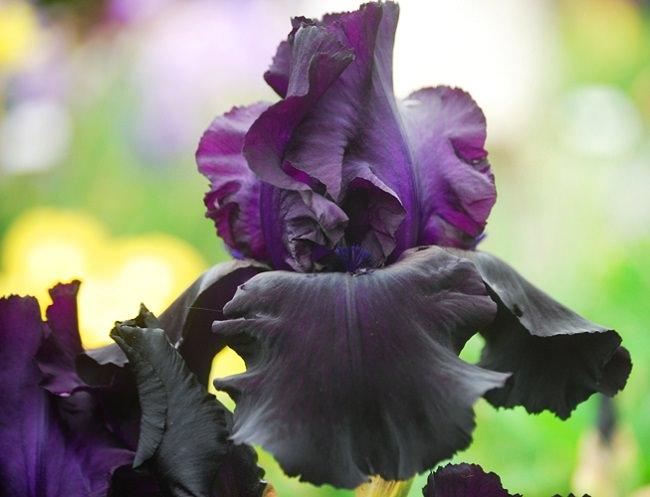
Irises are widely used in gardens and are available in almost every color imaginable, including chocolate and this new variety ‘Before the Storm’ of black color. This slightly fragrant iris requires a sunny position and well-drained soil in order to grow.
6. Physocarpus Opulifolius ‘Diabolo’ syn. ‘Monlo’
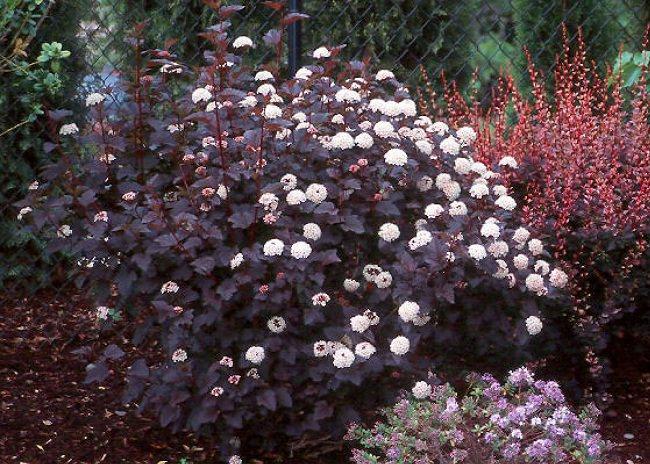
A versatile and appealing shrub with white flowers and deep burgundy foliage that looks black in shade or in dark. It is easy to grow and tolerates a wide range of soil conditions, it grows best in USDA Zones 2-7 and must be planted in an area of partial shade in warmer zones due to the reason that in higher heat the foliage can become green.
7. Black Baccara Rose

This dramatic tea rose due to its bold color and upright habit looks stunning, it is one of the best black flowers. Its almost black color and fragrant blooms make an amazing display in the garden. The leathery green foliage are reddish when young. The flowers appear blacker in cool weather.
8. Hollyhock ‘Nigra’
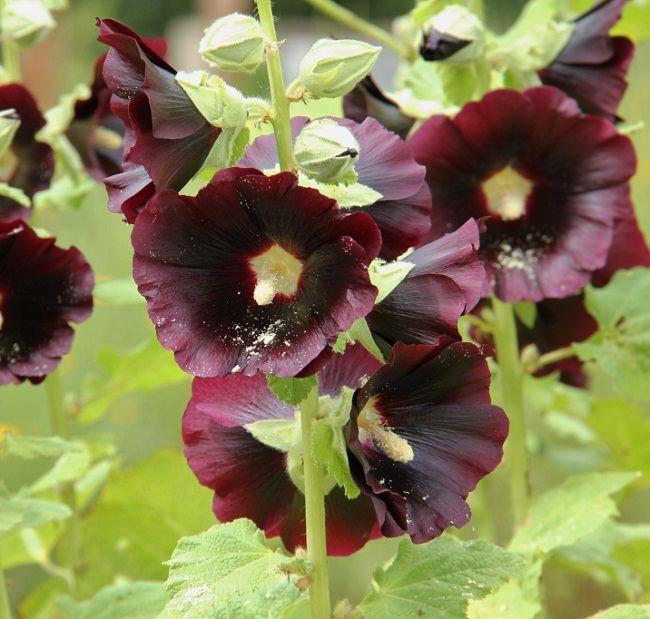
Hollyhocks are beautiful, they look exceptional when flowers appear on their tall strong stems. But, particularly, this unique variety hollyhock, Alcea rosea ‘Nigra’ bears breathtaking chocolate maroon flowers that look almost black towards the center. Hollyhocks are old traditional plants, easy to grow and grow in a variety of climates easily (both in cool and warm climates in USDA Zones 3-10a).
Hollyhocks are old traditional plants, easy to grow and grow in a variety of climates easily (both in cool and warm climates in USDA Zones 3-10a).
9. Wine and Roses (Weigela florida)

This variety of Weigela is sold as ‘Wine and Roses’ or ‘Alexandra’, it offers a surprising combination of flowers in pink tones immersed in a deep burgundy foliage, looks black like. Suitable for cold climates, it likes full sun but tolerates some light shade too, this small shrub can also be grown in containers; easy to grow and bloom profusely in spring or early summer and continue to bloom throughout the summer season.
10. Black Beauty ‘Elderberry’

Another excellent choice within our list of black flowers and plants is Sambucus nigra ‘Gerda’, valued for its purple-black foliage, pink flowers, and juicy edible fruits. Elderberry can be used to add foliage interest in the garden but it looks especially wonderful when its flowers appear in summer. These flowers cover the plant and emit a light lemon like fragrance, then, the dark purple berries appear.
11. Calla Lily ‘Black Star’
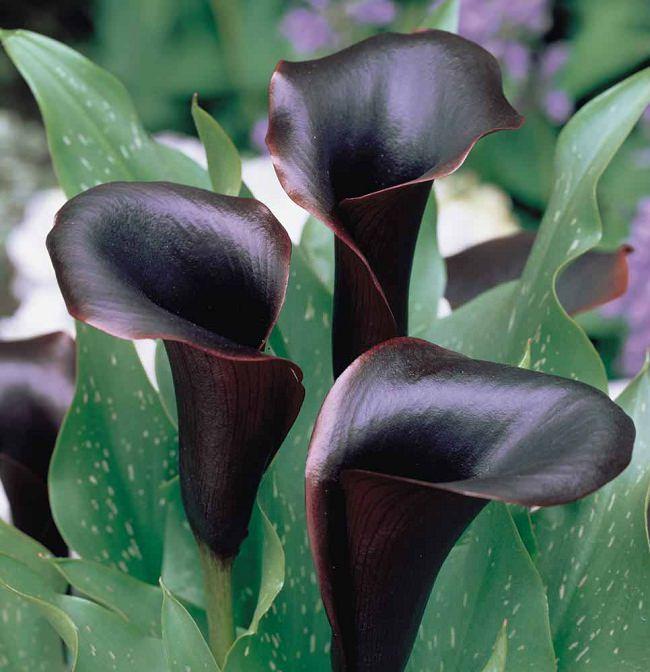
One of the most decorative flowers the ‘Black Star’ bloom is deep purple with a spathe that is almost black, it looks attractive in combination with light green foliage spotted with red tips. It can be planted in containers, in the garden border.
12. Black Mondo Grass

A wonderful alternative for warm climates in rock gardens, borders or in a pot. The ‘black mondo grass’ grows about 12 inches tall and can extend up to 6-12 inches wide. In spring, the new dark green foliage emerges and then in summer it changes into a very deep purple-black. Also by mid-summer tiny bell-shaped white flowers appear, followed by small black seeds.
13. Aeonium Arboreum

This subtropical subshrub is an impressive and dramatic plant. This tall succulent has rosettes of dark reddish brown or burgundy leaves and yellow flowers that appear from summer through fall. The plant is more suitable to warm climates and should be protected in winters in cold climates.
14. Canna- Black Tropicanna
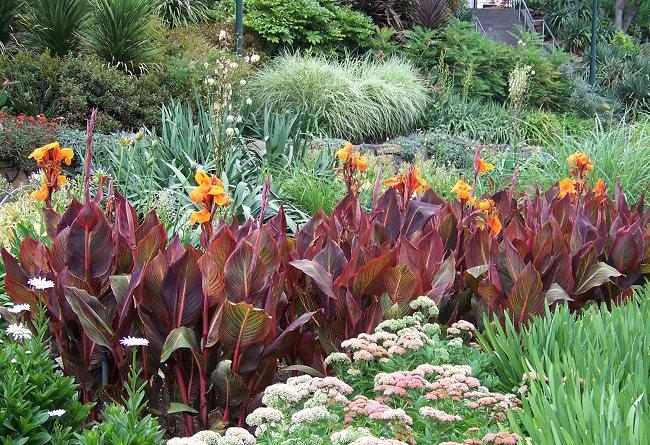
Bring a tropical touch with this plant to your garden. With its bright flowers and dark bronze to chocolate color large foliage, it can bring a great impact to your garden. More suitable for warmer zones, it must be planted in an area that receives at least six hours of daily sun.
15. Dahlia ‘Arabian Night’
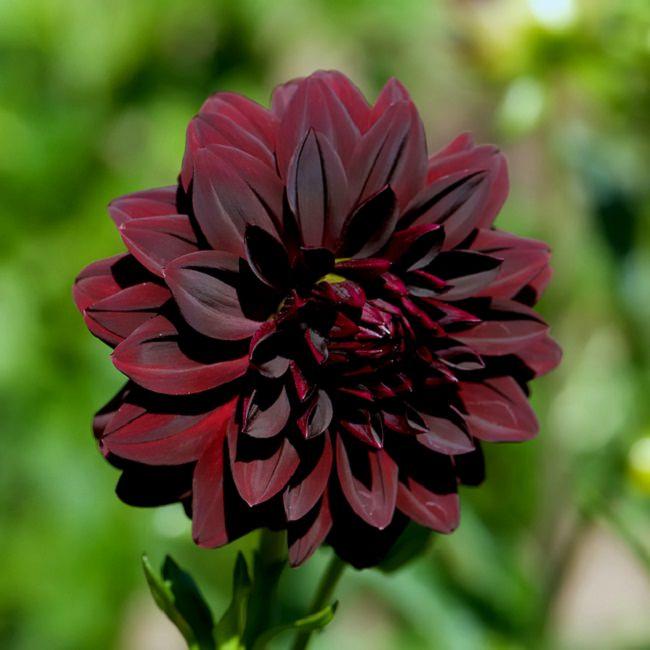
Dahlias become most beautiful cut flowers. This cultivar dahlia ‘Arabian night’ has deep purple-red flowers. The flowers look black like in shade. Growing dahlia requires full sun, however, shade in the afternoon in warm climates is preferable.
16. Colocasia ‘Black Magic’
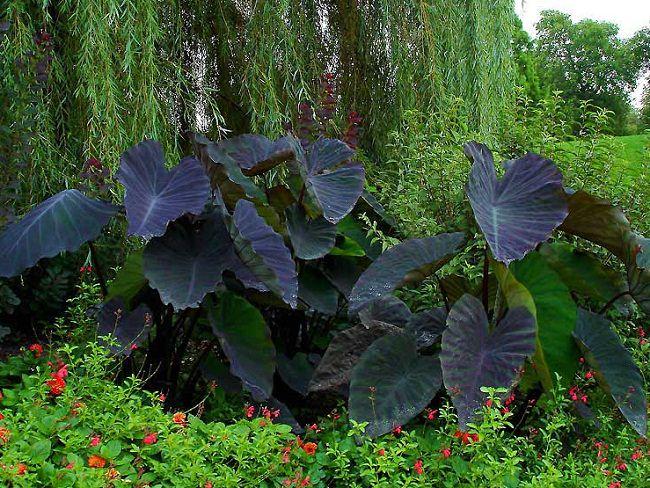
Colocasia ‘black magic’ is an astonishing plant that can be identified from its dramatic large and dark purple-black dusty leaves. This ‘Elephant Ear’ requires warmth and heat to thrive as it is a tropical plant and grows best in warm temperates and subtropical to tropical climates (USDA Zones 8-11). But even living in colder areas, you can enjoy this as an annual. It is a great idea to use it as a focal point by surrounding bright and colorful plants around it.
17. Coleus ‘Black Prince’

The coleus is one of the most widespread species and most popular when it comes to choosing striking foliage plants for the garden. The coleus ‘Black Prince’ can be grown for its unusual solid black foliage and small flowers, either as a perennial in warm subtropical or tropical regions or as an annual in temperates. It is a perfect plant for borders and can be used in combinations with other plants in containers.
Also Read: Heat Tolerant Flowers
18. Silver-Laced Primrose (Primula ‘Victoriana Lace Silver Black’)

Beautiful! This gorgeous flower is one of the rarest and difficult to obtain Primulas. It produces flowers of black-brown color with a scalloped silver edges and a golden center. Blooms are fragrant and appear in spring. This plant can be grown in cool and warm temperate regions (USDA Zones 5-9), it prefers partial shade and moist soil.
19. Heuchera ‘Obsidian’

Also called ‘Obsidian Coral Bells’ it is one of the most beautiful black color plants in our list that you can grow in borders, in flower beds or in containers to add an all season foliage interest to your garden. Its tiny flowers are also attractive, this plant requires cool weather and partial shade to thrive.
20. Bat Flower
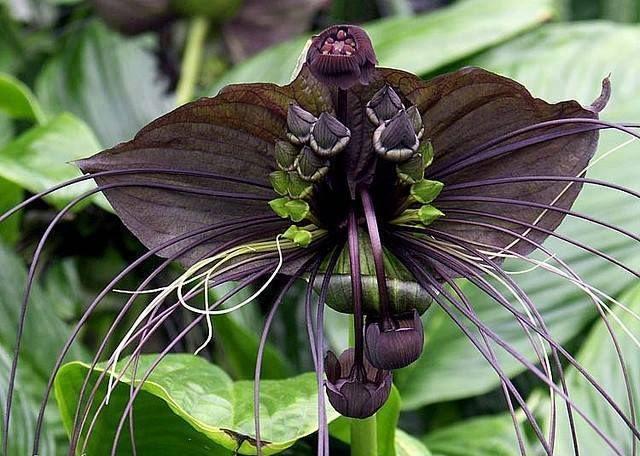
Tacca bat flower (Tacca chantieri) is really a unique, rare and exotic flower that mimics a bat in flight. The plant requires warm subtropical or tropical weather in order to grow outside, in a cold climate you can grow it outside.
First thing first, black plants are not really black, but dark purple, deep burgundy, maroon or red. These type of flowers and plants of black color can transform any garden or container garden in an exquisite way, they add a tropical touch and look exceptional when grown with other bright colored plants.
1. Tulip ‘Queen of Night’

Beautiful and dramatic, this tremendous closest to black flower appears in deep maroon color in spring. This variety can be mixed with white or pink tulips or other bright colored flower to create an astonishing view.
Good thing is that it is a low maintenance plant and usually easy to grow, that makes it a good plant for beginners. This fairly cold hardy plant blooms in mid or late spring under USDA Zones 3 to 8.
2. Petunia, Sophistica Blackberry Hybrid

Newly engendered varieties like ‘Black Velvet Petunia’ or ‘Black Cat Petunia’ look almost black but it may be hard and expensive to find their seeds. However, beautiful petunia, ‘Sophistica blackberry’ is an easier option. The dark flowers of this annual are actually deep reddish or burgundy in color and can be grown in window boxes, pots, beds and borders.
3. Helleborus ‘Onyx Odyssey’

The dark burgundy or nearly black hellebores are highly appreciated for their color. This lovely perennial can easily be grown in containers in part to full sun. Provide good air circulation around the plant and keep the soil well moist. Grows best in USDA zones 5-9 hellebores are early bloomers and flower in spring.
4. Viola ‘Molly Sanderson’

Violas ‘Molly Sanderson’ are another excellent option to enjoy flowers in black color, can be grown in both on the ground or in containers, flowers appear from spring to fall. They are very good around pale yellow primroses or multicolor pansies.
5. Iris ‘Before the Storm’

Irises are widely used in gardens and are available in almost every color imaginable, including chocolate and this new variety ‘Before the Storm’ of black color. This slightly fragrant iris requires a sunny position and well-drained soil in order to grow.
6. Physocarpus Opulifolius ‘Diabolo’ syn. ‘Monlo’

A versatile and appealing shrub with white flowers and deep burgundy foliage that looks black in shade or in dark. It is easy to grow and tolerates a wide range of soil conditions, it grows best in USDA Zones 2-7 and must be planted in an area of partial shade in warmer zones due to the reason that in higher heat the foliage can become green.
7. Black Baccara Rose

This dramatic tea rose due to its bold color and upright habit looks stunning, it is one of the best black flowers. Its almost black color and fragrant blooms make an amazing display in the garden. The leathery green foliage are reddish when young. The flowers appear blacker in cool weather.
8. Hollyhock ‘Nigra’

Hollyhocks are beautiful, they look exceptional when flowers appear on their tall strong stems. But, particularly, this unique variety hollyhock, Alcea rosea ‘Nigra’ bears breathtaking chocolate maroon flowers that look almost black towards the center. Hollyhocks are old traditional plants, easy to grow and grow in a variety of climates easily (both in cool and warm climates in USDA Zones 3-10a).
Hollyhocks are old traditional plants, easy to grow and grow in a variety of climates easily (both in cool and warm climates in USDA Zones 3-10a).
9. Wine and Roses (Weigela florida)

This variety of Weigela is sold as ‘Wine and Roses’ or ‘Alexandra’, it offers a surprising combination of flowers in pink tones immersed in a deep burgundy foliage, looks black like. Suitable for cold climates, it likes full sun but tolerates some light shade too, this small shrub can also be grown in containers; easy to grow and bloom profusely in spring or early summer and continue to bloom throughout the summer season.
10. Black Beauty ‘Elderberry’

Another excellent choice within our list of black flowers and plants is Sambucus nigra ‘Gerda’, valued for its purple-black foliage, pink flowers, and juicy edible fruits. Elderberry can be used to add foliage interest in the garden but it looks especially wonderful when its flowers appear in summer. These flowers cover the plant and emit a light lemon like fragrance, then, the dark purple berries appear.
11. Calla Lily ‘Black Star’

One of the most decorative flowers the ‘Black Star’ bloom is deep purple with a spathe that is almost black, it looks attractive in combination with light green foliage spotted with red tips. It can be planted in containers, in the garden border.
12. Black Mondo Grass

A wonderful alternative for warm climates in rock gardens, borders or in a pot. The ‘black mondo grass’ grows about 12 inches tall and can extend up to 6-12 inches wide. In spring, the new dark green foliage emerges and then in summer it changes into a very deep purple-black. Also by mid-summer tiny bell-shaped white flowers appear, followed by small black seeds.
13. Aeonium Arboreum

This subtropical subshrub is an impressive and dramatic plant. This tall succulent has rosettes of dark reddish brown or burgundy leaves and yellow flowers that appear from summer through fall. The plant is more suitable to warm climates and should be protected in winters in cold climates.
14. Canna- Black Tropicanna

Bring a tropical touch with this plant to your garden. With its bright flowers and dark bronze to chocolate color large foliage, it can bring a great impact to your garden. More suitable for warmer zones, it must be planted in an area that receives at least six hours of daily sun.
15. Dahlia ‘Arabian Night’

Dahlias become most beautiful cut flowers. This cultivar dahlia ‘Arabian night’ has deep purple-red flowers. The flowers look black like in shade. Growing dahlia requires full sun, however, shade in the afternoon in warm climates is preferable.
16. Colocasia ‘Black Magic’

Colocasia ‘black magic’ is an astonishing plant that can be identified from its dramatic large and dark purple-black dusty leaves. This ‘Elephant Ear’ requires warmth and heat to thrive as it is a tropical plant and grows best in warm temperates and subtropical to tropical climates (USDA Zones 8-11). But even living in colder areas, you can enjoy this as an annual. It is a great idea to use it as a focal point by surrounding bright and colorful plants around it.
17. Coleus ‘Black Prince’

The coleus is one of the most widespread species and most popular when it comes to choosing striking foliage plants for the garden. The coleus ‘Black Prince’ can be grown for its unusual solid black foliage and small flowers, either as a perennial in warm subtropical or tropical regions or as an annual in temperates. It is a perfect plant for borders and can be used in combinations with other plants in containers.
Also Read: Heat Tolerant Flowers
18. Silver-Laced Primrose (Primula ‘Victoriana Lace Silver Black’)

Beautiful! This gorgeous flower is one of the rarest and difficult to obtain Primulas. It produces flowers of black-brown color with a scalloped silver edges and a golden center. Blooms are fragrant and appear in spring. This plant can be grown in cool and warm temperate regions (USDA Zones 5-9), it prefers partial shade and moist soil.
19. Heuchera ‘Obsidian’

Also called ‘Obsidian Coral Bells’ it is one of the most beautiful black color plants in our list that you can grow in borders, in flower beds or in containers to add an all season foliage interest to your garden. Its tiny flowers are also attractive, this plant requires cool weather and partial shade to thrive.
20. Bat Flower

Tacca bat flower (Tacca chantieri) is really a unique, rare and exotic flower that mimics a bat in flight. The plant requires warm subtropical or tropical weather in order to grow outside, in a cold climate you can grow it outside.
1
1
文章
粉团
2017年05月23日

This homemade pesticide recipe is CHEMICAL FREE, all natural and easy to prepare. 5 effective ingredients together and your plants will be free of pests.
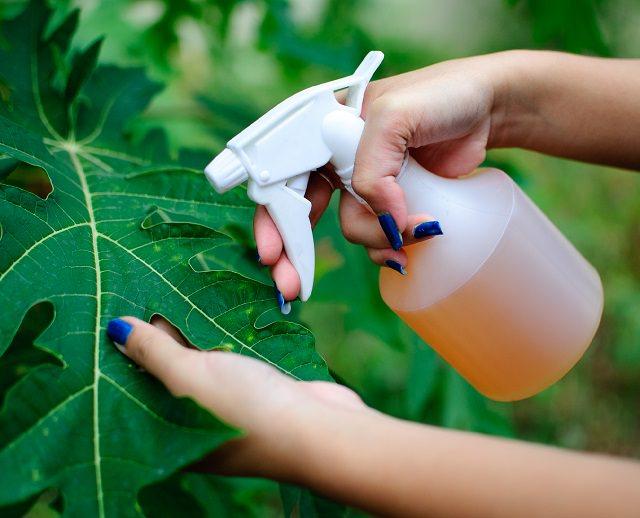
We all know how harmful chemical pesticides are, for the ecosystem and our environment. And after knowing all that if you’ve thought to go organic and looking for some natural ways to get rid of garden pests, you’re on right track.
Commercial pesticides are one of the most effective ways to tackle the problem of pest infestation but if you want to use homemade natural pesticides like this one, use it regularly for better results.
You can apply this amazing pesticide using the sprayer on your vegetable garden and herbs suffering from common pests and really it does work. Once in a week is sufficient, however, if the invasion of insects is way too much to handle you can apply more frequently. Once the plants start to recover, use it in every 2 weeks or so to get rid of pesky pests.
Things You’ll Need2 Whole Garlic Heads (Separate and peel the cloves)2 Tablespoon Turmeric powder2 Tablespoon Cayenne pepper (Or use any other hot pepper variety)2 Small Squirts of Dishwashing Liquid3 Cups of Mint Leaves (Sprigs included)12 Cups of WaterPreparationStep 1
Add garlic and mint to crush it in a food processor for a few seconds. Once done, add the water (in the quantity mentioned above) and pepper to the mixture.
Step 2
Transfer the mixture into a pot or boiler to boil this solution for a few minutes.
Step 3
Once boiled, remove from heat and let this sit overnight. That’s all, your natural pesticide spray is ready.
Step 4
Now strain the solution and add the liquid dish soap into it. Keep the solution into a bottle or sprayer.
Also Read: Plants That Attract Ladybugs In The Garden
How to Use it
Shake well before using it every time. Spray the solution all over the leaves of affected plants, don’t forget the undersides. The best time to use it when the day is cloudy, preferably in the evening or in the early morning.
2
3
文章
Carol
2017年05月23日

If you love to have a tropical garden like setup and you live in a cold climate then grow these cold hardy tropical plants to create a tropical garden in a cold climate.
The best thing about the plants we’ve listed here is that most of them can be grown in containers too.
Cold Hardy Tropical PlantsBamboos
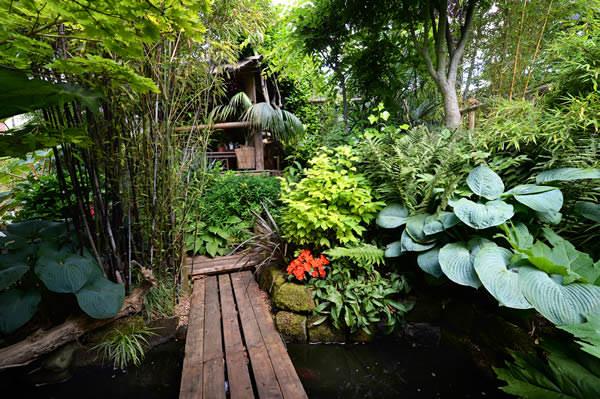
Bamboos grow best in warm tropical climate but there are many cold hardy varieties available that you can try under USDA Zones 5-9. To find out the cultivars check out this post on Gardening Know How.
Colocasia

Colocasia “Pink China” is one of the hardiest varieties. You can grow it in cold climate down to USDA zones 7 and even zone 6 outdoors on the ground. On the onset of winter mulch heavily with organic matter around the roots of the plant and keep the soil little dry to overwinter it.
Hibiscus
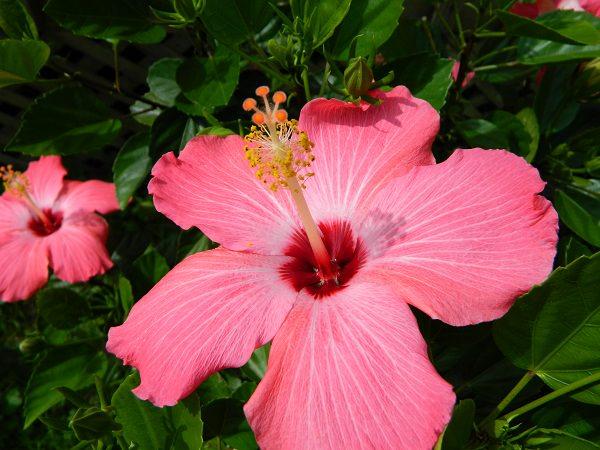
The reason behind the popularity of hibiscus is they are easy to grow and successfully thrive not only in tropics but also in cooler regions. Cold hardy hibiscus hybrids are grown as far north as zone 4. American Meadows has hibiscus varieties for you.
Bird of Paradise
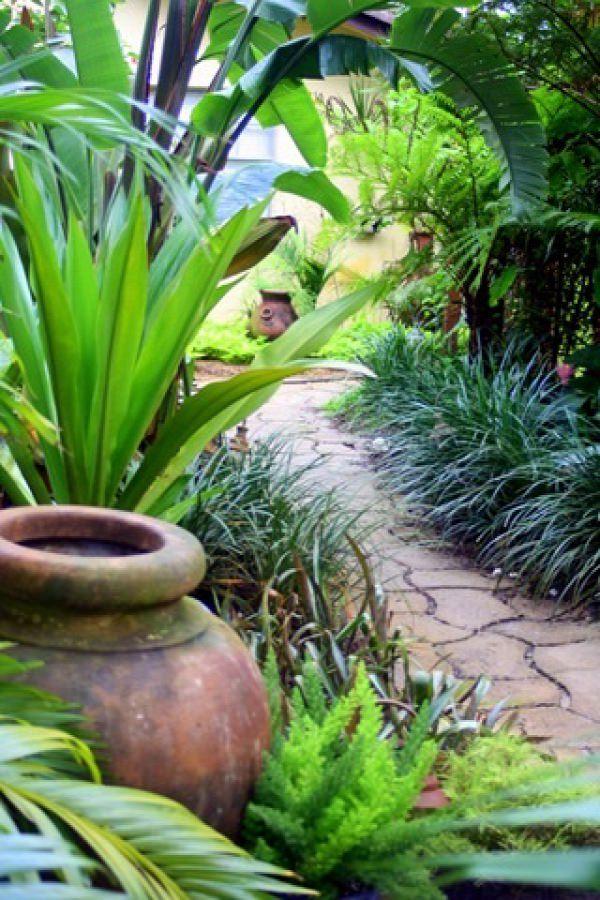
Grow giant bird of paradise (Strelitzia Nicolai) to add drama to your garden. It will give you a real tropical feel. However, bird of paradise grows best in subtropical and tropical climate (USDA Zones 9-11) and you’ll need to grow it in a pot if you live in a temperate region.
Palms

Needle palm, windmill palm, sago palm are grown in cold climates. Here’s a list of hardiest palms to check.
Canna
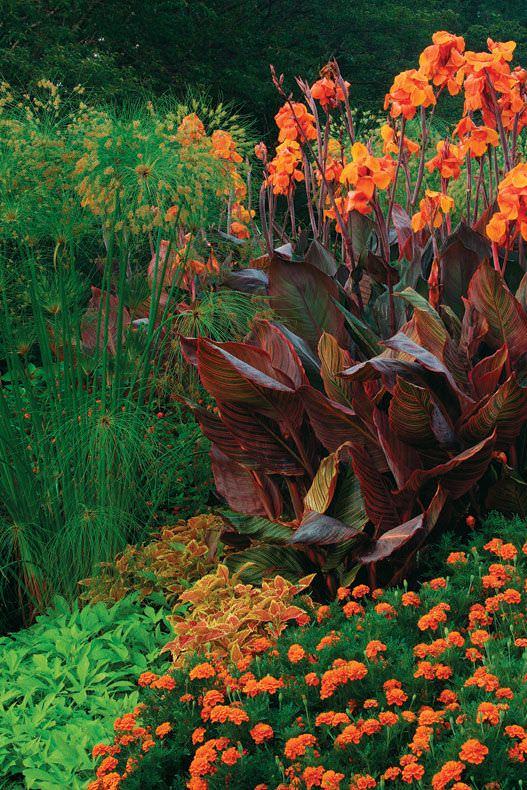
Canna can be grown in pots and on the ground easily. Probably they are one of the easiest tropical plants that you can grow. Growing canna will provide you a great foliage show and gaudy flowers and to get that all you have to do is to mulch heavily around the base in winter. You can try growing canna down to USDA Zone 6.
Hardy Banana (Musa basjoo)
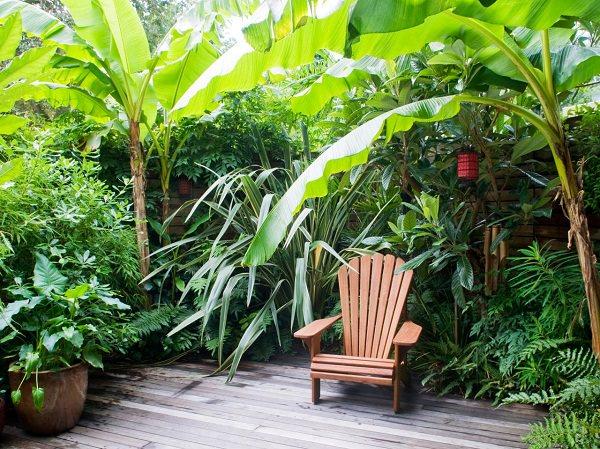
Banana trees add a tropical touch to any garden. You can even grow them in containers. This cold hardy banana cultivar called “Musa basjoo” can be grown in USDA Zones 5-11.
Hostas
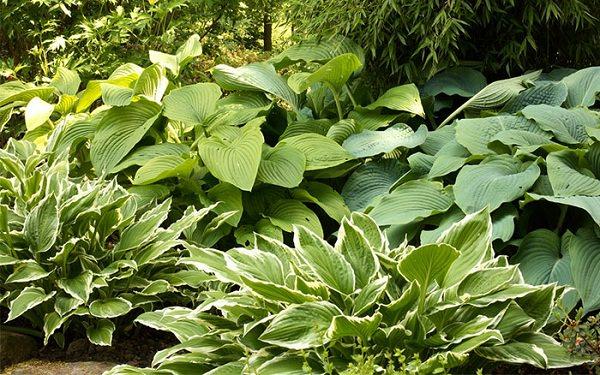
Hostas are great groundcover with the foliage that comes in a variety of shades, they look nice. Grow them in USDA Zones 3-10 in shade or partial shade and provide regular watering.
Ferns
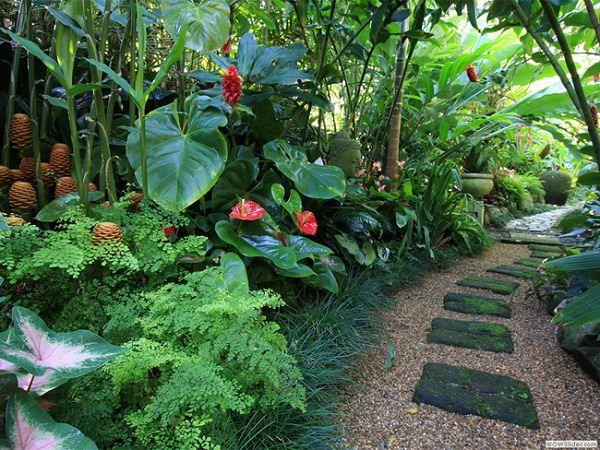
Ferns can be a great addition to your garden to give it a tropical look. Some of the most cold hardy ferns that you can grow are Western maidenhair fern, Lady fern, Christmas fern, Western sword fern, and Common polypody.
Agapanthus
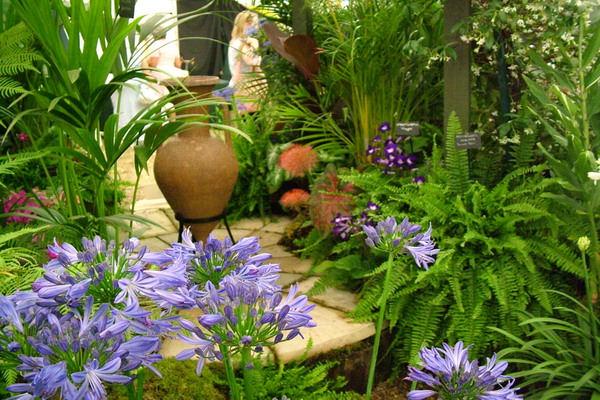
A beautiful and tough herbaceous perennial that grows in tropics and can be grown in temperates too. Introduce agapanthus in your garden to add a touch of blue-violet flowers and lush strap-like foliage. It is suitable for containers and borders.
Bougainvillea
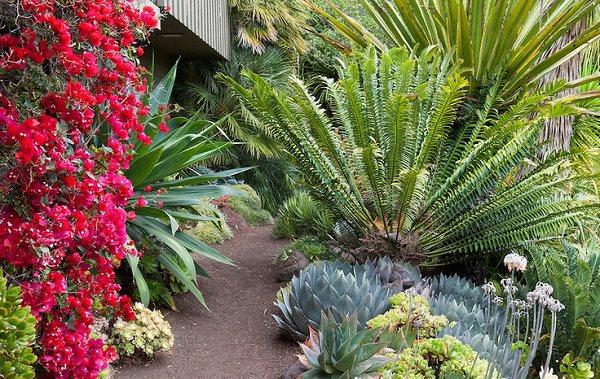
Bougainvillea is a very common plant in tropics. It is a sturdy perennial with lovely paper like flowers. However, bougainvillea is not as cold hardy as agapanthus but you can grow it in containers and move it inside in winters.
Yucca

Beaked Yucca (Yucca Rostrata) is the best cold hardy yucca that you can grow outside in cold climates. It grows well in USDA Zones 5-11. To overwinter it, protection from moisture must be provided in the winters in the cooler zones.
Mandevilla

In tropics, flowering vines grow in abundance. Bougainvillea, passiflora, Mandevilla, jasmine are a few names. Mandevilla is definitely not a cold hardy plant but you can overwinter it indoors by growing it in the container.
Japanese silver grass
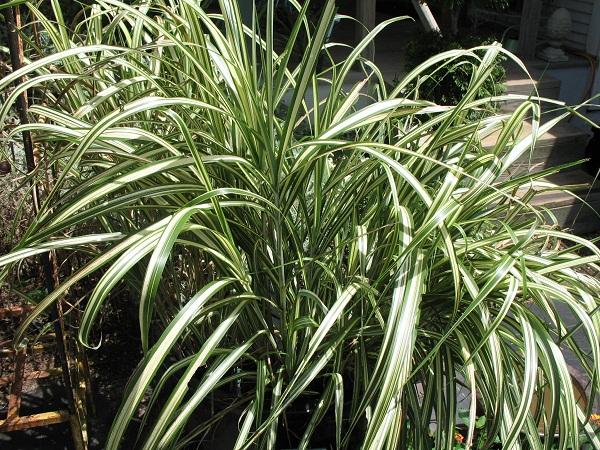
Japanese silver grass grows well in cool temperate regions in USDA zones 5-9. It is a tropical looking plant that can be a wonderful addition to your garden.
The best thing about the plants we’ve listed here is that most of them can be grown in containers too.
Cold Hardy Tropical PlantsBamboos

Bamboos grow best in warm tropical climate but there are many cold hardy varieties available that you can try under USDA Zones 5-9. To find out the cultivars check out this post on Gardening Know How.
Colocasia

Colocasia “Pink China” is one of the hardiest varieties. You can grow it in cold climate down to USDA zones 7 and even zone 6 outdoors on the ground. On the onset of winter mulch heavily with organic matter around the roots of the plant and keep the soil little dry to overwinter it.
Hibiscus

The reason behind the popularity of hibiscus is they are easy to grow and successfully thrive not only in tropics but also in cooler regions. Cold hardy hibiscus hybrids are grown as far north as zone 4. American Meadows has hibiscus varieties for you.
Bird of Paradise

Grow giant bird of paradise (Strelitzia Nicolai) to add drama to your garden. It will give you a real tropical feel. However, bird of paradise grows best in subtropical and tropical climate (USDA Zones 9-11) and you’ll need to grow it in a pot if you live in a temperate region.
Palms

Needle palm, windmill palm, sago palm are grown in cold climates. Here’s a list of hardiest palms to check.
Canna

Canna can be grown in pots and on the ground easily. Probably they are one of the easiest tropical plants that you can grow. Growing canna will provide you a great foliage show and gaudy flowers and to get that all you have to do is to mulch heavily around the base in winter. You can try growing canna down to USDA Zone 6.
Hardy Banana (Musa basjoo)

Banana trees add a tropical touch to any garden. You can even grow them in containers. This cold hardy banana cultivar called “Musa basjoo” can be grown in USDA Zones 5-11.
Hostas

Hostas are great groundcover with the foliage that comes in a variety of shades, they look nice. Grow them in USDA Zones 3-10 in shade or partial shade and provide regular watering.
Ferns

Ferns can be a great addition to your garden to give it a tropical look. Some of the most cold hardy ferns that you can grow are Western maidenhair fern, Lady fern, Christmas fern, Western sword fern, and Common polypody.
Agapanthus

A beautiful and tough herbaceous perennial that grows in tropics and can be grown in temperates too. Introduce agapanthus in your garden to add a touch of blue-violet flowers and lush strap-like foliage. It is suitable for containers and borders.
Bougainvillea

Bougainvillea is a very common plant in tropics. It is a sturdy perennial with lovely paper like flowers. However, bougainvillea is not as cold hardy as agapanthus but you can grow it in containers and move it inside in winters.
Yucca

Beaked Yucca (Yucca Rostrata) is the best cold hardy yucca that you can grow outside in cold climates. It grows well in USDA Zones 5-11. To overwinter it, protection from moisture must be provided in the winters in the cooler zones.
Mandevilla

In tropics, flowering vines grow in abundance. Bougainvillea, passiflora, Mandevilla, jasmine are a few names. Mandevilla is definitely not a cold hardy plant but you can overwinter it indoors by growing it in the container.
Japanese silver grass

Japanese silver grass grows well in cool temperate regions in USDA zones 5-9. It is a tropical looking plant that can be a wonderful addition to your garden.
0
0
文章
Carol
2017年05月23日

Learn about the Feng Shui plants and how to make a Feng Shui garden in this informative article. You can also make changes in your existing garden according to the feng shui.
Start with the parts of your garden you would like to change, grow the Feng Shui plants there and apply the principles given below and see how it works.
What is Feng Shui
Feng Shui is an art of reaching harmony in life, a practice that comes from the China. It is believed that if a place (home, garden, office or anywhere) is arranged according to the Feng Shui guidelines it remains, prosperous, peaceful and harmonious.
Principles of a Feng Shui Garden
A Feng Shui garden is a garden that is arranged in 9 areas or zones. Each represents a universe, a realm of life through forms, objects and colors. The Feng Shui garden must respect nature and be in harmony with it.
The 5 Elements

In Feng Shui, there are five basic elements– Fire, Water, Metal, Earth and Wood. They maintain harmony in the world around us and influence our lives. Therefore, in the feng shui garden design, these five elements must have to be in order in their zones.
Divison
According to the Feng Shui practice, the garden (or a home) must be divided into the nine energy zones. Draw a free-flowing square similar to the shape of your garden and divide that square into 9 equal parts.
The map will begin from your garden gate, consider the direction of your gate as North and align the feng shui map (bagua) according to it. The central area or zone will be called Tai Chi (the source of energy and life). The other eight areas or zones will surround this.
Dividing Garden into Nine Feng Shui Zones

Each zone represents an area of life and you must give space to the appropriate elements there.
North
The North is the zone that represents the fame, career and the flow and mystery of life. It symbolizes the winter season. It must have to be in the front of the entrance. Its dominant element is water and its color is blue, violet, black, and other dark colors. The shape is sinuous and items to integrate here are a water feature or pond, rocks, water plants, dark foliage plants and blue flowers.
North East
The Northeast represents wisdom and knowledge. The dominating element here is the earth and its colors are yellow, orange and cream. The shape is square. Garden benches, pots, and statues can be placed here. As the Northeast direction represents the wisdom, it is the place for meditation and yoga.
North West
Northwest part symbolizes support, friendship, guidance and represents the fall season. The dominant element here is metal and the colors to be there mainly are white, gray, golden brown, and silver. Plants like jasmine, gardenia or magnolia can be planted here. Rocks, gravels, and metallic objects are best suited here.
South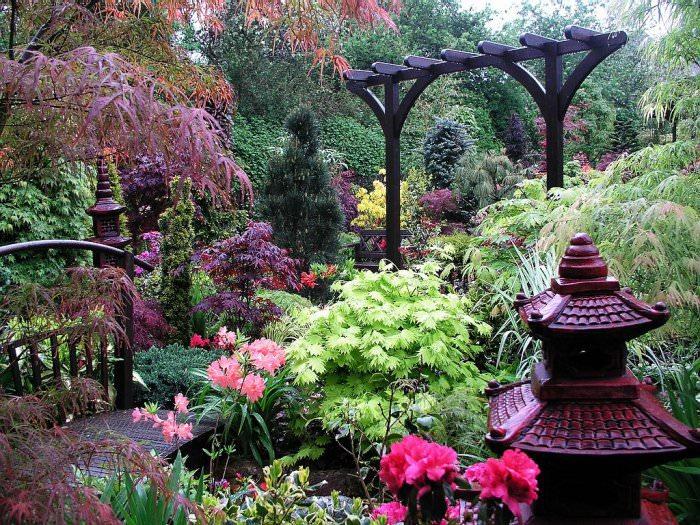
The South is the direction of success and fame and represents the summer. The dominant element here is fire and the main colors here are red, orange, purple and pink. Plants that have red or other similar colors like orange, pink, crimson, purple must be grown there. The shape of the South zone is the triangle.
South East
South East symbolizes the wealth and represents the season spring. Its dominant element is wood and its color is green and brown. You can grow here the plants that are related to this color.
South West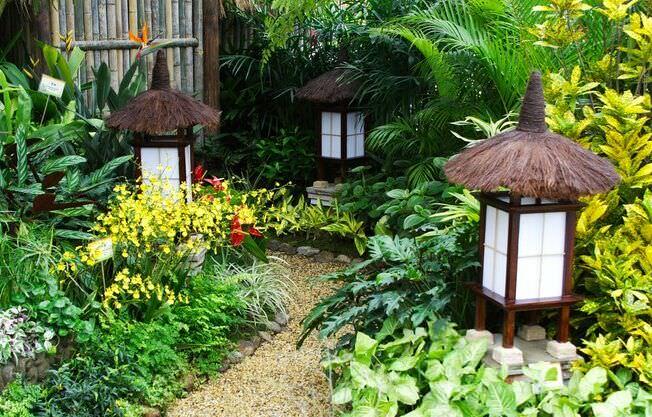
The South West is the zone that symbolizes love, pureness, and attraction between a couple. The dominant element here is Earth and the colors are to be yellow, orange, pink and other. The shape of the Southwest area is square and in this area you have to keep your garden furniture and objects in pairs to symbolize the parity.
East
This zone represents health and the season spring. Its dominant element is wood whose color is green (symbol of harmony and balance). Its shape is the rectangle. This is the area where you can grow medicinal plants, herbs, foliage plants and large trees like palms, plums, and bamboos.
West
This is the family area. Its main element is metal and its color is white (that symbolizes purity, freshness, and harmony). You can also use the gray and silver color here. The shape of the West Zone is the circle. Put some pots, chimes, rocks and wrought iron furniture. Plant shrubs here. Grow flowers of different colors together with whiter ones. Magnolia, jasmine, and lily of the valley are perfect for this area.
Central zone
Keep the central zone open and less cluttered as it is the most prominent point. This is the Tai Chi area. The key element here is earth and its color is yellow. This area represents the unity, harmony and balance. It connects all areas of the Feng Shui garden. This should be kept clean and maintained regularly.
Feng Shui Garden Design

A Feng Shui garden should not be overloaded, otherwise, Chi (energy of life) will circulate poorly. Keep the design simple.
To maintain the flow of energy, you must promote movement in the garden. Make curved paths and edgings. Invite butterflies, bees, and birds. Put feeders, grow fruit trees and flowers to attract them.
Furthermore, statues and sculptures also attract positive energy. Their size must be proportional to the garden. The large pots and urns are the holders of luck and abundance. So prefer the larger ones.
Water is an essential element in the Feng Shui garden. It is a symbol of prosperity. It takes place in the form of stream, waterfall or pond and it must be there in the appropriate zone.
The garden must be open, full of brightness and natural light. Walkways and entrances must not be blocked by any object or a tree. To bring nature, large rocks and gravels must be used.
Feng Shui Garden Plants According to Elements

The Feng Shui garden is full of positive energy and provides the perfect harmony of all the five elements. The plants you grow in your garden must be according to these elements. We offer you some examples of the plants that best represent the five elements.
A Few Popular Feng Shui PlantsBambooPeonyMaple TreePlumOrchidChrysanthemumIrisLilyLotusDaffodilMagnoliaJasmineGardeniaPine TreeCitrusGrassesElement 1. FireFeng Shui garden: Plants that represent the Fire
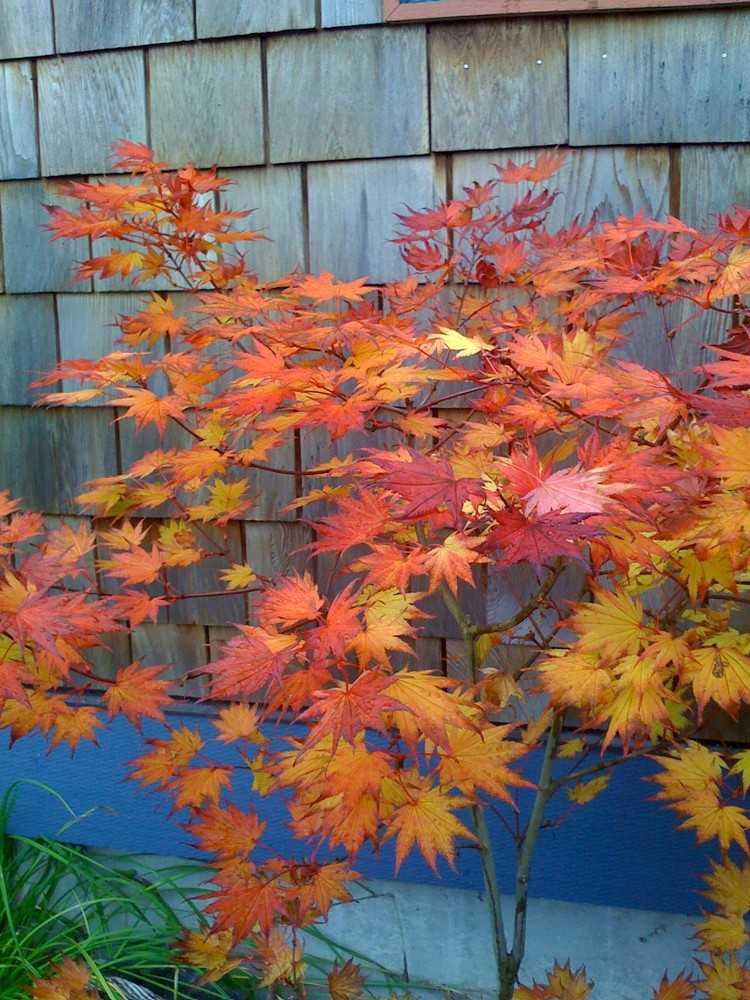
In general, plants with red bark and foliage or those with triangular or conical leaves represent the element fire. One of the most popular and the most beautiful examples of this is Japanese Maple tree (Acer palmatum).
Japanese red cedar (Cryptomeria Japonica), red camellia, boxwood shrub, holly, peonies, geraniums are other preferred Feng Shui plants that represent the fire.
Japanese Maple
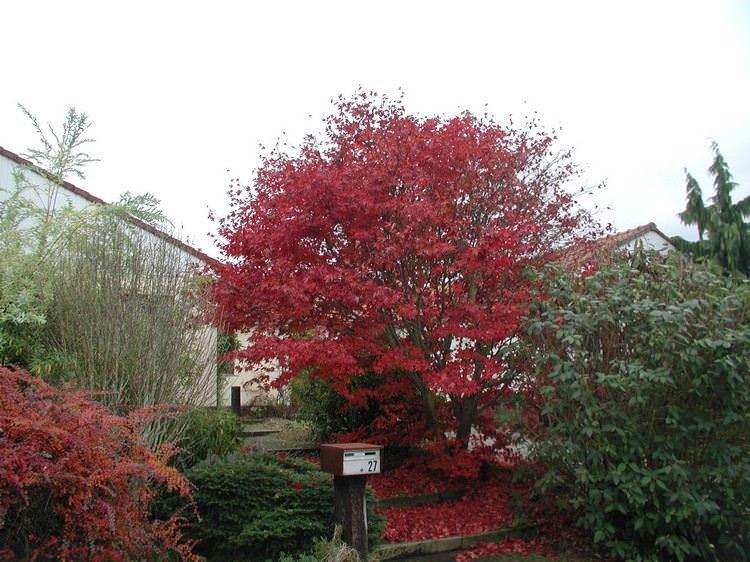
Red camellia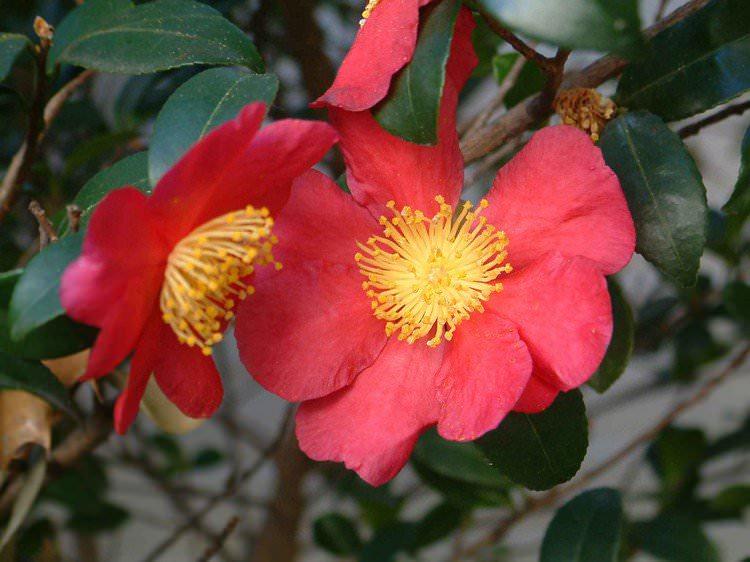
Element 2. WaterPlants that represent water element

The color of the water element is blue, violet, black. Plants of these colors represent the water element. Here are some examples: Snake’s beard, Heuchera, taro (Colocasia esculenta), sweet potato vine, iris, lily, and lotus.
Heuchera Micrantha

Sweet Potato Vine

Element 3. MetalPlants that represent the metal
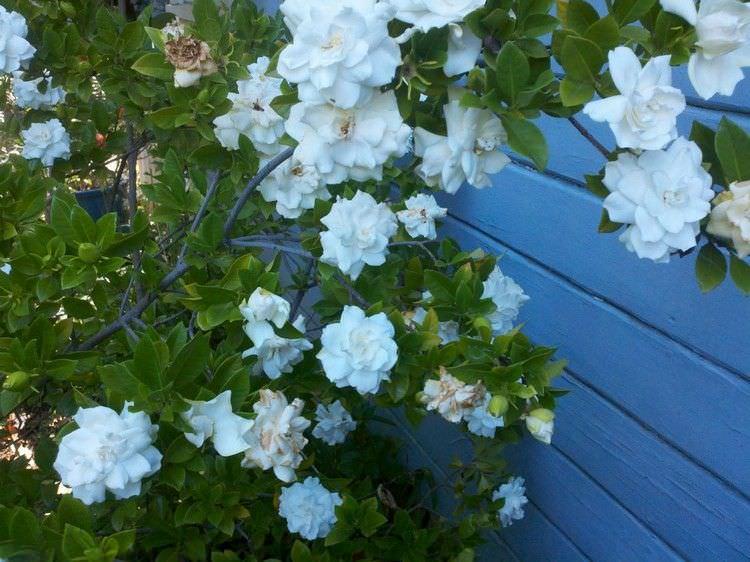
Plants that represent the metal in the Feng Shui garden are mainly those with the round or oval leaves and white flowers or of light golden brown colors. Plants like white hydrangeas, rhododendron, many species of hostas, gardenias, white mums, jasmine and dogwood tree represent the metal.
Hosta

Dogwood Tree

Hydrangea

Element 4. EarthPlants that represent the Earth
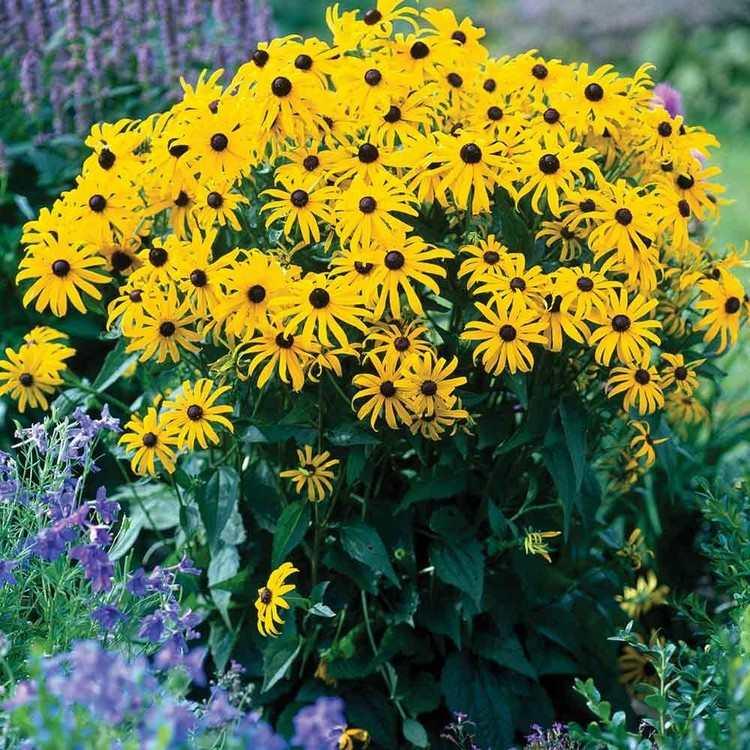
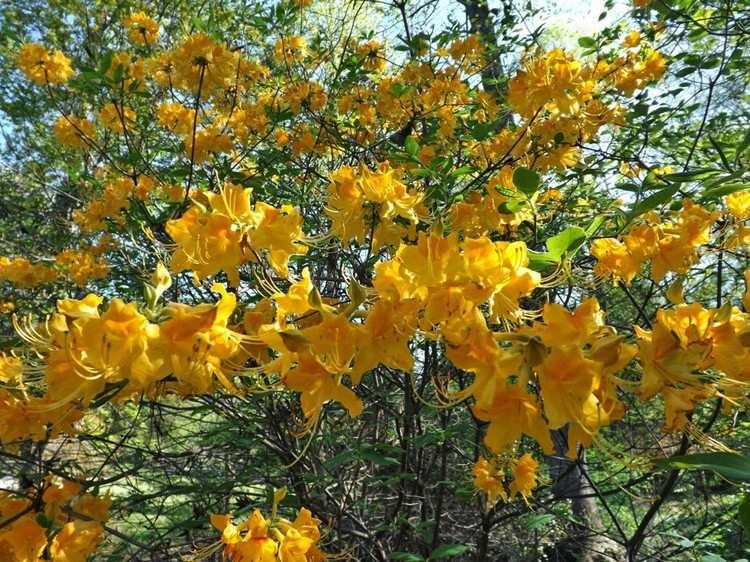
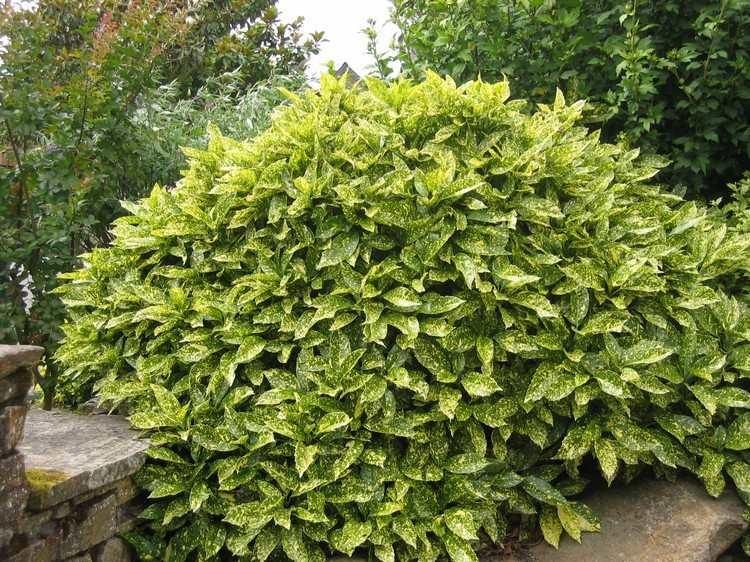
Plants with yellow flowers with similar colors or of earthy tones, those with square shaped foliage represent the Earth element in Feng Shui garden. A few of these plants that represent earth elements are Rudbeckia fulgida ‘Goldsturm’, Japanese laurel (Aucuba japonica), rhododendron, river birch (Betula nigra), Ginkgo biloba tree and grasses such as miscanthus.
Rhododendron ‘Admiral Semmes’
Miscanthus

Betula nigra

Aucuba japonica
Element 5. WoodPlants that represent wood in the garden
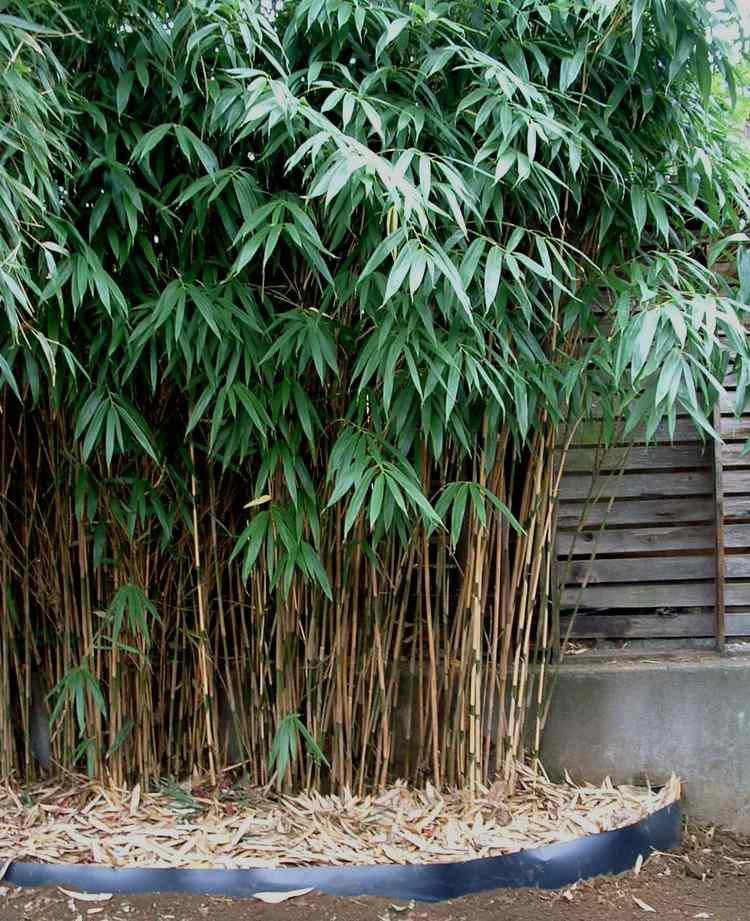
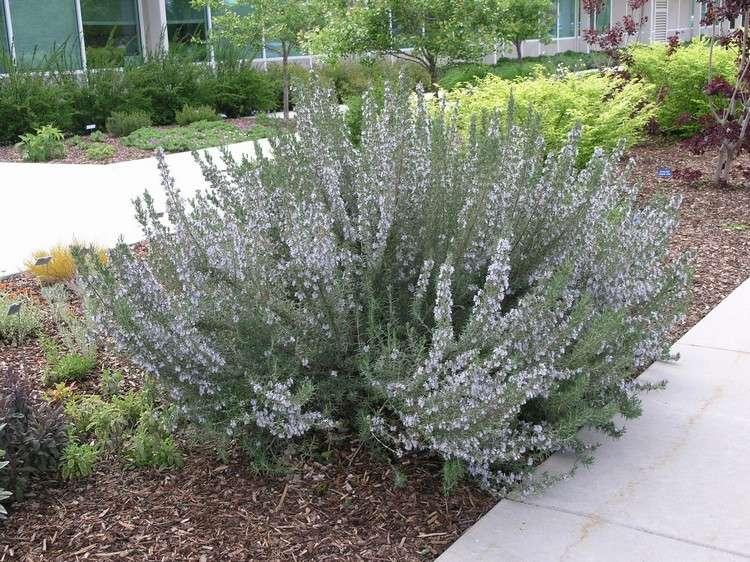
Plants with long thin stems and lush greenery such as Japanese bamboo (Pseudosasa Japonica), best represents the wood element in the Feng-shui garden. Palms, pine tree and other conifers, medicinal herbs and common lungwort (Pulmonaria Officinalis) are the plants well suited to represent the wood element in the garden.
Rosemary
Start with the parts of your garden you would like to change, grow the Feng Shui plants there and apply the principles given below and see how it works.
What is Feng Shui
Feng Shui is an art of reaching harmony in life, a practice that comes from the China. It is believed that if a place (home, garden, office or anywhere) is arranged according to the Feng Shui guidelines it remains, prosperous, peaceful and harmonious.

Principles of a Feng Shui Garden
A Feng Shui garden is a garden that is arranged in 9 areas or zones. Each represents a universe, a realm of life through forms, objects and colors. The Feng Shui garden must respect nature and be in harmony with it.
The 5 Elements

In Feng Shui, there are five basic elements– Fire, Water, Metal, Earth and Wood. They maintain harmony in the world around us and influence our lives. Therefore, in the feng shui garden design, these five elements must have to be in order in their zones.
Divison
According to the Feng Shui practice, the garden (or a home) must be divided into the nine energy zones. Draw a free-flowing square similar to the shape of your garden and divide that square into 9 equal parts.
The map will begin from your garden gate, consider the direction of your gate as North and align the feng shui map (bagua) according to it. The central area or zone will be called Tai Chi (the source of energy and life). The other eight areas or zones will surround this.
Dividing Garden into Nine Feng Shui Zones

Each zone represents an area of life and you must give space to the appropriate elements there.
North
The North is the zone that represents the fame, career and the flow and mystery of life. It symbolizes the winter season. It must have to be in the front of the entrance. Its dominant element is water and its color is blue, violet, black, and other dark colors. The shape is sinuous and items to integrate here are a water feature or pond, rocks, water plants, dark foliage plants and blue flowers.
North East
The Northeast represents wisdom and knowledge. The dominating element here is the earth and its colors are yellow, orange and cream. The shape is square. Garden benches, pots, and statues can be placed here. As the Northeast direction represents the wisdom, it is the place for meditation and yoga.
North West
Northwest part symbolizes support, friendship, guidance and represents the fall season. The dominant element here is metal and the colors to be there mainly are white, gray, golden brown, and silver. Plants like jasmine, gardenia or magnolia can be planted here. Rocks, gravels, and metallic objects are best suited here.
South

The South is the direction of success and fame and represents the summer. The dominant element here is fire and the main colors here are red, orange, purple and pink. Plants that have red or other similar colors like orange, pink, crimson, purple must be grown there. The shape of the South zone is the triangle.
South East
South East symbolizes the wealth and represents the season spring. Its dominant element is wood and its color is green and brown. You can grow here the plants that are related to this color.
South West

The South West is the zone that symbolizes love, pureness, and attraction between a couple. The dominant element here is Earth and the colors are to be yellow, orange, pink and other. The shape of the Southwest area is square and in this area you have to keep your garden furniture and objects in pairs to symbolize the parity.
East
This zone represents health and the season spring. Its dominant element is wood whose color is green (symbol of harmony and balance). Its shape is the rectangle. This is the area where you can grow medicinal plants, herbs, foliage plants and large trees like palms, plums, and bamboos.
West
This is the family area. Its main element is metal and its color is white (that symbolizes purity, freshness, and harmony). You can also use the gray and silver color here. The shape of the West Zone is the circle. Put some pots, chimes, rocks and wrought iron furniture. Plant shrubs here. Grow flowers of different colors together with whiter ones. Magnolia, jasmine, and lily of the valley are perfect for this area.
Central zone
Keep the central zone open and less cluttered as it is the most prominent point. This is the Tai Chi area. The key element here is earth and its color is yellow. This area represents the unity, harmony and balance. It connects all areas of the Feng Shui garden. This should be kept clean and maintained regularly.
Feng Shui Garden Design

A Feng Shui garden should not be overloaded, otherwise, Chi (energy of life) will circulate poorly. Keep the design simple.
To maintain the flow of energy, you must promote movement in the garden. Make curved paths and edgings. Invite butterflies, bees, and birds. Put feeders, grow fruit trees and flowers to attract them.
Furthermore, statues and sculptures also attract positive energy. Their size must be proportional to the garden. The large pots and urns are the holders of luck and abundance. So prefer the larger ones.
Water is an essential element in the Feng Shui garden. It is a symbol of prosperity. It takes place in the form of stream, waterfall or pond and it must be there in the appropriate zone.
The garden must be open, full of brightness and natural light. Walkways and entrances must not be blocked by any object or a tree. To bring nature, large rocks and gravels must be used.
Feng Shui Garden Plants According to Elements

The Feng Shui garden is full of positive energy and provides the perfect harmony of all the five elements. The plants you grow in your garden must be according to these elements. We offer you some examples of the plants that best represent the five elements.
A Few Popular Feng Shui PlantsBambooPeonyMaple TreePlumOrchidChrysanthemumIrisLilyLotusDaffodilMagnoliaJasmineGardeniaPine TreeCitrusGrassesElement 1. FireFeng Shui garden: Plants that represent the Fire

In general, plants with red bark and foliage or those with triangular or conical leaves represent the element fire. One of the most popular and the most beautiful examples of this is Japanese Maple tree (Acer palmatum).
Japanese red cedar (Cryptomeria Japonica), red camellia, boxwood shrub, holly, peonies, geraniums are other preferred Feng Shui plants that represent the fire.
Japanese Maple

Red camellia

Element 2. WaterPlants that represent water element

The color of the water element is blue, violet, black. Plants of these colors represent the water element. Here are some examples: Snake’s beard, Heuchera, taro (Colocasia esculenta), sweet potato vine, iris, lily, and lotus.
Heuchera Micrantha

Sweet Potato Vine

Element 3. MetalPlants that represent the metal

Plants that represent the metal in the Feng Shui garden are mainly those with the round or oval leaves and white flowers or of light golden brown colors. Plants like white hydrangeas, rhododendron, many species of hostas, gardenias, white mums, jasmine and dogwood tree represent the metal.
Hosta

Dogwood Tree

Hydrangea

Element 4. EarthPlants that represent the Earth

Plants with yellow flowers with similar colors or of earthy tones, those with square shaped foliage represent the Earth element in Feng Shui garden. A few of these plants that represent earth elements are Rudbeckia fulgida ‘Goldsturm’, Japanese laurel (Aucuba japonica), rhododendron, river birch (Betula nigra), Ginkgo biloba tree and grasses such as miscanthus.
Rhododendron ‘Admiral Semmes’

Miscanthus

Betula nigra

Aucuba japonica

Element 5. WoodPlants that represent wood in the garden

Plants with long thin stems and lush greenery such as Japanese bamboo (Pseudosasa Japonica), best represents the wood element in the Feng-shui garden. Palms, pine tree and other conifers, medicinal herbs and common lungwort (Pulmonaria Officinalis) are the plants well suited to represent the wood element in the garden.
Rosemary

0
0
文章
Hande Salcan
2017年05月23日


When the end of the season nears, serious gardeners should think about saving seeds from their own plants, to prepare for next season’s seed starting. Why save your own seed?
Saving your own seed is a budget friendly way to replant next year, after all, you pay for the seed or plant once, and you can keep saving the seed year after year!
Saving seed protects biodiversity. In other words, we save seed and protect those varieties from being lost to the generations of hybridizing. So many plants our great grandparents grew simply no longer exist… and that’s as tragic a loss as extinct animals.
It allows you to grow plants that do well in your garden, and over time, those seeds adapt to your growing conditions. Basically, you are growing “The Johnsons special corn seed”, and it would be true! After a few years, your seed has adapted to grow better in your garden then anywhere else on earth…and that is an amazing thing.
You are guaranteed not to have seed that’s been treated in any way. After all, you are your own seed company!
You can trade seed with friends, or participate in a seed lending program like some libraries are now sponsoring. Find out more about seed lending from the Washington state seed lending “library”. Many cities have these now. Imagine the possibilities. Search for one in your area.
It’s fun and educational. And it just makes you feel self-sufficient, doesn’t it?
Do remember, hybridized plants seeds’ will revert back to their parent plant. Look for open pollinated plants to grow true from seed. You can find more information on that at Organic Gardening. (Also a good beginners guide!)
Let’s start with the basics. The Farmer’s Almanac has a tutorial on beginning seed saving for vegetables. Start here, and get a feel for how easy it really is!
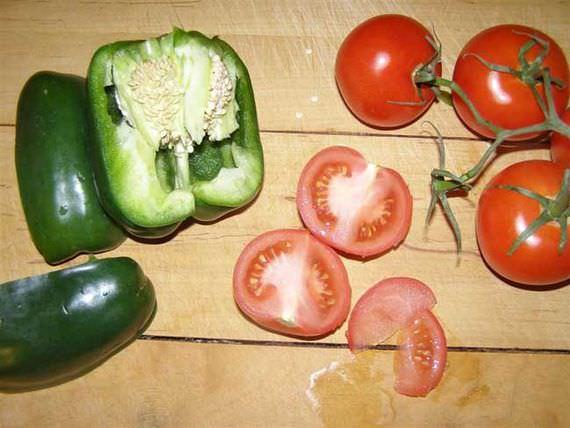
Now that you have the basics down, ‘Grow Real Food’ has a chart of seed saving tips that is really helpful, and gives you specific information plant by plant. This would be great to print out and include in your gardening journal!
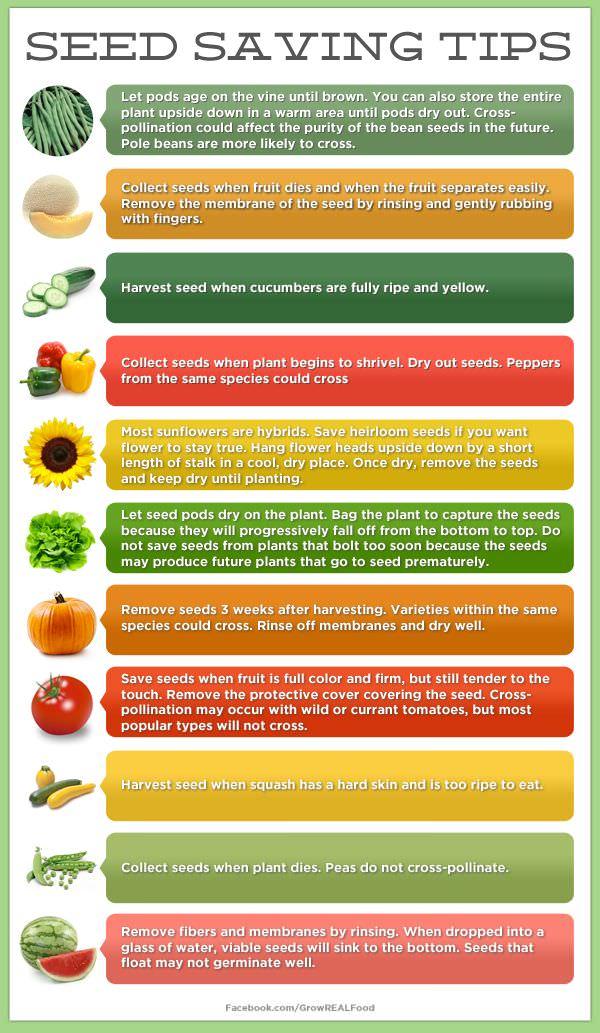
‘Tipnut’ has a good tutorial on saving tomato seeds, and includes a tip on getting heirloom varieties from a farmers market… That way, you know how they look and taste, and also that they grow well in your area. Then you can harvest seed directly from your farmers market tomato!
‘Weekend Gardener’ has a primer on saving flower seeds from annuals, for those of you who just can’t let those petunias go!

Now that you have your seeds, you need a way to store them! ‘Erin Vale Designs’ shows us how to make these DIY seed packets from scrapbook paper. I love this because you could choose any color or design to match your personality. These also would make lovely place cards for a garden party! Be sure to scroll to the bottom and click on the download buttons to find the designs for the packet.

If you just want to print out packets, ‘The Prudent Homemaker’ has this free pdf for printing these really nice seed packets… Great for gift giving, and gives space to write information on the variety, date, etc…

Don’t like the idea of packets? Found this idea on Cottage in the Oaks. Paint the tops of old spice jars with chalkboard paint! That way, each year they can be reused for different seeds!

1
2
文章
Hande Salcan
2017年05月23日

If you are a gardener, chances are you have thought about starting a compost bin. Not only is it great for the planet, but it can help you create “garden gold” and transform your soil into a healthier home for all your plants! Although there are compost bins you can purchase, they tend to be expensive, hard to transport and sometimes downright inefficient. If you don’t know how composting works, take a couple minutes and visit our quick primer on composting techniques, then jump on back here and pick one of these 12 creative DIY compost bins, and get started! Feature photo below, is from ‘A-Z West‘.
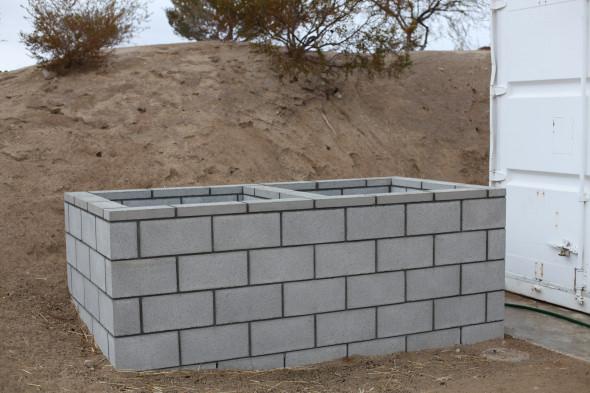
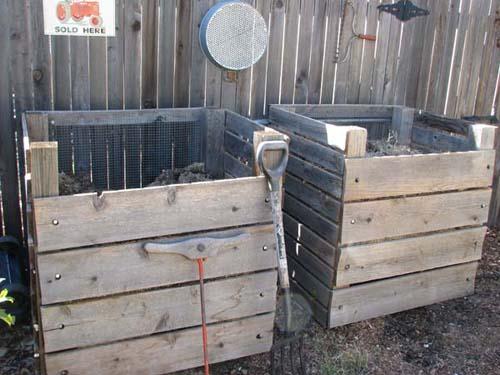
Our first tutorial from ‘Practically Functional’ is a DIY compost bin that has the details… A latching lid, sturdy construction, access to soil at the bottom, and my fav… You can easily open the lid with one hand to dump in the kitchen scraps! Lot’s of step by step directions, photos and drawings.

For those of you who want to use the three bin system and get really serious, this DIY compost bin from ‘Apartment Therapy’ even looks good… Links on how to get the plans for this project are included in their post.

So we love the compact, easy nature of this DIY garbage can compost bin by ‘Full Measure of Happiness’, but unfortunately, that site has gone to the big bloggers resting place in the sky… No worries, keep reading!

Fortunately for all of us, Toni at ‘The Happy Housewife’ has a full tutorial on making a DIY compost bin from a garbage can! Love the pics of her boys “rotating” the bin!

So, maybe you don’t have adorable little boys (or girls!) to push your compost bin around the yard? (Or maybe you do, but they no longer think it’s a cool play-toy. ): ) Using the same idea, this garbage can composter from ‘Instructables’ is on a stand that you rotate the compost bin on. Pretty clever!

If you want to recycle while creating your bin, make this DIY compost bin from pallets from ‘DIY Ready’. Did we mention cheap?

Don’t want to go through a bunch of construction? Make your own compost bin from wire hardware cloth or chicken wire with this tutorial by ‘Mother Earth Living’.

Keep recycling and protecting the earth by making this shower door compost bin from ‘Organic Gardening Magazine’. The shower door acts like a bit of a greenhouse and heats up the compost, making it decompose faster. You can pick one up at a Habitat for Humanity Restore or a similar store near you.

This low cost compost bin from ‘Instructables’ allows you to remove any side, and the whole thing is easily movable as well. Made from inexpensive fence pickets, this is an easy garden project.

From ‘Blue Planet, Green Living’, this DIY compost bin is different in that it’s made using concrete blocks. This makes it easy to make the bin larger or smaller, depending on the needs of that season, keep out critters, or even remove blocks to allow for more ventilation.

Lastly, these compost bins from ‘Birds and Blooms’ are made of cedar, and allow the boards at the bottom to slide out. This lets you remove finished compost from the bottom of the pile, while continuing to add to the top of the pile.

Our first tutorial from ‘Practically Functional’ is a DIY compost bin that has the details… A latching lid, sturdy construction, access to soil at the bottom, and my fav… You can easily open the lid with one hand to dump in the kitchen scraps! Lot’s of step by step directions, photos and drawings.

For those of you who want to use the three bin system and get really serious, this DIY compost bin from ‘Apartment Therapy’ even looks good… Links on how to get the plans for this project are included in their post.

So we love the compact, easy nature of this DIY garbage can compost bin by ‘Full Measure of Happiness’, but unfortunately, that site has gone to the big bloggers resting place in the sky… No worries, keep reading!

Fortunately for all of us, Toni at ‘The Happy Housewife’ has a full tutorial on making a DIY compost bin from a garbage can! Love the pics of her boys “rotating” the bin!

So, maybe you don’t have adorable little boys (or girls!) to push your compost bin around the yard? (Or maybe you do, but they no longer think it’s a cool play-toy. ): ) Using the same idea, this garbage can composter from ‘Instructables’ is on a stand that you rotate the compost bin on. Pretty clever!

If you want to recycle while creating your bin, make this DIY compost bin from pallets from ‘DIY Ready’. Did we mention cheap?

Don’t want to go through a bunch of construction? Make your own compost bin from wire hardware cloth or chicken wire with this tutorial by ‘Mother Earth Living’.

Keep recycling and protecting the earth by making this shower door compost bin from ‘Organic Gardening Magazine’. The shower door acts like a bit of a greenhouse and heats up the compost, making it decompose faster. You can pick one up at a Habitat for Humanity Restore or a similar store near you.

This low cost compost bin from ‘Instructables’ allows you to remove any side, and the whole thing is easily movable as well. Made from inexpensive fence pickets, this is an easy garden project.

From ‘Blue Planet, Green Living’, this DIY compost bin is different in that it’s made using concrete blocks. This makes it easy to make the bin larger or smaller, depending on the needs of that season, keep out critters, or even remove blocks to allow for more ventilation.

Lastly, these compost bins from ‘Birds and Blooms’ are made of cedar, and allow the boards at the bottom to slide out. This lets you remove finished compost from the bottom of the pile, while continuing to add to the top of the pile.

2
2
文章
粉团
2017年05月23日

Making your own compost is the best way to enrich your soil organically. It’s simple and easy, check out!IntroductionComposting is not difficult and is probably the best way to provide nutrients to your plants. You can start composting even in a small compost bin if you’re a container gardener. A great source of organic fertilizer for your edibles.
Preparing garden compost is also simple as it only needs a few ingredients. These include nitrogen, carbon, air, and water. To get these ingredients, collect kitchen and yard waste, but remember that full decomposition is a lengthy period that may take months. Needless to say, it is a process that requires a number of steps. Eventually, the overall product is a proven and useful tool for farming. Now let us look at the steps!
Look at our 4 Step Composting Guide if you’re new to Composting.Steps to Preparing Suitable Garden CompostPurchase or get a compost binCome up with a bottom layerFill your compost binInspect the compost pile in three day timeMix the contents of the garden compostCheck if the compost is ready1. Purchase Or Get A Compost Bin
Do not be afraid if you’re unable to get a compost bin. We are here to help you! You only need to buy a pre-made container from any agricultural store or supplier. Then, go on and build a box of your own by using wood. Ensure that you put the box on moisture free, bare soil.
2. Establish A Bottom Layer

Make sure the bottom layer has sufficient air flow. At the bottom of the compost bin, create small holes using a gardening fork. This is to assist in drainage and proper aeration. The next procedure is to place twigs, feeble sticks and other straw-like substances at the bottom. They should be 4-6 inches, translating to about 10 centimeters deep.
3. Fill Your Compost Bin

Add nitrogenous compounds, these are mostly greens. They include plants such as cut grass, raw peelings from vegetables, coffee grounds, diluted urine, manure, and weeds. Proceed also in adding carbon compounds, which are the mostly ‘the browns’. They include cardboards, dead leaves, cereal boxes, hedge clippings, and brown pruning.
Also Read: 13 Things You Should Not Put in a Compost Pile
In this stage, you will also be required to mix the fast-rotting green materials with the slow-rotting brown materials. Let us take the example of freshly cut grass. This may be combined with feeble sticks or other wood compounds. Why is this so? The main reason behind this is to prevent odors.
To hasten the process of decomposition, consider adding bacteria’ such as pseudomonas. You may also use a variety of macro and micro nutrients as alternatives. Besides, chopping off large materials also increases the process of decomposition. For example, branches should be cut to small pieces, cardboards shredded and eggshells crushed. Last but not least, continue adding water as you fill in your compost heap.
Also Read: Ways to Use Worm Casting
4. Inspect The Compost Heap After Three Days

You can also check your compost temperature with a compost thermometer. Here is more on it.
In three days’ time, place your hand over the top of the heap to feel if it’s hot. If so, this shows the start to the decomposition process. Visit the compost heap after one week, and repeat the same procedure. If it has a cool feel, start mixing it. However, if it still feels hot, wait an extra week.
5. Mix The Contents Of The Garden Compost

Use a garden fork or a shovel to thoroughly and effectively mix up the matter inside the container. Stir and move the contents from top to bottom in a continuous manner. You may be wondering why this step involves mixing up the contents. This helps in the rate of decomposition by adding oxygen which is the final ingredient. Lastly, if the contents appear dry, it is advisable to add water before you start mixing. Repeat this process for the next four to six weeks.
Also Read: 11 Best Composting Tips You Must Read Now
6. Check If The Compost Is Ready
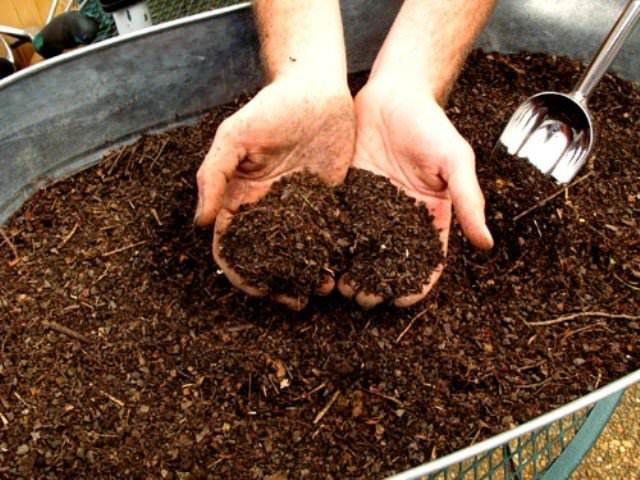
To determine if your compost heap is ready, look for a dark brown color, which often has the smell of earth.
Conclusion
Garden compost is an effective and cheap way of providing organic fertilizer to your vegetables and other garden plants. The article shows you some easy steps of preparing a simple compost heap and it is our hope that it’s well to your liking. If so, share this information with other interested parties and let’s keep the conversation going!
What are those challenges that you’ve faced in trying to make garden compost? Where do you go wrong?
Preparing garden compost is also simple as it only needs a few ingredients. These include nitrogen, carbon, air, and water. To get these ingredients, collect kitchen and yard waste, but remember that full decomposition is a lengthy period that may take months. Needless to say, it is a process that requires a number of steps. Eventually, the overall product is a proven and useful tool for farming. Now let us look at the steps!
Look at our 4 Step Composting Guide if you’re new to Composting.Steps to Preparing Suitable Garden CompostPurchase or get a compost binCome up with a bottom layerFill your compost binInspect the compost pile in three day timeMix the contents of the garden compostCheck if the compost is ready1. Purchase Or Get A Compost Bin

Do not be afraid if you’re unable to get a compost bin. We are here to help you! You only need to buy a pre-made container from any agricultural store or supplier. Then, go on and build a box of your own by using wood. Ensure that you put the box on moisture free, bare soil.
2. Establish A Bottom Layer

Make sure the bottom layer has sufficient air flow. At the bottom of the compost bin, create small holes using a gardening fork. This is to assist in drainage and proper aeration. The next procedure is to place twigs, feeble sticks and other straw-like substances at the bottom. They should be 4-6 inches, translating to about 10 centimeters deep.
3. Fill Your Compost Bin

Add nitrogenous compounds, these are mostly greens. They include plants such as cut grass, raw peelings from vegetables, coffee grounds, diluted urine, manure, and weeds. Proceed also in adding carbon compounds, which are the mostly ‘the browns’. They include cardboards, dead leaves, cereal boxes, hedge clippings, and brown pruning.
Also Read: 13 Things You Should Not Put in a Compost Pile
In this stage, you will also be required to mix the fast-rotting green materials with the slow-rotting brown materials. Let us take the example of freshly cut grass. This may be combined with feeble sticks or other wood compounds. Why is this so? The main reason behind this is to prevent odors.
To hasten the process of decomposition, consider adding bacteria’ such as pseudomonas. You may also use a variety of macro and micro nutrients as alternatives. Besides, chopping off large materials also increases the process of decomposition. For example, branches should be cut to small pieces, cardboards shredded and eggshells crushed. Last but not least, continue adding water as you fill in your compost heap.
Also Read: Ways to Use Worm Casting
4. Inspect The Compost Heap After Three Days

You can also check your compost temperature with a compost thermometer. Here is more on it.
In three days’ time, place your hand over the top of the heap to feel if it’s hot. If so, this shows the start to the decomposition process. Visit the compost heap after one week, and repeat the same procedure. If it has a cool feel, start mixing it. However, if it still feels hot, wait an extra week.
5. Mix The Contents Of The Garden Compost

Use a garden fork or a shovel to thoroughly and effectively mix up the matter inside the container. Stir and move the contents from top to bottom in a continuous manner. You may be wondering why this step involves mixing up the contents. This helps in the rate of decomposition by adding oxygen which is the final ingredient. Lastly, if the contents appear dry, it is advisable to add water before you start mixing. Repeat this process for the next four to six weeks.
Also Read: 11 Best Composting Tips You Must Read Now
6. Check If The Compost Is Ready

To determine if your compost heap is ready, look for a dark brown color, which often has the smell of earth.
Conclusion
Garden compost is an effective and cheap way of providing organic fertilizer to your vegetables and other garden plants. The article shows you some easy steps of preparing a simple compost heap and it is our hope that it’s well to your liking. If so, share this information with other interested parties and let’s keep the conversation going!
What are those challenges that you’ve faced in trying to make garden compost? Where do you go wrong?
0
0
文章
Gina
2017年05月23日

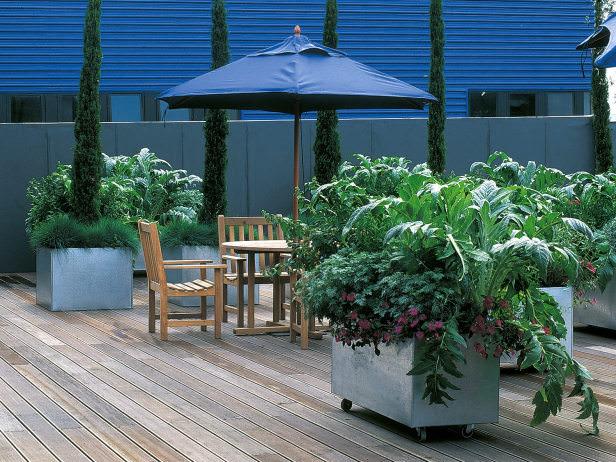
A lot of us love our container gardens… They allow you to grow things in a small space, or in a “no garden” space like a balcony, they cut down on maintenance chores, and they bring plants right up to the places you spend time so you can enjoy them! Oh, and they are pretty, too! But did you know you can go beyond the traditional annuals in a container? Almost anything can be grown in a container when the right requirements are met, don’t be afraid to think out of the box. (Or pot!) First, a quick refresh on the basics for container gardening.
Always match the size of the container to the size of the plants, especially large plants. Nothing makes a container garden fail faster than outgrowing it’s space too quickly!
That having been said, plants in container should be placed closer together than they would be in the ground. Everything is concentrated into a smaller space, including water and fertilizer, so they can tolerate, and look better, planted snugly. This especially applies to annuals that have shallow root systems and only last one season.
Always choose a good potting mix for your container, never use garden soil. Garden soil placed into containers is not light enough and will compact, not allowing the roots to breathe.
Containers need lots of water. In the heat of summer, especially smaller containers may need watering every day. You can set up a drip system if you group your containers together. Also, watch for pots that dry out extremely fast… Dark colored pots, metal pots or porous pots like terra cotta can be zapped of water in a few hours in the hot summer sun.
Fertilizer also leaches out of the container faster. Use a diluted liquid fertilizer every two weeks for most container grown plants. Consider using a potting mix with fertilizer pre-mixed in, like Miracle Gro.
One of the benefits of using containers is that they are mobile. Remember to outfit larger containers with wheeled platforms to make moving them easier, or use a hand truck.
Here are our picks for best unexpected plants you can grow in containers.
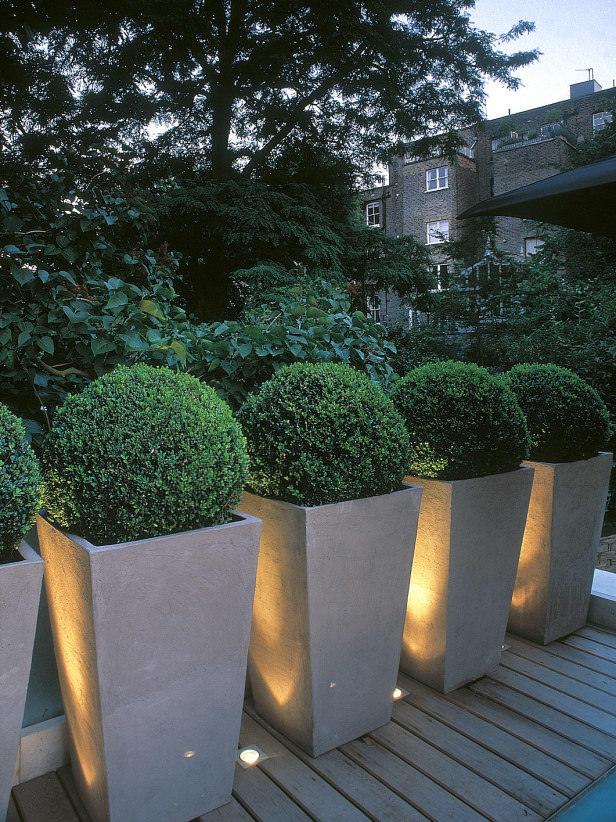
Our first picks are from ‘HGTV Gardens‘, both above and below. The top photo is a great example of using containers with unexpected plants. The focal plant (the taller spiky one) in these mobile containers are artichokes! Filled in with perennials and annuals, these containers offer a great aesthetic, and veggies too. Below is an example of using containers to create a typical hedge. Instead of plantings these boxwood straight in the ground, they are higher up to block views, and can be moved if necessary. Yep, they look cool too.
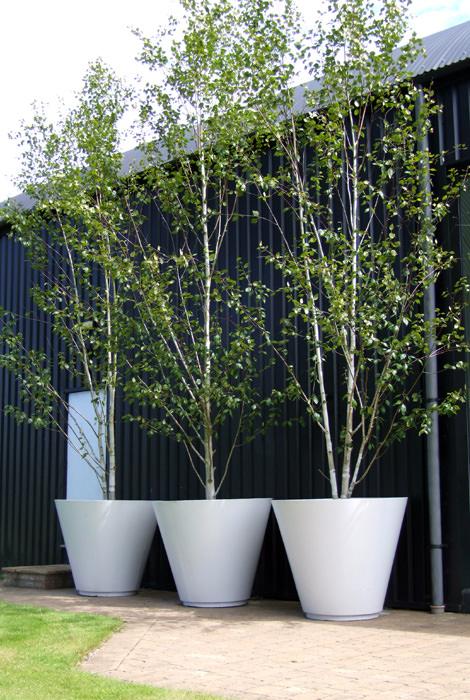
Don’t think you can plant trees in containers? Think again. These birch trees are placed in large containers, and because the root ball is kept from growing outward, the whole tree remains smaller and more manageable. Oh, yes, did we mention you can move them? Photo by ‘My Landscapes‘.
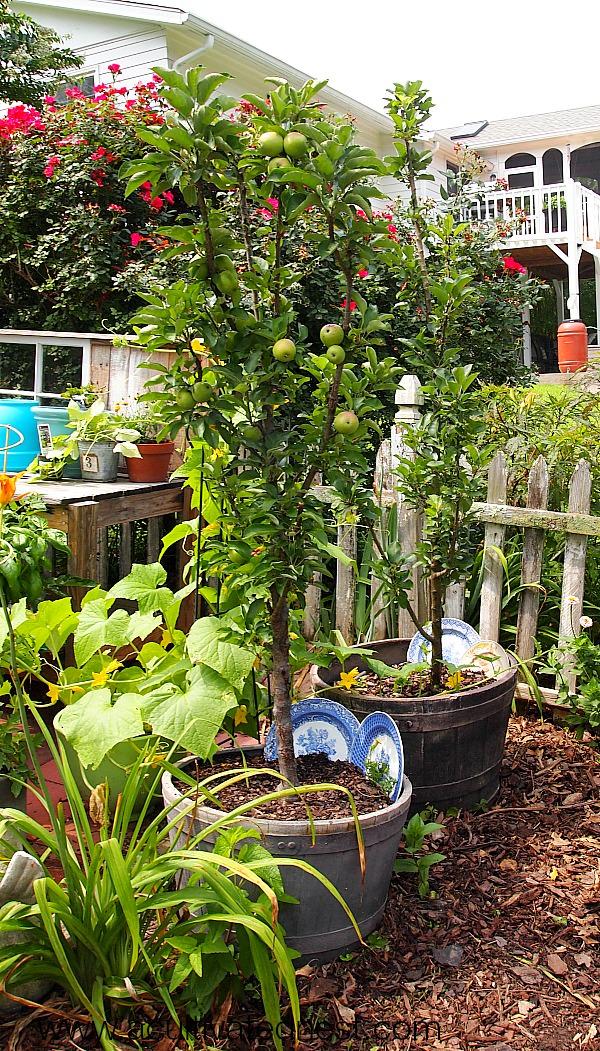
Want trees that give a little bit more? ‘A Cultivated Nest’ shows us how to grow apple trees in containers. She uses them as screens, and the apples are a bonus! There are lots of other type of fruit trees that come in dwarf or columnar varieties as well. Check out her tip on self pollinating varieties.
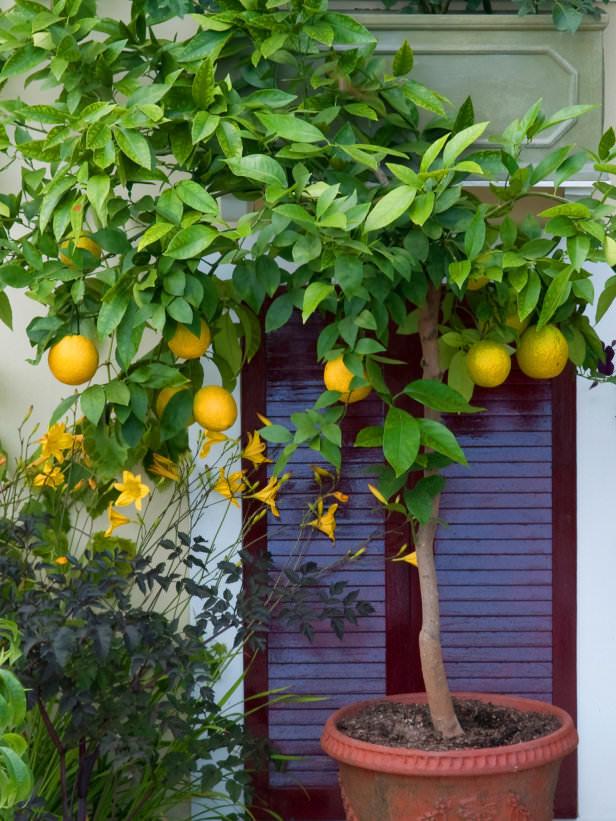
Citrus trees can be tough to grow in some parts of the country. Did you know that if you grow them in containers, you can bring them into a sunroom or sunny window for the winter? Photo by ‘HGTV‘.
You already know there are many veggies you can grow in pots… Watermelon? You think I’m kidding, don’t ya’? Well jump on over to ‘Gardening Know How‘ and find out how to grow these veggies that are traditionally a space hog, in pots!

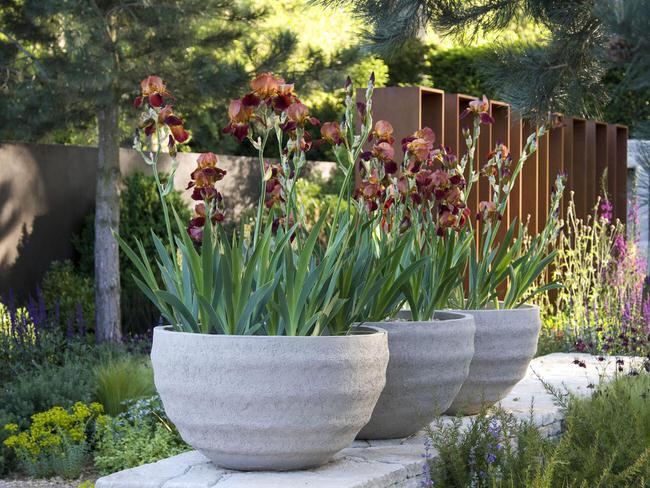
You may have seen small decorative bulbs in pots at the nursery, but what about larger bulbs and tubers, like Iris and Dahlias? They can be grown successfully in pots as well. Photo by ‘HGTV‘.
Vines can also grow in pots, you just need to make sure they have proper support. You can either set the pot in front of a wall or trellis, or provide a teepee within the container so that it can be moved when necessary. Photo by Taylors Clematis.
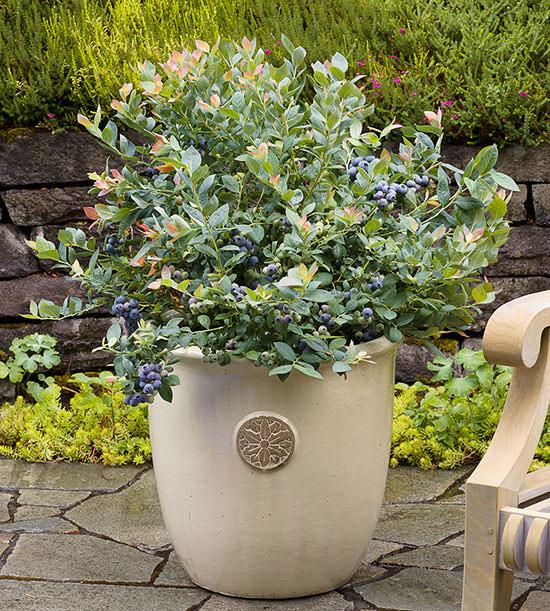
From ‘BHG’, learn how to grow berries in containers. These raspberries and blueberry plants do great when the right varieties are chosen, and they receive enough sun.
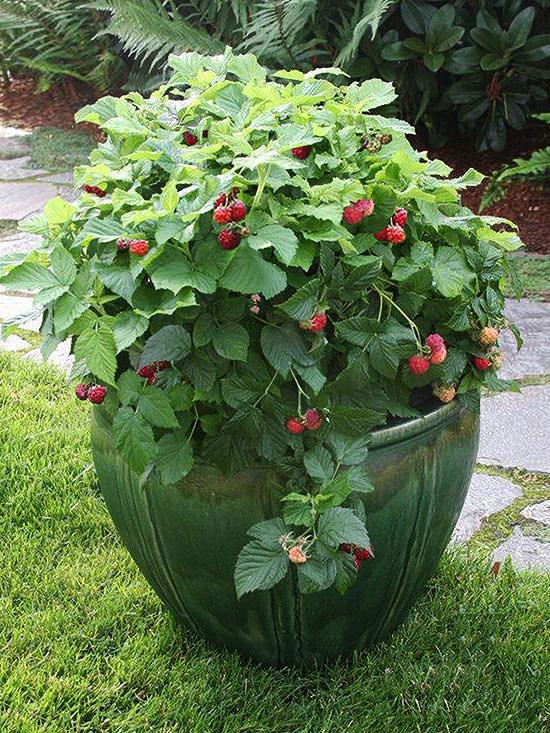
So don’t let the idea of using pots and containers limit you to marigolds and petunias! Use them to your full advantage and try these unexpected plants in containers!
2
0
文章
Mirella
2017年05月23日

Learn how to grow bell peppers in containers. Growing bell peppers in pots is a great idea if you’re short of space or live in a cold temperate climate as it requires warm soil to thrive.
USDA Zones— Pepper plants are short-lived perennials in tropics but in cold temperate regions, they are grown as annual.
Difficulty— Easy
Soil pH— Slightly acidic to neutral
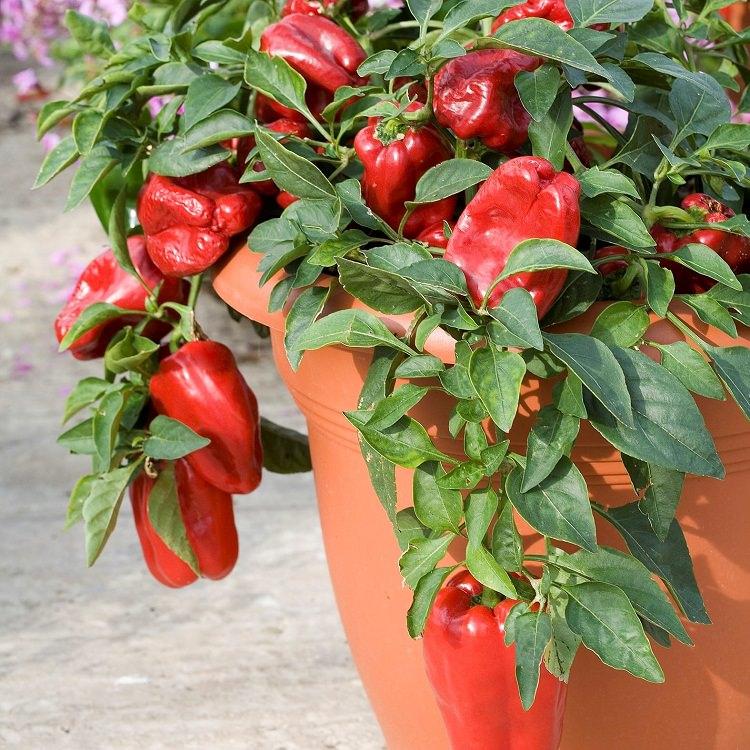
Due to the fact that the pepper is a warm weather vegetable crop and requires considerably more heat than cucumbers and tomatoes, growing bell peppers in pots is a great idea if you live in a cold climate.
How to Grow Bell Peppers in Containers
Growing bell pepper in the pot is easy. The first thing you have to do is to buy the plant from a nursery or propagate it from seeds.
Choosing a Pot
Planting bell pepper in containers requires a pot that is at least 10-12 inches deep and wide and has sufficient drainage holes. You can grow up to 2-3 plants (smaller varieties) in such a pot. Avoid using the black color container if you’re growing bell pepper in a tropical climate.
Propagation
Buy good quality seeds from a local garden store or buy them online. Also, buy seed starting mix or make yourself. Fill small pots or seedling tray with the seed mix and plant two seeds in each pot, 2-3 cm deep.
Start seeds 6-10 weeks before last spring frost date. Usually, in subtropical and tropical climate, you can start seeds anytime except in harsh summer.
The seeds will germinate in 1 to 3 weeks depending on the weather conditions and seed quality. After they germinate thin out and only keep one plant per pot. When seedlings have 2 true leaves they are ready to be transplanted into the desired containers.
Requirements for Growing Bell Pepper in Containers
Position
Peppers love the sun. The most productive pepper plants are grown in warmth and heat. When you’re growing bell peppers in pots, keep them in a position that receives at least 6 hours of sunlight daily. That place should be sheltered from strong wind.
Soil
Good soil is the key to productive pepper plants. Buy best quality potting mix that is well drained, loose and fertile or make your own potting mix. Potting mix must be rich in organic matter. Add well-rotted manure or compost in the combination of peat moss/coco peat and vermiculite or perlite (alternatively, sand). You can also add 5-10 gm neem cake at the time of soil preparation, it will protect the young plant from soil-borne diseases and pests.
Watering
Growing bell peppers require regular watering to keep the soil slightly moist, soil should never dry out completely. In any case, avoid wetting the foliage, overhead watering may cause fungal infection. Water at the foot of the plant. Also, pepper plants suffer from overwatering so be careful that your plants don’t sit in water.
Temperature
Growing bell peppers require soil temperature above 60 F (15 C) for best growth. The optimum seed germination temperature is above 68 F (20 C). It can tolerate temperature up to 95 F (35 C) and down to 50 F (10 C) easily. The ideal growing temperature is between 70-90 F (21-32C).
Bell Pepper CareMulching
For your convenience and to reduce the evaporation of water, do mulching. Cover the base of the plant with organic matter such as leaves, pine barks, straws, paper or whatever that is readily available to you.
Fertilizer
Pepper plants like tomatoes are heavy feeders and you’ll need to fertilize the plant in every 15 days or so. When fertilizing, remember too much nitrogen-rich fertilizer can promote foliage growth. You can also feed the plant with tomato fertilizer. Also, once in a month feed the plant with compost or manure tea. Use of Epsom salt (2tsp/gallon water at the time of watering, you can also spray the plants with this solution) each month improves the health and increases the yield of tomato and pepper plants so it must be applied too.
Pinching and Pruning
In the early stage, when the plant is young pinch growing tips regularly to make it bushier. Pruning is not necessary but can be carried out if required.
Deadheading
If your pepper plant is flowering too early deadhead the flowers, it is important. This will direct the plant’s energy into growing and becoming healthy. You can also stop the formation of new fruits if you want to speed up the maturation of pepper fruits that are already growing on the plant by pinching off emerging flowers.
Pollination
Pepper plants are self-fertile so you don’t need to care about pollination but to get better fruits and to improve productivity you can gently shake the plants when they’re in bloom.

Support
You may need to support the plants. For this, either use tomato cages or simply poke a stick near the main stem and tie the plant to it.
Pests and Diseases
Growing bell peppers in pots require care from aphids as they are the number one enemy of pepper plants. In hot and dry weather you’ll also need to keep an eye on spider mites.
Harvesting
Bell peppers are ready for harvesting in 60-90 days after transplanting. You can harvest them green when they reach full size and remain firm. If left to ripen, the color will change into orange, yellow or red.
A Fact: Pepper is one of the richest sources of Vitamin C (more than the oranges).
USDA Zones— Pepper plants are short-lived perennials in tropics but in cold temperate regions, they are grown as annual.
Difficulty— Easy
Soil pH— Slightly acidic to neutral

Due to the fact that the pepper is a warm weather vegetable crop and requires considerably more heat than cucumbers and tomatoes, growing bell peppers in pots is a great idea if you live in a cold climate.
How to Grow Bell Peppers in Containers
Growing bell pepper in the pot is easy. The first thing you have to do is to buy the plant from a nursery or propagate it from seeds.
Choosing a Pot
Planting bell pepper in containers requires a pot that is at least 10-12 inches deep and wide and has sufficient drainage holes. You can grow up to 2-3 plants (smaller varieties) in such a pot. Avoid using the black color container if you’re growing bell pepper in a tropical climate.
Propagation
Buy good quality seeds from a local garden store or buy them online. Also, buy seed starting mix or make yourself. Fill small pots or seedling tray with the seed mix and plant two seeds in each pot, 2-3 cm deep.
Start seeds 6-10 weeks before last spring frost date. Usually, in subtropical and tropical climate, you can start seeds anytime except in harsh summer.
The seeds will germinate in 1 to 3 weeks depending on the weather conditions and seed quality. After they germinate thin out and only keep one plant per pot. When seedlings have 2 true leaves they are ready to be transplanted into the desired containers.
Requirements for Growing Bell Pepper in Containers

Position
Peppers love the sun. The most productive pepper plants are grown in warmth and heat. When you’re growing bell peppers in pots, keep them in a position that receives at least 6 hours of sunlight daily. That place should be sheltered from strong wind.
Soil
Good soil is the key to productive pepper plants. Buy best quality potting mix that is well drained, loose and fertile or make your own potting mix. Potting mix must be rich in organic matter. Add well-rotted manure or compost in the combination of peat moss/coco peat and vermiculite or perlite (alternatively, sand). You can also add 5-10 gm neem cake at the time of soil preparation, it will protect the young plant from soil-borne diseases and pests.
Watering
Growing bell peppers require regular watering to keep the soil slightly moist, soil should never dry out completely. In any case, avoid wetting the foliage, overhead watering may cause fungal infection. Water at the foot of the plant. Also, pepper plants suffer from overwatering so be careful that your plants don’t sit in water.
Temperature
Growing bell peppers require soil temperature above 60 F (15 C) for best growth. The optimum seed germination temperature is above 68 F (20 C). It can tolerate temperature up to 95 F (35 C) and down to 50 F (10 C) easily. The ideal growing temperature is between 70-90 F (21-32C).
Bell Pepper CareMulching
For your convenience and to reduce the evaporation of water, do mulching. Cover the base of the plant with organic matter such as leaves, pine barks, straws, paper or whatever that is readily available to you.
Fertilizer
Pepper plants like tomatoes are heavy feeders and you’ll need to fertilize the plant in every 15 days or so. When fertilizing, remember too much nitrogen-rich fertilizer can promote foliage growth. You can also feed the plant with tomato fertilizer. Also, once in a month feed the plant with compost or manure tea. Use of Epsom salt (2tsp/gallon water at the time of watering, you can also spray the plants with this solution) each month improves the health and increases the yield of tomato and pepper plants so it must be applied too.
Pinching and Pruning
In the early stage, when the plant is young pinch growing tips regularly to make it bushier. Pruning is not necessary but can be carried out if required.
Deadheading
If your pepper plant is flowering too early deadhead the flowers, it is important. This will direct the plant’s energy into growing and becoming healthy. You can also stop the formation of new fruits if you want to speed up the maturation of pepper fruits that are already growing on the plant by pinching off emerging flowers.
Pollination
Pepper plants are self-fertile so you don’t need to care about pollination but to get better fruits and to improve productivity you can gently shake the plants when they’re in bloom.

Support
You may need to support the plants. For this, either use tomato cages or simply poke a stick near the main stem and tie the plant to it.
Pests and Diseases
Growing bell peppers in pots require care from aphids as they are the number one enemy of pepper plants. In hot and dry weather you’ll also need to keep an eye on spider mites.
Harvesting
Bell peppers are ready for harvesting in 60-90 days after transplanting. You can harvest them green when they reach full size and remain firm. If left to ripen, the color will change into orange, yellow or red.
A Fact: Pepper is one of the richest sources of Vitamin C (more than the oranges).
3
0
文章
粉团
2017年05月22日

Aspirin tablets can be used for growing healthy and productive plants, and it really WORKS. Here’re some of the best ASPIRIN uses in the garden!
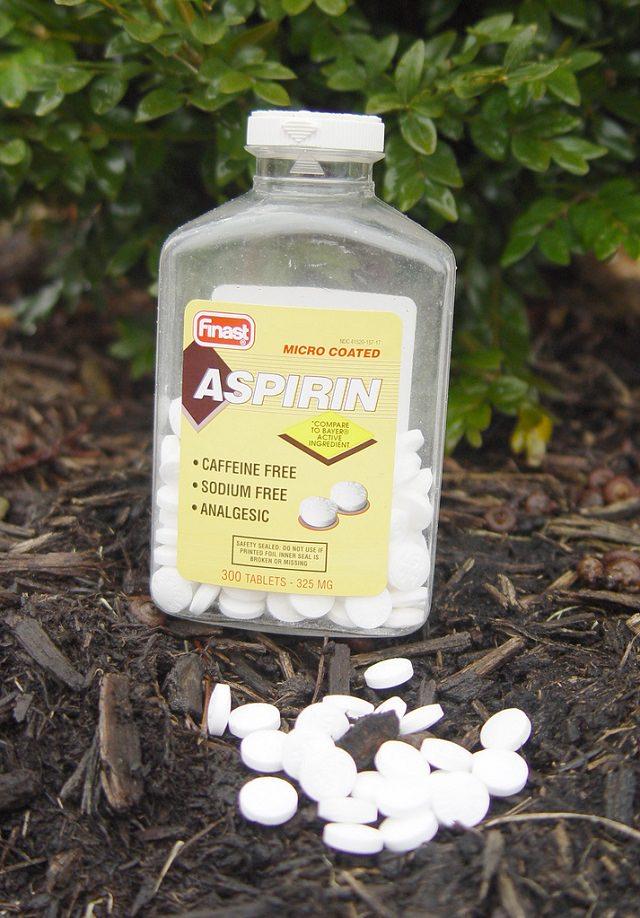
1. Increases the growth and productivity of plants
At the University of Rhode Island, gardeners made a solution containing 4 crushed aspirin tablets and 4 gallons of water and then sprayed the solution on their vegetable gardens every three weeks throughout the growing season. At the end of the season, they found that the treated plants grew more quickly and were more fruitful than the group that was left untreated.
They concluded that aspirin leads to increased vitamin C content and greater growth in plants.The science behind this claim
Aspirin contains an active ingredient known as salicylic acid. It is derived from willow bark. This acid enhances the immune system of plants (Plants prepare it naturally but in lower amounts) especially those in the nightshade family. Plants subjected to it get the boost in immunity power, which helps them in combating with pests and microbial attack and prevents the formation of fungus leading to increased growth rate of plants. Visit the New Scientist to learn more about this in detail.
2. It helps plants combating fungal diseases

Verticillium and fusarium wilt are common fungal diseases widely distributed in soil and can wipe out an entire crop in a matter of days. Fortunately, according to a recent study by the US Department of Agriculture, the use of aspirin spray can significantly reduce the spread of fungus on the plant. It is also helpful in blight. Visit the Dailymail to learn to learn how Aspirin helps tomatoes!
The science behind this claim
Apparently, plants produce small amounts of salicylic acid naturally especially when they are stressed. The salicylic acid creates a systematically acquired resistance protecting the plants against microbial attack, drought, and even insect attack. Since salicylic acid is the active ingredient in aspirin, when a solution of aspirin is sprayed on the plants, the amount of salicylic acid in the plants is increased which in turn boosts their immune system protecting the seedlings and plants from soil-borne diseases, bacteria, and fungi.
Gardeners can spray their plants with a solution of aspirin tablet mixed in distilled water. The drug is especially effective in warding off diseases in the nightshade family which include tomatoes or potatoes. You can also soak the seeds in the aspirin solution just before sowing to improve germination.
3. Help cut plants and flowers to last longer

Are you wondering how you can keep your cut flowers looking fresh for a long time? It is possible by adding aspirin to the vase water. To achieve this, crush an aspirin tablet, dissolve it in water and add the solution to a vase. Visit Lifehacker to learn more!
The science behind this claim
According to Judy Jernstedt, the professor in plant and soil department at the University of California, Davis, the salicylic acid reduces the production of ethylene. With reduced ethylene present, floral wilting is delayed, and the cut plants can last longer.
Also, the anti-fungal properties of salicylic acid that dissolve into the vase water slows down the growth of mold which if it enters the flower stem can clog the vascular tissue leading to the death of the flower. For longer lasting fresh flowers, be sure to change the water regularly.
4. Propagate plants from cuttings successfully
Rooting hormone helps in propagating plants from cuttings and using it improves the success rate. Take a cup of distilled water and dissolve one uncoated aspirin tablet and then keep the cut end of the plant in this rooting solution for a few hours before planting. It’ll work!
The science behind this claim
Instead of using willow bark, which contains growth hormones, you can use aspirin to prepare your own rooting solution. It contains the same salicylic acid that is found in willows and works the same.
How to Use Aspirin in the Garden
You should be careful when using aspirin in the garden as too much can burn or damage the plants. Improper use may lead to the development of brown spots that makes them appear to have burnt foliage. This guide on how to properly use aspirin in the garden can help prevent any damage to the plants.
The Right Dosage
The right dosage of aspirin should not be more than a tablet for each liter of water. Begin by crushing the tablet and ensure it is well dissolved before spraying. *It has been observed by gardeners that aspirin dissolves well in distilled water!
When spraying, do it in the morning as plants tend to absorb best at this time. Also, spraying in the morning helps to avoid harming the beneficial insects such as bees and other pollinators, which are active later and it gives the plants a chance to dry too.
You should also pay attention to the response of the plants to the treatment as not all plants are suitable for aspirin treatment. Plants in the nightshade family, of course, such as tomatoes, peppers, potatoes and eggplants benefit greatly from aspirin regimen.

1. Increases the growth and productivity of plants
At the University of Rhode Island, gardeners made a solution containing 4 crushed aspirin tablets and 4 gallons of water and then sprayed the solution on their vegetable gardens every three weeks throughout the growing season. At the end of the season, they found that the treated plants grew more quickly and were more fruitful than the group that was left untreated.
They concluded that aspirin leads to increased vitamin C content and greater growth in plants.The science behind this claim
Aspirin contains an active ingredient known as salicylic acid. It is derived from willow bark. This acid enhances the immune system of plants (Plants prepare it naturally but in lower amounts) especially those in the nightshade family. Plants subjected to it get the boost in immunity power, which helps them in combating with pests and microbial attack and prevents the formation of fungus leading to increased growth rate of plants. Visit the New Scientist to learn more about this in detail.
2. It helps plants combating fungal diseases

Verticillium and fusarium wilt are common fungal diseases widely distributed in soil and can wipe out an entire crop in a matter of days. Fortunately, according to a recent study by the US Department of Agriculture, the use of aspirin spray can significantly reduce the spread of fungus on the plant. It is also helpful in blight. Visit the Dailymail to learn to learn how Aspirin helps tomatoes!
The science behind this claim
Apparently, plants produce small amounts of salicylic acid naturally especially when they are stressed. The salicylic acid creates a systematically acquired resistance protecting the plants against microbial attack, drought, and even insect attack. Since salicylic acid is the active ingredient in aspirin, when a solution of aspirin is sprayed on the plants, the amount of salicylic acid in the plants is increased which in turn boosts their immune system protecting the seedlings and plants from soil-borne diseases, bacteria, and fungi.
Gardeners can spray their plants with a solution of aspirin tablet mixed in distilled water. The drug is especially effective in warding off diseases in the nightshade family which include tomatoes or potatoes. You can also soak the seeds in the aspirin solution just before sowing to improve germination.
3. Help cut plants and flowers to last longer

Are you wondering how you can keep your cut flowers looking fresh for a long time? It is possible by adding aspirin to the vase water. To achieve this, crush an aspirin tablet, dissolve it in water and add the solution to a vase. Visit Lifehacker to learn more!
The science behind this claim
According to Judy Jernstedt, the professor in plant and soil department at the University of California, Davis, the salicylic acid reduces the production of ethylene. With reduced ethylene present, floral wilting is delayed, and the cut plants can last longer.
Also, the anti-fungal properties of salicylic acid that dissolve into the vase water slows down the growth of mold which if it enters the flower stem can clog the vascular tissue leading to the death of the flower. For longer lasting fresh flowers, be sure to change the water regularly.
4. Propagate plants from cuttings successfully
Rooting hormone helps in propagating plants from cuttings and using it improves the success rate. Take a cup of distilled water and dissolve one uncoated aspirin tablet and then keep the cut end of the plant in this rooting solution for a few hours before planting. It’ll work!
The science behind this claim
Instead of using willow bark, which contains growth hormones, you can use aspirin to prepare your own rooting solution. It contains the same salicylic acid that is found in willows and works the same.
How to Use Aspirin in the Garden
You should be careful when using aspirin in the garden as too much can burn or damage the plants. Improper use may lead to the development of brown spots that makes them appear to have burnt foliage. This guide on how to properly use aspirin in the garden can help prevent any damage to the plants.
The Right Dosage
The right dosage of aspirin should not be more than a tablet for each liter of water. Begin by crushing the tablet and ensure it is well dissolved before spraying. *It has been observed by gardeners that aspirin dissolves well in distilled water!
When spraying, do it in the morning as plants tend to absorb best at this time. Also, spraying in the morning helps to avoid harming the beneficial insects such as bees and other pollinators, which are active later and it gives the plants a chance to dry too.
You should also pay attention to the response of the plants to the treatment as not all plants are suitable for aspirin treatment. Plants in the nightshade family, of course, such as tomatoes, peppers, potatoes and eggplants benefit greatly from aspirin regimen.
2
0
文章
Alicia
2017年05月22日

These 7 vegetable gardening tips on companion planting, intercropping and crop rotation will improve the productivity of your garden.
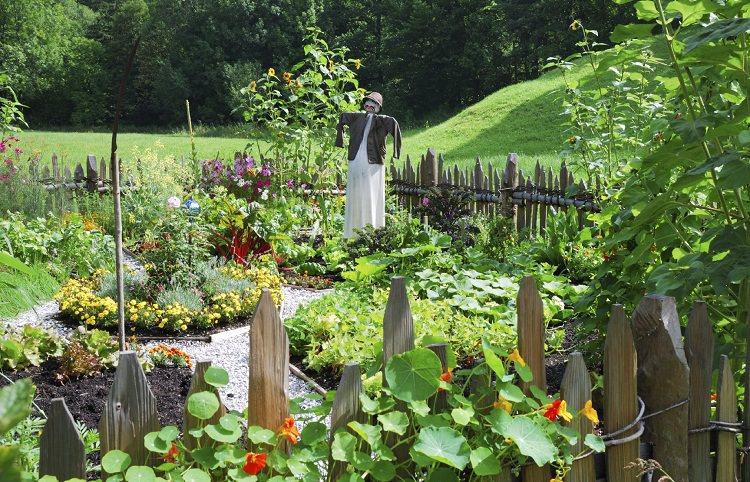
1) Do Crop Rotation: Avoid planting the plants of the same family at similar site each year
It is a good practice, avoid planting the plants of the same family at the same site continuously. Usually, the plants from similar family have common pest and disease problems, they also draw the same nutrition from the soil again and again. A useful and informative article on this issue that you must read for more information is available on the Harvest to Table.
2) Consider the Depth of Roots: Grow shallow root plants with deep root plants
Combine vegetables that have different root development. Those with shallow roots (lettuces) are best planted with those that root deeply (tomatoes). It allows them to “catch” the nutrients at different depths and this will prevent their competition for nutrients at the root zone.
3) Interplanting: Plant fast growing species with slow growing species
Cultivate the fast growing smaller crop at the same time with the large vegetable plants that take time. This will give all the space and time to both the species to develop well until harvest without damaging the other. For example, you can grow radishes with carrots, radishes mature early and harvested first, thus making more space for carrots to grow.
4) Grow legumes: Planting legumes fix the nitrogen in soil
Although there are vegetables that poorly tolerate their presence, it is always advisable to grow legumes in crop rotation. The reason is obvious: the plants (peas, beans, clover etc.) belong to this family have the ability to fix nitrogen. Thanks to the action of nitrogen-fixing bacteria that live in symbiosis with their roots.
5) Companion planting: Grow pest repellent plants
Plants from allium family such as garlic, leek and onion. Herbs like lavender, oregano, lemon balm, holy basil and flowers like nasturtiums and marigold are great pest repellents. These plants can be tucked here and there in your vegetable garden bed to deter some harmful insects and pests. For example, if nematodes are the problem in your soil, plant marigolds. Marigold roots consist thiophene that repels nematodes. Vegetables like potatoes and tomatoes usually suffer from them, in such a case you can plant marigold at the same site for a couple of months before planting these crops. For more information about marigold and its repellent properties read this educative article of the University of Florida.
6) Avoid plants that have high nutritional requirements: Don’t grow vegetables together that require higher amount of nutrition
Avoid the cultivation of plants that require a high consumption of nutrients (especially nitrogen) together. Grow them with plants that are less demanding and have low nutritional requirements. However, there is an exception to this rule, plants that have the same nutrition and watering needs must be grown together.
7) Disparity in size: Maintain balance in the size of the plants
Another element to be considered in the choice is the size of the vegetables you’re growing together. Plants that grow much in volume or in height (as in the case of cucumber, vertically) can shade smaller plants and disturb their growth. Conversely, this disparity in size can be best used if you grow such plants that thrive well in a little shade under tall, spreading plants.
4
2
文章
Alicia
2017年05月22日

Learn about the companion plants for tomatoes. Tomato companion plants are those that help it in growing more productively.
The key of getting most productive tomato plants is to plant right companions with it. Read this article to find out which are the best companion plants for tomatoes.

Companion planting is a sustainable way to grow healthy tomatoes without the use of toxic pesticides. Many good companion plant for tomatoes are herbs and flowers like marigold.
Also Read: How to Grow Tomatoes in Hanging Baskets
Tomato Companion Plants: Herbs
Basil and tomatoes in the garden go as well together as they do in the kitchen. Plant two or three basil plants near tomatoes. They not only enhances the flavor of each other and improves growth but also keep the pests away.
Plant garlic between each tomato plant to discourage red spider mites and plant parsley to improve the taste of tomatoes. Chives and mint are pungent herbs that also deter away the pests and are compatible with tomatoes.
Plant borage near tomatoes as it protects tomato plants from tomato hornworm.
Tomato Companion Plants: Vegetables
Tomatoes also do well with beans, peas, peppers, onions and lettuce. Carrots and tomatoes also go well together, although carrots grow little stunned if planted too close to the tomato plants but their flavor will be higher.
Also Read: Carrot Companion Plants
Tomato Companion Plants: Flowers
Flowers planted with tomatoes add variety in the garden. Plant marigolds along with tomatoes – they keep the soil healthy, prevent nematodes and discourage many common garden pests. This bright annual flower also adds color to the garden and attract beneficial insects to your tomato patch.
Calendula also keeps the pests away. As an added bonus, its flowers are edible and added in salads and desserts. Nasturtiums too are good companion plants for tomatoes.
Unsuitable Plants for Tomatoes
While some companion plants improve or do not affect the tomatoes, some plants are best avoided to be planted near them. Generally tomatoes are heavy feeders, they require lots of sun, water and nutrients so you should avoid plants that have higher growing requirements or have pests and diseases like tomatoes. Don’t pare tomatoes with cabbage, broccoli, kohlrabi and other members of brassica genus, as they slow up the growth and development of tomatoes.
Tomatoes and potatoes are also not a good match – both suffer from the same pests and diseases and once it hits one plant, quickly affect the other. Corn is another plant that needs to be avoided as both are vulnerable to a worm that can be transferred between the two plants.
Plants that Do well with Tomatoes
Tomatoes when planted with some plants also help them. A bed of asparagus with a few tomato plants will be more resistant to asparagus beetle. When planted with roses, tomatoes prevent black spot in roses, a fungal disease that attacks the roses.
The key of getting most productive tomato plants is to plant right companions with it. Read this article to find out which are the best companion plants for tomatoes.

Companion planting is a sustainable way to grow healthy tomatoes without the use of toxic pesticides. Many good companion plant for tomatoes are herbs and flowers like marigold.
Also Read: How to Grow Tomatoes in Hanging Baskets
Tomato Companion Plants: Herbs
Basil and tomatoes in the garden go as well together as they do in the kitchen. Plant two or three basil plants near tomatoes. They not only enhances the flavor of each other and improves growth but also keep the pests away.
Plant garlic between each tomato plant to discourage red spider mites and plant parsley to improve the taste of tomatoes. Chives and mint are pungent herbs that also deter away the pests and are compatible with tomatoes.
Plant borage near tomatoes as it protects tomato plants from tomato hornworm.
Tomato Companion Plants: Vegetables
Tomatoes also do well with beans, peas, peppers, onions and lettuce. Carrots and tomatoes also go well together, although carrots grow little stunned if planted too close to the tomato plants but their flavor will be higher.
Also Read: Carrot Companion Plants
Tomato Companion Plants: Flowers
Flowers planted with tomatoes add variety in the garden. Plant marigolds along with tomatoes – they keep the soil healthy, prevent nematodes and discourage many common garden pests. This bright annual flower also adds color to the garden and attract beneficial insects to your tomato patch.
Calendula also keeps the pests away. As an added bonus, its flowers are edible and added in salads and desserts. Nasturtiums too are good companion plants for tomatoes.
Unsuitable Plants for Tomatoes
While some companion plants improve or do not affect the tomatoes, some plants are best avoided to be planted near them. Generally tomatoes are heavy feeders, they require lots of sun, water and nutrients so you should avoid plants that have higher growing requirements or have pests and diseases like tomatoes. Don’t pare tomatoes with cabbage, broccoli, kohlrabi and other members of brassica genus, as they slow up the growth and development of tomatoes.
Tomatoes and potatoes are also not a good match – both suffer from the same pests and diseases and once it hits one plant, quickly affect the other. Corn is another plant that needs to be avoided as both are vulnerable to a worm that can be transferred between the two plants.
Plants that Do well with Tomatoes
Tomatoes when planted with some plants also help them. A bed of asparagus with a few tomato plants will be more resistant to asparagus beetle. When planted with roses, tomatoes prevent black spot in roses, a fungal disease that attacks the roses.
3
3
文章
Alicia
2017年05月22日

Iris are one of the most beautiful and low care flowers that is why they are gardener’s favorite and if you are growing them, learn about the iris companion plants.
There are hundreds of Iris species with different growing needs and if you want to plant iris and its companion plants, first you’ll need to know about the requirements of specific iris species you are growing.
Companion Plants for Iris
While choosing iris companion plants, experiment. Instead of focusing only on the plant’s health, consider about the plants that require similar growing conditions and complement the color and texture of irises you are growing.
Bearded Iris Companion Plants
Companion plants for tall, dwarf and other bearded iris are Columbine, sweet rocket, pyrethrum, blue salvia, coralbells and Narcissus. Lilies, hemerocallis hybrids, penstemons, phlox and chrysanthemums are also used in combination with irises. Some gardeners grow forsythia in poor soil with iris.
Japanese Iris Companion Plants
Japanese iris grows in moist soil, their soil requirement is similar to impatiens. You can grow them in moist to boggy soil. Grow moisture loving plants with Japanese iris like soft rush, tropical sage and impatiens if there is shade, you can also ferns and plants like hosta near it.
Siberian Iris Companion Plants
Siberian irises are cold hardy and low maintenance. They grow in full sun to part shade and thrive in wide range of soil, preferably moist. Grow siberian iris plants in clumps to create a beautiful color contrast with daylilies, marsh spurge, ornamental poppy, lady’s mantle and cranesbill.
Other Iris Companion Plants
Peonies are traditionally companions for irises. If you plant a garden with irises, peonies and roses it will look wonderful. One more plant is forsythia, forsythia not only helps the irises grow, but also provides the beautiful contrast of color. Forsythia flowers herald the arrival of spring and their yellow colored blooms are perfect match for reticulated iris that flowers in the spring as well.
There are hundreds of Iris species with different growing needs and if you want to plant iris and its companion plants, first you’ll need to know about the requirements of specific iris species you are growing.

Companion Plants for Iris
While choosing iris companion plants, experiment. Instead of focusing only on the plant’s health, consider about the plants that require similar growing conditions and complement the color and texture of irises you are growing.
Bearded Iris Companion Plants
Companion plants for tall, dwarf and other bearded iris are Columbine, sweet rocket, pyrethrum, blue salvia, coralbells and Narcissus. Lilies, hemerocallis hybrids, penstemons, phlox and chrysanthemums are also used in combination with irises. Some gardeners grow forsythia in poor soil with iris.
Japanese Iris Companion Plants
Japanese iris grows in moist soil, their soil requirement is similar to impatiens. You can grow them in moist to boggy soil. Grow moisture loving plants with Japanese iris like soft rush, tropical sage and impatiens if there is shade, you can also ferns and plants like hosta near it.
Siberian Iris Companion Plants
Siberian irises are cold hardy and low maintenance. They grow in full sun to part shade and thrive in wide range of soil, preferably moist. Grow siberian iris plants in clumps to create a beautiful color contrast with daylilies, marsh spurge, ornamental poppy, lady’s mantle and cranesbill.
Other Iris Companion Plants
Peonies are traditionally companions for irises. If you plant a garden with irises, peonies and roses it will look wonderful. One more plant is forsythia, forsythia not only helps the irises grow, but also provides the beautiful contrast of color. Forsythia flowers herald the arrival of spring and their yellow colored blooms are perfect match for reticulated iris that flowers in the spring as well.
0
1
文章
Alicia
2017年05月22日

Learn about the companion plants for carrots. Carrot companion planting plays a helpful role in the growth of carrots.
If planted together, carrot companion plants help in improving taste, attracting beneficial insects (pollinators) or repelling pests away. In addition, the use of such plants in combination allows a rational use of space in the garden and decrease the use of pesticides.

Carrot Companion Planting
Here are some plants that are advantageous to grow together (on adjacent rows or alternately in the same) with carrots to stimulate its growth: You can grow beans, peas and other legumes with carrots. Salad greens, bokchoi, lettuce or the plants that belong to cabbage family are good companion plants for carrots.
Sowing radish seeds together with carrot seeds is good for carrot’s growth. Radishes germinate quickly and help in germination of carrots. Also, they are harvested earlier than carrots and when rooted out, they make room for carrots to grow.
Tomatoes can be planted with carrots. Chives, onion, leek and garlic are good companion plants too, they also keep the pests like carrot flies away.
In herbs, you can grow sage, parsley and rosemary with carrots.
Foes
If planted together, carrot companion plants help in improving taste, attracting beneficial insects (pollinators) or repelling pests away. In addition, the use of such plants in combination allows a rational use of space in the garden and decrease the use of pesticides.

Carrot Companion Planting
Here are some plants that are advantageous to grow together (on adjacent rows or alternately in the same) with carrots to stimulate its growth: You can grow beans, peas and other legumes with carrots. Salad greens, bokchoi, lettuce or the plants that belong to cabbage family are good companion plants for carrots.
Sowing radish seeds together with carrot seeds is good for carrot’s growth. Radishes germinate quickly and help in germination of carrots. Also, they are harvested earlier than carrots and when rooted out, they make room for carrots to grow.
Tomatoes can be planted with carrots. Chives, onion, leek and garlic are good companion plants too, they also keep the pests like carrot flies away.
In herbs, you can grow sage, parsley and rosemary with carrots.
Foes
0
0


