文章
Andrea
2017年02月17日

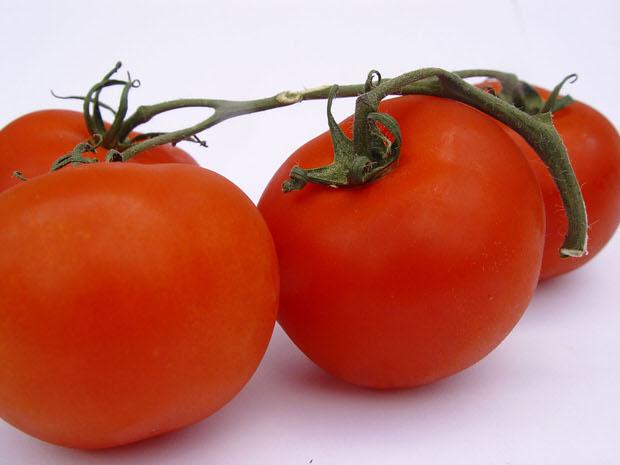
Tomatoes are without a doubt one of the most popular vegetables in the home garden, and for good reason. Homegrown tomatoes are very nutritious and much more flavorful than those bought from a store. Tomato plants will produce an abundance of fruit for the home gardener if they are properly planted and cared for.
#Tomato require a fairly long growing season, and for this reason the seeds are typically planted indoors about six to eight weeks before they can be planted in the garden. The seeds can be sown 1/4″ deep in small pots or flats in a soil less potting mix or sterilized potting soil. It takes 7-14 days at a temperature of 70-80 degrees Fahrenheit for the seeds to germinate. Keep the soil moist but not soggy. Placing plastic wrap loosely over the pots or flats will help maintain the humidity necessary for germination, but the plastic wrap must be removed once the seedlings sprout.
Bottom heat helps to speed the germination process. Garden centers and catalogs sell heating cables made just for this purpose, but you may also set the pots or flats on top of your water heater to take advantage of its warmth for germination.
As soon as the seedlings emerge, they should be moved to an area with full light, such as a sunny window or under grow lights. They should have light on them for about 12 hours a day and should be kept at a temperature of 70-80 degrees. Fertilize the seedlings with a water-soluble fertilizer when they’re about 3-4 weeks old, but dilute the fertilizer to about half the strength recommended on the label.
The little tomato plants will be accustomed to fairly steady and warm temperatures indoors, and planting them directly outside could come as quite a shock to them, especially when nighttime temperatures are still cool. About a week before it’s time to plant them in the garden, begin to gradually introduce them to outdoor conditions. This is called hardening off, and it simply involves moving the plants gradually to conditions more like what they’ll experience in the garden.
Start hardening them off by moving the plants to an enclosed porch for a day or two, then to a sunny spot outdoors that is protected from the wind. If the temperature threatens to take a drastic downward dip, bring the plants back indoors until it warms up outside again.
Tomatoes were originally found only in very warm climates. They don’t like to be cold and should not be planted outside until the danger of frost has passed and the soil has warmed up. That’s typically late May or even early June here in northern Ohio.
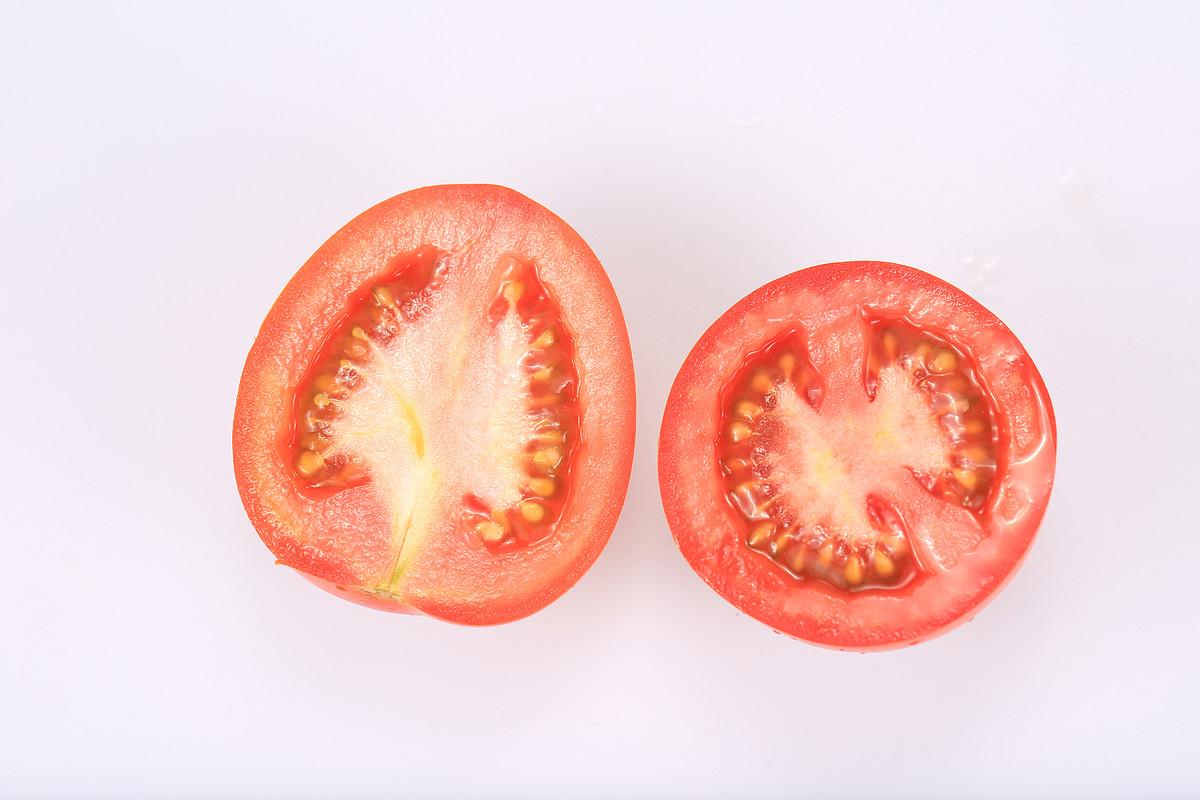
The sooner tomatoes are planted outside, the sooner they will begin to produce ripe fruit, and there are a few tricks that make it possible to plant tomatoes in the garden a bit earlier.
The garden soil may be warmed up by covering it with clear or white plastic for a few days. The little tomato plants will be much happier with their roots in warm soil. Once the plants are in the garden, the foliage can be protected from a light frost by covering the plants with plastic gallon jugs that have their bottoms removed, or with plastic or fabric sheets placed over the plants. Suspend this over the plants using wire hoops so the plastic or fabric doesn’t touch the foliage.
When you are ready to transplant your tomato seedlings into the garden, be sure to choose a spot for them that gets full sun for at least 8 hours a day. Dig a hole for each plant that is large enough to easily accommodate all of the roots. Before transplanting, water the plants while they are still in the pot. This not only helps prevent transplant shock, but it also makes it easier to slip the plant from the pot.
Tomato plants will grow roots from any part of the stem that is buried beneath the soil, so the plants will benefit from being planted deeply, up to the first set of leaves. If the plants have spent too much time in pots and have become leggy, they may be planted in furrows with their too-long stems laid in the furrow and gently buried with soil. This will help the plants develop a strong root system while preventing the long stem from breaking.
Fill in the planting hole with soil, pressing the soil in firmly to eliminate air pockets. Then give the plants a good drink of water, thoroughly soaking the soil around them.

If you plan on staking or trellising your tomato plants, they can be planted about 2-3 feet apart. Plants that will be allowed to sprawl on the ground will need more room and should be planted 4-6 feet apart.
If the soil is still a bit cool, your white or clear plastic may be placed on the ground beneath the plants to warm the soil. Once warmer temperatures have settled in, this plastic should be removed to avoid burning the foliage with reflective heat.
It is important to keep tomato leaves up off the soil to help prevent soil-borne diseases from attacking the plants. This can easily be done by applying straw mulch around the plants. But straw mulch should only be applied once the soil has warmed up above 70 degrees. If the mulch is laid down while the soil is still cool, it will keep the soil from warming up as it should, your tomato plants will suffer from cold feet and won’t produce as well as they could.
Planting your tomatoes properly is an important step toward a bountiful harvest of sweet, juicy fruit. In another article we’ll discuss how to trellis and prune tomato plants to increase your harvest.
#Tomato require a fairly long growing season, and for this reason the seeds are typically planted indoors about six to eight weeks before they can be planted in the garden. The seeds can be sown 1/4″ deep in small pots or flats in a soil less potting mix or sterilized potting soil. It takes 7-14 days at a temperature of 70-80 degrees Fahrenheit for the seeds to germinate. Keep the soil moist but not soggy. Placing plastic wrap loosely over the pots or flats will help maintain the humidity necessary for germination, but the plastic wrap must be removed once the seedlings sprout.
Bottom heat helps to speed the germination process. Garden centers and catalogs sell heating cables made just for this purpose, but you may also set the pots or flats on top of your water heater to take advantage of its warmth for germination.

As soon as the seedlings emerge, they should be moved to an area with full light, such as a sunny window or under grow lights. They should have light on them for about 12 hours a day and should be kept at a temperature of 70-80 degrees. Fertilize the seedlings with a water-soluble fertilizer when they’re about 3-4 weeks old, but dilute the fertilizer to about half the strength recommended on the label.
The little tomato plants will be accustomed to fairly steady and warm temperatures indoors, and planting them directly outside could come as quite a shock to them, especially when nighttime temperatures are still cool. About a week before it’s time to plant them in the garden, begin to gradually introduce them to outdoor conditions. This is called hardening off, and it simply involves moving the plants gradually to conditions more like what they’ll experience in the garden.
Start hardening them off by moving the plants to an enclosed porch for a day or two, then to a sunny spot outdoors that is protected from the wind. If the temperature threatens to take a drastic downward dip, bring the plants back indoors until it warms up outside again.
Tomatoes were originally found only in very warm climates. They don’t like to be cold and should not be planted outside until the danger of frost has passed and the soil has warmed up. That’s typically late May or even early June here in northern Ohio.

The sooner tomatoes are planted outside, the sooner they will begin to produce ripe fruit, and there are a few tricks that make it possible to plant tomatoes in the garden a bit earlier.
The garden soil may be warmed up by covering it with clear or white plastic for a few days. The little tomato plants will be much happier with their roots in warm soil. Once the plants are in the garden, the foliage can be protected from a light frost by covering the plants with plastic gallon jugs that have their bottoms removed, or with plastic or fabric sheets placed over the plants. Suspend this over the plants using wire hoops so the plastic or fabric doesn’t touch the foliage.
When you are ready to transplant your tomato seedlings into the garden, be sure to choose a spot for them that gets full sun for at least 8 hours a day. Dig a hole for each plant that is large enough to easily accommodate all of the roots. Before transplanting, water the plants while they are still in the pot. This not only helps prevent transplant shock, but it also makes it easier to slip the plant from the pot.
Tomato plants will grow roots from any part of the stem that is buried beneath the soil, so the plants will benefit from being planted deeply, up to the first set of leaves. If the plants have spent too much time in pots and have become leggy, they may be planted in furrows with their too-long stems laid in the furrow and gently buried with soil. This will help the plants develop a strong root system while preventing the long stem from breaking.
Fill in the planting hole with soil, pressing the soil in firmly to eliminate air pockets. Then give the plants a good drink of water, thoroughly soaking the soil around them.

If you plan on staking or trellising your tomato plants, they can be planted about 2-3 feet apart. Plants that will be allowed to sprawl on the ground will need more room and should be planted 4-6 feet apart.
If the soil is still a bit cool, your white or clear plastic may be placed on the ground beneath the plants to warm the soil. Once warmer temperatures have settled in, this plastic should be removed to avoid burning the foliage with reflective heat.
It is important to keep tomato leaves up off the soil to help prevent soil-borne diseases from attacking the plants. This can easily be done by applying straw mulch around the plants. But straw mulch should only be applied once the soil has warmed up above 70 degrees. If the mulch is laid down while the soil is still cool, it will keep the soil from warming up as it should, your tomato plants will suffer from cold feet and won’t produce as well as they could.
Planting your tomatoes properly is an important step toward a bountiful harvest of sweet, juicy fruit. In another article we’ll discuss how to trellis and prune tomato plants to increase your harvest.
0
0
文章
Joss
2017年02月16日


If your garden looks tired at the end of the season, but your neighbors’ is full of color and texture, chances are they may be growing dahlias. Dahlias bloom from mid summer until frost, and come in small bedding sizes to large 3 foot plants with dinner plate size blooms. They are easy to grow with a few basic guidelines and tips, and will bloom when few other things in the garden will. Did I mention they are gorgeous? Great cutting flowers and pretty in the garden. What more could you want? Here’s how to grow dahlias, the easy way!
Dahlias are most often grown from tubers (like bulbs) planted in the spring. If you want the best varieties though, be taking notice of the plants that are blooming in early fall, and take note of the variety. One way to do this is to visit a nursery and check out plants in pots. I don’t recommend planting them from pots in the fall… they just aren’t a good value for the time they will bloom before frost. Start them in the spring for a longer bloom time and healthier plants.
Choose tubers that are healthy and starting to sprout, or order online from a good quality company.
Plant in late spring after the soil is warm in full sun… don’t plant too early. A good rule of thumb is to plant when it’s safe to put tomato plants in the ground.
Plant in rich, well drained soil, so that the crown is just below the soil. Don’t water until they start to sprout out of the soil They are prone to rot.
For tall or dinner plate varieties, put several stakes around the plant, so that you can secure the heavy plant as it grows. Tomato or peony cages are good for this also, depending on the size you are growing.
Fertilize every two weeks with a bloom fertilizer. Its important that you use a fertilizer low in nitrogen, (thats the first of the three numbers on a fertilizer) because too much nitrogen will grow big plants with no blooms.
Keep well watered, but try not to water late in the evening, especially later in the fall. They can develop powdery mildew. if your area is prone to mildew (on roses, for instance) then you can use a commercial or natural anti fungal spray starting in July to prevent it.
When your plant is 6-8 inches tall, pinch off the top growing point above the third set of leaves to encourage a bushier plant. Remember to clip off dying flowers at least once a week to promote more blooms.
Dahlias can be hardy down to zone 7, but are usually treated as an annual.
If you want to lift your tubers and save them to replant next spring, do so before the first frost. Cut them back to 6 inches, and use a fork to gently pry them from the soil. Let them dry out for a few days, then store them in loose sawdust or vermiculite in an area that doesn’t freeze, such as an insulated garage.
To cut dahlias, cut them in the early morning hours. BHG has this tip for making the blooms last… “After you’ve harvested dahlia flowers, make a fresh horizontal cut at the bottom of the stem and place the cut ends in about 2-3 inches of very hot (not quite boiling) water. Let the stems stay in the water for at least one hour. This hot-water treatment conditions the stems so the blooms will last four to six days.”
That’s it! Here are some of our favorite varieties, both large and small! We recommend Swan Island Dahlias for ordering the best varieties online. Here are some of their choices…
Dreamcatcher – Grows to 4 feet with 6 inch blooms… This one is a focal point for the garden!

Tahiti Sunrise – This spiky bloomer is a smaller plant, about 2 1/2 feet tall, with 5 inch blooms.

Bonne Esperance – A variety from the ’40’s, this single blooming pink beauty shows you that not all dahlias are of the double appearance… Low growing to 12 inches, this blooms early and long for a charming bedding plant!
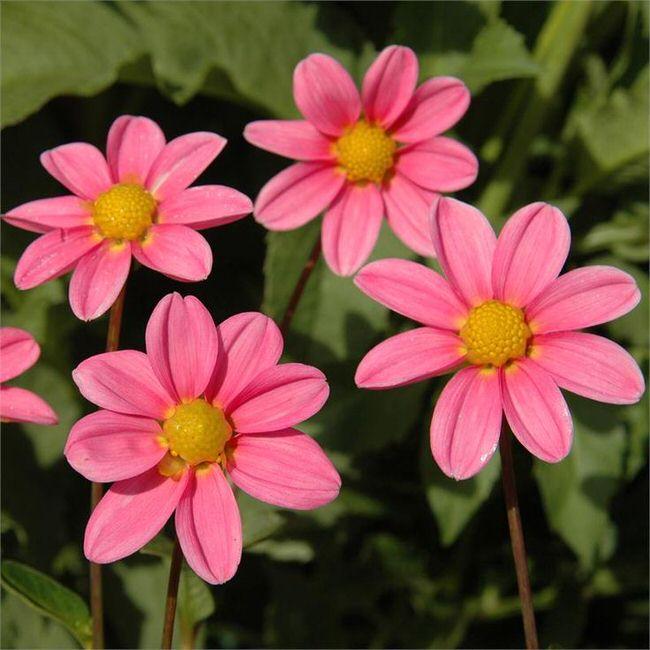
Emory Paul – This is a large, dinner plate variety, growing to 4 1/2 feet tall, with blooms over 10 inches across! Support is a must for this variety that is often used for exhibition. Color is amazing!

Bridezilla – Dahlias can be just as stunning without all the flashy color… this white variety with a yellow “eye” would be gorgeous in any garden and would make a wedding bouquet worthy cut flower. Tall, at 5 feet plus, the blooms are 6 inches across. My fav!

I am planning on ordering a few of these for my own garden… Do you have a dahlia experience you can share with us? Comment!
4
2
文章
Eyin Thor
2017年02月16日

Want to keep your plants healthy and productive? Here’re the 5 essential ways to do this. Learn more!
One of the most satisfying things to do is to have a healthy and productive garden. In fact, gardening has a lot of benefits. Greenery can keep away negative vibes that ruin your mood.
1. Right soil is what you need
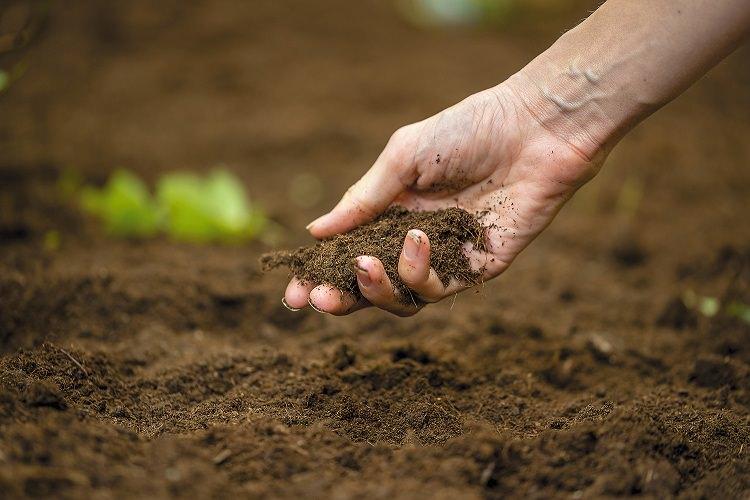
Obviously, you can’t have plants growing healthy and productive if you don’t have right soil. Right? It means, your soil should be fertile, permeable, loamy, and right pH. As good and healthy soil helps build up a strong, productive plant. Also, think again if you want to use chemicals for soil treatments– To have the best and desirable result, better go for organic soil.
2. Choosing the right plants is important
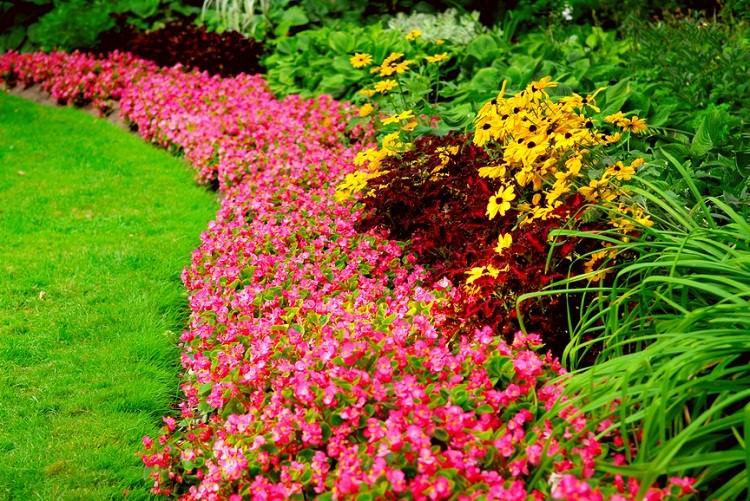
Just because you like a particular plant that doesn’t mean you can also have it growing successfully. You have to choose plants that not only look attractive but also match with the planting conditions you have. Choose plants that will adjust well to any spot in terms of the light, moisture, drainage, soil quality, and dimensions. Also, choose plants that are more resistant pests and diseases to ensure they will grow healthier day by day.
3. Proper spacing is must
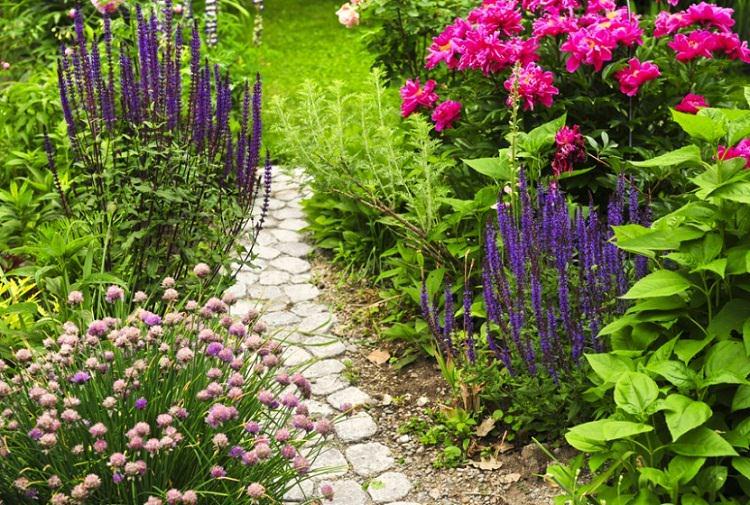
Proper planting space is essential. No doubt it is one of the biggest factors that contributes to the health of the plants. Each plant has its own spacing needs but a few tips like providing proper air circulation around the plants or choosing a large pot (for container gardening) must be considered. Groundcovers and low growing plants should be grouped tightly in beds you don’t walk on. Grouping the plants rightly will also help in reducing the need for weeding and the wastage of water. Moreover, it leads to easier path maintenance. Of course, since plants also need air circulation, you should have ample space between them and the rows. It will also contribute to repel fungal attacks. However, if you have limited space and time, and want the highest returns of your fresh organic plants, you ought to consider planting indeterminate tomatoes, non-hybrid (old) pole beans, and Zucchini in containers.
4. Proper watering must be done
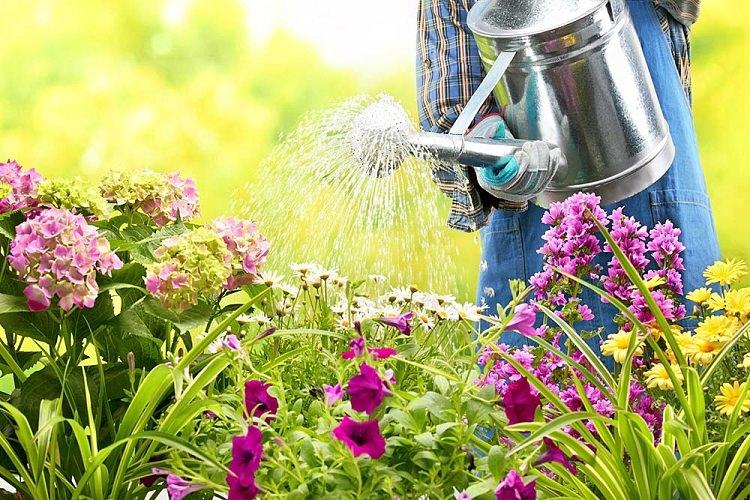
The right watering is one of the most important things you should consider. Just because you have to water the plants it doesn’t mean you’ll have to wet them. Different plants have different watering needs but there is a common approach– Never overwater or underwater your plants. Also, you should know about the right watering time– the best time to water plants is usually in the mornings, since it is the time when the day is cool and without strong winds. So the amount of water lost to evaporation is reduced. But if you water the plants in the evening, it might stay damp overnight, making them more likely to be damaged by fungal and bacterial diseases. Most experts recommend a substantial, infrequent watering for established plants. It is to ensure that the plants will grow in the right way.
5. Planting position is the key
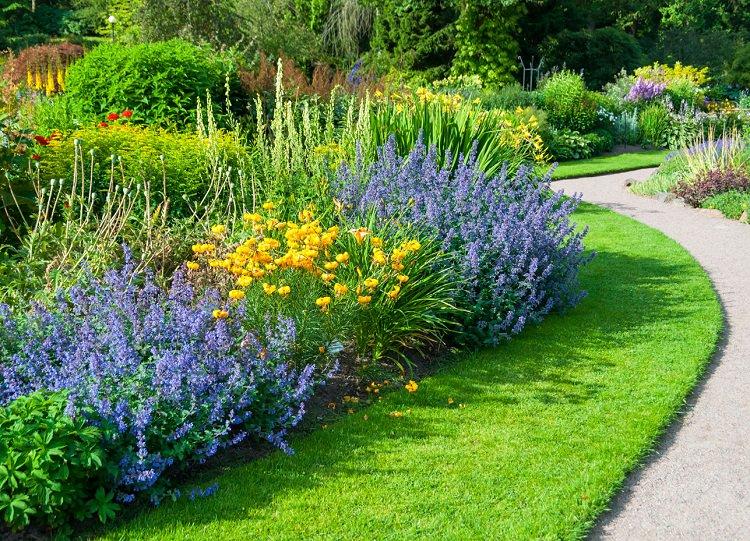
For the best-growing plants, it is important that you care about the planting position. Choose the space with proper sunlight. However, don’t forget about the fact that are the plants too that thrive in shade. Also, the planting position must be well-draining. If you’re growing plants in containers, care about there are sufficient drainage holes in the bottom of the pots.
Whether you realize it or not, gardening is an investment and it brings a significant impact in life!
John has great passion in writing and he writes on various topics. His engaging photos and well-written travel experiences are such a refreshing change from the other blogs in the related field.
One of the most satisfying things to do is to have a healthy and productive garden. In fact, gardening has a lot of benefits. Greenery can keep away negative vibes that ruin your mood.
1. Right soil is what you need

Obviously, you can’t have plants growing healthy and productive if you don’t have right soil. Right? It means, your soil should be fertile, permeable, loamy, and right pH. As good and healthy soil helps build up a strong, productive plant. Also, think again if you want to use chemicals for soil treatments– To have the best and desirable result, better go for organic soil.
2. Choosing the right plants is important

Just because you like a particular plant that doesn’t mean you can also have it growing successfully. You have to choose plants that not only look attractive but also match with the planting conditions you have. Choose plants that will adjust well to any spot in terms of the light, moisture, drainage, soil quality, and dimensions. Also, choose plants that are more resistant pests and diseases to ensure they will grow healthier day by day.
3. Proper spacing is must

Proper planting space is essential. No doubt it is one of the biggest factors that contributes to the health of the plants. Each plant has its own spacing needs but a few tips like providing proper air circulation around the plants or choosing a large pot (for container gardening) must be considered. Groundcovers and low growing plants should be grouped tightly in beds you don’t walk on. Grouping the plants rightly will also help in reducing the need for weeding and the wastage of water. Moreover, it leads to easier path maintenance. Of course, since plants also need air circulation, you should have ample space between them and the rows. It will also contribute to repel fungal attacks. However, if you have limited space and time, and want the highest returns of your fresh organic plants, you ought to consider planting indeterminate tomatoes, non-hybrid (old) pole beans, and Zucchini in containers.
4. Proper watering must be done

The right watering is one of the most important things you should consider. Just because you have to water the plants it doesn’t mean you’ll have to wet them. Different plants have different watering needs but there is a common approach– Never overwater or underwater your plants. Also, you should know about the right watering time– the best time to water plants is usually in the mornings, since it is the time when the day is cool and without strong winds. So the amount of water lost to evaporation is reduced. But if you water the plants in the evening, it might stay damp overnight, making them more likely to be damaged by fungal and bacterial diseases. Most experts recommend a substantial, infrequent watering for established plants. It is to ensure that the plants will grow in the right way.
5. Planting position is the key

For the best-growing plants, it is important that you care about the planting position. Choose the space with proper sunlight. However, don’t forget about the fact that are the plants too that thrive in shade. Also, the planting position must be well-draining. If you’re growing plants in containers, care about there are sufficient drainage holes in the bottom of the pots.
Whether you realize it or not, gardening is an investment and it brings a significant impact in life!
John has great passion in writing and he writes on various topics. His engaging photos and well-written travel experiences are such a refreshing change from the other blogs in the related field.
0
0
文章
Abigal
2017年02月16日


Ok, so you have the plants picked out, the hardscape in place, and even some evening lighting, but you still feel something is missing from your garden. Chances are, it’s a little bit o’ character, and a smile! The garden is meant to be a soothing place, but we must never forget, it’s also about affirming life. And what is life without laughter and fun? Learn how to add whimsy to your garden to take away the boring blahs, and to make your garden a place people want to come back to. Keep in mind though, adding whimsy to your garden is like anything else in life… it’s all about balance. While we love a smirking smile on our garden visitors, we try to steer away from things that are over the top cutesy. But honestly, whimsy means different things to different people. It’s your garden! If you want ten pink flamingoes, well then… ahem… go for it!
Here is some inspiration for you to get you started making your outdoor space a place of whimsy. (No flamingoes on our list, though!)
Our feature photo above, is from ‘Interiorholic’. This “spilled” flower pot is the perfect touch of make believe, with the blue lobelia spilling out the idea of rushing water. Easy instructions on how to make this work in your garden!
From ‘Crafts by Amanda’, this watering can that pours out crystals is a really clever take on whimsy… This is simply old chandelier crystals attached with a piece of wire. Longer crystals could also create sounds in the wind, like chimes. Loving’ this!

So I love this idea from "Jennifer Rizzo"… These are just vintage teacups hung from sisal twine in a tree. What about vintage flatware? I can just hear these clinking in a summer breeze, too!

From Kathy Hutchison at ‘Picasa’, this whimsical lawn shape doesn’t take any more than the desire to make it! Use a sharp garden knife to cut through the sod to make your shape, then peel away the sod on the outside. Keep well watered until roots on the edge of the sculpted sod take good root.

‘Earth Shapers‘ created this pebble mosaic for a walkway instead of just plain concrete… I would sure rather walk up this path!
You can easily purchase whimsical garden art, like these beaded sting stakes from ‘Gardener’s Supply‘. Just remember here, it easy to get too cute, so make sure you want to be known around the neighborhood as “the lady with all the smiling frogs”, or “that family who loves gnomes” before you go crazy with it!

Another choice from ‘Gardeners’, this LED fairy dust ball is a cool way to add whimsy for your night time garden!

‘Judy Sturman‘ created this pink tricycle planter from an old trike, some spray paint, and wired on some old planter pots. This is so vintage whimsical!

Etsy is a great place to find whimsical garden art… ‘ToriArt’ made these abstract garden art stakes that would take no effort to install in your garden, but looks like “The Good Ship Lollipop” to me!

Last, these garden art plant sticks from ‘AllegraArt‘ can bring a little happy color and form to any corner of your outdoor space. So add some whimsy to your garden!

0
0
文章
Gina
2017年02月15日

When gardening in a small space, one of the largest budget busters is purchasing containers for your plantings. Even at the discount stores, buying containers for your garden can take a huge chunk out of your wallet, leaving nothing for the plants! There are ways to creatively create your own containers and save money on gardening in a small space.
Remake a Cheap Container
When you look at the reality of it, all a container has to do is hold soil and allow water to drain. Looking pretty isn’t necessary for function, but most of us want to dress up our yards with our gardens.
Here’s some ideas:
Cheap pots from the dollar store, kitty litter buckets, or plastic paint buckets
Spray paint made for plastics
Glue gun
Decorative pebbles or stone
If your container has no way for water to drain, drill a few holes in the bottom. If you don’t have access to a drill, use a hammer and nail.
Make sure you clean your container well, then follow the paint can directions for giving your container an attractive base color. Earth or natural tones are best to keep the container looking unobtrusive. Metal finishes are also an option, you may want to try one of the newer hammered metal finishes for a modern look. Allow to dry overnight.
Using your glue gun, attach your stones or pebbles in a decorative fashion. I like to lay the planter on its side and work around the pot using bands of stones to “paint” simple designs. Lines, waves, geometric shapes and banding effects are all easy enough for any beginner. Try to plan your design to hide the less attractive areas of the container, especially if you’re using something recycled.
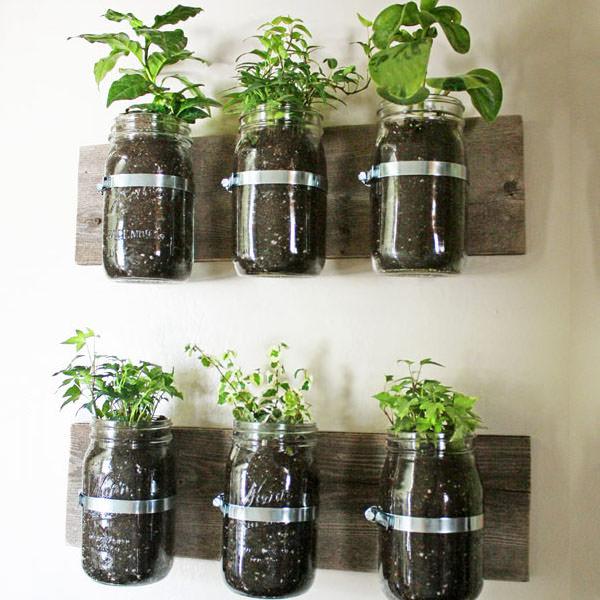
Allow the glue to set 24 hours. If the containers will not be in a protected area such as a porch or deck, you might want to consider using an exterior grade glue instead.
Fill with soil, plant, enjoy!
Using Unusual Containers
If cheap garden containers are what you need, yard sale season is the perfect time to find them! Since we already know that all garden containers need to do is hold soil and provide drainage, this is a perfect way to make charming container gardens on a budget.
Scour yard sales, thrift shops and your own home for unique garden container ideas. Miniature gardens can be created and displayed inside everything from pretty teapots with a chipped rim to old suitcases or even purses! Wooden tool boxes, hanging colanders, mason jars and even old canoes!
Want something with a modern flair? Check out a pipe supply company for lengths of metal drainage pipe that can be used as trendy, urban looking containers.
Attach lengths of chain to old light fixtures to make funky hanging containers. Use your imagination… and it doesn’t hurt to say it again. If it can hold soil, it can be a container!
That having been said, make sure to use items within the style and theme of your home and gardens. Planting old work boots with trailing sedums would look great near an old barn in a country garden, but its going to look all wrong on the porch of a contemporary home.

Tips and Tricks
When using cheap or free containers in your garden, there are a couple of tips to help keep your garden looking less than “cheap”.
Use a common element to keep things pulled together. Use the same color family, same style of decorating the pots, or use an unusual shape for the pots to make it all look deliberate. You don’t want it to look like a hodgepodge.
Use trailing plants with abandon. Letting plants fall over the side of the pots moves them into the background, hides imperfections in your containers, and puts the focus on the plants which is where it belongs.
Bring the eye up. Plant some tall, dramatic plants in pots to keep the eye from examining the containers too closely. Cleome, hollyhocks, and cosmos are tall plants that can easily (and quickly) be grown from seed, saving money.
When planning small space gardens, making cheap containers can help you save money, while adding color and flexibility to your special outdoor space.
Remake a Cheap Container
When you look at the reality of it, all a container has to do is hold soil and allow water to drain. Looking pretty isn’t necessary for function, but most of us want to dress up our yards with our gardens.
Here’s some ideas:
Cheap pots from the dollar store, kitty litter buckets, or plastic paint buckets
Spray paint made for plastics
Glue gun
Decorative pebbles or stone
If your container has no way for water to drain, drill a few holes in the bottom. If you don’t have access to a drill, use a hammer and nail.
Make sure you clean your container well, then follow the paint can directions for giving your container an attractive base color. Earth or natural tones are best to keep the container looking unobtrusive. Metal finishes are also an option, you may want to try one of the newer hammered metal finishes for a modern look. Allow to dry overnight.
Using your glue gun, attach your stones or pebbles in a decorative fashion. I like to lay the planter on its side and work around the pot using bands of stones to “paint” simple designs. Lines, waves, geometric shapes and banding effects are all easy enough for any beginner. Try to plan your design to hide the less attractive areas of the container, especially if you’re using something recycled.

Allow the glue to set 24 hours. If the containers will not be in a protected area such as a porch or deck, you might want to consider using an exterior grade glue instead.
Fill with soil, plant, enjoy!
Using Unusual Containers
If cheap garden containers are what you need, yard sale season is the perfect time to find them! Since we already know that all garden containers need to do is hold soil and provide drainage, this is a perfect way to make charming container gardens on a budget.
Scour yard sales, thrift shops and your own home for unique garden container ideas. Miniature gardens can be created and displayed inside everything from pretty teapots with a chipped rim to old suitcases or even purses! Wooden tool boxes, hanging colanders, mason jars and even old canoes!
Want something with a modern flair? Check out a pipe supply company for lengths of metal drainage pipe that can be used as trendy, urban looking containers.
Attach lengths of chain to old light fixtures to make funky hanging containers. Use your imagination… and it doesn’t hurt to say it again. If it can hold soil, it can be a container!
That having been said, make sure to use items within the style and theme of your home and gardens. Planting old work boots with trailing sedums would look great near an old barn in a country garden, but its going to look all wrong on the porch of a contemporary home.

Tips and Tricks
When using cheap or free containers in your garden, there are a couple of tips to help keep your garden looking less than “cheap”.
Use a common element to keep things pulled together. Use the same color family, same style of decorating the pots, or use an unusual shape for the pots to make it all look deliberate. You don’t want it to look like a hodgepodge.
Use trailing plants with abandon. Letting plants fall over the side of the pots moves them into the background, hides imperfections in your containers, and puts the focus on the plants which is where it belongs.
Bring the eye up. Plant some tall, dramatic plants in pots to keep the eye from examining the containers too closely. Cleome, hollyhocks, and cosmos are tall plants that can easily (and quickly) be grown from seed, saving money.
When planning small space gardens, making cheap containers can help you save money, while adding color and flexibility to your special outdoor space.
3
0
文章
stone
2016年12月28日
#lithops #living-stone #succulent Living Stones (Lithops) are unusual succulents that have evolved to resemble the pebbles and rocks that litter their native habitats through southern Africa. These very small plants hug the ground and grow extremely slowly. It can take years for a plant to eventually fill its pots with new leaves. Structurally, Lithops are comprised of two fused leaves above ground that connect to an underground stem with a long root.
The leaves are extremely thick and the degree of fusion depends on the species. Some species appear to be a single leaf, with hardly any evidence of the leaf fusion, while others are deeply lobed to the level of the soil. These plants are great collectibles, but require a careful hand with the water. Too much water and the leaves will burst or the plant will die from beneath. If you provide them with good conditions, they will flower in mid-to late summer with white and yellow daisy-like flowers that emerge from between the leaves.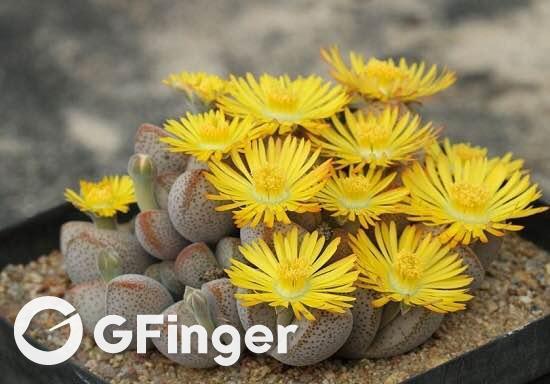
Growing Conditions
Light: Lithops thrive in full sunlight, so provide as much light as possible. Weak light will cause elongated leaves and washed out patterns on the leaves.
Water: Lithops have a definite annual cycle that should be carefully followed. In the summer, as the plants are dormant, it is okay to lightly water them if the leaves shrivel. In general, plants should not be watered during their summer dormancy or during the winter.
Temperature: Warm in summer (household temperatures are fine) and colder in winter months (down to 55˚F/13˚C at night).
Soil: Use a cactus mix or very fast-draining potting soil mixed with sand.
Fertilizer: Fertilizer is not necessary.
Propagation
Most Lithops species can be propagated from seeds. Seedlings typically take two to three years to reach maturity and begin flowering.
Repotting
Lithops are very slow growing, small plants, which makes them ideal as houseplants (once you get the hang of their watering schedule). Older plants form attractive clumps of “pebbles” in their pots, which are highly prized. In general, plants should only be repotted if there are cultural problems (soggy soil) or the plant has outgrown its dish container, which will only happen every several years。
Grower’s Tips
Lithops develop a new set of leaves every year, with new leaves emerging in the fall and growing through the winter and into the summer. In late summer, the plant will go dormant and water should be severely restricted to prevent bursting leaves. The flowers appear near the end of summer or fall, first showing up as a small bud forcing its way between the leaves and growth will begin again. It’s safe to water during this period. Heading into the winter, the leaves will still be growing, but you should stop watering, even as the older leaves shrivel up and encase the new growth. In the spring, it’s safe to begin lightly watering again as the plant begins to grow again, heading toward their summer dormancy period and the emergence of new leaves in the fall.

The leaves are extremely thick and the degree of fusion depends on the species. Some species appear to be a single leaf, with hardly any evidence of the leaf fusion, while others are deeply lobed to the level of the soil. These plants are great collectibles, but require a careful hand with the water. Too much water and the leaves will burst or the plant will die from beneath. If you provide them with good conditions, they will flower in mid-to late summer with white and yellow daisy-like flowers that emerge from between the leaves.

Growing Conditions
Light: Lithops thrive in full sunlight, so provide as much light as possible. Weak light will cause elongated leaves and washed out patterns on the leaves.
Water: Lithops have a definite annual cycle that should be carefully followed. In the summer, as the plants are dormant, it is okay to lightly water them if the leaves shrivel. In general, plants should not be watered during their summer dormancy or during the winter.
Temperature: Warm in summer (household temperatures are fine) and colder in winter months (down to 55˚F/13˚C at night).
Soil: Use a cactus mix or very fast-draining potting soil mixed with sand.
Fertilizer: Fertilizer is not necessary.

Propagation
Most Lithops species can be propagated from seeds. Seedlings typically take two to three years to reach maturity and begin flowering.
Repotting
Lithops are very slow growing, small plants, which makes them ideal as houseplants (once you get the hang of their watering schedule). Older plants form attractive clumps of “pebbles” in their pots, which are highly prized. In general, plants should only be repotted if there are cultural problems (soggy soil) or the plant has outgrown its dish container, which will only happen every several years。

Grower’s Tips
Lithops develop a new set of leaves every year, with new leaves emerging in the fall and growing through the winter and into the summer. In late summer, the plant will go dormant and water should be severely restricted to prevent bursting leaves. The flowers appear near the end of summer or fall, first showing up as a small bud forcing its way between the leaves and growth will begin again. It’s safe to water during this period. Heading into the winter, the leaves will still be growing, but you should stop watering, even as the older leaves shrivel up and encase the new growth. In the spring, it’s safe to begin lightly watering again as the plant begins to grow again, heading toward their summer dormancy period and the emergence of new leaves in the fall.
4
3
rebeccamee:Not so familiar with this plant but they look cute, will give it a thought to grow them if I have more room to keep all my succulents
文章
Andy
2016年12月26日

#air-plant #air-plant-care #tillandsia Tillandsia is a genus of around 650 species of evergreen, perennial flowering plants in the family Bromeliaceae, native to the forests, mountains and deserts of Central and South America, the southern United States and the West Indies.
Most Tillandsia species are epiphytes – i.e. they normally grow without soil while attached to other plants. Some are aerophytes or air plants, which have no roots and grow on shifting desert soil.
Light
Air plants should be kept where they'll receive bright, indirect sunlight or under fluorescent home/office lighting. Periods of direct sunlight are just fine, but more than a few hours of hot sun will deplete the plants of their moisture. If your plant will be in a spot with some pretty direct light, try misting them every couple of days to keep them hydrated.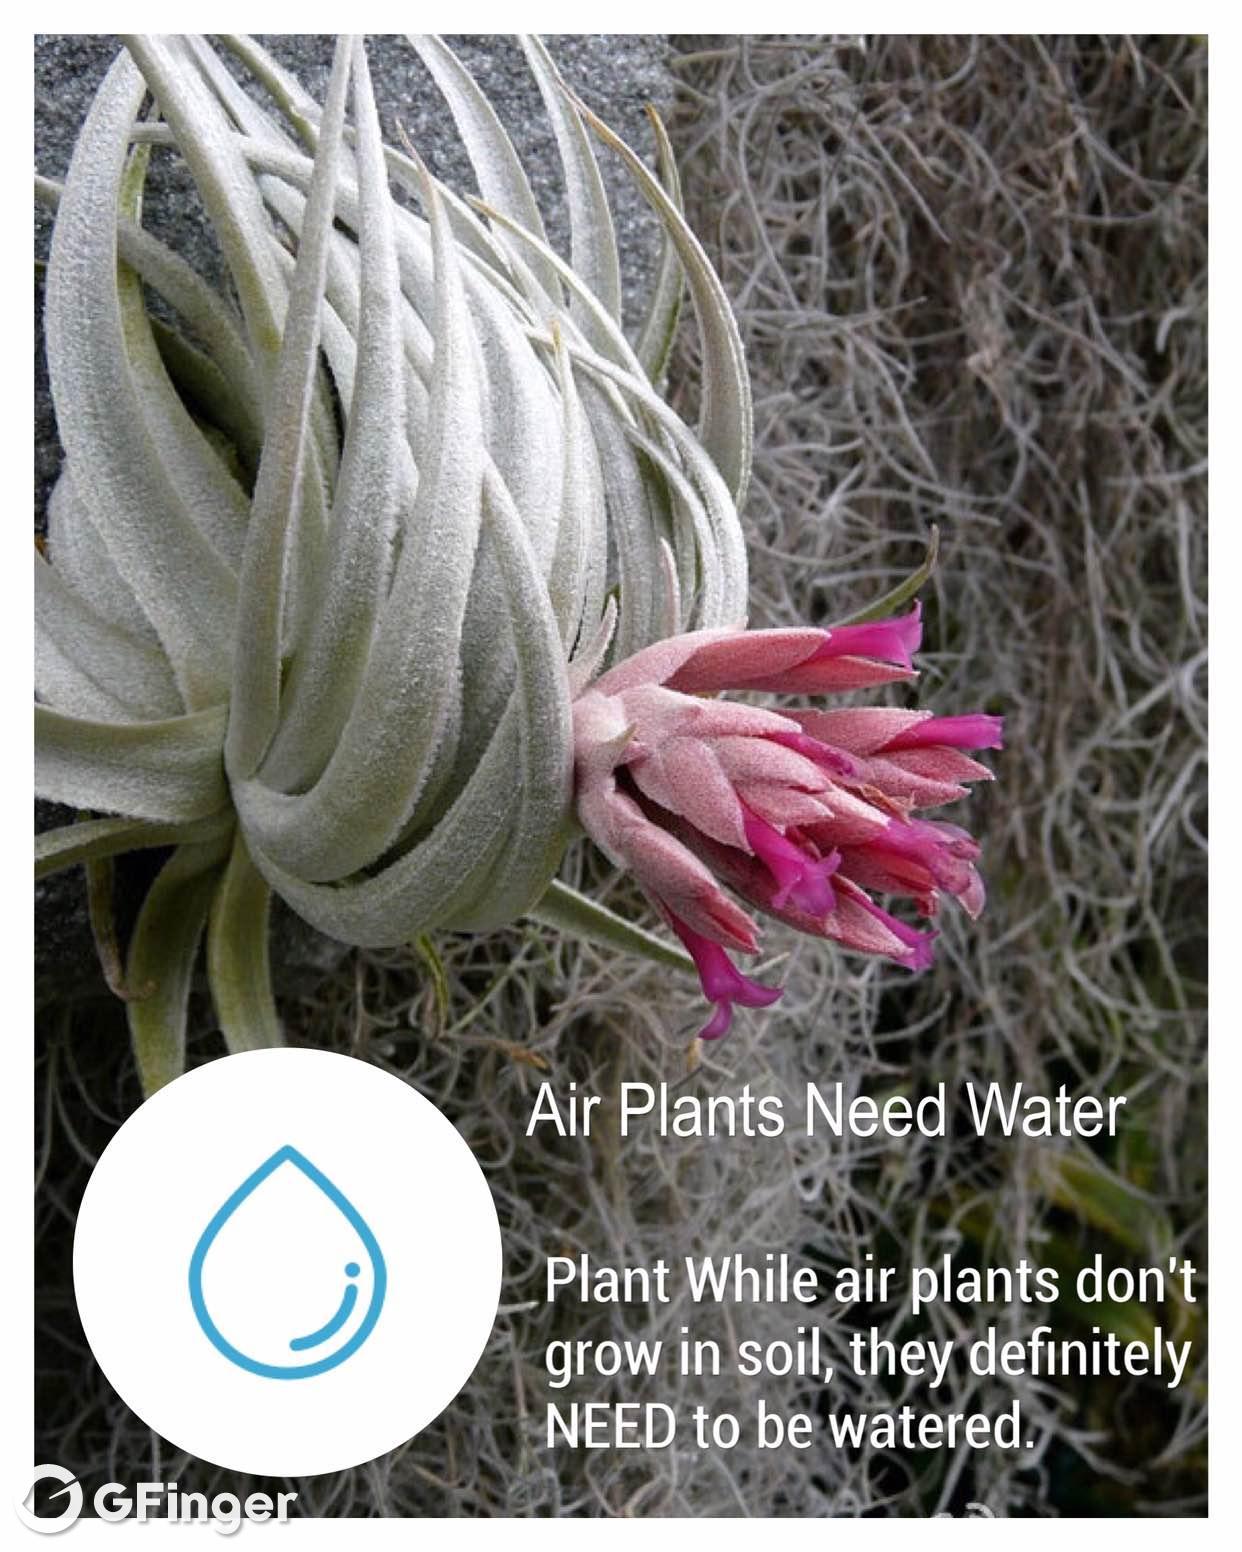
Water
Air plants live on air, right? Uh, not right! While air plants don't grow in soil, they definitely NEED to be watered. While the plants can survive for long periods of drought, they will not grow or thrive and will eventually die off if water is too scarce. Follow the directions below for watering your plants on a regular basis and they will stay alive and well for quite some time. The good news is that since these plants are very forgiving, you shouldn't stress over their care schedule. There's certainly no need to get a babysitter when you go on vacation.
How do I water my air plants?
As a main method of watering your plants, we recommend giving them a thorough rinsing under running water or letting them soak in a bath of water for 20-30 minutes. You can use a bowl, the sink or even the bathtub if you've got a family. After their shower or bath, gently shake the plants to remove any excess water from the base and the leaves, and set out to dry in an area with enough air circulation to dry them out in about 4 hours. If your plants need an in-between watering, misting them with a spray bottle is a great method. A plant in bloom should be rinsed rather than submerged in water, and take care when rinsing the delicate flowers.
How Often do I water my air plants?
Your plants should be watered once per week, and 2-3 times is recommended for optimal care. A longer, 2-hour soak is recommended every 2-3 weeks. If you are in a drier, hotter climate, more frequent watering or misting will be needed. You'll begin to notice that after watering, your plant's leaves will feel stiffer and full of water and they'll be softer and lighter in color when they're in need of water. Wrinkled or rolled leaves can be a sign of dehydration.
Temperature
Air plants will do best in generally warm conditions (a good range is 50-90 degrees).
Grooming & Aesthetic Maintenance
Everyone needs a little grooming once in a while! It is normal for some of the lower leaves of your tillandsias to dry out as the plant grows or acclimates to a new environment, and those leaves can be gently pulled right off of the plant. If the leaf tips have dried out, you can snip the dried tip off (try trimming at an angle to leave a natural-looking pointy tip), and the same can be done for the plant's roots. Don't worry about harming your plants during grooming--they'll regrow.
Fertilizer
Fertilizing your plants is not necessary, but will keep them in top shape and should promote blooming and reproduction. We recommend using Fertilizer once per month. Other water-soluble fertilizers can be used at 1/4 strength (Rapid Grow, Miracle-Grow, houseplant fertilizer, etc.) if Bromeliad fertilizer is not available.
Most Tillandsia species are epiphytes – i.e. they normally grow without soil while attached to other plants. Some are aerophytes or air plants, which have no roots and grow on shifting desert soil.

Light
Air plants should be kept where they'll receive bright, indirect sunlight or under fluorescent home/office lighting. Periods of direct sunlight are just fine, but more than a few hours of hot sun will deplete the plants of their moisture. If your plant will be in a spot with some pretty direct light, try misting them every couple of days to keep them hydrated.

Water
Air plants live on air, right? Uh, not right! While air plants don't grow in soil, they definitely NEED to be watered. While the plants can survive for long periods of drought, they will not grow or thrive and will eventually die off if water is too scarce. Follow the directions below for watering your plants on a regular basis and they will stay alive and well for quite some time. The good news is that since these plants are very forgiving, you shouldn't stress over their care schedule. There's certainly no need to get a babysitter when you go on vacation.
How do I water my air plants?
As a main method of watering your plants, we recommend giving them a thorough rinsing under running water or letting them soak in a bath of water for 20-30 minutes. You can use a bowl, the sink or even the bathtub if you've got a family. After their shower or bath, gently shake the plants to remove any excess water from the base and the leaves, and set out to dry in an area with enough air circulation to dry them out in about 4 hours. If your plants need an in-between watering, misting them with a spray bottle is a great method. A plant in bloom should be rinsed rather than submerged in water, and take care when rinsing the delicate flowers.
How Often do I water my air plants?
Your plants should be watered once per week, and 2-3 times is recommended for optimal care. A longer, 2-hour soak is recommended every 2-3 weeks. If you are in a drier, hotter climate, more frequent watering or misting will be needed. You'll begin to notice that after watering, your plant's leaves will feel stiffer and full of water and they'll be softer and lighter in color when they're in need of water. Wrinkled or rolled leaves can be a sign of dehydration.

Temperature
Air plants will do best in generally warm conditions (a good range is 50-90 degrees).

Grooming & Aesthetic Maintenance
Everyone needs a little grooming once in a while! It is normal for some of the lower leaves of your tillandsias to dry out as the plant grows or acclimates to a new environment, and those leaves can be gently pulled right off of the plant. If the leaf tips have dried out, you can snip the dried tip off (try trimming at an angle to leave a natural-looking pointy tip), and the same can be done for the plant's roots. Don't worry about harming your plants during grooming--they'll regrow.

Fertilizer
Fertilizing your plants is not necessary, but will keep them in top shape and should promote blooming and reproduction. We recommend using Fertilizer once per month. Other water-soluble fertilizers can be used at 1/4 strength (Rapid Grow, Miracle-Grow, houseplant fertilizer, etc.) if Bromeliad fertilizer is not available.
3
3
文章
Erin
2016年12月26日

#growing-fruit-tips
DOS
1.Do provide plenty of sunlight. Tomato plants need sunlight and lots of it. They need about 10 hours of direct sunlight a day during the summer (and 10-14 hours of bright diffused light a day as seedlings.)
2.Do start with healthy soil. A well amended soil is a must. I like to add a scoop of compost to every hole that I dig for any plant, and tomatoes are no exception. Soil that is full of rich compost is the secret weapon to any tomato grower and organic material is the best. There is just on chemical substitute for well good, old fashioned compost.
3.Do plant seedlings deeply. Tomato plants do best with a healthy root system. I like to choose a tall plant and pull of some of the lower leaves and plant it deeply into the hole. Roots will form along the planted stem and this will make for a very healthy plant.<img src="1000062739_24273_1482734228.jpg">
4.Do know your soil type. Tomatoes like soil that will hold water but not make them too soggy. The wrong soil type an cause all sorts of problems from flower drop, blossom end rot and split fruit.
5.Do remove lower leaves. These are the first leaves to grow on your plant and they are the easiest ones to develop fungus and other problems. As they plant grows, they also get the least amount of light ans circulation so they are more vulnerable to disease. Removing them also keeps them out of reach of the water.
6.Do Water Deeply from the roots. Tomato plants love water and they like a deep watering. A soaker hose works best for tomato plants. (affiliate link) Also see my tutorial for a soda bottle drip feeder here.
7.Do stake your plants. Indeterminate tomato plants can grow to 10 feet or more and definitely need some staking. Even determinate plants will get to 3 feet. If you don’t stake, the weight of fruit may break your stems.<img src="1000062740_24273_1482734228.jpg">
8.Do Mulch. While we are on the topic of watering, be sure to add mulch. Bring it to a few inches from the stem, right over a soaker hose. This conserves the water and helps to prevent soil born pathogens from getting on to the leaves.
9.Do pinch suckers. Small suckers will grow at each leaf axil. This can weaken the plant and won’t bear fruit. Pinch these out to encourage great plant growth.<img src="1000062741_24273_1482734229.jpg">
10.Do rotate your crop. If you plant your tomatoes in the same spot each year, you encourage soil borne pests and diseases to take hold. Move the area where you plant to another spot in your garden every three years or so.
11.Do choose a spot with good air circulation. Making sure there is plenty of air around the plants keeps the risk of many diseases at bay.
12.Do watch out for caterpillars. Horn worm caterpillars can devastate a tomato crop. Be on the look out and remove if you find them.
13.Do plant again. If you live in a sunny growing zone, be sure to practice succession planting. Add another crop a few weeks after you plant the first one to ensure luscious tomatoes all summer long.
3
0
文章
Erin
2016年12月09日

Calathea Plants, native to tropical South and Central America, Africa, and the West Indies, are grown primarily for their beautiful, brightly colored, upright, oval leaves. There are over 300 different types of Calathea Plants, many being man-made hybrids created by tissue cultures. The various Calathea varieties have leaves with a purple undersides and various vibrant colorful patterns on the top side. Indoors, a Calathea is a table plant or short bush that rarely gets bigger than 24” tall and 24”-26” wide. A Calathea Plant, with its exotic foliage, is difficult to care for, but like many other fussy plants, well worth the effort.<img src="1000055465_24273_1481263898.jpg">LIGHT
A Calathea Plant likes bright indirect light; so placing it in front of an east, west, or north window is ideal. Too much direct sun burns the leaves of a Calathea Plant and causes the beautiful leaf colors to fade.
WATER
Calathea Plants are very sensitive to the water you use. Hard water, soft water, fluoridated water, or water of poor quality causes the leaves of a Calathea Plant to turn brown from leaf burn. The best way to water a Calathea Plant is to use distilled water, rain water, or allow your tap water to sit out over night before using it. Keep the soil of a Calathea Plant moist but never soggy. Allow the top 2-3” to dry out before watering. Never let a Calathea Plant sit in water.
FERTILIZER
Feed a Calathea Plant monthly in the spring, summer, and fall with a basic houseplant food at ½ the recommended strength. Don't fertilize a Calathea Plant if it is not growing.
TEMPERATURE
Calathea Plants like temperatures between 65-80 degrees, and do not like cold drafts or temperatures below 55-60 degrees. Hot temperatures cause the leaves of a Calathea Plant to curl.
HUMIDITY
High humidity is a must for a Calathea Plant. A Calathea Plant gets brown leaf edges when the air is too dry. Humidity can be increased by placing your Calathea Plant on a tray of wet pebbles (be sure the pot is on the pebbles and not in the water), setting a humidifier close by, or by grouping plants together to create a greenhouse effect.FLOWERINGThe leaves of a Calathea Plant are more beautiful than many of the flowers on other indoor plants. With over 300 types of Calathea Plants, some varieties, such as Calathea Crocata, White Ice, and Brazilian have lovely flowers as well as spectacular leaves.<img src="1000055466_24273_1481263898.jpg">PESTS
spider mites, scale, Mealy Bugs and Aphids are houseplant pests that can be a problem for Calathea Plants.
DISEASES
The high humidity that a Calathea Plant needs, encourages bacterial and fungal diseases which usually manifest themselves as leaf lesions.SOILUse a good light porous indoor potting soil that retains water but still drains quickly for Calathea Plants. African Violet soil works well for Calatheas.
POT SIZE
A Calathea Plant rarely need repotting.
PRUNING
Cut off brown or crispy Calathea leaves as soon as they appear.
PROPAGATION
Calatheas Plants are propagated by plant division but it is a little difficult.
POISONOUS PLANT INFO
Calatheas are non- Poisonous Houseplants.<img src="1000055467_24273_1481263899.jpg">
3
3
文章
Erin
2016年12月05日

The best strawberries you’ll ever taste will come from a garden. As the first fruits to ripen in spring, strawberries are nutritious assets to any garden. The sturdy little plants prosper when planted in properly prepared beds or rows, or you can put them to work as edible edgings or let them sprawl over the top of a wall. Strawberries are happy to grow in strawberry jars and hanging baskets, too.<img src="1000053917_24273_1480928506.jpg">Life Cycle
Success with strawberries asks that you understand their life cycle. Like most hardy perennials, strawberries die back in winter and start growing vigorously as the soil warms in spring. After bearing fruit (as early as February in Florida, or June farther north), many types of strawberries produce numerous runners with baby plants at the tips. Those runners often root themselves nearby yet remain attached to the mother plant. These types of strawberries produce more fruit if you clip off most of the runners, allowing each plant to produce no more than 3 daughter plants each summer. (Some varieties, such as Loran, produce few to no runners.)
Exhausted from producing fruit and offspring, strawberries typically take a second rest period during summer’s second half. When kept weeded and lightly watered, most parent plants – and their offspring – perk up and grow again for a while in the fall. Even though it may look like little is going on with strawberries in September, the plants are busy during the fall months developing the latent buds that will grow into next spring’s flowers.
From zone 6 northward, strawberries are best planted in spring so they will be well-rooted by the following winter. Containers can be replanted in late summer and moved to a cool, protected place such as an unheated garage during the coldest months.
From zone 7 southward, strawberries can be planted in fall. (In Florida and other warm, humid coastal areas, many are grown as cool weather annuals.) Once a planting is established, simply lift your healthiest plants each September, and replant them in a freshly renovated site.
Growing strawberries doesn’t have to entail so much work, though. In all areas, strawberries can be allowed to grow into a vibrant green ground cover that requires little maintenance. The plants won’t bear as heavily as more intensively managed plants, but they will still produce delicious berries, year after year.<img src="1000053918_24273_1480928506.jpg">Soil, Planting, and Care
Strawberries need at least 8 hours of full sun each day, and they prefer slightly acidic soil with a pH between 5.5 and 6.8. If soils in your area are naturally alkaline, it is best to grow strawberries in half-barrels or other large containers filled with potting soil. Strawberries may also sulk in heavy clay, which should be generously amended with composted leaves, fully rotted sawdust, or another bulky type of organic matter before planting strawberries. After mixing in 4 inches or more of compost, rake clay soil into raised mounds to further improve drainage. If your soil is sandy, simply cultivate to remove weeds, and mix in a 1-inch layer of rich compost or rotted manure.
Many varieties of strawberries eagerly produce offspring, so it is best to space them 18 inches apart. There are a few varieties, though (such as Loran), that produce few if any runners; these can be spaced 6 inches apart. (Check the tag for exact details on spacing.) Be sure to set the plants so that their roots are well covered with soil but the central growing bud, or crown, is exposed to light and fresh air. This is very important: If you bury the crown, the plant could easily rot. Water them well. Any type of mulch – from black plastic to pine straw to shredded leaves – will keep the soil moist and the plants clean. Fertilize with Bonnie Herb, Vegetable & Flower Plant Food for excellent results. Look for your plants to begin blooming in early spring, and the flowers must be visited by bees and other pollinating insects before they can set fruit. In warm, sunny weather, berries ripen about 30 days after blossoms are fertilized.<img src="1000053919_24273_1480928507.jpg">Troubleshooting
Slugs often chew holes in strawberries just as they begin to ripen. Organic mulches such as straw encourage slugs, so where slugs are a problem, a plastic mulch helps.
In summer, several fungal diseases cause dark spots to form on leaves. Clipping or mowing strawberry foliage and raking it away in summer can interrupt the life cycles of some strawberry pests and diseases. By far the worst pests of strawberries are birds. To keep robins, brown thrashers, and other fruit-eaters from stealing your berries, cover the plants with lightweight bird netting when the berries begin to ripen.
Sometimes your fruit may be small because of heat and drought. Once you start watering and the weather improves, the new fruit should be of normal size.
Harvest and Storage
Homegrown strawberries are sweeter and more tender than store-bought strawberries.Pick strawberries in the morning, when the fruits are cool, and immediately put them in the refrigerator. Wait until just before you eat or cook them to rinse the berries thoroughly with cool water. Extra strawberries can be frozen, dried, or made into jam or preserves.
5
2
石头0717:表示英语没学好
Selina
2016年06月22日

Walking iris plants (Neomarica spp.), also known as twelve apostles, are herbaceous perennials that grow to a height of 1 1/2 to 3 feet. They bloom off and on in spring, summer and fall, producing small, iris-type flowers.


0
0


