文章
Miss Chen
2017年08月10日

Eggshells are calcium-rich organic material that decompose well when mixed into or layered on top of soil. Roses require heavy amounts of organic material to grow to their ultimate potential. Eggshells can be tilled directly into soil or added to compost or manure. Eggshells add nutrients, can help to stabilize the pH level and can act as a natural deterrent against pests.

Calcium
Plants, including roses, require large amounts of calcium in order to thrive. In terms of quantity needed, calcium ranks as a secondary nutrient behind nitrogen and potassium in plant nutrient needs. In plants, calcium helps to maintain the chemical balance of soil, increases metabolic rate and helps to neutralize cell acid. Egg shells are composed of about 95 percent calcium and therefore can provide roses with their full calcium requirement. There are no studies indicating harm caused by calcium overdose on plants, so tilling eggshells both into the soil and layering on top of the soil can be done simultaneously.
Lime
Aside from calcium, eggshells contain lime and protein. Lime is added to soil when it is too acidic (low pH level) to neutralize the acidity and raise the pH level. Roses grow best at a moderate pH level of about 6.5. Lime adds magnesium to the soil and helps increase aeration and drainage. Most commercial fertilizers contain lime.
Compost
Eggshells can be added to home compost piles to add calcium and lime to the mix. Eggshells act as an alkalizer when added to compost and do not change the nitrogen-to-carbon ratio. Home compost can be tilled into rose soil or crushed eggshells can be mixed into a commercial fertilizer or manure. Roses greatly benefit from large amounts of organic matter, the best ratio is 50 percent organic material to 50 percent soil.

Mulch
Crushed eggshells can also be scattered on top of the planted rose bed as a mulch. The nutrients seep into the soil with every rain or watering. To hide the eggshells, a second layer of bark or moss mulch can be layered on top. Eggshells placed on top and exposed to the air have a double use; aside from adding nutrients to the soil they act as a deterrent to slugs and cats. The eggshells lacerate a slug's underside, so slugs that crawl across broken eggshells turn back.

Calcium
Plants, including roses, require large amounts of calcium in order to thrive. In terms of quantity needed, calcium ranks as a secondary nutrient behind nitrogen and potassium in plant nutrient needs. In plants, calcium helps to maintain the chemical balance of soil, increases metabolic rate and helps to neutralize cell acid. Egg shells are composed of about 95 percent calcium and therefore can provide roses with their full calcium requirement. There are no studies indicating harm caused by calcium overdose on plants, so tilling eggshells both into the soil and layering on top of the soil can be done simultaneously.
Lime
Aside from calcium, eggshells contain lime and protein. Lime is added to soil when it is too acidic (low pH level) to neutralize the acidity and raise the pH level. Roses grow best at a moderate pH level of about 6.5. Lime adds magnesium to the soil and helps increase aeration and drainage. Most commercial fertilizers contain lime.
Compost
Eggshells can be added to home compost piles to add calcium and lime to the mix. Eggshells act as an alkalizer when added to compost and do not change the nitrogen-to-carbon ratio. Home compost can be tilled into rose soil or crushed eggshells can be mixed into a commercial fertilizer or manure. Roses greatly benefit from large amounts of organic matter, the best ratio is 50 percent organic material to 50 percent soil.

Mulch
Crushed eggshells can also be scattered on top of the planted rose bed as a mulch. The nutrients seep into the soil with every rain or watering. To hide the eggshells, a second layer of bark or moss mulch can be layered on top. Eggshells placed on top and exposed to the air have a double use; aside from adding nutrients to the soil they act as a deterrent to slugs and cats. The eggshells lacerate a slug's underside, so slugs that crawl across broken eggshells turn back.
0
0
文章
Dummer. ゛☀
2017年06月30日

The growth habit of Huang Zhonghua
Huang Zhonghua, general is more like a plant light fear of floods, it love light, generally requires full sun or partial sunshine, choose when to choose soil well drained and rich in organic matter, it is best to add a little fertilizer in soil, good for flowering. Water is generally sufficient, because of the drought is disadvantageous to yellow sikkmensis terms.
The ornamental function of Huang Zhonghua
When Huang Zhonghua blossoms, it is always golden, golden and yellow. It is very bright and bright. It can be used for planting or planting trees. It can also be potted and preserved, and it can make a good decorative effect.
Morphological character
Perennial herb. Stem base stout, with persistent scales on top, scales ovate, ca. 3 mm, ca. 1 mm wide. The number of stems and, ascending, 7-12 cm long, unbranched or short branched, densely gray white villous development. Ye Husheng, the only spend 4 or 5 leaves were gathered from verticillate shape, lower stem to increase gradually, more dense, subsessile; leaf blade elliptic or ovate, 5-14 mm long, 3-8 mm wide, two sharp, edges reflexed, entire, two students to carry out gray white pilose or glabrous. Flowers solitary in the top of the stem, pedicels 1-2 cm long, glabrous or sparsely pubescent; calyx tube shaped, round bottom, fruit enlargement, tube length and width nearly equal, 8-10 mm, glabrous, lobes triangular, both the length and width of about 3 mm, in sparsely pilose; corolla yellow or pale yellow, 2.5-2.7 cm long. Outside glabrous, inside throat densely white pilose, lobes obovate oblong or obovate elliptic, 1.4-1.6 cm long, 5-7 mm wide, apex usually few rusty pilose; calyx tube and ovary at about equal length, style beyond the corolla. Florescence 7-8 months. [1]
Leaves of this species elliptic or ovoid, 5-14 mm long, 3-8 mm wide, both ends acute, entire; corolla yellow or pale yellow, lobes longer than tube, distinct from similar species. Type specimens were collected from Yunnan (Lijiang). This species contains two variants.


0
0
成长记
Lunarlady
2017年06月28日

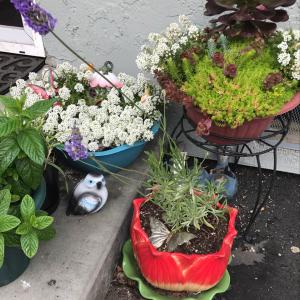
I new added a "Lavender 'Provence' (Lavandula x intermedia) Organic" in my "garden"

0
0
文章
Gina
2017年05月27日

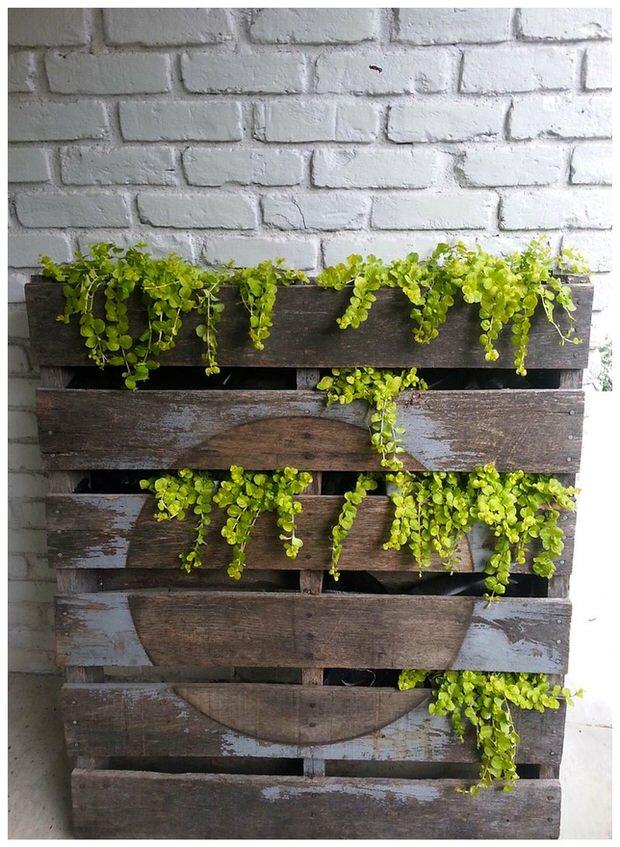
We’ve seen pallets turned into about every DIY project possible, and it’s good… they are cheap or free, we recycle when we create a pallet project, and I just love the organic feel to such a simple thing. My favorite use of pallets however, is pallet planters. They just fit in a garden, ya know?
So here are TGG’s fav five of the week, Pallet Planters!
This living wall was created by Dremel Weekends.
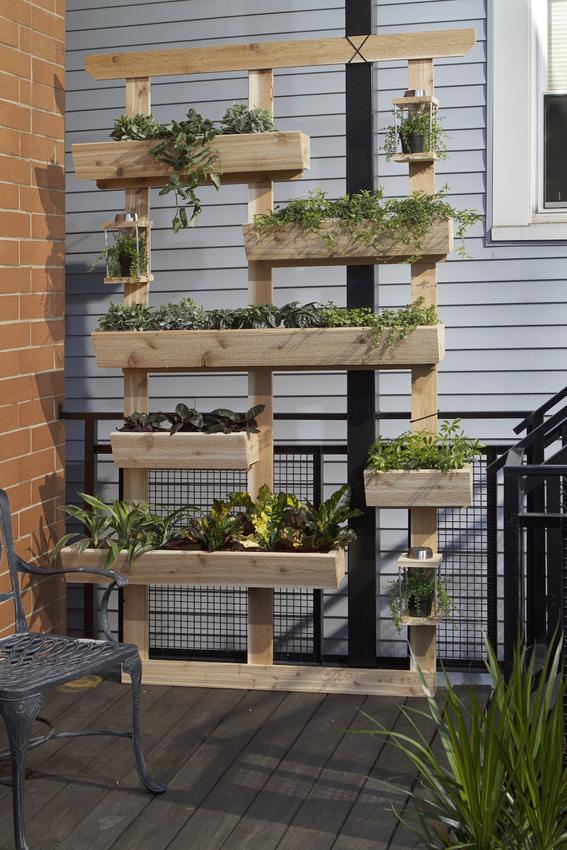
Love this plant stand created with a pallet from At Home with Kelsey.
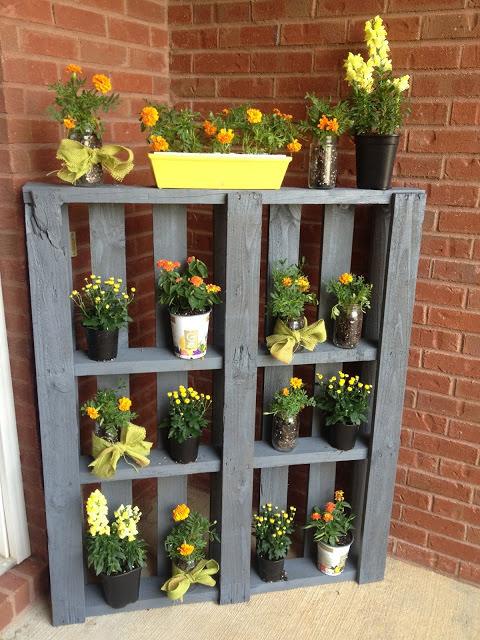
I love the more modern, fresh look of this pallet planter from A Storied Style.

For those of you who don’t want to use hammer and nails to switch up a pallets configuration, this is a great example from Young House Love on attaching pots to the pallet! Love this look!
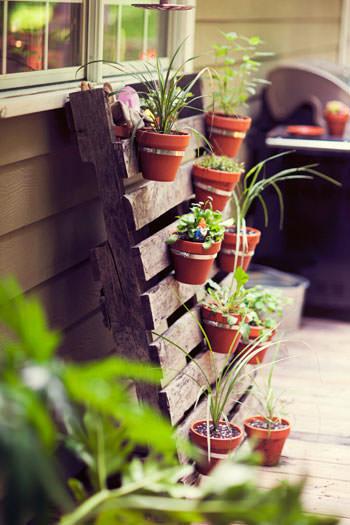
Lastly, this example perfects Reduce, Reuse, Recycle! Love it!
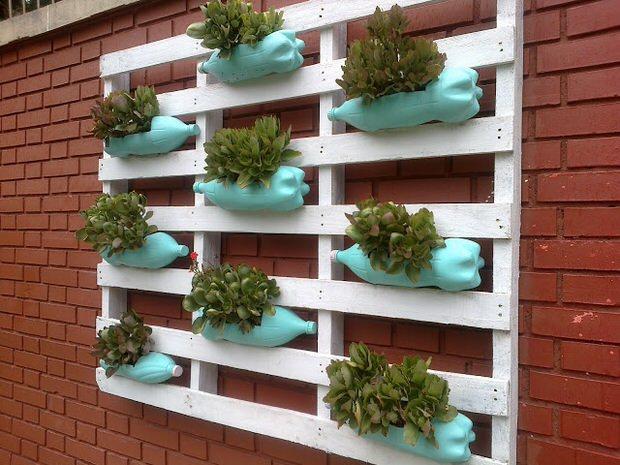
1
0
文章
lenny
2017年05月23日
Growing lettuce in containers is fun and easy and you can harvest fresh, crispy, and organic lettuce leaves for your salads in no time.

Lettuce is one of the vegetables that is very easy to grow in pots and you can even grow it in a small container. Healthy and continuously productive, this crispy salad green has many qualities that make it a blessing for health. Rich in water, fiber, vitamins and minerals such as calcium, magnesium, potassium and sodium, the lettuce is perfect for those who have intestinal transit problems, and also contributes to the smooth functioning of the nervous system.
You can start to harvest lettuce in no time– about 8 weeks for most of the varieties, it is super easy to grow and productive; similar to spinach. And the best part is you don’t need a lot of space to grow lettuce.
Also Read: How to Grow Spinach
Choosing a Pot
Almost all the lettuce varieties grow well in pots. As their shallow roots don’t need deep soil, they do best in wide and shallow containers. The pot must have adequate drainage holes in the bottom and should be at least 6 inches deep. You can use any material for pots such as plastic, clay or terracotta pots.
*However, if you’re growing lettuce in a container in a warm climate, do that in clay pots and plant heat resistant varieties.Planting Lettuce in Pots

Lettuce is a cool season crop and growing lettuce in pots is possible from spring to fall in most of the regions. Although, if you live in USDA Zones 10-11 or in any other subtropical or tropical part of the world, you should try to grow lettuce in winter.
You can easily cultivate the lettuce from seeds or from seedlings. If you want to grow it from seeds, read this post. Alternatively, you can directly buy the seedlings from a nearby nursery.
For continuous harvest do successive planting, sow seeds in every two weeks throughout the growing season.
In summer, when the weather starts to heat up the lettuce tends to bolt, to reduce this tendency keep your potted lettuce plant in a cool spot and provide proper shade.
Requirements for Growing Lettuce in ContainersSpacing
Considering you’re growing lettuce in a small space in your container garden, we assume you’ll harvest your lettuce plants regularly; trying “Cut And Come Again” method. This way you don’t need to care much about spacing.
Sow seeds densely and thin out the seedlings as they grow picking young, tender leaves regularly. Keep the plants 4-6 inches apart (depending on the size of the leaves you want and cultivar). However, head lettuces require more spacing than leaf lettuces and planting depth (8 inches) must be increased too.
Position
The lettuce loves the sunlight (*more in cooler zones) though it can be grown easily in a partially shaded area but if you’re growing lettuce in a warm climate where the sun is intense try to place the pot in a spot that receives only a few hours of morning sun.
During the hottest hours of the day (in the afternoon) it is recommended to create a shade for the plant to prevent the drying of the soil as lettuce prefers slightly moist soil constantly. Also, move the container in a cool spot when the temperature rises as this favorite green is heat sensitive.
Soil
For growing healthy lettuce, use a good quality soil mix which has plenty of organic matter, such as compost and peat. You can also add well-rotted manure or compost additionally. The soil you use must be loamy and well-drained and doesn’t hold water too much.
Watering
In shallow pots, you may need to water frequently so that the plant will not dry out completely. Make sure that you not only keep the soil slightly moist but also avoid to overwater your container grown lettuces as overwatering can kill the plants due to root rot.
Fertilizer
Because lettuce plants mature quickly, a single or double application of fertilizer is usually all that is needed to boost the production. Before you fertilize, wait for a few weeks to allow the seedlings to establish. To fertilize lettuce you can use a granular balanced fertilizer such as 10-10-10. You can also use liquid fertilizer for a quick boost. When fertilizing, be sure to follow manufacturer’s instructions as both over and under fertilization can be harmful.
Pests and Diseases
Growing lettuces in containers require care from leaf eating insects. However, if the plants are healthy there are fewer chances of infestation of pests or diseases. Mildew, leaf spot, rot and a variety of bacterial infections are common diseases that can attack lettuce. In pests and insects– caterpillars, cutworms, aphids, maggots and beetles can cause damage to the plant.
Harvesting
Once the lettuce leaves have reached the height of 4-6″ (the baby green size perfect for cut and come again method) or according to your desired size, either pick the outer leaves individually or harvest them by cutting the leaves off 1″ (2-3 cm) from above the base or crown (Must remember, don’t cut into or below the crown or else your plant will die). This way the plant will grow back and you’ll be able to harvest it again.
You can also pick the leaf lettuce before maturity, it’s simple, just remove the outer leaves when you need them in salads and keep the center leaves growing.

Lettuce is one of the vegetables that is very easy to grow in pots and you can even grow it in a small container. Healthy and continuously productive, this crispy salad green has many qualities that make it a blessing for health. Rich in water, fiber, vitamins and minerals such as calcium, magnesium, potassium and sodium, the lettuce is perfect for those who have intestinal transit problems, and also contributes to the smooth functioning of the nervous system.
You can start to harvest lettuce in no time– about 8 weeks for most of the varieties, it is super easy to grow and productive; similar to spinach. And the best part is you don’t need a lot of space to grow lettuce.
Also Read: How to Grow Spinach
Choosing a Pot
Almost all the lettuce varieties grow well in pots. As their shallow roots don’t need deep soil, they do best in wide and shallow containers. The pot must have adequate drainage holes in the bottom and should be at least 6 inches deep. You can use any material for pots such as plastic, clay or terracotta pots.
*However, if you’re growing lettuce in a container in a warm climate, do that in clay pots and plant heat resistant varieties.Planting Lettuce in Pots

Lettuce is a cool season crop and growing lettuce in pots is possible from spring to fall in most of the regions. Although, if you live in USDA Zones 10-11 or in any other subtropical or tropical part of the world, you should try to grow lettuce in winter.
You can easily cultivate the lettuce from seeds or from seedlings. If you want to grow it from seeds, read this post. Alternatively, you can directly buy the seedlings from a nearby nursery.
For continuous harvest do successive planting, sow seeds in every two weeks throughout the growing season.
In summer, when the weather starts to heat up the lettuce tends to bolt, to reduce this tendency keep your potted lettuce plant in a cool spot and provide proper shade.
Requirements for Growing Lettuce in ContainersSpacing
Considering you’re growing lettuce in a small space in your container garden, we assume you’ll harvest your lettuce plants regularly; trying “Cut And Come Again” method. This way you don’t need to care much about spacing.
Sow seeds densely and thin out the seedlings as they grow picking young, tender leaves regularly. Keep the plants 4-6 inches apart (depending on the size of the leaves you want and cultivar). However, head lettuces require more spacing than leaf lettuces and planting depth (8 inches) must be increased too.
Position
The lettuce loves the sunlight (*more in cooler zones) though it can be grown easily in a partially shaded area but if you’re growing lettuce in a warm climate where the sun is intense try to place the pot in a spot that receives only a few hours of morning sun.
During the hottest hours of the day (in the afternoon) it is recommended to create a shade for the plant to prevent the drying of the soil as lettuce prefers slightly moist soil constantly. Also, move the container in a cool spot when the temperature rises as this favorite green is heat sensitive.
Soil
For growing healthy lettuce, use a good quality soil mix which has plenty of organic matter, such as compost and peat. You can also add well-rotted manure or compost additionally. The soil you use must be loamy and well-drained and doesn’t hold water too much.
Watering
In shallow pots, you may need to water frequently so that the plant will not dry out completely. Make sure that you not only keep the soil slightly moist but also avoid to overwater your container grown lettuces as overwatering can kill the plants due to root rot.
Fertilizer

Because lettuce plants mature quickly, a single or double application of fertilizer is usually all that is needed to boost the production. Before you fertilize, wait for a few weeks to allow the seedlings to establish. To fertilize lettuce you can use a granular balanced fertilizer such as 10-10-10. You can also use liquid fertilizer for a quick boost. When fertilizing, be sure to follow manufacturer’s instructions as both over and under fertilization can be harmful.
Pests and Diseases
Growing lettuces in containers require care from leaf eating insects. However, if the plants are healthy there are fewer chances of infestation of pests or diseases. Mildew, leaf spot, rot and a variety of bacterial infections are common diseases that can attack lettuce. In pests and insects– caterpillars, cutworms, aphids, maggots and beetles can cause damage to the plant.
Harvesting
Once the lettuce leaves have reached the height of 4-6″ (the baby green size perfect for cut and come again method) or according to your desired size, either pick the outer leaves individually or harvest them by cutting the leaves off 1″ (2-3 cm) from above the base or crown (Must remember, don’t cut into or below the crown or else your plant will die). This way the plant will grow back and you’ll be able to harvest it again.
You can also pick the leaf lettuce before maturity, it’s simple, just remove the outer leaves when you need them in salads and keep the center leaves growing.
0
0
文章
小马奥
2017年05月23日

Instead of having a dull and deserted balcony, use it to create a Balcony Kitchen Garden where you can grow fresh organic food. Read on!
Instead of having a dull and deserted balcony where you usually keep your trash or old, unused items; chairs with faded color, brooms or vacuum cleaner you can use it to create a tiny balcony KITCHEN garden. Which, when the time come will reward you with the HARVEST of aromatic herbs, fresh and organic vegetables, and juicy plump fruits with great flavor that you can never get from store bought edibles!

Time, effort and planning are required
You’ll need to dedicate some time from your busy urban life to look after the plants you’ve chosen to grow. Since you’re not growing a real garden– 15 minutes a day would be enough for the most basic tasks like watering, pinching, pruning, and deadheading the fading flowers.
Minimal effort and the maximum result– for this you’ll need to be consistent! The right amount of watering, avoiding both the overwatering and underwatering, fertilizing plants on time, pruning, transplanting must be done as per scheduled.
Planning is the most crucial part here. You have limited space and that’s the real challenge– How to utilize every inch of space and improve the productivity of crops. Also, choosing the right kind of plants and varieties according to your climate is required.
Take help of vertical gardening to create space

Opt for vertical gardening ideas and you’ll be able to double up the planting space. Not only the simple pots, on your balcony– install railing planters, wall planters, add some stack planters and hang a few hanging baskets to create space. Grow more climbers, vines, and plants that grow vertically. You can also place plant stand like one in the picture above or else DIY a ladder shelf or planter which will provide you more area to arrange your pots.
A few basic requirements and tips before you start
These are really basic needs and you might already know about them. For example, use a soilless potting medium as this is light, doesn’t thwart the drainage, and permeable. Take a look at the direction and amount of sunlight you receive in your balcony. For a kitchen garden, it should receive at least 6-7 hours of direct sunlight. However, if you live in tropics most of the plants will thrive in fewer hours of sunlight too. Always apply organic fertilizers and use large pots instead of smaller ones for the plants like tomatoes, peppers, and lemon tree.
Also Read: Plants for North and South Facing Balcony
Start with herbs

If you’re new to edible gardening, start with herbs! They are the easiest plants to grow and you can grow them anywhere (unless they are not receiving a few hours of sunlight). See balcony herb garden ideas for inspiration. Choose your favorite herbs according to the growing conditions and climate. Sow the seeds or bought a few plants from your nearby nursery. Chive, mint, thyme, basil, oregano, parsley, cilantro, whichever you like. Don’t forget to check out our list on easy to grow herbs!
Also Read: How to Start a Balcony Herb Garden
Growing fruits is possible too

Not only the herbs and vegetables, growing fruit trees in containers is possible, even in a limited space like a balcony! Lemon tree, strawberries, apple, pomegranate or watermelon if you like. The list of the fruiting plants and trees is big. You can read more about this in detail in our article.
Vegetables you can grow
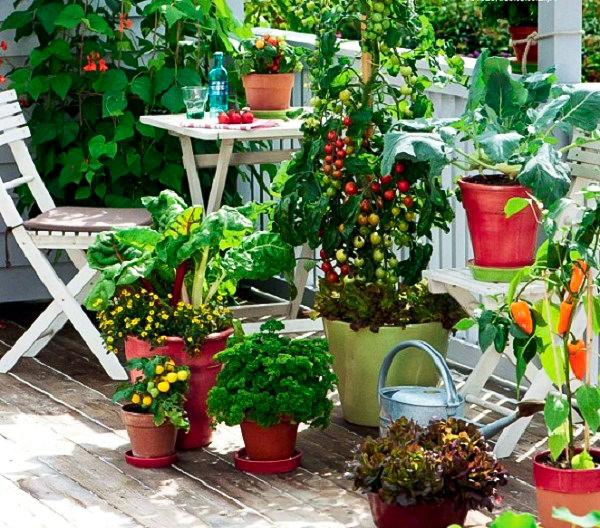
You can grow almost any vegetable plant on your balcony kitchen garden (if growing conditions are appropriate). For bigger plants like zucchini, tomatoes, eggplants, cucumbers or other fruit vegetables like peppers, okras, and beans– choose pots that are large and at least 30-40 cm deep. Herbs, leafy vegetables, salad greens, radishes, and carrots can be planted in wide shallow pots that are
15 to 20 cm deep. Cherry tomatoes, green onions, spinach, beans, and lettuces can be very productive there as they don’t need a lot of space.
Also Read: Growing Tomatoes in Hanging Baskets
Vegetable and herbs according to sunlight requirementsLow sun (minimum 4-6 hours)CeleryParsleyMintCilantroLettuceSalad greensSpinachGreen onions, onionsAsian greensGingerPeasRadishes and Carrots
Also Read: How to Start a Salad Garden
Sunny (More than 6 hours)BasilSageThymeDillChivesTomatoesPeppers and ChiliesEggplantOkraCucumberMelon and GourdsBeside these you can also grow plants like lavender, marigold, nasturtiums in your Balcony kitchen garden!
Instead of having a dull and deserted balcony where you usually keep your trash or old, unused items; chairs with faded color, brooms or vacuum cleaner you can use it to create a tiny balcony KITCHEN garden. Which, when the time come will reward you with the HARVEST of aromatic herbs, fresh and organic vegetables, and juicy plump fruits with great flavor that you can never get from store bought edibles!

Time, effort and planning are required
You’ll need to dedicate some time from your busy urban life to look after the plants you’ve chosen to grow. Since you’re not growing a real garden– 15 minutes a day would be enough for the most basic tasks like watering, pinching, pruning, and deadheading the fading flowers.
Minimal effort and the maximum result– for this you’ll need to be consistent! The right amount of watering, avoiding both the overwatering and underwatering, fertilizing plants on time, pruning, transplanting must be done as per scheduled.
Planning is the most crucial part here. You have limited space and that’s the real challenge– How to utilize every inch of space and improve the productivity of crops. Also, choosing the right kind of plants and varieties according to your climate is required.
Take help of vertical gardening to create space

Opt for vertical gardening ideas and you’ll be able to double up the planting space. Not only the simple pots, on your balcony– install railing planters, wall planters, add some stack planters and hang a few hanging baskets to create space. Grow more climbers, vines, and plants that grow vertically. You can also place plant stand like one in the picture above or else DIY a ladder shelf or planter which will provide you more area to arrange your pots.
A few basic requirements and tips before you start
These are really basic needs and you might already know about them. For example, use a soilless potting medium as this is light, doesn’t thwart the drainage, and permeable. Take a look at the direction and amount of sunlight you receive in your balcony. For a kitchen garden, it should receive at least 6-7 hours of direct sunlight. However, if you live in tropics most of the plants will thrive in fewer hours of sunlight too. Always apply organic fertilizers and use large pots instead of smaller ones for the plants like tomatoes, peppers, and lemon tree.
Also Read: Plants for North and South Facing Balcony
Start with herbs

If you’re new to edible gardening, start with herbs! They are the easiest plants to grow and you can grow them anywhere (unless they are not receiving a few hours of sunlight). See balcony herb garden ideas for inspiration. Choose your favorite herbs according to the growing conditions and climate. Sow the seeds or bought a few plants from your nearby nursery. Chive, mint, thyme, basil, oregano, parsley, cilantro, whichever you like. Don’t forget to check out our list on easy to grow herbs!
Also Read: How to Start a Balcony Herb Garden
Growing fruits is possible too

Not only the herbs and vegetables, growing fruit trees in containers is possible, even in a limited space like a balcony! Lemon tree, strawberries, apple, pomegranate or watermelon if you like. The list of the fruiting plants and trees is big. You can read more about this in detail in our article.
Vegetables you can grow

You can grow almost any vegetable plant on your balcony kitchen garden (if growing conditions are appropriate). For bigger plants like zucchini, tomatoes, eggplants, cucumbers or other fruit vegetables like peppers, okras, and beans– choose pots that are large and at least 30-40 cm deep. Herbs, leafy vegetables, salad greens, radishes, and carrots can be planted in wide shallow pots that are
15 to 20 cm deep. Cherry tomatoes, green onions, spinach, beans, and lettuces can be very productive there as they don’t need a lot of space.
Also Read: Growing Tomatoes in Hanging Baskets
Vegetable and herbs according to sunlight requirementsLow sun (minimum 4-6 hours)CeleryParsleyMintCilantroLettuceSalad greensSpinachGreen onions, onionsAsian greensGingerPeasRadishes and Carrots
Also Read: How to Start a Salad Garden
Sunny (More than 6 hours)BasilSageThymeDillChivesTomatoesPeppers and ChiliesEggplantOkraCucumberMelon and GourdsBeside these you can also grow plants like lavender, marigold, nasturtiums in your Balcony kitchen garden!
0
0
文章
小马奥
2017年05月23日

Want to grow FRESH & ORGANIC vegetables but short of space? No problem, you can even do this near your kitchen window. Just learn about the Windowsill Vegetable Gardening and 11 best vegetables you can grow there!
So what if you don’t have a big outdoor space to grow your own food, you can also grow your own fresh and organic vegetables in a small space– on your windowsill. Improvise and act, get some window boxes, hanging baskets or make some cool DIY containers.
Also Read: Windowsill Herb Garden
It’s fun and exciting and you’ll be successful if you care about a few things: Your window must receive minimum 4-5 hours of sunlight, you should fertilize your plants correctly and the balance in watering must be maintained (avoiding both overwatering and underwatering).
Also Read: How to Water Container Plants
1. Green Onions

Fresh green onions can be a wonderful and delicious addition to your salad bowls and sandwiches. In a small space like a windowsill, you can get enough harvest. You can even grow green onions in water. See the tutorial! If you want, you can try to grow onions, too. Also, vertically in plastic bottles. Check out this post.
A Tip: If you’re growing green onions in water, replace the water every day.
2. Loose Leaf Lettuce

After green onions growing lettuce is one of the easiest things in the windowsill gardening! It doesn’t require a sunny window, a few hours of sunlight is enough, if not, you can also use artificial light. And the best part is you can make decorative arrangements, combining red or green leaf lettuces in the same pot or choosing variegated ones.
A Tip: Wide-shallow containers are sufficient and provide you small crop. Learn how to grow lettuce in a pot here.
3. Tomatoes

Growing tomatoes on a windowsill is easy if it is sunny. A great way to grow and enjoy fresh, organic, juicy tomatoes indoors. For best results, choose dwarf varieties (cherry tomatoes, are perfect). Also, some varieties that grow well on windowsill includes Early Salad, Red Cushion, Pretty Patio and Tiny Tim.
Also Read: How to Grow So Many Tomatoes in So Little Space
A Tip: Cherry tomatoes don’t require a big deep pot, you can use a small to medium sized container. If you like to grow them in hanging baskets near your windows, it is possible too. Learn how to do this here.
4. Spinach

You can have your own spinach and you don’t need a big yard for this. You can grow it on a windowsill if it receives only a few hours of sun. Here’s the helpful guide on growing spinach in containers.
A Tip: Keep the soil slightly moist and provide shallow but wide planter, a 6 inches deep pot would be sufficient.
5. Chillies

Exotic, hot, spicy, and colorful– You can grow chilies on your kitchen windowsill. But only if it is sunny and warm. Also, the pot you use should be at least 8-10 inches deep. It’s fun and you’ll love your plants once they’ll start to flower and fruit. You can make your curry recipes spicier this way.
Also Read: How to Grow Banana Peppers
A Tip: Provide as much sun as possible and keep your eyes on pests.
6. Carrots
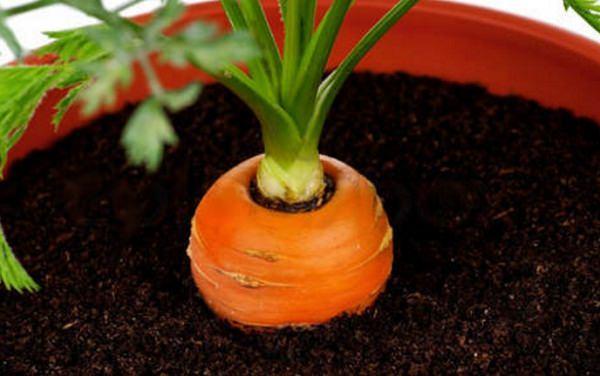
Growing carrot on a windowsill is possible and you can expect a decent homegrown harvest in small pots or window boxes. Carrot plants need regular watering, otherwise, the roots (carrots) will dry out and crack. Growing this root vegetable in containers is easy and it doesn’t take much space too. Read this to learn how to grow carrots in containers.
A Tip: Choose smaller varieties.
7. Sprouts

The healthiest stuff you can grow– Almost anywhere in your home, also on the windowsill. It is such a rewarding experience as they grow easily and quickly. All you need is a quart jar, a few tablespoons of sprouting seeds and water. In a week, you’ll have a jar full of healthy delicate sprouts that you can sprinkle on salads, add to sandwiches or toss into soups for a delicious and healthful twist on your favorite recipes.
A Tip: Just read these two articles– here and here.
8. Garlic

No need to teach you about the GARLIC glories! Let’s come to the point– Garlic will grow happily on your windowsill. To grow it, buy some fresh garlic from a grocery store. Plant a large, unpeeled clove with the pointed side up, in well-draining soil. Keep the soil moist and in a few days, you should see a green shoot. You can use its leaves in many recipes in place of garlic, will taste delicious. To harvest the leaves, cut them off with a sharp scissor, only a few inches at a time. When the leaves dry, dig up the soil to harvest the garlic bulbs.
A Tip: Choose at least 6 inches deep pot.
9. Microgreens

A big bowl of green leaves can be a prime source of vitamins A, C, K and folic acid. And microgreens (aka seedlings of herbs and vegetables) maybe even more nutrient-rich and tasty than the mature ones. Here is everything about growing microgreens.
A Tip: To grow microgreens you will need seeds of various greens and a wide but shallow tray.
10. Radishes

Radishes grow so fast and require little care and don’t mind the small pots. Plus, there leaves are also edible and you can prepare delicious exotic recipes from them. They need sunny windowsill and a moist soil.
A Tip: Ensure the pots you use have sufficient drainage holes and the potting soil must be well-drained and rich in organic matter.
11. Beans and Peas

Both the beans and peas can be grown on windowsills if there is space. Pole beans if planted in window boxes can be trained and supported by tying a string or wire from the planter to the window frame.
A Tip: Dwarf and bushier bean varieties and peas don’t require any special support, thus more suitable for windowsill gardening.
So what if you don’t have a big outdoor space to grow your own food, you can also grow your own fresh and organic vegetables in a small space– on your windowsill. Improvise and act, get some window boxes, hanging baskets or make some cool DIY containers.
Also Read: Windowsill Herb Garden
It’s fun and exciting and you’ll be successful if you care about a few things: Your window must receive minimum 4-5 hours of sunlight, you should fertilize your plants correctly and the balance in watering must be maintained (avoiding both overwatering and underwatering).
Also Read: How to Water Container Plants
1. Green Onions

Fresh green onions can be a wonderful and delicious addition to your salad bowls and sandwiches. In a small space like a windowsill, you can get enough harvest. You can even grow green onions in water. See the tutorial! If you want, you can try to grow onions, too. Also, vertically in plastic bottles. Check out this post.
A Tip: If you’re growing green onions in water, replace the water every day.
2. Loose Leaf Lettuce

After green onions growing lettuce is one of the easiest things in the windowsill gardening! It doesn’t require a sunny window, a few hours of sunlight is enough, if not, you can also use artificial light. And the best part is you can make decorative arrangements, combining red or green leaf lettuces in the same pot or choosing variegated ones.
A Tip: Wide-shallow containers are sufficient and provide you small crop. Learn how to grow lettuce in a pot here.
3. Tomatoes

Growing tomatoes on a windowsill is easy if it is sunny. A great way to grow and enjoy fresh, organic, juicy tomatoes indoors. For best results, choose dwarf varieties (cherry tomatoes, are perfect). Also, some varieties that grow well on windowsill includes Early Salad, Red Cushion, Pretty Patio and Tiny Tim.
Also Read: How to Grow So Many Tomatoes in So Little Space
A Tip: Cherry tomatoes don’t require a big deep pot, you can use a small to medium sized container. If you like to grow them in hanging baskets near your windows, it is possible too. Learn how to do this here.
4. Spinach

You can have your own spinach and you don’t need a big yard for this. You can grow it on a windowsill if it receives only a few hours of sun. Here’s the helpful guide on growing spinach in containers.
A Tip: Keep the soil slightly moist and provide shallow but wide planter, a 6 inches deep pot would be sufficient.
5. Chillies

Exotic, hot, spicy, and colorful– You can grow chilies on your kitchen windowsill. But only if it is sunny and warm. Also, the pot you use should be at least 8-10 inches deep. It’s fun and you’ll love your plants once they’ll start to flower and fruit. You can make your curry recipes spicier this way.
Also Read: How to Grow Banana Peppers
A Tip: Provide as much sun as possible and keep your eyes on pests.
6. Carrots

Growing carrot on a windowsill is possible and you can expect a decent homegrown harvest in small pots or window boxes. Carrot plants need regular watering, otherwise, the roots (carrots) will dry out and crack. Growing this root vegetable in containers is easy and it doesn’t take much space too. Read this to learn how to grow carrots in containers.
A Tip: Choose smaller varieties.
7. Sprouts

The healthiest stuff you can grow– Almost anywhere in your home, also on the windowsill. It is such a rewarding experience as they grow easily and quickly. All you need is a quart jar, a few tablespoons of sprouting seeds and water. In a week, you’ll have a jar full of healthy delicate sprouts that you can sprinkle on salads, add to sandwiches or toss into soups for a delicious and healthful twist on your favorite recipes.
A Tip: Just read these two articles– here and here.
8. Garlic

No need to teach you about the GARLIC glories! Let’s come to the point– Garlic will grow happily on your windowsill. To grow it, buy some fresh garlic from a grocery store. Plant a large, unpeeled clove with the pointed side up, in well-draining soil. Keep the soil moist and in a few days, you should see a green shoot. You can use its leaves in many recipes in place of garlic, will taste delicious. To harvest the leaves, cut them off with a sharp scissor, only a few inches at a time. When the leaves dry, dig up the soil to harvest the garlic bulbs.
A Tip: Choose at least 6 inches deep pot.
9. Microgreens

A big bowl of green leaves can be a prime source of vitamins A, C, K and folic acid. And microgreens (aka seedlings of herbs and vegetables) maybe even more nutrient-rich and tasty than the mature ones. Here is everything about growing microgreens.
A Tip: To grow microgreens you will need seeds of various greens and a wide but shallow tray.
10. Radishes

Radishes grow so fast and require little care and don’t mind the small pots. Plus, there leaves are also edible and you can prepare delicious exotic recipes from them. They need sunny windowsill and a moist soil.
A Tip: Ensure the pots you use have sufficient drainage holes and the potting soil must be well-drained and rich in organic matter.
11. Beans and Peas

Both the beans and peas can be grown on windowsills if there is space. Pole beans if planted in window boxes can be trained and supported by tying a string or wire from the planter to the window frame.
A Tip: Dwarf and bushier bean varieties and peas don’t require any special support, thus more suitable for windowsill gardening.
3
1
文章
Abigal
2017年05月22日

Want more flowers in your garden? Here’re 7 tips you should know to keep your plants blooming.1. Use rich soil
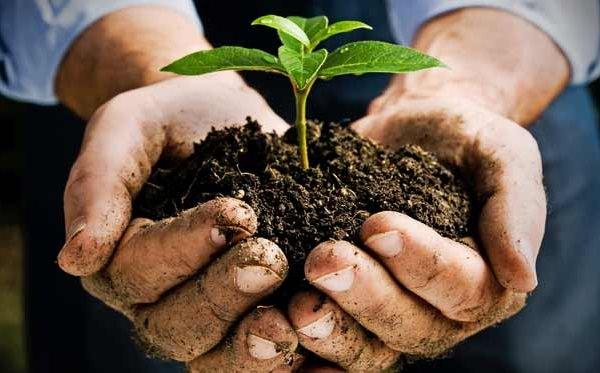
Soil that is light and rich in compost or manure provides plenty of nutrients constantly to the plants. A soil that is rich in organic matter also encourages bacterial activity that promotes soil fertility. Add some compost or manure to the soil when planting your plants and go adding them time to time.
2. Deadhead often

Most plants grow better and have more flowers if their wilted and faded blooms are plucked often. When you see the wilted flowers, remove them, so the plant can direct its energy on other flowers and they will be receiving more nutrients. Wilted flowers waste energy and sap. They also attract insect and pests. Also, by cutting off the spent flowers you prevent plants from seeding.
3. Fertilize the plants

To have more flowers, feed the plants regularly during the growing season with half strength liquid fertilizer, a flowering fertilizer should be used that has more phosphorus than nitrogen, as phosphorus is the element that promotes more flower buds. Also, you can mix time-based fertilizer in the soil at the beginning of the growing season.
4. Provide more sun

Light is essential for the plant’s growth, direct sunlight for several hours a day can be a prerequisite for many plants that come to flower, however, shade loving plants tend to reduce the number of flowers when exposed to more sun.
5. Nurse the roots
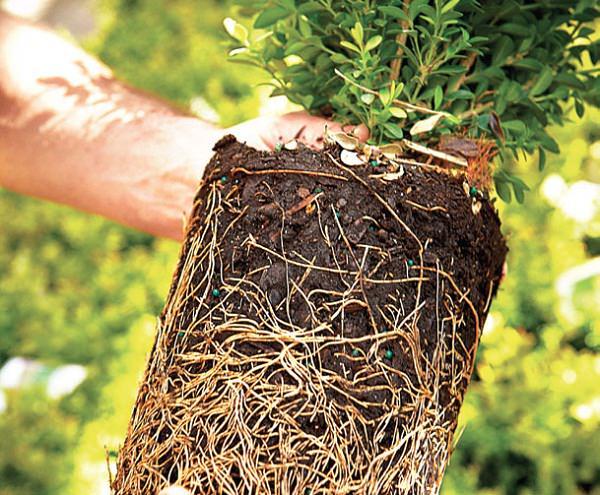
To have healthy plants and abundant blooms– nurse the roots, and remember that it is through them the plants absorb nutrients and water from the soil. When you perform the transplant or when you dig soil around the plant be careful not to cut or damage the roots as if being damaged plant would take a while to recover or it may die.
6. Apply mulch

Plants growing in a mulched soil are usually more vigorous, less prone to pests and diseases.
7. Do moderate watering
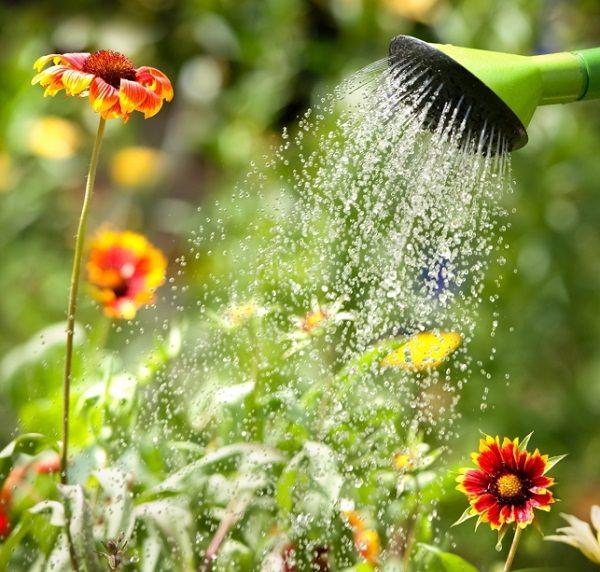
Excess watering tends to favor the development of foliage but can also produce the absence of flowering. Similarly, the lack of water can cause the plant to drop the flower buds. The best way is to do moderate watering (avoiding both overwatering and underwatering) during the flowering season.

Soil that is light and rich in compost or manure provides plenty of nutrients constantly to the plants. A soil that is rich in organic matter also encourages bacterial activity that promotes soil fertility. Add some compost or manure to the soil when planting your plants and go adding them time to time.
2. Deadhead often

Most plants grow better and have more flowers if their wilted and faded blooms are plucked often. When you see the wilted flowers, remove them, so the plant can direct its energy on other flowers and they will be receiving more nutrients. Wilted flowers waste energy and sap. They also attract insect and pests. Also, by cutting off the spent flowers you prevent plants from seeding.
3. Fertilize the plants

To have more flowers, feed the plants regularly during the growing season with half strength liquid fertilizer, a flowering fertilizer should be used that has more phosphorus than nitrogen, as phosphorus is the element that promotes more flower buds. Also, you can mix time-based fertilizer in the soil at the beginning of the growing season.
4. Provide more sun

Light is essential for the plant’s growth, direct sunlight for several hours a day can be a prerequisite for many plants that come to flower, however, shade loving plants tend to reduce the number of flowers when exposed to more sun.
5. Nurse the roots

To have healthy plants and abundant blooms– nurse the roots, and remember that it is through them the plants absorb nutrients and water from the soil. When you perform the transplant or when you dig soil around the plant be careful not to cut or damage the roots as if being damaged plant would take a while to recover or it may die.
6. Apply mulch

Plants growing in a mulched soil are usually more vigorous, less prone to pests and diseases.
7. Do moderate watering

Excess watering tends to favor the development of foliage but can also produce the absence of flowering. Similarly, the lack of water can cause the plant to drop the flower buds. The best way is to do moderate watering (avoiding both overwatering and underwatering) during the flowering season.
1
1
文章
Abigal
2017年05月22日

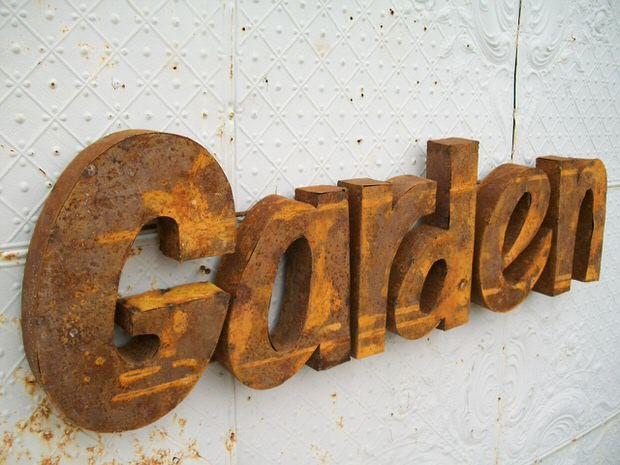
I’m a big fan of certain things in the garden… stone, concrete, metal and wood. I think it’s because even while some of these things are not organic in their mentioned forms, (though some are), they all do represent natural entities… earth, fire, water – and come from the earth in some way. And they are all subject to the rigors of Mother Nature, no matter how strong or hard they once were. There is something really visceral about being reminded of the amazing strength of the forces of nature, and how strong is the circle of life. Yea, I get it, metal, stone and concrete? Not so much on the alive part. But they represent what happens to everything on this earth… It is born of need or want, it serves it’s life, and then it decays and eventually passes on to other places and things. Those are the things a garden remind us of over and over again… The need to understand the how and the why of the world is right here in front of us. Birth, beauty, suffering, resilience, joy, meaning, death. They are all right here in nature. And they all teach us something that is relevant to what is going on in our lives.
As my teenage daughter would say, “Wow. Little off the deep end Mom.” Ok, ok. So to my point. The gardens that inspire me the most are ones that contain these elements. Have you ever walked through a garden full of rusty metal garden decor, maybe a touch of deep green moss and an old decaying log and not wanted to stay, or take photos, or remember that scene? I betcha haven’t. So here is a our little virtual tour of what has inspired us this week. BTW, at the end, look for the recipe we found on how to create rust on items you might want to use as rusty garden decor! (But aren’t quite to the “rusty” stage yet!) Garden sign above, from ‘A Rustic Garden‘.
These rusted metal garden spheres from ‘The Oresome Garden‘ are large enough to catch your attention in the garden. It seems like either this kind of decor needs to hide quietly, to be discovered in secret under some leafy bower, or to make a big impact. Love these. We recently saw similar ones made from wine barrels rings!

Steve took this photo of a rusted leafy plant during a local walk here recently… Make sure you remember to look around your neighborhoods and local gardens for inspiring scenes every day!

This bird bath made of rusted old machinery parts was found at Dragonfly Farm by Denise from ‘Spittin Toad‘. Her son used this as inspiration to make a gift like this for his grandparents… I love the idea of passing on garden values to kids, and then sharing it with other generations!

From ‘Hidden Hills Garden‘, these rusted metal funnels are a reminder to every gardener who wants to learn about repurposing that you don’t have to get fancy or complicated… Simple idea, vintage result.

From ‘Workshop 11 Design‘ via ‘Houzz’, this address sign/ mailbox is ever so cool. It’s not just me either! Visit the page and see ow many people are asking for ordering info! Rusty things are not just for vintage style! Remember, Frank Lloyd Wright felt that modern style and nature were as one.

This rusted cactus comes to us from ‘The Outlaw Gardener‘ of the garden of Cleo Raulerson in Bellevue, Washington. (We know this area well!) You should definitely click through and see all the photos of her gardens… amazing Pac NW gardening!

These next two photos were a result of a simple neighborhood walk by ‘Rhone Street Gardens‘ in Brooklyn. Yep, Brooklyn. We love the diversity and creativity we find in city gardens.


Sandi at ‘The Dirt‘, a master gardening blog in Minnesota, shared this Father’s Day gift of flowers! Thanks Sandi, for also sharing the artists’ contact info. We love featuring local artists, even if they aren’t local to us! Paul’s Metal Petals.

Want a rusted metal accent in your garden that is practical too? These steel edgings from ‘Skemah‘ are unique, pre-rusted and look great!

This metal sculpture from ‘Bellewood Gardens‘ in Pennsylvania is an example of how elegant something can look that is technically decaying! This is a more formal garden, and this piece is right at home.
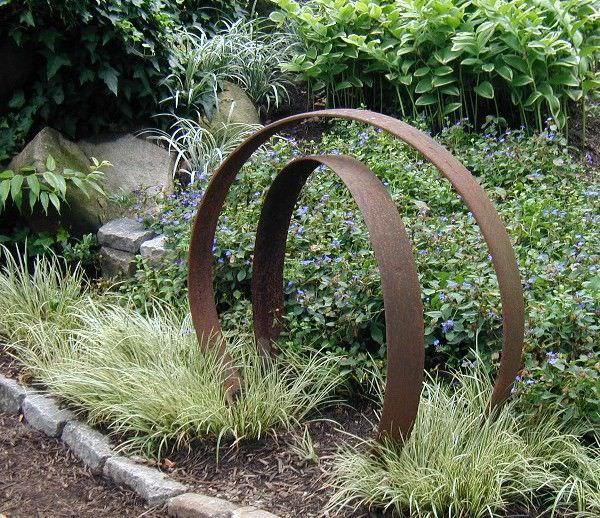
Finally, like I promised, a recipe for creating rust when your patience doesn’t keep up with your intentions! ‘Lucy Designs’ shows us an easy way to give metal pieces a rusty patina using just salt, vinegar and peroxide.

0
0
文章
Abigal
2017年03月29日


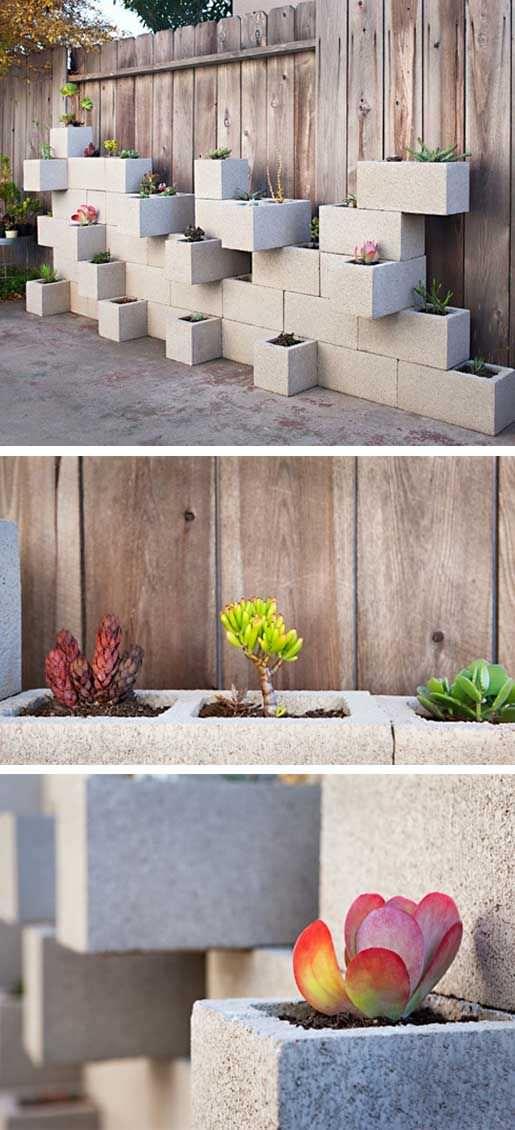
Concrete, or cinder block, is an inexpensive and organic building material for the garden. Easily picked up at your local home improvement store, with a little creativity you can use it to create garden hardscaping that will last. It combines well with other elements such as wood, and is easy for even the beginning DIY’er to work with. What are five ways to use it in the garden?
From ‘J Peterson Garden Design’, this cinder block succulent planter is a scaled down (read : easier) version of a planter that made it’s way across the internet last year. We understand the appeal, we created our own mini version of this with our DIY cinder block vertical planter. But we love the large scale this project is done on, and the steps are easy!

Here is another version of a cinder block succulent planter by ‘Zack Benson Photography’…
Steps
From ‘Step by Step’, these DIY concrete block stairs are so much better than using wood… they won’t rot away in a couple years! I like the idea of planting them with a stepable ground cover… Really complete tutorial with TONS of step by step pics…

Another example, this inspirational photo of concrete block steps is from ‘Sustainable Urban Living‘… Love how they just seamlessly merge into the side of the hill!
Fire Pit
What is nature, and therefore a garden, without fire? Fire is a necessary element in the world of nature and should be respected in the garden. Many trees cannot even release their seeds without the heat of a fire. This simple DIY fire pit by ‘Must Add Fabric Softener’ is another good example of the simplicity of using concrete block. And for all of you who have heard these fire pits are dangerous, read their take on this… which I happen to agree with.

This easy fire pit was done by ‘The Dirty Loft’, and he also addresses the “concrete block will explode” controversy… BTW… Lowe’s themselves list these blocks as fire resistant.

Furniture
This DIY cinder block bench was created by ‘Decoist’ during their front porch makeover, and has a complete tutorial. They also show several different variations of adding the planter sections.

From a Pinterest user, this bench follows the same principles…

Another Pinterest find, this bench incorporates stacked cinder block. You can use exterior landscaping adhesive to secure the blocks together if you wish.

This cinder block potting bench is a great idea, and is a much more stylish version college bookshelves!

Privacy wall
From ‘The Info Mine’, I love the Southwest look of this DIY cinder block planter wall… They used ‘Deck Restore’ to seal and add the color.

Here is the unpainted version.

This inspirational photo from ‘Houzz‘ shows you that even in an upscale design, like with this Eichler home, cinder block is a great building material!

3
0
文章
Abigal
2017年02月23日

I love concrete in the #garden . It’s such an organic material that blends well with nature, yet it holds up over time, and only improves it’s looks with age. It’s inexpensive, and can be bought in ready made forms, or created by mixing with water and other organic elements. Grow a little moss on it, and you will have me swooning… So given a choice, if I can’t have a natural element such as stone or wood…give me concrete! Here are our fav DIY concrete garden projects gathered from around the web. Our featured project, above – Give you garden structure with this #DIY concrete edging project.

And of course, we have our very own DIY concrete globes project from last season… Anyone tried this yet?

Upcycled Garden Style created these outdoor planters from concrete pavers and caulking adhesive. These are so simple, they’re brilliant! Can’t wait to try this out! Remember to check out the caulking you use and make sure its warm enough outside for it to harden and cure.

Martha tells us how to use the age old technique of hypertufa to create cool planters that make great garden accents.
The Hunted Interior has a great tutorial on how she made this cinder block planter… hers also happened to be an outdoor bar as well! You gotta check out this project…

These modern grassy planters are awesome… learn to create them here.

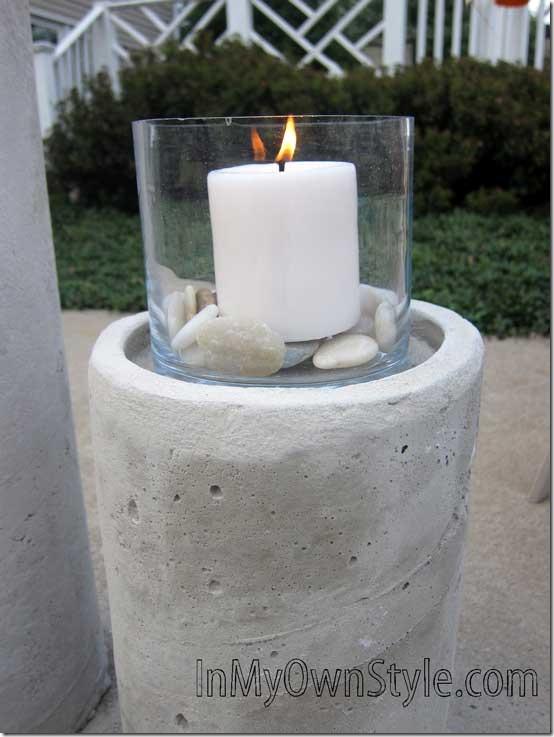
Check out these great DIY concrete fire columns from In My Own Style that are a Restoration Hardware dupe… complete with all the how-to’s!
And finally, Man Made DIY teaches us how to make this amazing DIY concrete fire pit! Love the clean look that would work in any space…

Make some DIY concrete garden projects and let us know how they turn out, and please share your ideas in the comments!

And of course, we have our very own DIY concrete globes project from last season… Anyone tried this yet?

Upcycled Garden Style created these outdoor planters from concrete pavers and caulking adhesive. These are so simple, they’re brilliant! Can’t wait to try this out! Remember to check out the caulking you use and make sure its warm enough outside for it to harden and cure.

Martha tells us how to use the age old technique of hypertufa to create cool planters that make great garden accents.
The Hunted Interior has a great tutorial on how she made this cinder block planter… hers also happened to be an outdoor bar as well! You gotta check out this project…

These modern grassy planters are awesome… learn to create them here.

Check out these great DIY concrete fire columns from In My Own Style that are a Restoration Hardware dupe… complete with all the how-to’s!

And finally, Man Made DIY teaches us how to make this amazing DIY concrete fire pit! Love the clean look that would work in any space…

Make some DIY concrete garden projects and let us know how they turn out, and please share your ideas in the comments!
0
0
文章
Andy
2017年02月15日

Start apartment gardening if you live in a city and don’t have space for a regular garden with these 7 apartment herb garden tips.
We all try to be as healthy and natural as possible. We go to grocery stores, organic markets and spend money on superfoods. We purify our drinking water, pay attention to our body and try occasionally to enjoy nature to come out of our hectic schedules. A herb garden fits perfectly into this picture. Your home-grown herbs and perhaps vegetables too. Who does not want that? Freshest and tastiest. But of course, there is still a practical side to this story. How to create a herb garden? Did you have space for a garden in your urban house?
Maybe not, but you can create a small garden anywhere. In your apartment balcony, on a small terrace, patio or on a rooftop you can create a herb garden.
Apartment Herb Garden Tips
1. Choose herbs that you like and use most

Gardening with herbs is easiest. A good start is half the work. Carefully think about what you want exactly. A herb garden (or any kind of garden) takes time, money and energy so it’s good to know what you need before you start.
Do you eat a lot of basil, parsley, cilantro or even thyme or rosemary? If you’re not so sure what you’re using exactly and frequently wait for a couple of weeks and keep a small diary or save your observation in a message or email draft and see what often gets into your food, which herb is essential in your food culture and which one you would like to try. Once you get the answers, go ahead to buy herbs for a herb garden or start them from seeds.
2. Evaluate well the available space

Next, it is important that you choose a good place for your herb garden. That is of course entirely dependent on the available space. In a limited space like a windowsill you should probably do this with a few pots. It would be better if you have a balcony or roof terrace, you are all set and if you have a garden, the possibilities are quite endless. What you should think, especially if you need to work in a small space, is that how much sunlight you get there.
3. Go vertical to create space

Go vertical to create space. Use walls, railings and ceiling to hang planters. If you think smartly you can increase your space up to 3-4 times this way. You can hang shelves too where you can put small pots. Another attractive solution to make a pallet shelve or use a shoe rack. If you’re growing herbs indoors buying a herb garden set is also a good idea.
4. Grow more than just herbs

If there is space left grow more than just herbs. Beautiful annual flowers, foliage plants or long-lasting perennials. A lemon tree or a dwarf fruit tree. The possibilities are endless. You can also start to grow your ow vegetables.
5. Provide shade in the hottest months

Plants love sunlight. But as with everything in moderation is very important. If your place receives day long excessive sunshine provides a little afternoon shade, especially in warm climates. Too much sun can dry the herbs and die, herbs like cilantro bolts in warm temperature in the scorching sun.
6. Create a nice seating area in your herb garden

Your herb garden will also look very nice and the fragrance of aromatic herbs will make it a wonderful place to sit in. If you have grown some flowers and shrubs you can enjoy it more. So it’s a good idea to create a nice place to sit.
Also Read: How to Make a Balcony Herb Garden
7. Get enough place to store herbs

With these apartment herb garden tips and some dedication, the time will come when the herbs are ready to be picked. You can pick off fresh fragrant leaves to garnish on your dishes or you can store some for later use. Of course, it depends entirely on how much you have sown this will decide how much you will have to reap. It is nice to keep the dried herbs in the kitchen so that you can use them during cooking conveniently.
We all try to be as healthy and natural as possible. We go to grocery stores, organic markets and spend money on superfoods. We purify our drinking water, pay attention to our body and try occasionally to enjoy nature to come out of our hectic schedules. A herb garden fits perfectly into this picture. Your home-grown herbs and perhaps vegetables too. Who does not want that? Freshest and tastiest. But of course, there is still a practical side to this story. How to create a herb garden? Did you have space for a garden in your urban house?
Maybe not, but you can create a small garden anywhere. In your apartment balcony, on a small terrace, patio or on a rooftop you can create a herb garden.
Apartment Herb Garden Tips
1. Choose herbs that you like and use most

Gardening with herbs is easiest. A good start is half the work. Carefully think about what you want exactly. A herb garden (or any kind of garden) takes time, money and energy so it’s good to know what you need before you start.
Do you eat a lot of basil, parsley, cilantro or even thyme or rosemary? If you’re not so sure what you’re using exactly and frequently wait for a couple of weeks and keep a small diary or save your observation in a message or email draft and see what often gets into your food, which herb is essential in your food culture and which one you would like to try. Once you get the answers, go ahead to buy herbs for a herb garden or start them from seeds.
2. Evaluate well the available space

Next, it is important that you choose a good place for your herb garden. That is of course entirely dependent on the available space. In a limited space like a windowsill you should probably do this with a few pots. It would be better if you have a balcony or roof terrace, you are all set and if you have a garden, the possibilities are quite endless. What you should think, especially if you need to work in a small space, is that how much sunlight you get there.
3. Go vertical to create space

Go vertical to create space. Use walls, railings and ceiling to hang planters. If you think smartly you can increase your space up to 3-4 times this way. You can hang shelves too where you can put small pots. Another attractive solution to make a pallet shelve or use a shoe rack. If you’re growing herbs indoors buying a herb garden set is also a good idea.
4. Grow more than just herbs

If there is space left grow more than just herbs. Beautiful annual flowers, foliage plants or long-lasting perennials. A lemon tree or a dwarf fruit tree. The possibilities are endless. You can also start to grow your ow vegetables.
5. Provide shade in the hottest months

Plants love sunlight. But as with everything in moderation is very important. If your place receives day long excessive sunshine provides a little afternoon shade, especially in warm climates. Too much sun can dry the herbs and die, herbs like cilantro bolts in warm temperature in the scorching sun.
6. Create a nice seating area in your herb garden

Your herb garden will also look very nice and the fragrance of aromatic herbs will make it a wonderful place to sit in. If you have grown some flowers and shrubs you can enjoy it more. So it’s a good idea to create a nice place to sit.
Also Read: How to Make a Balcony Herb Garden
7. Get enough place to store herbs

With these apartment herb garden tips and some dedication, the time will come when the herbs are ready to be picked. You can pick off fresh fragrant leaves to garnish on your dishes or you can store some for later use. Of course, it depends entirely on how much you have sown this will decide how much you will have to reap. It is nice to keep the dried herbs in the kitchen so that you can use them during cooking conveniently.
1
0


