文章
莹723
2021年01月11日

Christmas has passed, but you don't have to pack up all your holiday decorations for the season. There are still lots of DIY winter decorations that will add festive touches to your home right on until the warmer weather.
Once you’ve decided what direction to take your winter decoration ideas, you'll probably end up adding some fun winter activities to your list.

1.Yarn-Wrapped Vases
Wrap plain glass vases with strands of yarn, and thread with wood knitting needles. For more textured strands, braid lengths of yarn and tie around vases. Add ranunculuses, baby’s breath, snowberries, and twigs.

2.Winterberries and Greenery
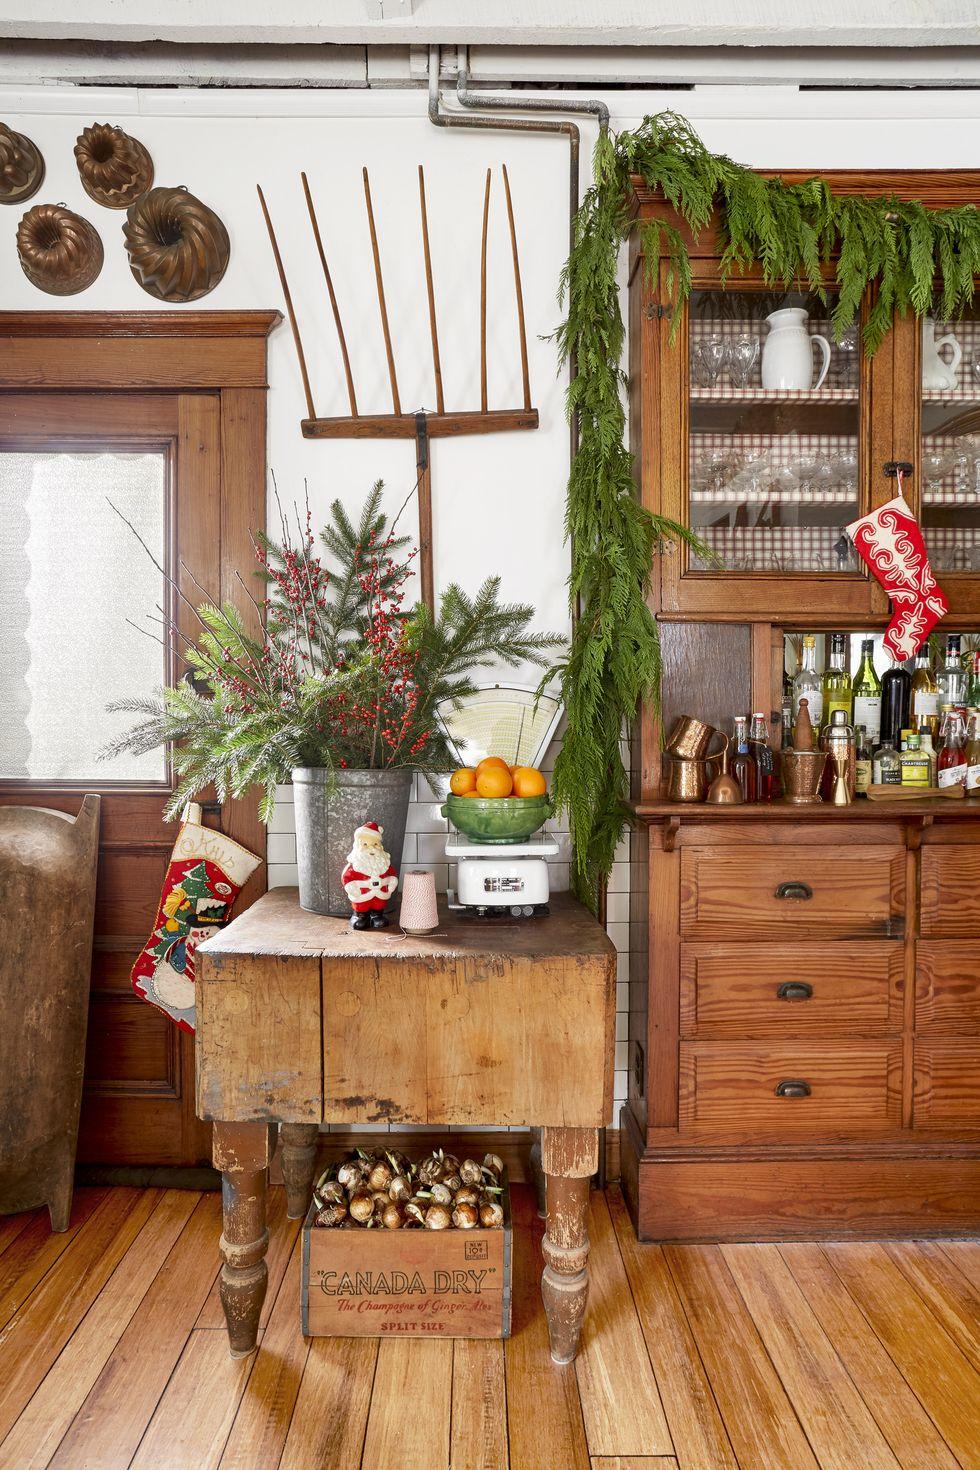
One easy way to spruce up any table: Arrange winterberries and evergreen branches in a galvanized bucket. Here, a simple garland also adds a wintery touch to a country hutch.
3.Wintery Wreath
A simple wreath of pine cones, fresh greenery, and a few white flowers makes a versatile piece you can showcase above a fireplace all winter long.

4. Wintertime Porch Decor
An evergreen tree, branches, and berries make for a merry welcome when styled in vintage galvanized buckets. You can even save a few bucks by using actual sleds instead of props.

5.Stoneware Crock Decoration
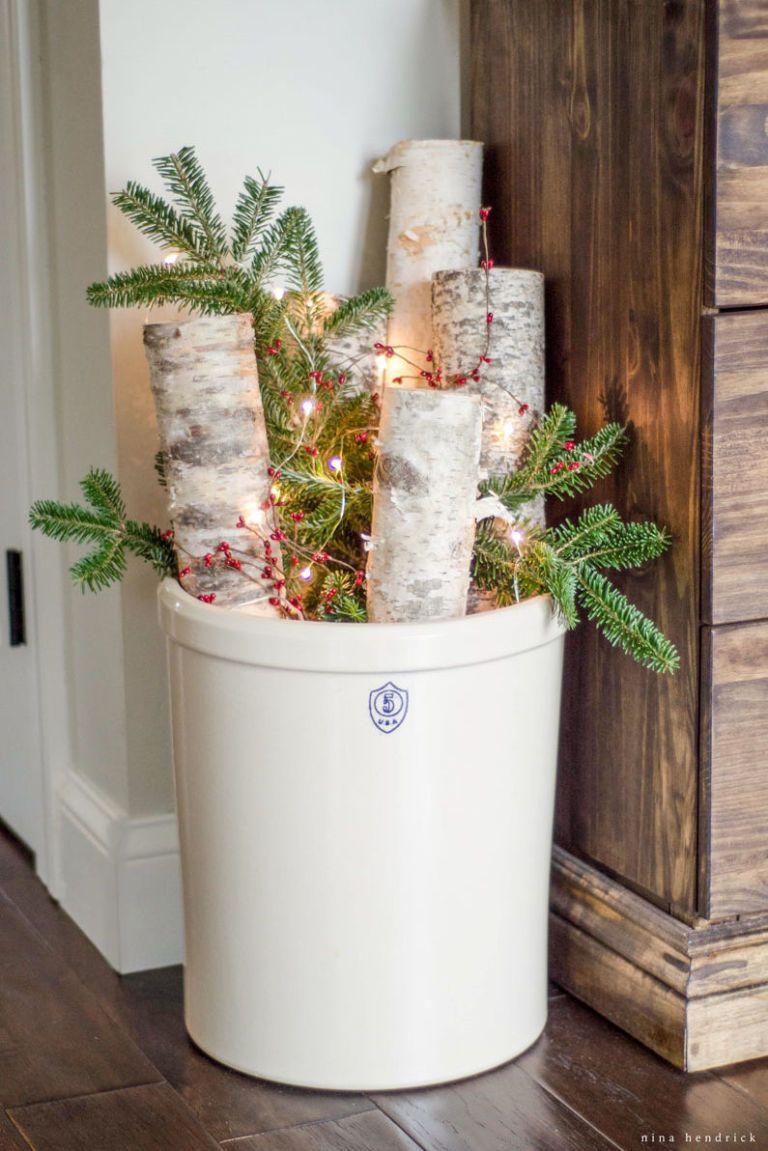
This bundle of birch logs, berries, and Christmas tree clippings will look perfect in the foyer. Add a string of lights for extra sparkle.
6.Snowy Pinecone Candle Jars
Snow texture paint, pinecones, Mason jars, and twine come together to create DIY winter luminaries.

7.Birch Candles
Want to add some oomph to an empty space? Create a cluster of birch candlestick holders and place on a hutch or entryway table.

Once you’ve decided what direction to take your winter decoration ideas, you'll probably end up adding some fun winter activities to your list.

1.Yarn-Wrapped Vases
Wrap plain glass vases with strands of yarn, and thread with wood knitting needles. For more textured strands, braid lengths of yarn and tie around vases. Add ranunculuses, baby’s breath, snowberries, and twigs.

2.Winterberries and Greenery
One easy way to spruce up any table: Arrange winterberries and evergreen branches in a galvanized bucket. Here, a simple garland also adds a wintery touch to a country hutch.

3.Wintery Wreath
A simple wreath of pine cones, fresh greenery, and a few white flowers makes a versatile piece you can showcase above a fireplace all winter long.

4. Wintertime Porch Decor
An evergreen tree, branches, and berries make for a merry welcome when styled in vintage galvanized buckets. You can even save a few bucks by using actual sleds instead of props.

5.Stoneware Crock Decoration
This bundle of birch logs, berries, and Christmas tree clippings will look perfect in the foyer. Add a string of lights for extra sparkle.

6.Snowy Pinecone Candle Jars
Snow texture paint, pinecones, Mason jars, and twine come together to create DIY winter luminaries.

7.Birch Candles
Want to add some oomph to an empty space? Create a cluster of birch candlestick holders and place on a hutch or entryway table.

0
0
文章
莹723
2020年11月23日

1——DIY Pumpkin Vase Centerpiece
Subtlety is key when it comes to Thanksgiving centerpieces. You've already got so much on the table—why crowd it further? Here, a stunning, quiet arrangement of faux flowers and branches is more than enough to make a serious statement.

2——White Centerpiece
Fall decor isn't all about oranges, yellows, and reds. Dried hydrangeas and white, antler-like decorations can make for an equally gorgeous monochrome centerpiece. Candles bring warmth, and faux pumpkins add texture.

3——Whitewash Pinecones
These pale pinecones are pretty enough to display on their own, or in this simple arrangement featuring gourds, berries, and succulents.

4——Bold Red Centerpiece
A vibrant arrangement is a guaranteed head-turner at any dinner party, but it'll be especially appreciated on Thanksgiving Day. Dahlias, roses, and ranunculus will fit right in with all the red-hued pies and cranberry sauce on your table.

5——Retro Cooler Vase
If Thanksgiving tends to be a casual shindig in your home, use a vintage jug cooler and foraged branches, leaves, and flowers from your backyard.

6——Natural Reeds Centerpiece
Dried reeds and grasses make for a totally unexpected Thanksgiving centerpiece. Evoking the earthiness of the fall season, their muted tones and subdued color palette is sure to elicit more than a few oohs and aahs from your guests.

7——Seasonal Spices
Mix and match wildflowers and vintage spice cans in autumnal hues according to the length of your table. Display two for small settings, and a series for longer setups.
8——Metallic Maize
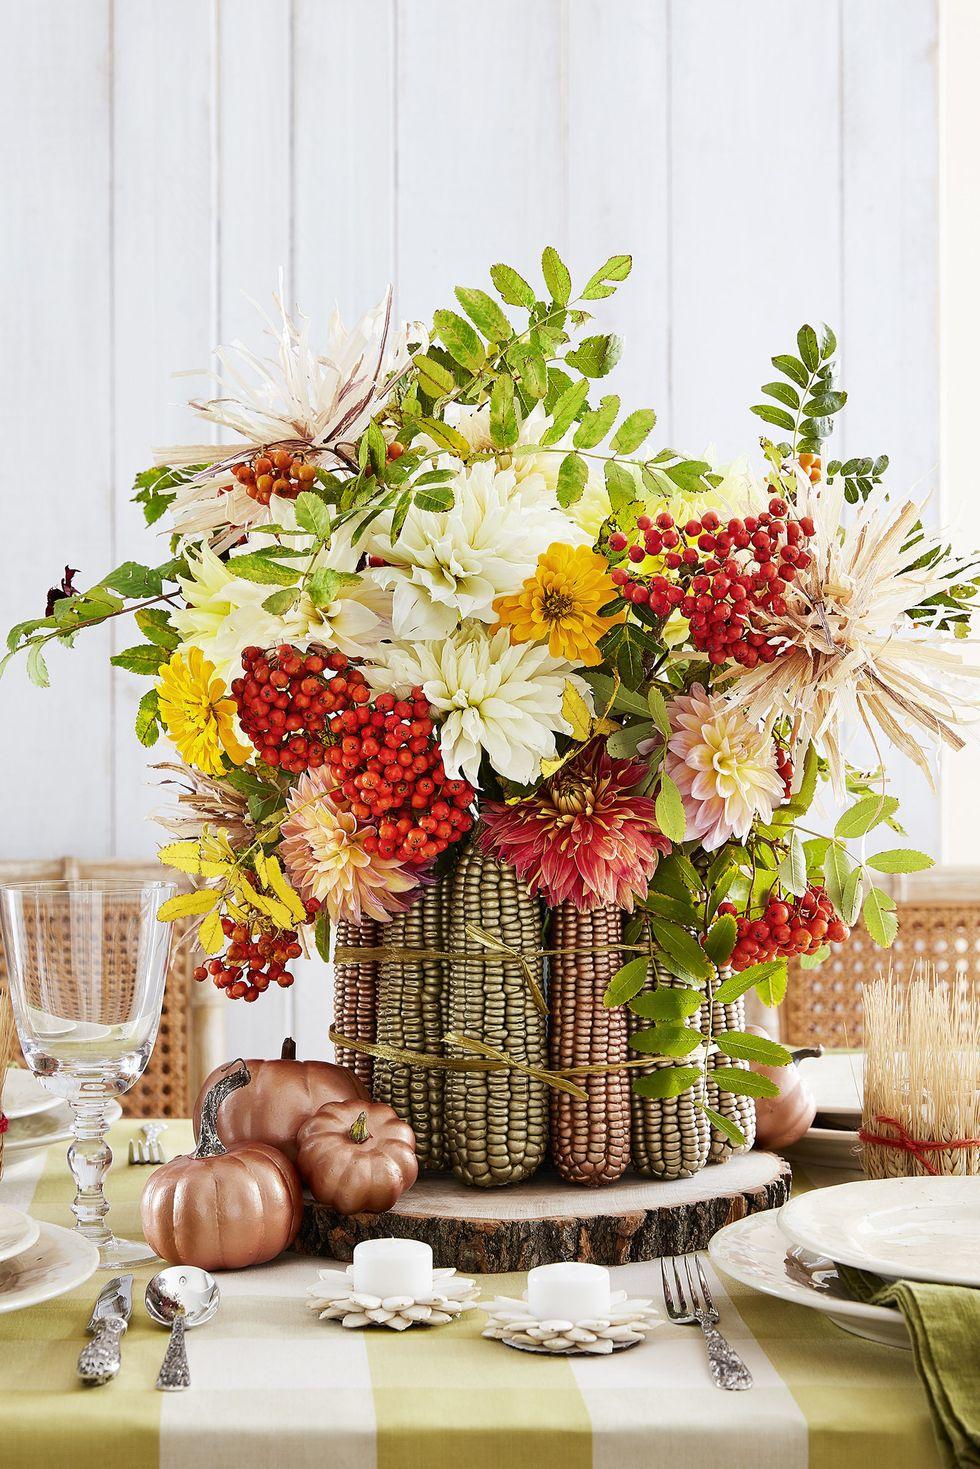
Give a plain ol' vase some fall flair with this easy idea. Start by coating roughly 14 cobs of dried corn with metallic gold and copper spray paint. Once dry, hot-glue cobs to the perimeter of a 6-inch round vase. Tie it all together with gold raffia. Fill vase with floral foam and add seasonal flowers as desired. (This sampling includes dahlias, zinnias, and mountain ash berries.)
9——Wheat Cloches
Start by bundling a small handful of wheat and tie with twine. Turn a cloche upside down and place the wheat inside, then top with base and invert. Add leftover snips of wheat to securing with twine.

10——Go Green!
A scattering of green gourds and acorn squash laid down the center of the table and accented with orange and red flowers creates quite a pretty site. Bonus: Hot glue acorns to lengths of brown waxed twine and use to tie up rolled napkins. Apply gold leaf to a portion of a preserved maple leaf and use a gold paint pen to mark with guest's initials.

11——Pumpkin Vase
Remove the top quarter of a small pumpkin. Scoop out the seeds and pulp and fill with floral foam and flowers (here, dahlias, scabiosa, strawflowers, zinnias, forget-me-nots, and nigella). Surround your centerpiece with acorns, squash, and other seasonal elements.

12——Foliage-Inspired Florals
Bring some autumnal beauty indoors with this arrangement inspired by the yellow, orange, red, and purple leaves on the trees. A vintage trophy makes the perfect vessel for a big bunch of blooms.

13——Use a Vintage Vessel
A vintage blue-and-white transferware tureen stuffed full of white and yellow flowers, with hints of greenery, looks great as a Thanksgiving table centerpiece. Bonus: Decoupage a white pumpkin with blue and white toile wallpaper.

14——Frilly Lace Pumpkins
Hot glue lace and sewing trim on orange pumpkins and sprinkle them down the center of the table. Orange flower and bittersweet add a soft touch. Bonus: Form napkins into a bow shape and slip a gold napkin ring over the center.

15——Thanksgiving Table Centerpiece
This floral pumpkin centerpiece may look ornate, but it's actually incredibly easy to make. The crafter in question simply carved a gourd and filled it with a bouquet she got from the grocery store!

Subtlety is key when it comes to Thanksgiving centerpieces. You've already got so much on the table—why crowd it further? Here, a stunning, quiet arrangement of faux flowers and branches is more than enough to make a serious statement.

2——White Centerpiece
Fall decor isn't all about oranges, yellows, and reds. Dried hydrangeas and white, antler-like decorations can make for an equally gorgeous monochrome centerpiece. Candles bring warmth, and faux pumpkins add texture.

3——Whitewash Pinecones
These pale pinecones are pretty enough to display on their own, or in this simple arrangement featuring gourds, berries, and succulents.

4——Bold Red Centerpiece
A vibrant arrangement is a guaranteed head-turner at any dinner party, but it'll be especially appreciated on Thanksgiving Day. Dahlias, roses, and ranunculus will fit right in with all the red-hued pies and cranberry sauce on your table.

5——Retro Cooler Vase
If Thanksgiving tends to be a casual shindig in your home, use a vintage jug cooler and foraged branches, leaves, and flowers from your backyard.

6——Natural Reeds Centerpiece
Dried reeds and grasses make for a totally unexpected Thanksgiving centerpiece. Evoking the earthiness of the fall season, their muted tones and subdued color palette is sure to elicit more than a few oohs and aahs from your guests.

7——Seasonal Spices
Mix and match wildflowers and vintage spice cans in autumnal hues according to the length of your table. Display two for small settings, and a series for longer setups.
8——Metallic Maize
Give a plain ol' vase some fall flair with this easy idea. Start by coating roughly 14 cobs of dried corn with metallic gold and copper spray paint. Once dry, hot-glue cobs to the perimeter of a 6-inch round vase. Tie it all together with gold raffia. Fill vase with floral foam and add seasonal flowers as desired. (This sampling includes dahlias, zinnias, and mountain ash berries.)

9——Wheat Cloches
Start by bundling a small handful of wheat and tie with twine. Turn a cloche upside down and place the wheat inside, then top with base and invert. Add leftover snips of wheat to securing with twine.

10——Go Green!
A scattering of green gourds and acorn squash laid down the center of the table and accented with orange and red flowers creates quite a pretty site. Bonus: Hot glue acorns to lengths of brown waxed twine and use to tie up rolled napkins. Apply gold leaf to a portion of a preserved maple leaf and use a gold paint pen to mark with guest's initials.

11——Pumpkin Vase
Remove the top quarter of a small pumpkin. Scoop out the seeds and pulp and fill with floral foam and flowers (here, dahlias, scabiosa, strawflowers, zinnias, forget-me-nots, and nigella). Surround your centerpiece with acorns, squash, and other seasonal elements.

12——Foliage-Inspired Florals
Bring some autumnal beauty indoors with this arrangement inspired by the yellow, orange, red, and purple leaves on the trees. A vintage trophy makes the perfect vessel for a big bunch of blooms.

13——Use a Vintage Vessel
A vintage blue-and-white transferware tureen stuffed full of white and yellow flowers, with hints of greenery, looks great as a Thanksgiving table centerpiece. Bonus: Decoupage a white pumpkin with blue and white toile wallpaper.

14——Frilly Lace Pumpkins
Hot glue lace and sewing trim on orange pumpkins and sprinkle them down the center of the table. Orange flower and bittersweet add a soft touch. Bonus: Form napkins into a bow shape and slip a gold napkin ring over the center.

15——Thanksgiving Table Centerpiece
This floral pumpkin centerpiece may look ornate, but it's actually incredibly easy to make. The crafter in question simply carved a gourd and filled it with a bouquet she got from the grocery store!

0
0
文章
莹723
2020年10月21日

When it comes to Halloween decorations, nothing is better than a collection of DIY jack-o'-lanterns. You can use them to decorate your porch to greet trick-or-treaters or light up your windowsills every night.This Halloween, rather than the classic ghoulish grin and eyes, think about these creative pumpkin faces ideas.
Dress up your farmhouse with pumpkins designed with the help of a few easy-to-find craft supplies. We will get you covered with pumpkin faces that'll outshine all the others in the neighborhood.
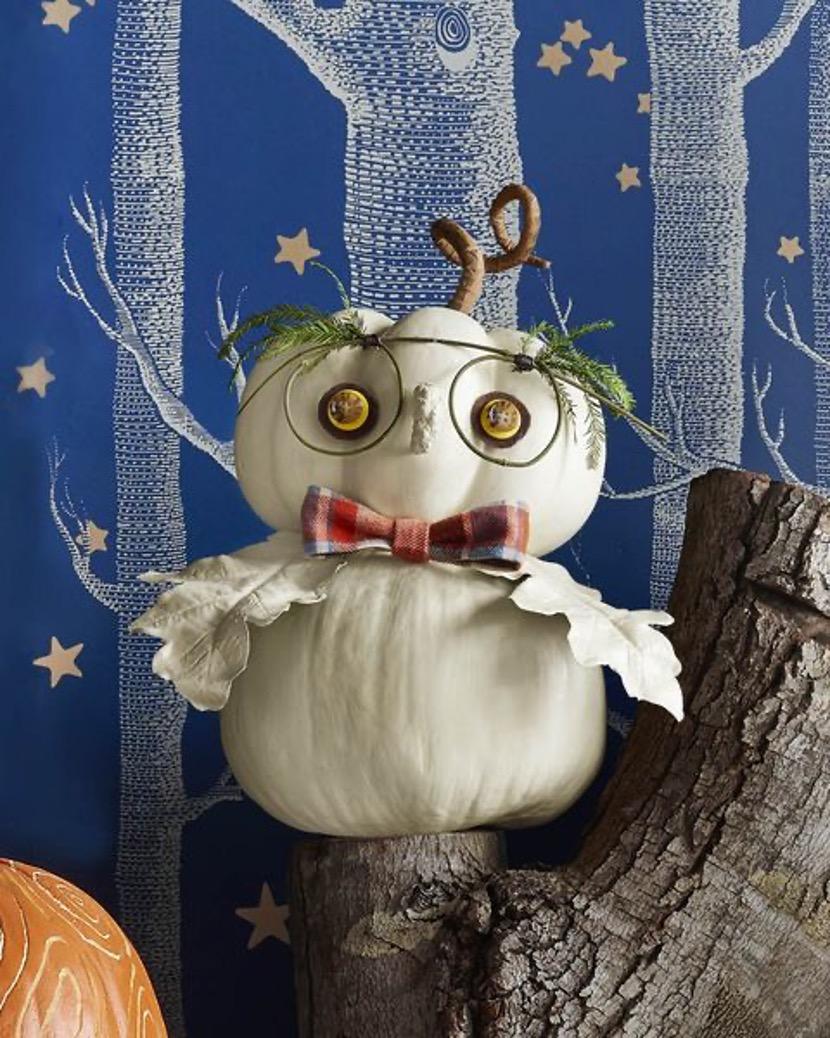
1. Owl Pumpkin
Look to nature for many of the materials needed to craft this wise fella.
Make the pumpkin: Hot-glue two white (lumina) pumpkins together to create the head and body. For each eye, cut out a small brown felt circle, then glue a slightly smaller yellow button on top, followed by an even smaller brown button. Hot-glue eyes to top pumpkin. Create loops from a thin twig and tie in place with wax twine to create eye-glasses shape. Hot-glue fir sprigs to glasses to create eyebrows. Spray-paint two oak leaves and a baby pinecone a similar color to pumpkin. Hot-glue leaves to pumpkin to create wings and pinecone to create a nose. Make a bow tie from plaid ribbon. Hot-glue to pumpkin.
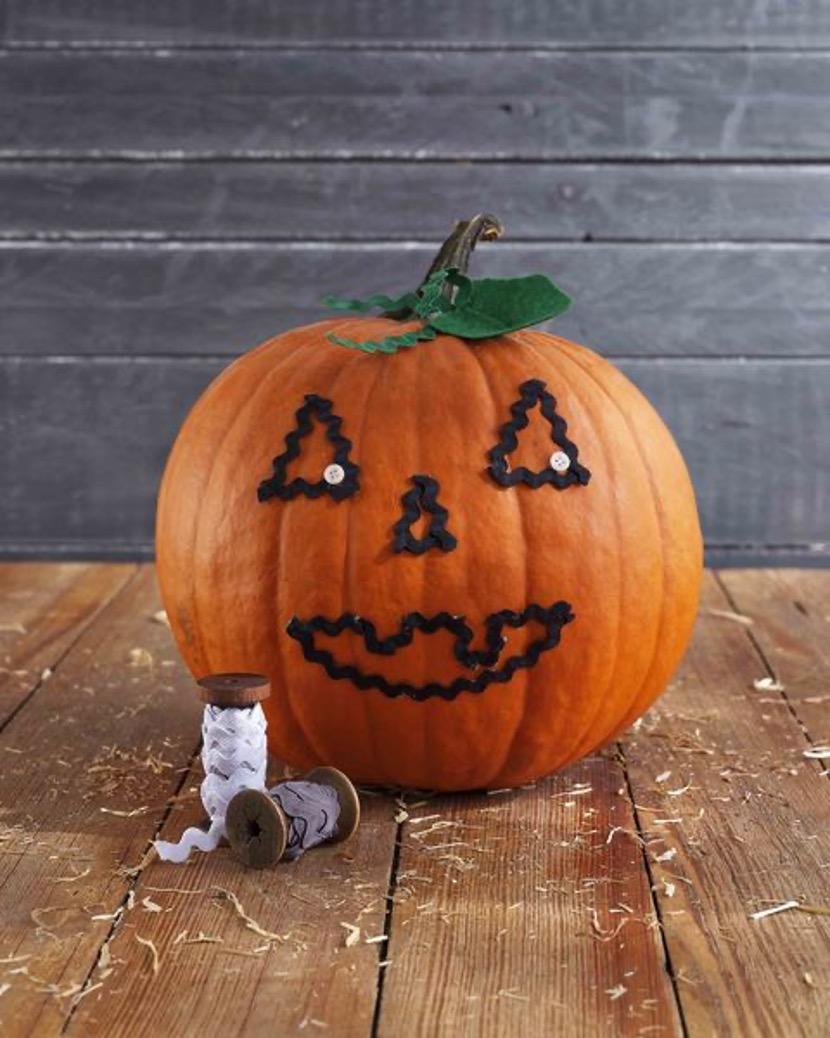
2. Rickrack Pumpkin Face
No carving necessary to create this sweet pumpkin face.
Make the pumpkin: Lightly draw a simple pumpkin face on a pumpkin. Use lengths of black rickrack to cover the drawing, attaching it with hot-glue. Attach small white buttons to the corner of each eye with hot-glue. Cut pumpkin-shaped leaves from green felt and lengths of green rickrack to create tendrils; attach at the base of the pumpkin stem with hot-glue.
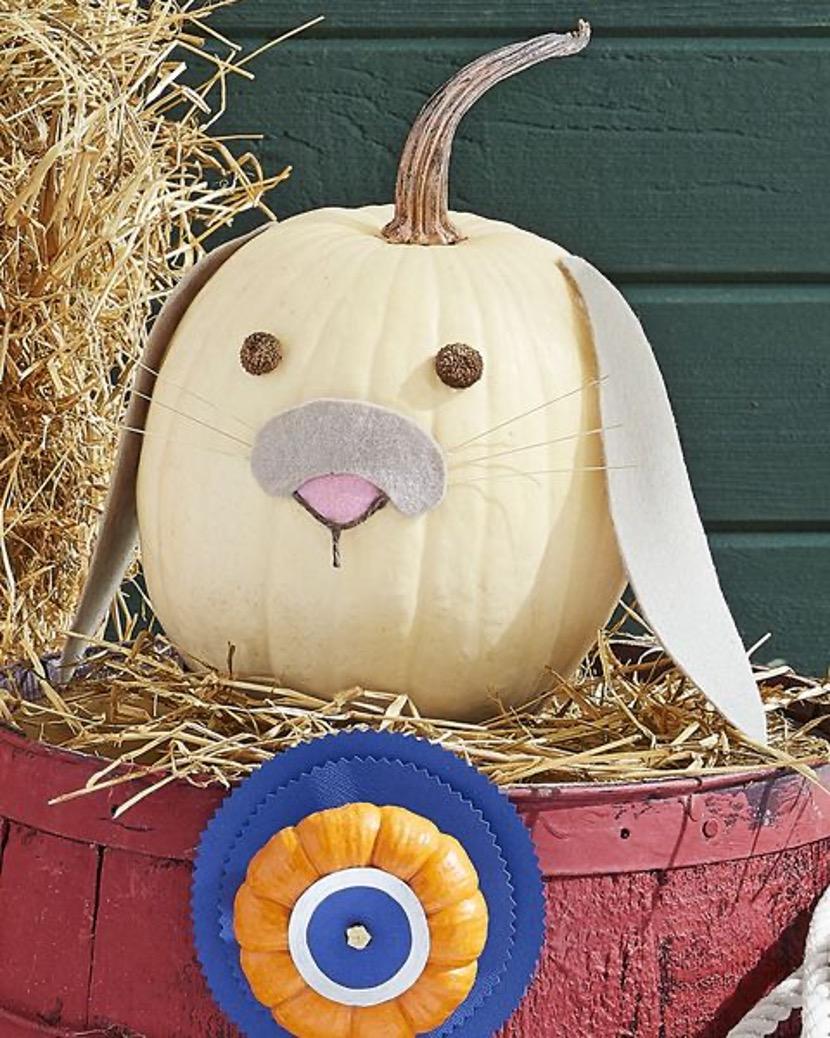
3. Bunny Pumpkin Face
Every-bunny will love seeing this adorable decoration.
Make the pumpkin: Use ears and top nose templates to trace on gray felt and cut out. Trace the separate nose on pink felt and cut out, sizing accordingly. Hot-glue the pink nose on the center of a white pumpkin. Using craft glue, attach twigs from wheat stalks to the back of the gray nose top. Glue on top of the pink button, overlapping slightly. Outline the bottom of the nose with brown twine and attach with hot glue. Attach the ears and acorn tops for eyes with hot glue.
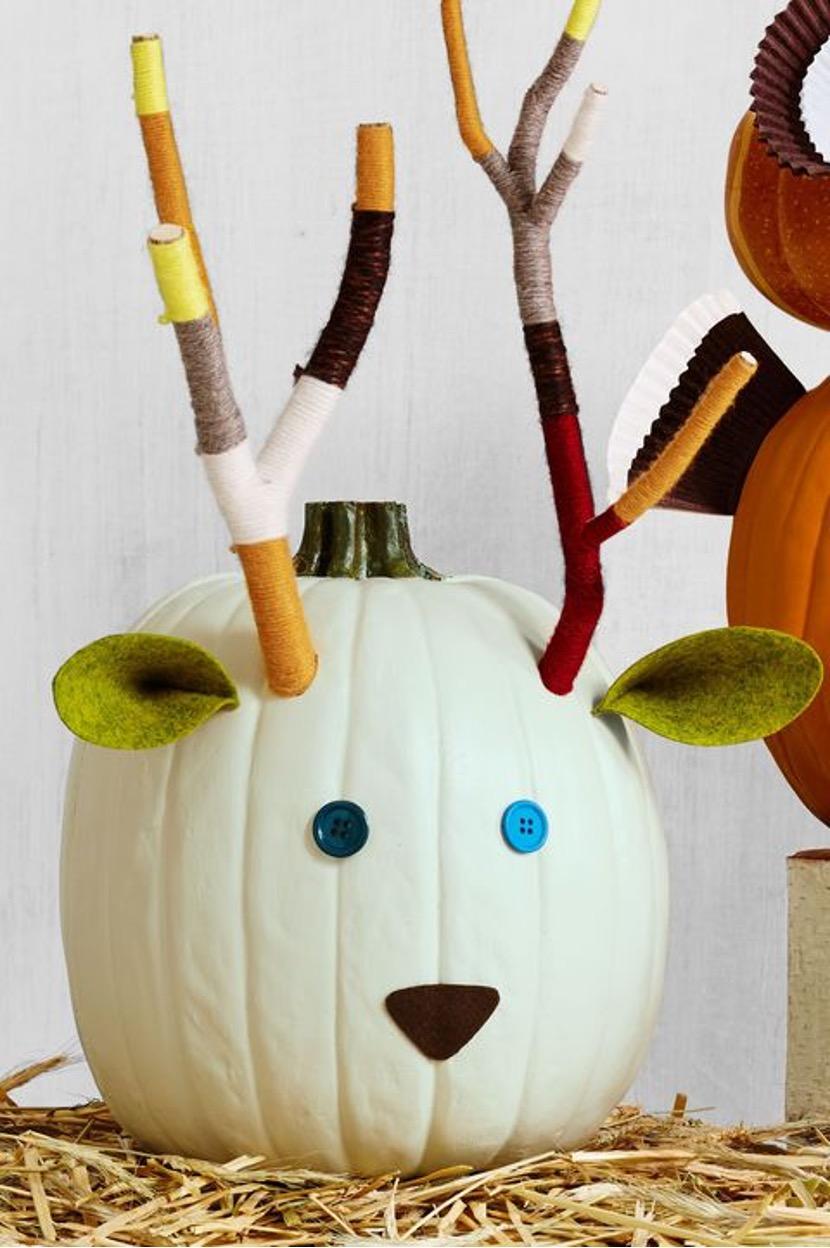
4.Deer Pumpkin Face
Thanks to yarn-wrapped tree branches, this woodland decoration looks just like the real deal.
Make the pumpkin: Use a plain white pumpkin (like Lumina) as the base. Assemble tree branches and tightly wrap assorted colors of yarn in color block patterns. Secure loose yarn ends with hot-glue. To attach the antlers, drill two holes into the upper third of the pumpkin, keeping the drill bit angled down so antlers stick up, not out. Attach button eyes, a triangle felt nose, and pinched felt triangle ears with hot-glue.
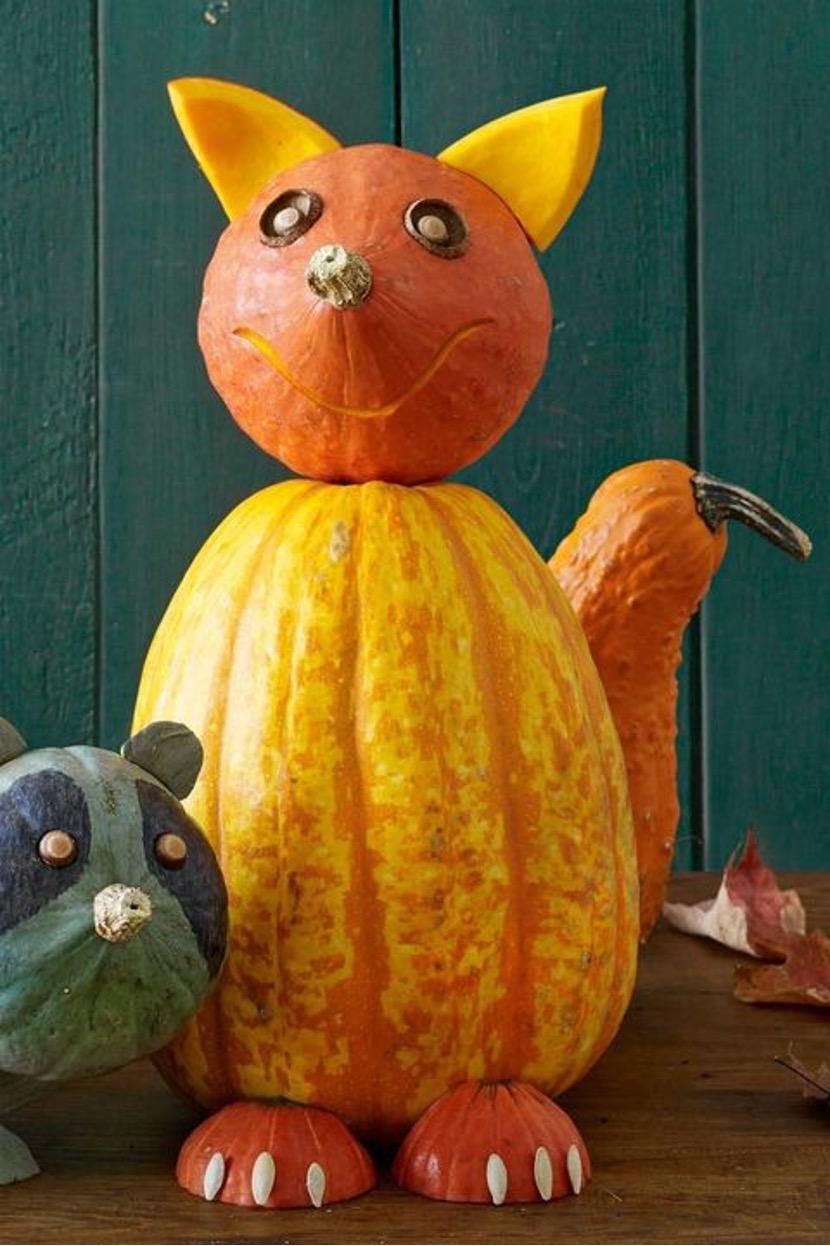
5. Friendly Fox Pumpkin
Stand the variegated squash straight up. Break five skewers in half and stick them into the back of the squash where the tail should sit, leaving 2" exposed. Press the bell-shaped orange gourd into the skewers at the back of the squash to secure as the tail.
Break four skewers in half and press them into the top of the squash body, leaving 2" exposed. Position a small pumpkin so the stem is centered where the nose should sit and push down on the skewers to secure. With the tip of the craft knife, etch out a thin smile by scraping away just the top layer of rind. To create eye sockets, etch slightly deeper holes. Remove the caps of two large acorns. Flip each cap curved-side out and press into the sockets.
Remove the caps of slightly smaller acorns. Apply a dot of hot glue to each acorn and affix to the eye socket caps as pupils. Using the craft knife, cut the small pumpkin into quarters (slice in half horizontally, then in half vertically), scraping away any excess flesh with the spoon.
Rinse and clean a handful of seeds. Pat dry and set aside. Cut pointy ears from two of the pumpkin quarters and press into the pumpkin head with a skewer (break, as needed), allowing the fleshy side to face forward. Turn the remaining pumpkin quarters face down and use the hot glue to affix three pumpkin seeds to each to resemble claws. Secure to the body with skewers (break, as needed).
6. Pineapple Pumpkin Faces
We can't imagine a more perfect jack-o'-lantern idea for anyone living in a warmer area—though this totally works on the East Coast as well! A simple pair of sunglasses is all you need.

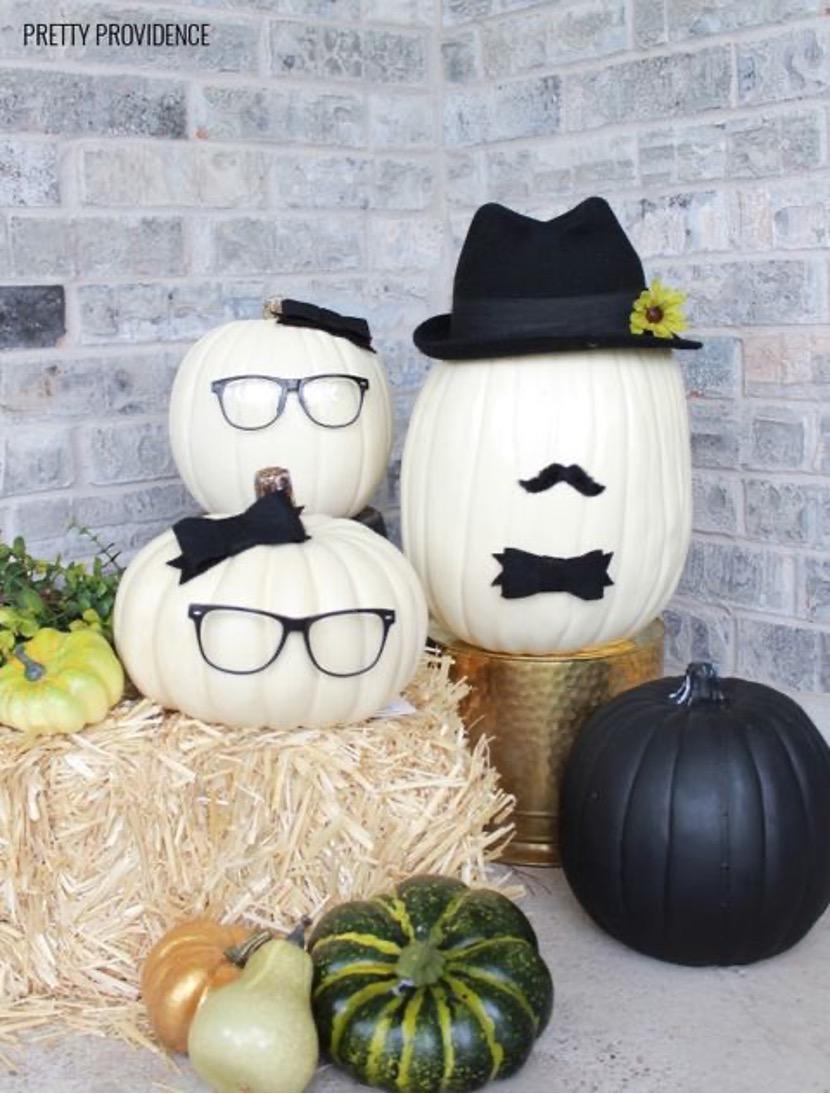
7. Mr. and Mrs. Pumpkin Faces
Pair off your pumpkins with quirky his and hers looks—which, might also bear hilarious resemblance to Mr. and Mrs. Potato Head. They'll work perfectly with your imaginative DIY costumes.

8. No-Carve Pumpkin People Faces
Use your family and friends as inspiration to create a gaggle of pumpkin faces!
TRY YOURSELF NOW~!
Dress up your farmhouse with pumpkins designed with the help of a few easy-to-find craft supplies. We will get you covered with pumpkin faces that'll outshine all the others in the neighborhood.
1. Owl Pumpkin
Look to nature for many of the materials needed to craft this wise fella.
Make the pumpkin: Hot-glue two white (lumina) pumpkins together to create the head and body. For each eye, cut out a small brown felt circle, then glue a slightly smaller yellow button on top, followed by an even smaller brown button. Hot-glue eyes to top pumpkin. Create loops from a thin twig and tie in place with wax twine to create eye-glasses shape. Hot-glue fir sprigs to glasses to create eyebrows. Spray-paint two oak leaves and a baby pinecone a similar color to pumpkin. Hot-glue leaves to pumpkin to create wings and pinecone to create a nose. Make a bow tie from plaid ribbon. Hot-glue to pumpkin.

2. Rickrack Pumpkin Face
No carving necessary to create this sweet pumpkin face.
Make the pumpkin: Lightly draw a simple pumpkin face on a pumpkin. Use lengths of black rickrack to cover the drawing, attaching it with hot-glue. Attach small white buttons to the corner of each eye with hot-glue. Cut pumpkin-shaped leaves from green felt and lengths of green rickrack to create tendrils; attach at the base of the pumpkin stem with hot-glue.

3. Bunny Pumpkin Face
Every-bunny will love seeing this adorable decoration.
Make the pumpkin: Use ears and top nose templates to trace on gray felt and cut out. Trace the separate nose on pink felt and cut out, sizing accordingly. Hot-glue the pink nose on the center of a white pumpkin. Using craft glue, attach twigs from wheat stalks to the back of the gray nose top. Glue on top of the pink button, overlapping slightly. Outline the bottom of the nose with brown twine and attach with hot glue. Attach the ears and acorn tops for eyes with hot glue.

4.Deer Pumpkin Face
Thanks to yarn-wrapped tree branches, this woodland decoration looks just like the real deal.
Make the pumpkin: Use a plain white pumpkin (like Lumina) as the base. Assemble tree branches and tightly wrap assorted colors of yarn in color block patterns. Secure loose yarn ends with hot-glue. To attach the antlers, drill two holes into the upper third of the pumpkin, keeping the drill bit angled down so antlers stick up, not out. Attach button eyes, a triangle felt nose, and pinched felt triangle ears with hot-glue.

5. Friendly Fox Pumpkin
Stand the variegated squash straight up. Break five skewers in half and stick them into the back of the squash where the tail should sit, leaving 2" exposed. Press the bell-shaped orange gourd into the skewers at the back of the squash to secure as the tail.
Break four skewers in half and press them into the top of the squash body, leaving 2" exposed. Position a small pumpkin so the stem is centered where the nose should sit and push down on the skewers to secure. With the tip of the craft knife, etch out a thin smile by scraping away just the top layer of rind. To create eye sockets, etch slightly deeper holes. Remove the caps of two large acorns. Flip each cap curved-side out and press into the sockets.
Remove the caps of slightly smaller acorns. Apply a dot of hot glue to each acorn and affix to the eye socket caps as pupils. Using the craft knife, cut the small pumpkin into quarters (slice in half horizontally, then in half vertically), scraping away any excess flesh with the spoon.
Rinse and clean a handful of seeds. Pat dry and set aside. Cut pointy ears from two of the pumpkin quarters and press into the pumpkin head with a skewer (break, as needed), allowing the fleshy side to face forward. Turn the remaining pumpkin quarters face down and use the hot glue to affix three pumpkin seeds to each to resemble claws. Secure to the body with skewers (break, as needed).

6. Pineapple Pumpkin Faces
We can't imagine a more perfect jack-o'-lantern idea for anyone living in a warmer area—though this totally works on the East Coast as well! A simple pair of sunglasses is all you need.

7. Mr. and Mrs. Pumpkin Faces
Pair off your pumpkins with quirky his and hers looks—which, might also bear hilarious resemblance to Mr. and Mrs. Potato Head. They'll work perfectly with your imaginative DIY costumes.

8. No-Carve Pumpkin People Faces
Use your family and friends as inspiration to create a gaggle of pumpkin faces!

TRY YOURSELF NOW~!
0
0
成长记
sunnyzou
2018年05月02日
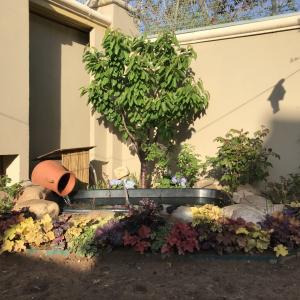
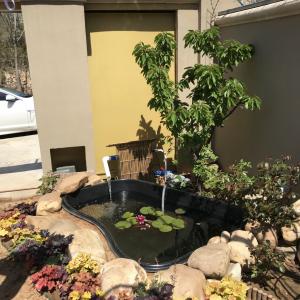
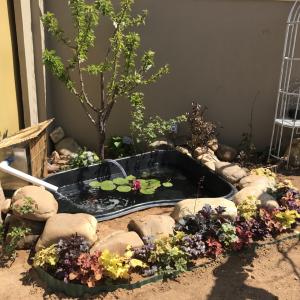
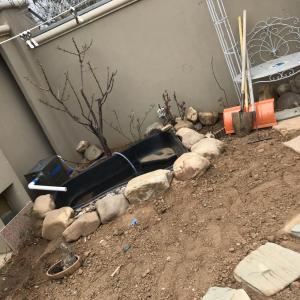
完全DIY的水景。去年怀孕时候,月份尚浅时,我淘到一个室外鱼缸。买回来后,老妈帮我挖坑把鱼缸镶嵌好。又开车去石材市场花了300元买的鹅卵石堆砌在周围。半成品用着。今年开春重新深挖了下。栽植上景观植物。一个流水的陶罐,淘了好久才找到大小模样都合适的。我都晒成小非洲了,总算出来点模样了。


8
0
sunnyzou:@小婷💎 实体店淘的。网上好像没有。
小婷💎:👍👍水池是实体店还是网上定做的?
sunnyzou:@奶酪 谢谢 瞎折腾的
奶酪:你的花园好漂亮~~
sunnyzou:@FieryFlame 通透👍
显示更多
文章
MimiSue
2018年04月04日

掌握适当的旧物改造技巧,不仅能够DIY各种园艺工具,还能很好改善院子阳台上的景观,下面这些回收旧物的改造创意就非常棒,废弃物制作成容器,用来养花实用、省钱、美观,丝毫不必买来的花盆差。
1.旧轮胎变花坛

废弃的黑色轮胎被重新上漆,颜色看起来非常
清新,院子就变得更有活力了,轮胎可以堆叠起来,形成层次不同的错落感,轮胎上选择栽种五颜六色的太阳花,只要阳光充足就能开花,露养基本是不用浇水的。
2.加仑盆变草莓塔

一些较深的加仑盆可以在侧面钻孔,装上土壤之后就可以堆叠起来,它们底部排水孔非常大,不用担心排水不佳,堆叠起来的之后就可以在钻孔的位置栽种草莓苗,养护的位置要有充足的直射光,定期给有机液肥,促进草莓开花结果。
3.鞋架DIY

如果家里有一些废弃的鞋架,可以将它改造成香草盆栽的架子,用来栽种其他植物可能会有些困难,不过栽种一些薄荷、香菜或芹菜就没有太大的问题,它们对光照需求不大,对环境适应性强,植株矮小,鞋架也能撑得起。
4. DIY便携式盆栽工作台
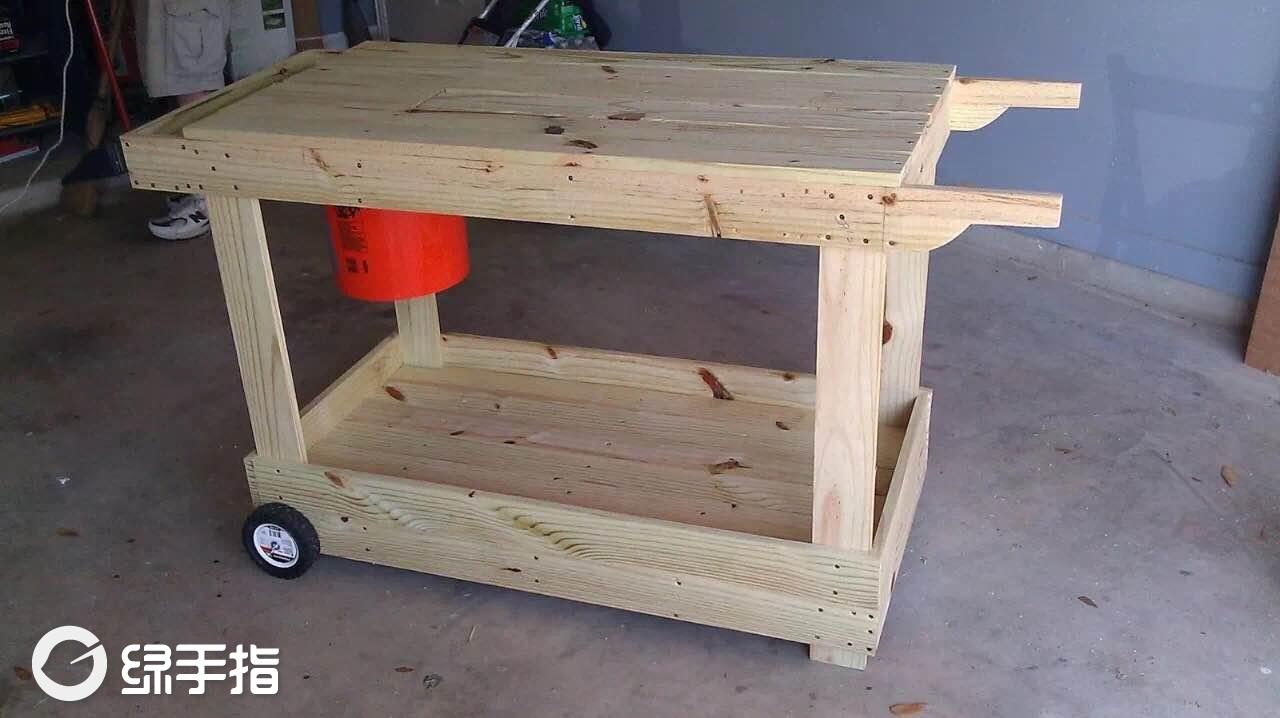
制作一个可以推动的盆栽工作台是非常有必要的,可以让你的园艺工作变得更加轻松,会让你更好地享受养花的乐趣甚至可以在上面做一个凹槽,用来搅拌土壤,养花会变得轻松无比。
5.奶粉罐变吊盆

1.旧轮胎变花坛

废弃的黑色轮胎被重新上漆,颜色看起来非常
清新,院子就变得更有活力了,轮胎可以堆叠起来,形成层次不同的错落感,轮胎上选择栽种五颜六色的太阳花,只要阳光充足就能开花,露养基本是不用浇水的。
2.加仑盆变草莓塔

一些较深的加仑盆可以在侧面钻孔,装上土壤之后就可以堆叠起来,它们底部排水孔非常大,不用担心排水不佳,堆叠起来的之后就可以在钻孔的位置栽种草莓苗,养护的位置要有充足的直射光,定期给有机液肥,促进草莓开花结果。
3.鞋架DIY

如果家里有一些废弃的鞋架,可以将它改造成香草盆栽的架子,用来栽种其他植物可能会有些困难,不过栽种一些薄荷、香菜或芹菜就没有太大的问题,它们对光照需求不大,对环境适应性强,植株矮小,鞋架也能撑得起。
4. DIY便携式盆栽工作台

制作一个可以推动的盆栽工作台是非常有必要的,可以让你的园艺工作变得更加轻松,会让你更好地享受养花的乐趣甚至可以在上面做一个凹槽,用来搅拌土壤,养花会变得轻松无比。
5.奶粉罐变吊盆

0
1
文章
Miss Chen
2017年09月22日

Este elegante y sencillo enrejado DIY para tu jardín te costará mucho menos de lo que piensas tanto en tiempo como en inversión. Si tienes un patio o terraza puedes instalarlo en cualquier pared o en unos paneles de madera como se ve abajo. Es una instalación muy decorativa que le aportará un toque señorial a tu jardín, patio o terraza.
En cuanto tengáis la trepadora bien guiada por los alambres tendréis algo tan fantástico como lo que se ve aquí. Te puede servir tanto para hiedra, jazmín, buganvillas, hortensias, glicinias o muchas otras. Si quieres un resultado rápido es importante que te acerques a tu centro de jardinería o tu vivero para escoger plantas que cuenten ya con zarcillos. Obviamente unas plantas son de más rápido crecimiento que otras y también debes tenerlo en cuenta.

Materiales:
alambre galvanizado
tijeras o alicates cortaalambres
cáncamos o hembrillas
taladro
cinta métrica
la planta trepadora de tu elección

Se pueden usar diversos patrones de espaldera pero en esta ocasión se han decantado por un patrón entrecruzado que resulta fácil de hacer y se obtiene un resultado fantástico. Coge la cinta métrica y ve marcando las líneas por las que irán los alambres, marca los cruces y taladra ahí un orificio para colocar una hembrilla. Si estás trabajando sobre madera enróscala directamente pero si trabajas sobre una pared de mampostería deberás colocar primero un taco.

Puedes usar un listón de madera a modo de regla para trazar las líneas si te hace falta o también puedes usar un nivel si quieres ver que todos los puntos donde se crucen las líneas quedan al mismo nivel. Eso ya depende de la minuciosidad con la que os guste trabajar.

Cuando tengas instaladas todas las hembrillas es el momento de fijar los alambres, cuidado cuando los cortes pues suele quedarse una rebaba muy peligrosa, te recomiendo que trabajes con guantes.

Una vez tengas tendidos todos los alambres y bien fijados a los cáncamos puedes pasar a plantar las trepadoras elegidas e ir envolviendo los zarcillos en los alambres. El enrejado entrecruzado requiere de varios ejemplares de la planta elegida, una plantada debajo de cada columna romboidal.

Puedes agregar objetos decorativos que complementen el efecto de las enredaderas. Tendrás un fondo fantástico para una zona de estar o de comedor en tu patio, terraza o jardín.
En cuanto tengáis la trepadora bien guiada por los alambres tendréis algo tan fantástico como lo que se ve aquí. Te puede servir tanto para hiedra, jazmín, buganvillas, hortensias, glicinias o muchas otras. Si quieres un resultado rápido es importante que te acerques a tu centro de jardinería o tu vivero para escoger plantas que cuenten ya con zarcillos. Obviamente unas plantas son de más rápido crecimiento que otras y también debes tenerlo en cuenta.

Materiales:
alambre galvanizado
tijeras o alicates cortaalambres
cáncamos o hembrillas
taladro
cinta métrica
la planta trepadora de tu elección

Se pueden usar diversos patrones de espaldera pero en esta ocasión se han decantado por un patrón entrecruzado que resulta fácil de hacer y se obtiene un resultado fantástico. Coge la cinta métrica y ve marcando las líneas por las que irán los alambres, marca los cruces y taladra ahí un orificio para colocar una hembrilla. Si estás trabajando sobre madera enróscala directamente pero si trabajas sobre una pared de mampostería deberás colocar primero un taco.

Puedes usar un listón de madera a modo de regla para trazar las líneas si te hace falta o también puedes usar un nivel si quieres ver que todos los puntos donde se crucen las líneas quedan al mismo nivel. Eso ya depende de la minuciosidad con la que os guste trabajar.

Cuando tengas instaladas todas las hembrillas es el momento de fijar los alambres, cuidado cuando los cortes pues suele quedarse una rebaba muy peligrosa, te recomiendo que trabajes con guantes.

Una vez tengas tendidos todos los alambres y bien fijados a los cáncamos puedes pasar a plantar las trepadoras elegidas e ir envolviendo los zarcillos en los alambres. El enrejado entrecruzado requiere de varios ejemplares de la planta elegida, una plantada debajo de cada columna romboidal.

Puedes agregar objetos decorativos que complementen el efecto de las enredaderas. Tendrás un fondo fantástico para una zona de estar o de comedor en tu patio, terraza o jardín.
0
0
文章
Miss Chen
2017年09月20日

El ingenio del ser humano es una de las grandes maravillas de la Naturaleza y aquí os traemos una pequeña muestra. Con este plantador DIY para maíz, alubias y cualquier planta de semillas grandes podrás aliviar tu espalda y el resto de huesos y articulaciones. Vamos a ver cómo en unos sencillos pasos.
Aquí lo tenemos y adivinamos de inmediato que su construcción no puede ser muy difícil. Aunque su eficacia será muy alta. Necesitaremos los siguientes materiales:
1 tubo de 120 cm de PVC de 1/2″ o 12 mm
1 tubo de 20 cm del mismo diámetro
1 tubo de 14 cm
1 tubo de 15,5 cm
2 conectores en T
1 codo
1 tapón
trozo redondo de madera para encajar en el tubo
4-4 cm de varilla roscada 3/16″ o 5 mm
4 tuercas
taladro
pegamento PVC
cinta americana
lata de conservas

El tubo largo, 120 cm o la longitud que mejor se acomode a vuestra altura, será por donde verteremos las semillas de maíz o alubias (frijoles) o cualquier otra similar. Deslizaremos una T y marcaremos en la zona del tubo donde nos quede más a mano para funcionar como mango. Pegamos la T con el adhesivo para PVC y en el hueco horizontal pegamos el tubo de 20 cm que actuará como mango del plantador. Podemos pegarle un tapón en el extremo aunque no es imprescindible.

En la parte inferior crearemos el espaciador y perforador. Consiste en una T de la que sale el tubo de 14 cm y después le pegamos el codo para colocar el trozo de tubo de 15,5 cm. En el extremo inferior de este tubo pondremos el tapón de madera que podemos preparar con un mango de escoba o similar. Con que entre dentro del tubo unos 3-4 cm será suficiente. Haremos un orificio en el tubo y el mango de escoba para pasar la varilla roscada que fijaremos con tuercas y arandelas. Esta parte nos servirá para practicar en la tierra los orificios donde cultivar las semillas.

Entre el mango y la parte superior del tubo largo, el de 120 cm, podemos pegar con un poco de cinta americana un bote de conserva donde verteremos las semillas que vamos a sembrar. Las tendremos así bien a mano y nos facilitará la tarea sobremanera.

Vamos a ver cómo usar el plantador. Es muy sencillo, tras haber preparado el terreno comenzamos posando el plantador en el suelo. Presionamos y hacemos el agujero en el que plantar la semilla.

Vamos avanzando y colocando el tubo plantador en el orificio que ha dejado la pieza delantera.

Colocamos una semilla sobre la parte superior del tubo de PVC y la dejamos deslizar hasta el orificio que hemos hecho anteriormente en el suelo.

El perforador además de hacer el agujero nos permite controlar la profundidad del mismo gracias a la varilla roscada colocada de manera transversal. Las características del plantador permiten usarlo para el maíz, tal cual, y dejando un agujero sin semilla entre cada dos para las habichuelas.
Aquí lo tenemos y adivinamos de inmediato que su construcción no puede ser muy difícil. Aunque su eficacia será muy alta. Necesitaremos los siguientes materiales:
1 tubo de 120 cm de PVC de 1/2″ o 12 mm
1 tubo de 20 cm del mismo diámetro
1 tubo de 14 cm
1 tubo de 15,5 cm
2 conectores en T
1 codo
1 tapón
trozo redondo de madera para encajar en el tubo
4-4 cm de varilla roscada 3/16″ o 5 mm
4 tuercas
taladro
pegamento PVC
cinta americana
lata de conservas

El tubo largo, 120 cm o la longitud que mejor se acomode a vuestra altura, será por donde verteremos las semillas de maíz o alubias (frijoles) o cualquier otra similar. Deslizaremos una T y marcaremos en la zona del tubo donde nos quede más a mano para funcionar como mango. Pegamos la T con el adhesivo para PVC y en el hueco horizontal pegamos el tubo de 20 cm que actuará como mango del plantador. Podemos pegarle un tapón en el extremo aunque no es imprescindible.

En la parte inferior crearemos el espaciador y perforador. Consiste en una T de la que sale el tubo de 14 cm y después le pegamos el codo para colocar el trozo de tubo de 15,5 cm. En el extremo inferior de este tubo pondremos el tapón de madera que podemos preparar con un mango de escoba o similar. Con que entre dentro del tubo unos 3-4 cm será suficiente. Haremos un orificio en el tubo y el mango de escoba para pasar la varilla roscada que fijaremos con tuercas y arandelas. Esta parte nos servirá para practicar en la tierra los orificios donde cultivar las semillas.

Entre el mango y la parte superior del tubo largo, el de 120 cm, podemos pegar con un poco de cinta americana un bote de conserva donde verteremos las semillas que vamos a sembrar. Las tendremos así bien a mano y nos facilitará la tarea sobremanera.

Vamos a ver cómo usar el plantador. Es muy sencillo, tras haber preparado el terreno comenzamos posando el plantador en el suelo. Presionamos y hacemos el agujero en el que plantar la semilla.

Vamos avanzando y colocando el tubo plantador en el orificio que ha dejado la pieza delantera.

Colocamos una semilla sobre la parte superior del tubo de PVC y la dejamos deslizar hasta el orificio que hemos hecho anteriormente en el suelo.

El perforador además de hacer el agujero nos permite controlar la profundidad del mismo gracias a la varilla roscada colocada de manera transversal. Las características del plantador permiten usarlo para el maíz, tal cual, y dejando un agujero sin semilla entre cada dos para las habichuelas.
0
0
文章
Miss Chen
2017年09月19日

Un jardín de musgo en miniatura es fácil de montar y resulta muy decorativo. Los jardines de musgo japoneses son la inspiración de esta versión sencilla que cualquiera puede preparar sin ser un maestro del DIY. Vamos a ver cómo lo podemos hacer en cinco fáciles pasos.
Aquí tenemos nuestro objetivo. Veamos cómo llegar a él, para ello necesitaremos el siguiente material.
Materiales:
taladro y broca para cerámica
plato de cerámica
geotextil
grava fina
sustrato
varios tipos de musgo y helecho
piedras
pinzas, cuchara…

Comenzaremos perforando el plato de cerámica para que pueda drenar el agua con que regaremos regularmente el musgo. Para ello echaremos un poco de agua en el plato y comenzaremos a trabajar con el taladro en un ángulo de 45º. En cuanto hayamos marcado el esmalte pasaremos a poner el taladro perpendicular al plato, 90º, y acabar la tarea. Limpiaremos el plato para retirar el agua y el polvo producido.

Colocamos el geotextil en el fondo del plato y cubrimos con una capa de grava fina. Procuraremos en todo momento no obstruir el orificio de drenaje que hemos hecho antes.

Rellenamos ahora con el sustrato, usaremos una mezcla con buen drenaje, y vamos poniendo las rocas y plantas escogidas. Para plantar el helecho o las plantas que prefiramos usaremos una cuchara.

Seguimos poniendo los otros tipos de musgo y lo acoplaremos, si es necesario, recortando con unas tijeras de podar. Presionaremos fuerte para facilitar el agarre del musgo en el sustrato del plato.

Ahora con un pincho de bambú o el mango de la cuchara, por ejemplo, iremos colocando el musgo dentro del plato. Si sobresale algo que no podamos remeter lo cortaremos con las tijeras. Los musgos usados en este jardín son: Brachythecium rutabulum, Dicranum scoparium y Cladonia spp. El helecho es un Asplenium platyneuron pero evidentemente se pueden usar otros tipos de musgos y helechos, los que te resulten más fáciles de conseguir.
Aquí tenemos nuestro objetivo. Veamos cómo llegar a él, para ello necesitaremos el siguiente material.
Materiales:
taladro y broca para cerámica
plato de cerámica
geotextil
grava fina
sustrato
varios tipos de musgo y helecho
piedras
pinzas, cuchara…

Comenzaremos perforando el plato de cerámica para que pueda drenar el agua con que regaremos regularmente el musgo. Para ello echaremos un poco de agua en el plato y comenzaremos a trabajar con el taladro en un ángulo de 45º. En cuanto hayamos marcado el esmalte pasaremos a poner el taladro perpendicular al plato, 90º, y acabar la tarea. Limpiaremos el plato para retirar el agua y el polvo producido.

Colocamos el geotextil en el fondo del plato y cubrimos con una capa de grava fina. Procuraremos en todo momento no obstruir el orificio de drenaje que hemos hecho antes.

Rellenamos ahora con el sustrato, usaremos una mezcla con buen drenaje, y vamos poniendo las rocas y plantas escogidas. Para plantar el helecho o las plantas que prefiramos usaremos una cuchara.

Seguimos poniendo los otros tipos de musgo y lo acoplaremos, si es necesario, recortando con unas tijeras de podar. Presionaremos fuerte para facilitar el agarre del musgo en el sustrato del plato.

Ahora con un pincho de bambú o el mango de la cuchara, por ejemplo, iremos colocando el musgo dentro del plato. Si sobresale algo que no podamos remeter lo cortaremos con las tijeras. Los musgos usados en este jardín son: Brachythecium rutabulum, Dicranum scoparium y Cladonia spp. El helecho es un Asplenium platyneuron pero evidentemente se pueden usar otros tipos de musgos y helechos, los que te resulten más fáciles de conseguir.
0
0
Tiara Rojas
2017年07月23日

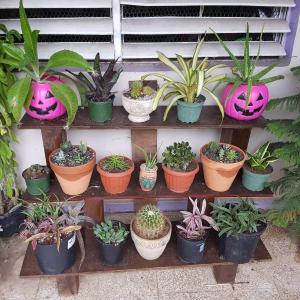
por fin termine mi tablillero diy 😁😁😁 espero q los gatos no me tumben las matas!

2
0
文章
Gina
2017年05月27日

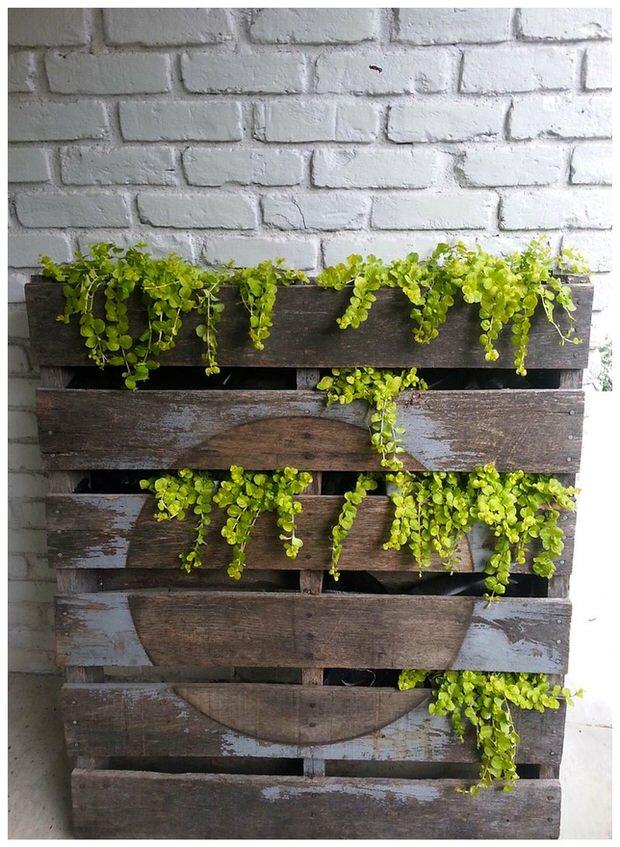
We’ve seen pallets turned into about every DIY project possible, and it’s good… they are cheap or free, we recycle when we create a pallet project, and I just love the organic feel to such a simple thing. My favorite use of pallets however, is pallet planters. They just fit in a garden, ya know?
So here are TGG’s fav five of the week, Pallet Planters!
This living wall was created by Dremel Weekends.
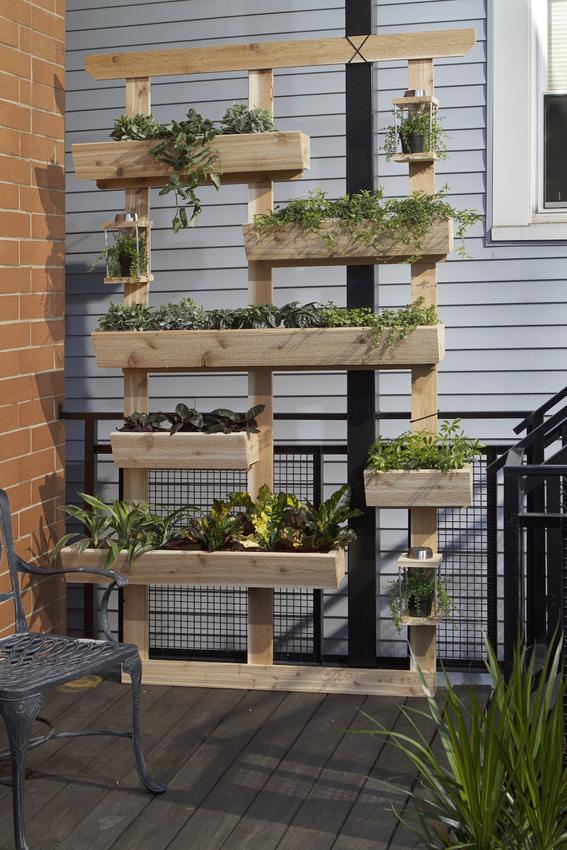
Love this plant stand created with a pallet from At Home with Kelsey.
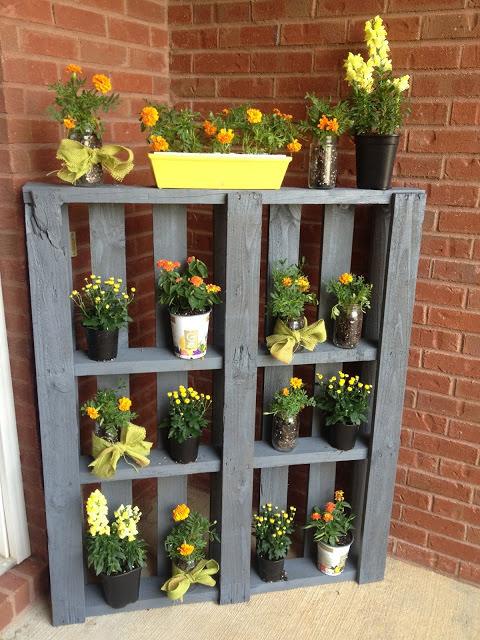
I love the more modern, fresh look of this pallet planter from A Storied Style.

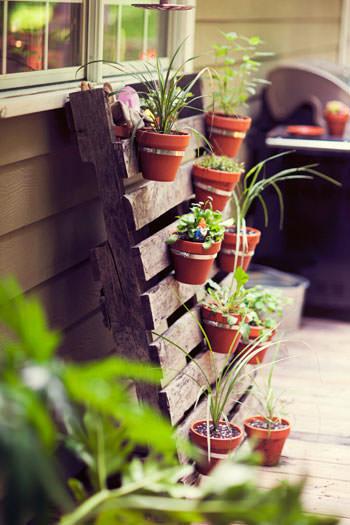
For those of you who don’t want to use hammer and nails to switch up a pallets configuration, this is a great example from Young House Love on attaching pots to the pallet! Love this look!
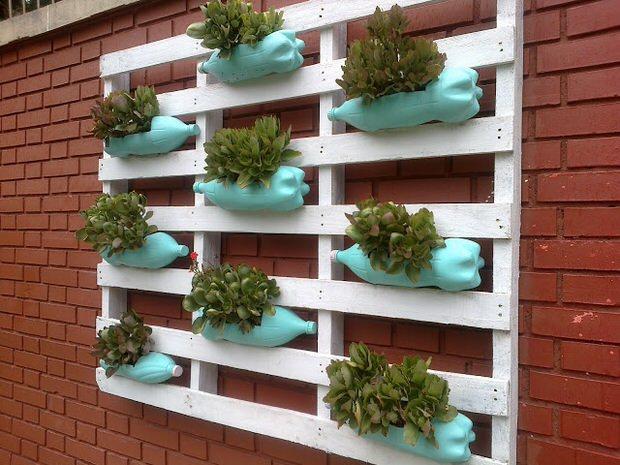
Lastly, this example perfects Reduce, Reuse, Recycle! Love it!
1
0


