文章
三等生
2017年05月27日


家里不用的塑料瓶不要当成垃圾的丢掉哦!经过简单的改造,这些塑料瓶就能变废为宝,diy制作成一个个漂亮而实用的花盆了!
塑料瓶花盆
这样的一个花盆是不是很高大上,制作简单,重点是环保、省钱。

准备材料:塑料瓶、剪子。
#塑料瓶花盆 制作方法
1、先找一只500ml的饮料瓶 。

2、从饮料瓶瓶身上部剪开。剪成两截,留下下半部分。

3、然后再竖着剪,一直剪到花纹的位置。剪成的细条宽度要相同,四周全部剪成细条。

4、将瓶身朝下扣,让剪出的细条全部展开。

5、压平,使瓶子正放时细条也不再回缩反弹。

6、如图,以4条为一组编织。

7、将第1条如图掖好。

8、用相同的方法掖第2条。

9、再掖第3条。

10、这是已经掖好了3条的全景。

11、用同样的方法将所有的细条依次掖好。收尾的方法也是同样的。

12、细条全部掖好后就完成了,非常简单吧。
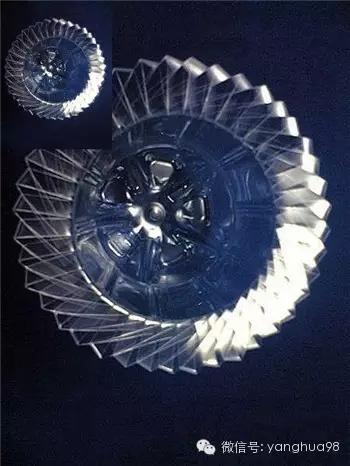
13、可以插花了。

2
7
文章
Gina
2017年05月25日

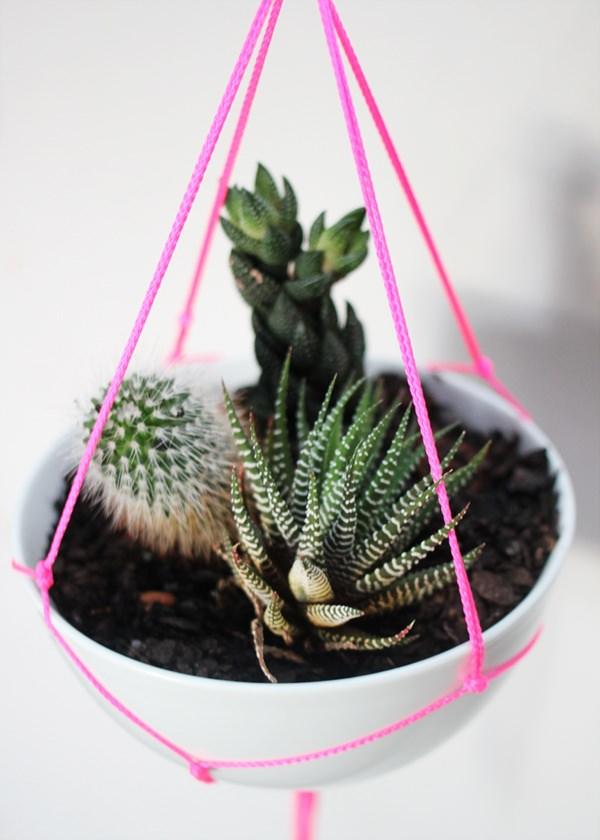
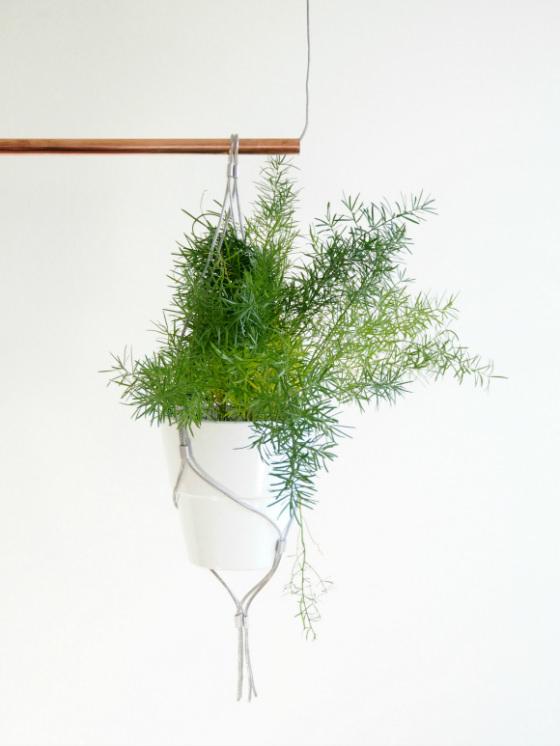
#Hanging planters work both indoors and out, with garden annuals and with evergreens. Creating your own DIY hanging planters is easy, and it adds character to your home or garden by giving you a unique container. Keep in mind that hanging planters can be heavy, so please use your judgement in choosing hanging materials, and in securing them to a structure. Other than that, anything that holds soil and is light enough to hang is fair game! Here are some DIY tutorials, inspirational photos and ideas to get you started. You can find the instructions for our featured project, above, at Drifter and the Gypsy.
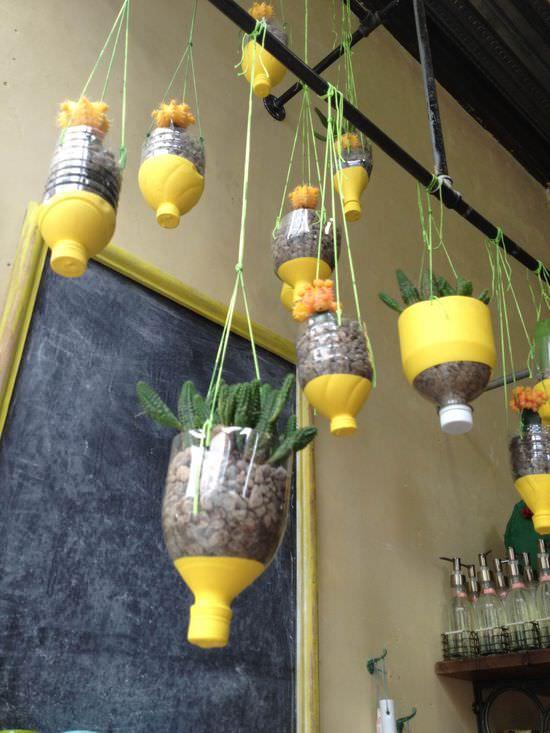
This re-cycled hanging container idea is an easy one to figure out… glue pop container lids on, dip into paint and let dry, then punch holes (I bet a hole punch would work!) and hang with twine.
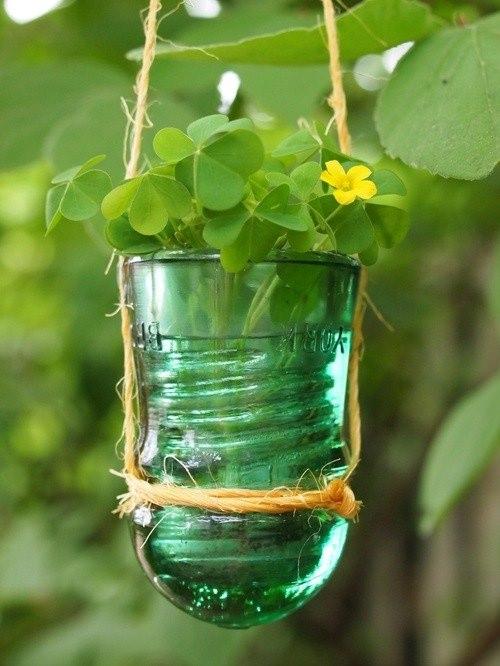
If you loved our post on garden lighting using insulators, you’re going to love this hanging planter. Pretty simple!
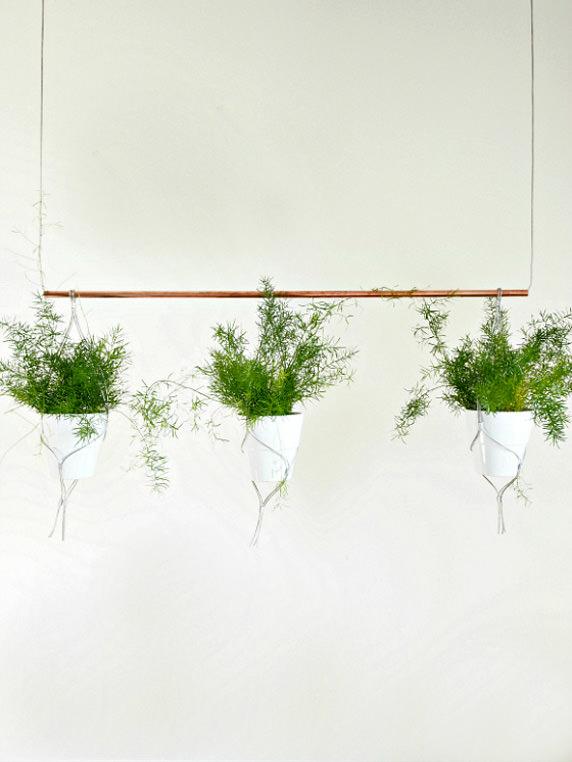
Eclectic Trends offers us this great tutorial on making this contemporary hanging planter with copper pipe and wire. Love the creativity!
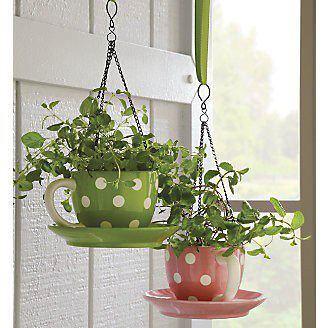
For the “cute” in all of us… these polka dot teacups were converted by gluing the saucers to the cups with industrial strength glue (we recommend Gorilla Glue) and using a ceramic tile bit and an drill to create holes for hanging.
Old light fixtures and that same tile bit and drill create these great planters by Lark Books.
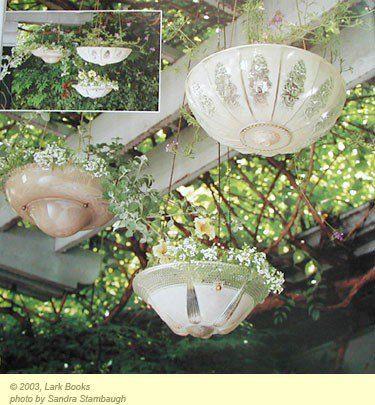
This project both recycles, which makes is cool modern, and uses a touch of the past. Love it’s originality. Find the DIY instructions here.
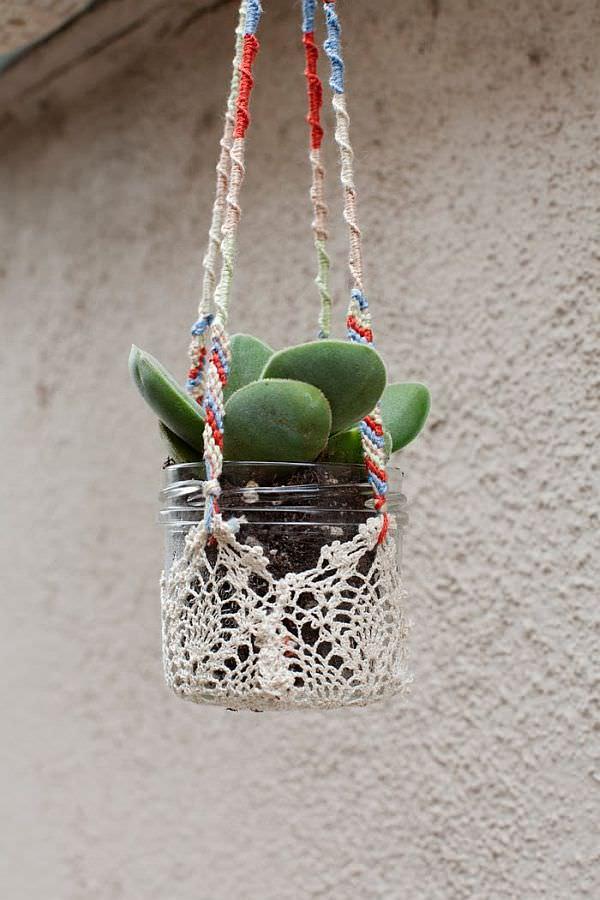
One of my favorites in this post is the DIY mason jar planters! Oh So Very Pretty has the complete instructions. See more mason jar ideas from us here.
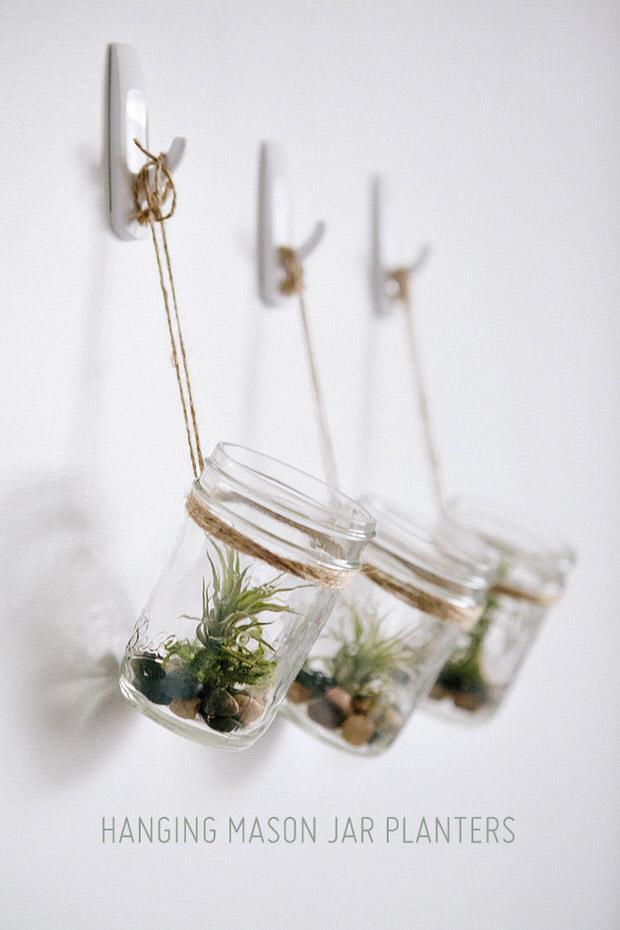
So create some hanging planters for your garden! Don’t feel like you have to limit them to the front porch though. Hang them in trees, off brackets on fence posts, or from the top of arbors and decks. Let us know, which one is your favorite?
1
0
文章
苍山洱海
2017年05月23日

Growing plants indoors can make your home look lively and lavish and if you too love that– Must see our 19 best DIY indoor garden decoration ideas!
If you too love indoor gardening (like we do!), learn about the arrangement ideas, DIY tricks and how you can maximize your planting space available indoors in this article.
1. Use Wall Mounted Storage to Keep Pots

The space between windows can also be prime real estate for growing, just like this one in the picture above. You can use wall mounted storage to keep the pots to decorate your home with plants.
2. DIY Pegboard Planter

This DIY pegboard planter project is simple, inexpensive, and easy to follow. If you want to see the step by step tutorial, visit brePURPOSED!
3. DIY Ladder Planter/Ladder Shelf

If you have got an old ladder, use it to keep pots in it. It can be made into an astonishing pot holder, perfect for growing indoor plants. A step by step tutorial is available on our site!
4. DIY Succulent Frame or Succulent Wall Planter

A DIY succulent frame or succulent wall planter is a great way to add a whim to your interior without spending a lot of money on materials you can make this. Here is the tutorial to follow.
5. Mason Jar Ideas

Upcycle mason jars can used to grow herbs. Here are some DIY ideas.
Mason jar can become adorable small pots and can be used to grow plants and herbs indoors. There are myriads of ideas available on the web to look for inspiration, you can look at one of our posts for more ideas!
6. Indoor Chair Planter

Not only outdoors, if you’ve got an old chair create an indoor chair planter and grow succulents or indoor plants on it to add a dramatic touch to your rooms. See more chair planter ideas!
7. Indoor Zen or Japanese Garden

An indoor Japanese or Zen garden can be a beautiful addition to your home when combined with a water feature, flowers of cool colors, stones, or succulents, a great way to add “calmness” to your home. You can also make a mini succulent zen garden in a pot, check out the tutorial here.
8. Flowering Houseplants

Decorate your indoor garden with flowering houseplants. They can add a bright touch to your home, growing them is similar to other indoor plants. Check out our article on best flowering houseplants here.
9. Use Plant Stands

Plant stand can not only increase your indoor planting space but also look elegant and decorate your home. The best thing about them is that you can also DIY them easily, here are some ideas.
10. Succulent Bookend
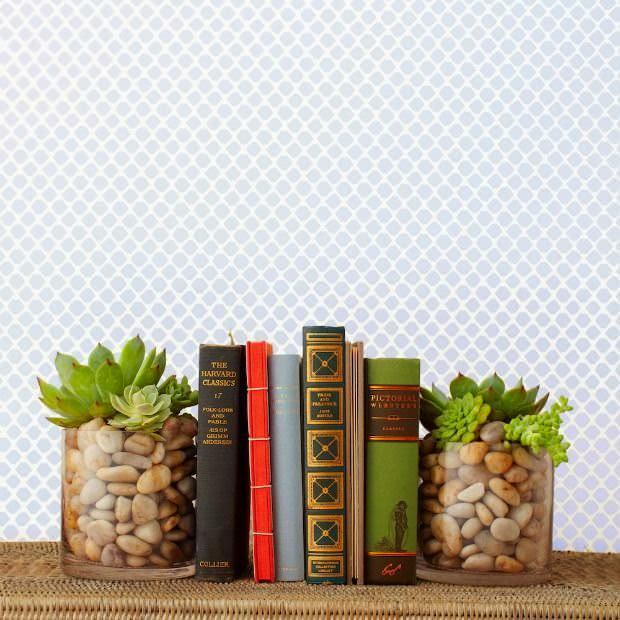
Prop up your favorite reads with this easy-to-make mini garden. Succulents are easy to grow. They add a welcome pop of greenery to any book collection when planted in clear vases filled with pretty river stones. See more of it here.
11. Hanging Coconut Planter
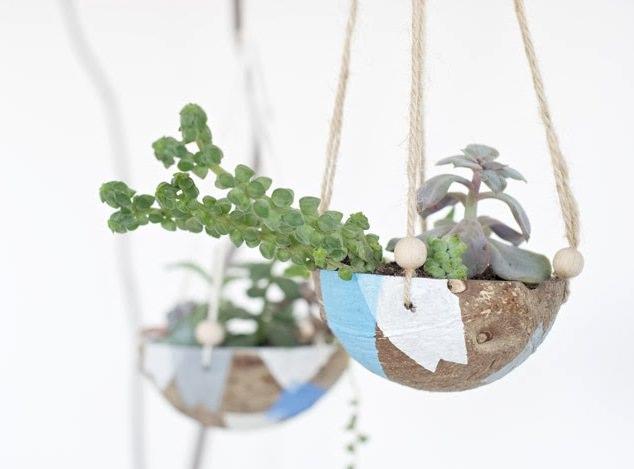
Use coconut shells after eating to create this super cute hanging indoor garden. This project is unique, still simple and doesn’t require much. Check out the tutorial here.
12. Sea Shell Planter
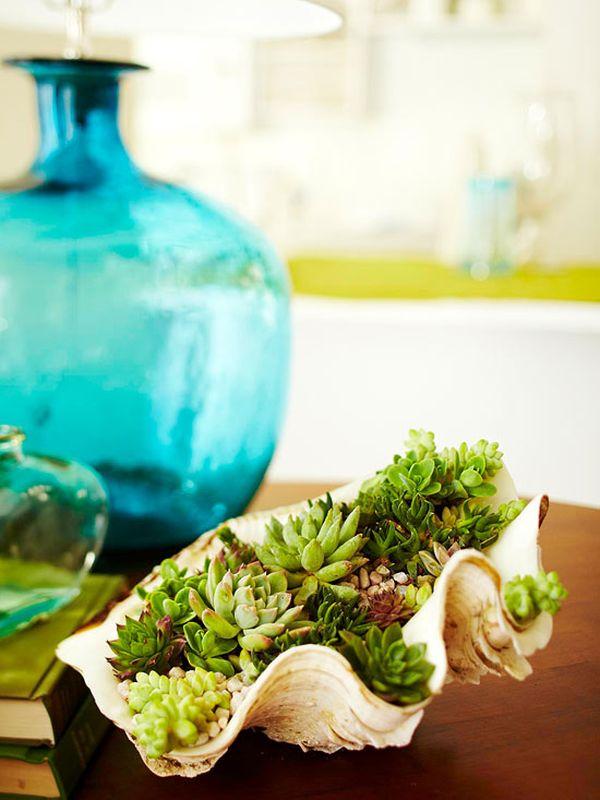
Sea-shell planters are creative ways to show off plants. You can tuck smaller succulents and use them as a centerpiece of your home. Check out these ideas!
13. Use Utility Cart to Hold Pots

Utility cart can be found in stores easily, it has many uses and one of them is this, especially if you’re short of space. Use it to hold planters.
14. Create an Indoor Fairy Garden

This well-planned fairy garden that resembles a gnome village (or many more other fairy garden ideas here) is looking amazing with colorful mushrooms, walkway, tiny houses, and banners.
15. Make a Succulent Dish Garden

Plant succulents in a dish and place it on the table top. It will make the focal point of the room. A complete DIY article on how to make a succulent dish garden is available here.
16. Plant Stand Room Dividers

Ikea plant stand (Socker series)
Plant stands can be used as room dividers, keeping cut beautiful cut flowers, herbs, and small plants. This way you’ll be able to maximize your growing space and create a division in a room too!
17. Keep a Plant Stand Near Window
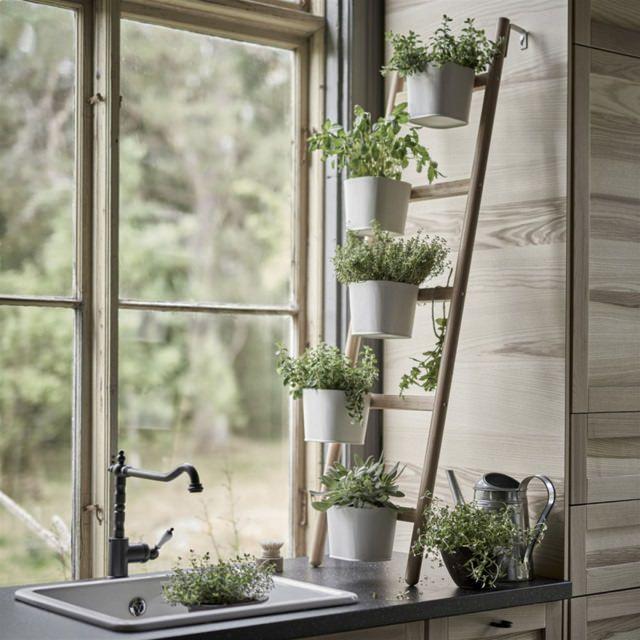
Why just keep plants on a windowsill, let the plants use the sunlight comes from the windows by keeping a plant stand like this.
18. Teacup Herb Garden

Grow a herb garden in vintage teacups that you no longer use. Not only it will look good but this way you will be able to grow your own herbs. If you want to make a teacup planter too, here is the tutorial.
Also Read: Indoor Herb Garden Ideas
19. DIY Mosaic Pots

Take some of your old clay pots and turn them into astonishing mosaic pots. It’s easy! You’ll need a terracotta pot, vase filler chips or alternatively use pot shard or broken tile pieces. You’ll also need glue and spray paint. The first step is to paint the pot in your favorite color and leave it to dry. Once done, lie the pot and glue the chips or shards one by one. See more mosaic ideas!
If you too love indoor gardening (like we do!), learn about the arrangement ideas, DIY tricks and how you can maximize your planting space available indoors in this article.
1. Use Wall Mounted Storage to Keep Pots

The space between windows can also be prime real estate for growing, just like this one in the picture above. You can use wall mounted storage to keep the pots to decorate your home with plants.
2. DIY Pegboard Planter

This DIY pegboard planter project is simple, inexpensive, and easy to follow. If you want to see the step by step tutorial, visit brePURPOSED!
3. DIY Ladder Planter/Ladder Shelf

If you have got an old ladder, use it to keep pots in it. It can be made into an astonishing pot holder, perfect for growing indoor plants. A step by step tutorial is available on our site!
4. DIY Succulent Frame or Succulent Wall Planter

A DIY succulent frame or succulent wall planter is a great way to add a whim to your interior without spending a lot of money on materials you can make this. Here is the tutorial to follow.
5. Mason Jar Ideas

Upcycle mason jars can used to grow herbs. Here are some DIY ideas.
Mason jar can become adorable small pots and can be used to grow plants and herbs indoors. There are myriads of ideas available on the web to look for inspiration, you can look at one of our posts for more ideas!
6. Indoor Chair Planter

Not only outdoors, if you’ve got an old chair create an indoor chair planter and grow succulents or indoor plants on it to add a dramatic touch to your rooms. See more chair planter ideas!
7. Indoor Zen or Japanese Garden

An indoor Japanese or Zen garden can be a beautiful addition to your home when combined with a water feature, flowers of cool colors, stones, or succulents, a great way to add “calmness” to your home. You can also make a mini succulent zen garden in a pot, check out the tutorial here.
8. Flowering Houseplants

Decorate your indoor garden with flowering houseplants. They can add a bright touch to your home, growing them is similar to other indoor plants. Check out our article on best flowering houseplants here.
9. Use Plant Stands

Plant stand can not only increase your indoor planting space but also look elegant and decorate your home. The best thing about them is that you can also DIY them easily, here are some ideas.
10. Succulent Bookend

Prop up your favorite reads with this easy-to-make mini garden. Succulents are easy to grow. They add a welcome pop of greenery to any book collection when planted in clear vases filled with pretty river stones. See more of it here.
11. Hanging Coconut Planter

Use coconut shells after eating to create this super cute hanging indoor garden. This project is unique, still simple and doesn’t require much. Check out the tutorial here.
12. Sea Shell Planter

Sea-shell planters are creative ways to show off plants. You can tuck smaller succulents and use them as a centerpiece of your home. Check out these ideas!
13. Use Utility Cart to Hold Pots

Utility cart can be found in stores easily, it has many uses and one of them is this, especially if you’re short of space. Use it to hold planters.
14. Create an Indoor Fairy Garden

This well-planned fairy garden that resembles a gnome village (or many more other fairy garden ideas here) is looking amazing with colorful mushrooms, walkway, tiny houses, and banners.
15. Make a Succulent Dish Garden

Plant succulents in a dish and place it on the table top. It will make the focal point of the room. A complete DIY article on how to make a succulent dish garden is available here.
16. Plant Stand Room Dividers

Ikea plant stand (Socker series)
Plant stands can be used as room dividers, keeping cut beautiful cut flowers, herbs, and small plants. This way you’ll be able to maximize your growing space and create a division in a room too!
17. Keep a Plant Stand Near Window

Why just keep plants on a windowsill, let the plants use the sunlight comes from the windows by keeping a plant stand like this.
18. Teacup Herb Garden

Grow a herb garden in vintage teacups that you no longer use. Not only it will look good but this way you will be able to grow your own herbs. If you want to make a teacup planter too, here is the tutorial.
Also Read: Indoor Herb Garden Ideas
19. DIY Mosaic Pots

Take some of your old clay pots and turn them into astonishing mosaic pots. It’s easy! You’ll need a terracotta pot, vase filler chips or alternatively use pot shard or broken tile pieces. You’ll also need glue and spray paint. The first step is to paint the pot in your favorite color and leave it to dry. Once done, lie the pot and glue the chips or shards one by one. See more mosaic ideas!
2
3
文章
Gina
2017年05月23日

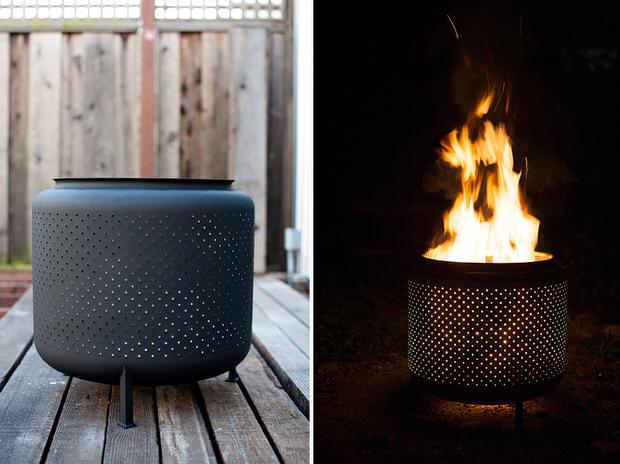
This week we have some of TGG’s favorite creative garden projects we have run across while exploring the many wonderful DIY blogs out there! Check all these out for DIY garden tutorials and inspiration!
1 – Moss Graffiti – Learn how to make moss graffiti.

2 – $10 DIY One Hour Upcycled Firepit – From a washing machine drum.

3 – Pebble Mosaic – Make edging, stepping stones, or even a small patio with river rocks and mortar.
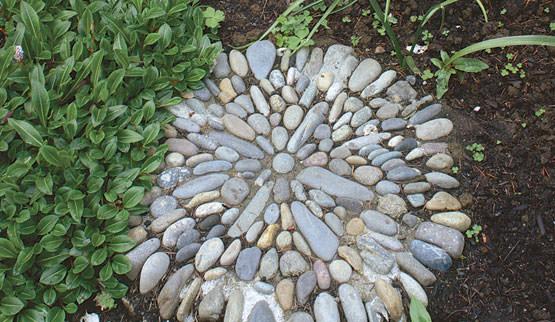
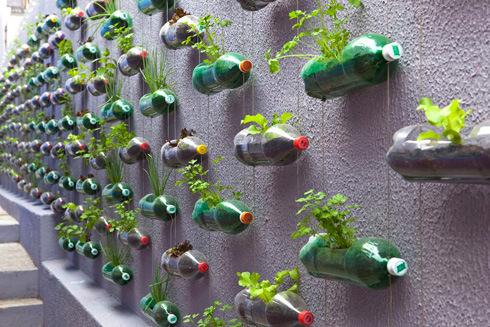
4 – Recycled Garden – ECO green vertical garden with upcycled soda bottles.
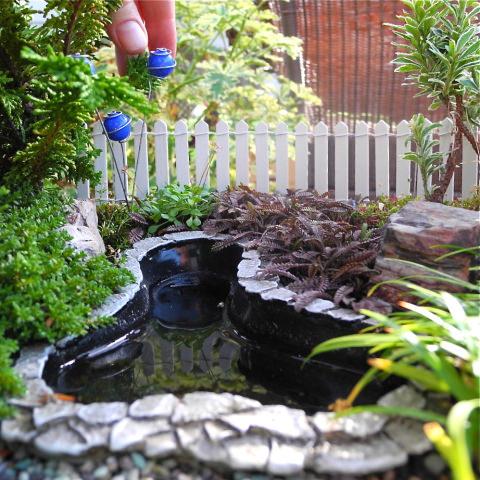
5 – Miniature Gardens – DIY ideas for miniature gardens.
There you have it, The Garden Glove’s fav five this week! What have you found this week that’s garden fabulous?
0
2
文章
扭扭
2017年05月23日

Want to grow so many strawberries in so little space? Try one of these vertical DIY ideas for growing strawberries!
The fresh and juicy strawberries are one of the best fruits you can grow in containers
Also Read: How to Grow Strawberries
1. Vertical Strawberry Tube Planter
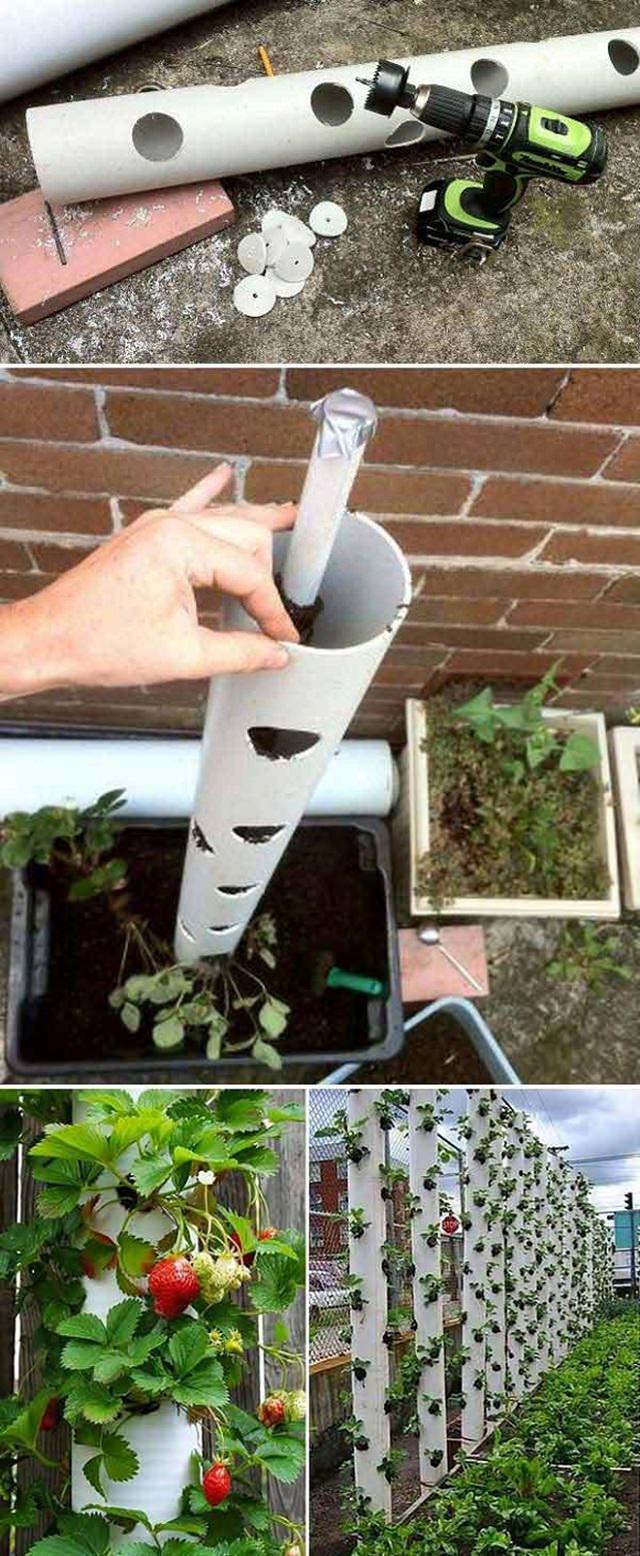
Ordinary PVC pipes are used for growing tons of strawberry plants in a small space, unbelievable. When you lack an appropriate garden space or yard, a vertical gardening idea like this can be tried. All you need for this DIY idea is a few PVC pipes, a drilling machine, and of course, some gardening essentials. Just keep in mind that vertical units require careful watering, so the last thing you would want is for them to dry out. The tutorial is available here!
2. Vertical Pyramid Planter

Go vertical, if you lack enough room to plant. A strawberry tower planter gives you the additional planting and growing space you need to showcase your love for this much-loved fruit. It’s an unusual and functional DIY garden project you can try. See the step by step DIY article here!
3. Hanging Basket

Growing strawberries in hanging baskets is possible and easy enough. An average-sized basket can fit a few strawberry plants. So, all you have to do is fill it up with the right rich potting soil and water regularly. That’s it! Check out the DIY tutorial on this site.
Also Read: The Right Time to Plant Strawberries
4. Strawberry Pallet Planter

A strawberry pallet planter is a clever idea to grow plants like strawberries that spread through runners; it also improves the productivity of this fruit. Pallets are cheap and sturdy; you can use them to create a raised bed like structure. Must see the tutorial post here!
5. Hanging Strawberry Planters

Growing strawberries up in the air in hanging containers is a simple and easy way to grow a lot of plants in a little to no space. Choose some big tin cans as a planter, also some cool color paint. This perfect idea of recycling used TIN CANS can be found here.
6. Strawberry Tower

A strawberry tower with an in-built reservoir is an excellent and unique way to grow juicy and fresh strawberries when you’re short of space. Easy to maintain, it is made of an array of plastic pots stacked up one on top of each other in the form of a tower. Also, the inbuilt reservoir makes watering a lot easier. This fantastic step by step DIY idea is curated from A Piece of Rainbow.
7. Strawberry Gutter Garden

Strawberries are super easy fruits to grow in gutters; it also saves them from diseases like crown rot and fruit rot. Also, this you can grow so many plants. See the step by step DIY idea with pictures here.
8. Stepped Strawberry Ladder
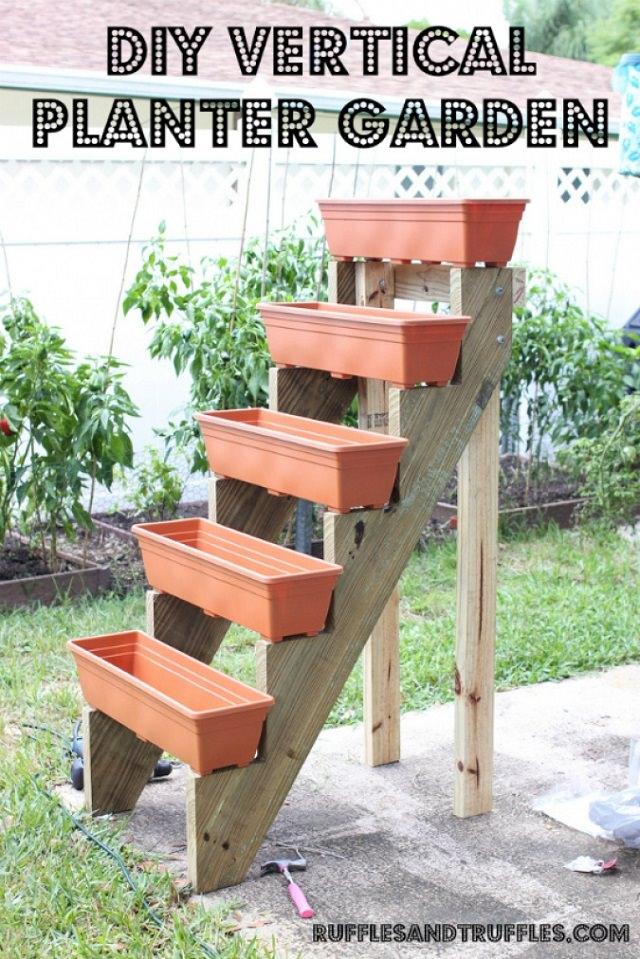
Not only the strawberries but you can also grow vegetables and herbs following this smart idea. You will need some help with the assembly process, though, as this is one of those DIY ideas for growing strawberries that need considerable effort. Once the structure is complete, fill up the planter boxes with the correct potting soil, seedlings and then watch them grow. The step by step article is available here.
Also Read: Vertical Garden Ideas for Small Gardens
9. A Strawberry Jar

A strawberry jar is a fun way to plant strawberries. After all, what is more, appealing than a nicely painted jar brimming with lush, green suckers and deep red berries. The one thing that makes these jars unique is that they have holes on their sides in addition to the top. This facilitates easy watering and proper care. To increase variety, plant another ornamental or edible plant, such as thyme or cilantro along with the strawberries, if you like. Click here to learn more this DIY idea.
The fresh and juicy strawberries are one of the best fruits you can grow in containers
Also Read: How to Grow Strawberries
1. Vertical Strawberry Tube Planter

Ordinary PVC pipes are used for growing tons of strawberry plants in a small space, unbelievable. When you lack an appropriate garden space or yard, a vertical gardening idea like this can be tried. All you need for this DIY idea is a few PVC pipes, a drilling machine, and of course, some gardening essentials. Just keep in mind that vertical units require careful watering, so the last thing you would want is for them to dry out. The tutorial is available here!
2. Vertical Pyramid Planter

Go vertical, if you lack enough room to plant. A strawberry tower planter gives you the additional planting and growing space you need to showcase your love for this much-loved fruit. It’s an unusual and functional DIY garden project you can try. See the step by step DIY article here!
3. Hanging Basket

Growing strawberries in hanging baskets is possible and easy enough. An average-sized basket can fit a few strawberry plants. So, all you have to do is fill it up with the right rich potting soil and water regularly. That’s it! Check out the DIY tutorial on this site.
Also Read: The Right Time to Plant Strawberries
4. Strawberry Pallet Planter

A strawberry pallet planter is a clever idea to grow plants like strawberries that spread through runners; it also improves the productivity of this fruit. Pallets are cheap and sturdy; you can use them to create a raised bed like structure. Must see the tutorial post here!
5. Hanging Strawberry Planters

Growing strawberries up in the air in hanging containers is a simple and easy way to grow a lot of plants in a little to no space. Choose some big tin cans as a planter, also some cool color paint. This perfect idea of recycling used TIN CANS can be found here.
6. Strawberry Tower

A strawberry tower with an in-built reservoir is an excellent and unique way to grow juicy and fresh strawberries when you’re short of space. Easy to maintain, it is made of an array of plastic pots stacked up one on top of each other in the form of a tower. Also, the inbuilt reservoir makes watering a lot easier. This fantastic step by step DIY idea is curated from A Piece of Rainbow.
7. Strawberry Gutter Garden

Strawberries are super easy fruits to grow in gutters; it also saves them from diseases like crown rot and fruit rot. Also, this you can grow so many plants. See the step by step DIY idea with pictures here.
8. Stepped Strawberry Ladder

Not only the strawberries but you can also grow vegetables and herbs following this smart idea. You will need some help with the assembly process, though, as this is one of those DIY ideas for growing strawberries that need considerable effort. Once the structure is complete, fill up the planter boxes with the correct potting soil, seedlings and then watch them grow. The step by step article is available here.
Also Read: Vertical Garden Ideas for Small Gardens
9. A Strawberry Jar

A strawberry jar is a fun way to plant strawberries. After all, what is more, appealing than a nicely painted jar brimming with lush, green suckers and deep red berries. The one thing that makes these jars unique is that they have holes on their sides in addition to the top. This facilitates easy watering and proper care. To increase variety, plant another ornamental or edible plant, such as thyme or cilantro along with the strawberries, if you like. Click here to learn more this DIY idea.
1
1
文章
Micky
2017年05月23日


Wanna make your backyard awesome this summer? Whether your idea of summer backyard fun is quiet nights having dinner al fresco with friends, or a yard full of giggling and squealing eight year olds, we have the DIY projects to make your backyard awesome! Pick one for major fun, or smaller projects to make the entire space just a little bit cooler than it is today. And make this summer your awesomest.
What is summer without the beach? This amazing tutorial by Sunset magazine shows you how to build a beach, in your own backyard! So dig out the beach towels and sand pails…

Now that you have the beach, how about an outdoor shower? Learn how to make this simple one from Sweet Paul magazine…

Brambleberry Cottage created these DIY garden mirrors from old windows. What a great way to make your backyard magical! The mirrors double all the amazing in your yard!

Now, you need a place to kick back in this gorgeous yard of yours, so learn to make your own hammock! ‘Outside Mom’ has great instructions to make one using fabric, some rope and a sewing machine!

Once again, this project, featured at the top of the post from ‘Camille Styles’, is another great option for a nice lazy day hammock. This one made from muslin.

The Art of Doing Stuff gives us directions on how to make a dollar store pot lantern! Yes, dollar store! Great for those evening meals in the backyard this summer. Or forget the meals, and make it Merlot. Or tea, but I prefer the Merlot. :)

‘Home Sweet Homemade’ made these seashore wind chimes. No tutorial on this, but lots of close up photos for you DIY’ers with a detective in the family. Just remember, the knots are everything! Just what you need to “sing” you to sleep while you kick back in that amazing hammock you just made!

This modern family table by BHG has a short and easy to follow tutorial. This project is so easy, I would do it by myself! But it looks very high end… Love the clay chimney flues as a base!

You may need a place for everyone to hang out when they aren’t eating, so try this DIY outdoor sectional by Shoestring Sophistication. Made from pallets and left over 2x4s, this is a budget and earth friendly project.

This drive through kid bike wash sprinkler by Momfluential is so cute… I can imagine kids using this as a sprinkler toy all summer long!


The folks at DIY Network give us step by step’s on how to build a bocce ball court… If you’ve never played, you should start. It’s a great lawn game..one of our local wineries here in Washington wine country has even created courts at their outdoor seating area…they are always full on summer evenings. Find out how to play bocce ball.

Really want to make your backyard awesome? Check out our post on making a backyard movie theater!

Light your way to the twilight “feature” with this cool idea we found on Pinterest… instead of just sprinkling Tiki torches around the yard, bunch them into pots… It makes a better statement! And they are cheap, so you can afford to go a little crazy!

Also from Pinterest, hanging globe lights over your backyard makes for magical summer nights… So easy! I like the globe lights at Target.

Domesticated Engineer built this DIY patio table with cooler for less than $140! They show you exactly how to do it, complete with their lumber supply list. Can you imagine, not even having to go inside to the fridge?

Lastly, what summer is complete without a good ol’ fashioned fire pit! Check out the tutorial from Lowe’s on how to make this one or check out one of our previous posts on how to Make a backyard fire pit!

0
1
文章
Micky
2017年05月23日


This may be one of our most fun summer garden fun ideas yet! Build a backyard movie theater! Ok, it wasn’t our idea. But we’re running with it. Sound like an impossible DIY project? Not! We have tutorials for every skill level, and remember, even an old sheet and a projector still make a great movie night. But for those of you who want a little more in your outdoor movie viewing experience, try these ideas. Most of the tutorials require simple materials including pvc pipe, buckets and sheets. You could also consider investing in a higher quality screen for a more upscale experience. And don’t think this idea is just for the kids! We know lots of couples who host outdoor movie/wine tasting parties that don’t include the little ones. Ready to roll? Don’t miss all the great tips these bloggers post on their tutorial pages as well. Our featured project, above, Pottery Barn has gotten in the “picture” with a simple version of a backyard movie screen. Simple and quick tutorial. Cozy!
This project is by Wholesome Mommy, and she has an incredible step by step on how to build an outdoor movie screen. Packed with easy instructions, step by step photos, and tons of tips, this is a good basic primer on how to do it right.

Digital Trends has tons of great info. If you are building an outdoor theater… then you should read this, as it covers everything from logistics to social etiquette.

AmberLee of Givers Log has some great tips as well, including projector placement and even food! Best of all, she has ideas for alternatives to homemade screens in her Backyard Movie: How-To!

Sunset magazine created their backyard movie theater with the same idea as the projects above with a frame, concrete in buckets (or pots) and a screen. They offer another alternative to a sheet, and also some good resources online for projectors.

Lots and lots of tips from Cracker Jack Theater including sound systems and storage ideas, but also a new idea for using your outdoor theater.

We found this great photo floating out in internet space, but it’s so inspirational we wanted to share it. This is the life, folks!

And lastly, a couple more inspirational photos to get you motivated!


0
0
文章
小马奥
2017年05月23日

If you’re looking for some OFFBEAT ideas for growing plants indoors or outdoors, these DIY hanging planter ideas are worth looking at!To give your garden a playful look, you need to be creative and what’s better than some offbeat planters made from unused home items hanging in line and beautiful plants trailing from them.1. DIY Hanging Terrarium

The DIY hanging terrarium planter is perfect for keeping indoors, and it looks awesome. With a few supplies and plants, you can do this without any difficulty following the steps. Visit this website and this ONE too, to learn everything.
2. DIY Birdcage Planter

Add a little whim to your garden by adding a birdcage planter. You can also hang it on your balcony. The step by step article is available here!
3. Hanging Purse Garden

Repurpose old and damaged purses into a beautiful hanging garden. Keep the plants in their pots so you can easily slip them out to drain excess moisture. You can also line the purse with plastic to keep the purse from getting wet.
4. Hanging Seashell Planter

You’ll need some big conch shells, threads to tie, soil, trailing succulents or you can also use air plants. See more INCREDIBLE SEASHELL planter ideas here!
5. DIY Mason Jar Hanging Planter

The Mason jars are so versatile; we also added a few ideas here! This DIY mason jar planter is not hanging but actually clamped, a wonderful idea. We found it on Allison Patrick’s blog. Here’s an another link to a different DIY post!
6. Hanging Hat Planter

If you have a few old hats, use them for this bizarre idea. Hang your planters from a wall, cut a hole into the top of the hat of the size of plant stems. Now slide the stems out through the hole so that it’ll look like plants are growing in hats, your planter is ready. Allow a few days for plants to grow around the hat to see the natural display.
7. Hanging Plastic Bottle Planter

Simple idea for upcycling old plastic bottles and turn them into beautiful hanging plant pots. Check out the tutorial here.
8. Creative Hanging Planter

We found this DIY tutorial on Bloglovin and loved it. Although the tutorial is not available in English, you can translate it using Google translate.
9. DIY Hanging Air Plant Holder

Impressive DIY for indoors. This unique plant holder is cool to display air plants. The step by step tutorial is available on Squirrelly Minds.
10. Tin Can Hanging Planter

If you have tin cans in your homes that you’re about to throw, make use of them to grow annuals, succulents or herbs and hang them. So many DIY tutorials available if you search the web. One of its kind is here!
11. Hanging Gloves Planters

If you love to surprise your visitors, this idea is for you. Just plant the plants in small pots and place them in gloves. Hang the gloves on a wall, on a tree or a rope.
12. DIY Hanging Planters Out of Metal Bowls

These hanging planters are so unique and made of metal bowls. It’s a sexy idea, to learn step by step– Visit A Beautiful Mess
13. Ice Cream Cone DIY Hanging Planter

A fun DIY hanging planter idea for Ice cream lovers. You can make a planter like this for under 10$. The complete tutorial is available on Brit.co.
14. Hanging Tire Planter

Old Tire Uses in the garden are popular, and one of the best ways to use an old tire in the garden is to make it a hanging tire planter. See the DIY tutorial here!
15. DIY Plastic Bottle Hanging Planter

If you love recycling projects, take a look at this DIY at PopSugar! You can also look at 13 Plastic Bottle Recycling Ideas here.
16. Hanging Tray Planter

Make this easy hanging succulent planter with a tray or shallow pot, succulents, threads, and candles. To make it, just plant the succulents in a tray that has holes on sides to hang (or drill a few holes). Hang the tray with the help of threads. You can also put some candles, burn those candles in the night to create an astonishing effect. Ensure you do not hang this in a windy spot.

The DIY hanging terrarium planter is perfect for keeping indoors, and it looks awesome. With a few supplies and plants, you can do this without any difficulty following the steps. Visit this website and this ONE too, to learn everything.
2. DIY Birdcage Planter

Add a little whim to your garden by adding a birdcage planter. You can also hang it on your balcony. The step by step article is available here!
3. Hanging Purse Garden

Repurpose old and damaged purses into a beautiful hanging garden. Keep the plants in their pots so you can easily slip them out to drain excess moisture. You can also line the purse with plastic to keep the purse from getting wet.
4. Hanging Seashell Planter

You’ll need some big conch shells, threads to tie, soil, trailing succulents or you can also use air plants. See more INCREDIBLE SEASHELL planter ideas here!
5. DIY Mason Jar Hanging Planter

The Mason jars are so versatile; we also added a few ideas here! This DIY mason jar planter is not hanging but actually clamped, a wonderful idea. We found it on Allison Patrick’s blog. Here’s an another link to a different DIY post!
6. Hanging Hat Planter

If you have a few old hats, use them for this bizarre idea. Hang your planters from a wall, cut a hole into the top of the hat of the size of plant stems. Now slide the stems out through the hole so that it’ll look like plants are growing in hats, your planter is ready. Allow a few days for plants to grow around the hat to see the natural display.
7. Hanging Plastic Bottle Planter

Simple idea for upcycling old plastic bottles and turn them into beautiful hanging plant pots. Check out the tutorial here.
8. Creative Hanging Planter

We found this DIY tutorial on Bloglovin and loved it. Although the tutorial is not available in English, you can translate it using Google translate.
9. DIY Hanging Air Plant Holder

Impressive DIY for indoors. This unique plant holder is cool to display air plants. The step by step tutorial is available on Squirrelly Minds.
10. Tin Can Hanging Planter

If you have tin cans in your homes that you’re about to throw, make use of them to grow annuals, succulents or herbs and hang them. So many DIY tutorials available if you search the web. One of its kind is here!
11. Hanging Gloves Planters

If you love to surprise your visitors, this idea is for you. Just plant the plants in small pots and place them in gloves. Hang the gloves on a wall, on a tree or a rope.
12. DIY Hanging Planters Out of Metal Bowls

These hanging planters are so unique and made of metal bowls. It’s a sexy idea, to learn step by step– Visit A Beautiful Mess
13. Ice Cream Cone DIY Hanging Planter

A fun DIY hanging planter idea for Ice cream lovers. You can make a planter like this for under 10$. The complete tutorial is available on Brit.co.
14. Hanging Tire Planter

Old Tire Uses in the garden are popular, and one of the best ways to use an old tire in the garden is to make it a hanging tire planter. See the DIY tutorial here!
15. DIY Plastic Bottle Hanging Planter

If you love recycling projects, take a look at this DIY at PopSugar! You can also look at 13 Plastic Bottle Recycling Ideas here.
16. Hanging Tray Planter

Make this easy hanging succulent planter with a tray or shallow pot, succulents, threads, and candles. To make it, just plant the succulents in a tray that has holes on sides to hang (or drill a few holes). Hang the tray with the help of threads. You can also put some candles, burn those candles in the night to create an astonishing effect. Ensure you do not hang this in a windy spot.
1
1
文章
扭扭
2017年05月23日

Learn how to make a vertical succulent wall planter in a few steps without spending money. You don’t need to be a great DIYer to have this DIY succulent frame in your home.

Succulents are easiest plants to grow on earth. They are not demanding and most of them grow in severe conditions, plus they come in different colors, sizes, and shapes. All this makes them perfect for vertical gardening.
Things you’ll need to make DIY succulent wall planter

SucculentA tape to measureChicken wireA hammerNailsA pencil or MarkerGlueSpecial potting mix for cacti and succulentsMore succulents4 equal size thick sticks or frame moulding to make frameMoss (Optional)A piece of board (plywood or something else) to adhere behind the frame.Staple gun or whatever you find easily to attach the chicken wire to the frame.Pincer or wire cutter to cut wiresSteps to Follow
Step 1
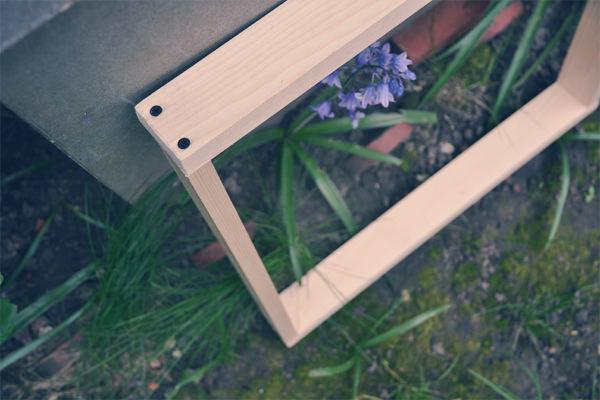
Make a frame by joining the pieces of wood. (See the photo above)
Step 2
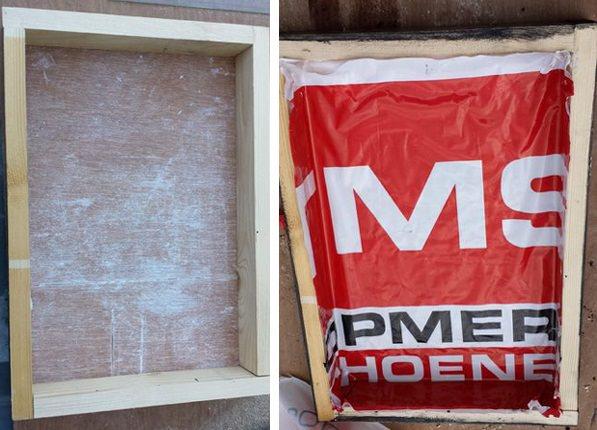
Measure and cut the plyboard or picture frame board to cover the frame from behind according to the dimensions of the frame. Once you join it to the frame with nails and glue, stick a plastic bag or film over it. To make your vertical succulent wall waterproof.
Step 3
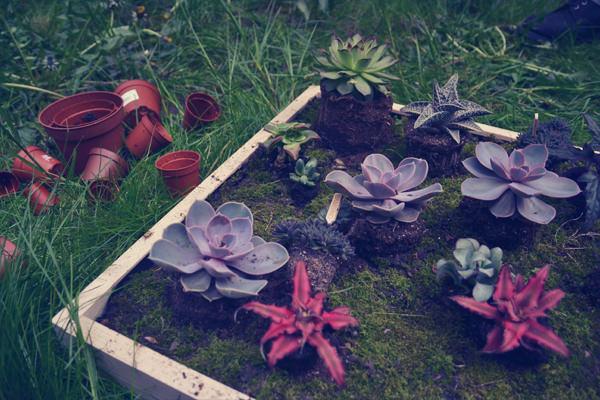
Evenly spread the soil in your frame. Stop filling just before the soil reaches the edge of the frame.
Step 4
Before fixing the chicken wire on your succulent wall planter, distribute moss over the soil (optional) and put succulents to see and adjust them according to colors, shapes and sizes. This is fun! Once you have found the ideal location for your small plants, remove them again.
Step 5
Attach the chicken wire using a staple gun on the edges of the frame. You can skip this step if you want but chicken wire is used to support the succulents and soil.
Step 6
Now plant the succulents. Skip this step if you are planting them from cuttings but if you are planting potted succulents you may need to cut chicken wire mesh to create a few small planting holes to transplant succulents with the help of a pincer or wire cutter.
Step 7
Poke holes in the soil and then gently tuck the plants in and close the hole and mist the soil to moisten it.
Wait a few days before hanging your DIY succulent wall planter or putting it vertically until the plants recover and establish well.
How to Care for Succulent Wall PlanterPosition
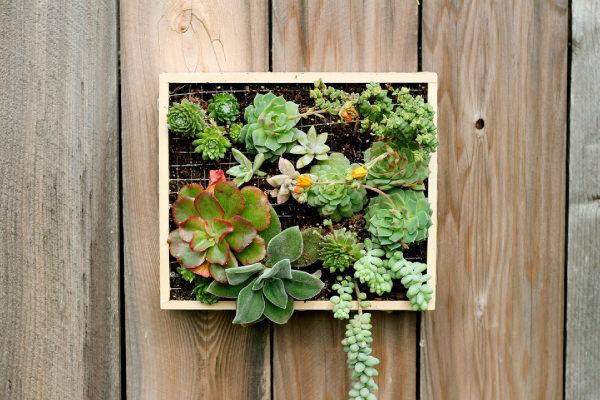
Keep the succulent wall planter on a table, near a windowsill, in your living room, somewhere where it will receive some sun or indirect sunlight. You can also hang it on the wall but for this, you’ll need to attach a picture hanger to your frame.
Watering
Spray water on your vertical succulent wall to keep the soil slightly moist in the next few days. Once established water only when the substrate is slightly dry. Be attentive to it and observe when the plants need water.
Soil
Right kind of soil is the key as you’re growing plants vertically in a too small space. Use succulent potting mix for this.

Succulents are easiest plants to grow on earth. They are not demanding and most of them grow in severe conditions, plus they come in different colors, sizes, and shapes. All this makes them perfect for vertical gardening.
Things you’ll need to make DIY succulent wall planter

SucculentA tape to measureChicken wireA hammerNailsA pencil or MarkerGlueSpecial potting mix for cacti and succulentsMore succulents4 equal size thick sticks or frame moulding to make frameMoss (Optional)A piece of board (plywood or something else) to adhere behind the frame.Staple gun or whatever you find easily to attach the chicken wire to the frame.Pincer or wire cutter to cut wiresSteps to Follow
Step 1

Make a frame by joining the pieces of wood. (See the photo above)
Step 2

Measure and cut the plyboard or picture frame board to cover the frame from behind according to the dimensions of the frame. Once you join it to the frame with nails and glue, stick a plastic bag or film over it. To make your vertical succulent wall waterproof.
Step 3

Evenly spread the soil in your frame. Stop filling just before the soil reaches the edge of the frame.
Step 4
Before fixing the chicken wire on your succulent wall planter, distribute moss over the soil (optional) and put succulents to see and adjust them according to colors, shapes and sizes. This is fun! Once you have found the ideal location for your small plants, remove them again.
Step 5
Attach the chicken wire using a staple gun on the edges of the frame. You can skip this step if you want but chicken wire is used to support the succulents and soil.
Step 6
Now plant the succulents. Skip this step if you are planting them from cuttings but if you are planting potted succulents you may need to cut chicken wire mesh to create a few small planting holes to transplant succulents with the help of a pincer or wire cutter.
Step 7
Poke holes in the soil and then gently tuck the plants in and close the hole and mist the soil to moisten it.
Wait a few days before hanging your DIY succulent wall planter or putting it vertically until the plants recover and establish well.
How to Care for Succulent Wall PlanterPosition

Keep the succulent wall planter on a table, near a windowsill, in your living room, somewhere where it will receive some sun or indirect sunlight. You can also hang it on the wall but for this, you’ll need to attach a picture hanger to your frame.
Watering
Spray water on your vertical succulent wall to keep the soil slightly moist in the next few days. Once established water only when the substrate is slightly dry. Be attentive to it and observe when the plants need water.
Soil
Right kind of soil is the key as you’re growing plants vertically in a too small space. Use succulent potting mix for this.
1
0
文章
Hande Salcan
2017年05月23日


Making a DIY terrarium is a stylish and trendy garden project that is easy. Here is a simple tutorial on making and maintaining a terrarium garden in your home!
Supplies:
Glass container with open top
Activated charcoal chips (in bags in the indoor potting mix department)
Potting Soil
Plants
Sheet moss or decorative stones
Planting tool (I like a long handled spoon)
Choosing Plants to Fit the Container (Or vice-versa!)
First, choose your plants for the terrarium. Most plants can adapt to terrarium living, but keep in mind the plants water needs. Plants that need less moisture such as cacti, sedums and succulents need a very open container, so that the moisture has a chance to escape. Tropical houseplants, or my fav, a variety of mosses love moisture, so the container can have more narrow opening, as they will thrive on the humidity. Choose small specimens that will fit easily in your container, and don’t overcrowd. You want to leave a little space between plants.

Start your Terrarium
Start building your terrarium by adding a 1-2 inch layer of charcoal chips on the bottom. Now add your potting soil on top of the chips, packing gently as you go. Fill the container one third full. Pack down gently with your planting tool.
Add Plants
Now add your plants on top of the soil. Use your planting tool to add soil around the plant roots and gently pack down until the roots are covered.
Add Decorative Stones or Moss
Add small pieces of sheet moss between the plants, and/or decorative gravel or stones. Water until you see moisture at the bottom of the container.

Care of Your Terrarium
You can water your terrarium with a container with a spout, or you can use a mister for moisture loving plants. Be sure to water only as often as needed. If you use plants that prefer dried conditions, make sure the soil dries out between watering. Use scissors to prune plants as necessary. Place in a bright spot, but never where the terrarium gets direct sun.

That’s it! Easy, inexpensive and you can personalize your DIY terrarium to your own tastes. Try making several different kinds of terrariums. Here at TGG we are planning an all succulent terrarium, one with several varieties of moss, and a miniature garden. Watch for pics as the projects finish! Have you seen some cool terrariums at shops near you? Share any unique ideas with us!
2
0
文章
Abigal
2017年05月22日
Sometimes you don’t want to build a whole “fire pit” adventure in your backyard, but you still want that fire factor. No problem, we found some easy DIY table top fire bowls for you that fit perfectly in any garden space! Whether you don’t want to smoke out the neighbors, or you just don’t have the space, fire bowls can be used on the patio any time of year. Fire is an element of nature that is a natural in a garden space, and allows you to enjoy the outdoors long after the sun goes down. Think “campfire” without the firewood hunting! (If you do want to go all out, learn how to build a fire pit!) Our feature photos below show us how to make a tabletop fire pit from ‘Dunn Lumber’, They use easy to find gel fuel, and they even have a budget tip for the fuel at the end! All of the supplies needed you can get at most home improvement stores.
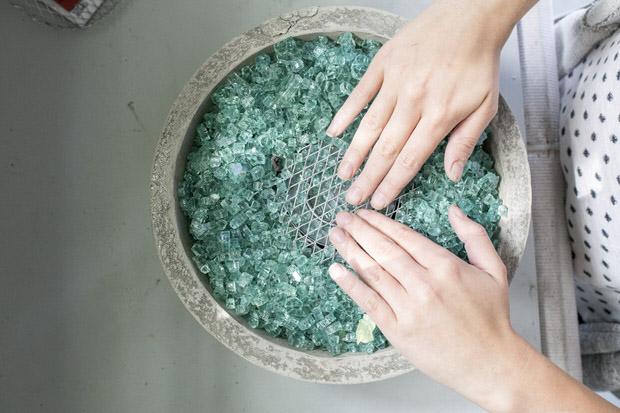
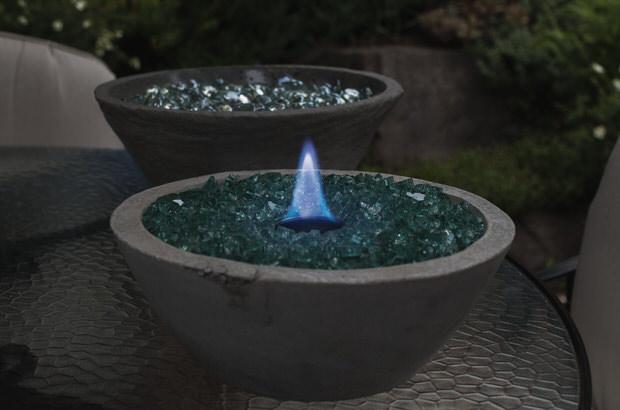
Mike from ‘Modern Builds’ shows us how to make his modern concrete fire bowl in video! This is a great tutorial for those of us who really need to be walked through a project visually, and honestly I think most of us fall into that category!

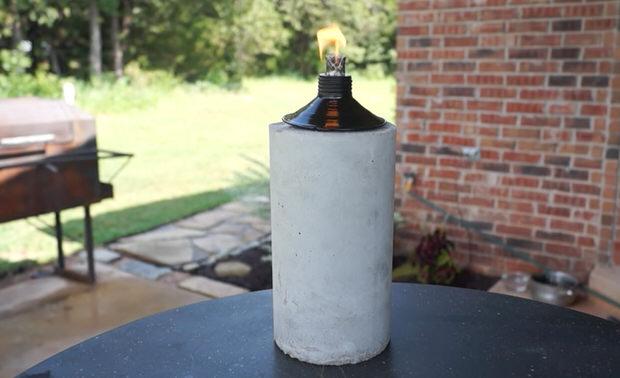
Also from Mike at ‘Modern Builds’ is this DIY concrete tabletop Tiki torch. Also in video, this tutorial was a little different, and we love different!
Karen at ‘The Art of Doing Stuff’ made this awesome DIY personal fire pit for cheap. She made this for under $25, and we’ve seen similar ones for over $150…

‘BHG” made this really simple backyard fire pit with a galvanized metal bowl, fire glass and gel fuel. Be sure if you use a metal container you remember it can get hot really fast.

Kim at ‘Today’s Creative Life’ made this DIY tabletop fire bowl from a flower bowl, gorgeous blue fire glass and gel fuel.

Now that you have Kim’s flower pot tutorial down, we will wrap up this post on DIY tabletop fire pits with this inspirational photo from ‘Pinterest’. Using a terra cotta flower pot with a base, this fire pit is an easy DIY!


Mike from ‘Modern Builds’ shows us how to make his modern concrete fire bowl in video! This is a great tutorial for those of us who really need to be walked through a project visually, and honestly I think most of us fall into that category!

Also from Mike at ‘Modern Builds’ is this DIY concrete tabletop Tiki torch. Also in video, this tutorial was a little different, and we love different!

Karen at ‘The Art of Doing Stuff’ made this awesome DIY personal fire pit for cheap. She made this for under $25, and we’ve seen similar ones for over $150…

‘BHG” made this really simple backyard fire pit with a galvanized metal bowl, fire glass and gel fuel. Be sure if you use a metal container you remember it can get hot really fast.

Kim at ‘Today’s Creative Life’ made this DIY tabletop fire bowl from a flower bowl, gorgeous blue fire glass and gel fuel.

Now that you have Kim’s flower pot tutorial down, we will wrap up this post on DIY tabletop fire pits with this inspirational photo from ‘Pinterest’. Using a terra cotta flower pot with a base, this fire pit is an easy DIY!

0
0
文章
Abigal
2017年05月21日


If you have kids or pets to keep in, (or out!) or just want some privacy from the neighbors, building a DIY fence is a great way to save money in your landscaping. We have a round up of some great DIY fence projects for you, but also a couple of tips to keep in mind…
Always call your local utility company and have them come out and mark your lines BEFORE you dig. Nothing will stop a DIY project faster than hitting a utility line. Not to mention, they could charge you for the damage… Don’t DIY the utility marking!
Make sure you are willing to be flexible with supplies. For instance, a tutorial may suggest one type of wood that is common in their part of the country, but expensive in yours. Ask your home improvement store for suggestions.
A fence doesn’t have to be just utilitarian… It can be an attractive part of your landscape.
Remember safety when using power tools!!!
Ok, on to your DIY fence projects!
A great place to start with all the basics of fence building is ‘Buildipedia’. Learn how to build a wood privacy fence from their very complete tutorial, including a video.
Are your fence dreams more of the white picket variety? No problem, ‘Yahoo’ has the how-to’s for you… How to build a picket fence. Can’t you just see the climbing roses now?

So ‘Crafty Texas Girl’ prettied up the fence she had with a little industrial flair… Learn how to build a tin accent wall!

‘C.R.A.F.T.’ has another take on dressing up a fence, DIY style… making a marble fence! I love what this looks like with the sun shining through!

Love, love LOVE this modern fence project by ‘The Cavender Diary’! Lots and lots of photos for this project, so be sure you check out their awesomeness.

Want an Asian feel to your yard or garden? Install a bamboo fence with this tutorial by ‘DIY Network‘… BTW, you can do a similar look with rolled bamboo fencing bought from Home Depot for less cost.

Check out this great idea with tutorial from ‘Home-Dzine’. They show us how to make wood post sleeves to transform an ugly chain link fence.

‘Recyclart’ has a great idea for adding art to the garden, while recycling old pallets! Find out all about their pallets patio fence!

Finally, if you want to know how to build a quick and easy recycle pallet fence, try this basic plan from ‘Horse and Hound‘… The pallets fit right over the fence posts! When you go to this site, scroll down a little to find the post for the fence, and the instructions…

So DIY a fence project and make your dream yard one step closer to being exactly what you want!
0
0
文章
Abigal
2017年05月21日


We love living outdoors as much as possible, but in order to live outdoors, you need to have a spot to do that living! That pretty much requires furniture, which can be pricey, cheap looking, or just plain not work for your needs. These brilliant DIY outdoor furniture projects will make sure you always have a place to sit, cook, serve, and even just set down your glass of wine or lemonade! Give one (or all of them) a try to make your outside spaces more comfortable for your family and friends to wile away those warm afternoons and evenings. Our feature project above, is from ‘DIY Candy’. This Williams Sonoma inspired DIY outdoor bench is just what you need for extra seating on the deck, or to tuck in a little garden nook for an afternoon breather. Such a nice, clean look to this project! Great tutorial! Oh, and did we mention? They did this for $35!
We found this tutorial for this really awesome DIY pallet rustic table from ‘Inspire Me Heather’ via ‘The 36Th Avenue’… What a great way to repurpose, and make something really useable and full of charm. I can see this with more modern chairs, or paired with poufs on a simple patio!

From ‘Design Confidential’ this Chesapeake double lounger is exactly what Steve and I need… This is an amazing DIY project, because it looks very high end. Could you touch this in a place like “Room and Board” for less than $700? Find the link for the free plans in the first paragraph!

This DIY picnic table from ‘BHG’ is one of my fav outdoor table designs… Not only do I LOVE the base, but using wood of different sizes makes the piece look simple, yet really interesting all at the same time. Pretty simple table top!
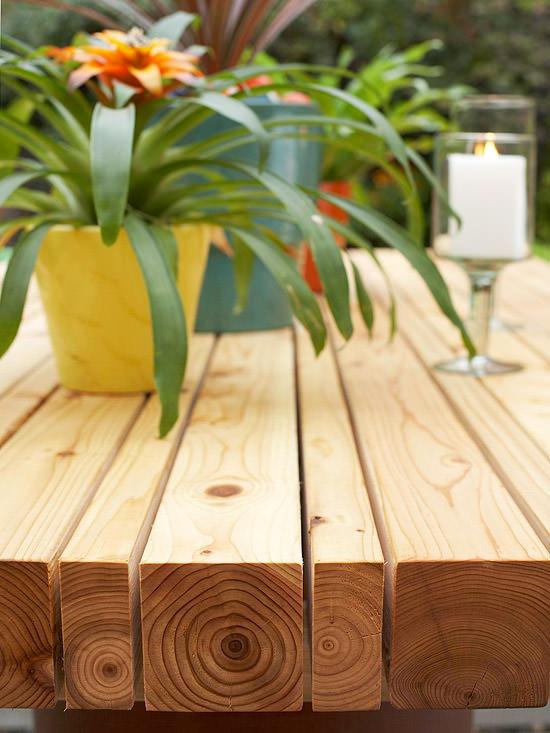
From “Home Dzine”, this pine garden love seat is a great project for using out in the garden, or better yet, in a spot with a view of the garden! Complete supply list along with these plans.

Remember when I mentioned having a place to set that glass of wine? This DIY concrete side table totally fits the bill for me. Yes, please! Love this look. From ‘Store Front Life’, lot’s of step by step photos and instructions.

So if you have been reading us for awhile, you know we are HUGE fans of Ana White. She is one amazing woodworker, DIY’er, and all around brilliant artist with building furniture. And the best part for you guys? She’s gives out free plans, instructions, and even shares her readers versions of her projects! So we are featuring several of her projects next…Why? ‘Cause she is that good.
This grill table with stainless top was made by one of her readers, Krochelle… We believe it was modified from her sturdy work bench plans. Be sure to read both, because Krochelle does offer a lot of tips on how she did this version in the comments. Also, there are other versions of this done by other readers on her site… lot’s of opportunities to personalize your project here!

Build this Adirondack stool or end table from Ana White’s free plans! Be sure to scroll down to find the drawings and instructions. I love the bright colors she used on these!

This cedar ladder garden planter is our last project for today from Ana, and it is the perfect way to bring a touch of the garden up to eye level for these outdoor living spaces. As always, GREAT instructions for this project!

0
0
文章
Abigal
2017年05月21日

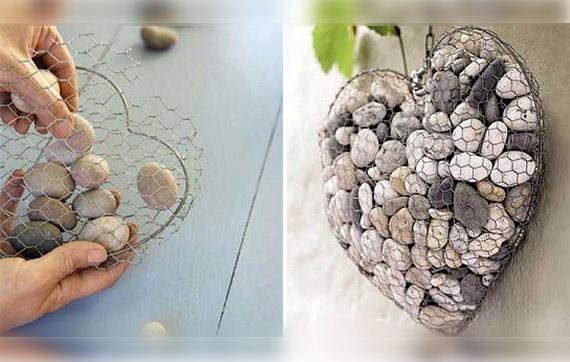
I love projects with rocks. I don’t know if it’s because they are such a natural element, or because they are all so different, or just because it’s like playing with adult legos… But I love them! So when I run across a great DIY project with rocks, all I want to do is start digging around in the garden for some great basalt and quartz! We ran across all these creative garden projects with rocks that any of you can do. Use something from nature and create useful and artful accents for your garden!
Our feature project above and below, is a wire and stone heart craft by ‘Country Woman’… Have I mentioned, I use to be the home decor expert for “Country Woman’? Love this project! Photos for Country Woman by StockFood/Gallo Images.

‘Better Homes Australia’ shows us how to make a water feature with stones. I love this! Can you think of a better use for rocks? Great tutorial with lots of photos.


‘Oh My Creative’ made a vegetables garden in a stone spiral, one of the most creative veggie gardens I have ever seen. Lot’s of photos!

Create a pebble mosaic with these instructions form ‘BHG’… Make you walkway or patio something special!


‘This Old House’ shows us how to make a stone sculpture for your garden with these easy instructions, They even tell you what kind of epoxy to use, which can be the hardest thing to figure out for these kind of outdoor projects.

Nancy at ‘Sugar Lump Studios‘ shared this great photo she took while on a girlfriend getaway in Michigan… This is just chicken wire forms filled with stones. Isn’t this the most charming front porch? Thanks for sharing Nancy!

From ‘Prairie Break‘, use this easy idea for all the stones you dig up planting your garden. Stones offer good drainage for a downspout area.

‘Fresh Ideen‘ brings us this photo from Pinterest (not sure about the original source)… Look for rebar forms or repurposed iron pieces to fill with stones.

This idea on creating a stone fence with wire and posts comes to us from ‘Green Landscapes to Envy‘. Just remember whatever posts/wire/cable set up you use, make sure it is strong enough to hold the weight of the rocks you fill it with.
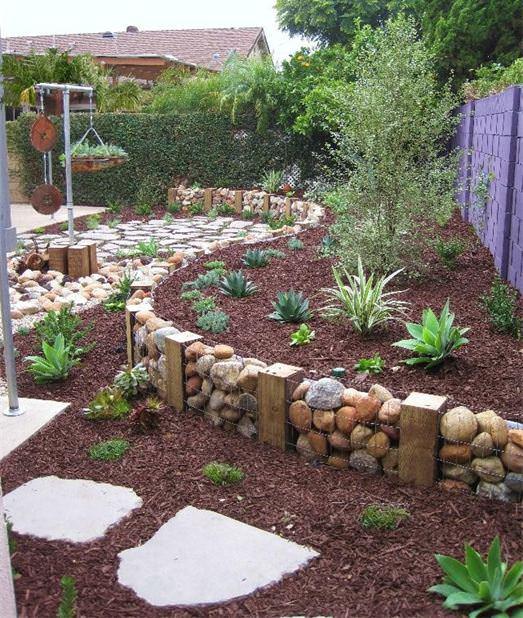
‘Project Landscape‘ brings us this idea of making wire rock towers… Use heavy duty wire fencing, join with wire ties, and fill with rocks! Use pieces of rebar stuck through the tower and into the ground to stabilize.

1
1
文章
Abigal
2017年05月21日


It’s pretty tough to enjoy summer activities in a backyard that bakes in the afternoon heat. We all need a way to get out of the sun, but still be able to spend time outdoors. We found these 9 clever DIY ways to a shady backyard oasis for you to help turn your space into a retreat! We didn’t want to just share the same ol’ wood pergolas (though if thats what you are looking for, check out our post on DIY pergolas!) so we hope these unique and creative shade structure ideas hit the shady spot!
Our feature project above, is a DIY drop cloth fabric shade cover made by ‘Anything Pretty’. Check out her tutorial, it took them just a couple of hours to get this up, and made over their old pergola! LOVE the globe lights woven through the shades.
Here is another tutorial for a fabric shade by ‘Koiphen’. Good close up photos here to help you understand the wire system for holding the shades.

From ‘J and B Marvin’, this DIY fabric pergola has a quick tutorial, and a lot of good tips. Same type of system as the project above. This is fully retractable too!
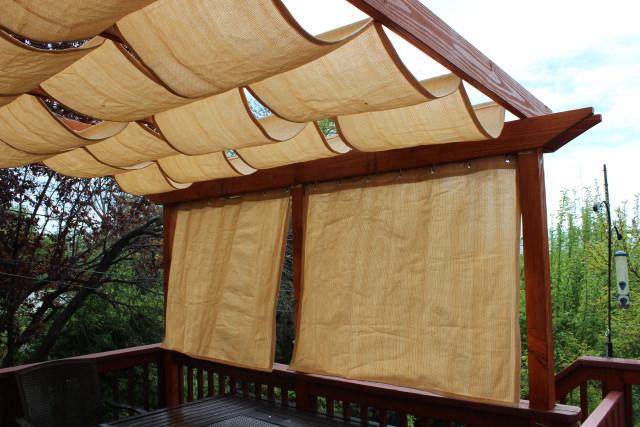
Ok, so you need Google Translate for this one, unless you read Dutch. At least, I think it’s Dutch! But I love this one, because it’s a freestanding DIY fabric pergola that can be put up even where there is no existing structure. From ‘VT Wonen’.

Hope you were paying attention to those tutorials, ’cause these next few ideas don’t have instructions, but they follow the same principles of the ones you’ve seen so far! This space from ‘InDecora‘ has a simple wire mounted fabric shade, with grommets to string the cable through. Grommet kits can be bought at craft and sewing stores, and this could be made out of sturdy canvas drop cloths from the hardware store.


Same idea as some of the projects above with this slide wire canopy from ‘Superior Awning’.

From Jamie Durie of ‘HGTV‘, these sliding canvas panels are mounted and slide the same way as the fabric ones above. There are eye hooks mounted on the frame of the panels, and the wire cable slides through the hooks, over the top of the panel. These can be moved to cover different areas of the space as the sun moves.

Also from ‘HGTV‘, covering sections of your existing pergola with canvas cloth makes a more permanent shade structure. Clever!

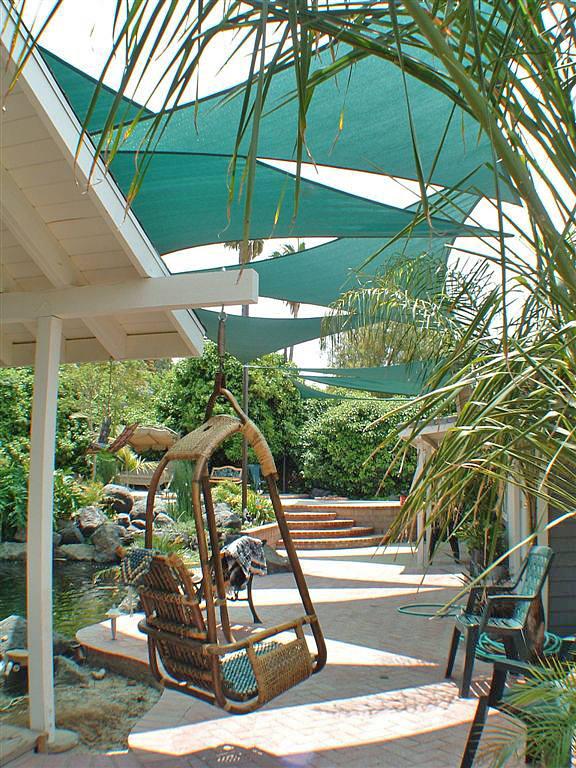
Finally, if you want a cool look for over your patio, or even your pool, think about using shade sails. They come in triangular and rectangular shapes of different sizes, and are attached to posts, trees or buildings with hooks and cables. Check out our post on how to hang shade sails for more info on this project!
0
0


