文章
Joss
2017年05月23日

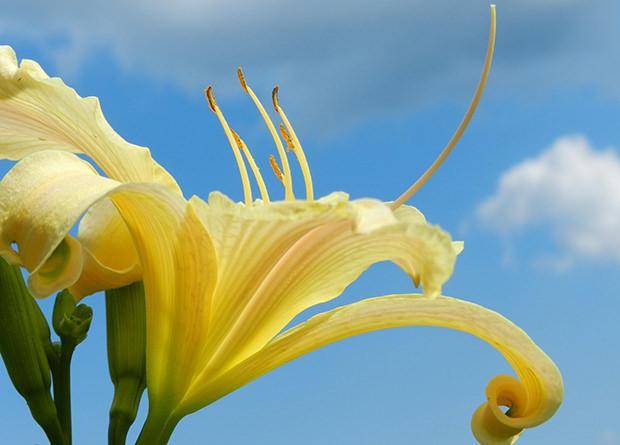
There aren’t very many plants that I will call fool proof, but the daylily comes pretty close. Tolerant of drought, tough soils, even partial shade, these beauties’ blooms last only one day. The good news is that there are always more buds to follow the ones that fade! A lot of gardeners gave up on daylilies the last few years because their characteristic yellow blooms and strappy leaves just became a little overused. ‘Stella de Oro’ was a variety that rebloomed, was compact, easy to grow… and planted in about every garden and street side patch for about 20 years. Ok, that can get old. But did you know that daylilies come in every color except blue? That some are fragrant, some have huge blooms, and some grow 4 feet tall? That they can be used planted en masse for great effect, as a ground cover, as a focal point in the garden, or in containers? So here is your quick primer on how to grow delightful daylilies!

Most prefer full sun to get the best blooms, although the darker varieties will like some afternoon shade for the best color.
Choose an early, mid, and late blooming variety to make sure you always have blooms.
Plant with the crown of the plant 1/2 inch under the soil. They prefer a soil rich in organic matter, but will tolerate poor soils as well.
Water regularly the first season to get the root system established, then as needed after that.
Fertilize in the spring with a low nitrogen fertilizer.
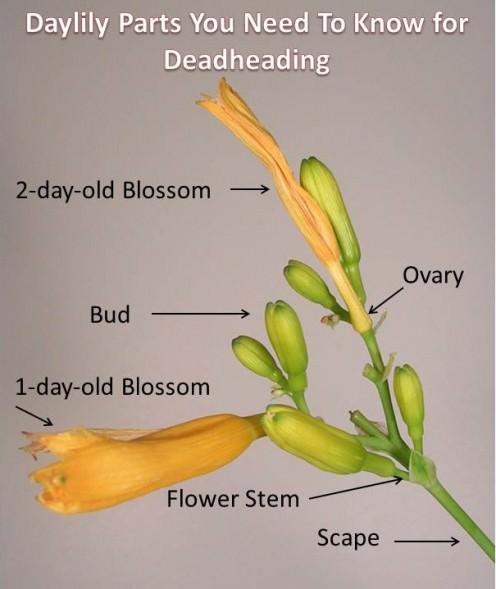
Deadhead the faded blooms as often as possible for the most blooms on each plant. Strive for twice a week if you can. Some varieties are “self cleaning” which means you don’t have to deadhead. Here is how to deadhead a daylily, complete with a video from ‘Sally’s Trove’.
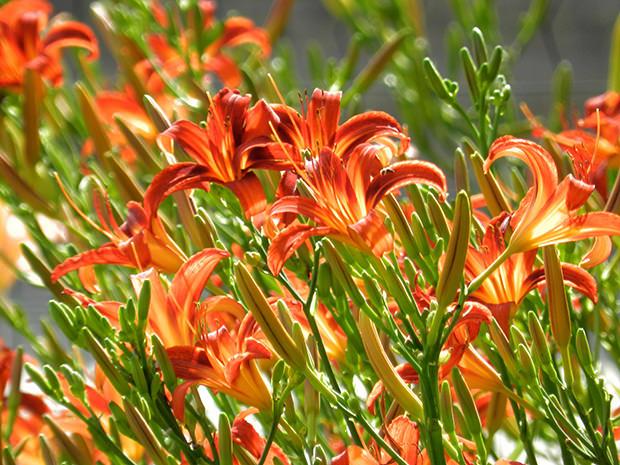
The last thing you need to know about daylilies is that they need to be divided every 2-5 years to keep them healthy and growing vigorously. This sounds like a chore, but is pretty easy to do, and provides you with lots of new, free plants! Jump on over to ‘BHG’ and watch quick video on how to divide daylilies. Did we mention they are tough? It would be pretty hard for you to do it wrong! Below are ‘Stella de Oro’ daylilies.

That’s all there is to growing amazing daylilies in your garden. They are seldom bothered by pests and disease, but if you see mis-shapen, malformed blooms, consider treating for thrips. A simple insecticide soap is a good choice.
A few of our top choices?
‘Happy Returns‘ is probably the best yellow flowered replacement for ‘Stella de Oro’, as it starts blooming in June and goes right through to October! If you want a tough, dependable daylily, this is your choice!

An old favorite, ‘Catherine Woodbury‘ has a gorgeous pink color with a yellow throat, and it’s fragrant! About 30 inches tall, one of my fav’s. Midsummer bloomer.

‘Joan Senior‘ will rebloom from July onward, and is the most white variety. Easy to grow, and very drought resistant, they grow about 2 feet tall.
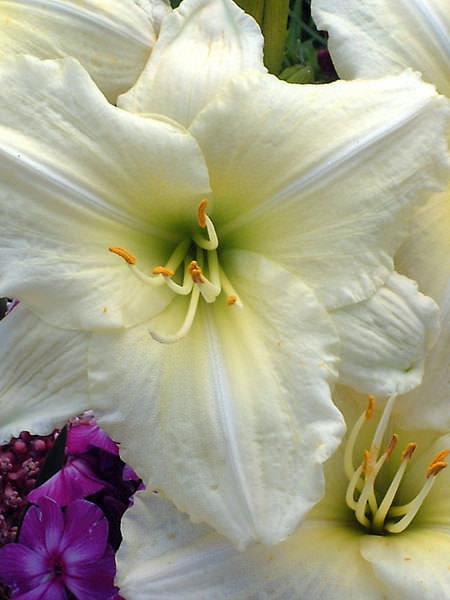
‘Wineberry Candy‘ is a pink/ purple selection that reblooms mid to late, and is a perfect 2 feet high.

‘Siloam Double Classic‘ has perfect peachy flowers, a super sweet fragrance and blooms early to late! For me, this is a tie with ‘Catherine Woodbury’.

A daylily that looks like red velvet is ‘Red Volunteer‘. Midseason, likes afternoon shade where its hot.

‘Strawberry Candy‘ is a very popular variety of deep pink blooms with strong, green foliage.

Lastly, ‘Indian Giver‘ is a deep purple bloom with a crisp white edge. Mid season blooming, grows to 2 1/2 feet tall. As with most darker varieties, prefers some afternoon shade for best color.

So grow some daylilies! Now that you know how easy they are, what’s your excuse? :)
1
0
文章
lenny
2017年05月23日

Want to improve the privacy of your rooftop garden? See a few helpful ideas for you to follow.
One of the main advantages of having a rooftop or terrace is that you have a wide view from all sides but in some cases, this advantage becomes a disadvantage, if your rooftop is exposed to the view of all the neighbors or you have a bad view from there.
Rooftop Garden Privacy Ideas1. Bamboo mat

Use bamboo mat to cover terrace for privacy quickly and easily. Bamboo mats look so natural and ideal for a garden like setting on a rooftop.
2. Construct Tall Walls

Construct walls that are 6 feet high to protect your terrace garden from prying eyes, this will also save you from bad view.
3. Grow Small Trees and Large Shrubs
You can grow small trees and large shrubs on your rooftop garden to hide it from neighbors.
Also Read: 44 Best Shrubs You can Grow in Containers
4. Plant bamboos

Bamboos are a great way to cover a balcony or terrace for privacy. They grow quickly and are low maintenance.
5. Cover with wooden planks

Cover your terrace garden with wood to give it amazing modern look.
6. Grow Hedging plants

You can grow hedging plants all around your roof terrace to hide its view for others for privacy.
7. Artificial hedging

Busy person? Artificial hedging is the solution.
8. Fabric

One of the main advantages of having a rooftop or terrace is that you have a wide view from all sides but in some cases, this advantage becomes a disadvantage, if your rooftop is exposed to the view of all the neighbors or you have a bad view from there.
Rooftop Garden Privacy Ideas1. Bamboo mat

Use bamboo mat to cover terrace for privacy quickly and easily. Bamboo mats look so natural and ideal for a garden like setting on a rooftop.
2. Construct Tall Walls

Construct walls that are 6 feet high to protect your terrace garden from prying eyes, this will also save you from bad view.
3. Grow Small Trees and Large Shrubs
You can grow small trees and large shrubs on your rooftop garden to hide it from neighbors.
Also Read: 44 Best Shrubs You can Grow in Containers
4. Plant bamboos

Bamboos are a great way to cover a balcony or terrace for privacy. They grow quickly and are low maintenance.
5. Cover with wooden planks

Cover your terrace garden with wood to give it amazing modern look.
6. Grow Hedging plants

You can grow hedging plants all around your roof terrace to hide its view for others for privacy.
7. Artificial hedging

Busy person? Artificial hedging is the solution.
8. Fabric

0
0
文章
小马奥
2017年05月23日

To provide visual interest to a container garden, follow the concept of planting flower pots “Thriller Spiller Filler”. In that, you have to combine plants of different heights and sprawling habit in each pot.

1. Thriller
Thrillers are tall, upright plants that add the height to the arrangement. Thrillers are the great way to add a vertical aspect to your containers.
Thriller Plant OptionsOrnamental grassesAlocasiaCanna lilyYuccaAsterColeusCosmosDracaena2. Fillers
Fillers are covering plants that spread to fill the gaps between the Thrillers and spillers.
Filler Plant OptionsGeraniumImpatiensPetuniaPansyColeusDusty millerBegoniaPentasLantana3. Spiller
Spiller plants are those that spill over the edges of the container and cascade down.
Spiller Plant OptionAllysumMillion bellsFuchsiaHelichrysumSweet potato vineMandevillaNasturtiumMorning gloryBacopaString of pearlHow to arrange plants

Image Credit: Space GardeningStep 1.
In order to organize the arrangements of plants in a container consummately, start with the thriller-type plants. Plant them in the center of the pot, so that they will not cover other plants and can be viewed from all sides. Thriller plants must be the twice of the height of the container.
Step 2.
Surround thrillers with filler plants. You can flower fillers or foliage fillers or both if your container is big. Choose great fillers, they will connect both the thrillers and spillers and add interest to the arrangement.
Step 3.
At last, plant the spillers (trailing plants) near the edges of the container so that they’ll grow naturally across the sides of the container.
A Tip

When planting pots in thriller spiller filler style, care to grow plants with similar growing requirements. Choose plants that need a similar amount of growing conditions, location, sun, water, shade and climate to thrive.
For example, you can’t grow a moisture loving plant with the plant that needs dry soil in order to grow.
A Few Arrangements1.

There is no reason you can not include edibles in your arrangements.
Thriller: Semi-dwarf mandarin
Spiller: Million Bells (Calibrachoa)
Filler: Thyme
2.

Thriller: Evergreen Miscanthus and Coastal WoolybushSpiller: Sweet potato vine and BacopaFiller: Sand Hill Sage and Wand Flower (Gaura)3.

Thriller: ‘Rose Altissimo’Spiller: Bacopa, Glacier IvyFiller: Purple Lilac Vine

1. Thriller
Thrillers are tall, upright plants that add the height to the arrangement. Thrillers are the great way to add a vertical aspect to your containers.
Thriller Plant OptionsOrnamental grassesAlocasiaCanna lilyYuccaAsterColeusCosmosDracaena2. Fillers
Fillers are covering plants that spread to fill the gaps between the Thrillers and spillers.
Filler Plant OptionsGeraniumImpatiensPetuniaPansyColeusDusty millerBegoniaPentasLantana3. Spiller
Spiller plants are those that spill over the edges of the container and cascade down.
Spiller Plant OptionAllysumMillion bellsFuchsiaHelichrysumSweet potato vineMandevillaNasturtiumMorning gloryBacopaString of pearlHow to arrange plants

Image Credit: Space GardeningStep 1.
In order to organize the arrangements of plants in a container consummately, start with the thriller-type plants. Plant them in the center of the pot, so that they will not cover other plants and can be viewed from all sides. Thriller plants must be the twice of the height of the container.
Step 2.
Surround thrillers with filler plants. You can flower fillers or foliage fillers or both if your container is big. Choose great fillers, they will connect both the thrillers and spillers and add interest to the arrangement.
Step 3.
At last, plant the spillers (trailing plants) near the edges of the container so that they’ll grow naturally across the sides of the container.
A Tip

When planting pots in thriller spiller filler style, care to grow plants with similar growing requirements. Choose plants that need a similar amount of growing conditions, location, sun, water, shade and climate to thrive.
For example, you can’t grow a moisture loving plant with the plant that needs dry soil in order to grow.
A Few Arrangements1.

There is no reason you can not include edibles in your arrangements.
Thriller: Semi-dwarf mandarin
Spiller: Million Bells (Calibrachoa)
Filler: Thyme
2.

Thriller: Evergreen Miscanthus and Coastal WoolybushSpiller: Sweet potato vine and BacopaFiller: Sand Hill Sage and Wand Flower (Gaura)3.

Thriller: ‘Rose Altissimo’Spiller: Bacopa, Glacier IvyFiller: Purple Lilac Vine
0
0
文章
Hande Salcan
2017年05月22日

Juiciest and largest fruit from citrus family learn how to grow pomelo. Growing pomelo is not so difficult if you follow the directions given below.

Family– Rutaceae
Genus– Citrus
Other names– Citrus maxima, shaddock, pomelo, pummelo, pommelo, pamplemousse, or shaddok) jeruk besar, jeruk bali, jambua, limau betawi, limau bali, muli, som-o, ma-o, shouk-ton-oh, suha, lukban, kabugaw and buongon.
USDA Zones — 9 to 11
Propagation — Seed, Rootstock
Difficulty — Easy
Bloom Color — White
Height — 15 feet to 40 feet
About Pomelo
Pomelo or Pummelo is largest fruit of citrus family having up to 10 inches fruits, which are sweet and tart in taste with easily removable orange like thick pale yellow skin.
Growing condition for Pomelo
As pomelo is a subtropical evergreen tree, it grows best in warm and humid climate. It does not like cold. If you’re growing pomelo in cold weather grow it in a pot.
RequirementsSun
Like all citrus varieties, pomelo needs full sun to produce its large juicy fruits. It can also be grown in partial sun, but it will produce less fruits.
Soil
Pomelo can be grown in many types of soil, however in grows best in medium textured soil of pH around 5.5 to 7. *Soil must be well draining to prevent root rot.
Watering
Pomelo likes moist soil. If grown on ground it should be watered at least once a week. Watering should be consistent and deep. Over-watering, under-watering or inconsistent watering can lead to blossom drop and fruit drop.
CareFertilizer
Feed with citrus fertilizer according to the product instruction given on the packet.
Harvest
Like most citrus fruits, pomelo may appear fully ripe weeks before it is actually ripe. The best method to check if the fruit is ripe is to taste it.
Pests and diseases
0
0
文章
Abigal
2017年05月16日


One of the most important design elements in a #garden is structure. It’s easy (ok, it is a little bit of work!) to add structure by adding paths and walkways. They give the eye a place to rest, #follow , and let you lead visitors throughout the garden. Classic #DIY garden walkway #projects can be done in a weekend, and can seriously up the anty on any garden design. Even adding a simple pathway from the street to the front door adds value. Direct the garden wanderings, keep visitors out of special areas, and lead to the important focal points and recreation areas of your yard with a walkway.
We’ve done a few posts on casual, creative paths, but it was time to make sure you all had the classic options as well. Try out these projects to give your garden a smart framework and foundation.
Learn how to lay a paver or flagstone walkway from ‘BHG’… instructions for three different options of pathway.

‘Paint Speckled Paw Prints‘ transformed their existing “paver in the grass” walkway into one laid into rock for easier mowing… Make sure you scroll down to the end of their post and see the photo of the front yard with the finished path… Big improvement! I would have chosen a different rock, but I’m probably biased against red lava rock… saw too much in my youth in California…

Another idea of the same type of project… with a different mulching material between the pavers! This walkway project is by Danielle from ‘Life Be Green‘…

Find out how to lay a slate walkway from ‘Young House Love’… This one looks so high end!

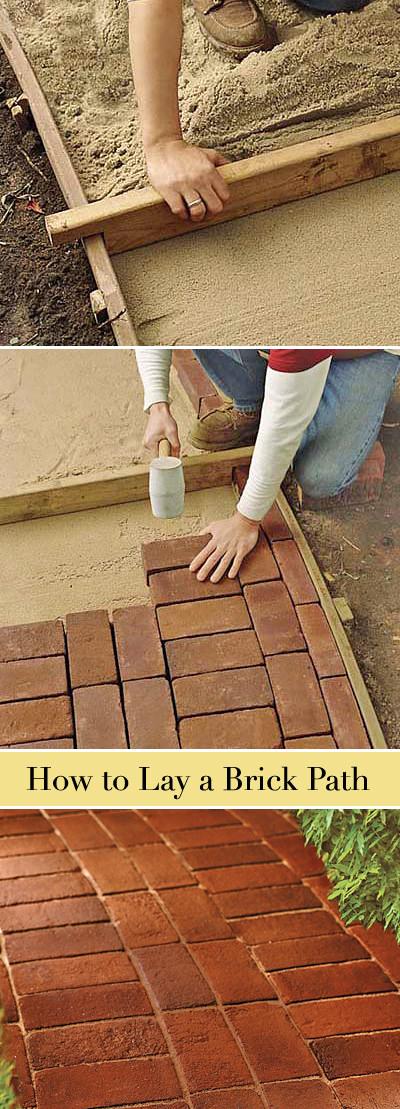
How to lay a brick path, from ‘This Old House’. This is a great choice for a more traditional home…
Also from ‘This Old House’, how to lay a gravel path. I would use this material for a more casual home, but remember to choose gravel that compacts together for easy walking. Round pea gravel is not easy to walk in!

And number 7 is how to build a concrete walkway, by ‘Family Handyman’… This is the most permanent solution, so make sure of your placement before you take this one on. Good luck with adding a walkway to your garden!

0
1
文章
Hande Salcan
2017年03月15日

If you need to lay a new lawn, or repair or replace an old one, there is no faster way to get it established then laying sod. It’s not a difficult job if you follow some easy hints. Steve and I have both laid sod before, and we have a step by step guide for you and one big “got to know”. You will be sore. Accept it now…but it will be from a job well done, and nothing…I mean nothing transforms a yard faster then the velvet green of a sod lawn.
Why lay sod instead of seed? First of all, a seeded lawn can take months before it can be used for any kind of regular traffic, be that from pets, kids, or guests. Second, it requires the same prep time, yet weeks and weeks more extra maintenance chores while you baby that seed into germination and to become a full and lush lawn. Third, seed lawns tend to need patching later on, and use a lot more water to establish. (I guess thats fourth, too!) Need anymore? It’s pretty darn satisfying spending a good afternoon laying down sod, to step back and look at your instant happy garden. Also, sod can be laid pretty much anytime during the growing season, though spring and fall are best. (Summer installation requires more attention to watering!) Seed is best planted in spring, fall planting can be tough.The only con to laying sod (besides the “sore” part is that it initially costs more than seed. But if you factor in the extra water required to get a seed lawn started, the extra expense patching the lawn later on, and the time spent waiting to use your yard, sod is a pretty good investment.
Sod can be ordered straight from sod companies, or from your local nursery. It is delivered in 3-4 foot rolls on wood pallets, and is sold by the foot. You will need to figure our how many square feet you want to lay before you call to order.

Ok, so on to our step by step tutorial on how to lay sod!
1. Prep is everything. Just like any gardening, prepping the soil will make the difference between a lawn that is healthy and lush, and one that is thin, dries out easily and eventually fails. The weekend before you have the sod delivered, rent or borrow a rototiller and till the soil six inches deep. Add an inch or two layer of compost to the top of the soil and till it in. Then the fun part. Using a metal rake, smooth out the area to be sodded, and break up any large chunks. Water.

2. Have the sod delivered the morning of installation if possible. If not, no more than the day before. Water the sod on the pallets lightly to keep it from drying out. Hint: Don’t soak the sod, it will make it much heavier to pick up and carry.
3. Lay your first row of sod, usually along the longest side of the yard. Lay the sod strips with the ends butting up together, but not overlapping. This is key to not having weeds growing up between your sod strips while the lawn is establishing.

4. Lay the next row. This row, you want to stagger the seams, as This Old House says, “like you are laying brick.” Lay the rest of your rows in this staggering manner.
5. Use a sharp garden knife to cut strips to fit. My “garden” knife was an old serrated knife from the kitchen drawer. It lasted just long enough to get the whole lawn done. Be warned.
6. When the sod is all laid, walk along the seams to gently help them make contact with the soil. Some rent a roller, but we have never had an issue from just walking the seams. Water well with sprinklers.

7. Water the new lawn every day for a week, then every other day for the next week. By week three, you should be seeing significant growth and you should be able to water like a normal (new) lawn for your climate. When the lawn is 3 inches high, it’s time for the first mowing. It’s also ready for light foot traffic. Sod lawns are pretty tough, you can walk across them to set up a sprinkler, for instance, from day one. Just hold off on the football and slip and slide for a bit, ok?
That’s it, you have learned how to lay sod, and transformed your yard! Anyone laid sod before and want to share their tips? Share with us in comments!
Why lay sod instead of seed? First of all, a seeded lawn can take months before it can be used for any kind of regular traffic, be that from pets, kids, or guests. Second, it requires the same prep time, yet weeks and weeks more extra maintenance chores while you baby that seed into germination and to become a full and lush lawn. Third, seed lawns tend to need patching later on, and use a lot more water to establish. (I guess thats fourth, too!) Need anymore? It’s pretty darn satisfying spending a good afternoon laying down sod, to step back and look at your instant happy garden. Also, sod can be laid pretty much anytime during the growing season, though spring and fall are best. (Summer installation requires more attention to watering!) Seed is best planted in spring, fall planting can be tough.The only con to laying sod (besides the “sore” part is that it initially costs more than seed. But if you factor in the extra water required to get a seed lawn started, the extra expense patching the lawn later on, and the time spent waiting to use your yard, sod is a pretty good investment.
Sod can be ordered straight from sod companies, or from your local nursery. It is delivered in 3-4 foot rolls on wood pallets, and is sold by the foot. You will need to figure our how many square feet you want to lay before you call to order.

Ok, so on to our step by step tutorial on how to lay sod!
1. Prep is everything. Just like any gardening, prepping the soil will make the difference between a lawn that is healthy and lush, and one that is thin, dries out easily and eventually fails. The weekend before you have the sod delivered, rent or borrow a rototiller and till the soil six inches deep. Add an inch or two layer of compost to the top of the soil and till it in. Then the fun part. Using a metal rake, smooth out the area to be sodded, and break up any large chunks. Water.

2. Have the sod delivered the morning of installation if possible. If not, no more than the day before. Water the sod on the pallets lightly to keep it from drying out. Hint: Don’t soak the sod, it will make it much heavier to pick up and carry.
3. Lay your first row of sod, usually along the longest side of the yard. Lay the sod strips with the ends butting up together, but not overlapping. This is key to not having weeds growing up between your sod strips while the lawn is establishing.

4. Lay the next row. This row, you want to stagger the seams, as This Old House says, “like you are laying brick.” Lay the rest of your rows in this staggering manner.
5. Use a sharp garden knife to cut strips to fit. My “garden” knife was an old serrated knife from the kitchen drawer. It lasted just long enough to get the whole lawn done. Be warned.
6. When the sod is all laid, walk along the seams to gently help them make contact with the soil. Some rent a roller, but we have never had an issue from just walking the seams. Water well with sprinklers.

7. Water the new lawn every day for a week, then every other day for the next week. By week three, you should be seeing significant growth and you should be able to water like a normal (new) lawn for your climate. When the lawn is 3 inches high, it’s time for the first mowing. It’s also ready for light foot traffic. Sod lawns are pretty tough, you can walk across them to set up a sprinkler, for instance, from day one. Just hold off on the football and slip and slide for a bit, ok?
That’s it, you have learned how to lay sod, and transformed your yard! Anyone laid sod before and want to share their tips? Share with us in comments!
0
0
文章
Abigal
2017年02月22日

I love stone! Just do. So many of you loved our post “Got Stones?” that we are doing a #follow up with more great ideas for easy projects with stones and rocks. All of these are beginner projects, are simple, inexpensive, and creative…and best of all, you may have the stones right in your back yard!

Stick and Stones
Use bundles of branches or sticks to create a garden post, then top with decorative rocks from your #garden . Love this!

Gabions
A gabion is a box or container made of wire mesh or fencing, and filled with a material for stability. In this case, wire mesh is used to create a tall box, filled with rock, then used as a decorative column. You can create tables, benches, even retaining walls with this method. Its a trendy and modern way to re-purpose in the garden, and its so creative!

Spiral Garden
Use rocks and your fav plants to create a spiral garden.

Create a Mural
Got an ugly fence or wall that could use an artistic touch? Use rocks and stones and a construction adhesive from the home improvement store to create simple murals. This community garden has it right!

And just because it’s fun, here are some more inspirational photos with stone and rock!


Stick and Stones
Use bundles of branches or sticks to create a garden post, then top with decorative rocks from your #garden . Love this!

Gabions
A gabion is a box or container made of wire mesh or fencing, and filled with a material for stability. In this case, wire mesh is used to create a tall box, filled with rock, then used as a decorative column. You can create tables, benches, even retaining walls with this method. Its a trendy and modern way to re-purpose in the garden, and its so creative!

Spiral Garden
Use rocks and your fav plants to create a spiral garden.

Create a Mural
Got an ugly fence or wall that could use an artistic touch? Use rocks and stones and a construction adhesive from the home improvement store to create simple murals. This community garden has it right!

And just because it’s fun, here are some more inspirational photos with stone and rock!

0
0
文章
Joss
2017年02月20日

The crocus delights us in early spring as it dares to peek through the snow and lift its face to the sun. Soon after follow tulips, narcissus, iris, lilacs… all perennials that welcome spring with vibrant color and fragrance. Perennial plants bloom at different times during the growing season and delight you with variety in color and size from earliest spring to late autumn. However, many perennials like those mentioned, bloom only for a few short weeks and then disappear from the landscape until the following year.

Annual #plants provide a garden with continuous bloom and color throughout the summer. The “mission” of an annual is to produce seed. Seeds sprout, foliage grows, flowers bloom and then the plant goes to seed. When the annual completes its mission, the entire plant – flower, foliage, and root system, dies.
Some annuals have a very short life span and depending upon when they are planted, may reseed and go through two or more growing cycles per season. Other annual plants grow continuously from spring planting until the first frost of autumn.
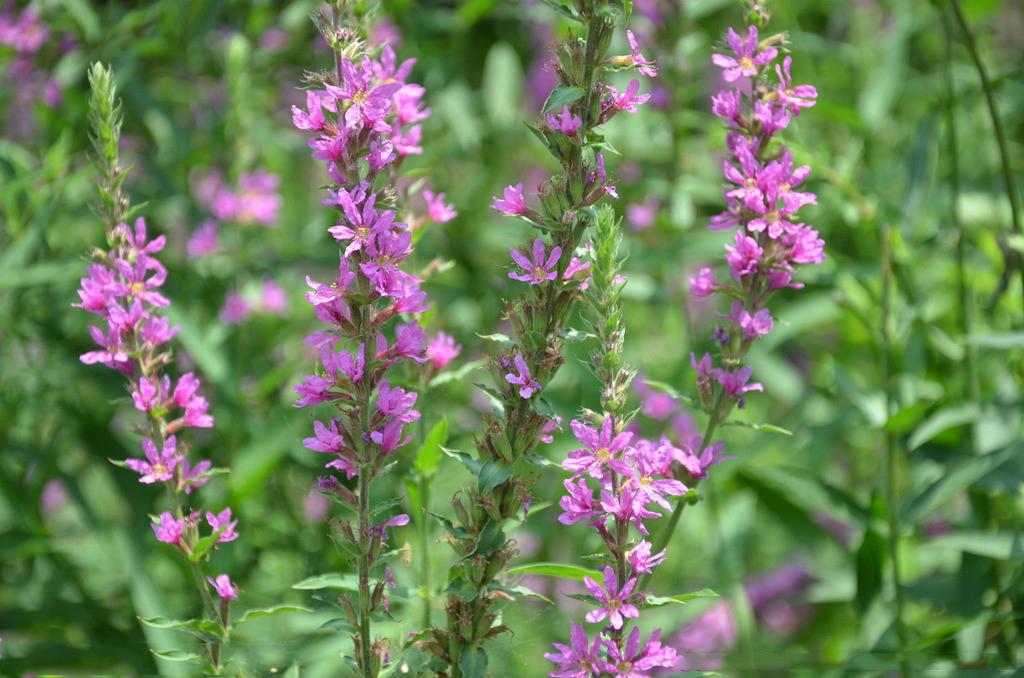
Since annual plants die completely at season end, they need to be replaced yearly. Depending on the cultivar, annual seeds can be planted directly into a garden or sprouted indoors for transplanting when weather conditions and soil temperatures are right for growth.
Annual transplants are also available each spring at gardening centers and many are sold in inexpensive flats that contain four or more plants. Annual plants can often be closely grouped to fill in barren areas of your landscape whereas perennials often need space to multiply and/or to grow to maturity.
Although some perennial plants are more expensive to purchase than annuals, in the long run you may find them less expensive since they last for longer than a single growing season. You can also purchase groups of assorted perennial bulbs in very inexpensive packs.
Perennial foliage and flowers also die at the end of a growing season, but contrary to annuals, the root systems of perennial plants live over winter and resprout with new growth each spring.

Another advantage of perennial plants is that although flowers and foliage die back, the branches of perennial shrubs offer some visual appeal to a winter landscape.
Perennial plants may take more than one season to reach full maturity. Because perennials propagate from root structures, many types of perennials also need to be divided after three or four seasons to reduce crowding and maintain their vigor.
Although all perennial plants are able to resprout for multiple seasons, perennials are divided into to categories of hardy perennials or tender perennials according to the temperature zone in which they are grown.
Hardy perennials are those that can be left in the ground to return the following season. Except for occasional division and/or pruning, hardy perennial plants need little care once established.
Bulbs like tulips and daffodils are among the easiest plants to grow and excellent choices for a beginning gardener. Tender perennials need your help to survive the winter. Some can over winter when covered with a layer of mulch or otherwise protected from the elements with gardening appurtenances such as rose cones. Some tender perennials need to be lifted and stored indoors over winter.
So the question remains, do you need annual plants or perennials? Each type of plant is ripe with “pros” and short on “cons” if you love flowers. The best solution is to experiment by planting some of each to get a summer full of color, variety, and pure gardening enjoyment!

Annual #plants provide a garden with continuous bloom and color throughout the summer. The “mission” of an annual is to produce seed. Seeds sprout, foliage grows, flowers bloom and then the plant goes to seed. When the annual completes its mission, the entire plant – flower, foliage, and root system, dies.
Some annuals have a very short life span and depending upon when they are planted, may reseed and go through two or more growing cycles per season. Other annual plants grow continuously from spring planting until the first frost of autumn.

Since annual plants die completely at season end, they need to be replaced yearly. Depending on the cultivar, annual seeds can be planted directly into a garden or sprouted indoors for transplanting when weather conditions and soil temperatures are right for growth.
Annual transplants are also available each spring at gardening centers and many are sold in inexpensive flats that contain four or more plants. Annual plants can often be closely grouped to fill in barren areas of your landscape whereas perennials often need space to multiply and/or to grow to maturity.
Although some perennial plants are more expensive to purchase than annuals, in the long run you may find them less expensive since they last for longer than a single growing season. You can also purchase groups of assorted perennial bulbs in very inexpensive packs.
Perennial foliage and flowers also die at the end of a growing season, but contrary to annuals, the root systems of perennial plants live over winter and resprout with new growth each spring.

Another advantage of perennial plants is that although flowers and foliage die back, the branches of perennial shrubs offer some visual appeal to a winter landscape.
Perennial plants may take more than one season to reach full maturity. Because perennials propagate from root structures, many types of perennials also need to be divided after three or four seasons to reduce crowding and maintain their vigor.
Although all perennial plants are able to resprout for multiple seasons, perennials are divided into to categories of hardy perennials or tender perennials according to the temperature zone in which they are grown.
Hardy perennials are those that can be left in the ground to return the following season. Except for occasional division and/or pruning, hardy perennial plants need little care once established.
Bulbs like tulips and daffodils are among the easiest plants to grow and excellent choices for a beginning gardener. Tender perennials need your help to survive the winter. Some can over winter when covered with a layer of mulch or otherwise protected from the elements with gardening appurtenances such as rose cones. Some tender perennials need to be lifted and stored indoors over winter.
So the question remains, do you need annual plants or perennials? Each type of plant is ripe with “pros” and short on “cons” if you love flowers. The best solution is to experiment by planting some of each to get a summer full of color, variety, and pure gardening enjoyment!
1
0
文章
苍山洱海
2017年02月16日

If you love your cat, it’s a good idea to make an indoor cat garden for her. Just follow this step by step guide to do this!
If you’re like me who love her cats, you’ll surely approve of my idea of creating a CAT FRIENDLY GARDEN. Here I am mentioning about making an INDOOR CAT GARDEN.

As I love growing plants indoors, I always keep care when choosing plants– if they are safe for my kitty. So the first thing I suggest you for creating an indoor cat garden is to avoid growing plants that are toxic to a cat.
Avoid Growing Plants That Are Toxic To Cats
Grow cat safe plants, make a list of plants that are toxic to cats– When doing this, leave the plants that contain calcium oxalate as they don’t possess a threat and are mildly toxic. We also published a list of Plants that are toxic to dogs a while ago, take help of it. Again, you can exclude plants from your not growing list that contain ONLY calcium oxalate crystals like pothos, peace lily, philodendron or Chinese evergreen!
Many of our readers suggested through emails and comments that we should not label plants that contain calcium oxalate as toxic and we are in agreement.
Do research to find out what are the most poisonous plants for cats! Some plants that can be toxic to cats are the flame lily, tiger lily, azalea, sago palm, oleander, cyclamen, daffodils, etc.
Grow cat safe plants, plants that cats love to nibble

Cats love to play with plants and to bite them sometimes; you already know that! I have a few terracotta planters, broken; due to my cat’s mischief. If you too have broken pots, look at these DIY ideas. So, is not it a good idea to grow plants that your cat will love to nibble? It’s easy if you have a window that receives some sun you can create a Windowsill garden for your feline friend.
Here’re some plants to consider:

Valerian
Grow valerian. A medicinal herb, safe for cats. Most cats love rubbing, sniffing, and eating this plants and its healthy for them.
Catnip
Catnip is called catnip because cats like to nip it :P. Well, jokes apart, this edible herb contains an active ingredient called ‘Nepetalactone,’ this compound acts like a cat attractant.
Cat Grass
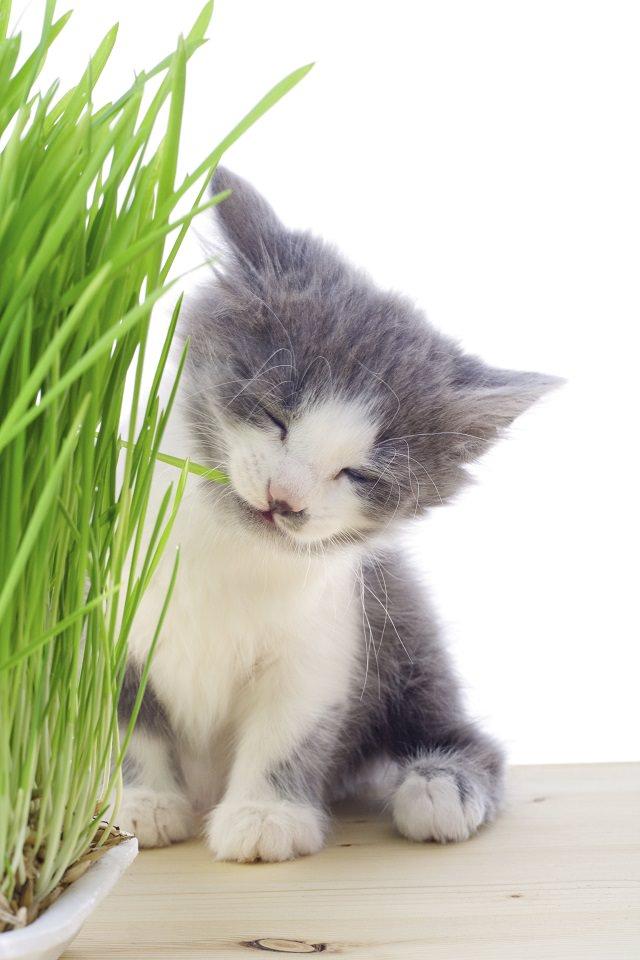
Cat grass is nothing but a mix of grasses– oat grass, wheat grass, rye grass, barley grass, orchard grass that cats love to gnaw on. You can grow them together in a wide container or window boxes. Learn how to grow Wheatgrass and its health benefits!
Mint
Grow mint family plants like spearmint, peppermint or any other type; it is not only safe for cats, but it also has many culinary uses, you and your feline both will love to smell this refreshing herb.
Lemongrass
Lemongrass is an exotic culinary and medicinal herb, and it releases fresh lemon like scent when crushed. The Pussycat rambling in your house will be very much interested in biting and smelling it. I also heard people saying it also deters mosquitoes but don’t know how much true it is!
Other Herbs
Also, these fours herbs rosemary, parsley, cilantro, and thyme are good for cats. You can create an indoor herb garden using them.
Scented Geranium
Scented geranium is a plant that your feline will love to sniff and rub against, it is perfectly safe for them. If you want to learn how to grow geranium indoors, click here!
Cat Thyme
Cat thyme only looks like original thyme, which is my most favorite herb. I dislike its musty odor and haven’t tried myself growing it for my cat. But it’s true that most of the cats love this plant.
Choose a right type of planter
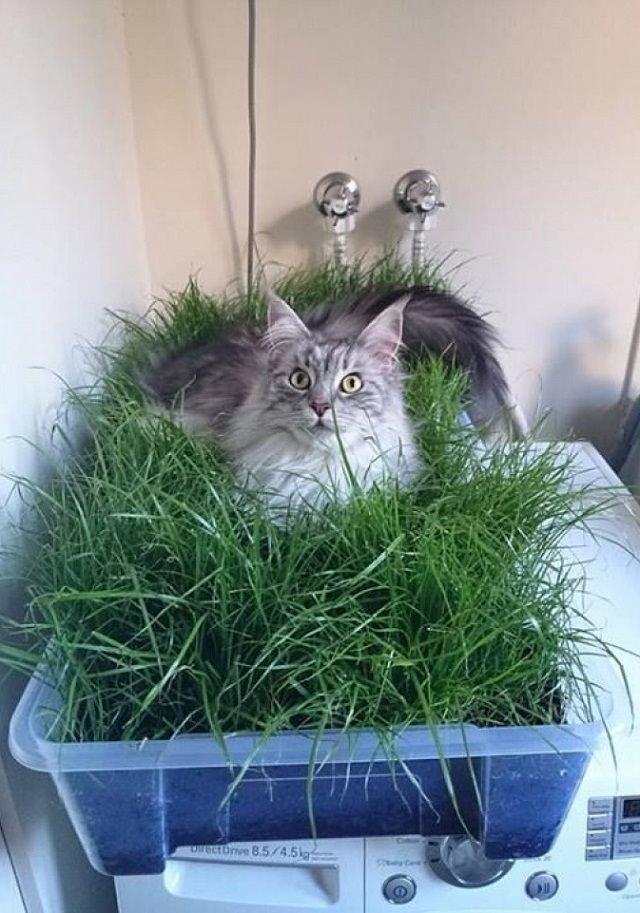
A planter that is wide and has space for your kitty to let her sit would be perfect. Wide planters are right; window boxes for example! Also, use sterilized soil to keep your pet safe.
If you’re like me who love her cats, you’ll surely approve of my idea of creating a CAT FRIENDLY GARDEN. Here I am mentioning about making an INDOOR CAT GARDEN.

As I love growing plants indoors, I always keep care when choosing plants– if they are safe for my kitty. So the first thing I suggest you for creating an indoor cat garden is to avoid growing plants that are toxic to a cat.
Avoid Growing Plants That Are Toxic To Cats
Grow cat safe plants, make a list of plants that are toxic to cats– When doing this, leave the plants that contain calcium oxalate as they don’t possess a threat and are mildly toxic. We also published a list of Plants that are toxic to dogs a while ago, take help of it. Again, you can exclude plants from your not growing list that contain ONLY calcium oxalate crystals like pothos, peace lily, philodendron or Chinese evergreen!
Many of our readers suggested through emails and comments that we should not label plants that contain calcium oxalate as toxic and we are in agreement.
Do research to find out what are the most poisonous plants for cats! Some plants that can be toxic to cats are the flame lily, tiger lily, azalea, sago palm, oleander, cyclamen, daffodils, etc.
Grow cat safe plants, plants that cats love to nibble

Cats love to play with plants and to bite them sometimes; you already know that! I have a few terracotta planters, broken; due to my cat’s mischief. If you too have broken pots, look at these DIY ideas. So, is not it a good idea to grow plants that your cat will love to nibble? It’s easy if you have a window that receives some sun you can create a Windowsill garden for your feline friend.
Here’re some plants to consider:

Valerian
Grow valerian. A medicinal herb, safe for cats. Most cats love rubbing, sniffing, and eating this plants and its healthy for them.
Catnip
Catnip is called catnip because cats like to nip it :P. Well, jokes apart, this edible herb contains an active ingredient called ‘Nepetalactone,’ this compound acts like a cat attractant.
Cat Grass
Cat grass is nothing but a mix of grasses– oat grass, wheat grass, rye grass, barley grass, orchard grass that cats love to gnaw on. You can grow them together in a wide container or window boxes. Learn how to grow Wheatgrass and its health benefits!
Mint
Grow mint family plants like spearmint, peppermint or any other type; it is not only safe for cats, but it also has many culinary uses, you and your feline both will love to smell this refreshing herb.

Lemongrass
Lemongrass is an exotic culinary and medicinal herb, and it releases fresh lemon like scent when crushed. The Pussycat rambling in your house will be very much interested in biting and smelling it. I also heard people saying it also deters mosquitoes but don’t know how much true it is!
Other Herbs
Also, these fours herbs rosemary, parsley, cilantro, and thyme are good for cats. You can create an indoor herb garden using them.
Scented Geranium
Scented geranium is a plant that your feline will love to sniff and rub against, it is perfectly safe for them. If you want to learn how to grow geranium indoors, click here!
Cat Thyme
Cat thyme only looks like original thyme, which is my most favorite herb. I dislike its musty odor and haven’t tried myself growing it for my cat. But it’s true that most of the cats love this plant.
Choose a right type of planter

A planter that is wide and has space for your kitty to let her sit would be perfect. Wide planters are right; window boxes for example! Also, use sterilized soil to keep your pet safe.
0
0
文章
Andy
2017年02月15日

Turmeric is a superfood and has many medicinal benefits. Growing turmeric in pots is not so difficult if you follow this how-to guide.

USDA Zones— 7b – 11, below these zones grow it from spring to fall
Difficulty— Easy to Moderate
Other Names— Curcuma, Curcuma aromatica, Curcuma domestica, Curcumae longa, Curcumae Longae Rhizoma, Curcumin, Curcumine, Curcuminoid, Curcuminoïde, Curcuminoïdes, Curcuminoids, Halada, Haldi, Haridra, Indian Saffron, Nisha, Pian Jiang Huang, Racine de Curcuma, Radix Curcumae, Rajani, Rhizoma Cucurmae Longae, Safran Bourbon, Safran de Batallita, Safran des Indes, Turmeric Root, Yu Jin.
Soil pH— Slightly acidic to slightly alkaline soil
Turmeric (Curcuma longa) is obtained from the underground tubers or rhizomes. Originated in India, it is now cultivated throughout the tropical Asia and in smaller extent in other subtropical and tropical parts of the world.
Turmeric plants look good too, you can grow them outdoors to get a tropical look in your garden.

Where to Find the Rhizome or Turmeric Plant
As you may already know, turmeric grows from the rhizomes like ginger. The easiest way to find them is to search for fresh turmeric rhizome in organic food stores. Also, try searching for it in the local garden center or seed store. Alternatively, you can find a turmeric plant or rhizome online.
Choosing a Pot
For growing turmeric in pots, choose a large pot as this amazing herb can easily exceed the height of 1 m. Pot should be at least 12 inches deep and 12-18 inches wide so that the plant can spread its tubers freely. Plant 1 or 2 rhizomes in such a pot.
Planting Turmeric
The best season to plant turmeric is spring or summer when the temperature starts to stay above 54 F (12 C), but if you are living in tropics, it can be planted throughout the year.
After you have got the rhizome follow the steps below for planting:
Break large rhizome into small pieces, each one should have at least two or three buds.Fill a pot with rich organic soil that is moist and well-drained.Place it about 2 inches (5 cm) below the soil surface, with the buds facing up.Water the pot thoroughly.Requirements for Growing Turmeric in Containers

Growing turmeric is similar to ginger, it requires warm and humid climate to thrive. If you live in a cool temperate climate or if you’re short of space and want to grow your own turmeric rhizomes then learn how to grow turmeric in pots.
Position
The position must be sheltered from the wind. In tropics, the plant is grown in dappled shade and does not like all day long intense direct sun, considering this keep the turmeric plant in partial sun in the warmer zones (USDA Zone 9 and above). However, in temperate climates, provide it full sun for optimum growth, some shade in the afternoon would be okay.
Soil
Plant turmeric in a light and loamy soil that is rich in organic matters. Use well-drained soil otherwise the plant will suffer.
Water
Watering requirements are similar to ginger. Keep the soil moist throughout the growing season from spring to fall and do not hesitate to mist the foliage in dry weather to increase the humidity level around the plant.
If growing turmeric in a warmer region, keep watering the plant to maintain moist soil in winters too.
Temperature
The ideal temperature range for growing turmeric is between 68-95 F (20-35 C). When the temperature drop below 50 F (10 C) the plant suffers.
Turmeric Plant Care
Overwintering
Since you are growing turmeric in a pot, move the plant inside even in low-light conditions. Because you have to only overwinter the roots. It is important that when you grow turmeric indoors maintain a constant ambient temperature of approximately 64 F (18 C).
Overwintering turmeric on ground
If you’re growing turmeric in true tropical climate then you don’t need to care about winter. But in warm temperate zones (below USDA Zones 9b and down to 7) to overwinter your turmeric plants, reduce watering around the end of fall and when the leaves begin to wilt and turn yellow due to temperature drop cut the plant back to the ground so that it can hibernate. It will perk up again in the spring.
If you want to grow turmeric in cooler areas (below zone 7) then you have to dig up the rhizomes to save them from freezing. For this, dig up the rhizomes and rinse off excess soil from them, snap off rotting pieces. Air dry them and store in a cool and dry place until spring.
Fertilizer
Fertilize turmeric every month with an all-purpose liquid fertilizer during the growing season. Application of manure or compost also helps.
Pruning
The turmeric plant should not be pruned. It is sufficient if you remove dried leaves time to time.
Pests and Diseases
Turmeric plant is not prone to any serious disease or pests. However, red spider mites and scales can become a problem. In diseases, it only suffers from rhizome rot and leaf spot. Rot appears when the plant is grown in waterlogged soil. Therefore, it is important to grow turmeric in well-drained soil.
Harvesting
Turmeric plant takes 8 to 10 months to mature. Harvesting is done once the leaves become yellow and stems start to dry. Harvesting turmeric is not difficult, simply dig up the plant entirely, including the roots.
Cut the required amount and then replant the remaining part again to get a new plant growing.
After you cut the rhizome, follow the steps below to process it:
Boil the rhizomes.Carefully remove the skin from rhizomes.Place the bare rhizomes in a tray.Dry them by exposing to sunlight.
When the rhizomes are dry, grind them and store your homemade organic fresh turmeric powder in an air tight container.
Turmeric Uses and Benefits
Turmeric powder has many medicinal properties that have long been known in the India and China. Turmeric is termed as ‘Super Food‘ probably the most powerful natural anti-inflammatory and antioxidant. It is used as an anti-depressant and plays a protective role against Alzheimer’s disease and against different types of cancers. Turmeric powder is the most prominent ingredient in almost all kind of curry recipes, a pinch of it is used to provide pretty orange color. Its leaves are also useful. Young shoots and flowers are used in Thai cuisines while the leaves are used to flavor the fish in Indonesia.
One thing you did not know and surprise you is the addition of pepper in a diet as it contains piperine helps in the absorption of turmeric. Especially the black pepper, it can tenfold the benefits of this superfood.

USDA Zones— 7b – 11, below these zones grow it from spring to fall
Difficulty— Easy to Moderate
Other Names— Curcuma, Curcuma aromatica, Curcuma domestica, Curcumae longa, Curcumae Longae Rhizoma, Curcumin, Curcumine, Curcuminoid, Curcuminoïde, Curcuminoïdes, Curcuminoids, Halada, Haldi, Haridra, Indian Saffron, Nisha, Pian Jiang Huang, Racine de Curcuma, Radix Curcumae, Rajani, Rhizoma Cucurmae Longae, Safran Bourbon, Safran de Batallita, Safran des Indes, Turmeric Root, Yu Jin.
Soil pH— Slightly acidic to slightly alkaline soil
Turmeric (Curcuma longa) is obtained from the underground tubers or rhizomes. Originated in India, it is now cultivated throughout the tropical Asia and in smaller extent in other subtropical and tropical parts of the world.
Turmeric plants look good too, you can grow them outdoors to get a tropical look in your garden.

Where to Find the Rhizome or Turmeric Plant
As you may already know, turmeric grows from the rhizomes like ginger. The easiest way to find them is to search for fresh turmeric rhizome in organic food stores. Also, try searching for it in the local garden center or seed store. Alternatively, you can find a turmeric plant or rhizome online.
Choosing a Pot
For growing turmeric in pots, choose a large pot as this amazing herb can easily exceed the height of 1 m. Pot should be at least 12 inches deep and 12-18 inches wide so that the plant can spread its tubers freely. Plant 1 or 2 rhizomes in such a pot.
Planting Turmeric
The best season to plant turmeric is spring or summer when the temperature starts to stay above 54 F (12 C), but if you are living in tropics, it can be planted throughout the year.
After you have got the rhizome follow the steps below for planting:
Break large rhizome into small pieces, each one should have at least two or three buds.Fill a pot with rich organic soil that is moist and well-drained.Place it about 2 inches (5 cm) below the soil surface, with the buds facing up.Water the pot thoroughly.Requirements for Growing Turmeric in Containers

Growing turmeric is similar to ginger, it requires warm and humid climate to thrive. If you live in a cool temperate climate or if you’re short of space and want to grow your own turmeric rhizomes then learn how to grow turmeric in pots.
Position
The position must be sheltered from the wind. In tropics, the plant is grown in dappled shade and does not like all day long intense direct sun, considering this keep the turmeric plant in partial sun in the warmer zones (USDA Zone 9 and above). However, in temperate climates, provide it full sun for optimum growth, some shade in the afternoon would be okay.
Soil
Plant turmeric in a light and loamy soil that is rich in organic matters. Use well-drained soil otherwise the plant will suffer.
Water
Watering requirements are similar to ginger. Keep the soil moist throughout the growing season from spring to fall and do not hesitate to mist the foliage in dry weather to increase the humidity level around the plant.
If growing turmeric in a warmer region, keep watering the plant to maintain moist soil in winters too.
Temperature
The ideal temperature range for growing turmeric is between 68-95 F (20-35 C). When the temperature drop below 50 F (10 C) the plant suffers.
Turmeric Plant Care

Overwintering
Since you are growing turmeric in a pot, move the plant inside even in low-light conditions. Because you have to only overwinter the roots. It is important that when you grow turmeric indoors maintain a constant ambient temperature of approximately 64 F (18 C).
Overwintering turmeric on ground
If you’re growing turmeric in true tropical climate then you don’t need to care about winter. But in warm temperate zones (below USDA Zones 9b and down to 7) to overwinter your turmeric plants, reduce watering around the end of fall and when the leaves begin to wilt and turn yellow due to temperature drop cut the plant back to the ground so that it can hibernate. It will perk up again in the spring.
If you want to grow turmeric in cooler areas (below zone 7) then you have to dig up the rhizomes to save them from freezing. For this, dig up the rhizomes and rinse off excess soil from them, snap off rotting pieces. Air dry them and store in a cool and dry place until spring.
Fertilizer
Fertilize turmeric every month with an all-purpose liquid fertilizer during the growing season. Application of manure or compost also helps.
Pruning
The turmeric plant should not be pruned. It is sufficient if you remove dried leaves time to time.
Pests and Diseases
Turmeric plant is not prone to any serious disease or pests. However, red spider mites and scales can become a problem. In diseases, it only suffers from rhizome rot and leaf spot. Rot appears when the plant is grown in waterlogged soil. Therefore, it is important to grow turmeric in well-drained soil.
Harvesting
Turmeric plant takes 8 to 10 months to mature. Harvesting is done once the leaves become yellow and stems start to dry. Harvesting turmeric is not difficult, simply dig up the plant entirely, including the roots.
Cut the required amount and then replant the remaining part again to get a new plant growing.
After you cut the rhizome, follow the steps below to process it:
Boil the rhizomes.Carefully remove the skin from rhizomes.Place the bare rhizomes in a tray.Dry them by exposing to sunlight.
When the rhizomes are dry, grind them and store your homemade organic fresh turmeric powder in an air tight container.
Turmeric Uses and Benefits
Turmeric powder has many medicinal properties that have long been known in the India and China. Turmeric is termed as ‘Super Food‘ probably the most powerful natural anti-inflammatory and antioxidant. It is used as an anti-depressant and plays a protective role against Alzheimer’s disease and against different types of cancers. Turmeric powder is the most prominent ingredient in almost all kind of curry recipes, a pinch of it is used to provide pretty orange color. Its leaves are also useful. Young shoots and flowers are used in Thai cuisines while the leaves are used to flavor the fish in Indonesia.
One thing you did not know and surprise you is the addition of pepper in a diet as it contains piperine helps in the absorption of turmeric. Especially the black pepper, it can tenfold the benefits of this superfood.
4
1
文章
Andy
2017年02月15日

Learn how to grow cilantro in a pot. Growing cilantro in containers is not difficult all you need is to follow a few tips and fulfill a few growing requirements.

Cilantro is a highly aromatic herb that is used to enhance the flavor of many South-East Asian and Mexican cuisines and as a dressing to improve the appearance of meal served. Most of the people tend to think that cilantro is one of the most difficult herbs to grow but that’s not true. However, it is little but easy to grow if you follow the way of growing cilantro.
Choosing A Pot
Mostly people choose too shallow pots for growing cilantro but that’s a mistake. Similar to dill, cilantro needs a pot that is deep and wide. For growing cilantro in a pot, choose one that is 18 inches wide and at least 10-12 inches deep, this would be a perfect size.
Best Cilantro Planting Time
Start cilantro once all the dangers of frost are passed. You can grow cilantro successively from spring to fall. In warm temperates and much hotter regions (USDA Zone 8 and above) you can grow cilantro in winters too. Cilantro can tolerate light frost easily. Below the zone 8, in much cooler regions, you can grow cilantro in cold frames and overwinter it.
In warm tropical climate (USDA Zone 10-11), cilantro grows best in fall and winter. However, it can be grown year round in such climate as in many tropical countries fresh cilantro leaves are available all year but you’ll need to cope with the bolting problem. You may need to harvest quickly and provide shade in spring and summer.
Growing Cilantro From Seeds
It is better if you sow the seeds directly in a pot in which you like to grow the plants later as cilantro has long taproot and it doesn’t transplant well, especially when the plant grows up slightly. Sow seeds 1/4 inches deep. Keep the soil moist until the seedlings germinate. If you have grown them in the seed tray, once the plants have formed 2-3 leaves, plant them to their final location in a pot.
If you’re planting grocery store seeds, gently crush the seed husk before sowing. As cilantro seeds are enclosed in a husk that you’ll need to crush to improve the germination rate.Requirements For Growing Cilantro In Pot

Location
It is a plant that grows best in the sun. But be careful, too much heat will make it go to seed quickly. In summer (or in warm climates) place it in a position that receives shade in the afternoon.
Watering
Cilantro likes evenly moist soil. When watering, make sure you never wet the foliage as cilantro is really susceptible to powdery mildew.
Soil
Neutral soil that is very rich in organic matter and crumbly in texture helps this plant to grow. Also, the addition of aged manure or compost provide a good steady supply of nitrogen and other trace elements, thus promotes the vegetative growth.
Spacing
You can grow cilantro plants thickly but for optimum growth space the plants 4 inches apart.
Cilantro Plant Care
Fertilizer
Feed the cilantro bimonthly with any half strength nitrogen-rich fertilizer to promote the foliage growth. You don’t need to fertilize your cilantro plants much if you side dress them with compost or manure. Also, the application of fish emulsion is recommended.
Deadheading
Inspect your cilantro plants every day to see if the flowers are appearing, deadhead them regularly to promote the production of leaves. However, you can leave them if you want your plants to seed.
Problem With Coriander/Cilantro:
The recurring problem with cilantro is bolting.
The plant eventually goes to seed but a lot earlier in hot weather. Flowers start to appear quickly, then giving way to seed and after seeding the plant dies.
The best solution for this problem is to sow seeds successively, plant seeds every other week to get a regular harvest. Also, once the plant starts to bolt pinch the top of it to slow down the process.
Pests And Diseases
In pests, look out for aphids. Mildew is the most common disease that kills this herb, more consistently occurs in humid warm weather.
To prevent powdery mildew, keep a good distance between the plants, provide good air circulation and avoid overhead watering, wetting the leaves also promote the growth of many other fungal infections.
Harvesting
You can start to harvest young cilantro leaves too early, about 3-4 weeks after sowing seeds. Leaves can be picked from the plant when they have reached 3-6 inches in length.
If you want to harvest the entire plant you should wait at least 45-70 days. Cutting the entire plant at soil level or 2 inches above the crown.

Cilantro is a highly aromatic herb that is used to enhance the flavor of many South-East Asian and Mexican cuisines and as a dressing to improve the appearance of meal served. Most of the people tend to think that cilantro is one of the most difficult herbs to grow but that’s not true. However, it is little but easy to grow if you follow the way of growing cilantro.
Choosing A Pot
Mostly people choose too shallow pots for growing cilantro but that’s a mistake. Similar to dill, cilantro needs a pot that is deep and wide. For growing cilantro in a pot, choose one that is 18 inches wide and at least 10-12 inches deep, this would be a perfect size.
Best Cilantro Planting Time
Start cilantro once all the dangers of frost are passed. You can grow cilantro successively from spring to fall. In warm temperates and much hotter regions (USDA Zone 8 and above) you can grow cilantro in winters too. Cilantro can tolerate light frost easily. Below the zone 8, in much cooler regions, you can grow cilantro in cold frames and overwinter it.
In warm tropical climate (USDA Zone 10-11), cilantro grows best in fall and winter. However, it can be grown year round in such climate as in many tropical countries fresh cilantro leaves are available all year but you’ll need to cope with the bolting problem. You may need to harvest quickly and provide shade in spring and summer.
Growing Cilantro From Seeds
It is better if you sow the seeds directly in a pot in which you like to grow the plants later as cilantro has long taproot and it doesn’t transplant well, especially when the plant grows up slightly. Sow seeds 1/4 inches deep. Keep the soil moist until the seedlings germinate. If you have grown them in the seed tray, once the plants have formed 2-3 leaves, plant them to their final location in a pot.
If you’re planting grocery store seeds, gently crush the seed husk before sowing. As cilantro seeds are enclosed in a husk that you’ll need to crush to improve the germination rate.Requirements For Growing Cilantro In Pot

Location
It is a plant that grows best in the sun. But be careful, too much heat will make it go to seed quickly. In summer (or in warm climates) place it in a position that receives shade in the afternoon.
Watering
Cilantro likes evenly moist soil. When watering, make sure you never wet the foliage as cilantro is really susceptible to powdery mildew.
Soil
Neutral soil that is very rich in organic matter and crumbly in texture helps this plant to grow. Also, the addition of aged manure or compost provide a good steady supply of nitrogen and other trace elements, thus promotes the vegetative growth.
Spacing
You can grow cilantro plants thickly but for optimum growth space the plants 4 inches apart.
Cilantro Plant Care

Fertilizer
Feed the cilantro bimonthly with any half strength nitrogen-rich fertilizer to promote the foliage growth. You don’t need to fertilize your cilantro plants much if you side dress them with compost or manure. Also, the application of fish emulsion is recommended.
Deadheading
Inspect your cilantro plants every day to see if the flowers are appearing, deadhead them regularly to promote the production of leaves. However, you can leave them if you want your plants to seed.
Problem With Coriander/Cilantro:
The recurring problem with cilantro is bolting.
The plant eventually goes to seed but a lot earlier in hot weather. Flowers start to appear quickly, then giving way to seed and after seeding the plant dies.
The best solution for this problem is to sow seeds successively, plant seeds every other week to get a regular harvest. Also, once the plant starts to bolt pinch the top of it to slow down the process.
Pests And Diseases
In pests, look out for aphids. Mildew is the most common disease that kills this herb, more consistently occurs in humid warm weather.
To prevent powdery mildew, keep a good distance between the plants, provide good air circulation and avoid overhead watering, wetting the leaves also promote the growth of many other fungal infections.
Harvesting
You can start to harvest young cilantro leaves too early, about 3-4 weeks after sowing seeds. Leaves can be picked from the plant when they have reached 3-6 inches in length.
If you want to harvest the entire plant you should wait at least 45-70 days. Cutting the entire plant at soil level or 2 inches above the crown.
2
1


