文章
Miss Chen
2022年04月07日

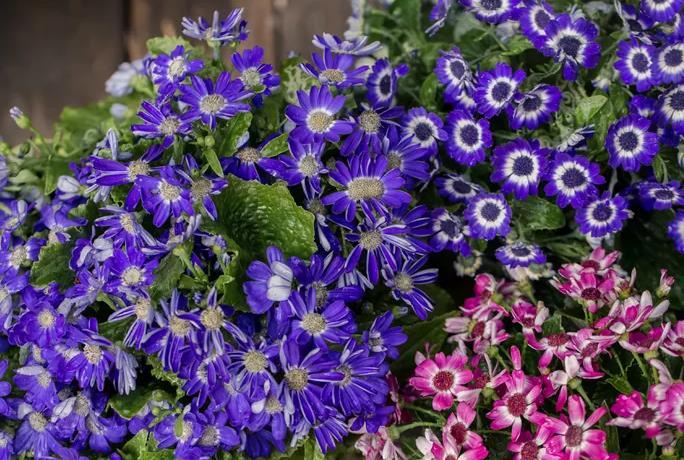
Cineraria is a hybrid plant, a cross between Pericallis cruenta and P. lanata, species that are native to the Azores and Canary Island. Cineraria is a tender perennial, hardy in zones 9 to 11, but it is usually grown as an annual or short-lived seasonal houseplant. Known for a wide range of colors and long-lasting blooms, Cineraria comes in vibrant shades of pink, red, purple, blue, and many bi-colors. Cineraria is a mound-forming plant with large leaves that becomes covered with blossoms during its blooming season. It prefers cool weather, so as a garden plant it is usually grown for spring blossoms, then removed from the garden in favor of summer-blooming annuals after the bloom period is over. Many gardeners prefer to use them for container culture rather than as in-ground bedding plants.
As outdoor plants, cineraria plants are usually planted from nursery starts in the spring, which have been commercially grown to provide cool-season spring blooming. But these plants bloom about four months after seed germination, so it's possible to dictate the bloom period by carefully selecting the time when you sow seeds. Sowing in late summer, for example, can give indoor flowering plants for Christmas.
Common Name Cineraria, Florist's cineraria
Botanical Name Pericallis × hybrida
Family Asteraceae
Plant Type Tender perennial, usually grown as annual
Mature Size 6–12 in. tall, 9–12 in. wide
Sun Exposure Partial to full shade
Soil Type Moist but well-draining
Soil pH Acidic (5.5–6.0)
Bloom Time Seasonal bloomer; blossoms 16 to 18 weeks after seed germination
Flower Color Various (no yellow)
Hardiness Zones 9–11 (USDA)
Native Areas Nursery hybrid; parent species are from the Azores and Canary Islands
Cineraria Care
The flamboyant colors of cineraria, as well their versatile daisy shape, have made them increasingly popular in the United States in recent years as a decorative annual. But if you happen to live in a very warm zone (USDA 9 to 11) you can try growing them as perennials. As an annual, they hold their color for a decent period of time, so make sure they stay evenly moist and deadhead them continually to encourage new buds, and you'll have weeks of glorious colorful blooms from spring through summer.
Light
Cineraria will do best in filtered sunlight or partial shade conditions and it resents full sunlight. If grown as a short-lived indoor plant, however, it likes more light.
Soil
Cineraria like a rich, moist, slightly acidic soil that has good drainage. Amendments such as peat moss and coffee grounds can help create good coil conditions for this somewhat fussy plant. When grown indoors, a standard potting mix works well, as it contains a high percentage of peat which ensures an acidic pH.
Water
Cineraria needs constant moisture but it still needs to breathe. Water well and frequently at the base of the plant, checking the soil to make sure it feels moist but not soggy. Steady watering in hot weather is a must. But at the same time, cineraria doesn't like constantly soggy soil, which can encourage root and crown rot diseases. Thus, it's critical that frequent watering is paired with well-draining soil.
Temperature and Humidity
Cineraria is temperamental about temperature. The preferred temp is between 50 and 65 degrees Fahrenheit. If temps dip below 35 degrees at night, the plants will die, and if they go above 80 degrees, they'll stop blooming. In the heat of summer, make sure cineraria plants stay in shade; it may be necessary to bring potted plants indoors during very hot days.
When grown indoors, cineraria plants like a cool environment; they will bloom longer with
daytime temperatures of about 65 degrees Fahrenheit and nighttime temps of 50 to 55 degrees.
These flowers thrive in an environment that is humid yet not quite tropical. Even if your location is not consistently humid, you can approximate the climate needs of this plant by keeping the soil around it consistently moist. However, avoid making the ground too soggy as this can cause root rot. The best way to provide this humidity for both indoor and outdoor plantings is to create a pebble tray. Spread a layer of pebbles or pea gravel on a low dish or tray and place it beneath the container. Keep filled with water to up to a 1/2 inch in depth (that may mean refreshing it daily if your house has dry air). As that water evaporates it will create an evenly humid atmosphere around the plant. Misting is not recommended as it may overwhelm the flower petals.
Fertilizer
Feed cineraria plants with a half-strength balanced fertilizer every two weeks, beginning at the point where flower buds appear. These plants have a steady appetite, but don't want to be gorged with fertilizer.
Types of Cineraria
Cineraria is usually offered in various named color mixes. Some popular ones include the 'Senetti' mix, which includes blue, light blue, magenta, pink, and bicolors; 'Cruenta Amigo' mix, including blue, red, purple, magenta, and white flowers, often with white eyes; 'Satellite Mix', featuring ground-hugging 8-inch plants; and the 'Early Perfection' series, with compact 8- to 10-inch plants ideal for small pots.
Pruning
Deadheading spent flowers will both keep the plants looking tidy and extend the bloom season by prompting the plant to produce additional flower buds. After flowering is complete, these plants are usually pulled out and replaced with summer-flowering annuals.
Propagating Cineraria
Cineraria is usually propagated from seed, but you can also propagate new plants for indoor winter growing by taking stem cuttings in fall:
Cut a 4- to 6-inch stem tip, preferably one without flowers. Remove all but the top leaves.
Dip the cut end in rooting hormone, then plant it in a small pot filled with ordinary potting soil.
Moisten the soil and place the planted cutting in a large plastic bag, taking care that the plastic does not touch the leaves.
Place the cutting in a cool location with good indirect light. Periodically check the cutting to see if roots have formed (tug on the stem; with a rooted cutting you'll be able to feel resistance).
When roots have formed, remove the plastic bag and continue to grow the cutting in a relatively cool location with bright light but out of the direct sun. Propagated in this manner, the new plant should flower within about three months.
How to Grow Cineraria From Seed
Popular in the commercial trade as a cut flower, cineraria is most commonly propagated by seed. Plant the seeds in small pots or flat trays containing commercial seed-starter mix, lightly pressing the seeds into the soil. Do not cover them, as they need light to germinate. Keep the seeds moist; germination generally takes 14 to 21 days. As seedings develop their true leaves, they can be transplanted into individual pots to continue growing. The plants will bloom 16 to 18 weeks after seed germination.
If grown as garden perennials, these plants will readily reseed themselves and colonize. If you wish to prevent this, deadhead the flowers before the seeds mature.
Potting and Repotting Cineraria
When grown in containers, cineraria does well in an ordinary commercial potting mix with a high peat content. For best bloom, they prefer to be somewhat root-bound, so smallish containers with good drainage are usually sufficient.
These are not easy plants to grow indoors as houseplants, as they require careful control of temperatures (cool) and humidity (high). Give indoor potted plants more light than is required for outdoor plants.
Overwintering
Once they flower, cineraria is reluctant to bloom again, so the plants are often removed from the garden once the flowering is complete.
If you live in a climate where cineraria can be grown as garden perennials, you may want to leave the plants in place so that they will self-seed and create new volunteer plants.
Common Pests & Plant Diseases
Cineraria is subject to quite a number of plant pests and diseases. Indoor plants are often more susceptible than outdoor garden plants.
Aphids, thrips, spider mites, white fly and leaf miners can all feast on cineraria. The best treatment is a spray with a horticultural oil such as neem oil, or a chemical pesticide.
Disease issues include powdery mildew, gray mold, fungal rot of the crown or roots, and various plant viruses. Keeping soil moisture levels and humidity levels correct will prevent many disease problems, but badly affected plants may need to be removed.
How to Get Cineraria to Bloom
Failure to bloom can usually be traced to a lack of water or nutrients. Cineraria is a relatively demanding plant that needs a half-strength feeding every two weeks. Frequent light feeding is the key to good flowering. These plants also require soil that is consistently moist but not soggy.
Common Problems With Cineraria
The trickiest part of growing cineraria is getting the moisture levels right. Too much water induces root or crown rot, while too little water will prevent the profuse blooming that these plants are famous for. They are also quite sensitive to temperature, preferring coolish conditions and often succumbing when conditions are too warm. It's best not to grow cineraria at all if you live in very hot climate, and excessively dry or rainy conditions are also problematic.

FAQ
How was cineraria developed?
These, cheery, colorful daisy-like flowers are in the Asteraceae (aster) family, which also includes sunflowers, daisies, strawflowers and ageratum. The parent species (Pericallis cruenta and P. lanata) were first discovered by horticulturists from the British Royal Gardens in 1777, growing in the Azores and Canary Islands on cool ocean cliffs overlooking the Atlantic. The varieties now popular in the trade are derived from the hybrid cross of these two species.
How can I use this plant in the landscape?
Cineraria is most often used as an annual, either for garden beds or more often as a container plant for patios, decks, or window boxes, or as a short-lived indoor flowering plant. There is nothing subtle about cineraria, so they are popular whenever you want to make a bold color statement. The cobalt blue shades are especially popular in summer to create red, white, and blue arrangements for Independence Day.
How long does Cineraria live?
Even when it can be grown as perennial in warm climates, cineraria does not readily rebloom after flowering, so in most areas, this short-lived perennial is simply discarded after the flowering is complete.
How do I force cineraria into winter blooming as a houseplant?
Cineraria is a seasonal bloomer that generally flowers 16 to 18 weeks after seeds germinate and sprout. Thus, it's easy enough to dictate the bloom period by choosing the proper time to plant the seeds. For Christmas bloom, for example, you should plant seeds in late August to early September. Remember, though, that it's tricky to provide the proper cool and humid conditions when growing this plant indoors. This is why many people seeking winter-blooming plants simply buy them in season from a houseplant supplier.
As outdoor plants, cineraria plants are usually planted from nursery starts in the spring, which have been commercially grown to provide cool-season spring blooming. But these plants bloom about four months after seed germination, so it's possible to dictate the bloom period by carefully selecting the time when you sow seeds. Sowing in late summer, for example, can give indoor flowering plants for Christmas.
Common Name Cineraria, Florist's cineraria
Botanical Name Pericallis × hybrida
Family Asteraceae
Plant Type Tender perennial, usually grown as annual
Mature Size 6–12 in. tall, 9–12 in. wide
Sun Exposure Partial to full shade
Soil Type Moist but well-draining
Soil pH Acidic (5.5–6.0)
Bloom Time Seasonal bloomer; blossoms 16 to 18 weeks after seed germination
Flower Color Various (no yellow)
Hardiness Zones 9–11 (USDA)
Native Areas Nursery hybrid; parent species are from the Azores and Canary Islands

Cineraria Care
The flamboyant colors of cineraria, as well their versatile daisy shape, have made them increasingly popular in the United States in recent years as a decorative annual. But if you happen to live in a very warm zone (USDA 9 to 11) you can try growing them as perennials. As an annual, they hold their color for a decent period of time, so make sure they stay evenly moist and deadhead them continually to encourage new buds, and you'll have weeks of glorious colorful blooms from spring through summer.
Light
Cineraria will do best in filtered sunlight or partial shade conditions and it resents full sunlight. If grown as a short-lived indoor plant, however, it likes more light.
Soil
Cineraria like a rich, moist, slightly acidic soil that has good drainage. Amendments such as peat moss and coffee grounds can help create good coil conditions for this somewhat fussy plant. When grown indoors, a standard potting mix works well, as it contains a high percentage of peat which ensures an acidic pH.
Water
Cineraria needs constant moisture but it still needs to breathe. Water well and frequently at the base of the plant, checking the soil to make sure it feels moist but not soggy. Steady watering in hot weather is a must. But at the same time, cineraria doesn't like constantly soggy soil, which can encourage root and crown rot diseases. Thus, it's critical that frequent watering is paired with well-draining soil.
Temperature and Humidity
Cineraria is temperamental about temperature. The preferred temp is between 50 and 65 degrees Fahrenheit. If temps dip below 35 degrees at night, the plants will die, and if they go above 80 degrees, they'll stop blooming. In the heat of summer, make sure cineraria plants stay in shade; it may be necessary to bring potted plants indoors during very hot days.
When grown indoors, cineraria plants like a cool environment; they will bloom longer with
daytime temperatures of about 65 degrees Fahrenheit and nighttime temps of 50 to 55 degrees.
These flowers thrive in an environment that is humid yet not quite tropical. Even if your location is not consistently humid, you can approximate the climate needs of this plant by keeping the soil around it consistently moist. However, avoid making the ground too soggy as this can cause root rot. The best way to provide this humidity for both indoor and outdoor plantings is to create a pebble tray. Spread a layer of pebbles or pea gravel on a low dish or tray and place it beneath the container. Keep filled with water to up to a 1/2 inch in depth (that may mean refreshing it daily if your house has dry air). As that water evaporates it will create an evenly humid atmosphere around the plant. Misting is not recommended as it may overwhelm the flower petals.
Fertilizer
Feed cineraria plants with a half-strength balanced fertilizer every two weeks, beginning at the point where flower buds appear. These plants have a steady appetite, but don't want to be gorged with fertilizer.
Types of Cineraria
Cineraria is usually offered in various named color mixes. Some popular ones include the 'Senetti' mix, which includes blue, light blue, magenta, pink, and bicolors; 'Cruenta Amigo' mix, including blue, red, purple, magenta, and white flowers, often with white eyes; 'Satellite Mix', featuring ground-hugging 8-inch plants; and the 'Early Perfection' series, with compact 8- to 10-inch plants ideal for small pots.
Pruning
Deadheading spent flowers will both keep the plants looking tidy and extend the bloom season by prompting the plant to produce additional flower buds. After flowering is complete, these plants are usually pulled out and replaced with summer-flowering annuals.
Propagating Cineraria
Cineraria is usually propagated from seed, but you can also propagate new plants for indoor winter growing by taking stem cuttings in fall:
Cut a 4- to 6-inch stem tip, preferably one without flowers. Remove all but the top leaves.
Dip the cut end in rooting hormone, then plant it in a small pot filled with ordinary potting soil.
Moisten the soil and place the planted cutting in a large plastic bag, taking care that the plastic does not touch the leaves.
Place the cutting in a cool location with good indirect light. Periodically check the cutting to see if roots have formed (tug on the stem; with a rooted cutting you'll be able to feel resistance).
When roots have formed, remove the plastic bag and continue to grow the cutting in a relatively cool location with bright light but out of the direct sun. Propagated in this manner, the new plant should flower within about three months.
How to Grow Cineraria From Seed
Popular in the commercial trade as a cut flower, cineraria is most commonly propagated by seed. Plant the seeds in small pots or flat trays containing commercial seed-starter mix, lightly pressing the seeds into the soil. Do not cover them, as they need light to germinate. Keep the seeds moist; germination generally takes 14 to 21 days. As seedings develop their true leaves, they can be transplanted into individual pots to continue growing. The plants will bloom 16 to 18 weeks after seed germination.
If grown as garden perennials, these plants will readily reseed themselves and colonize. If you wish to prevent this, deadhead the flowers before the seeds mature.
Potting and Repotting Cineraria
When grown in containers, cineraria does well in an ordinary commercial potting mix with a high peat content. For best bloom, they prefer to be somewhat root-bound, so smallish containers with good drainage are usually sufficient.
These are not easy plants to grow indoors as houseplants, as they require careful control of temperatures (cool) and humidity (high). Give indoor potted plants more light than is required for outdoor plants.
Overwintering
Once they flower, cineraria is reluctant to bloom again, so the plants are often removed from the garden once the flowering is complete.
If you live in a climate where cineraria can be grown as garden perennials, you may want to leave the plants in place so that they will self-seed and create new volunteer plants.
Common Pests & Plant Diseases
Cineraria is subject to quite a number of plant pests and diseases. Indoor plants are often more susceptible than outdoor garden plants.
Aphids, thrips, spider mites, white fly and leaf miners can all feast on cineraria. The best treatment is a spray with a horticultural oil such as neem oil, or a chemical pesticide.
Disease issues include powdery mildew, gray mold, fungal rot of the crown or roots, and various plant viruses. Keeping soil moisture levels and humidity levels correct will prevent many disease problems, but badly affected plants may need to be removed.
How to Get Cineraria to Bloom
Failure to bloom can usually be traced to a lack of water or nutrients. Cineraria is a relatively demanding plant that needs a half-strength feeding every two weeks. Frequent light feeding is the key to good flowering. These plants also require soil that is consistently moist but not soggy.
Common Problems With Cineraria
The trickiest part of growing cineraria is getting the moisture levels right. Too much water induces root or crown rot, while too little water will prevent the profuse blooming that these plants are famous for. They are also quite sensitive to temperature, preferring coolish conditions and often succumbing when conditions are too warm. It's best not to grow cineraria at all if you live in very hot climate, and excessively dry or rainy conditions are also problematic.

FAQ
How was cineraria developed?
These, cheery, colorful daisy-like flowers are in the Asteraceae (aster) family, which also includes sunflowers, daisies, strawflowers and ageratum. The parent species (Pericallis cruenta and P. lanata) were first discovered by horticulturists from the British Royal Gardens in 1777, growing in the Azores and Canary Islands on cool ocean cliffs overlooking the Atlantic. The varieties now popular in the trade are derived from the hybrid cross of these two species.
How can I use this plant in the landscape?
Cineraria is most often used as an annual, either for garden beds or more often as a container plant for patios, decks, or window boxes, or as a short-lived indoor flowering plant. There is nothing subtle about cineraria, so they are popular whenever you want to make a bold color statement. The cobalt blue shades are especially popular in summer to create red, white, and blue arrangements for Independence Day.
How long does Cineraria live?
Even when it can be grown as perennial in warm climates, cineraria does not readily rebloom after flowering, so in most areas, this short-lived perennial is simply discarded after the flowering is complete.
How do I force cineraria into winter blooming as a houseplant?
Cineraria is a seasonal bloomer that generally flowers 16 to 18 weeks after seeds germinate and sprout. Thus, it's easy enough to dictate the bloom period by choosing the proper time to plant the seeds. For Christmas bloom, for example, you should plant seeds in late August to early September. Remember, though, that it's tricky to provide the proper cool and humid conditions when growing this plant indoors. This is why many people seeking winter-blooming plants simply buy them in season from a houseplant supplier.
0
0
文章
Miss Chen
2022年03月07日

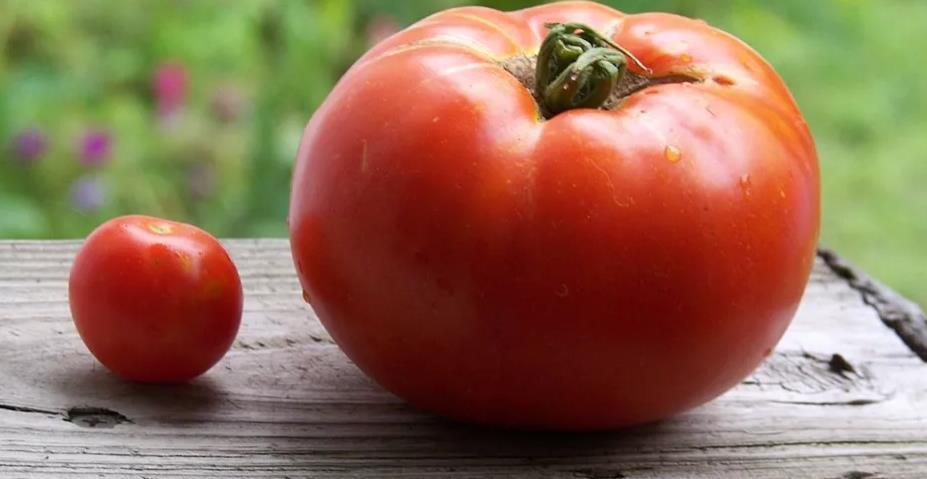
The Celebrity tomato is a hybrid cultivar prized for its strong plants, disease and pest resistance, and robust production of fruit. If you've ever struggled growing garden or patio tomatoes that become vulnerable to pests or just don't produce very many tomatoes, the Celebrity may be a game changer for you. These tomatoes usually weigh in at half a pound each or more, and measure four inches across: the perfect size for a slicer! Its meaty texture and smooth globe shape make it a perfect sandwich tomato, but it can also be used in salads or in sauces, or chopped and simmered with fresh herbs to serve over pasta.
Among tomato-growing aficionados, this variety is known as a "semi determinate" plant, because after reaching its full height of 3-4 feet, it continues to produce fruit until frost (unlike determinate tomatoes that have a "bush" habit and finite fruiting period/single crop, or indeterminate tomato plants that continue to sprawl and produce fruit throughout their growth season (like cherry tomatoes)
Because they produce such an abundance of large fruits, these plants definitely need cages or stakes to keep them upright. Even with cages, you may find you want to use some plant ties for extra support, especially as fruits grow larger. If the vines seem too heavy with fruit you can always pluck some tomatoes just before they fully ripen, and finish ripening them in a sunny windowsill (indoors, or squirrels might start snacking on them).
Scientific Name Solanum lycopersicum, cultivar 'Celebrity'
Common Name Celebrity tomato
Plant Type Annual
Mature Size 3 to 4 ft. tall
Sun Exposure Full sun
Soil Type Fertile, well-drained
Soil pH 6.2 to 6.8
Bloom Time Early summer, fruits appear through fall
Flower Color Yellow
Hardiness Zones 5 to 8 (USDA)
Native Areas Native to Central and South America
Toxicity Green parts of plant may be toxic to dogs or cats
Growing Celebrity Tomatoes
Even inexperienced tomato growers may find this variety to be relatively trouble free. It's resistant to many pests and diseases, and has a robust growth habit. It also can be grown easily in containers, Use a large container that's at least five gallons, to give your plants plenty of root space, and make sure the container has good drainage.
Soil
Tomatoes like a rich, well-drained soil. It's important to add new soil and amendments to the garden area where tomatoes are grown each season, and to rotate nightshade crops, to benefit from optimal soil nutrition. The Celebrity tomato does best in a slightly acidic soil. You may also want to consider companion plantings best for tomatoes.
Light
Two words: full sun. Celebrity tomatoes should be grown in full sun.
Water
Watering at the base of the plant with a watering can or drip hose, instead of using a sprinkler or hose from above, is recommended to help prevent spread of blight or disease. (Rain is good too!) Water in the morning or evening on dry days, and avoid watering during the hottest part of the day in summer. Tomatoes like plenty of water, but they do not like wet feet. If your tomato plants are pot grown they will need to be watered more often. Good drainage is essential to prevent root rot and overwatering may cause leaves to turn yellow.
Temperature and Humidity
The ideal temperature for tomato plants to blossom, fruit and ripen falls in the 70 to 85 degree F. range.1 Being such a hardy plant, variations in temperature probably won't do too much damage to Celebrity tomato plants, but if a heat wave crops up, be sure to water with cool water in the morning and again in the evening so the foliage doesn't dry out. Too much humidity may increase susceptibility to mold or mildew, but the Celebrity has been bred to resist such problems. Even though Celebrity is more a bush type of plant, it is important to leave plenty of space between tomatoes planted in a row in the garden. Good air circulation will help prevent many of the disease problems that plague your plants.
Common Pests and Diseases
This hardy hybrid plant is resistant to verticillium wilt, fusarium wilt, and tobacco mosaic virus, as well as nematodes. Tomato fruits are tempting to birds and small wildlife, so you may need to protect them with netting if this is a problem in your garden.
Growing Celebrity Tomatoes from Seed
With the right set up, growing tomatoes from seed is fairly straightforward. Germination will be dependent on light, heat and moisture but most tomato seeds have a good germination rate. Use a seed starting mix and follow the instructions on the seed packet. A greenhouse is ideal for starting seeds for the vegetable and flower gardens but you can grow tomatoes from seed in a sunny windowsill. Once the seedlings emerge, they will begin to reach for the sun, so remember to turn the pots regularly to keep the plants from becoming leggy.
You will need to harden off your tomato seedlings before planting them in the garden. You can accomplish this by exposing them to outdoor temperatures for increasingly longer periods of time over a week or several days. Choose good-sized containers for transplanting your seedlings, or plant in your garden once the seedlings are at least six inches tall, and all danger of frost has passed.
Potting and Repotting
Most tomatoes grow easily in containers, with a few simple guidelines to follow, and Celebrity tomatoes are no exception. The most important tip for growing tomatoes in pots is to make sure the pots are big enough! Tomato root systems require a good amount of space and good drainage. Once transplanted a light watering will help avoid transplant shock. When you are ready to plant out in the garden, dig a deep hole and remove the seed leaves and up to several sets of lower leaves depending on the size of your seedlings. You can bury up to a third of the plant in the soil which encourages a strong root system and helps the roots take up available water.
Among tomato-growing aficionados, this variety is known as a "semi determinate" plant, because after reaching its full height of 3-4 feet, it continues to produce fruit until frost (unlike determinate tomatoes that have a "bush" habit and finite fruiting period/single crop, or indeterminate tomato plants that continue to sprawl and produce fruit throughout their growth season (like cherry tomatoes)
Because they produce such an abundance of large fruits, these plants definitely need cages or stakes to keep them upright. Even with cages, you may find you want to use some plant ties for extra support, especially as fruits grow larger. If the vines seem too heavy with fruit you can always pluck some tomatoes just before they fully ripen, and finish ripening them in a sunny windowsill (indoors, or squirrels might start snacking on them).
Scientific Name Solanum lycopersicum, cultivar 'Celebrity'
Common Name Celebrity tomato
Plant Type Annual
Mature Size 3 to 4 ft. tall
Sun Exposure Full sun
Soil Type Fertile, well-drained
Soil pH 6.2 to 6.8
Bloom Time Early summer, fruits appear through fall
Flower Color Yellow
Hardiness Zones 5 to 8 (USDA)
Native Areas Native to Central and South America
Toxicity Green parts of plant may be toxic to dogs or cats
Growing Celebrity Tomatoes
Even inexperienced tomato growers may find this variety to be relatively trouble free. It's resistant to many pests and diseases, and has a robust growth habit. It also can be grown easily in containers, Use a large container that's at least five gallons, to give your plants plenty of root space, and make sure the container has good drainage.
Soil
Tomatoes like a rich, well-drained soil. It's important to add new soil and amendments to the garden area where tomatoes are grown each season, and to rotate nightshade crops, to benefit from optimal soil nutrition. The Celebrity tomato does best in a slightly acidic soil. You may also want to consider companion plantings best for tomatoes.
Light
Two words: full sun. Celebrity tomatoes should be grown in full sun.
Water
Watering at the base of the plant with a watering can or drip hose, instead of using a sprinkler or hose from above, is recommended to help prevent spread of blight or disease. (Rain is good too!) Water in the morning or evening on dry days, and avoid watering during the hottest part of the day in summer. Tomatoes like plenty of water, but they do not like wet feet. If your tomato plants are pot grown they will need to be watered more often. Good drainage is essential to prevent root rot and overwatering may cause leaves to turn yellow.
Temperature and Humidity
The ideal temperature for tomato plants to blossom, fruit and ripen falls in the 70 to 85 degree F. range.1 Being such a hardy plant, variations in temperature probably won't do too much damage to Celebrity tomato plants, but if a heat wave crops up, be sure to water with cool water in the morning and again in the evening so the foliage doesn't dry out. Too much humidity may increase susceptibility to mold or mildew, but the Celebrity has been bred to resist such problems. Even though Celebrity is more a bush type of plant, it is important to leave plenty of space between tomatoes planted in a row in the garden. Good air circulation will help prevent many of the disease problems that plague your plants.
Common Pests and Diseases
This hardy hybrid plant is resistant to verticillium wilt, fusarium wilt, and tobacco mosaic virus, as well as nematodes. Tomato fruits are tempting to birds and small wildlife, so you may need to protect them with netting if this is a problem in your garden.

Growing Celebrity Tomatoes from Seed
With the right set up, growing tomatoes from seed is fairly straightforward. Germination will be dependent on light, heat and moisture but most tomato seeds have a good germination rate. Use a seed starting mix and follow the instructions on the seed packet. A greenhouse is ideal for starting seeds for the vegetable and flower gardens but you can grow tomatoes from seed in a sunny windowsill. Once the seedlings emerge, they will begin to reach for the sun, so remember to turn the pots regularly to keep the plants from becoming leggy.
You will need to harden off your tomato seedlings before planting them in the garden. You can accomplish this by exposing them to outdoor temperatures for increasingly longer periods of time over a week or several days. Choose good-sized containers for transplanting your seedlings, or plant in your garden once the seedlings are at least six inches tall, and all danger of frost has passed.
Potting and Repotting
Most tomatoes grow easily in containers, with a few simple guidelines to follow, and Celebrity tomatoes are no exception. The most important tip for growing tomatoes in pots is to make sure the pots are big enough! Tomato root systems require a good amount of space and good drainage. Once transplanted a light watering will help avoid transplant shock. When you are ready to plant out in the garden, dig a deep hole and remove the seed leaves and up to several sets of lower leaves depending on the size of your seedlings. You can bury up to a third of the plant in the soil which encourages a strong root system and helps the roots take up available water.
0
0
文章
Miss Chen
2022年02月17日

'Casa Blanca' is a beloved hybrid Oriental lily which is part of the Lilium genus. Its gorgeous flowering bulbs bloom in mid to late summer after the Asiatic lilies, which earlier in the season. Both types of lilies are easy to grow. 'Casa Blanca' has firm leaves with very large and noticeably fragrant flowers.
Oriental cultivars like the 'Casa Blanca' thrive in cooler regions, can tolerate poorer soil conditions, and have larger flowers atop exceptionally tall stems that grow three to four feet tall. Each stem produces six to eight blooms.
Each "Casa Blanca' flower has six gleaming white petals with reddish-brown anthers. As it blooms, every large eight-inch broad petal curls outwards, beaming beautifully in the summer sun.
Very fragrant on strong, dark green stems, they make exceptional fresh cut flowers often used by florists and in bridal bouquets. Hardy in USDA Zones 5 through 8 ( and sometimes even 4 and 9), this bulbous perennial is grown widely and vigorously in containers and in garden beds.
Learn to care for the ravishing 'Casa Blanca' Lily and watch it add richness and texture to your landscape, perhaps even in a moon garden.
Botanical Name Lilium 'Casa Blanca'
Common Name Casa Blanca Lily
Plant Type Oriental hybrid lily (bulbous, herbaceous perennial)
Mature Size Three to four feet tall, one foot wide
Sun Exposure Full sun to light shade
Soil Type Organic, well-drained
Soil pH Slightly acidic or neutral soil
Bloom Time Mid to late summer
Flower Color White
Hardiness Zones USDA 4-9
Native Area Europe, North America and Asia south to the Philippines
Toxicity Toxic to cats
Planting Instructions
Plant 'Casa Blanca' bulbs in spring in colder zones (zones 4-7) and in the spring or fall in milder climates. Space bulbs ten inches apart and dig planting holes six to eight inches deep.
Plant in small groups of three bulbs for a beautiful display. These lilies are easy to grow in a perennial border and grow equally well in containers where they can tolerate crowding.
With proper care, 'Casa Blanca' lily bulbs will bloom in their first year.
Light
This lily prefers full sun but will also grow in part sun to part shade. Ideally, the top of the plant should receive plenty of sunlight, six to eight hours per day, while the lower part is shaded by other lower-growing plants to prevent the bulbs from drying out.
Plants might need staking if grown in too much shade, which produces weaker stems.
Soil
The 'Casa Blanca' lily grows in just about any average, well-drained but moist, garden soil. If soil is heavy and does not drain well, consider planting the bulbs in a raised bed. Mulch the area to keep roots cool and preserve moisture.
Water
Water plants regularly so that the soil stays moist, and don't let the soil dry out. Do not overwater; these plants do not tolerate boggy conditions.
Fertilizer
When new growth appears in spring, feed plants with a low-nitrogen, well-balanced 5-10-5 fertilizer. During the growing season, feed plants every two weeks.
Temperature
If an especially cold winter is expected, dig up the bulbs. Store them indoors and then replant them in spring.
Cut Flowers
When cutting flowers for bouquets, choose blooms that are just about open, and clip off no more than one-third of the stem. Doing so preserves enough foliage for photosynthesis to continue producing food for the bulb. Snip off the stamens so that the brown pollen does not stain your hands or clothing.
Propagating Casa Blanca Lily
Every three or four years, blooms will likely become so large that the plants will flop over. As this weakens the stem, stake plants until flowers are finished blooming. Then, in autumn, dig up the bulbs and divide each cluster. Transplant the bulbs and spread a few inches of organic mulch on the area.
Common Pests/Diseases
Avoid overwatering and creating a boggy condition as this could cause bulbs to rot. Excessively wet weather can also cause gray mold. Like all lilies, beware of aphids spreading the lily mosaic virus, which is not curable. Hand pick lily leaf beetles.
0
0
文章
Miss Chen
2022年02月06日

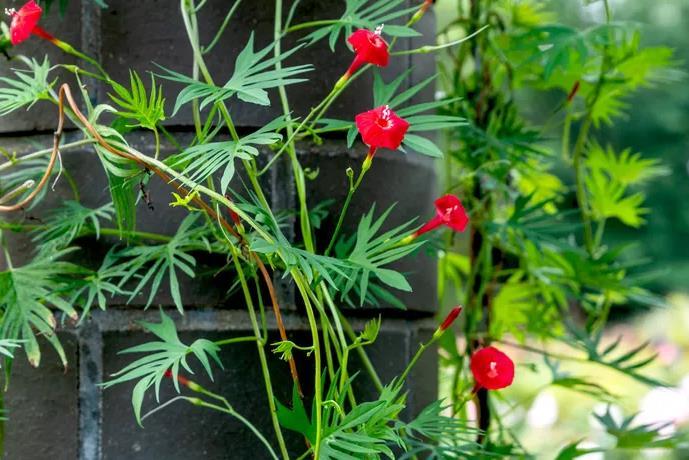
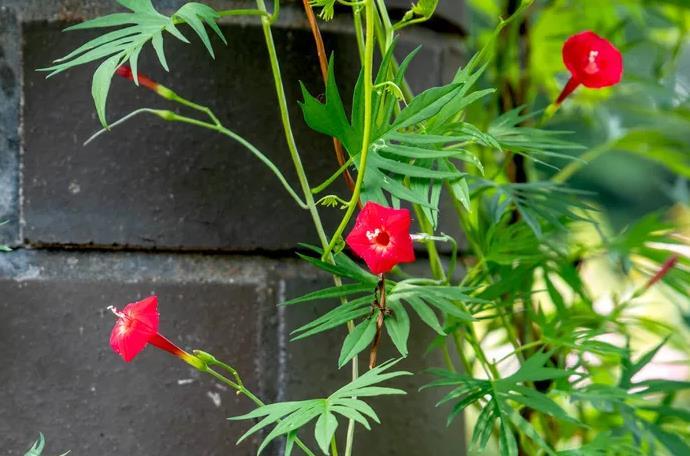
Cardinal climber Ipomoea × multifida) is one of those plants that fully lives up to its name. The blossoms of this hybrid plant are a true cardinal red, and the vine reaches for whatever it can grab. This is a very graceful, airy annual vine, related to morning glory (one of the parent plants of this hybrid). It blooms profusely throughout the summer and the red, trumpet-shaped flowers are big favorites of hummingbirds and other pollinators. The bright green leaves are triangular, with deep, narrow lobes that give them a lacy appearance resembling that of small palm leaves. The tubular flowers are red, with white or yellow throats. Five petals overlap to form a swept-back pentagon at the opening.
Cardinal climber is often planted near a trellis or other structure that it can climb; it can also be used as a dense ground-cover. The delicate, lacy leaves form a peek-a-boo screen rather than blocking the view entirely. This makes them great for training over an arbor or trellis. They are also a good choice for softening a wall and adding an airy feeling.
Cardinal climber can also be grown in containers. Add support in the container for even more height. They look wonderful growing around an obelisk, in the center of other flowers.
Botanical Name Ipomoea × multifida
Common Name Cardinal climber
Plant Type Annual flowering vine
Mature Size 6 to 12 feet tall, 9- to 12-inch spread
Sun Exposure Full sun; will tolerate some shade
Soil Type Any well-drained soil
Soil pH 6.0 to 7.2; prefers a fairly neutral pH
Bloom Time Midsummer until frost
Flower Color Red, with yellow or white throats
Hardiness Zones None; this plant is a true annual
Native Area None; this plant is a cultivated hybrid
Toxicity Toxic to pets
How to Grow Cardinal Climber
Plant cardinal climber in any well-drained soil, in a full-sun location. It requires regular water but does not need to be fertilized unless the soil is poor. It is often planted from potted seedlings, but it can also be seeded directly into the soil, covering the seeds 1/4 inch deep. Space plants 6 to 12 inches apart.
Growing From Seeds
You can sow seeds directly into the garden after danger of frost has passed, to a depth of 1/4 inch. Or, they can be started indoors 4 to 6 weeks before the last frost of the winter/spring.
The seeds have a hard shell and germinate best if some type of scarification is done before planting. The easiest method is to soak them overnight. If you're really ambitious, you can rub them gently with some sandpaper and then soak them overnight. Seeds should germinate within 10 days. Give the young plants a regular weekly watering of at least 1 to 2 inches while getting established.
Light
Cardinal climber prefers full sun but will tolerate part shade.
Soil
This plant does well in any well-drained soil; it prefers a neutral pH.
Water
Cardinal climber will tolerate dry soil, but its parent species are tropical plants, and it grows best if kept moist. Make sure it gets at least 1 inch of water each week, either through rainfall or irrigation. Cardinal climber doesn't like prolonged periods of dryness.
Temperature and Humidity
This plant-like hot, humid weather for best growth; cool weather will cause it to grow slowly.
Fertilizer
This plant rarely needs feeding, unless the soil is very poor.
Propagation of Cardinal Climber
This is a hybrid that grows true from its seeds. You can allow the seed pods to dry on the plants and then collect the seeds to plant the following year.
Comparison With Cypress Vine and Morning Glory
Cardinal flower is a hybrid of cypress vine (Ipomoea quamoclit) and red morning glory (Ipomoea coccinea) and is sometimes confused with those plants since it shares characteristics of both. However, its leaves are distinctly different than the fine, feathery leaves of cypress vine and the heart-shaped leaves of morning glory.
Common Pests/ Diseases
In warmer climates, all members of the morning glory family (Ipomoea) can become aggressive self-seeders. So far, only the Arizona Department of Agriculture has banned their sale.
Cardinal climber is virtually pest-free. If the vines get too thick, they may attract whitefly. Insecticidal soap should control the problem.
Cardinal climber is often planted near a trellis or other structure that it can climb; it can also be used as a dense ground-cover. The delicate, lacy leaves form a peek-a-boo screen rather than blocking the view entirely. This makes them great for training over an arbor or trellis. They are also a good choice for softening a wall and adding an airy feeling.
Cardinal climber can also be grown in containers. Add support in the container for even more height. They look wonderful growing around an obelisk, in the center of other flowers.

Botanical Name Ipomoea × multifida
Common Name Cardinal climber
Plant Type Annual flowering vine
Mature Size 6 to 12 feet tall, 9- to 12-inch spread
Sun Exposure Full sun; will tolerate some shade
Soil Type Any well-drained soil
Soil pH 6.0 to 7.2; prefers a fairly neutral pH
Bloom Time Midsummer until frost
Flower Color Red, with yellow or white throats
Hardiness Zones None; this plant is a true annual
Native Area None; this plant is a cultivated hybrid
Toxicity Toxic to pets
How to Grow Cardinal Climber
Plant cardinal climber in any well-drained soil, in a full-sun location. It requires regular water but does not need to be fertilized unless the soil is poor. It is often planted from potted seedlings, but it can also be seeded directly into the soil, covering the seeds 1/4 inch deep. Space plants 6 to 12 inches apart.
Growing From Seeds
You can sow seeds directly into the garden after danger of frost has passed, to a depth of 1/4 inch. Or, they can be started indoors 4 to 6 weeks before the last frost of the winter/spring.
The seeds have a hard shell and germinate best if some type of scarification is done before planting. The easiest method is to soak them overnight. If you're really ambitious, you can rub them gently with some sandpaper and then soak them overnight. Seeds should germinate within 10 days. Give the young plants a regular weekly watering of at least 1 to 2 inches while getting established.
Light
Cardinal climber prefers full sun but will tolerate part shade.
Soil
This plant does well in any well-drained soil; it prefers a neutral pH.

Water
Cardinal climber will tolerate dry soil, but its parent species are tropical plants, and it grows best if kept moist. Make sure it gets at least 1 inch of water each week, either through rainfall or irrigation. Cardinal climber doesn't like prolonged periods of dryness.
Temperature and Humidity
This plant-like hot, humid weather for best growth; cool weather will cause it to grow slowly.
Fertilizer
This plant rarely needs feeding, unless the soil is very poor.
Propagation of Cardinal Climber
This is a hybrid that grows true from its seeds. You can allow the seed pods to dry on the plants and then collect the seeds to plant the following year.
Comparison With Cypress Vine and Morning Glory
Cardinal flower is a hybrid of cypress vine (Ipomoea quamoclit) and red morning glory (Ipomoea coccinea) and is sometimes confused with those plants since it shares characteristics of both. However, its leaves are distinctly different than the fine, feathery leaves of cypress vine and the heart-shaped leaves of morning glory.
Common Pests/ Diseases
In warmer climates, all members of the morning glory family (Ipomoea) can become aggressive self-seeders. So far, only the Arizona Department of Agriculture has banned their sale.
Cardinal climber is virtually pest-free. If the vines get too thick, they may attract whitefly. Insecticidal soap should control the problem.
0
0
文章
Miss Chen
2021年11月08日

Whether you know it as blue beard or blue mist, Caryopteris x clandonensis is one of the few plants that produce genuinely blue flowers. This plant originated as an accidental hybrid of C. incana and C. mongholica and has since been bred to produce several popular cultivars. The compact size and soft gray foliage make blue beard plants a good choice in any size garden.
Depending on the climate, these plants are grown either as deciduous shrubs or woody perennials that die back to the ground each winter. Growing from neat low mounds, the narrow silvery-gray leaves resemble those of willow. Ideally, the plant should be planted in the spring or fall, provided that your area doesn't get too cold. Clandonensis hybrids typically grow between 18 and 30 inches annually.
FEATURED VIDEO
How to Pick the Perfect Front Door Color
Fun Fact
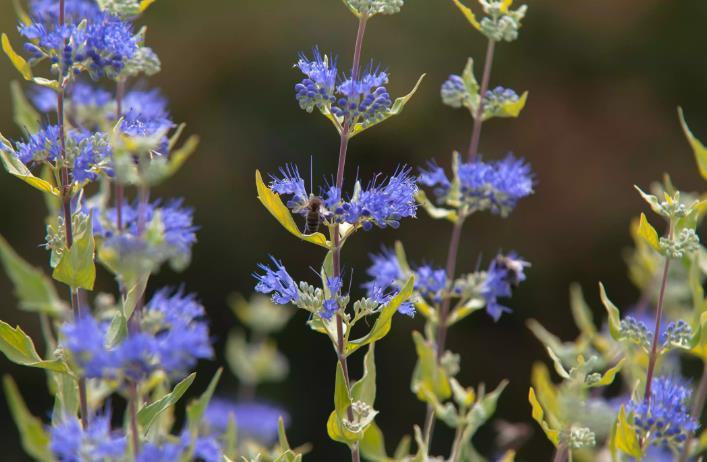
The plant's common names come from the hue of the flowers. The blue or purplish blooms, appearing are mid-to-late summer, are clustered in panicles above the foliage in small feathery puffs.
Botanical Name Caryopteris × clandonensis
Common Names Blue beard, blue mist
Plant Type Deciduous shrub or woody perennial
Mature Size 2 to 4 feet tall with a similar spread
Sun Exposure Full sun
Soil Type Medium moisture, well-drained soil
Soil pH 6.5 to 7.5 (slightly acidic to slightly alkaline)
Bloom Time Mid-to-late summer
Flower Color Blue, purple; pink cultivars available
Hardiness Zones 5 to 9 (USDA)
Native Area Parent species are native to East Asia
Blue Beard Care
The compact size and soft gray foliage make blue beard plants a good choice in any size garden. This is a versatile plant, equally at home in perennial borders, shrub borders, or as a small hedge plant. It is very effective planted in mass and is highly valued for its late summer flowers when few other shrubs are blooming.
Blue beard plants are low-maintenance—they tolerate both drought and shade, and they don't need much fertilizer, if any. However, like all other plants, blue beards have their preferences, so you should plant them in full sun and with medium-moisture soil if you want them to thrive.
Light
Caryopteris plants should be sited in full sun for best blooms. They will tolerate some shade, although flowering will be somewhat reduced. Blue beard may bloom later in the season when they are planted in a shady location.
Soil
Caryopteris prefers a medium-moisture, well-draining soil, though it tolerates fairly moist soil. It does not tolerate wet, poorly drained soils. They thrive best with a neutral soil pH, but will accept slightly acidic or slightly alkaline conditions.
Water
Blue bears are drought-tolerant, but water the plants regularly when young. Once established, they don’t require any supplemental watering unless you are having a particularly dry season.
Temperature and Humidity
Blue beard is reliably hardy in USDA zones 5 to 9; however, in the northern part of the range (zones 5 and 6), it may die back to ground level in winter. This is not a problem, though, because this is a fast-growing shrub that blooms on new growth from the current year.
Fertilizer
These plants are not heavy feeders, so some organic matter mixed into the planting hole should be all the food they need. Side dressing with compost is preferred over fertilizing Caryopteris plants. Too much fertilizer makes for a leafy plant with fewer blooms.
Varieties of Blue Beard
Caryopteris x clandonensis : The original hybrid is one of the hardiest forms available and still one of the most popular.
'Dark Knight': This variety has the darkest blue flowers, but it is a bit more temperamental to grow.
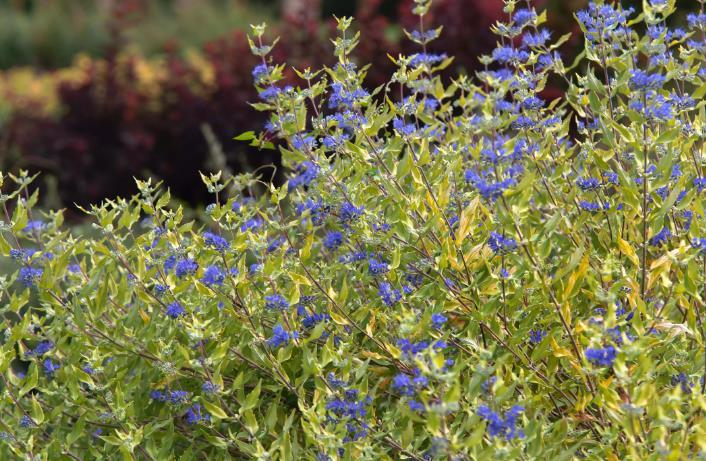
'Sunshine Blue': This cultivar has deep blue flowers offset by yellow foliage.
‘Pink Chablis’: This Proven Winners introduction has pink flowers.
‘Longwood Blue’: This variety has sky-blue fragrant blooms and has a taller stature that's about 4 feet high.
‘Worchester Gold’: This cultivar has golden foliage and lavender flowers.
Pruning
To keep the plant shaped and flowering, Caryopteris plants should be cut down by at least half in the early spring. You can cut them back to 12 to 18 inches without harm. As the plants age, you will get some dead wood in the center. Prune this out as needed. If the plants die back in winter, remove the dead stalks in spring as new growth is beginning.
Tip
Blue beard is slow to leaf out in the spring, so don’t panic if yours looks like a dead twig. Be patient.
Propagating Blue Beard Plants
Blue beard may self seed, and the volunteers can be transplanted as you wish. You can also propagate by soft-wood cuttings in late spring. Cut 6-inch segments off new-growth stems, then remove the lower pairs of leaves. Dip the ends of the cuttings in rooting hormone, then plant them in potting mix. Keep the cuttings in bright indirect light and make sure they are well-watered until they have developed good root systems.
Common Pests/Diseases
Caryopteris can be bothered by the four-line plant bug in June. The foliage will get mottled, but it doesn’t harm the plant and the bug moves on quickly enough. If the bugs disturb you, insecticidal soap, horticultural oil, or neem oil will control them.
Depending on the climate, these plants are grown either as deciduous shrubs or woody perennials that die back to the ground each winter. Growing from neat low mounds, the narrow silvery-gray leaves resemble those of willow. Ideally, the plant should be planted in the spring or fall, provided that your area doesn't get too cold. Clandonensis hybrids typically grow between 18 and 30 inches annually.
FEATURED VIDEO
How to Pick the Perfect Front Door Color
Fun Fact
The plant's common names come from the hue of the flowers. The blue or purplish blooms, appearing are mid-to-late summer, are clustered in panicles above the foliage in small feathery puffs.

Botanical Name Caryopteris × clandonensis
Common Names Blue beard, blue mist
Plant Type Deciduous shrub or woody perennial
Mature Size 2 to 4 feet tall with a similar spread
Sun Exposure Full sun
Soil Type Medium moisture, well-drained soil
Soil pH 6.5 to 7.5 (slightly acidic to slightly alkaline)
Bloom Time Mid-to-late summer
Flower Color Blue, purple; pink cultivars available
Hardiness Zones 5 to 9 (USDA)
Native Area Parent species are native to East Asia
Blue Beard Care
The compact size and soft gray foliage make blue beard plants a good choice in any size garden. This is a versatile plant, equally at home in perennial borders, shrub borders, or as a small hedge plant. It is very effective planted in mass and is highly valued for its late summer flowers when few other shrubs are blooming.
Blue beard plants are low-maintenance—they tolerate both drought and shade, and they don't need much fertilizer, if any. However, like all other plants, blue beards have their preferences, so you should plant them in full sun and with medium-moisture soil if you want them to thrive.
Light
Caryopteris plants should be sited in full sun for best blooms. They will tolerate some shade, although flowering will be somewhat reduced. Blue beard may bloom later in the season when they are planted in a shady location.
Soil
Caryopteris prefers a medium-moisture, well-draining soil, though it tolerates fairly moist soil. It does not tolerate wet, poorly drained soils. They thrive best with a neutral soil pH, but will accept slightly acidic or slightly alkaline conditions.
Water
Blue bears are drought-tolerant, but water the plants regularly when young. Once established, they don’t require any supplemental watering unless you are having a particularly dry season.
Temperature and Humidity
Blue beard is reliably hardy in USDA zones 5 to 9; however, in the northern part of the range (zones 5 and 6), it may die back to ground level in winter. This is not a problem, though, because this is a fast-growing shrub that blooms on new growth from the current year.
Fertilizer
These plants are not heavy feeders, so some organic matter mixed into the planting hole should be all the food they need. Side dressing with compost is preferred over fertilizing Caryopteris plants. Too much fertilizer makes for a leafy plant with fewer blooms.

Varieties of Blue Beard
Caryopteris x clandonensis : The original hybrid is one of the hardiest forms available and still one of the most popular.
'Dark Knight': This variety has the darkest blue flowers, but it is a bit more temperamental to grow.
'Sunshine Blue': This cultivar has deep blue flowers offset by yellow foliage.
‘Pink Chablis’: This Proven Winners introduction has pink flowers.
‘Longwood Blue’: This variety has sky-blue fragrant blooms and has a taller stature that's about 4 feet high.
‘Worchester Gold’: This cultivar has golden foliage and lavender flowers.
Pruning
To keep the plant shaped and flowering, Caryopteris plants should be cut down by at least half in the early spring. You can cut them back to 12 to 18 inches without harm. As the plants age, you will get some dead wood in the center. Prune this out as needed. If the plants die back in winter, remove the dead stalks in spring as new growth is beginning.
Tip
Blue beard is slow to leaf out in the spring, so don’t panic if yours looks like a dead twig. Be patient.
Propagating Blue Beard Plants
Blue beard may self seed, and the volunteers can be transplanted as you wish. You can also propagate by soft-wood cuttings in late spring. Cut 6-inch segments off new-growth stems, then remove the lower pairs of leaves. Dip the ends of the cuttings in rooting hormone, then plant them in potting mix. Keep the cuttings in bright indirect light and make sure they are well-watered until they have developed good root systems.
Common Pests/Diseases
Caryopteris can be bothered by the four-line plant bug in June. The foliage will get mottled, but it doesn’t harm the plant and the bug moves on quickly enough. If the bugs disturb you, insecticidal soap, horticultural oil, or neem oil will control them.
0
0
文章
Miss Chen
2021年10月05日

Becky shasta daisies (Leucanthemum x superbum 'Becky') are a cultivar of the hybrid shasta daisies. They grow larger than several of the other shasta cultivars, sporting many long-lasting, showy flowers that stretch roughly 3 to 4 inches across. The blooms have a classic daisy look with white petals around a central bright yellow disk. Becky shasta daisies rise up on rigid stems that bear leathery, lance-shaped green leaves. These flowers have a fast growth rate and can be aggressive spreaders in the garden if you let them freely sow their seeds. They can be planted in the spring or early fall.
Botanical Name Leucanthemum x superbum 'Becky'
Common Name Becky shasta daisy
Plant Type Herbaceous, perennial
Mature Size 3–4 ft. tall, 2–3 ft. wide
Sun Exposure Full
Soil Type Well-drained
Soil pH Neutral
Bloom Time Summer
Flower Color White with a yellow center
Hardiness Zones 5–9 (USDA)
Native Area Hybrid developed in North America
Toxicity Toxic to people and animals

Becky Shasta Daisy Care
When provided with the proper growing conditions, Becky shasta daisies don’t require much care. Even though these flowers grow fairly tall, they typically don’t require staking due to their rigid stems. They’re commonly used as borders, in mixed flower beds, and in cutting gardens (as they make a wonderfully long-lasting cut flower).
When the daisies are in bloom, deadheading (removing spent blooms) can help to promote additional flowering. Plus, removing the flower heads before they go to seed will prevent unwanted spread of the plants. Furthermore, every two to three years, plan to divide your plants to maintain their vigor. Simply dig up a clump and break it apart at its roots, keeping as many as possible intact. Then, replant the smaller clumps wherever you wish.
Light
Plant Becky shasta daisies in full sun, meaning at least six hours of direct sunlight on most days. This will result in the best flowering on the plants. However, in climates with especially hot summers, some light shade in the afternoon can be beneficial for the daisies. But if they are starting to look leggy, that can mean they aren't getting enough sun.
Soil
These flowers aren’t picky about their soil type as long as it has good drainage. Soil that remains wet for too long can cause root rot and ultimately be fatal to the plants.
Water
Becky shasta daisies have low to moderate water requirements, and they have fairly good drought tolerance. During their first growing season, water your daisies regularly to keep the soil lightly moist (but ensure that it doesn’t get soggy). After that, you typically will only need to water during prolonged periods of drought when your plants have noticeable signs of wilt.
Temperature and Humidity
These plants have fairly good heat and cold tolerance within their growing zones. But extremely high temperatures can stress the plants and hinder their blooming. Likewise, a late frost or freeze in the spring can injure the buds and prevent some blooming. A layer of mulch around the daisies can help to protect the roots from extreme temperature fluctuations. Humidity typically isn't an issue for Becky shasta daisies as long as they have good soil drainage.
Fertilizer
Becky shasta daisies typically don't need fertilizer unless you have very lean soil. But it can be beneficial to work some compost into the soil around your plants annually in the spring.
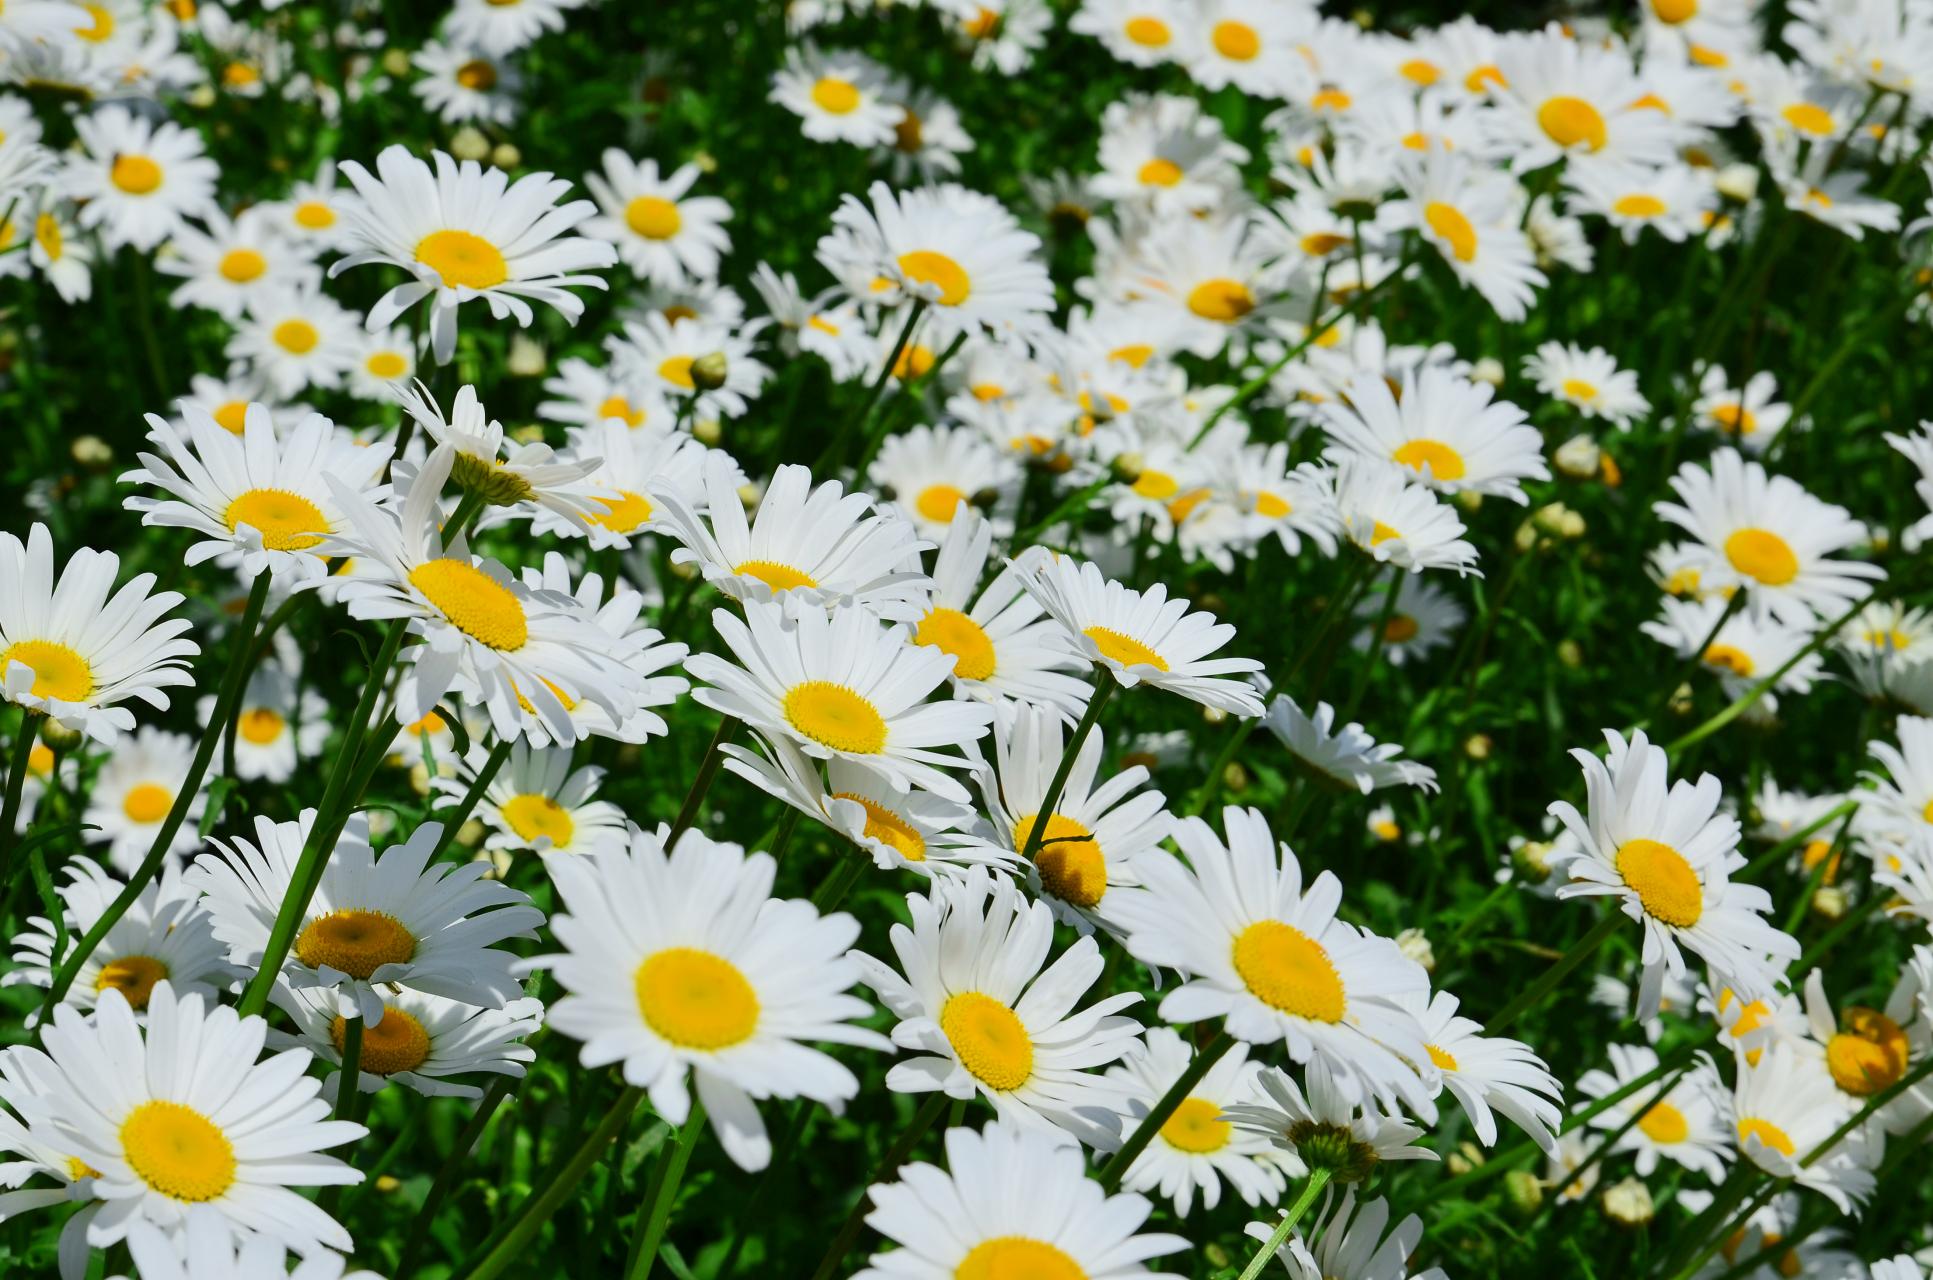
Shasta Daisy Varieties
There are multiple cultivars of shasta daisies besides 'Becky' including:
‘Esther Read’: This variety has pure white double flowers (having extra petals) with yellow centers.
‘Silberprinzesschen’: A compact plant, it only grows up to a foot tall but features profuse blooms that stretch about 3 inches across.
‘Snow Lady’: This is another compact variety that only reaches around a foot high and features the classic white daisy flowers, which stretch roughly 2.5 inches across.
‘Wirral Pride’: Double flowers adorn this variety which reaches around 1.5 to 2 feet tall.
Common Pests/Diseases
These daisies occasionally come down with a fungal disease called verticillium wilt, in which the plants quickly wilt and sometimes turn yellow first. It’s recommended to remove and destroy plants with this disease. They also are susceptible to leaf spot, a fungal disease that causes spots and damage to the foliage. This can be treated with a fungicide. Some common garden pests that might visit Becky shasta daisies include aphids and leaf miners, which can be treated with neem oil.
Botanical Name Leucanthemum x superbum 'Becky'
Common Name Becky shasta daisy
Plant Type Herbaceous, perennial
Mature Size 3–4 ft. tall, 2–3 ft. wide
Sun Exposure Full
Soil Type Well-drained
Soil pH Neutral
Bloom Time Summer
Flower Color White with a yellow center
Hardiness Zones 5–9 (USDA)
Native Area Hybrid developed in North America
Toxicity Toxic to people and animals

Becky Shasta Daisy Care
When provided with the proper growing conditions, Becky shasta daisies don’t require much care. Even though these flowers grow fairly tall, they typically don’t require staking due to their rigid stems. They’re commonly used as borders, in mixed flower beds, and in cutting gardens (as they make a wonderfully long-lasting cut flower).
When the daisies are in bloom, deadheading (removing spent blooms) can help to promote additional flowering. Plus, removing the flower heads before they go to seed will prevent unwanted spread of the plants. Furthermore, every two to three years, plan to divide your plants to maintain their vigor. Simply dig up a clump and break it apart at its roots, keeping as many as possible intact. Then, replant the smaller clumps wherever you wish.
Light
Plant Becky shasta daisies in full sun, meaning at least six hours of direct sunlight on most days. This will result in the best flowering on the plants. However, in climates with especially hot summers, some light shade in the afternoon can be beneficial for the daisies. But if they are starting to look leggy, that can mean they aren't getting enough sun.
Soil
These flowers aren’t picky about their soil type as long as it has good drainage. Soil that remains wet for too long can cause root rot and ultimately be fatal to the plants.
Water
Becky shasta daisies have low to moderate water requirements, and they have fairly good drought tolerance. During their first growing season, water your daisies regularly to keep the soil lightly moist (but ensure that it doesn’t get soggy). After that, you typically will only need to water during prolonged periods of drought when your plants have noticeable signs of wilt.
Temperature and Humidity
These plants have fairly good heat and cold tolerance within their growing zones. But extremely high temperatures can stress the plants and hinder their blooming. Likewise, a late frost or freeze in the spring can injure the buds and prevent some blooming. A layer of mulch around the daisies can help to protect the roots from extreme temperature fluctuations. Humidity typically isn't an issue for Becky shasta daisies as long as they have good soil drainage.
Fertilizer
Becky shasta daisies typically don't need fertilizer unless you have very lean soil. But it can be beneficial to work some compost into the soil around your plants annually in the spring.

Shasta Daisy Varieties
There are multiple cultivars of shasta daisies besides 'Becky' including:
‘Esther Read’: This variety has pure white double flowers (having extra petals) with yellow centers.
‘Silberprinzesschen’: A compact plant, it only grows up to a foot tall but features profuse blooms that stretch about 3 inches across.
‘Snow Lady’: This is another compact variety that only reaches around a foot high and features the classic white daisy flowers, which stretch roughly 2.5 inches across.
‘Wirral Pride’: Double flowers adorn this variety which reaches around 1.5 to 2 feet tall.
Common Pests/Diseases
These daisies occasionally come down with a fungal disease called verticillium wilt, in which the plants quickly wilt and sometimes turn yellow first. It’s recommended to remove and destroy plants with this disease. They also are susceptible to leaf spot, a fungal disease that causes spots and damage to the foliage. This can be treated with a fungicide. Some common garden pests that might visit Becky shasta daisies include aphids and leaf miners, which can be treated with neem oil.
0
0
文章
Miss Chen
2021年06月25日

Hailing from Southeast Asia, Amazon elephant's ear is a popular tropical plant that is sometimes also referred to as African mask. It's a hybrid varietal that makes a striking and beautiful houseplant and is typically sold as such. It can be purchased, planted, and cared for year-round in an indoor environment.
Amazon elephant's ear is defined by its deep green leaves, which are accentuated by whitish or light green veins. The leaves are roughly serrated, and in some cases, the leaf color appears as an almost purple-green. The plant will grow quickly, reaching a mature height of up to 2 feet. Amazon elephant ear plants rarely bloom (especially indoors), and are grown primarily for their eye-catching foliage.
Botanical Name Alocasia x amazonica
Common Name Amazon elephant's ear, African mask
Plant Type Tropical
Mature Size 1–2 ft. tall, 1–2 ft. wide
Sun Exposure Partial shade
Soil Type Moist but well-drained
Soil pH Neutral to acidic
Bloom Time Spring, summer (rarely blooms)
Flower Color Green
Hardiness Zones 9–11 (USDA)
Native Area Asia
Toxicity Toxic to humans, dogs, and cats
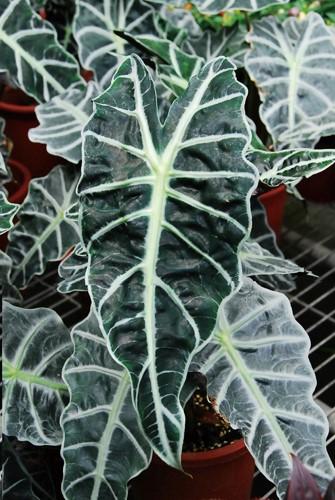
Amazon Elephant's Ear Care
The good news is that growing Amazon elephant's ear is pretty easy. They like filtered sun or shade and rich, moist soil. Like most tropical plants, they thrive in warm temperatures and high humidity and crave plenty of water. These plants are best propagated by division during the spring. In a healthy specimen with multiple stems, corms can be dug up from the existing pot and repotted into smaller pots. Cut away dead and dying leaves for the best presentation.
Light
Amazon elephant's ear plants require lots of bright, indirect light. They can survive in 80 percent shade but prefer about 60 percent shade, which will guarantee you the best growth and a rich, green shade on the leaves. Take care not to expose the plant to harsh direct rays of sunlight, which can bleach or scorch the leaves.
Soil
This plant prefers a fast-draining, well-aerated potting soil. An organic, loose soil that contains a good amount of peat moss is ideal. If your soil mixture is too heavy, you can lighten it with some sand or perlite.
Water
Keep the soil moist but remember that Amazon elephant's ear plants do not like wet feet. If possible, water your plant in the morning from below (at the root zone) to keep the leaves from getting too wet. The plant needs a rest period in winter, so allow the soil to become almost dry between waterings during these months. However, if it dries completely, the plant may go dormant.
Temperature and Humidity
As a tropical plant, Amazon elephant's ear will go dormant or die if exposed to cold temperatures. It likes to be in a climate similar to its native Southeast Asia, with temperatures ranging between 65 degrees Fahrenheit and 75 degrees Fahrenheit. Additionally, the plant loves above-average humidity levels. You can start by housing your Amazon elephant's ear in a typically humid room in your home (like a bathroom), but you may also need to place the plant on a humidity tray with pebbles or invest in a small space a humidifier to put nearby.
Fertilizer
Amazon elephant's ear tends to be a heavy feeder during its growing period and will respond well to applications of a diluted balanced fertilizer. Starting in spring, feed the plant every two weeks, stopping at the end of August, then beginning the cycle again at the start of the following spring. Occasionally, the plant's leaves will yellow—if this happens, try adding fertilizer with micronutrients, or sprinkle Epsom salts around the base of the plant once a month.
Is Amazon Elephant's Ear Toxic?
Elephant's ear is a mildly poisonous houseplant and should be kept away from any curious children or pets that may be tempted to eat or bite the plant. If a person or pet is poisoned by elephant's ear, call the proper poison control center or emergency services promptly. Most symptoms will disappear within several days to a week if treated properly.
Symptoms of Poisoning in Humans
Nausea
Vomiting
Stomach cramps
Redness, pain, or burning of the eyes
Burning in the mouth or throat
Facial swelling (including tongue, mouth, and eyes)
Symptoms of Poisoning in Animals
Oral irritation
Pain and swelling of mouth, tongue, and lips
Excessive drooling
Vomiting
Difficulty swallowing

Potting and Repotting Amazon Elephant's Ear
When growing Amazon elephant's ear in a pot, choose a stable container with ample room to support the plant's growth. A well-grown plant may need yearly repotting. Keep in mind, however, that these plants like to be slightly under-potted for best foliage development.
Common Pests & Diseases
Amazon elephant's ear is typically not susceptible to diseases, but over-watering can lead to fungal infections. If you notice dark brown or black spots (often accompanied by a yellowish rim on the leaves), that's a good sign that a fungal infection is brewing. To treat, remove the damaged leaves, move the plant away from any other plants, and treat it with a fungicide spray. Misting it with a soapy water mixture every few weeks can also help to help deter pests such as mealybugs, spider mites, and aphids—and serve to keep your Amazon elephant's ear dust-free.
Amazon elephant's ear is defined by its deep green leaves, which are accentuated by whitish or light green veins. The leaves are roughly serrated, and in some cases, the leaf color appears as an almost purple-green. The plant will grow quickly, reaching a mature height of up to 2 feet. Amazon elephant ear plants rarely bloom (especially indoors), and are grown primarily for their eye-catching foliage.
Botanical Name Alocasia x amazonica
Common Name Amazon elephant's ear, African mask
Plant Type Tropical
Mature Size 1–2 ft. tall, 1–2 ft. wide
Sun Exposure Partial shade
Soil Type Moist but well-drained
Soil pH Neutral to acidic
Bloom Time Spring, summer (rarely blooms)
Flower Color Green
Hardiness Zones 9–11 (USDA)
Native Area Asia
Toxicity Toxic to humans, dogs, and cats

Amazon Elephant's Ear Care
The good news is that growing Amazon elephant's ear is pretty easy. They like filtered sun or shade and rich, moist soil. Like most tropical plants, they thrive in warm temperatures and high humidity and crave plenty of water. These plants are best propagated by division during the spring. In a healthy specimen with multiple stems, corms can be dug up from the existing pot and repotted into smaller pots. Cut away dead and dying leaves for the best presentation.
Light
Amazon elephant's ear plants require lots of bright, indirect light. They can survive in 80 percent shade but prefer about 60 percent shade, which will guarantee you the best growth and a rich, green shade on the leaves. Take care not to expose the plant to harsh direct rays of sunlight, which can bleach or scorch the leaves.
Soil
This plant prefers a fast-draining, well-aerated potting soil. An organic, loose soil that contains a good amount of peat moss is ideal. If your soil mixture is too heavy, you can lighten it with some sand or perlite.
Water
Keep the soil moist but remember that Amazon elephant's ear plants do not like wet feet. If possible, water your plant in the morning from below (at the root zone) to keep the leaves from getting too wet. The plant needs a rest period in winter, so allow the soil to become almost dry between waterings during these months. However, if it dries completely, the plant may go dormant.
Temperature and Humidity
As a tropical plant, Amazon elephant's ear will go dormant or die if exposed to cold temperatures. It likes to be in a climate similar to its native Southeast Asia, with temperatures ranging between 65 degrees Fahrenheit and 75 degrees Fahrenheit. Additionally, the plant loves above-average humidity levels. You can start by housing your Amazon elephant's ear in a typically humid room in your home (like a bathroom), but you may also need to place the plant on a humidity tray with pebbles or invest in a small space a humidifier to put nearby.
Fertilizer
Amazon elephant's ear tends to be a heavy feeder during its growing period and will respond well to applications of a diluted balanced fertilizer. Starting in spring, feed the plant every two weeks, stopping at the end of August, then beginning the cycle again at the start of the following spring. Occasionally, the plant's leaves will yellow—if this happens, try adding fertilizer with micronutrients, or sprinkle Epsom salts around the base of the plant once a month.
Is Amazon Elephant's Ear Toxic?
Elephant's ear is a mildly poisonous houseplant and should be kept away from any curious children or pets that may be tempted to eat or bite the plant. If a person or pet is poisoned by elephant's ear, call the proper poison control center or emergency services promptly. Most symptoms will disappear within several days to a week if treated properly.
Symptoms of Poisoning in Humans
Nausea
Vomiting
Stomach cramps
Redness, pain, or burning of the eyes
Burning in the mouth or throat
Facial swelling (including tongue, mouth, and eyes)
Symptoms of Poisoning in Animals
Oral irritation
Pain and swelling of mouth, tongue, and lips
Excessive drooling
Vomiting
Difficulty swallowing

Potting and Repotting Amazon Elephant's Ear
When growing Amazon elephant's ear in a pot, choose a stable container with ample room to support the plant's growth. A well-grown plant may need yearly repotting. Keep in mind, however, that these plants like to be slightly under-potted for best foliage development.
Common Pests & Diseases
Amazon elephant's ear is typically not susceptible to diseases, but over-watering can lead to fungal infections. If you notice dark brown or black spots (often accompanied by a yellowish rim on the leaves), that's a good sign that a fungal infection is brewing. To treat, remove the damaged leaves, move the plant away from any other plants, and treat it with a fungicide spray. Misting it with a soapy water mixture every few weeks can also help to help deter pests such as mealybugs, spider mites, and aphids—and serve to keep your Amazon elephant's ear dust-free.
0
0
文章
Miss Chen
2021年06月17日

The Acoma crape myrtle is a hybrid variety of the Lagerstroemia, most frequently known by its common name the crape (or crepe) myrtle. This particular variety only attains a height up to ten feet or so and is frequently reported as staying small in size and being more shrub-like instead of appearing like a tree.
These plants are a great option for planting in urban or suburban environments. Its small size makes it an ideal option for gardens or lawns, or it can be used as part of a commercial landscaping plan. In addition, this cultivar demonstrates greater resistance to powdery mildew—a frequent problem with some crape myrtle trees.
Botanical Name Lagerstroemia x ‘Acoma’
Common Name Acoma crape myrtle
Plant Type Tree
Mature Size 2 to 10 feet tall and 2 to 10 feet wide
Sun Exposure Full sun
Soil Type Well-draining
Soil pH Slightly acidic to neutral
Bloom Time Spring, summer
Flower Color White
Hardiness Zones 7 to 9
Native Area Asia, Australia
How to Grow Acoma Crape Myrtle
The Acoma crape myrtle is a rewarding shrub or small tree to cultivate since it produces weeping branches with lush foliage and delicate blooms. While this variety requires abundant sun, it succeeds in a variety of soil conditions and has just basic needs for water or fertilizer.
Described as having a medium rate of growth, you’ll have plenty of time to watch these trees mature. Just don’t think you'll have much more to do than watch; the Acoma crepe myrtle requires only occasional pruning of its lower branches.
Light
Full sun is necessary for crape myrtle to bloom to its full potential. These plants are known for their beautiful blooms, and to make the most of the flowering display, ensure that your crape myrtle receives at least six hours of sun each day.
Soil
The crape myrtle is adaptable to varying soil conditions—including loam, clay, or sandy soils, as long as the ground is well-draining. When it comes to soil pH, these plants prefer slightly acidic to neutral pH levels, but they can grow in slightly alkaline soils as well.
Water
When first planted, the crape myrtle will need regular watering as it gets established. However, once mature, these plants have modest water needs and do well with about an inch of water per week.
They have proven to be relatively drought-resistant, but keep in mind that a lack of water during bloom season may result in a less showy display. If possible, supplement rainfall with regular watering if you experience an extended period of dry weather and you don’t want to see your flower production impacted.
Temperature and Humidity
Like other crape myrtle varieties that thrive in the sun and heat, the Acoma crape myrtle does well even in hot climates, and it has a tolerance for humidity or drought.
On the other end of the spectrum, it is hardy in USDA zones 7 to 9, and can generally withstand temperatures down to about zero-degrees Fahrenheit successfully.
Fertilizer
For the best blooms, you may need to fertilize your crape myrtle. While these plants are adaptable to even low nutrient soil conditions, they do require sufficient nitrogen to support bloom production.
If you have soil that is lacking, then you might consider fertilizing your Acoma crape myrtle with a balanced formula—like an 8-8-8 or 10-10-10. The fertilizer can be applied at the start of the growing season and should be distributed immediately after rain or else watered sufficiently afterwards.
While the right amount of fertilizer can bring out the best in your crape myrtle, too much can have an adverse effect. Be cautious that you don’t supply too many nutrients—doing so can lead to foliage overgrowth and reduced blossoms.
Propagating Acoma Crape Myrtle
The most successful way of propagating Acoma crape myrtle is by cuttings. You can either use soft or hardwood cuttings, in addition to root cuttings.
Follow these steps to propagate with cuttings:
Use clean scissors or garden shears to remove hardwood or softwood cuttings. Hardwood cuttings should be about eight inches in length. Take hardwood cuttings once the tree has become dormant for the year, typically in the late fall. Softwood cuttings are obtained in the spring or summer and should be about six inches in length with several nodes.
Plant the cutting in a container with quality potting soil, leaving about one inch of the cutting above the soil line.
Maintain soil moisture and position the pot in a location that receives plenty of sun. Softwood cuttings should see new growth in about a month. Hardwood cuttings will grow more slowly, but won’t be ready for planting until summer anyway.
Once the cutting has taken root and is showing signs of new growth, it can be planted out. Be sure to water generously and position your new plant in a location with abundant light.
Toxicity of Acoma Crape Myrtle
If you’re concerned about your pets or other animals nibbling on your crape myrtle, you can rest assured that this tree will do them no harm. The Acoma crape myrtle is non-toxic, to both animals and humans.
Pruning
Keep your Acoma crape myrtle in good form with light pruning; this is best done in the spring before the lush foliage fills the branches.
Since this hybrid variety is known for having a petite form, it won’t need extensive pruning to retain its height, but you may want to clean up low branches on the tree to show off the attractive red-and-white smooth bark.
In addition, you can spur the tree on to increased branching by pinching off new growth, which will encourage your crape myrtle to grow fuller and bushier rather than taller. In addition, remove spent blossoms to support further flowering.
Common Pests
While crepe myrtle trees are often subject to powdery mildew, one of the advantages of this hybrid variety is increased resistance to this fungus. However, Acoma trees are still subject to infestation by aphids. While this can produce a black mold, it isn’t overly threatening or damaging to the tree.
0
0
文章
ritau
2020年07月14日

The grapefruit (Citrus × paradisi) is a subtropical citrus tree known for its relatively large sour to semisweet, somewhat bitter fruit. Grapefruit is a citrus hybrid originating in Barbados as an accidental cross between the sweet orange (C. sinensis) and pomelo (or shaddock; C. maxima), both of which were introduced from Asia in the 17th century. When found, it was nicknamed the "forbidden fruit". Frequently, it is misidentified as the very similar parent species, pomelo.
The "grape" part of the name alludes to clusters of fruit on the tree that often appear similar to grape clusters. The interior flesh is segmented and varies in color from white to yellow to pink to red.
The genetic origin of the grapefruit is a hybrid mix. One ancestor of the grapefruit was the Jamaican sweet orange (Citrus sinensis), itself an ancient hybrid of Asian origin; the other was the Indonesian pomelo (C. maxima). One story of the fruit's origin is that a certain "Captain Shaddock" brought pomelo seeds to Jamaica and bred the first fruit, although it probably originated as a naturally occurring hybrid between the two plants some time after they had been introduced there.
The hybrid fruit, then called "the forbidden fruit", was first documented in 1750 by a Welshman, Rev. Griffith Hughes, who described specimens from Barbados in The Natural History of Barbados.Currently, the grapefruit is said to be one of the "Seven Wonders of Barbados".
The grapefruit was brought to Florida by Count Odet Philippe in 1823, in what is now known as Safety Harbor. Further crosses have produced the tangelo (1905), the Minneola tangelo (1931), and the oroblanco (1984).

The grapefruit was known as the shaddock or shattuck until the 19th century.Its current name alludes to clusters of the fruit on the tree, which often appear similar to those of grapes. Botanically, it was not distinguished from the pomelo until the 1830s, when it was given the name Citrus paradisi. Its true origins were not determined until the 1940s. This led to the official name being altered to Citrus × paradisi, the "×" identifying its hybrid origin.
An early pioneer in the American citrus industry was Kimball Atwood, a wealthy entrepreneur who founded the Atwood Grapefruit Company in the late 19th century. The Atwood Grove became the largest grapefruit grove in the world, with a yearly output of 80,000 boxes of fruit. There, pink grapefruit was first discovered in 1906.
The varieties of Texas and Florida grapefruit include: 'Oro Blanco', 'Ruby Red', 'Pink', 'Rio Star', 'Thompson', 'White Marsh', 'Flame', 'Star Ruby', 'Duncan', and 'Pummelo HB'.
Raw grapefruit is 90% water, 8% carbohydrates, 1% protein, and negligible fat. In a 100-g reference amount, raw grapefruit provides 33 Calories and is a rich source of vitamin C (40% of the Daily Value), with no other micronutrients in significant content.
Grapefruit juice contains about half the citric acid of lime or lemon juice, and about 50% more citric acid than orange juice.
Grapefruit has also been investigated in cancer medicine pharmacodynamics. Its inhibiting effect on the metabolism of some drugs may allow smaller doses to be used, which can help to reduce costs.
In aromatherapy, the fruity aroma of grapefruit is believed to have an uplifting and stimulating effect on the mind, inhaling the aroma of grapefruit can be used to help combat tiredness or mental exhaustion.
Lifestyle magazines and websites sometimes recommend grapefruit as a stain remover for porcelain and enamel.
The "grape" part of the name alludes to clusters of fruit on the tree that often appear similar to grape clusters. The interior flesh is segmented and varies in color from white to yellow to pink to red.
The genetic origin of the grapefruit is a hybrid mix. One ancestor of the grapefruit was the Jamaican sweet orange (Citrus sinensis), itself an ancient hybrid of Asian origin; the other was the Indonesian pomelo (C. maxima). One story of the fruit's origin is that a certain "Captain Shaddock" brought pomelo seeds to Jamaica and bred the first fruit, although it probably originated as a naturally occurring hybrid between the two plants some time after they had been introduced there.
The hybrid fruit, then called "the forbidden fruit", was first documented in 1750 by a Welshman, Rev. Griffith Hughes, who described specimens from Barbados in The Natural History of Barbados.Currently, the grapefruit is said to be one of the "Seven Wonders of Barbados".
The grapefruit was brought to Florida by Count Odet Philippe in 1823, in what is now known as Safety Harbor. Further crosses have produced the tangelo (1905), the Minneola tangelo (1931), and the oroblanco (1984).

The grapefruit was known as the shaddock or shattuck until the 19th century.Its current name alludes to clusters of the fruit on the tree, which often appear similar to those of grapes. Botanically, it was not distinguished from the pomelo until the 1830s, when it was given the name Citrus paradisi. Its true origins were not determined until the 1940s. This led to the official name being altered to Citrus × paradisi, the "×" identifying its hybrid origin.
An early pioneer in the American citrus industry was Kimball Atwood, a wealthy entrepreneur who founded the Atwood Grapefruit Company in the late 19th century. The Atwood Grove became the largest grapefruit grove in the world, with a yearly output of 80,000 boxes of fruit. There, pink grapefruit was first discovered in 1906.
The varieties of Texas and Florida grapefruit include: 'Oro Blanco', 'Ruby Red', 'Pink', 'Rio Star', 'Thompson', 'White Marsh', 'Flame', 'Star Ruby', 'Duncan', and 'Pummelo HB'.
Raw grapefruit is 90% water, 8% carbohydrates, 1% protein, and negligible fat. In a 100-g reference amount, raw grapefruit provides 33 Calories and is a rich source of vitamin C (40% of the Daily Value), with no other micronutrients in significant content.
Grapefruit juice contains about half the citric acid of lime or lemon juice, and about 50% more citric acid than orange juice.
Grapefruit has also been investigated in cancer medicine pharmacodynamics. Its inhibiting effect on the metabolism of some drugs may allow smaller doses to be used, which can help to reduce costs.

In aromatherapy, the fruity aroma of grapefruit is believed to have an uplifting and stimulating effect on the mind, inhaling the aroma of grapefruit can be used to help combat tiredness or mental exhaustion.
Lifestyle magazines and websites sometimes recommend grapefruit as a stain remover for porcelain and enamel.
0
0
文章
ritau
2020年03月19日

The garden strawberry (or simply strawberry; Fragaria × ananassa) is a widely grown hybrid species of the genus Fragaria, collectively known as the strawberries, which are cultivated worldwide for their fruit. The fruit is widely appreciated for its characteristic aroma, bright red color, juicy texture, and sweetness. It is consumed in large quantities, either fresh or in such prepared foods as jam, juice, pies, ice cream, milkshakes, and chocolates. Artificial strawberry flavorings and aromas are also widely used in products such as candy, soap, lip gloss, perfume, and many others.
The garden strawberry was first bred in Brittany, France, in the 1750s via a cross of Fragaria virginiana from eastern North America and Fragaria chiloensis, which was brought from Chile by Amédée-François Frézier in 1714. Cultivars of Fragaria × ananassa have replaced, in commercial production, the woodland strawberry (Fragaria vesca), which was the first strawberry species cultivated in the early 17th century.
The strawberry is not, from a botanical point of view, a berry. Technically, it is an aggregate accessory fruit, meaning that the fleshy part is derived not from the plant's ovaries but from the receptacle that holds the ovaries. Each apparent "seed" (achene) on the outside of the fruit is actually one of the ovaries of the flower, with a seed inside it.
*How to grow?
1. DECIDE WHERE TO GROW YOUR STRAWBERRIES
Get them some sun on the balcony, rooftop, patio or doorstep.
And even if you live in an apartment, condo, townhouse, or small home, you can grow berries in a container on your balcony, rooftop, patio, or even doorstep. If your horizontal space is limited, consider growing strawberries in a hanging basket or stacked planter, which will allow you to take advantage of vertical growing space as the strawberry plants tumble out over the sides. By home-growing your own berries, you will also be helping the environment, since commercially grown strawberries use wasteful amounts of water, chemical fertilizers, and some of the worst pesticides imaginable, not to mention the environmental cost of shipping them for hundreds or thousands of miles.
A sunny spot outside your home is the best place to grow strawberries, though you can get a partial crop with less than a half day of direct sunlight. For shadier spots, try planting Alpine strawberries (available from vegetable seed catalogs and online nurseries), which take more patience but ultimately produce delicious fruit.
2. CHOOSE A CONTAINER FOR THEM
Give your plants enough room to grow.
Whether you choose a container made of clay, plastic, wood, or other material, make sure it has a soil depth of at least 12-14 inches to give the plants’ root systems space to grow. How many plants you can fit in will depend upon the width of the container, since you should space plants about 10-12 inches apart to allow them to spread horizontally.
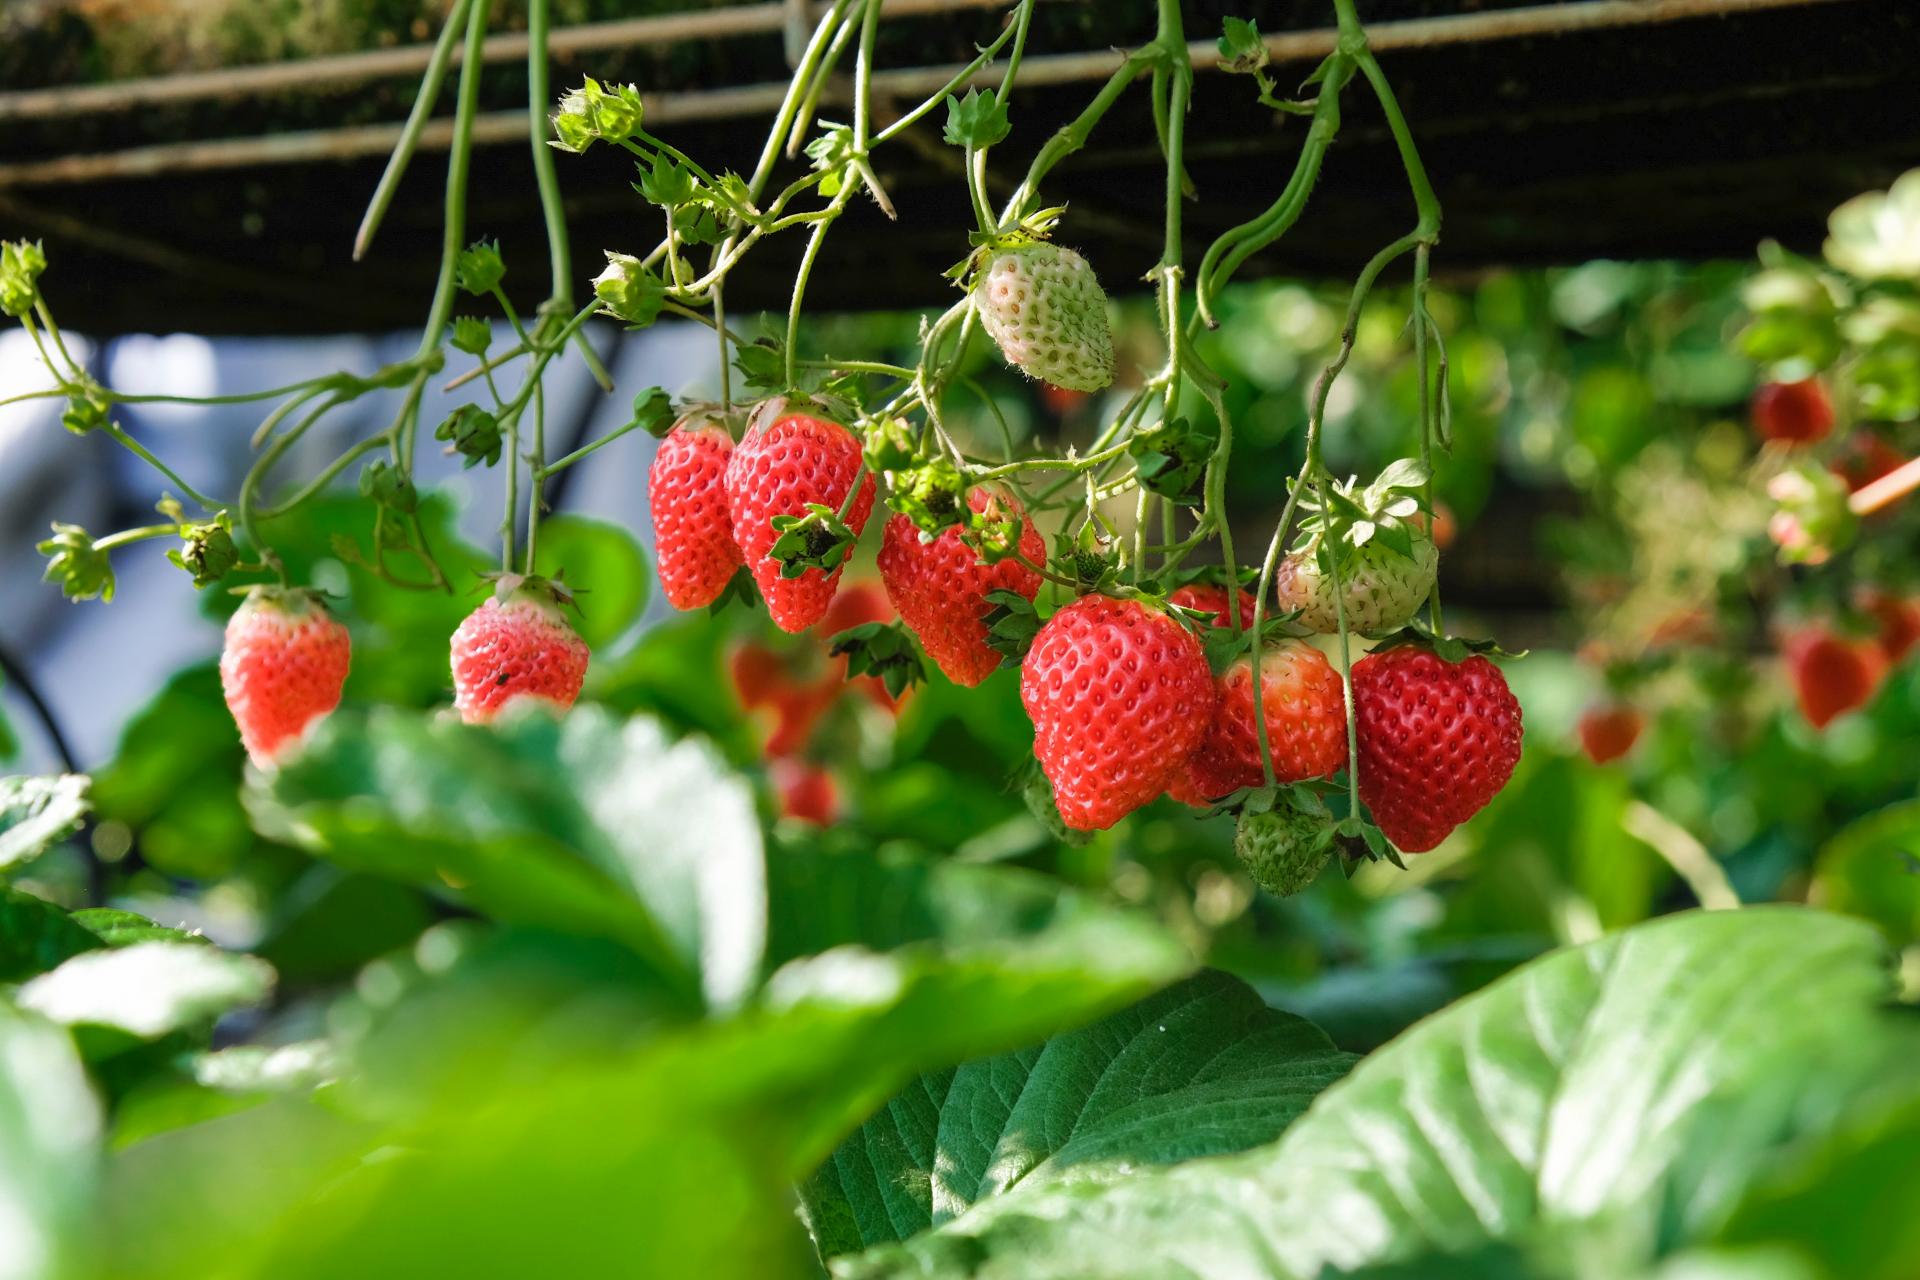
3. FILL THE CONTAINER WITH SOIL THAT MAKES STRAWBERRIES HAPPY
Strawberries like room!
Strawberries like deep, loamy soil that drains well. This means that it should contain plenty of organic matter (such as compost, shredded bark or peat moss) as well as some sand or grit. Most potting soil mixes sold at nurseries will be sufficient, and if you have access to compost, sprinkle an inch or so on top. Be sure the container has drainage holes in the bottom.
Before planting, buy a small bag of organic fertilizer from your nursery, mix it into your soil, and water this down. You can ask your nursery to recommend the right fertilizer for your soil type and region, but in general, strawberries like plenty of nitrogen plus balanced amounts of the other major nutrients. A 10-10-10 fertilizer is not excessive, especially since organic fertilizers have a slower release time.
4. GET YOUR STRAWBERRY PLANTS
Want your strawberries this year, or can you wait?
Your next step is to find some plants and put them in the soil. There are two main kinds of strawberries available: “June-bearing” plants that will bear in spring or early summer, and “Everbearing” or day-neutral varieties that can bear from early summer right up until your first frost. While June-bearing varieties can take a year to establish (you normally plant them now for next year’s harvest), everbearing plants can give you fruit the very first year and may allow you to extend your harvest over a period of weeks or months. There are many great varieties of strawberries out there and your local nursery should be able to recommend some good ones for the climate in your area. Sequoia and Chandler are the two sweetest berries I have ever tasted, while Seascape, Honeoye, Quinalt, Tristar, and Allstar have proven themselves in multiple climates.
5. CARE FOR YOUR PLANTS AND ENJOY
For optimum production, keep your strawberry plants well watered throughout the growing season. Plants should continue to be productive for at least 2-3 years, but will need to be replaced thereafter. To renovate June-bearing plants for next year, trim off their old leaves, making sure not to damage the center stalk (crown) of the plant. Everbearers do not need this trimming, but all plants should be given some top-dressed fertilizer again after fruiting. I wish you the best of success in growing your own berries!
R.J. Ruppenthal is author of FRESH FOOD FROM SMALL SPACES

The garden strawberry was first bred in Brittany, France, in the 1750s via a cross of Fragaria virginiana from eastern North America and Fragaria chiloensis, which was brought from Chile by Amédée-François Frézier in 1714. Cultivars of Fragaria × ananassa have replaced, in commercial production, the woodland strawberry (Fragaria vesca), which was the first strawberry species cultivated in the early 17th century.
The strawberry is not, from a botanical point of view, a berry. Technically, it is an aggregate accessory fruit, meaning that the fleshy part is derived not from the plant's ovaries but from the receptacle that holds the ovaries. Each apparent "seed" (achene) on the outside of the fruit is actually one of the ovaries of the flower, with a seed inside it.

*How to grow?
1. DECIDE WHERE TO GROW YOUR STRAWBERRIES
Get them some sun on the balcony, rooftop, patio or doorstep.
And even if you live in an apartment, condo, townhouse, or small home, you can grow berries in a container on your balcony, rooftop, patio, or even doorstep. If your horizontal space is limited, consider growing strawberries in a hanging basket or stacked planter, which will allow you to take advantage of vertical growing space as the strawberry plants tumble out over the sides. By home-growing your own berries, you will also be helping the environment, since commercially grown strawberries use wasteful amounts of water, chemical fertilizers, and some of the worst pesticides imaginable, not to mention the environmental cost of shipping them for hundreds or thousands of miles.
A sunny spot outside your home is the best place to grow strawberries, though you can get a partial crop with less than a half day of direct sunlight. For shadier spots, try planting Alpine strawberries (available from vegetable seed catalogs and online nurseries), which take more patience but ultimately produce delicious fruit.
2. CHOOSE A CONTAINER FOR THEM
Give your plants enough room to grow.
Whether you choose a container made of clay, plastic, wood, or other material, make sure it has a soil depth of at least 12-14 inches to give the plants’ root systems space to grow. How many plants you can fit in will depend upon the width of the container, since you should space plants about 10-12 inches apart to allow them to spread horizontally.

3. FILL THE CONTAINER WITH SOIL THAT MAKES STRAWBERRIES HAPPY
Strawberries like room!
Strawberries like deep, loamy soil that drains well. This means that it should contain plenty of organic matter (such as compost, shredded bark or peat moss) as well as some sand or grit. Most potting soil mixes sold at nurseries will be sufficient, and if you have access to compost, sprinkle an inch or so on top. Be sure the container has drainage holes in the bottom.
Before planting, buy a small bag of organic fertilizer from your nursery, mix it into your soil, and water this down. You can ask your nursery to recommend the right fertilizer for your soil type and region, but in general, strawberries like plenty of nitrogen plus balanced amounts of the other major nutrients. A 10-10-10 fertilizer is not excessive, especially since organic fertilizers have a slower release time.
4. GET YOUR STRAWBERRY PLANTS
Want your strawberries this year, or can you wait?
Your next step is to find some plants and put them in the soil. There are two main kinds of strawberries available: “June-bearing” plants that will bear in spring or early summer, and “Everbearing” or day-neutral varieties that can bear from early summer right up until your first frost. While June-bearing varieties can take a year to establish (you normally plant them now for next year’s harvest), everbearing plants can give you fruit the very first year and may allow you to extend your harvest over a period of weeks or months. There are many great varieties of strawberries out there and your local nursery should be able to recommend some good ones for the climate in your area. Sequoia and Chandler are the two sweetest berries I have ever tasted, while Seascape, Honeoye, Quinalt, Tristar, and Allstar have proven themselves in multiple climates.
5. CARE FOR YOUR PLANTS AND ENJOY
For optimum production, keep your strawberry plants well watered throughout the growing season. Plants should continue to be productive for at least 2-3 years, but will need to be replaced thereafter. To renovate June-bearing plants for next year, trim off their old leaves, making sure not to damage the center stalk (crown) of the plant. Everbearers do not need this trimming, but all plants should be given some top-dressed fertilizer again after fruiting. I wish you the best of success in growing your own berries!
R.J. Ruppenthal is author of FRESH FOOD FROM SMALL SPACES

0
0
成长记
kensong
2019年05月01日

The hybrid Ficus Lyrata Variegata is not an easy find and also not an easy plant to care for compared to the regular FLF but it's such a beauty.
It's leaves look painted with a cream white that frames a forest green leaf with unpredictable patches of olive green intertwined.
#ficus #ficuslyrata #ficuslyratavariegata #ficuslyratavariegated #lyrata #rubberplant #rubberplants #variegated #variegatedplants #houseplants #gardening #gardening_love #betterhomesandgardens #urbanplants
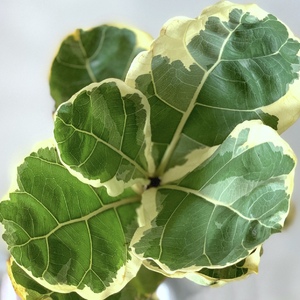

1
0


