文章
Dummer. ゛☀
2017年08月25日

Any gardener will tell you that you can’t go wrong with composting. Whether you want to add nutrients, break up dense soil, introduce beneficial microbes, or all three, compost is the perfect choice. But not all compost is the same. Many gardeners will tell you that the best stuff you can get is cotton burr compost. Keep reading to learn more about how to use cotton burr compost in your garden.
What is Cotton Burr Compost?
What is cotton burr compost? Usually, when cotton is harvested, the plant is run through a gin. This separates the good stuff (the cotton fiber) from the leftovers (the seeds, stems, and leaves). This leftover stuff is called cotton burr.
For a long time, cotton farmers didn’t know what to do with the leftover burr, and they often just burned it. Eventually, though, it became clear that it could be made into incredible compost. The benefits of cotton burr compost are great for a few reasons. Mainly, cotton plants famously use up a lot of nutrients. This means those beneficial minerals and nutrients are sucked out of the soil and up into the plant. Compost the plant and you’ll get all those nutrients back. It’s very good for breaking up heavy clay soil because it’s coarser than some other composts, like manure, and easier to wet than peat moss. It’s also full of beneficial microbes and bacteria, unlike some other varieties.
How to Use Cotton Burr Compost in Gardens
Using cotton burr compost in gardens is both easy to do and excellent for plants. If you want to add it to your soil before planting, simply mix in 2 to 3 inches of compost with your topsoil. Cotton burr compost has so many nutrients that you may not have to add more for two growing seasons. Many gardeners also use cotton burr compost as mulch. To do this, simply lay down an inch of compost around your plants. Water thoroughly and lay down a layer of woodchips or other heavy mulch on top to keep it from blowing away.

What is Cotton Burr Compost?
What is cotton burr compost? Usually, when cotton is harvested, the plant is run through a gin. This separates the good stuff (the cotton fiber) from the leftovers (the seeds, stems, and leaves). This leftover stuff is called cotton burr.
For a long time, cotton farmers didn’t know what to do with the leftover burr, and they often just burned it. Eventually, though, it became clear that it could be made into incredible compost. The benefits of cotton burr compost are great for a few reasons. Mainly, cotton plants famously use up a lot of nutrients. This means those beneficial minerals and nutrients are sucked out of the soil and up into the plant. Compost the plant and you’ll get all those nutrients back. It’s very good for breaking up heavy clay soil because it’s coarser than some other composts, like manure, and easier to wet than peat moss. It’s also full of beneficial microbes and bacteria, unlike some other varieties.

How to Use Cotton Burr Compost in Gardens
Using cotton burr compost in gardens is both easy to do and excellent for plants. If you want to add it to your soil before planting, simply mix in 2 to 3 inches of compost with your topsoil. Cotton burr compost has so many nutrients that you may not have to add more for two growing seasons. Many gardeners also use cotton burr compost as mulch. To do this, simply lay down an inch of compost around your plants. Water thoroughly and lay down a layer of woodchips or other heavy mulch on top to keep it from blowing away.
0
0
文章
Dummer. ゛☀
2017年08月25日

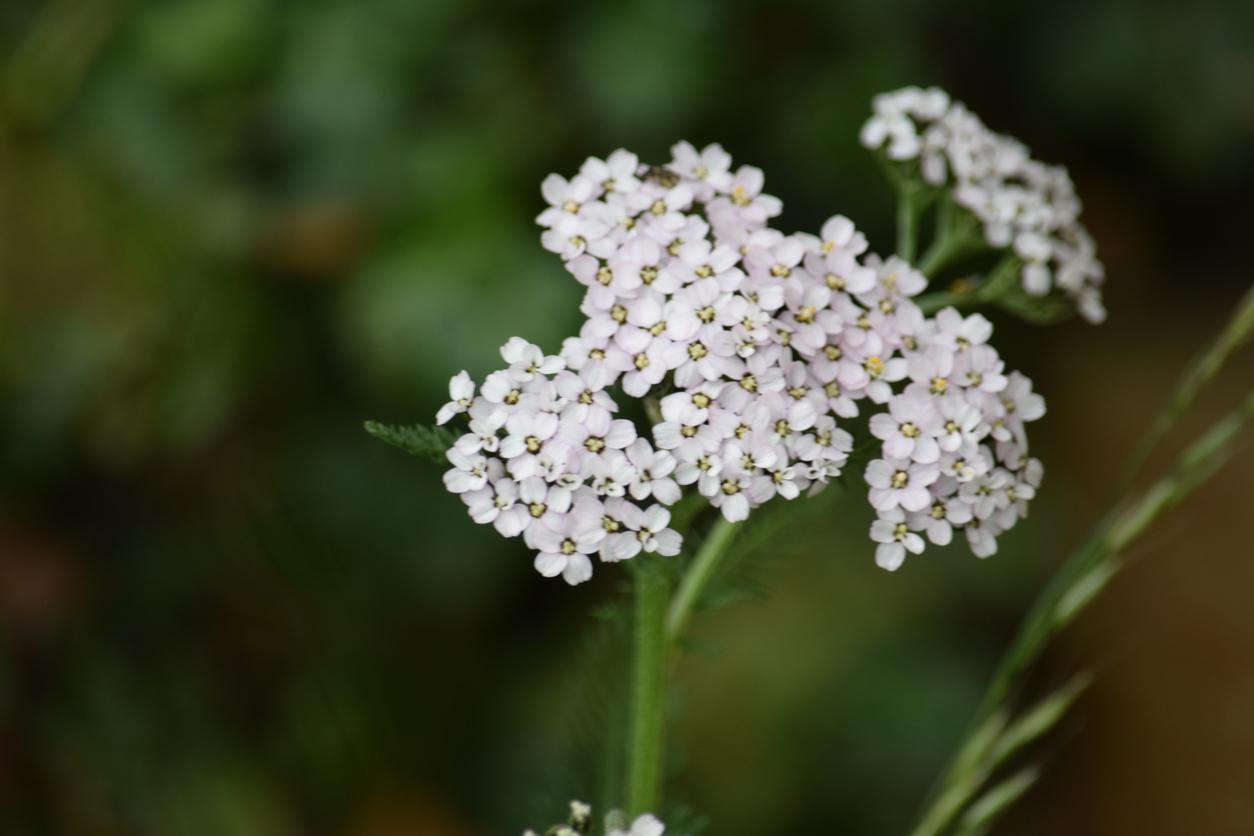
Composting is a great way to do away with garden waste and get free nutrients in return. It’s mostly common knowledge that effective compost needs a good mix of “brown” and “green” material, but if you want to go above and beyond, you can add more specialty ingredients. Yarrow, in particular, is thought to be an excellent addition because of its high concentration of certain nutrients and its ability to speed up the decomposition process. Keep reading to learn more about composting with yarrow.
Yarrow as Compost Accelerant
Is yarrow good for composting? A lot of gardeners say yes. Yarrow plants have a high concentration of sulfur, potassium, copper, phosphates, nitrates, copper, and potash. No matter what, these are beneficial nutrients to have in your compost. In fact, many gardeners use yarrow to make a useful, nutrient rich tea that can be used in a similar fashion to compost tea.
How Does Yarrow Speed Up Decomposition?
Still, there’s more to yarrow than that. It’s also thought by some sources that these high concentrations of nutrients work to speed up the decomposition process of the composting materials around them. This is good – faster decomposition means less time to finished compost and, ultimately, more compost.
How does composting with yarrow work? Most sources recommend chopping up a single small yarrow leaf and adding it to your compost heap. Using yarrow in compost even in such small amounts is, presumably, enough to have a noticeable effect. So what’s the bottom line?
Composting with yarrow is certainly worth a try, but the amount needed is so miniscule that it’s not necessarily worth it to plant an entire crop just for the sake of adding it to the compost pile. If you already have it growing in your garden, however, give it a shot! At the very least you’ll be adding plenty of good nutrients to your eventual compost.

Yarrow as Compost Accelerant
Is yarrow good for composting? A lot of gardeners say yes. Yarrow plants have a high concentration of sulfur, potassium, copper, phosphates, nitrates, copper, and potash. No matter what, these are beneficial nutrients to have in your compost. In fact, many gardeners use yarrow to make a useful, nutrient rich tea that can be used in a similar fashion to compost tea.

How Does Yarrow Speed Up Decomposition?
Still, there’s more to yarrow than that. It’s also thought by some sources that these high concentrations of nutrients work to speed up the decomposition process of the composting materials around them. This is good – faster decomposition means less time to finished compost and, ultimately, more compost.
How does composting with yarrow work? Most sources recommend chopping up a single small yarrow leaf and adding it to your compost heap. Using yarrow in compost even in such small amounts is, presumably, enough to have a noticeable effect. So what’s the bottom line?

Composting with yarrow is certainly worth a try, but the amount needed is so miniscule that it’s not necessarily worth it to plant an entire crop just for the sake of adding it to the compost pile. If you already have it growing in your garden, however, give it a shot! At the very least you’ll be adding plenty of good nutrients to your eventual compost.
0
0
文章
粉团
2017年05月23日

Making your own compost is the best way to enrich your soil organically. It’s simple and easy, check out!IntroductionComposting is not difficult and is probably the best way to provide nutrients to your plants. You can start composting even in a small compost bin if you’re a container gardener. A great source of organic fertilizer for your edibles.
Preparing garden compost is also simple as it only needs a few ingredients. These include nitrogen, carbon, air, and water. To get these ingredients, collect kitchen and yard waste, but remember that full decomposition is a lengthy period that may take months. Needless to say, it is a process that requires a number of steps. Eventually, the overall product is a proven and useful tool for farming. Now let us look at the steps!
Look at our 4 Step Composting Guide if you’re new to Composting.Steps to Preparing Suitable Garden CompostPurchase or get a compost binCome up with a bottom layerFill your compost binInspect the compost pile in three day timeMix the contents of the garden compostCheck if the compost is ready1. Purchase Or Get A Compost Bin

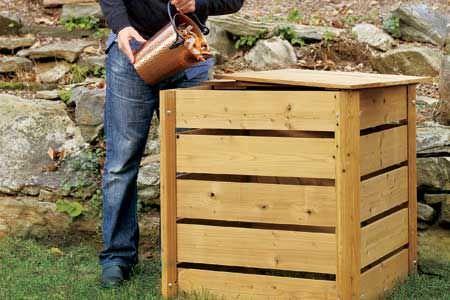
Do not be afraid if you’re unable to get a compost bin. We are here to help you! You only need to buy a pre-made container from any agricultural store or supplier. Then, go on and build a box of your own by using wood. Ensure that you put the box on moisture free, bare soil.
2. Establish A Bottom Layer

Make sure the bottom layer has sufficient air flow. At the bottom of the compost bin, create small holes using a gardening fork. This is to assist in drainage and proper aeration. The next procedure is to place twigs, feeble sticks and other straw-like substances at the bottom. They should be 4-6 inches, translating to about 10 centimeters deep.
3. Fill Your Compost Bin

Add nitrogenous compounds, these are mostly greens. They include plants such as cut grass, raw peelings from vegetables, coffee grounds, diluted urine, manure, and weeds. Proceed also in adding carbon compounds, which are the mostly ‘the browns’. They include cardboards, dead leaves, cereal boxes, hedge clippings, and brown pruning.
Also Read: 13 Things You Should Not Put in a Compost Pile
In this stage, you will also be required to mix the fast-rotting green materials with the slow-rotting brown materials. Let us take the example of freshly cut grass. This may be combined with feeble sticks or other wood compounds. Why is this so? The main reason behind this is to prevent odors.
To hasten the process of decomposition, consider adding bacteria’ such as pseudomonas. You may also use a variety of macro and micro nutrients as alternatives. Besides, chopping off large materials also increases the process of decomposition. For example, branches should be cut to small pieces, cardboards shredded and eggshells crushed. Last but not least, continue adding water as you fill in your compost heap.
Also Read: Ways to Use Worm Casting
4. Inspect The Compost Heap After Three Days

You can also check your compost temperature with a compost thermometer. Here is more on it.
In three days’ time, place your hand over the top of the heap to feel if it’s hot. If so, this shows the start to the decomposition process. Visit the compost heap after one week, and repeat the same procedure. If it has a cool feel, start mixing it. However, if it still feels hot, wait an extra week.
5. Mix The Contents Of The Garden Compost

Use a garden fork or a shovel to thoroughly and effectively mix up the matter inside the container. Stir and move the contents from top to bottom in a continuous manner. You may be wondering why this step involves mixing up the contents. This helps in the rate of decomposition by adding oxygen which is the final ingredient. Lastly, if the contents appear dry, it is advisable to add water before you start mixing. Repeat this process for the next four to six weeks.
Also Read: 11 Best Composting Tips You Must Read Now
6. Check If The Compost Is Ready

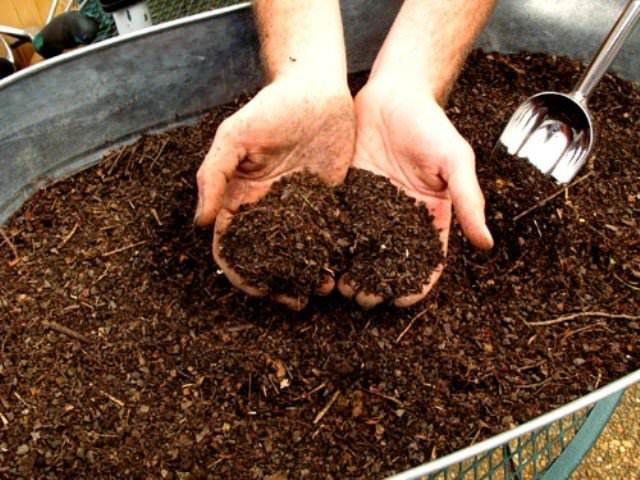
To determine if your compost heap is ready, look for a dark brown color, which often has the smell of earth.
Conclusion
Garden compost is an effective and cheap way of providing organic fertilizer to your vegetables and other garden plants. The article shows you some easy steps of preparing a simple compost heap and it is our hope that it’s well to your liking. If so, share this information with other interested parties and let’s keep the conversation going!
What are those challenges that you’ve faced in trying to make garden compost? Where do you go wrong?
Preparing garden compost is also simple as it only needs a few ingredients. These include nitrogen, carbon, air, and water. To get these ingredients, collect kitchen and yard waste, but remember that full decomposition is a lengthy period that may take months. Needless to say, it is a process that requires a number of steps. Eventually, the overall product is a proven and useful tool for farming. Now let us look at the steps!
Look at our 4 Step Composting Guide if you’re new to Composting.Steps to Preparing Suitable Garden CompostPurchase or get a compost binCome up with a bottom layerFill your compost binInspect the compost pile in three day timeMix the contents of the garden compostCheck if the compost is ready1. Purchase Or Get A Compost Bin

Do not be afraid if you’re unable to get a compost bin. We are here to help you! You only need to buy a pre-made container from any agricultural store or supplier. Then, go on and build a box of your own by using wood. Ensure that you put the box on moisture free, bare soil.
2. Establish A Bottom Layer

Make sure the bottom layer has sufficient air flow. At the bottom of the compost bin, create small holes using a gardening fork. This is to assist in drainage and proper aeration. The next procedure is to place twigs, feeble sticks and other straw-like substances at the bottom. They should be 4-6 inches, translating to about 10 centimeters deep.
3. Fill Your Compost Bin

Add nitrogenous compounds, these are mostly greens. They include plants such as cut grass, raw peelings from vegetables, coffee grounds, diluted urine, manure, and weeds. Proceed also in adding carbon compounds, which are the mostly ‘the browns’. They include cardboards, dead leaves, cereal boxes, hedge clippings, and brown pruning.
Also Read: 13 Things You Should Not Put in a Compost Pile
In this stage, you will also be required to mix the fast-rotting green materials with the slow-rotting brown materials. Let us take the example of freshly cut grass. This may be combined with feeble sticks or other wood compounds. Why is this so? The main reason behind this is to prevent odors.
To hasten the process of decomposition, consider adding bacteria’ such as pseudomonas. You may also use a variety of macro and micro nutrients as alternatives. Besides, chopping off large materials also increases the process of decomposition. For example, branches should be cut to small pieces, cardboards shredded and eggshells crushed. Last but not least, continue adding water as you fill in your compost heap.
Also Read: Ways to Use Worm Casting
4. Inspect The Compost Heap After Three Days

You can also check your compost temperature with a compost thermometer. Here is more on it.
In three days’ time, place your hand over the top of the heap to feel if it’s hot. If so, this shows the start to the decomposition process. Visit the compost heap after one week, and repeat the same procedure. If it has a cool feel, start mixing it. However, if it still feels hot, wait an extra week.
5. Mix The Contents Of The Garden Compost

Use a garden fork or a shovel to thoroughly and effectively mix up the matter inside the container. Stir and move the contents from top to bottom in a continuous manner. You may be wondering why this step involves mixing up the contents. This helps in the rate of decomposition by adding oxygen which is the final ingredient. Lastly, if the contents appear dry, it is advisable to add water before you start mixing. Repeat this process for the next four to six weeks.
Also Read: 11 Best Composting Tips You Must Read Now
6. Check If The Compost Is Ready

To determine if your compost heap is ready, look for a dark brown color, which often has the smell of earth.
Conclusion
Garden compost is an effective and cheap way of providing organic fertilizer to your vegetables and other garden plants. The article shows you some easy steps of preparing a simple compost heap and it is our hope that it’s well to your liking. If so, share this information with other interested parties and let’s keep the conversation going!
What are those challenges that you’ve faced in trying to make garden compost? Where do you go wrong?
0
0
文章
Abigal
2017年05月16日


We all know by now that #composting is important to the #environment . It allows natural waste to return to the earth, while adding a nutrient rich material to our gardens. Here is a break down of the top 3 most common techniques for composting for the home #gardener .

Hot Composting – Open Bins
Hot composting is the most intensive method, but also the fastest way to get finished compost. It involves building compost piles that have a balance of green material (nitrogen), oxygen, water and brown material. The most common method is a three bin open bin method. Made of open slats to allow the piles to breathe, this option is not a great choice for those with limited space, or who will not keep up with turning the pile…. But for those with a little space in the back of the garden, it’s the fastest way to generate a larger amount of compost, and to utilize a larger amount of scraps. Here’s how to make an open bin hot compost pile.
Build or buy three, side by side compost bins. ‘Backyard Feast’ has a complete tutorial on building the ultimate compost bin.

Bin #1 will be for brown materials…kind of a holding area for things you want to compost.
Bin #2 is where all the action happens.
In this bin, layer brown and green materials (green materials include fresh grass, leaves, veggie scraps, etc… browns include dried leaves, twigs, and dead plant material) until you have a ratio of approximately 2 parts brown to 1 part green.
Wet the pile with water until moist, but not soggy.
Turn the pile regularly with a spading fork to allow air to reach the pile and to mix the nitrogen throughout the pile.
Wait for the pile to get hot, and to start composting for you! Basically, the more attentive you are to turning the pile, keeping it moist and not adding any new material until its finished, the faster you will get compost. That gives you a window of 6-12 months. Compost is done when it is warm, not hot, and smells and looks like a sweet soil amendment, and no longer like rotting cantaloupe. :) Move the compost in bin #2 to bin #3 to “settle” and continue to cool until you need to use it. Start another hot pile in bin #2 from all the stuff you have been holding in bin #1!
The benefits to having the three bin system is that you can continue to collect brown materials during the season in bin #1, and that once you move the compost to bin #3 to settle, you can start over again with a new compost pile. Moves things along a lot faster!
You can also create a hot compost pile in just one bin if you have don’t have space, or don’t have much material to compost… it just means you can only work on one pile of compost at a time. ‘This Old House’ shows you complete plans on making a single compost bin.

Hot Composting – Closed Bins or Tumblers
This is a one bin system where you use a closed bin or tumbler, add the same “hot” ratio of green to brown and water, then turn the bin itself to mix the ingredients once a week or so. This saves you from having to deal directly with the compost, and saves a little on your back as well! The downside is that you can only make a small amount of compost at a time. If you don’t want to buy a tumbler, ‘Full Measure of Happiness’ shows us how to make a DIY compost bin from a plastic garbage can!

A more intensive project will keep you composting like a pro. ‘Urban Farm Online’ has a tutorial for this DIY compost tumbler you can use year after year.

Cold Composting – Otherwise known as the lazy mans compost pile!
So for all of you groaning out loud because all that sounds like so much work, I have good news. Stuff will compost with or without your help. It’s just a matter of how fast! Cold composting works, but it can take 1-2 years, depending on what kind of materials you have in your pile. Basically, this is the way to do it…
Make a pile 3×3 feet of compostable materials, the smaller the pieces, the better, so shred!
Add some water, or not, and cover if you want to speed the process along… or not. :)
When, and if, you think of it… turn it, water it, and then forget it again.
Wait until it’s done. Voila!
This info graphic by Well Home tells your everything you need to know about hot and cold composting, and also some less well known (and one icky!) composting techniques.

That’s it! Three easy techniques for composting everyone should know! It’s not rocket science, and there is no compost police that is checking to make sure you have turned your pile this week. Just remember, the more attention you give it, the faster it will give you a wonderful, organic soil conditioner for your garden!
3
1


