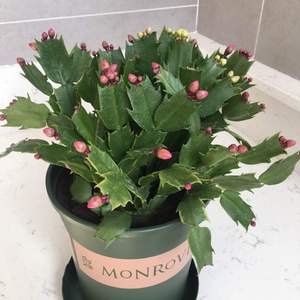
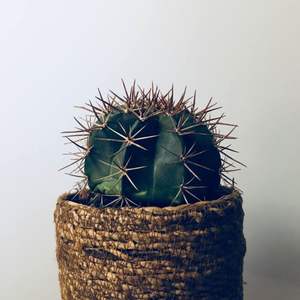
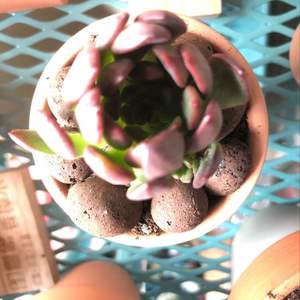
求助
七夜雪殇
2018年09月14日

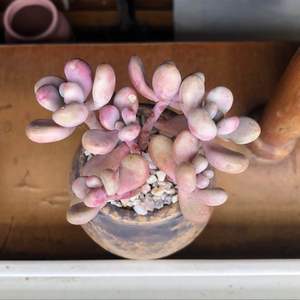
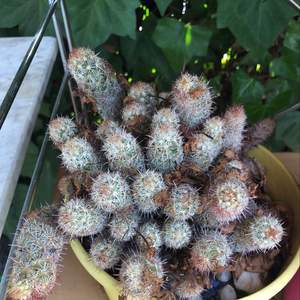
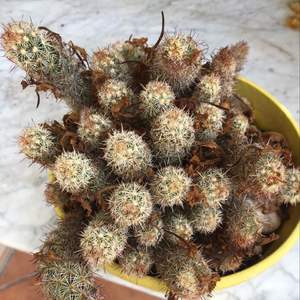
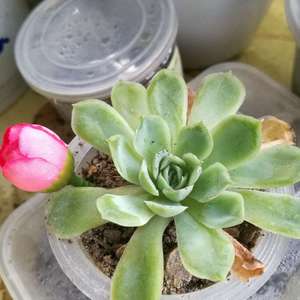
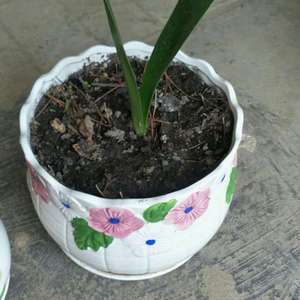
我买来的君子兰6片叶子,栽下去半个月旁边4片叶子全死了,只剩下中心两片叶子健康的活着,麻烦大神告诉我它能健康的活下去吗

0
0
对方正在输入......:这是朱顶红
文章
Miss Chen
2018年09月10日

梅雨时期很多植物都都会或多或少遭受一些病虫害的侵入,而此时也需要我们格外的用心去照顾它们。而杜鹃的花期在5-8月,由于不同的品种可能花期也会存在一定延迟。而作为夏季6-7月份的梅雨季节,恰逢杜鹃盆景花枝招展、竞相开放的季节,虽然在这个时间段更加适合赏花,同时也需要及时做好养护管理工作。否则,如果呵护不到位的话,可能引起花叶焦枯脱落的现象,这对于盆景而言是莫大的损失,对于赏花者而言,也必然让人感到遗憾,毕竟盆景的观赏价值会大打折扣。

从夏季的6月到七月上旬期间恰逢是梅雨季,同时也正是杜鹃开花抽叶、发枝旺盛的时期,所以需要尽可能为其提供光照。只要不是被长时间暴晒,一般不会对开花造成什么影响。但如果在烈日当空的晴天,一般从上午9点到下午4点之间这段时间需要及时采取必要的遮阴措施,以避免烈日灼伤花叶而出现杜鹃出现花叶焦枯脱落的现象。但仅此还不够,以为杜鹃耐寒而不耐热,当气温高于30°C时,往往脱水比较严重,同时也容易出现休眠现象,所以为了确保其在梅雨季开花旺盛,遮阴、降温、保湿等工作一定要做好。
杜鹃盆景在梅雨季出现花叶焦枯脱落的现象,主要是光照过强、气温太高、脱水严重等因素造成的。所以,为了避免这种现象的发生,我们首先需要将杜鹃盆景摆放在相对凉爽、通风顺畅的环境中养护,同时做好遮阴工作,一般为其提供半阴的环境即可。当然,确保杜鹃盆景在梅雨季不会出现花叶焦枯脱落的现象,仅仅靠遮阴通风的条件还不够,我们还需要及时做好补水工作。
杜鹃本身是比较喜欢湿润但不耐高温的生长环境,所以当发现盆土变干时要及时浇水,多在早上9点之前或下午4点之后进行。而为了达到降温保湿的效果,我们还需要结合喷水进行,尤其是在像梅雨季的6-7月这种炎热的夏季环境下,更应该多喷洒叶面水和地面水。喷洒叶面水和地面水除了可以起到保湿降温的作用之外,也可以让杜鹃盆景的叶片更显干净、鲜绿,而实现鲜花配绿叶的效果,提高盆景的观赏价值。不过浇水不宜太多,否则仍然可能引起落花的。

当然一般情况下,处于花期的花卉植物是不宜进行追肥的,尤其是处于梅雨季且不耐高温的杜鹃盆景,更应该在花期停止追肥。除此之外,也需要做好病虫害的管理,因为在湿热通风差的环境下,杜鹃盆景比较容易感染病虫害。相信只要通过大家对杜鹃盆景进行精心的呵护和管理,梅雨季出现花叶焦枯脱落的现象会逐渐消失的,而盆景的观赏效果也能得到保障。

从夏季的6月到七月上旬期间恰逢是梅雨季,同时也正是杜鹃开花抽叶、发枝旺盛的时期,所以需要尽可能为其提供光照。只要不是被长时间暴晒,一般不会对开花造成什么影响。但如果在烈日当空的晴天,一般从上午9点到下午4点之间这段时间需要及时采取必要的遮阴措施,以避免烈日灼伤花叶而出现杜鹃出现花叶焦枯脱落的现象。但仅此还不够,以为杜鹃耐寒而不耐热,当气温高于30°C时,往往脱水比较严重,同时也容易出现休眠现象,所以为了确保其在梅雨季开花旺盛,遮阴、降温、保湿等工作一定要做好。
杜鹃盆景在梅雨季出现花叶焦枯脱落的现象,主要是光照过强、气温太高、脱水严重等因素造成的。所以,为了避免这种现象的发生,我们首先需要将杜鹃盆景摆放在相对凉爽、通风顺畅的环境中养护,同时做好遮阴工作,一般为其提供半阴的环境即可。当然,确保杜鹃盆景在梅雨季不会出现花叶焦枯脱落的现象,仅仅靠遮阴通风的条件还不够,我们还需要及时做好补水工作。
杜鹃本身是比较喜欢湿润但不耐高温的生长环境,所以当发现盆土变干时要及时浇水,多在早上9点之前或下午4点之后进行。而为了达到降温保湿的效果,我们还需要结合喷水进行,尤其是在像梅雨季的6-7月这种炎热的夏季环境下,更应该多喷洒叶面水和地面水。喷洒叶面水和地面水除了可以起到保湿降温的作用之外,也可以让杜鹃盆景的叶片更显干净、鲜绿,而实现鲜花配绿叶的效果,提高盆景的观赏价值。不过浇水不宜太多,否则仍然可能引起落花的。

当然一般情况下,处于花期的花卉植物是不宜进行追肥的,尤其是处于梅雨季且不耐高温的杜鹃盆景,更应该在花期停止追肥。除此之外,也需要做好病虫害的管理,因为在湿热通风差的环境下,杜鹃盆景比较容易感染病虫害。相信只要通过大家对杜鹃盆景进行精心的呵护和管理,梅雨季出现花叶焦枯脱落的现象会逐渐消失的,而盆景的观赏效果也能得到保障。
0
1
文章
Miss Chen
2018年09月10日

Named for their large, broad leaves, elephant ears (Colocasia spp.) are moisture loving plants that can grow in up to 6 inches of standing water. Colocasia esculenta, which is hardy in U.S. Department of Agriculture plant hardiness zones 8 through 10, is a commonly grown variety of elephant ears. Also called taro, this elephant ears variety usually grows 3 to 6 feet tall and wide, and features boldly veined leaves up to 2 feet long. Uncooked elephant ears are poisonous, and the plants are invasive in some areas of the United States.

Transplanting Time
The best time for transplanting elephant ears is when new growth appears in spring. Elephant ears sprout from tubers in spring and quickly grow into large, spreading clumps. In frost-free areas elephant ears can be transplanted any time of year, but transplanting when the plants are small is easiest.
In areas of the United States that experience frosts, elephant ears must be transplanted after the final local average frost date. If late frosts threaten after the plants have been transplanted, cover elephant ears with old sheets or several layers of newspaper overnight.
Growing Spot
A sheltered, partially shaded spot with organically rich, medium moisture or wet soil provides the best growing conditions for transplanted elephant ears. These plants also need protection from strong winds. In a wet site, such as the edge of a pond, elephant ears tolerate up to eight hours of direct sunlight, but the plants grow best in filtered sun or shade during the hottest part of the day.
Improve the soil for elephant ears by mixing in organic matter before transplanting. Spread a 4-inch layer of garden compost or aged manure over the growing spot and mix it 12 inches deep into the soil with a garden fork.
Planting Hole
Elephant ears can establish quickly in wide planting holes. These vigorous plants can grow up to 8 feet tall in one growing season in ideal conditions and produce tubers that weigh 1 to 2 pounds.
Dig a hole as deep as an elephant ear's root ball and twice as wide. Remove the plant from its container and place it in the center of the hole. The plant should sit at its original growing depth. Holding the elephant ears plant upright with one hand, scoop the dug soil into the hole with the other hand until you fill the hole. Gently press the soil around the plant with the flats of your hands to firm the plant in the hole.

Watering Elephant Ears
Regular watering is essential for newly transplanted elephant ears. Spray water over the growing spot using a garden hose fitted with a soft spray attachment. When the water puddles, stop watering and wait an hour. Test the soil moisture level by pushing your fingers into it. If the soil is moist but not wet, water the plants again.
Don't allow the soil around elephant ears to dry out. Water elephant ears when the soil surface begins to dry or more frequently.

Transplanting Time
The best time for transplanting elephant ears is when new growth appears in spring. Elephant ears sprout from tubers in spring and quickly grow into large, spreading clumps. In frost-free areas elephant ears can be transplanted any time of year, but transplanting when the plants are small is easiest.
In areas of the United States that experience frosts, elephant ears must be transplanted after the final local average frost date. If late frosts threaten after the plants have been transplanted, cover elephant ears with old sheets or several layers of newspaper overnight.
Growing Spot
A sheltered, partially shaded spot with organically rich, medium moisture or wet soil provides the best growing conditions for transplanted elephant ears. These plants also need protection from strong winds. In a wet site, such as the edge of a pond, elephant ears tolerate up to eight hours of direct sunlight, but the plants grow best in filtered sun or shade during the hottest part of the day.
Improve the soil for elephant ears by mixing in organic matter before transplanting. Spread a 4-inch layer of garden compost or aged manure over the growing spot and mix it 12 inches deep into the soil with a garden fork.
Planting Hole
Elephant ears can establish quickly in wide planting holes. These vigorous plants can grow up to 8 feet tall in one growing season in ideal conditions and produce tubers that weigh 1 to 2 pounds.
Dig a hole as deep as an elephant ear's root ball and twice as wide. Remove the plant from its container and place it in the center of the hole. The plant should sit at its original growing depth. Holding the elephant ears plant upright with one hand, scoop the dug soil into the hole with the other hand until you fill the hole. Gently press the soil around the plant with the flats of your hands to firm the plant in the hole.

Watering Elephant Ears
Regular watering is essential for newly transplanted elephant ears. Spray water over the growing spot using a garden hose fitted with a soft spray attachment. When the water puddles, stop watering and wait an hour. Test the soil moisture level by pushing your fingers into it. If the soil is moist but not wet, water the plants again.
Don't allow the soil around elephant ears to dry out. Water elephant ears when the soil surface begins to dry or more frequently.
1
1
文章
Miss Chen
2018年09月10日

Himalayan blue poppies are one of the few flowers that produce an intense sky-blue blossom. In their native location in China, they can grow to more than 6 feet tall; in other locations, they average 20 to 28 inches tall. These poppies look best planted in mass displays or threaded throughout a border. These flowers are not a good choice for the impatient gardener; in some locations they may not bloom the first season. The foliage will die down for the winter and you should expect to see blooms the second year. If it is prevented from blooming the first time the bud sets, the poppy is more likely to become a perennial. These flowers are suitable for USDA zones 3 to 8.

Step 1
Select a site for the Himalayan blue poppies. These plants need partial, dappled shade and protection from strong, drying winds. The soil needs to be rich and well-drained and, in colder climates, it needs to be acidic. Several weeks before planting, dig up the soil, remove rocks and other garden debris and test the pH level. If the soil is too alkaline, amend it with sulfur. Add plenty of organic matter to enrich the soil.
Step 2
Plant the poppies in early spring. Dig a hole that is larger than the poppy's container. Remove it from the container and gently loosen the roots with your fingers. Place the poppy in the hole, add soil to fill in the hole and tamp down gently to remove air bubbles. Water gently to settle the soil. Space the poppies 18 to 24 inches apart.
Step 3
Water the poppies regularly, but do not over water; waterlogged plants can suffer from crown rot. However, do not let the soil dry out between waterings. Give them a light application of general fertilizer in the spring. Downy mildew can be a problem, especially in locations with high humidity. Spray with a fungicide at the first sign of mildew.
Step 4
Watch for the Himalayan blue poppies to bloom beginning in early summer and continuing through to early fall. Unless you want the seed to ripen, remove spent flower stems. After all growth dies down, cut the poppies to ground level. Use a plant marker to indicate the location of the poppies.

Step 5
Propagate the poppies from fresh ripe seed in the fall or spring. After the seeds have sprouted, thin the seedlings to 18 to 24 inches apart. Water well initially, but back off so as not to over water.

Step 1
Select a site for the Himalayan blue poppies. These plants need partial, dappled shade and protection from strong, drying winds. The soil needs to be rich and well-drained and, in colder climates, it needs to be acidic. Several weeks before planting, dig up the soil, remove rocks and other garden debris and test the pH level. If the soil is too alkaline, amend it with sulfur. Add plenty of organic matter to enrich the soil.
Step 2
Plant the poppies in early spring. Dig a hole that is larger than the poppy's container. Remove it from the container and gently loosen the roots with your fingers. Place the poppy in the hole, add soil to fill in the hole and tamp down gently to remove air bubbles. Water gently to settle the soil. Space the poppies 18 to 24 inches apart.
Step 3
Water the poppies regularly, but do not over water; waterlogged plants can suffer from crown rot. However, do not let the soil dry out between waterings. Give them a light application of general fertilizer in the spring. Downy mildew can be a problem, especially in locations with high humidity. Spray with a fungicide at the first sign of mildew.
Step 4
Watch for the Himalayan blue poppies to bloom beginning in early summer and continuing through to early fall. Unless you want the seed to ripen, remove spent flower stems. After all growth dies down, cut the poppies to ground level. Use a plant marker to indicate the location of the poppies.

Step 5
Propagate the poppies from fresh ripe seed in the fall or spring. After the seeds have sprouted, thin the seedlings to 18 to 24 inches apart. Water well initially, but back off so as not to over water.
0
0


