文章
Miss Chen
2018年09月04日

The care and effort it takes to overwinter elephant ears (Colocasia spp.), which grow in U.S. Department of Agriculture plant hardiness zones 8 through 11 with some variation within species, depends on your climate. In frost-free tropical and sub-tropical areas, these lush foliage plants grow year-round with minimal winter care. In frost-prone regions, overwintering elephant ears takes a little more effort, but it's worth it when the 2- to 3-foot-long heart-shaped leaves bring a tropical flair to the garden the following summer.

Mild Climates Need Little Care
In USDA zones 10 through 11, elephant ear plants will grow year-round, remaining green through the winter. Discontinue watering from late fall through winter so the soil dries out. The soil can dry out completely during the dormant period, but natural rainfall will likely keep the soil moist. Cut back dead foliage and stalks as they die 2 to 4 inches from the soil line. Elephant ear foliage dies back throughout the year, but winter is a good time to tidy plants. You can cut out dead leaves any time of year.
Frosty Areas Require Some Protection
While elephant ear plants survive winters in frost-prone areas, specifically within USDA zones 8 through 9, the foliage will die back after a frost or cold spell. Once the first frost kills the foliage, cut back the stalks 2 to 4 inches from the soil line, then cover the soil with a layer of mulch 4 inches deep. No additional water is necessary during the dormant period. The mulch helps insulate the soil. Sawdust, seed-free straw, leaf-mold and compost all make good mulching materials.
Overwintering Indoors
Outside of the growing zone -- anywhere colder than USDA zone 8 -- elephant ears are not reliably hardy. The roots will freeze in the cold soil, killing the plants. In cold areas you have two choices: you can grow elephant ears in pots and keep them in a frost-free area over winter in a dormant state, or dig the tubers in the fall and .
Overwintering Pots Indoors
Before the first frost, move the container to an area that won't freeze over winter. An unheated garage or shed that stays above 50 degrees Fahrenheit works well. Discontinue watering through the winter. This forces elephant ear tubers into dormancy. Cut all the stalks down at the soil level. In the spring when the temperature is consistently at or above 60 degrees F, water when the top of the soil feels dry. Once the last frost has passed, you can return the pots outdoors.

Digging and Storing Tubers
Allow the leaves and stalks to die back naturally with the first of the winter frosts. Once dead, cut back the foliage 2 to 4 inches from the soil, then carefully dig out the roots. Elephant ears have fleshy tubers for roots. Brush soil away from the surface and identify the shape and size of the tuber, then dig down around the outside of the root and lift it from the soil. Brush off extra dirt and pack the tubers in dry sawdust or peat moss in a bucket or tub. Keep the tubers dry in a 50-degrees F spot through the winter.

Mild Climates Need Little Care
In USDA zones 10 through 11, elephant ear plants will grow year-round, remaining green through the winter. Discontinue watering from late fall through winter so the soil dries out. The soil can dry out completely during the dormant period, but natural rainfall will likely keep the soil moist. Cut back dead foliage and stalks as they die 2 to 4 inches from the soil line. Elephant ear foliage dies back throughout the year, but winter is a good time to tidy plants. You can cut out dead leaves any time of year.
Frosty Areas Require Some Protection
While elephant ear plants survive winters in frost-prone areas, specifically within USDA zones 8 through 9, the foliage will die back after a frost or cold spell. Once the first frost kills the foliage, cut back the stalks 2 to 4 inches from the soil line, then cover the soil with a layer of mulch 4 inches deep. No additional water is necessary during the dormant period. The mulch helps insulate the soil. Sawdust, seed-free straw, leaf-mold and compost all make good mulching materials.
Overwintering Indoors
Outside of the growing zone -- anywhere colder than USDA zone 8 -- elephant ears are not reliably hardy. The roots will freeze in the cold soil, killing the plants. In cold areas you have two choices: you can grow elephant ears in pots and keep them in a frost-free area over winter in a dormant state, or dig the tubers in the fall and .
Overwintering Pots Indoors
Before the first frost, move the container to an area that won't freeze over winter. An unheated garage or shed that stays above 50 degrees Fahrenheit works well. Discontinue watering through the winter. This forces elephant ear tubers into dormancy. Cut all the stalks down at the soil level. In the spring when the temperature is consistently at or above 60 degrees F, water when the top of the soil feels dry. Once the last frost has passed, you can return the pots outdoors.

Digging and Storing Tubers
Allow the leaves and stalks to die back naturally with the first of the winter frosts. Once dead, cut back the foliage 2 to 4 inches from the soil, then carefully dig out the roots. Elephant ears have fleshy tubers for roots. Brush soil away from the surface and identify the shape and size of the tuber, then dig down around the outside of the root and lift it from the soil. Brush off extra dirt and pack the tubers in dry sawdust or peat moss in a bucket or tub. Keep the tubers dry in a 50-degrees F spot through the winter.
0
0
文章
Miss Chen
2018年08月27日

Hostas (Hosta spp.) are usually prized for their foliage, but yellow and brown leaves are not the most desirable of rewards. Growing in U.S. Department of Agriculture plant hardiness zones 3 through 8, they thrive in rich, moist soil and can tolerate full shade. Healthy hostas glow in shades of blue, green, gold and cream. Unfortunately, that fabulous foliage will fade if hostas are cared for improperly or are damaged by pests or diseases.

The Root of the Problem
Anything that damages the roots of hostas can cause yellow and brown leaves. The damaged roots are unable to absorb nutrients and water, and as a result, the plant suffers or even dies, depending on the extent of the damage. Although hostas prefer moist, cool soils, heavy and wet soil in spring and winter can lead to root rot -- a fungal disease that rots away the roots. Well-drained soil is a must for these plants, and pots containing hostas should have a hole in the bottom to allow for good drainage. Burrowing animals, such as voles, can also damage the roots of the plants. Voles prefer to create their tunnels under lawns, mulch and areas with loose soil, so try planting your hostas among tree roots or near other underground barriers that will naturally block tunneling animals.
Let There Be Light
Many home gardeners use hostas to brighten up shady corners of their gardens, but hostas are brighter when they receive some sunlight. They key here is knowing how much is too much. Some hostas are much more tolerant of direct sunlight than others. Too much hot, direct sunlight can scorch the leaves of some varieties, causing them to turn yellow and brown. Choose varieties that can withstand the sun, such as "Sun Power" hybrids. In general, home gardeners in USDA zones 6 and above should avoid planting hostas in direct sunlight, according to the Missouri Botanical Gardens website. Making sure your hostas get enough water during hot, dry periods can also help.
Vexing Viruses
Hostas can sometimes suffer from something called "Virus X," which causes the leaves to develop dark spots, rings, browning or twisting of the leaves. Unfortunately, there is no cure for this disease. In addition, these symptoms often mimic those of spontaneous mutations, or sports, which some home gardeners find desirable. In general, however, it's best to remove plants that suffer from these symptoms, especially if they appear all over the plant. If they appear in just one section of the plant or on only a few leaves, you can just remove those leaves.

Frustrating Fungi
Fungi don't just affect the roots of hosta plants. They can also damage the stems and leaf petioles. In fact, petiole rot is a common and serious affliction of hostas. When this happens, the leaves are cut off from the main stem and are unable to receive nutrients. They turn yellow and brown, and pull away easily from the plant. Southern blight, which rots the stem, and anthracnose, which usually attacks the leaves themselves, are also fungal diseases that can cause hosta foliage to turn yellow and brown. Avoid these problems as best you can by watering at the ground level, rather than from overhead, and by watering early in the morning so that the sun can dry off the leaves. Overcrowded conditions can also contribute to fungal diseases, so make sure air can circulate around your hosta plants.

The Root of the Problem
Anything that damages the roots of hostas can cause yellow and brown leaves. The damaged roots are unable to absorb nutrients and water, and as a result, the plant suffers or even dies, depending on the extent of the damage. Although hostas prefer moist, cool soils, heavy and wet soil in spring and winter can lead to root rot -- a fungal disease that rots away the roots. Well-drained soil is a must for these plants, and pots containing hostas should have a hole in the bottom to allow for good drainage. Burrowing animals, such as voles, can also damage the roots of the plants. Voles prefer to create their tunnels under lawns, mulch and areas with loose soil, so try planting your hostas among tree roots or near other underground barriers that will naturally block tunneling animals.
Let There Be Light
Many home gardeners use hostas to brighten up shady corners of their gardens, but hostas are brighter when they receive some sunlight. They key here is knowing how much is too much. Some hostas are much more tolerant of direct sunlight than others. Too much hot, direct sunlight can scorch the leaves of some varieties, causing them to turn yellow and brown. Choose varieties that can withstand the sun, such as "Sun Power" hybrids. In general, home gardeners in USDA zones 6 and above should avoid planting hostas in direct sunlight, according to the Missouri Botanical Gardens website. Making sure your hostas get enough water during hot, dry periods can also help.
Vexing Viruses
Hostas can sometimes suffer from something called "Virus X," which causes the leaves to develop dark spots, rings, browning or twisting of the leaves. Unfortunately, there is no cure for this disease. In addition, these symptoms often mimic those of spontaneous mutations, or sports, which some home gardeners find desirable. In general, however, it's best to remove plants that suffer from these symptoms, especially if they appear all over the plant. If they appear in just one section of the plant or on only a few leaves, you can just remove those leaves.

Frustrating Fungi
Fungi don't just affect the roots of hosta plants. They can also damage the stems and leaf petioles. In fact, petiole rot is a common and serious affliction of hostas. When this happens, the leaves are cut off from the main stem and are unable to receive nutrients. They turn yellow and brown, and pull away easily from the plant. Southern blight, which rots the stem, and anthracnose, which usually attacks the leaves themselves, are also fungal diseases that can cause hosta foliage to turn yellow and brown. Avoid these problems as best you can by watering at the ground level, rather than from overhead, and by watering early in the morning so that the sun can dry off the leaves. Overcrowded conditions can also contribute to fungal diseases, so make sure air can circulate around your hosta plants.
0
0
成长记
Min-Jeong Kim
2018年08月23日

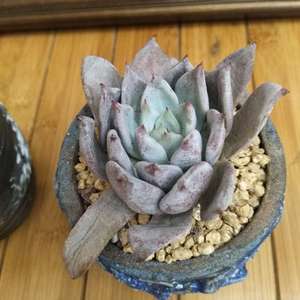
더운 여름을 지나며 돌돌말려 새로 잎이 더 나오고 있다.
제일 겉잎은 힘이 빠져 꺾였길래 잘라주었다. 남은 부분이 갈색이 되고 있음.
흙이 말라 2L 정도 물을 주었다 8/23

제일 겉잎은 힘이 빠져 꺾였길래 잘라주었다. 남은 부분이 갈색이 되고 있음.
흙이 말라 2L 정도 물을 주었다 8/23

0
0
文章
Miss Chen
2018年08月19日

Pagoda plant (Clerodendrum paniculatum) earned its common name because of the tiered, pyramidal shape of its flower clusters, which stand out against its large, heart-shaped leaves. It grows in U.S. Department of Agriculture plant hardiness zones 8 through 11, where its equally ornamental foliage and flowers brighten gardens all year. Pagoda plant requires year-round care to maintain its good looks and long-term health. Its care requirements vary by season but decrease significantly in winter.

Seasonal Watering
A pagoda plant's water needs fluctuate significantly during the year. In summer, it needs consistently moist soil and should be watered weekly or whenever the soil dries out completely on the surface. A potted pagoda plant will quickly deplete soil moisture and may need to be watered several times each week, especially if it is in an unglazed clay pot. Water until the soil feels moist in the top 2 inches, or until water trickles from the pot's drainage holes. Only use pots with drainage holes so the plant doesn't sit in soggy soil. In winter, water only if no rain falls for longer than one week or if the plant appears slightly wilted.
Fertilizer Needs
A pagoda plant is a moderately heavy feeder during summer, especially if it is in full sun. In shade, feed a pagoda plant once every two weeks with soluble fertilizer with an N-P-K number of 15-15-15 or 12-12-12. Increase the frequency to weekly for a plant in full sun. Dissolve 1/2 teaspoon of fertilizer in 1 gallon of water and apply the solution to wet soil around the base of the plant. Don't fertilize in winter to allow the pagoda plant to rest. Resume feeding in spring.
Pruning and Grooming
A pagoda plant will grow quickly in summer, which means it may crowd out less assertive plants. Prune it to restrict its size and encourage better blooming and denser foliage. Prune in summer after the last flowers have faded. Snip off any spent flowers and trim back the entire plant by up to one-half, is you wish. Before pruning, soak your shears in a disinfecting solution for five minutes, then rinse and wipe them thoroughly. Use 1 part pine oil cleaner and 3 parts water or full-strength household disinfectant as the solution.

Potential Problems
Pests, including aphids, whiteflies and spider mites, often trouble a pagoda plant, causing damage that ranges from cosmetic to catastrophic. Early detection is key to ensuring the survival of the plant, so routinely monitor it for signs of bugs such as eggs on the undersides of the leaves, honeydew and abnormally yellow leaves. Treat infestations with an insecticidal soap solution. Mix 5 tablespoons of insecticidal soap in 1 gallon of water in a pump sprayer. Saturate the foliage every four to seven days, preferably when the weather is still and cool. Although insecticidal soap is nontoxic, wear goggles and a face mask to protect your mucous membranes. Rinse off the plant two to three hours after each treatment to prevent leaf damage.

Seasonal Watering
A pagoda plant's water needs fluctuate significantly during the year. In summer, it needs consistently moist soil and should be watered weekly or whenever the soil dries out completely on the surface. A potted pagoda plant will quickly deplete soil moisture and may need to be watered several times each week, especially if it is in an unglazed clay pot. Water until the soil feels moist in the top 2 inches, or until water trickles from the pot's drainage holes. Only use pots with drainage holes so the plant doesn't sit in soggy soil. In winter, water only if no rain falls for longer than one week or if the plant appears slightly wilted.
Fertilizer Needs
A pagoda plant is a moderately heavy feeder during summer, especially if it is in full sun. In shade, feed a pagoda plant once every two weeks with soluble fertilizer with an N-P-K number of 15-15-15 or 12-12-12. Increase the frequency to weekly for a plant in full sun. Dissolve 1/2 teaspoon of fertilizer in 1 gallon of water and apply the solution to wet soil around the base of the plant. Don't fertilize in winter to allow the pagoda plant to rest. Resume feeding in spring.
Pruning and Grooming
A pagoda plant will grow quickly in summer, which means it may crowd out less assertive plants. Prune it to restrict its size and encourage better blooming and denser foliage. Prune in summer after the last flowers have faded. Snip off any spent flowers and trim back the entire plant by up to one-half, is you wish. Before pruning, soak your shears in a disinfecting solution for five minutes, then rinse and wipe them thoroughly. Use 1 part pine oil cleaner and 3 parts water or full-strength household disinfectant as the solution.

Potential Problems
Pests, including aphids, whiteflies and spider mites, often trouble a pagoda plant, causing damage that ranges from cosmetic to catastrophic. Early detection is key to ensuring the survival of the plant, so routinely monitor it for signs of bugs such as eggs on the undersides of the leaves, honeydew and abnormally yellow leaves. Treat infestations with an insecticidal soap solution. Mix 5 tablespoons of insecticidal soap in 1 gallon of water in a pump sprayer. Saturate the foliage every four to seven days, preferably when the weather is still and cool. Although insecticidal soap is nontoxic, wear goggles and a face mask to protect your mucous membranes. Rinse off the plant two to three hours after each treatment to prevent leaf damage.
0
0


