简杰
2018年09月08日

秋播9月8日
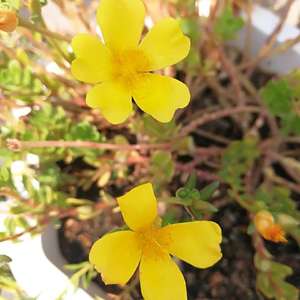
角堇:小马,天蓝,钱币
垂钓天竺葵:龙卷风
没名字的某花
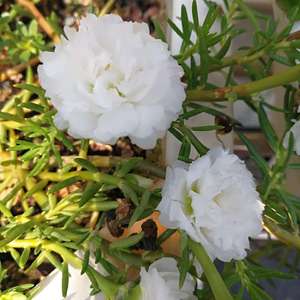
满天星:吉普赛白色,机灵鬼
百日草,马鞭草,翠菊,美女樱,非洲菊
洋桔梗7种
虞美人棉花糖
矮牵牛:晨光,小鸭
海棠高高
舞春花白色
赛船天蓝
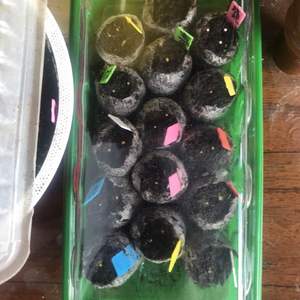
角堇:小马,天蓝,钱币
垂钓天竺葵:龙卷风
没名字的某花
满天星:吉普赛白色,机灵鬼
百日草,马鞭草,翠菊,美女樱,非洲菊
洋桔梗7种
虞美人棉花糖
矮牵牛:晨光,小鸭
海棠高高
舞春花白色
赛船天蓝

1
0
文章
Miss Chen
2018年09月07日

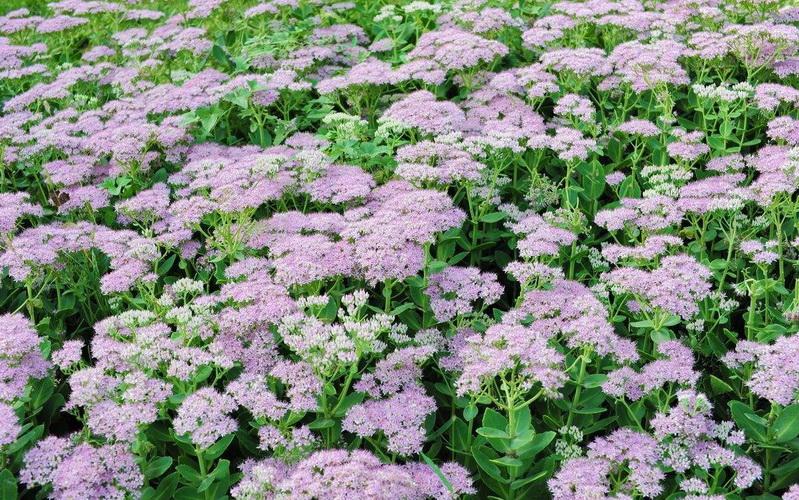
Considered one of the top perennials for fall color, "Autumn Joy" sedum (Sedum x "Autumn Joy") grows in U.S. Department of Agriculture plant hardiness zones 5 through 9. Once you have one sedum, it's easy to make more by taking stem and leaf cuttings or dividing the plant. Because "Autumn Joy" is a hybrid, seeds will not produce exact copies of the parent plant.
Cut Stems or Leaves
"Autumn Joy" sedum roots easily from stem or leaf cuttings. You can do this any time the plants are actively growing. Cuttings taken from new growth root more easily than cuttings from older stems.
Take cuttings in the early morning or late afternoon, and water the plants one hour before you take the cuttings. Make stem cuttings 2 to 6 inches long, with at least three sets of leaves. Cut the stem just below the node where a leaf joins the stem.
For leaf cuttings, remove the leaf along with the stalk that attaches the leaf to the stem. To keep them from drying out before planting, place stem and leaf cuttings in water or in a plastic bag with a damp paper towel.
Use sharp scissors or pruners to take the cuttings. Disinfect cutting tools by soaking them in a solution of 1 part bleach to 3 parts water for 5 minutes. Rinse them in clean water, and let them air-dry before use.
Plant Cuttings
Cuttings root best in a sterile, soilless potting mix. You can use a purchased seed-starting mix, or make your own for rooting cuttings by mixing equal parts river sand, perlite, and either vermiculite or peat moss. Use this mix to fill pots or planting trays with drainage holes. Water the potting mix so it is damp, and smooth the surface.
To avoid spreading disease, plant in new pots and planting trays or sterilize used pots before filling them with soil. Clean used pots and trays by scrubbing away any loose dirt, then soaking them in a solution of 1 part bleach to 9 parts water for 30 minutes. Wipe them dry before use. Always use pots and containers that have drainage holes.

For stem cuttings, use sterilized scissors or pruners to clip off the lowest set of leaves. If there are any flower buds on the cutting, remove those as well. Use a pencil to poke a hole in the potting mix, then place the cutting in the hole, firming the potting mix around the cutting so the place where you cut the leaves off is covered. For leaf cuttings, cover about 1/4 inch of the stem-end of the leaf with potting mix. There is no need to use a rooting hormone on "Autumn Joy" sedum cuttings.
Keep Them Moist
Cover the cuttings with clear plastic bags to help keep them from drying out. Some planting trays come with clear plastic domes which makes it easy to keep humidity levels high. The cuttings still need air circulation, though, so make sure there is space between the plastic and the pot or tray. Don't let the plastic touch the plant leaves.
Mist the cuttings as needed to keep the soil from drying out. You want the soil to stay moist, but not waterlogged. After two weeks, check if the stem cuttings are rooting by gently lifting the stem. If it comes free of the soil easily, replant it and check again in another week. Keep checking until the cuttings stay rooted in the soil when you gently tug at the stem.
You can tell leaf cuttings have rooted when new leaves start to emerge from the base of the leaf. Once the new stem or leaf cuttings have roots, gradually decrease the humidity by leaving the plastic off for several hours each day.
Move the Sedums Outside
The best time to plant new "Autumn Joy" sedum is in the spring after danger of frost has passed, but this plant is not picky about planting time. If you take cuttings in spring, the resulting plants can still be planted outdoors in the summer or fall. Mature plants reach 12 to 24 inches tall, and they should be spaced 12 to 18 inches apart.
A spot in full-sun is best, and "Autumn Joy" sedum will grow in any soil type as long as it drains well. Sedum is highly drought-tolerant, but water once a week for the first year if there is no rain. This encourages deep rooting.
Divide Established Plants
Once "Autumn Joy" sedum is established, divide the clumps every three to five years. This is an easy way to get new plants and to keep the sedum from becoming crowded. Divide the sedum in the spring, as soon as new growth starts to emerge from the soil. Choose an overcast day, preferably with light rain in the forecast. Water the plants the day before you plan to divide the plant.
Use a sharp spade to dig around the entire sedum clump, about 4 to 6 inches away from the base of the plant. Lift the entire clump, and shake off loose soil so you can see the root system better. Sedums form clumps, and you many need to use a sharp, large knife to divide the clump and cut through the roots. Sterilize this knife before use the same way you sterilized the pruning tools.
Replant the divisions as soon as possible. If you must delay planting, place the sedum in the shade and keep the soil moist. When you plant the new divisions, place them at the same depth they were previously growing. Firm the soil around the plants, and water thoroughly.

Cut Stems or Leaves
"Autumn Joy" sedum roots easily from stem or leaf cuttings. You can do this any time the plants are actively growing. Cuttings taken from new growth root more easily than cuttings from older stems.
Take cuttings in the early morning or late afternoon, and water the plants one hour before you take the cuttings. Make stem cuttings 2 to 6 inches long, with at least three sets of leaves. Cut the stem just below the node where a leaf joins the stem.
For leaf cuttings, remove the leaf along with the stalk that attaches the leaf to the stem. To keep them from drying out before planting, place stem and leaf cuttings in water or in a plastic bag with a damp paper towel.
Use sharp scissors or pruners to take the cuttings. Disinfect cutting tools by soaking them in a solution of 1 part bleach to 3 parts water for 5 minutes. Rinse them in clean water, and let them air-dry before use.
Plant Cuttings
Cuttings root best in a sterile, soilless potting mix. You can use a purchased seed-starting mix, or make your own for rooting cuttings by mixing equal parts river sand, perlite, and either vermiculite or peat moss. Use this mix to fill pots or planting trays with drainage holes. Water the potting mix so it is damp, and smooth the surface.
To avoid spreading disease, plant in new pots and planting trays or sterilize used pots before filling them with soil. Clean used pots and trays by scrubbing away any loose dirt, then soaking them in a solution of 1 part bleach to 9 parts water for 30 minutes. Wipe them dry before use. Always use pots and containers that have drainage holes.

For stem cuttings, use sterilized scissors or pruners to clip off the lowest set of leaves. If there are any flower buds on the cutting, remove those as well. Use a pencil to poke a hole in the potting mix, then place the cutting in the hole, firming the potting mix around the cutting so the place where you cut the leaves off is covered. For leaf cuttings, cover about 1/4 inch of the stem-end of the leaf with potting mix. There is no need to use a rooting hormone on "Autumn Joy" sedum cuttings.
Keep Them Moist
Cover the cuttings with clear plastic bags to help keep them from drying out. Some planting trays come with clear plastic domes which makes it easy to keep humidity levels high. The cuttings still need air circulation, though, so make sure there is space between the plastic and the pot or tray. Don't let the plastic touch the plant leaves.
Mist the cuttings as needed to keep the soil from drying out. You want the soil to stay moist, but not waterlogged. After two weeks, check if the stem cuttings are rooting by gently lifting the stem. If it comes free of the soil easily, replant it and check again in another week. Keep checking until the cuttings stay rooted in the soil when you gently tug at the stem.
You can tell leaf cuttings have rooted when new leaves start to emerge from the base of the leaf. Once the new stem or leaf cuttings have roots, gradually decrease the humidity by leaving the plastic off for several hours each day.
Move the Sedums Outside
The best time to plant new "Autumn Joy" sedum is in the spring after danger of frost has passed, but this plant is not picky about planting time. If you take cuttings in spring, the resulting plants can still be planted outdoors in the summer or fall. Mature plants reach 12 to 24 inches tall, and they should be spaced 12 to 18 inches apart.
A spot in full-sun is best, and "Autumn Joy" sedum will grow in any soil type as long as it drains well. Sedum is highly drought-tolerant, but water once a week for the first year if there is no rain. This encourages deep rooting.
Divide Established Plants
Once "Autumn Joy" sedum is established, divide the clumps every three to five years. This is an easy way to get new plants and to keep the sedum from becoming crowded. Divide the sedum in the spring, as soon as new growth starts to emerge from the soil. Choose an overcast day, preferably with light rain in the forecast. Water the plants the day before you plan to divide the plant.
Use a sharp spade to dig around the entire sedum clump, about 4 to 6 inches away from the base of the plant. Lift the entire clump, and shake off loose soil so you can see the root system better. Sedums form clumps, and you many need to use a sharp, large knife to divide the clump and cut through the roots. Sterilize this knife before use the same way you sterilized the pruning tools.
Replant the divisions as soon as possible. If you must delay planting, place the sedum in the shade and keep the soil moist. When you plant the new divisions, place them at the same depth they were previously growing. Firm the soil around the plants, and water thoroughly.
0
0
文章
Miss Chen
2018年09月06日

虫害分布
主要分布于中国浙江、福建等地。
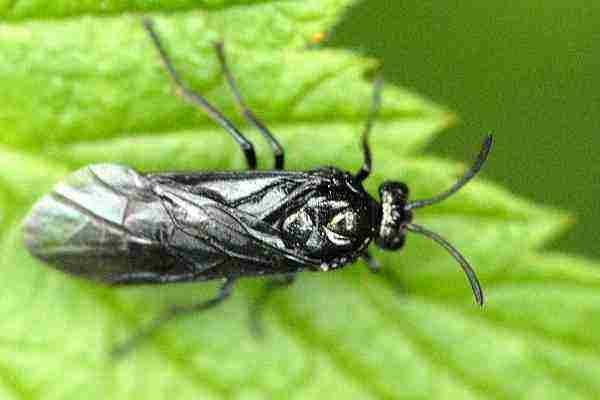
虫害形态特征
成虫
雌虫体长7-9 mm。体黑色,有天蓝色光泽。触角黑色,9节,密生黑色绒毛。前翅淡烟褐色;翅柄黑色,中央稍带黄色;翅脉黑色。前足及中足腿节尖端、胜节、第一、二跗节或第一、三胫节,后足腿节尖端、脱节均黄白色。唇基前线平直,中窝深,近圆形。触角沟深。横缝及侧缝深,冠缝隐晦。头部及胸部刻点细稀;中胸前侧片几乎无刻点。头、胸部细毛黑色。雄虫体长5-7mm。中胸后片后端刻点较密。触角9节,第三节长度与第四、第五节长度和之比为1:1:1。其余色泽及构造(外生殖器除外)同雌虫。
卵
长椭圆形,长约2 mm,宽0.8 mm。初产时为粉红色,近孵化时变为灰色。
幼虫
初孵幼虫身体淡黄色,头黑色。5龄幼虫后期,腹部气门下线处每节各有2个黑点,6龄时黑点成肉瘤状。老熟幼虫身体黄色发亮,气门黑褐色,腹部有2排横向排列的刺。
蛹
长约10 mm,刚化蛹时,身体淡黄色,足白色透明。近羽化时为揭黑色。
虫害发生规律
竹林区 1年发生1代或2代,以老熟幼虫在上中1-4 cm深处结茧变为预蛹越冬。翌年5月中旬开始化蛹,5月下旬始见成虫,6月上旬为羽化盛期,6月下旬为羽化末期;6月上旬开始产卵,中旬为产卵盛期;6月中旬卵孵化,7月中旬幼虫进入7龄,并陆续下竹入土。其中部分发生2代的老熟幼虫8月下旬开始化蛹,9月上旬开始羽化,中旬为羽化盛期,并开始产卵,9月下旬卵孵化,10月下旬幼虫老熟下竹。幼虫从竹杆上爬行下竹,至地面入土作茧静伏其中。同一批蛹雄成虫比雌成虫羽化早。
在羽化始盛期,雄成由约占78%,至盛期雌成虫的占70%。雨天基本不羽化;天气晴朗,有利于成虫羽化。雌雄性比一般为1:2.2。成虫羽化后喜成群活跃在阳光充足的东南坡毛竹、杂竹及其它植物顶部,阴天停息于叶片上,很少活动。交尾前,雌、雄成虫均在竹冠顶部成群飞舞。交尾后,卵产于毛竹或杂竹的叶肉组织内。产卵时,成虫停息在竹叶上,腹部紧贴叶片,从主脉两侧的叶片正面将卵产入。每产1粒卵移动约1mm,卵成“一”字形排列。一般每叶产卵1排偶有2排。产卵部位的叶背稍有泡状隆起。卵快孵化时,卵边缘出现小黑点。同一卵块的卵多在同一时间孵化。孵化率:第一代为50-100%,平均93%;第二代为20一100%,平均 75.4%。孵化时,幼虫多从正面咬一小孔钻出,少数从叶背钻出,不食卵壳。
幼虫孵出后即在原产卵叶上取食,全部幼虫沿叶缘排成一队,头向叶基,前一条幼虫的尾部翘在后一条幼虫的头上,从叶尖吃向叶的基部,常将叶食尽,仅留主脉,以后一起转移至另一叶片上取食。 4龄幼虫开始分散取食。幼虫蜕皮6次。蜕皮前停止取食,排尽体内粪便。蜕皮时用尾钩住被食叶的主脉或其他部位,由体中前部胀直,头亮与前胸间的旧蜕不断膨胀,伸胀几次后头壳开裂,虫体逐渐伸出。从脱裂线胀开到虫体爬出约需15分钟。脱皮后约75分钟,头壳成黑色,随即幼虫开始爬行活动。幼虫每次脱皮后,体长和头壳明显增大;而7龄幼虫体长自脱皮3-6天后缩短,此时开始爬行下竹,寻找适宜地面入土作茧。

虫害防治方法
1.加强毛竹林抚育,铲除林内或林缘蜜源植物,以断绝毛竹黑叶蜂补充营养来源。
2. 人工防治:(1)幼龄幼虫群集叶上时,可采取人工捕捉方法。(2)利用幼虫假死性,3龄后于树下铺张塑料薄膜,震动树干,收集落下幼虫拿来沤肥。
3. 生物防治可喷1亿孢子/毫升苏云金杆菌、10亿孢子/毫升白僵菌防治2—3龄幼虫。
4. 化学防治:(1)对幼龄幼虫可 用45%丙溴辛硫磷(国光依它)1000倍液,或国光乙刻(20%氰戊菊酯)1500倍液+乐克(5.7%甲维盐)2000倍混合液,40%啶虫.毒(必治)1500-2000倍液喷杀幼虫,可连用1-2次,间隔7-10天。可轮换用药,以延缓抗性的产生。(2)对于成虫可利用其取食花蜜习性,喷45%丙溴辛硫磷(国光依它)1000倍液。
主要分布于中国浙江、福建等地。

虫害形态特征
成虫
雌虫体长7-9 mm。体黑色,有天蓝色光泽。触角黑色,9节,密生黑色绒毛。前翅淡烟褐色;翅柄黑色,中央稍带黄色;翅脉黑色。前足及中足腿节尖端、胜节、第一、二跗节或第一、三胫节,后足腿节尖端、脱节均黄白色。唇基前线平直,中窝深,近圆形。触角沟深。横缝及侧缝深,冠缝隐晦。头部及胸部刻点细稀;中胸前侧片几乎无刻点。头、胸部细毛黑色。雄虫体长5-7mm。中胸后片后端刻点较密。触角9节,第三节长度与第四、第五节长度和之比为1:1:1。其余色泽及构造(外生殖器除外)同雌虫。
卵
长椭圆形,长约2 mm,宽0.8 mm。初产时为粉红色,近孵化时变为灰色。
幼虫
初孵幼虫身体淡黄色,头黑色。5龄幼虫后期,腹部气门下线处每节各有2个黑点,6龄时黑点成肉瘤状。老熟幼虫身体黄色发亮,气门黑褐色,腹部有2排横向排列的刺。
蛹
长约10 mm,刚化蛹时,身体淡黄色,足白色透明。近羽化时为揭黑色。
虫害发生规律
竹林区 1年发生1代或2代,以老熟幼虫在上中1-4 cm深处结茧变为预蛹越冬。翌年5月中旬开始化蛹,5月下旬始见成虫,6月上旬为羽化盛期,6月下旬为羽化末期;6月上旬开始产卵,中旬为产卵盛期;6月中旬卵孵化,7月中旬幼虫进入7龄,并陆续下竹入土。其中部分发生2代的老熟幼虫8月下旬开始化蛹,9月上旬开始羽化,中旬为羽化盛期,并开始产卵,9月下旬卵孵化,10月下旬幼虫老熟下竹。幼虫从竹杆上爬行下竹,至地面入土作茧静伏其中。同一批蛹雄成虫比雌成虫羽化早。
在羽化始盛期,雄成由约占78%,至盛期雌成虫的占70%。雨天基本不羽化;天气晴朗,有利于成虫羽化。雌雄性比一般为1:2.2。成虫羽化后喜成群活跃在阳光充足的东南坡毛竹、杂竹及其它植物顶部,阴天停息于叶片上,很少活动。交尾前,雌、雄成虫均在竹冠顶部成群飞舞。交尾后,卵产于毛竹或杂竹的叶肉组织内。产卵时,成虫停息在竹叶上,腹部紧贴叶片,从主脉两侧的叶片正面将卵产入。每产1粒卵移动约1mm,卵成“一”字形排列。一般每叶产卵1排偶有2排。产卵部位的叶背稍有泡状隆起。卵快孵化时,卵边缘出现小黑点。同一卵块的卵多在同一时间孵化。孵化率:第一代为50-100%,平均93%;第二代为20一100%,平均 75.4%。孵化时,幼虫多从正面咬一小孔钻出,少数从叶背钻出,不食卵壳。
幼虫孵出后即在原产卵叶上取食,全部幼虫沿叶缘排成一队,头向叶基,前一条幼虫的尾部翘在后一条幼虫的头上,从叶尖吃向叶的基部,常将叶食尽,仅留主脉,以后一起转移至另一叶片上取食。 4龄幼虫开始分散取食。幼虫蜕皮6次。蜕皮前停止取食,排尽体内粪便。蜕皮时用尾钩住被食叶的主脉或其他部位,由体中前部胀直,头亮与前胸间的旧蜕不断膨胀,伸胀几次后头壳开裂,虫体逐渐伸出。从脱裂线胀开到虫体爬出约需15分钟。脱皮后约75分钟,头壳成黑色,随即幼虫开始爬行活动。幼虫每次脱皮后,体长和头壳明显增大;而7龄幼虫体长自脱皮3-6天后缩短,此时开始爬行下竹,寻找适宜地面入土作茧。

虫害防治方法
1.加强毛竹林抚育,铲除林内或林缘蜜源植物,以断绝毛竹黑叶蜂补充营养来源。
2. 人工防治:(1)幼龄幼虫群集叶上时,可采取人工捕捉方法。(2)利用幼虫假死性,3龄后于树下铺张塑料薄膜,震动树干,收集落下幼虫拿来沤肥。
3. 生物防治可喷1亿孢子/毫升苏云金杆菌、10亿孢子/毫升白僵菌防治2—3龄幼虫。
4. 化学防治:(1)对幼龄幼虫可 用45%丙溴辛硫磷(国光依它)1000倍液,或国光乙刻(20%氰戊菊酯)1500倍液+乐克(5.7%甲维盐)2000倍混合液,40%啶虫.毒(必治)1500-2000倍液喷杀幼虫,可连用1-2次,间隔7-10天。可轮换用药,以延缓抗性的产生。(2)对于成虫可利用其取食花蜜习性,喷45%丙溴辛硫磷(国光依它)1000倍液。
0
0
文章
Miss Chen
2018年09月06日

Winter-blooming clivia (Clivia miniata) flowers in winter and early spring. The clusters of yellow and orange blossoms are surrounded by strappy green leaves. Clivia grows outdoors in U.S. Department of Agriculture plant hardiness zones 9 through 11, but it can grow as a houseplant anywhere with proper care.

Pick a Spot
Whether you grow clivia outdoors in the garden, or indoors in a pot, provide the plant with partial shade. Outdoor beds with dappled sunlight work well, while indoors you can set them in an area with bright but indirect sunlight. Clivia is prone to root rot in wet soil, so grow them in well-draining beds or use pots with bottom drainage holes. Temperatures below 32 degrees Fahrenheit kill the plant, so bring outdoor potted plants indoors before a freeze and don't allow the foliage to touch a window during cold weather.
Watering Wisely
How much water a clivia needs depends on the season. During spring and summer, water the soil when the top 1 inch feels completely dry. When watering a potted plant, allow the excess to drain from the bottom drainage in the pot and empty the drip tray afterward. Withhold water from late fall through midwinter if you want the plant to flower, because clivia only flowers in response to drought stress. During this dry rest period, keep the temperature below 60 F to further encourage blooms. Resume regular watering and increase temperatures when the flower stalk is about 6 inches tall.
Feeding Tips
Light fertilizer encourages healthy growth, whether the clivia is grown indoors or outside. Fertilize once a week in spring and summer. Dilute 1/2 teaspoon of 15-15-15 fertilizer in 1 gallon of water, and use the mixture water for one regular watering each week. Clivia doesn't need fertilizer during its dormant period in fall and winter.
Pruning Needs
Clivia doesn't require any regular pruning, but you can trim off dead or badly damaged leaves to improve the plant's appearance. Gently pull off the leaves or trim them off with shears wiped with a rubbing alcohol-soaked cloth. Potted clivia also rarely needs repotting and grows best when root bound. If the roots completely fill the pot, which happens about every three or four years, transplant it in spring to a new pot one size larger than the old one. The new pot must have bottom drainage holes. Plant the clivia at the same depth it was growing previously, and handle the roots gently to avoid damage.

Controlling Pests
Diseases rarely affect clivia, with the exception of root rot in overly wet soil. Indoors, aphids and mites may feed on the foliage, but you can rinse these off with a strong stream of water. Slugs and snails may feast on clivia foliage outdoors. Pick these off by hand and drop them into a bucket of soapy water.

Pick a Spot
Whether you grow clivia outdoors in the garden, or indoors in a pot, provide the plant with partial shade. Outdoor beds with dappled sunlight work well, while indoors you can set them in an area with bright but indirect sunlight. Clivia is prone to root rot in wet soil, so grow them in well-draining beds or use pots with bottom drainage holes. Temperatures below 32 degrees Fahrenheit kill the plant, so bring outdoor potted plants indoors before a freeze and don't allow the foliage to touch a window during cold weather.
Watering Wisely
How much water a clivia needs depends on the season. During spring and summer, water the soil when the top 1 inch feels completely dry. When watering a potted plant, allow the excess to drain from the bottom drainage in the pot and empty the drip tray afterward. Withhold water from late fall through midwinter if you want the plant to flower, because clivia only flowers in response to drought stress. During this dry rest period, keep the temperature below 60 F to further encourage blooms. Resume regular watering and increase temperatures when the flower stalk is about 6 inches tall.
Feeding Tips
Light fertilizer encourages healthy growth, whether the clivia is grown indoors or outside. Fertilize once a week in spring and summer. Dilute 1/2 teaspoon of 15-15-15 fertilizer in 1 gallon of water, and use the mixture water for one regular watering each week. Clivia doesn't need fertilizer during its dormant period in fall and winter.
Pruning Needs
Clivia doesn't require any regular pruning, but you can trim off dead or badly damaged leaves to improve the plant's appearance. Gently pull off the leaves or trim them off with shears wiped with a rubbing alcohol-soaked cloth. Potted clivia also rarely needs repotting and grows best when root bound. If the roots completely fill the pot, which happens about every three or four years, transplant it in spring to a new pot one size larger than the old one. The new pot must have bottom drainage holes. Plant the clivia at the same depth it was growing previously, and handle the roots gently to avoid damage.

Controlling Pests
Diseases rarely affect clivia, with the exception of root rot in overly wet soil. Indoors, aphids and mites may feed on the foliage, but you can rinse these off with a strong stream of water. Slugs and snails may feast on clivia foliage outdoors. Pick these off by hand and drop them into a bucket of soapy water.
1
1
文章
Miss Chen
2018年09月04日

Daylilies (Hemerocallis spp.) are named for their short-lived blooms, but these perennials can produce flowers for three to four weeks with the right care. Daylilies are hardy in U.S. Department of Agriculture plant hardiness 3 through 9 and grow 6 to 36 inches tall and 18 to 24 inches wide, depending on the variety. Watering daylilies frequently, removing their faded flowers, dividing them when crowded and growing them in full sun encourage prolific flowering.

Watering Daylilies
Continually moist soil promotes flowering in daylilies. These plants are drought-tolerant, but they flower best when they receive 1 inch of water per week, and they need more water when the weather is hot and dry.
Water daylilies thoroughly when their first flower buds appear in spring, and spread a 2-inch-thick layer of shredded leaves or other light mulch over the bare soil between plants. Water the plants again when the soil surface is dry; scrape back some mulch to check if you aren't sure about the soil's condition. Don't water the plants so much that the ground becomes soggy.
Removing Faded Flowers
Taking off faded flowers prevents daylilies from developing seeds, which encourages more blooms. Seedpods behind the faded flowers must be removed to prompt the plants to flower again.
Daylilies produce many flowers on single stems, and usually the flowers last about one day. Every two or three days, pinch off the faded flowers and developing seedpods where they join the stems. When all the flower buds on a stem have bloomed, prune the stem at its base. Sterilize pruning shear blades before and after pruning daylilies by wiping them with a cloth that was dipped in rubbing alcohol.
Dividing Daylilies
Poorly performing daylilies may be crowded, and dividing the plants usually increases blooming. Daylilies grow in fan-shaped clumps, and over time these clumps become congested. A sign of crowded plants is few flowers.
Divide daylilies in spring. Push a garden fork deeply into the ground several times around a daylily clump, levering the fork upward each time until the daylily's root ball lifts out of the ground. Using a sharp knife or two garden forks inserted back to back into the clump then pulled apart, divide the clump into three or four sections. Plant the sections 18 to 24 inches apart and at their original growing depths.

Using Full-Sun Sites
Daylilies flower best when planted in a full-sun location. Specimens growing in partially shaded spots grow well, but they flower less. Growing daylilies in areas that receive at least six hours of sunlight daily provides the most flowers, but in warm climates the plants need some light shade during the hottest part of the day.
Remove sources of shade, such as overhanging foliage, or transplant shaded daylilies to a full-sun site. Daylilies also can be replanted in a sunny spot after their clumps are divided in spring.

Watering Daylilies
Continually moist soil promotes flowering in daylilies. These plants are drought-tolerant, but they flower best when they receive 1 inch of water per week, and they need more water when the weather is hot and dry.
Water daylilies thoroughly when their first flower buds appear in spring, and spread a 2-inch-thick layer of shredded leaves or other light mulch over the bare soil between plants. Water the plants again when the soil surface is dry; scrape back some mulch to check if you aren't sure about the soil's condition. Don't water the plants so much that the ground becomes soggy.
Removing Faded Flowers
Taking off faded flowers prevents daylilies from developing seeds, which encourages more blooms. Seedpods behind the faded flowers must be removed to prompt the plants to flower again.
Daylilies produce many flowers on single stems, and usually the flowers last about one day. Every two or three days, pinch off the faded flowers and developing seedpods where they join the stems. When all the flower buds on a stem have bloomed, prune the stem at its base. Sterilize pruning shear blades before and after pruning daylilies by wiping them with a cloth that was dipped in rubbing alcohol.
Dividing Daylilies
Poorly performing daylilies may be crowded, and dividing the plants usually increases blooming. Daylilies grow in fan-shaped clumps, and over time these clumps become congested. A sign of crowded plants is few flowers.
Divide daylilies in spring. Push a garden fork deeply into the ground several times around a daylily clump, levering the fork upward each time until the daylily's root ball lifts out of the ground. Using a sharp knife or two garden forks inserted back to back into the clump then pulled apart, divide the clump into three or four sections. Plant the sections 18 to 24 inches apart and at their original growing depths.

Using Full-Sun Sites
Daylilies flower best when planted in a full-sun location. Specimens growing in partially shaded spots grow well, but they flower less. Growing daylilies in areas that receive at least six hours of sunlight daily provides the most flowers, but in warm climates the plants need some light shade during the hottest part of the day.
Remove sources of shade, such as overhanging foliage, or transplant shaded daylilies to a full-sun site. Daylilies also can be replanted in a sunny spot after their clumps are divided in spring.
0
0
文章
Miss Chen
2018年09月01日

A standby in the butterfly garden, milkweed (Asclepias syriaca), which grows in U.S. Department of Agriculture plant hardiness zones 3 through 9, provides the sole food source for monarch butterfly caterpillars. This 2 to 3-foot-tall perennial flowers through the summer and is one of several nectar sources for the adult monarch butterflies. With little required care, milkweed is a smart choice for meadows and wild areas of the yard.

Seed Control
Milkweed is best grown in naturalized areas and meadows as it tends to spread and take over more formal garden settings. You can keep it in check by plucking off all the flowers before they turn into seedpods. Use a pair of pruning shears. After clipping, rinse the blades in a solution of 1 part rubbing alcohol to 1 part water then let them dry before storing. Milkweed also spreads -- sometimes aggressively -- by its roots.
Milkweed and Larvae
Monarch butterfly caterpillars rely on the milkweed's leaves for food, but they leave holes behind when they feed. Because of this, milkweed works best in an informal garden setting where the feeding caterpillars can leave ragged-looking plants without ruining your manicured gardens. The caterpillars are easy to find with their striking yellow, white and black stripes.
Slug Problems
While resistant to disease, milkweed does attract slugs. These slow-moving, leaf-eating garden pests damage leaves and flowers when given a chance. If you notice large holes in the leaves, check for slugs -- the best time is after dark with a flashlight -- under the leaves every two to three days. Bring a bucket of water with 1 capful of dish soap added with you. As you pick off the slugs, drop them in the bucket. The soap kills the slugs, eliminating the unpleasant task of crushing them. Wear gardening gloves if you don't like touching the slugs.

Milkweed Aphids
Milkweed aphids suck sap from the plant's leaves. While natural predators usually keep aphids in check, you can use insecticidal soap for severe infestations. Spray the aphids directly with a ready-to-use product until they are saturated. Be careful not to get any on monarch butterfly caterpillars. Because milkweed is such an important plant for the monarch butterfly, avoid treatments when possible and don't use harsher chemical treatments. Sometimes simply spraying aphids with a strong jet of water is enough to get rid of them. Don't mistake the aphids for monarch eggs. Monarch butterflies commonly lay a single egg on each milkweed plant under a leaf. The milkweed aphids are yellow and generally live in colonies while the egg is and white and commonly on its own.
Winter Care and Toxicity
Milkweed plants survive the winter in cold regions by going dormant. In fall, adding a 3- to 4-inch-deep layer of mulch helps insulate the soil. While not required, this helps keep the ground from freezing and thawing and disrupting the roots. In spring, pull back the mulch to give space to the new growth. Plant milkweed away from areas where small children or pets spend time as the leaves are toxic if eaten.

Seed Control
Milkweed is best grown in naturalized areas and meadows as it tends to spread and take over more formal garden settings. You can keep it in check by plucking off all the flowers before they turn into seedpods. Use a pair of pruning shears. After clipping, rinse the blades in a solution of 1 part rubbing alcohol to 1 part water then let them dry before storing. Milkweed also spreads -- sometimes aggressively -- by its roots.
Milkweed and Larvae
Monarch butterfly caterpillars rely on the milkweed's leaves for food, but they leave holes behind when they feed. Because of this, milkweed works best in an informal garden setting where the feeding caterpillars can leave ragged-looking plants without ruining your manicured gardens. The caterpillars are easy to find with their striking yellow, white and black stripes.
Slug Problems
While resistant to disease, milkweed does attract slugs. These slow-moving, leaf-eating garden pests damage leaves and flowers when given a chance. If you notice large holes in the leaves, check for slugs -- the best time is after dark with a flashlight -- under the leaves every two to three days. Bring a bucket of water with 1 capful of dish soap added with you. As you pick off the slugs, drop them in the bucket. The soap kills the slugs, eliminating the unpleasant task of crushing them. Wear gardening gloves if you don't like touching the slugs.

Milkweed Aphids
Milkweed aphids suck sap from the plant's leaves. While natural predators usually keep aphids in check, you can use insecticidal soap for severe infestations. Spray the aphids directly with a ready-to-use product until they are saturated. Be careful not to get any on monarch butterfly caterpillars. Because milkweed is such an important plant for the monarch butterfly, avoid treatments when possible and don't use harsher chemical treatments. Sometimes simply spraying aphids with a strong jet of water is enough to get rid of them. Don't mistake the aphids for monarch eggs. Monarch butterflies commonly lay a single egg on each milkweed plant under a leaf. The milkweed aphids are yellow and generally live in colonies while the egg is and white and commonly on its own.
Winter Care and Toxicity
Milkweed plants survive the winter in cold regions by going dormant. In fall, adding a 3- to 4-inch-deep layer of mulch helps insulate the soil. While not required, this helps keep the ground from freezing and thawing and disrupting the roots. In spring, pull back the mulch to give space to the new growth. Plant milkweed away from areas where small children or pets spend time as the leaves are toxic if eaten.
0
0
文章
Miss Chen
2018年09月01日

Petunias (Petunia spp.) grow as perennials in U.S. Department of Agriculture plant hardiness zones 9 through 10 and are broken into four categories of grandiflora, multiflora, milliflora and spreading types, but they are often treated as annuals. Though a prolonged frost can kill petunias, including new transplants, established and older transplants usually can survive a light frost, according to Colorado State University Extension. Cells within plant stems and roots freeze and burst when the temperature cools quickly during a frost, which can kill tender perennials. Prompt plant protection can help petunias survive a frost, as long as the temperature below 32 degrees Fahrenheit aren't prolonged. You also can protect newly planted petunias in spring or early summer when a late frost occurs. If frost damage does occur, wait until all danger of frost has left your area before pruning affected foliage.
Wise Watering

Moisture increases humidity, and humid air and moist soil can hold warmth better than dry air. Water the petunias thoroughly the day before the expected frost, but avoid watering during the cold period because moisture on the leaves can cause damage. Irrigate potted petunia plants until the excess moisture just begins to drip from the pots' bottom drainage holes, and water petunias planted in the ground until the top 6 inches of their soil feels moist but not soggy to your touch.
Planter Protection

Potted petunias require the least effort to protect during cool temperatures. Simply take the pots indoors during the frost or move them to another protected area, such as an unheated shed or garage. Placing them under a patio awning may provide sufficient protection during a brief frost. If the pots are too heavy to move easily, then protect the petunias using the same methods as you would for petunias planted in the ground..
Mulch Matters

A layer of mulch on top of soil insulates plant roots and helps conserve warmth in the soil. Mulch can prevent petunia roots from becoming too cold during a brief frost and may even provide sufficient protection for the petunia foliage. Use dry leaves or a straw mulch for frost protection. Mound the mulch over the plants after irrigation, and completely cover the crowns, where stems and roots merge. Remove the mulch covering the crowns and foliage only after the danger of frost passes, but leave a 2-inch-thick layer of mulch over the soil to continue insulating the roots.
Creative Covers

Covering the petunias protects their flowers and foliage from a brief frost. If daytime temperatures are warm between nights with frost, then an option is to cover the petunias overnight and uncover them during the day. Insert stakes around the petunias to elevate the cover so it doesn't touch any foliage. Drape a blanket, cloth sheet or plastic over the stakes, anchoring the cover's edges to the ground with a mound of soil or small rocks. The cover will trap soil warmth and keep frost off the petunias. You also can place a string of holiday lights around the petunias and turn on the lights to generate some heat under the cover, but place the lights so they don't actually touch the cover.
Care Concerns

Warming cold petunias too quickly in the morning can result in further damage after the frost has passed. If their area receives direct morning sunlight, then vent the cover so the air doesn't warm too quickly and cause the moisture in the plant cells to overheat and the cells to burst. Remove the cover after the temperature beneath it and in the surrounding air stabilizes. If the foliage or flowers die back due to frost, then trim back the dead foliage and stems, but wipe the shears you use with a cloth soaked in isopropyl alcohol to disinfect them before pruning. The petunias will grow back from the plant crowns if the roots survived the frost.
Wise Watering

Moisture increases humidity, and humid air and moist soil can hold warmth better than dry air. Water the petunias thoroughly the day before the expected frost, but avoid watering during the cold period because moisture on the leaves can cause damage. Irrigate potted petunia plants until the excess moisture just begins to drip from the pots' bottom drainage holes, and water petunias planted in the ground until the top 6 inches of their soil feels moist but not soggy to your touch.
Planter Protection

Potted petunias require the least effort to protect during cool temperatures. Simply take the pots indoors during the frost or move them to another protected area, such as an unheated shed or garage. Placing them under a patio awning may provide sufficient protection during a brief frost. If the pots are too heavy to move easily, then protect the petunias using the same methods as you would for petunias planted in the ground..
Mulch Matters

A layer of mulch on top of soil insulates plant roots and helps conserve warmth in the soil. Mulch can prevent petunia roots from becoming too cold during a brief frost and may even provide sufficient protection for the petunia foliage. Use dry leaves or a straw mulch for frost protection. Mound the mulch over the plants after irrigation, and completely cover the crowns, where stems and roots merge. Remove the mulch covering the crowns and foliage only after the danger of frost passes, but leave a 2-inch-thick layer of mulch over the soil to continue insulating the roots.
Creative Covers

Covering the petunias protects their flowers and foliage from a brief frost. If daytime temperatures are warm between nights with frost, then an option is to cover the petunias overnight and uncover them during the day. Insert stakes around the petunias to elevate the cover so it doesn't touch any foliage. Drape a blanket, cloth sheet or plastic over the stakes, anchoring the cover's edges to the ground with a mound of soil or small rocks. The cover will trap soil warmth and keep frost off the petunias. You also can place a string of holiday lights around the petunias and turn on the lights to generate some heat under the cover, but place the lights so they don't actually touch the cover.
Care Concerns

Warming cold petunias too quickly in the morning can result in further damage after the frost has passed. If their area receives direct morning sunlight, then vent the cover so the air doesn't warm too quickly and cause the moisture in the plant cells to overheat and the cells to burst. Remove the cover after the temperature beneath it and in the surrounding air stabilizes. If the foliage or flowers die back due to frost, then trim back the dead foliage and stems, but wipe the shears you use with a cloth soaked in isopropyl alcohol to disinfect them before pruning. The petunias will grow back from the plant crowns if the roots survived the frost.
0
0
文章
Miss Chen
2018年08月31日

Hellebore is the common spelling for Helleborus spp., a genus of flowering perennials that grow in U.S. Department of Agriculture plant hardiness zones 3 through 9, depending on species. Ideally, transplant hellebores during their dormant period in fall. The popular variety lenten rose (Helleborus orientalis), hardy in USDA zones 4 through 9, adapts most readily to transplanting. Regardless of species, it may take two to three years for plants to fully recover after a move and start blooming with their previous abundance.

Relocation and Bed Preparation
Ideally, transplant hellebores at one or two years old. You can still transplant more mature, established hellebores, but success rate and recovery time will vary.
Hellebores thrive in light shade and moist, organically rich soil. Before transplanting, prepare the bed at the new location by mixing compost with the soil. Use a 2- to 3-inch-thick layer spread evenly over the bed, then dig it 12 inches deep into the soil. Adding the compost before transplanting hellebores provides the high amount organic matter these perennials enjoy.
There's no need to cut back hellebores before transplanting.
Digging and Transplanting
Use a shovel to dig out and lift the root ball from the soil. To get enough of the roots, look at the drip line -- the soil under the outer leaf tips -- and dig the root ball the same diameter.
Dig a hole at the new planting site the same depth and slightly wider than the root mass.
Set the hellebore in the hole -- adjust the soil level at the bottom until the point where the roots meet the stem sits level with the soil -- then fill in around the root ball. Use the same soil you just dug out to fill the hole.
Water and Mulching
Water right after transplanting. This settles the soil, minimizes transplant shock and helps the roots adapt quickly to the new environment. Water when the top of the soil feels dry through any remaining dry fall weather.

Mulch the bed to keep the soil moist after transplanting. The mulch layer also provides some cold protection over winter. Use 2 to 3 inches of compost spread evenly over the soil but leave 1 to 2 inches of space between the hellebore stalks and the compost. This helps minimize rot and insect problems.

Transplanting Seedlings
When mature hellebores go to seed after flowering, new seedlings grow the following spring near the parent plant. You can transplant these seedlings in the spring, either into pots or to fill out new areas of the garden. Transplant them when they are big enough to handle, and before new foliage on the parent plant blocks the sun. Dig out the seedlings with a small trowel, being careful not to disrupt the root ball. Replant them in moist soil and light shade.
To plant the seedlings in pots, select containers at least 8 inches in diameter with drainage holes, filled with potting soil.

Relocation and Bed Preparation
Ideally, transplant hellebores at one or two years old. You can still transplant more mature, established hellebores, but success rate and recovery time will vary.
Hellebores thrive in light shade and moist, organically rich soil. Before transplanting, prepare the bed at the new location by mixing compost with the soil. Use a 2- to 3-inch-thick layer spread evenly over the bed, then dig it 12 inches deep into the soil. Adding the compost before transplanting hellebores provides the high amount organic matter these perennials enjoy.
There's no need to cut back hellebores before transplanting.
Digging and Transplanting
Use a shovel to dig out and lift the root ball from the soil. To get enough of the roots, look at the drip line -- the soil under the outer leaf tips -- and dig the root ball the same diameter.
Dig a hole at the new planting site the same depth and slightly wider than the root mass.
Set the hellebore in the hole -- adjust the soil level at the bottom until the point where the roots meet the stem sits level with the soil -- then fill in around the root ball. Use the same soil you just dug out to fill the hole.
Water and Mulching
Water right after transplanting. This settles the soil, minimizes transplant shock and helps the roots adapt quickly to the new environment. Water when the top of the soil feels dry through any remaining dry fall weather.

Mulch the bed to keep the soil moist after transplanting. The mulch layer also provides some cold protection over winter. Use 2 to 3 inches of compost spread evenly over the soil but leave 1 to 2 inches of space between the hellebore stalks and the compost. This helps minimize rot and insect problems.

Transplanting Seedlings
When mature hellebores go to seed after flowering, new seedlings grow the following spring near the parent plant. You can transplant these seedlings in the spring, either into pots or to fill out new areas of the garden. Transplant them when they are big enough to handle, and before new foliage on the parent plant blocks the sun. Dig out the seedlings with a small trowel, being careful not to disrupt the root ball. Replant them in moist soil and light shade.
To plant the seedlings in pots, select containers at least 8 inches in diameter with drainage holes, filled with potting soil.
0
0
文章
Miss Chen
2018年08月30日

Shasta daisies (Leucanthemum X superbum) are undemanding plants, but pruning encourages more flowers and stronger growth. These perennials grow in U.S. Department of Agriculture plant hardiness zones 5 through 9, and thrive in full sun and well-drained, alkaline soils. They benefit from pruning from mid-summer onward, and dividing plants also encourages healthy growth. Shasta daisies grow 2 to 3 feet tall and 1 1/2 to 2 feet wide, depending on the cultivar.

Fading Flowers
Pruning Shasta daisy blooms as they fade encourages more flowers. Shasta daisies can flower less after they set seed, but removing the flowers before seeds develop prompts the plants to bloom again. Sterilize your pruning shear blades by wiping them with rubbing alcohol, and prune Shasta daisies when their petals droop and turn brown. Hold the flower in one hand and feel down to the base of the flower stem with the other hand. Prune the stem at the base, and remove the other fading blooms in the same way. Sterilize your pruning shears again after use.
Summer Pruning
Shasta daises benefit from pruning when the earliest blooms start to fade. Check your Shasta daisies every week, and prune fading flowers until late summer or the end of blooming. If the soil surface is dry after pruning, water plants until the water begins to puddle on the ground, and feed them with a liquid 15-30-15 fertilizer, which encourages more blooms. Dilute the product at a rate of 1 tablespoon per 1 gallon of water and apply it every 14 days, or dilute and apply the product according to the instructions on the label.
Pruning Clumps
Severely pruning Shasta daisy clumps in early fall can prolong their lives. Shasta daisies are short-lived perennials, but removing their leaves and stems when flowering is over encourages strong growth, which helps plants store energy for winter. Prune Shasta daisies to 8 inches tall, using sterilized pruning shears, and put the trimmings on the compost pile or in the trash. If your plants are too tall and lanky, pinch out the tips of non-flowering stems with your thumb and forefinger in spring to encourage them to grow more compact and bushy.

Lifting and Dividing
Lift and divide Shasta daisies every two or three years to encourage strong, healthy growth and flowering. Dig up a Shasta daisy plant on a cool, cloudy day in winter or early spring by pushing a garden fork into the soil about 6 inches from the plant base and gently levering it up. Do this three or four times around the base until the root ball lifts out of the soil. Divide the plant into three sections by pushing a sharp spade down through the roots, and plant the sections 24 to 36 inches apart at their original growing depths. Water the plants thoroughly and continue to water them regularly so that the soil stays moist.

Fading Flowers
Pruning Shasta daisy blooms as they fade encourages more flowers. Shasta daisies can flower less after they set seed, but removing the flowers before seeds develop prompts the plants to bloom again. Sterilize your pruning shear blades by wiping them with rubbing alcohol, and prune Shasta daisies when their petals droop and turn brown. Hold the flower in one hand and feel down to the base of the flower stem with the other hand. Prune the stem at the base, and remove the other fading blooms in the same way. Sterilize your pruning shears again after use.
Summer Pruning
Shasta daises benefit from pruning when the earliest blooms start to fade. Check your Shasta daisies every week, and prune fading flowers until late summer or the end of blooming. If the soil surface is dry after pruning, water plants until the water begins to puddle on the ground, and feed them with a liquid 15-30-15 fertilizer, which encourages more blooms. Dilute the product at a rate of 1 tablespoon per 1 gallon of water and apply it every 14 days, or dilute and apply the product according to the instructions on the label.
Pruning Clumps
Severely pruning Shasta daisy clumps in early fall can prolong their lives. Shasta daisies are short-lived perennials, but removing their leaves and stems when flowering is over encourages strong growth, which helps plants store energy for winter. Prune Shasta daisies to 8 inches tall, using sterilized pruning shears, and put the trimmings on the compost pile or in the trash. If your plants are too tall and lanky, pinch out the tips of non-flowering stems with your thumb and forefinger in spring to encourage them to grow more compact and bushy.

Lifting and Dividing
Lift and divide Shasta daisies every two or three years to encourage strong, healthy growth and flowering. Dig up a Shasta daisy plant on a cool, cloudy day in winter or early spring by pushing a garden fork into the soil about 6 inches from the plant base and gently levering it up. Do this three or four times around the base until the root ball lifts out of the soil. Divide the plant into three sections by pushing a sharp spade down through the roots, and plant the sections 24 to 36 inches apart at their original growing depths. Water the plants thoroughly and continue to water them regularly so that the soil stays moist.
0
0


