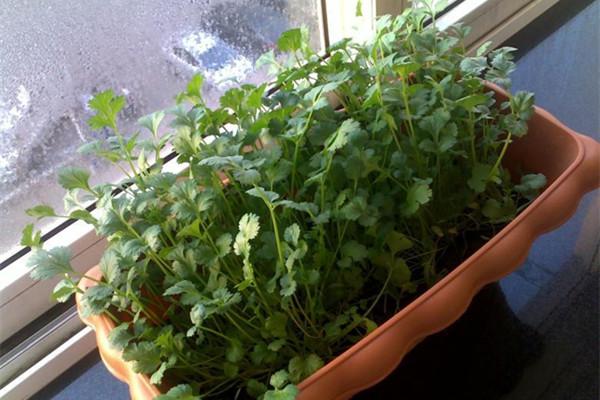
播种时间
#香菜 籽最佳的种植时间为9~10月,当然春季也可以,南方全年都可播种哦!不过当温度过高时,需要将种子浸泡24小时后在20~25℃的环境下催芽,不然很难出苗的!
具体方法
选种:香菜种子较小,很难分得出好坏。所以建议直接去购买,品种靠运气。
压种:将香菜种子轻轻压裂,轻轻地就好,不要将种子压扁。压种是为了更好的发芽,而不是破坏种子。
浸种:将种子放到40度温水中浸泡6小时 (在温水中,沉睡的种子会被唤醒。)
备土:将准备好的土倒入容器中,浇透水,备用。
播种:将种子洒在土中,盖上一层薄土。1厘米左右。至于种子的密度随意一点。
发芽:待种子发芽后,放在太阳下晒晒太阳,早晚浇水。一个月左右就能长出小嫩苗。

香菜育苗小贴示:
香菜籽通常一周左右就发芽,若没有发芽,可以考虑是否养护不周缺水而未发芽,确认后重新补种。
栽种后要经常浇水,保持盆土湿润。
冬天种植要放在室内或封闭性的阳台,室温要达到185℃。

在家种植香菜的好处是做饭时可以随时掐点叶子,很方便,吃在嘴里很有成就感,脸上何止惬意两字。种植香菜就这么简单。


▼栽培#カレンダー
時期
1月
2月
3月
4月
5月
6月
7月
8月
9月
10月
11月
12月
種まき
植え替え
剪定(通年)
開花
収穫
肥料
目次
ボトルツリー(ブラキキトン)の基本情報
ボトルツリー(ブラキキトン)の育て方
ボトルツリー(ブラキキトン)の育て方|まとめ
ボトルツリー(ブラキキトン)のちょっといい話
ボトルツリーの基本情報
ボトルツリーは近年人気の観葉植物です。特徴的なのはその見た目。根からぷっくりと膨らんだ木の幹。そして幹の中心から急に細くスリムな幹へと変化します。太い形から細い形へ変化する幹。そのシルエットが何かに似ている…そうだ!ワインボトルだ!と気づき「ボトルツリー」という名前を命名されました。幹から枝は横に広がりキノコの様なシルエットにもなります。緑の葉を茂らすボトルツリーですが初夏から黄色い花を咲かせるのも特徴です。大きさはなんと約20mにも及びます。若い木はまだ細いですが、樹齢を重ねるごとに株元はぷっくりと膨れていきさらにボトル感が増していきます。

ボトルツリーの基本情報科・属アオギリ科ブラキキトン属英名Queensland bottle tree(クイーンズランド・ボトルツリー)学名Brachychiton rupestris(ブラキキトン・ルベストリス)原産地オーストラリア出回り時期4月~8月育てやすさ
ボトルツリーの種類・品種
ボトルツリーで良く見かけるのは枝を幅広く茂らす姿。同じブラキキトン属にはそのようなシルエットのものにゴウシュウアオギリという種類が存在します。こちらも花を咲かせますがボトルツリーの黄色ではなく、赤色です。反対に、縦方向に向かって成長するボトルツリーがあります。その名前はクイーンズランドボトルツリー。成長すると20mを超しますが、手入れ次第で1mにも抑えることが出来ます。ボトルツリーはこれらを始めとした約30種類が存在していると言われています。
ボトルツリー(ブラキキトン)の育て方用土
水はけのよい土を使います
鉢植えで育てる場合の用土は水はけのよいものが向いています。市販の観葉植物用の用土を使用しても問題ありませんがパーライトや軽石を1割くらい混ぜて使うとよいでしょう。また配合する場合は赤玉小土、腐葉土を7:3の割合で作るのがベストでしょう。耐寒性は弱いので地植えは向きません。ボトルツリーは鉢植えで育てることが良いでしょう。
苗の選び方
ボトルツリーの苗は、発芽し始めた若いものから、木として成しているものまで大きさにばらつきがあります。初心者の方はある程度育っている苗を購入すると育てやすいでしょう。青々とした木であり、ポッドが深めの物を選ぶと苗から丁寧に育てたものだとわかります。
植え付け・植え替え
準備する鉢は苗よりも一回り大きい物を準備しましょう。根が十分に張れないとボトルツリーの成長を妨げることになります。但し、この時大きすぎる鉢にしてしまうと逆に成長しすぎてしまう場合があります。自分の育てたい大きさを考慮して鉢の大きさを選んでください。
水やり
冬場は乾燥気味に育てます。
水やりはが乾いてからやるのが基本ですが、特に冬の期間は水を与える頻度を極端に少なくしても大丈夫です。土が乾いて数日経ってから与えるくらいの頻度でちょうど良いです。
追肥
追肥を行うのは初夏~夏にかけてで良いでしょう。冬は成長がゆっくりになる時期なので追肥を施さなくても良いです。夏の時期に与える追肥は液体肥料を月に2回程度上げれば良いでしょう。葉の肌艶が良くなります。
剪定
ボトルツリーは一年中、葉が生えている常緑性高木です。いつでも葉が茂っているので、成長に合わせて剪定を行って下さい。葉が折り重なって互いの成長を邪魔するなどが見られた時に剪定を行えば大丈夫です。
病害虫アブラムシ・カイガラムシ
ボトルツリーを育てる場合、害虫の存在に気を付けてください。見つけ次第除去しましょう。冬季に予防剤を蒔いておくと効果的です。
アブラムシ
アブラムシは3月から5月に多く発生する害虫です。新芽や茎、若い葉や葉の裏にくっついて吸汁して株を弱らせます。春から秋に発生するので見つけ次第、駆除しましょう。
カイガラムシ
カイガラムシがつくと樹液を吸われてしまい、株が弱り生育も悪くなり衰え枯れてしまいます。カイガラムシは国内で約400種が発見されており、大きさや形なども様々であり、カイガラがあるのとないものもいます。野菜や果樹、草花、サボテン、ラン、観葉植物と様々な植物に発生し、吸汁(きゅうじゅう)します。
ボトルツリー(ブラキキトン)の育て方|まとめ
・用土は観葉植物用用土でも使用可能です。配合する場合は赤玉小土と腐葉土を7:3 の割合で作りましょう。
・植え付けの際は一回り大きい鉢を準備し、根の成長を妨げないようにしましょう!
・冬は水やりを控えて。夏は土が乾いたら水をやりましょう。
ボトルツリーのちょっといい話寒暖の落差に弱いボトルツリー
暖かい地域が原産のボトルツリー。どうしても、著しい気温の変化には対応できません。暖かい気温は比較的強いです。寧ろ思い切り直射日光を浴びせてあげるとグングン成長します。ボトルツリーは太陽が大好きなのです。乾いた空気などにも耐えることが出来ます。しかし、それとは反対の寒さにはどうしても弱ってしまいます。15度を下回ると元気がなくなっていきます。更に10度を下回ると成長が止まり、5度以下になると枯れてしまうのです。冬は室内または暖かく風の通らない場所で管理して育ててください。冬を乗り越えればまた一年元気に育ってくれますよ。
生のボトルツリーを見て見たい!
今では家庭の中で育てられる観葉植物として人気のボトルツリー。成長すると20mを超す長巨大木です。しかし、そんな立派な姿中々日本ではお目に掛かれませんよね…。では、いったいどこに行けば巨大ボトルツリーが見られるのでしょうか。いくつかの国をご紹介します。まずお隣中国、広東省の郊外住宅地に植えられています。また、タイの自然公園でも巨大なボトルツリーが連なっているのが見れますよ。もっと広大な地で見たい!と希望ならやはり原産国のオーストラリアは外せないでしょう。クイーンズランド州はオーストラリアで2番目に大きい州でゴールドコーストがあります。ここでなら確実に大きなボトルツリーが見れますよ!
他の育て方の記事はこちら。LOVEGREEN育て方記事一覧
花・植物を、もっと楽しみたい!!室内で楽しもう!

症状:
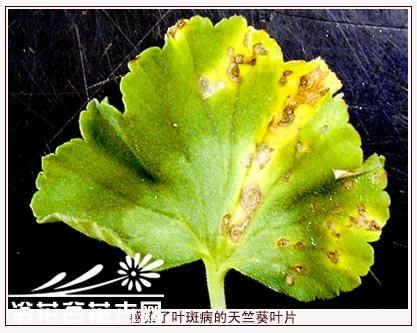
①鸡冠花叶斑病,侵染叶片、叶柄和茎部。叶上病斑圆形,后扩大呈不规则状大病斑,并产生轮纹,病斑由红褐色变为黑褐色,中央灰褐色。茎和叶柄上病斑褐色、长条形。
②鱼尾葵叶斑病。叶片上产生黑褐色小圆斑,后扩大或病斑连片呈不规则大斑块,边缘略微隆起,叶两面散生小黑点。
③君子兰叶斑病。叶上有椭圆型、长条形浅红褐色病斑,周围有退绿圈,后扩大呈不规则大斑块,病斑上产生黑点。
发病规律:叶斑病菌在病残体或随之到地表层越冬,翌年发病期随风、雨传播侵染寄主。鸡冠花褐斑病夏秋病重,鱼尾葵叶斑病夏季高温病重,君子兰叶斑病春、秋发生,但温室中四季均可发生。连作、过度密植、通风不良、湿度过大均有利于发病。
防治方法:
①及时除去病组织,集中烧毁。
②轮作(温室内可换土)。
③不宜对植株喷浇。
④从发病初期开始喷药,防止病害扩展蔓延。常用药剂有25%多菌灵可湿性粉剂300-600倍液,50%托布津1000倍,70%代森锰500倍、80%代森锰锌400-600倍,50%克菌丹500倍等。要注意药剂的交替使用,以免病菌产生抗药性。

#褐斑病 :叶片染病后,初现淡黄色小点,扩大下陷,最后形成近圆形中央灰白色,边缘暗褐色白病斑,具轮纹,直径1-5毫米,表面产生淡黑色霉状物。病菌在病叶残体中过冬,6-8月发病重,可用1%波尔多液或75%百菌清600倍防治。
#病毒病 :表现花叶、褪绿、矮化等症状。毒原为小丽花花叶病毒,黄瓜花叶病毒,番茄斑萎病毒,烟草线条病毒等,叶蝉与蚜虫传毒,防治上可选用无毒繁殖材料,防治传毒昆虫。
#螟蛾 :幼虫淡黄色或淡红色,年发生2-3代,幼虫为害期6-8月,可喷50%杀螟松1000倍,如虫蛀人茎中,可注射氧化乐果100-200倍。

#栽培カレンダー
時期
1月
2月
3月
4月
5月
6月
7月
8月
9月
10月
11月
12月
種まき
植え付け
植え替え
剪定
開花
収穫
肥料
目次
ドラゴンフルーツの基本情報
ドラゴンフルーツの育て方
ドラゴンフルーツの育て方 まとめ
ドラゴンフルーツのその他色々
ドラゴンフルーツの基本情報
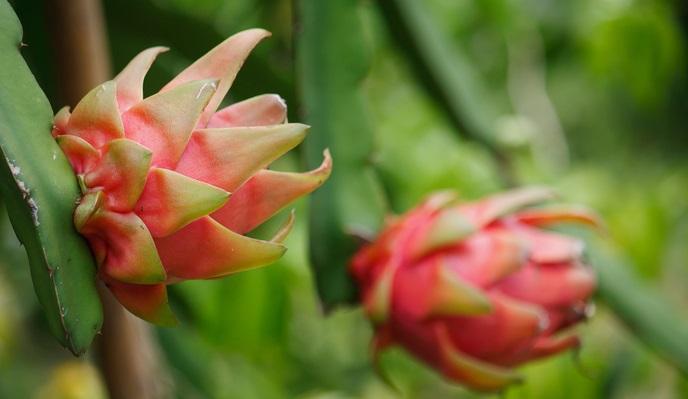
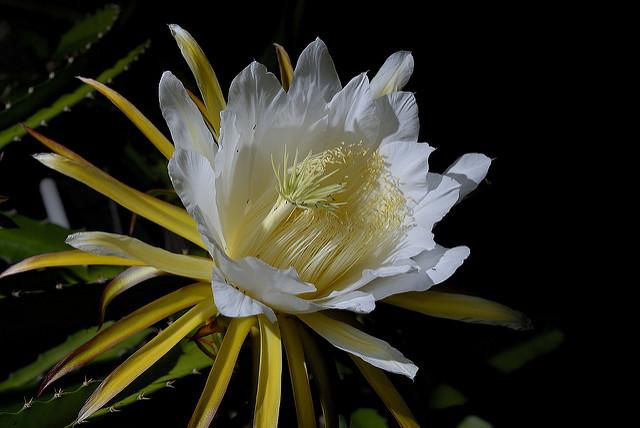
熱帯地域に生息する森林性サボテンの一種で茎の太さは4~7センチほどになりよく分枝します。気根を出して近くの木などに絡まりながら最大で10メートル以上にまで生長します。 夜に大きさ30センチほどの月下美人に似た花を咲かせ、強い芳香があります。午後8時~9時ごろに開花し翌朝にはしぼむ一日花です。丈夫でそれほど手間がかからないので家庭でも結実させることができ、沖縄以外の温暖な地域でも徐々に栽培されてきています。果皮が龍のうろこのように見えるので「ドラゴンフルーツ」と呼ばれ別名を「ピタヤ」といいます。果肉の中にはごまのような種子が散らばっていて、味はさっぱりとして酸味はほとんどありません。
ドラゴンフルーツの基本情報科・属サボテン科ヒロケレウス属英名Dragon fruit・Pitaya学名Hylicereus undatus原産地中米出回り時期4月~6月育てやすさ★★☆☆☆
ドラゴンフルーツの種類・品種
赤い果皮で半透明色の果肉を持ち最も流通量が多い「ホワイトピタヤ」、赤い果皮に赤紫色の果肉を持つ品種「レッドピタヤ」、果肉が淡いピンク色の「ピンクピタヤ」、果皮が黄色くうろこ状になっている「ゴールデンドラゴン」、黄色い果皮でごつごつとしていてとげが生えている「イエローピタヤ」などがあります。
ドラゴンフルーツの育て方用土
鉢植えの場合は市販のサボテン培養土だと少し水はけが良すぎることがあるので、赤玉土4:鹿沼土3:腐葉土2:バーミキュライト1の割合で配合しましょう。
種まき
果実の中からタネを取り出し果肉を水で洗い落とし種まき用土にまいて水やりをします。20度以上であれば発芽率は高いです。
苗の選び方
品種によって最低温度に差があり、食味にも違いがあるので適したものを選びましょう。また茎に傷がないかを確認します。
植え付け
風通しが良く日光が良く当たる場所にできるだけ根鉢の土をつけたまま植え付けましょう。直射日光が強すぎると葉やけすることがありますので注意しましょう。水やりは植え付け後数日してから行います。
水やり
土の表面が乾いたらたっぷりとやります。過湿にすると根ぐされをおこしやすいので注意します。冬場10度以下に温度が下がる場合は水をやらずに管理します。
追肥
春から秋の生育期に肥料の三要素が均等に入ったものか、ややリン酸が多いものをほどこすと実つきが良くなります。
剪定
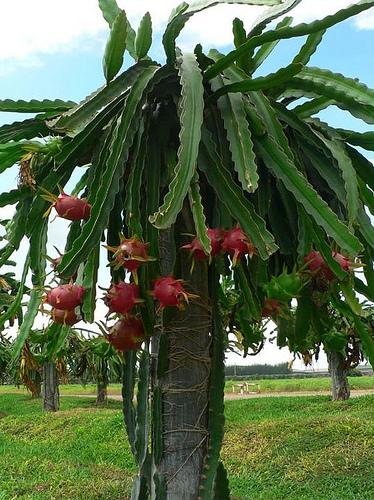
主幹を決めたら1.5mほど伸ばし、摘芯します。わき芽が数本伸びたら垂れさがるようにし、50センチほど伸びたらさらに摘芯してわき芽を伸ばします。これを繰り返して傘のように仕立てます。下向きの枝はひもで固定し下垂させると実つきがよくなるといわれています。3月には若枝をすべて摘芯して残った枝を充実させるようにします。
収穫
花が散った後3週間で15センチほどの大きさになります。完熟の目安は開花後40~60日といわれています。 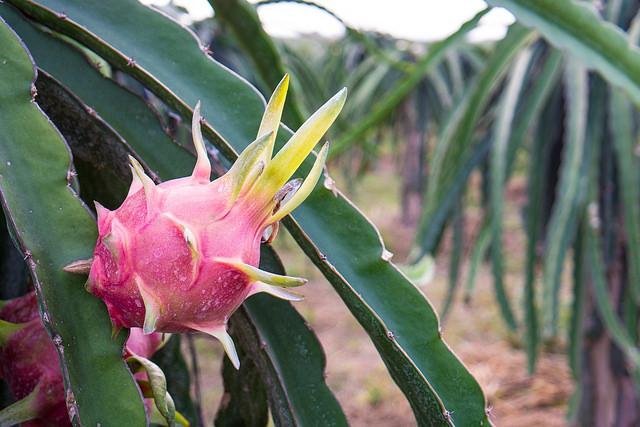
病害虫
病害虫には比較的強いですがアブラムシやカイガラムシが発生することがあります。風通しを良くし、日光にできるだけあてましょう。また過湿にすると立枯病が発生する事があります。
アブラムシ
アブラムシは3月から5月に多く発生する害虫です。新芽や茎、若い葉や葉の裏にくっついて吸汁して株を弱らせます。春から秋に発生するので見つけ次第、駆除しましょう。
カイガラムシ
カイガラムシがつくと樹液を吸われてしまい、株が弱り生育も悪くなり衰え枯れてしまいます。カイガラムシは国内で約400種が発見されており、大きさや形なども様々であり、カイガラがあるのとないものもいます。野菜や果樹、草花、サボテン、ラン、観葉植物と様々な植物に発生し、吸汁(きゅうじゅう)します。
立枯病
初期症状は葉枯れ病とほとんど同じで、葉に円形や楕円形の赤褐色の小斑点ができ、斑点の中心部はやや淡い褐色となってくぼんでしまいます。カビが原因の病気です。株全体が萎れてしまい、根元近くからだんだんと黄色く変色してやがて腐ってしまいます。葉には紫褐色の病斑が現れて枯れ落ち、花が咲く前に蕾の状態で褐色になり枯れ死してしまいます。
ドラゴンフルーツの育て方|まとめ
・結実させるには仕立て方が重要です。主枝を支柱(トレリスなど)の先端まで誘引し、先端部分から4~5本分枝させてそれぞれの枝が下垂するようにひもなどで誘引します。新芽は随時取り除きます。
・結実率をあげるには夜に開花した時に筆などで人工授粉してやるとよいでしょう 。
・1~2年に1回は植え替えをしてやるとよく生長します。
・冬越しは最低温度が8度以上になるように保ち、冬場の水やりは控えましょう。
ドラゴンフルーツのその他色々ドラゴンフルーツに含まれる栄養成分
ドラゴンフルーツは果物の中でもっとも多くのマグネシウムを含みます。また、ナトリウムの排出を促すカリウムも多いので高血圧の予防に効果があるといわれています。葉酸も多いので妊婦さんや貧血気味の人にもオススメです。レッドピタヤの独特な赤い果肉に含まれる「ベタシアニン」という色素は抗酸化作用のあるポリフェノールの一種なのでがんなどの抑制効果も期待されています。
美味しいドラゴンフルーツの見分け方と保存方法
ドラゴンフルーツは追熟しないので収穫したら出来るだけ早くたべるようにし、購入する場合もできるだけ新鮮なものを選びましょう。ドラゴンフルーツの糖の主成分はブドウ糖なので甘味を感じにくいです。一方イエローピタヤには果糖やしょ糖が含まれるので甘く感じます。保存方法は果実をビニール袋にいれて野菜室で保存します。日持ちがしないのでなるべく早くたべましょう。
ドラゴンフルーツの増やし方
種まきだと開花まで3~4年かかりますがドラゴンフルーツは挿し木で増やすと1~2年で開花します。4月~9月に長さ20センチほどの枝を切り取り、切り口を日陰で2~3日乾かした後に鹿沼土などの清潔な土にさします。水をやりすぎず乾燥気味に管理すると比較的容易に発根します。 


#栽培カレンダー
時期
1月
2月
3月
4月
5月
6月
7月
8月
9月
10月
11月
12月
植え替え
肥料
目次
ペペロミアの基本情報
ペペロミアの育て方
ペペロミアの育て方 まとめ
ペペロミアのその他色々
ペペロミアの基本情報
熱帯地域を中心に千種類ほどの原種があるといわれるコショウ科を代表するグループで匍匐性から直立性、ロゼットタイプ、着生植物まで様々な形態がある常緑多年草です。
小型の種類が多く多肉質の葉や茎をもち管理しやすいのでインテリアグリーンとして人気があります。葉の模様や色、草姿などが個性的なものも多く国内でも多くの種類が栽培されています。仕立て方もさまざまでヘゴ付けにしたり、茎が匍匐するタイプはつり鉢にしたり、小型品種はミニ観葉として楽しみます。乾燥には強いのですが多湿を好むので葉にまめに霧吹きをしてやるとよく育ちます。ペペロミアは「コショウに似た」という意味があります。
ペペロミアの基本情報
科・属コショウ科サダソウ属英名Peperomia学名Peperomia原産地世界中の熱帯から亜熱帯出回り時期5月~9月育てやすさ★★★★☆
ペペロミアの種類・品種
葉にちりめん状のしわがある「ペペロミア・カペラタ」、すいか葉ペペロミアやシマアオイソウの別名がある「ペペロミア・アルギレア」、光沢のある緑葉で最もポピュラーな「ペペロミア・オブツシフォリア」、 金属光沢のある灰緑色の葉をもつ「ペペロミア・グリセオアルゲンテア」、その中でも「ホワイトエメラルド」は白色の覆輪が入ります。 豆の莢のような細長い多肉質の葉をもつ「ペペロミア・フェレイラエ」、直立タイプの小型種でよく枝分かれする「ペペロミア・オルバ」など葉色や形状の幅が広いのが特徴です。

ペペロミアの育て方用土
排水の良い土を好みます。鉢底石を敷いてから赤玉土6:腐葉土2:川砂2の割合で配合した用土に植え付けを行います。
苗の選び方
同じ種類であれば葉の数が多く、下葉までついた締まった苗が良いです。葉に艶があり、多肉質の茎が細くなったりしていないもの、病害虫のないものを選びましょう。
植え付け
屋内での冬越しが必要なため鉢で栽培します。耐陰性が強く室内の明るい場所で栽培します。夏の強い光で葉やけを起こすので注意が必要です。逆に光が足りないと斑が弱くなったり葉の光沢がなくなったり節間が間延びしたりします。
水やり
葉や茎が多肉質で水分を貯めているので乾燥に強く、過湿によわいので土の表面が乾いてから数日経って水やりをします。ときどき葉水をしてやるとよいでしょう。
追肥
特に必要ありませんが施す場合は5~9月の生育期に規定の倍率よりもさらに薄めた液体肥料を与えます。多肥は厳禁です。
病害虫
カイガラムシがつくことがあるので見つけ次第歯ブラシでこすり落とすか薬剤散布で対応します。ハダニは予防のためときどき葉裏にも水をかけます。病気は疫病や細菌病が発生します。発見したら葉を取り除きましょう。
ペペロミアの育て方 まとめ
・置き場所は春と秋はレースのカーテン越し、夏は半日陰におきましょう。強い光線による葉やけに注意が必要です。ただし光が足りないと斑が弱くなったり葉の光沢がなくなり、節間が間延びしてしまいます。ちょうど良い場所を見つけましょう。
・水やりは控えめにし、乾燥気味に育てますが空気中の多湿を好むので葉にまめに霧吹きをしてやるとよく育ちます。
・冬越しは水を控え乾燥気味にすれば5度以上で越冬します。室内でガラス越しの光線に当てるようにしましょう
・害虫はカイガラムシとハダニが発生しますので風通し良く管理し、ときどき株全体に葉水をかけるのがポイントです。

ペペロミアのその他色々
植え替えの方法
植え替えは5月~8月が適期です。鉢から抜き、鉢土を3分の1ほど落として黒くなった古い根や古い土を落とし、脇芽や傷んだ茎や葉も整理します。茎は根元から5センチくらいまで切り戻してから新しい用土に植え付けます。その後は風の当たらない半日陰におき水やりは最初の1~2週間は鉢土が白っぽく乾いてから与えます。
ペペロミアの挿し木と葉ざしの方法
5月~8月が挿し芽や葉ざしの適期です。挿し木は赤玉土の小粒を平鉢に入れ、4~5節つけて切った挿し穂をつけ根の葉を取り除いてから挿します。約1カ月ほどで発根し、新芽が4~5枚になったら鉢上げします。葉挿しの場合は葉柄の部分を1~2センチ残して切り取り、バーミキュライトをいれた平鉢などに葉柄が埋まる深さまで挿します。どちらも腐りにくくするために発根促進剤を切り口にぬってもよいでしょう。管理は日陰で乾かしすぎないように水やりしながら管理をします。発根したら少しずつ明るい場所へ移動させます。ペペロミアは多肉質なので根ぐされなどで株が傷んでもすぐに枯れることはありません。調子が悪くなった株も挿し芽や葉ざしで復活させることができます。
ペペロミアの目立たない花
ひも形の穂状に小さな花がたくさんつきますが花弁がないのでひとつひとつは目立ちません。色は黄色、茶色、緑色ですが一見ツルが伸びたような花らしくない見かけなので花が咲いたことに気づかれていない方も多いかもしれません。


時期
1月
2月
3月
4月
5月
6月
7月
8月
9月
10月
11月
12月
植え替え
目次
ハオルシア・オブツーサの基本情報
ハオルシア・オブツーサの水やりなどの育て方
ハオルシア・オブツーサの育て方|まとめ
ハオルシア・オブツーサのその他色々
ハオルシア・オブツーサの基本情報
ハオルシア・オブツーサはアロエに近い多肉植物で、地面の一か所から肉厚な葉が花弁のように生えます。
特にオブツーサは和名を「雫石(しずくいし)」といい、球状に近い葉の先端は透き通っており、まるで水を固めたような不思議な姿で非常に人気の高い品種です。直射日光を避け風通しの良い半日蔭で育てます。寒さには弱いため、冬場は屋内の日当たりのよい場所が好ましいです。乾燥気味を好みますが、あまりに水分不足に陥ると葉が萎れ見栄えに影響するため、水やりには注意が必要です。
科・属 ユリ科(アロエ科)ハオルシア属英名 Haworthia obtusa学名 Haworthia obtusa原産地 南アフリカ育てやすさ★★★
ハオルシア・オブツーサの水やりなどの育て方苗の選び方
株と鉢のバランスが良く、葉に変色や傷んでいるものがないものを選びましょう。
日当たり・置き場所
明るく風通しのよい場所を好みます。夏場は屋外でも問題なく、冬場は寒さを避けるために屋内の日当たりのよい場所に置きましょう。本来岩陰などに生息する種のため、直射日光は避けましょう。半日蔭や屋内で十分に育ちます。光が足りなすぎると、徒長(とちょう)します。
徒長(とちょう)とは、茎が細く葉の間隔が長く間伸びした状態を言います。1番の原因は日照不足ですが、水や肥料の与え過ぎ、風通しの悪さも原因になります。ハオルシア・オブツーサは徒長すると、このような姿になります。
水やり
土中の乾燥を好むため、水のやりすぎに注意します。夏場は土の表面が乾いたらたっぷりと水を与え、それ以外の時期はさらに乾燥気味にて管理します。成長期は春と秋のため夏と冬は生育を止めるます。夏と冬は水は控えめにして管理します。夏から秋は気温が徐々に下がり始めてから、冬から春は気温が上がり安定してきてから徐々に水やりの回数を増やしていきましょう。株に水がかからないように水は株元から土に与えます。
温度
冬場は寒さに弱いため屋内か温室での管理が良いです。凍結や霜に当たると葉が痛む原因になります。
植え替え
1~2年に一度植え替えをします。一回り大きな鉢か同じ大きさの鉢に植え替えましょう。生育時期である春か秋が適期です。
用土
水はけの良い用土を使用します。園芸店やホームセンターで手に入る多肉植物用の用土を使用しましょう。
増やし方
葉挿しと株分けで増やすことができます。根元から生える芽を取り、土にさせば増やすことができます。
病害虫カイガラムシ
カイガラムシがつくと樹液を吸われてしまい、株が弱り生育も悪くなり衰え枯れてしまいます。カイガラムシは国内で約400種が発見されており、大きさや形なども様々であり、カイガラがあるのとないものもいます。野菜や果樹、草花、サボテン、ラン、観葉植物と様々な植物に発生し、吸汁(きゅうじゅう)します。
▼病害虫の予防や対策は?要注意したい天敵!カイガラムシの駆除方法夏越し
夏は休眠期のため、風通し良く涼しい場所での管理が好ましいです。室内の場合は空調が当たらないように気をつけてください。
ハオルシア・オブツーサの育て方|まとめ
・水のやりすぎに気をつけましょう。
・根腐れを起こしやすいため、土中は乾燥気味にしましょう。
・風通しの良い明るいところで管理。

ハオルシア・オブツーサのその他色々
キラキラと透き通りぷっくりとした葉が特徴のオブツーサ。そのみずみずしさを保つために水を与えすぎて失敗することが多いようです。水やりは頻繁に行うのではなく、土が乾ききったときに水を与えます。鉢底から流れ出るくらいにたっぷりとあげましょう。こうすることで、土の中の余分なゴミが流れ、根腐れを防ぎ水の吸い上げがよくなります。
ハオルシアの関連記事はコチラから

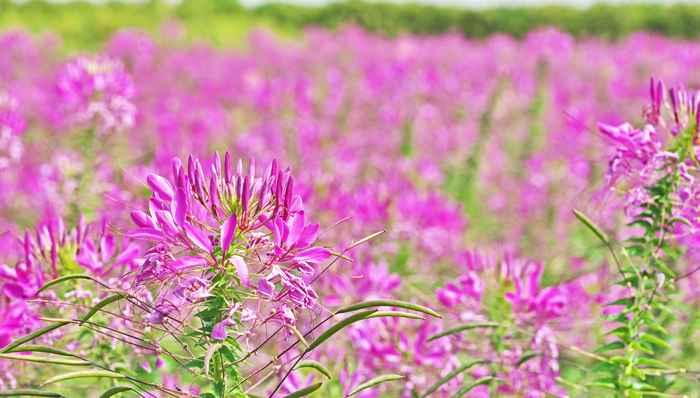
10月15日の誕生花
10月15日の誕生花は、「#クレオメ 」です。
南アフリカ原産のフウチョウソウ科フウチョウ属の一年草です。花期は7~9月で、草丈は80~120㎝位に伸び、頂点に桃色や白、紫のたくさんの4弁花を咲かせます。つぼみは濃い桃色ですが、咲くと淡い桃色に、さらに時間が経過すると白色に変化します。花のひとつひとつの寿命は短いですが、毎日新しい花が開いていくので長い間花を楽しめます。
クレオメについて科・属 フウチョウソウ科フウチョウソウ属英名 Spider flower学名 Cleome spinosa原産地 南アメリカ開花時期 7月~10月花名の由来
クレオメの咲いている花姿がチョウが飛んでいるように見えることから和名では「西洋風蝶草」とよばれます。英語では蜘蛛の花を意味する「Spider flower」と呼ばれ、これはチョウではなく細く長い蜘蛛の足に例えています。
クレオメの花言葉と由来
クレオメの花言葉は、「秘密のひととき」「想像したほど悪くない」「あなたの容姿に酔う」「風に舞う胡蝶」。
「秘密のひととき」という花言葉は、クレオメは夕方頃になったら花が開き、次の日になるとしおれてしまっている「一日花」であることから、人の眠っている夜の間にひっそりと咲くことに由来しているようです。

クレオメの豆知識意外と流通しない
こぼれダネでよく増えるのにもかかわらず意外と流通していません。流通量が少ないのもあって、ちょっと苗が高くなっています。それでもネットショップで寄せたほうがよさそうです。

Having plants in your house is like a baby to care. There are many things (if you’re new) you do not know when you plan to keep a plant in the house or the garden. If you are wondering WHY YOUR INDOOR PLANTS ARE DYING even after taking so much care and extra pampering, then there are some mistakes that you are doing. Here are the nine little (or the BIGGEST) mistakes which can kill your plant. So avoid doing them!
1. Keeping the plant in a location that is not suitable

Every plant has its specific needs, do’s and don’t do’s. If you don’t know what they are, acquire the knowledge from a florist, books or from the best place, the internet (consider our website)! Some plants are very specific with their placement indoor or outdoor. Placing them in an unsuitable location is certainly kill them sooner or later, quickly or gradually.
Mostly the plants growing indoors die due to this reason. You must read what a plant needs before you seek a place for it. Some plants require shade, indirect light or direct sunlight, while some need moisture. If a plant needs more level of moisture, then keep it in a shaded area. If not done so, all the moisture in the soil will dry up, and this will certainly kill the plant.
2. Changing the location to and fro
Plants adjust to the spot where they kept for a while, either at home or outdoors. When they moved often, it becomes difficult for them to adapt quickly to the different conditions of the new environment. Also, moving the plants frequently can hurt the growth of your houseplant.
3. Wrong soil
We say– Soil is the key! And when it comes to growing plants indoors, you can’t compromise with soil. A soilless potting mix is what we suggest. You can also make your own or choose high quality, organic soil mix.
Make sure that the soil you mix or buy is according to your plant’s needs. Some plants do better in moisture retaining, dense soil, while other plants, such as cacti, need light, fast-draining soil with high sand and peat content, to prevent root rot.
4. Overwatering

Even the experienced gardener make this mistake, this is the problem with container gardening. People who are new to gardening or growing plants do this– they think that giving more water to the plant will keep it healthy and let it grow faster. However, especially indoors, where the sun is scarce, the situation is different. Keeping plants on a little bit drier side is a good idea but if the plant you’re growing is a moisture loving plant then keep the soil slightly moist.
It is recommended that you do the research about the watering needs of your plant. Also, the most important factor that decides the watering requirements of a plant is the climate in which you’re growing it. Usually indoors, watering the plants only once a week should be enough though some of the low maintenance plants require even less water. It’s a good idea to feel the soil in every three days and when you water, water the plants thoroughly.
5. Keeping plants in too much or too little light
It is true that plants need light, but indoor plants are tender, low sunlight plants and exceeding their light requirement can kill them. It is always better to know about your plant before placing it anywhere. Some plants require little light for healthy growth. If they are supplied with more light, then this can kill or debilitate them.
6. Exposing to extreme temperatures
Indoor plants are indoor plants because they like indoor conditions and unvarying temperature, there are only a few that like high or low temperature than normal average room temperature. The safest daytime temperature for indoor plants is 65-75 F (18-24 C) or somewhere around it, whereas, during night time, fall in 5-10 F in temperature is optimum. Moderate temperature works well for houseplants and having a constant temperature leads to healthy growth.
7. Keeping the plant rootbound
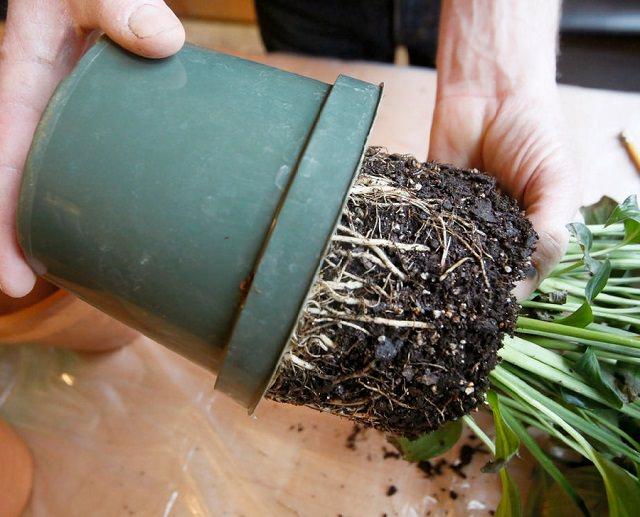
If you have a houseplant for a long time and you do not re-pot it then it, becomes bound to the pot you have planted it in. In optimum conditions, (if the plant is not slow-growing) plants outgrow the pot within a year or two. When leaves start to turn yellow or if you see the roots popping out, it is the signal to re-pot the plant. This indication is due to less space and freshness to grow healthy. When sending Plants for housewarming, you tend to gift it is small pot, but later it can be repotted in larger spaces.
Leaves turning yellow are the indication of insufficient space, water, nutrients and air. So when you see these signs, take the right step and re-pot the plant in a larger space.8. Neglecting the plants
Many of us, plant the plants and forget about them. Underwatering is one of the consequences of it. Neglecting plants is the reason why most people kill the indoor plants. Not looking at plants suffering from pests or diseases, missing to prune, no regular fertilization. All this must be avoided.
9. Not cleaning the leaves
Is it important to clean the leaves of the houseplants? Well, yes! For two reasons you should clean the leaves of your houseplants. First, it makes them look attractive. Second, it makes them HEALTHY! Already, the sun is scarce indoors, and the layer of dust accumulated on the foliage of houseplants contributes to blocking the direct or indirect sunlight and reduce the plant’s ability to photosynthesize. And a result you get a weak and stressful plant. Gardening Know How has an important article on this. Check out!


Why should you avoid this?
When the view is blocked and you can’t see everything in one go it creates an illusion of more space and interest.
What you should do!
If your garden is open and you have not divided it into different sections, it is going to look less interesting and small. Draw your plan in advance and divide the space of your garden within it in different sections. You do not need to create solid divisions in your garden like a wall or fence, you can do this with large trees, shrubs that can block a certain part, grasses or potted plants densely arranged.
Mistake 2: Not making a plan
Why should you avoid this?
If you’re going to start designing a garden without a plan, you’ll not be going to get what you’ve thought or imagined in your mind.
What you should do!
Plan every aspect of your garden on the paper, take help of landscaping software and make a list of plants you would like to grow. Do proper research and make a budget. If necessary, take help of professionals.
Mistake 3: Forgetting the furniture
Why should you avoid this?
Many gardeners tend to forget about furniture. They choose furniture of different styles that are too colorful and fancy this makes the garden look busy and without the symphony.
What you should do!
Not only the plants but also the furniture and materials you choose automatically give an atmosphere to your garden. Take great care to the type of plants and materials you will use. Buy all your furniture together of the same style to create harmony. Do not mix!
Mistake 4: Avoiding the Foliage

Why should you avoid this?
Most of us buy plants for flowers and fruits, avoiding the foliage plants. But to get a year round interest buy more foliage plants.
What you should do!
Buy plants for their foliage–texture, color, shape– their leaves are what you are going to see most of the year.
Mistake 5: Excessive ornamentation and so many garden accessories
Why should you avoid this?
This is one of the most common garden design mistakes. Using too many decorative items in the garden creates a distraction and makes your garden look cluttered and busy.
What you should do!
Do not overdo anything. Add a whim to your garden but avoid adding so many decorative items. Before adding anything see how it fits with the style of your garden and outdoor space.
Mistake 6: Forgetting the view from inside
Why should you avoid this?
Getting a good view of the garden from the windows is important. When designing a garden don’t forget its view you’ll get from the inside.
What you should do!
Before planting or placing your containers at the exact spot, go inside and look from every window to see how it’ll look to get a good view.
Mistake 7: So many colors

Why should you avoid this?
So many colors that are not in harmony can cause a distraction.
What you should do!
Decide a color palette for every section of your garden and add plants according to it. So many colors together can create a chaos.
Mistake 8: Ignoring the seasons
Why should you avoid this?
Every garden looks beautiful in spring and summer (in winter in tropics) but you should not forget about fall and winter.
What you should do!
Plan to grow plants with regard to the seasons for a year round interest. When you go to a nursery don’t just buy plants for the following season.
Mistake 9: Growing wrong plants in wrong positions
Why should you avoid this?
This one of the most common gardening mistakes that must be avoided. Not growing right plants in a right position will make all of your plants to die eventually.
What you should do!
Grow plants that are most suitable for your climate and weather and conditions you have in your garden is important. For example, plants that require full should be grown in a sunny position, plants that require dry soil must not be grown in moist soggy soil and so on. Also, at the time of planting, give them recommended space. Don’t forget that they’ll become tall and spread once you plant them.

If you are suddenly feeling anxious, tired or sad and that you’re lacking energy, well join the club and don’t worry; winter is coming. Days are way too short, temperatures are low, sun is absent of the picture and summer gave way to a colder and heavier season. Yes, it’s tough, but winter also has advantages: snowfalls, holidays, skiing. If winter activities are not enough to kick the blues, we have lots of suggestions for ways to lift your spirits up and get rid of the winter melancholies.
You miss the light, the greenery and the colors of summer? So let’s bring them home! A lot of studies have shown that indoor plants can have positive effects on wellbeing. Besides providing a soothing environment, reducing stress or making you relax, indoor plants also stimulate us. This is exactly what we need to beat the winter blues, isn’t it?
And to make the solution even more effective, you should include flowers in the mix. Indeed, colors have healing powers that can cheer anyone up! Garden design trends are also incorporating color therapy. Meaning, that the arrangements include colorful flowers which trigger happy emotions, heightens feelings of life satisfaction and affects social behavior in a positive manner, as analyzed by behavioral studies led at Rutgers University. Let’s explore colors, shall we?
1. Red
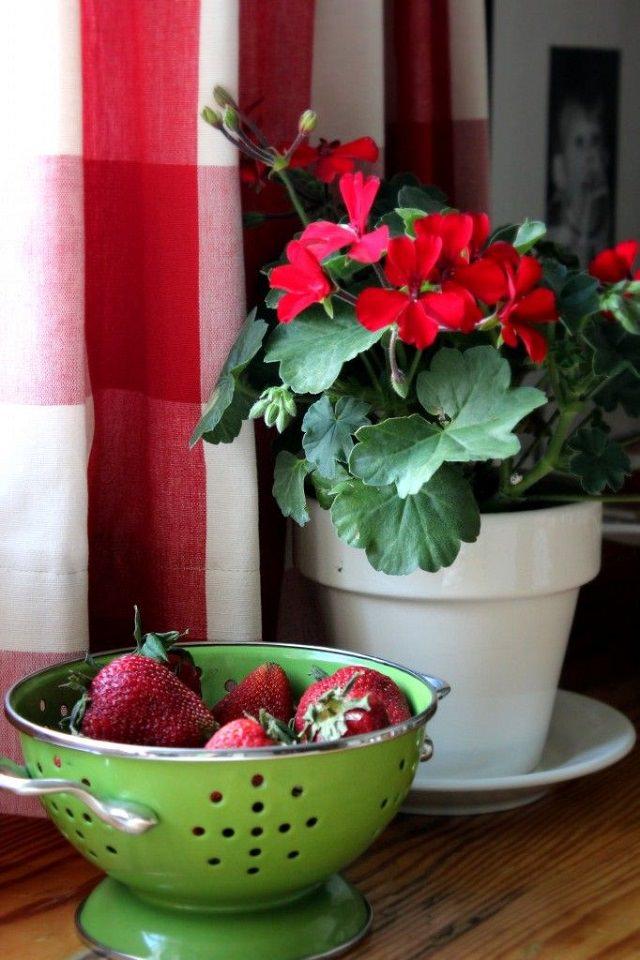
Even if red is not a recommended when it comes to the wall of your new bedroom, this color triggers a sense of vitality and boosts energy. This warm color is good for passive people and for those who always feel tired. Red also multiplies by ten the senses such as hearing, vision and touch. So what do you think about a Ranunculus bouquet in your bedroom or poisettias, Christmas cactus, geraniums, you have plenty of options.
2. Orange
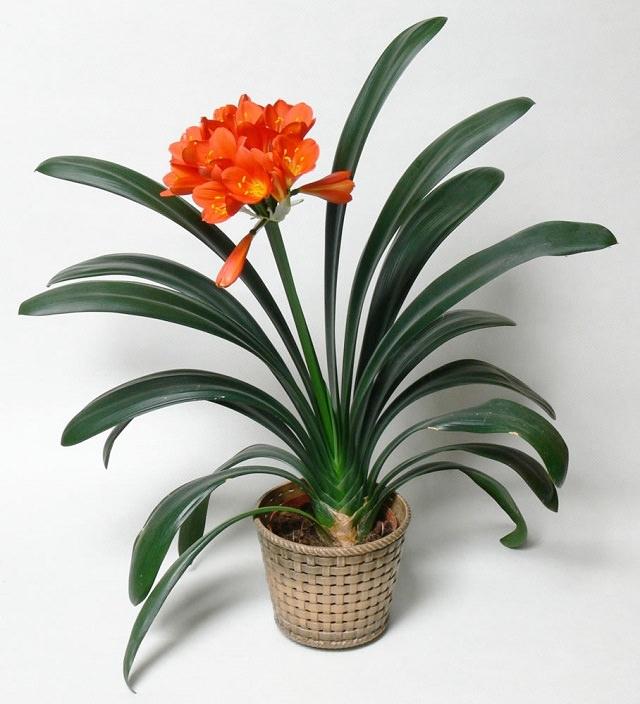
Don’t forget to add some orange in your indoor landscape design. Like red, it is a warm color but it’s less exciting. It still cheers people up but in a softer way. By seeing orange flowers such as begonias, people feel their body and mind relieved from pressures. Plus, orange fosters creative thinking, by helping people at rock bottom get out of it and imagine new possibilities in life.
3. Yellow
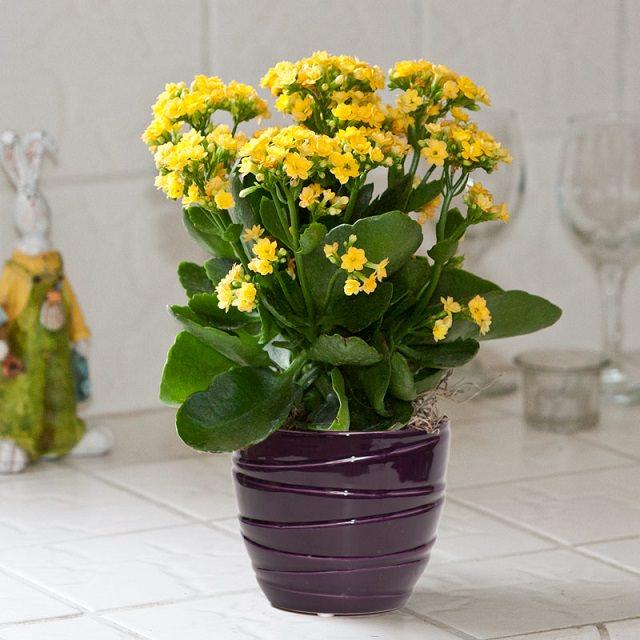
If creative people love yellow, it is because it allows them to be even more creative. This cheerful color, associated to the brightness of the sun, helps stimulate intelligence. Just be careful not to overuse it because it can lead to insomnia for example. So, just avoid putting those wonderful sunflowers in your bedroom. However, you have many other planting options like sweet potato vine, kalenchoe, black eyed susan etc.
4. Green
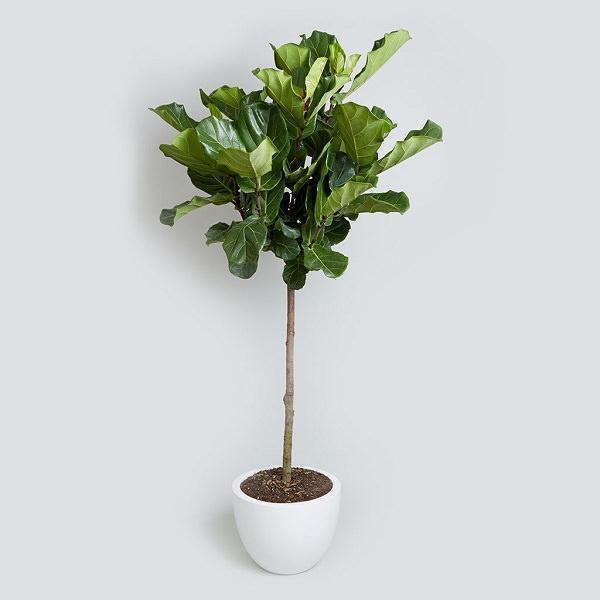
Because green is the color of nature and that represents the Earth, it symbolizes growth and renewal. So green bring balance and comforts you. A Spider Plant is perfect to bring harmony into a home.
5. Blue
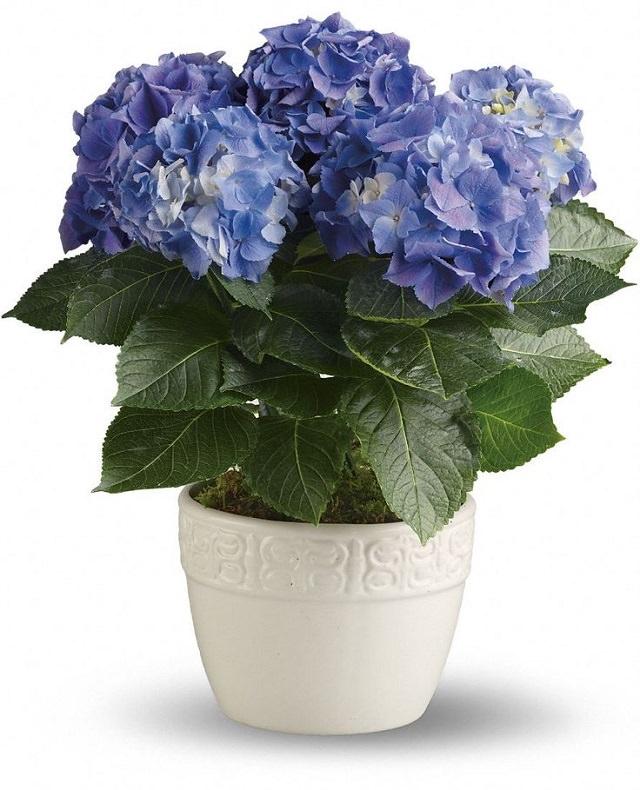
Blue is probably the most famous color in terms of soothing. As the color symbolizing the sky and the sea, it is linked with serenity. Blue calms strong emotions such as anger or hysteria. Grow Iris or hydrangea inside your home and you will definitely get rid of any rage signs. If you feel distressed, the blue color will lower blood pressure as well as your heart rate. Tranquility boost guaranteed.
6. Violet
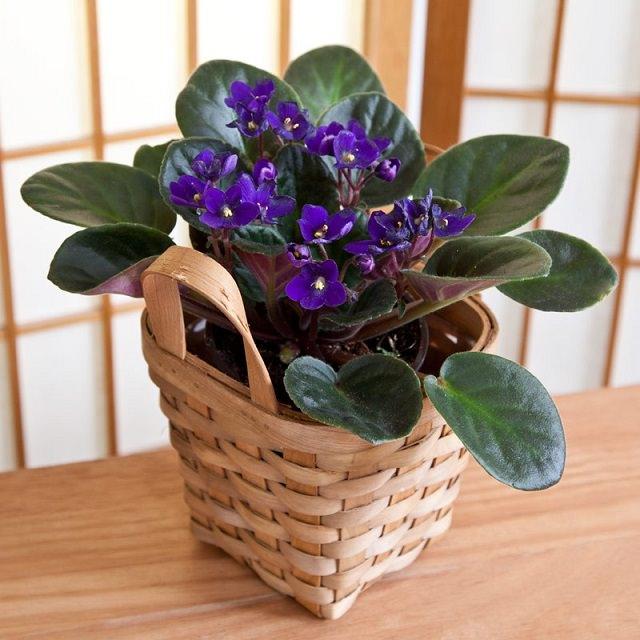
Along with purple and lavender, the violet color is linked with the cerebral and nervous systems, and for that reason, it relaxes the mind by releasing any kind of emotional stress. Violet heals different states of mind like melancholy or hysteria by bringing spiritual insights. For that matter, violet gives way to renewal and motivates the transformation. Simply grow Pansies in your bedroom, it will help you sleep, and dreams will positively affect the day coming next.
7. White
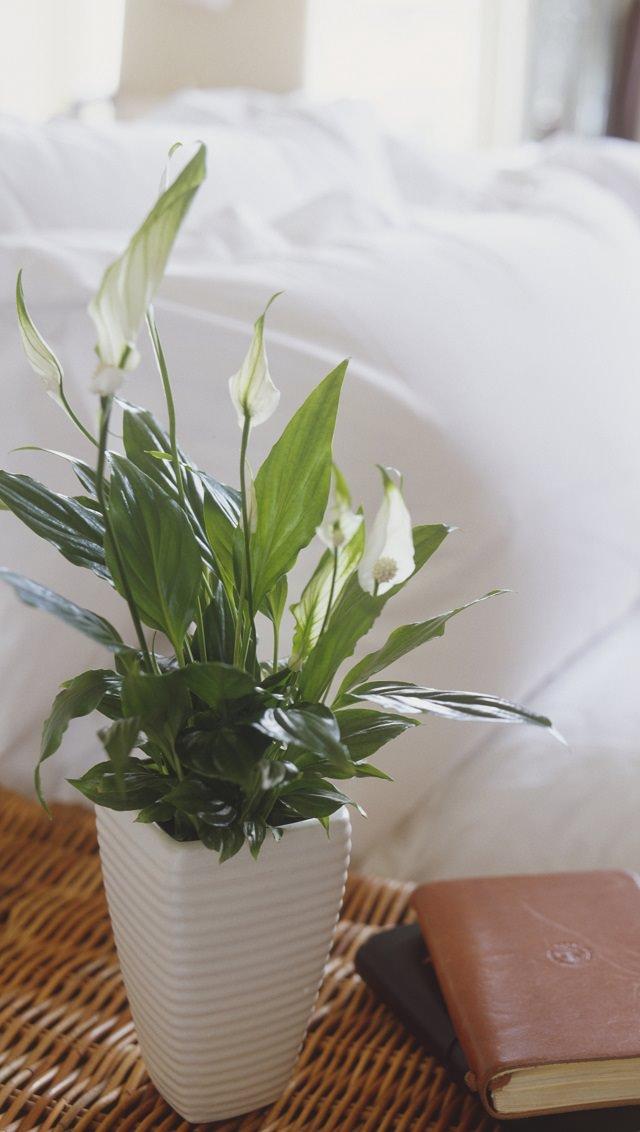
White is a sign of pureness, and that is why it helps to get rid of all the negative moods and reach the truth. If winter makes you feel insecure, simply add Paperwhites into your indoor landscape design and you’ll immediately feel the harmony getting the upper hand in every aspects of your life. There are many other beautiful houseplants that provide white color like peace lily, jasmine, gardenia.
8. Magenta
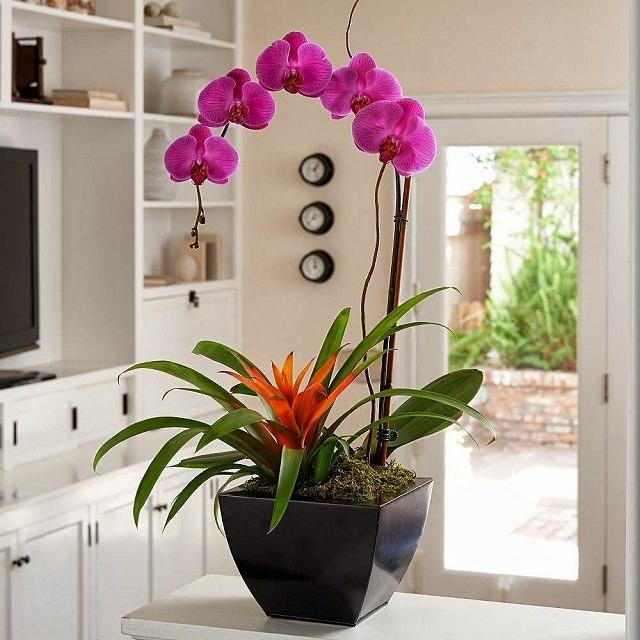
Like violet, magenta is also a spiritual color. It helps strengthen the link with your life purpose. And because it is a little bit flashier than purple, it boosts adrenaline. At home, Tulips do the job perfectly well or you can grow the orchids.
9. Pink
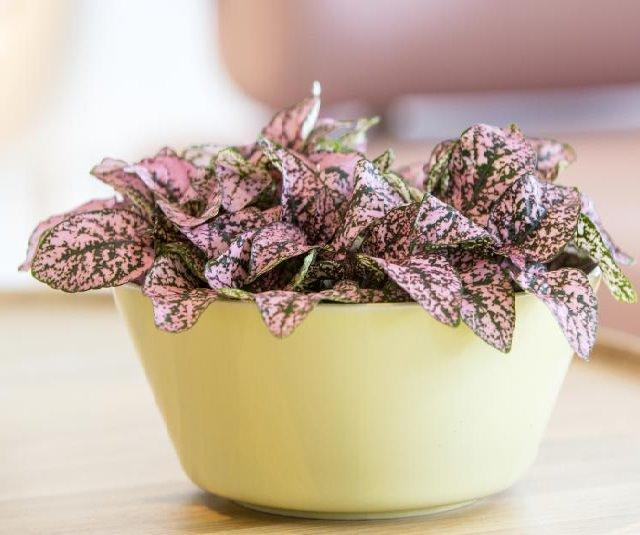
You see pink and you automatically see candies and tender images from your childhood. Pink definitely brings some youth back, and heals your grief and sadness, because it means affection and protection. For that matter, this bouquet of roses is going to please all the family. You can also look at other plants like pink hibiscus, geraniums, polka-dot plant, and begonia.
Now that you know how to set up your indoor garden to battle the winter blues, you don’t need to be afraid! Simply use flowers and plants from all different colors to boost your mood, and you will be the happiest person in the world!


1. Create a brush pile for birds and wildlife
Use your dead Christmas tree to create a brush pile, you can find twigs, leaves, and logs in your garden, the Christmas tree can be used as its base. It’ll help and redirect the small animals and birds towards during the wintry months. The dead tree will not only offer the much-needed protection from chill to the animals but also act as a source of food.
2. Create a DIY bird sanctuary
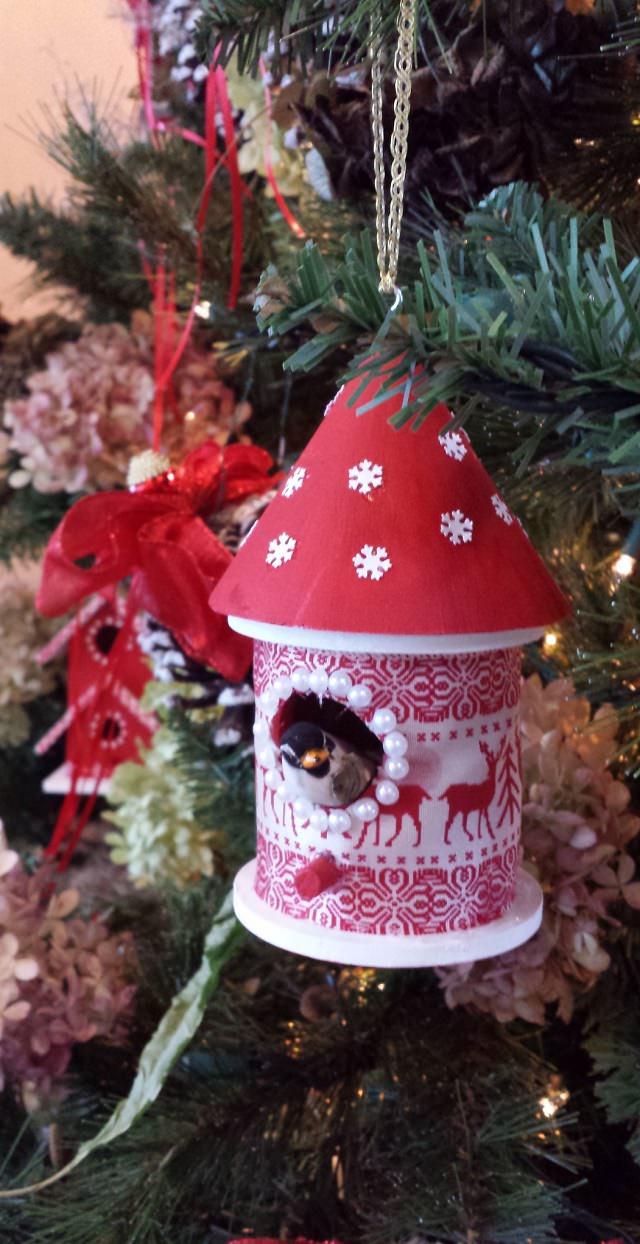
It’s a nice idea if you keep the tree at a strategic point in the garden and place some birdhouses and feeders on or in it. This way, the birds can appreciate your tree, too. You can also go a step further and decorate it, and fill bird feeders with edible seeds and hang them from the branches/boughs to attract the birds to their new home.
3. Replant it for the next Christmas
If you’ve bought a living Christmas tree with the root ball intact, it’s a good idea to replant it for the next Christmas, it might be more than 11 months from now but that only gives us all the more reasons to start early. The Gardening Know How has a good article on it, take a look!
4. Edge flowerbeds and walkways
Instead of using it for bonfire, slice up the trunk of your Christmas tree into thin discs and use them to edge walkways and flowerbeds. This is a not only a good way to use your Christmas tree but also beautiful and functional.
5. Keep your perennials warm
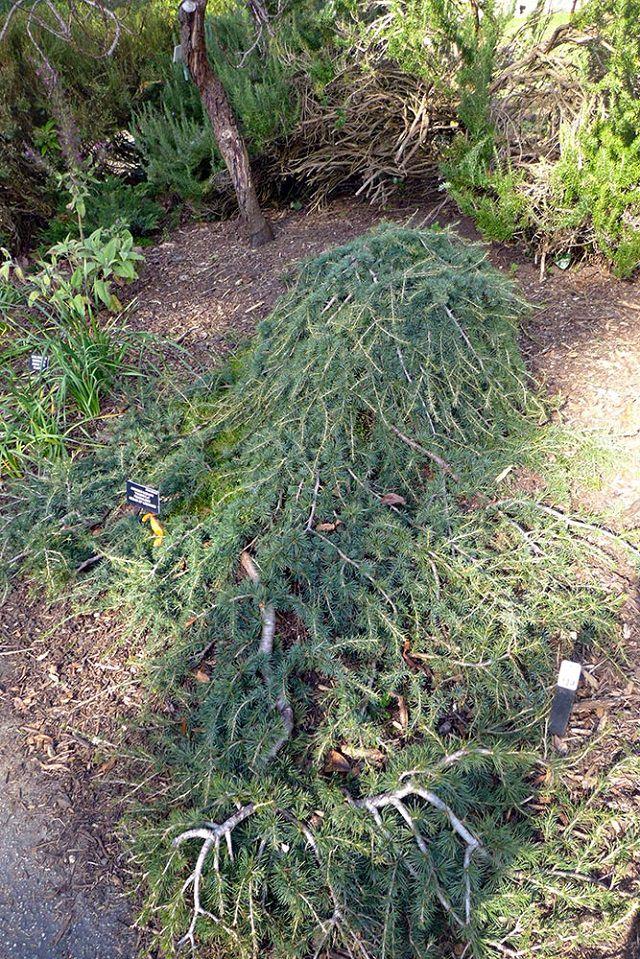
You can cut off the boughs from the Christmas tree and lay them around the root of the perennial plants, this mulching will protect them from cold temperature and also reduce the chances of frost heaving.
6. As pot risers
If you have a decent size Christmas tree, you can cut the trunk into pieces of different lengths and use them as pot risers or you can get creative with it and make a rolling plant stand out of it. If you’re not satisfied with the natural looks and want to protect the wood from deterioration, varnish or paint the tree stump pieces.
7. Suppressing the weeds
Instead of sawing and splitting it, you can rent a chipper and mash up the trunk into chips. During the next season, you can spread these wood chips as a mulch under your plants, this will suppress the growth of weeds. Also, remember that when decomposed, this wood chip mulch will enrich your soil.
8. Use it to stake plants
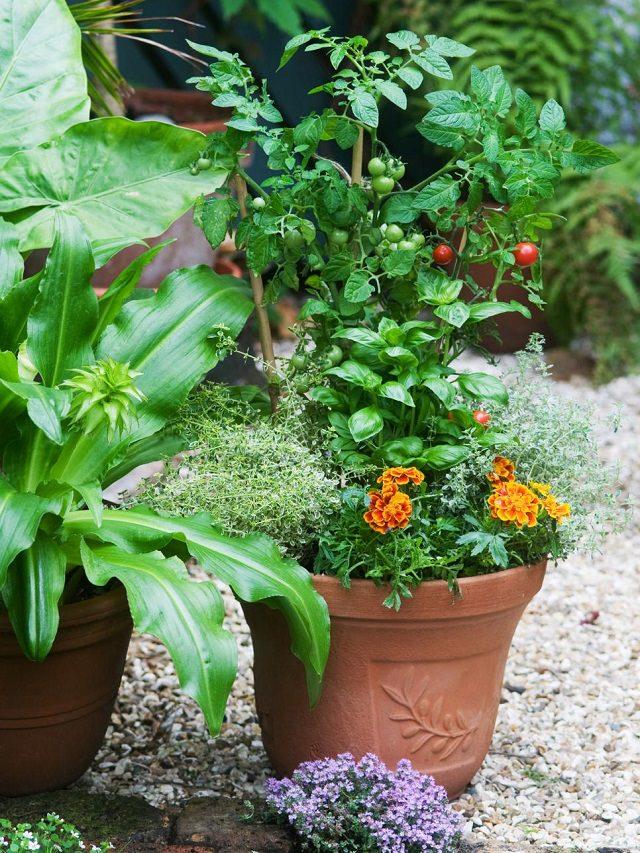
A majority of dead Christmas trees varieties are typically sturdy in nature. And you can use this to your advantage. Strip away the branches and use them to support your plants.
9. Create habitat for the fishes
If you or your neighbor has a pond or if you live near a lake, give your Christmas tree a proper send off by tossing its branches in the water. But before you do this— Remove all the needles and tie something into the middle, like a cinder block, a stone or something as heavy. During the harsh winter months, the fish can find warm refuge beneath the branches. Nonetheless, make sure that the dead tree is chemical free before throwing it overboard.

USDA Zones— 9 – 11
Difficulty— Easy
Other Names— Banane de Prairie, Caricae Papayae Folium, Carica papaya, Carica peltata, Carica posoposa, Chirbhita, Erandachirbhita, Erand Karkati, Green Papaya, Mamaerie, Melonenbaumblaetter, Melon Tree, Papaw, Pawpaw, Papaya Fruit, Papayas, Papaye, Papaye Verte, Papayer, Papita.

Papaya (Carica papaya L.) is native to the tropics of Mexico and Central America. This fruit for high nutritional value, great taste and medicinal properties.
Papaya is mainly consumed as a fruit, but it is also used for making soft drinks, juices, pickles, jams, and curries. It produces latex that is extracted from the green fruit and stem, which contains an enzyme called papain that helps in digestion of proteins.
Plant Characteristics
Papaya is a herbaceous plant of relatively rapid growth and short life (not profitable to cultivate mature plants for longer than 3 years because the fruit yield gets low). It has a hollow, segmented and erect single stem and no branches. It presents a many large, lobed leaves. The plant height can reach up to several meters.
The fruit has a wide variety of forms, its shape and size vary depending on the variety and type of flower.
Pollination
If you’re growing papaya you must know that papayas come in three sexes: Male, female and hermaphrodite (bisexual). Male papaya trees must be eliminated as they don’t produce fruits. Female papaya trees require male tree for pollination. In orchards and papaya plantations, generally, 1 male tree per 10 female trees is grown. Bisexual papaya trees are self-pollinating and don’t require male trees for pollination. Commercial growers plant them. You will need to plant either female or bisexual papaya tree.
To learn how to identify male or female papaya, tree read this informative discussion on helpful gardener
Our recommendation for you is to buy seeds from quality source so that you know what you’re buying and to get a self-fertile bisexual tree. Most of the hybrid varieties that are coming are either bisexual or female, it is better to buy them. If you’re sowing seeds obtained from the fruits, choose seeds from elongated fruits instead of rounded fruits. Elongated fruits have 66% probability of hermaphrodite (bisexual) seeds and 33% female seeds.
Cross pollination from hand is required for pollination of female papaya trees.
How to Grow Papaya in Pots
Growing papaya in pots is not difficult, considering it is short living small tree. You can grow any papaya variety in pots but it is better to choose a dwarf variety.

Choosing a container
Choose a large 15-20 gallon size container for growing papaya in pots, also, ensure there are enough drainage holes in the bottom before planting. A pot that is around 18-22 inches in diameter and 12-15 inches deep would be sufficient.
Sow the seeds directly in the pot you wish to use for growing papaya tree as papayas don’t transplant well. All the other growing requirements are given below in the article.
Growing Papaya from Seeds
Seeds must be given treatment before sowing for germination. The first method is to simply wash the seeds to remove gelatinous coating before sowing. Another method is to immerse them in a container full of neutral water for the period of 4 days. Change the water twice in a day. After 2 days of soaking, separate the seeds that are floating on the surface from those that have settled down.
Leave the seeds that are settled down for another day. After this time, the seeds that float up again must be removed. This way only the viable papaya seeds are left. On the last day when changing the water, add fungicides in it.
After this process, keep the seeds on cotton cloth for 2 to 3 days, keeping up the seeds wet. Once the white dot in them can be observed they are ready for sowing.
Proceed to sow the seeds directly on the ground or in the pot or seed tray but remember that papaya trees don’t transplant well and you’ll have a low success rate. Seeds will germinate in 2-3 weeks. Optimum germination temperature is around 70 F (20 C).
Planting Papaya Tree
Once the seedlings germinate sow them directly in a spot as papayas have less success rate when transplanted.
Prepare the ground well before planting. Make a hole in soil that is of the same depth as of rootball of the plant but twice wide. Apply slow release 16-48-0, 18-46-0 or balanced 15-15-15 fertilizer according to the product instruction at the base of the hole, fill it with a thin layer of soil to prevent the plant roots from coming in direct contact with the fertilizer.
The base of each plant should be 1 cm above ground level, to prevent rot at the stem base. After transplanting, a fungicide can be applied to ensure greater protection especially if planting during the rainy season.
How to Grow Papaya Tree in Cold Climate
Papaya is a tropical fruit tree but if you are thinking to plant it in a temperate climate plant it in a large pot and try to overwinter it in a well-protected area, like a greenhouse. Another way is to start the seeds in fall, or in early spring indoors. Once the temperature soars up to plant the seedlings outside. The tree will grow until the frost comes and get killed but there is a possibility that you’ll get some juicy papayas.
Requirements for Growing Papaya TreeTemperature
It is also an important factor that determines if the plant will grow or not. Papaya is one of the easiest fruit trees you can grow the optimum temperature for growing papaya ranges between 68 – 86 F (20 to 30 C).
Low temperatures lead to a slow growth of the plant and higher temperatures cause low production. However, papaya tree can bear cold temperature down to 32 F (0 C) for a short period of time. In extremely high tropical temperatures and in heat waves and droughts, flower buds fall and the plant suspends its growth.
Location
The papaya needs plenty of sun due to its high photosynthetic activity. It is impossible to grow it in the lack of sunlight. One more thing you need to keep in mind when choosing a location for growing papaya trees that they are not strongest and must not be planted in a too windy spot.
Spacing
Papaya trees must be spaced 8-10 feet apart from each other.
Soil
The main characteristics of soil for growing a papaya tree are following:
Loose and moist.With good drainage.High organic matter content.A pH level around 5.5 to 7 (Neutral).Fertile and deep.
The ideal growing medium must be loamy and have adequate content of organic matter with good moisture retention and efficient drainage. Soil depth is also an important factor for root development. The soil that is more than a meter deep is suitable. Compact soil must be avoided, also, clean the rocks or other debris that is limiting the development of roots till the following depth.
Drainage is crucial in papaya cultivation. The proportion of sand, silt and clay determines the texture and soil structure.
Sandy soils have better drainage than clay. But too sandy soils that are low in organic matter have reduced water retention capacity, which must be avoided.
In clay-rich soils, water movement is slow and this can lead to root rot, slow development of plant and inhibit nutrition uptake. In very alkaline soils (above pH level 8.0) Zinc, iron, and other micro-element deficiency can occur.
Excess water causes yellowing of young leaves, premature fall of flowers and contribute to root rot. Low moisture in the soil can lead to slow growth, accelerated aging and premature leaf and fruit drop.
Good soil preparation practices are key to growing papaya, such as deep plowing and mixing organic matter.
Watering
Water is the main contributor of the plant (the plant is composed about 85% of water). In the process of germination, and first few months after planting, papaya needs a lot of water, so at this stage water regularly.
In the dry season, to get the good results in production, watering must be increased again. Keep the soil slightly moist but not wet. As a rule of thumb, water papaya plant deeply when top 1 inch of soil dries out.
Papaya Tree Care
Papaya tree care is easy if you grow it in the warm conditions in full sun.
Mulching
Mulching papaya tree with organic matter helps in retaining moisture, which is essential.
Fertilizer
Papayas are heavy feeders. Apply plenty of manure or compost regularly near the base of your plant.
You can also apply complete fertilizer 15-15-15, 0.1 kg or a similar mixture at intervals of two weeks during the first six months and 0.2 kg thereafter.
Pruning
No pruning is required.
Pests and Diseases
Pests that can attack it are fruit flies, mites, black vine weevil, aphids, leafhoppers, and whitefly. In diseases, it suffers from soil fungi, powdery mildew, fruit rot, papaya ringspot virus, and nematodes.
Harvesting Papayas
Papaya fruit set occurs 10-12 months after planting. The fruit is sensitive to sunburn and it must be separated from the tree carefully using plastic gloves or something similar, pick it lightly with a twist or use a short knife, leaving 0.5 cm stalk.
Harvesting should be done according to the following maturity indices:
1. 0% Ripe: Completely green, but well developed.
2. 10-15% Ripe: Color change, one or two yellow stripes with 10-15% yellow surface shell surrounded by a bright green color.
3. 25% Ripe: 25% of the surface of the shell is yellow surrounded by the clear green color.
4. 75% Ripe: 75% of the surface is yellow.
5. 76-100% Ripe: The surface of the shell have yellow to orange color.
Papaya is a fruit that after being cut continues its maturation without stopping. Papayas that are harvested for selling in the market are harvested green with two or three yellow stripes as fruits that reach 75 to 100% maturity are difficult to transport. Fruits must be harvested in the early hours of the day and must not be exposed to the sun.


二月兰日常养护要点:
二月兰日常管理相对其他花卉而言比较粗放,不需要多加养护,因为其耐寒性、耐阴性较强,有一定散射光即能正常生长、开花、结实,对土壤要求不严,最好选择疏松肥沃且排水良好的砂质土壤,只要及时浇水,施肥,稍加管理即可健壮生长。
有条件的花友,二月兰课一年施肥4次。早春的花芽肥、花谢后的健壮肥、坐果后的壮果肥、入冬前的壮苗肥。如果在花蕾期和幼果期各进行1次叶面喷施0.2%磷酸二氢钾溶液的话,花色则更艳丽,果实将更饱满。
二月兰的花期从早春至6月,角果长条形,6月成熟,种子黑褐色,卵形。


