文章
Miss Chen
2018年01月07日

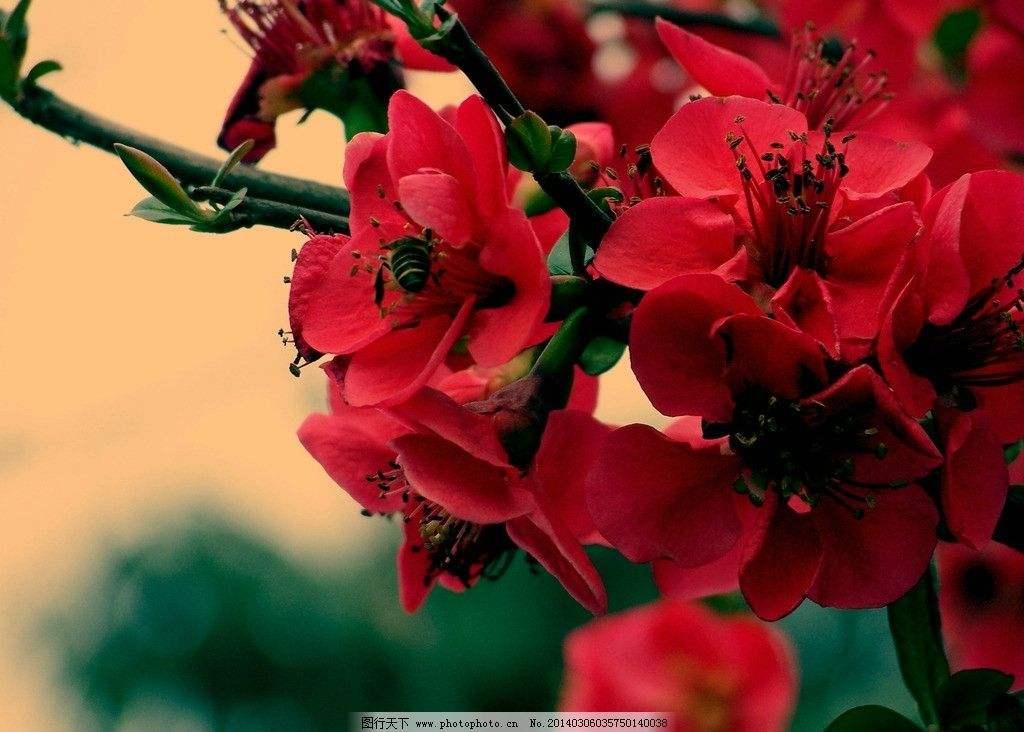
A tuberous begonia in bloom is a spectacular sight. The large, full blossoms will light up the darkest shade. Tuberous begonias can be used in shaded areas in hanging baskets, window boxes, pots, beds or borders. There are many different forms of tuberous begonias including ruffled or plain, solid or bi-color, trailing or upright. Growing your own tuberous begonias will give you the greatest selection to choose from. Sprouting a tuberous begonia can take time and patience, but it is well worth the effort.
Starting Tuberous Begonias Indoors
It takes 12 to 14 weeks for a tuberous begonia to bloom after the tubers are planted, so most gardeners like to start their begonias indoors eight weeks before the last frost date or even sooner. You can grow tuberous begonias in any pot that has drainage holes and is large enough to fit the bulb. Some tuberous begonias can be 4 to 6 inches across. Use a well-draining potting mix, and place the bulb concave side up (so it looks like a bowl) on the surface of the soil. Cover the bulb with just a small amount of potting mix. Tuberous begonias are susceptible to rot, so water from the bottom by placing the pot in a dish with water in it. The pot will wick the water up the soil, but water will not sit in the concave hollow of the bulb. Sprouts should appear in one month, and can then be transplanted to a large container.
When and Where to Transplant

Plant your begonia so the pointy leaves face the way you want the flowers to show.
Tuberous begonias are sensitive to frost, and should be planted outdoors after all danger of frost has passed. Tuberous begonias are shade-loving plants, but can tolerate morning and a little afternoon sun. Take your sprouted begonia tuber, and plant it 2 inches deep in a well-draining potting mix. Moss-lined planters work well for tuberous begonias because of their ability to drain well and still maintain good soil moisture.
Caring for Your Tuberous Begonias
Once planted, tuberous begonias will need regular watering, deadheading and fertilizing. Make sure your begonias are watered at least once a week, and more if they are planted in containers. Fertilize every two weeks with a liquid fertilizer to maintain heavy blooming and leaf growth. Begonias need to be deadheaded on almost a daily basis to keep the foliage clean. If left to deadhead on their own (which they will, they are self-cleaners), the spent flowers will stick to the foliage and diminish the overall appearance.
End-of-Season Care
Tuberous begonias will not survive a killing frost. A few days before the first frost of the season, dig up the tubers, cut the stems to 1 inch and leave a little soil on the roots. Place the tubers in a cool, dry area to cure for two to three weeks. Once cured, place the tubers in sawdust, peat moss or vermiculite and store in an area where the temperature stays between 40 and 50 degrees Fahrenheit. You then can start the whole process over the following year.

Starting Tuberous Begonias Indoors
It takes 12 to 14 weeks for a tuberous begonia to bloom after the tubers are planted, so most gardeners like to start their begonias indoors eight weeks before the last frost date or even sooner. You can grow tuberous begonias in any pot that has drainage holes and is large enough to fit the bulb. Some tuberous begonias can be 4 to 6 inches across. Use a well-draining potting mix, and place the bulb concave side up (so it looks like a bowl) on the surface of the soil. Cover the bulb with just a small amount of potting mix. Tuberous begonias are susceptible to rot, so water from the bottom by placing the pot in a dish with water in it. The pot will wick the water up the soil, but water will not sit in the concave hollow of the bulb. Sprouts should appear in one month, and can then be transplanted to a large container.
When and Where to Transplant

Plant your begonia so the pointy leaves face the way you want the flowers to show.
Tuberous begonias are sensitive to frost, and should be planted outdoors after all danger of frost has passed. Tuberous begonias are shade-loving plants, but can tolerate morning and a little afternoon sun. Take your sprouted begonia tuber, and plant it 2 inches deep in a well-draining potting mix. Moss-lined planters work well for tuberous begonias because of their ability to drain well and still maintain good soil moisture.
Caring for Your Tuberous Begonias
Once planted, tuberous begonias will need regular watering, deadheading and fertilizing. Make sure your begonias are watered at least once a week, and more if they are planted in containers. Fertilize every two weeks with a liquid fertilizer to maintain heavy blooming and leaf growth. Begonias need to be deadheaded on almost a daily basis to keep the foliage clean. If left to deadhead on their own (which they will, they are self-cleaners), the spent flowers will stick to the foliage and diminish the overall appearance.
End-of-Season Care
Tuberous begonias will not survive a killing frost. A few days before the first frost of the season, dig up the tubers, cut the stems to 1 inch and leave a little soil on the roots. Place the tubers in a cool, dry area to cure for two to three weeks. Once cured, place the tubers in sawdust, peat moss or vermiculite and store in an area where the temperature stays between 40 and 50 degrees Fahrenheit. You then can start the whole process over the following year.
0
0
文章
Miss Chen
2017年11月16日

A hanging basket offers an alternative that takes advantage of vertical space when you lack yard space for a strawberry (Fragaria x ananassa) patch. Compact day-neutral and alpine strawberry varieties work best for the smaller space in hanging baskets because they don't spread with runners like June-bearing strawberries. Try strawberry cultivars such as "Albion" or "Seascape," which grow in U.S. Department of Agriculture plant hardiness zones 3 through 9 and 4 through 9, respectively.

Hanging baskets made from peat moss, coir or other natural materials work best for strawberry hanging baskets because they drain well and mimic the straw commonly used around strawberry plants. A 12-inch diameter basket can typically hold three to five strawberry plants, so you can increase or decrease the number of plants and holes according to the basket size and personal preference. You can place all three to five plants in the top of the basket, or you can plant two in the top and add the remaining ones around the outside of the basket to create a dramatic, cascading look that also gives each plant more room to grow. After deciding how many plants you want, cut evenly spaced, 2-inch diameter holes into the bottom half of the basket liner. Remove the basket liner from the basket frame and cut the holes with a simple kitchen knife.
Planting the Strawberries
Strawberries are typically sold as bare root plants that should go into the ground (or container) as soon as possible. If you chose to plant strawberries in holes along the outside of the basket, insert the root end of the plants through the holes and into the empty basket. The root crown should be even with the basket. Stuff straw, coir, or peat moss around the holes to hold the plants and soil in place. Fill the basket with a well-draining potting mix rich in organic matter. Instead of purchasing bagged potting mix, try your own blend, such as two parts sphagnum peat moss to one part finished compost and one part perlite. Leave about 2 inches of space to the basket edge so you can plant the remaining strawberry plants in the top. Mulch applied up to the top edge helps retain some moisture in the soil.

Care Requirements
Strawberries need full sunlight -- a minimum of 6 hours of direct sunlight daily. Soil in hanging baskets dries out much faster than ground soil. Daily watering might be required during the hottest, driest parts of the growing season to keep the soil moist, but not wet. Regular all-purpose fertilizer application every two weeks gives plants a boost during the flowering and fruiting stages, but is only necessary once monthly before flowering begins. Mix the fertilizer to approximately half strength for container strawberries. Mix a water-soluble, all-purpose fertilizer at a rate of 1/2 tablespoon of fertilizer to 1 gallon of water. Apply the fertilizer until the soil is evenly moist, using the fertilizer in place of the regular watering routine. Pinch off all flowers from day-neutral and alpine strawberries until July to delay the fruiting period.
Overwintering Strawberry Baskets
With proper care, strawberries grown in hanging baskets can be overwintered and produce more fruit the following year. Bring the entire basket indoors before the first frost, placing it in a protected location such as a garage or basement for the the winter. A garden shed or other unheated space works for overwintering, but spread a 2- to 3-inch layer of straw over the soil and around the crown of each plant to provide insulation. Burlap or old blankets wrapped around the container provide extra insulation to keep the soil warm. Water the plants when the soil feels dry, which is typically only necessary a few times each month. Strawberries can return outdoors in spring after all frost danger has passed. Replace the soil in the hanging baskets with fresh soil before rehanging them.

Hanging baskets made from peat moss, coir or other natural materials work best for strawberry hanging baskets because they drain well and mimic the straw commonly used around strawberry plants. A 12-inch diameter basket can typically hold three to five strawberry plants, so you can increase or decrease the number of plants and holes according to the basket size and personal preference. You can place all three to five plants in the top of the basket, or you can plant two in the top and add the remaining ones around the outside of the basket to create a dramatic, cascading look that also gives each plant more room to grow. After deciding how many plants you want, cut evenly spaced, 2-inch diameter holes into the bottom half of the basket liner. Remove the basket liner from the basket frame and cut the holes with a simple kitchen knife.
Planting the Strawberries
Strawberries are typically sold as bare root plants that should go into the ground (or container) as soon as possible. If you chose to plant strawberries in holes along the outside of the basket, insert the root end of the plants through the holes and into the empty basket. The root crown should be even with the basket. Stuff straw, coir, or peat moss around the holes to hold the plants and soil in place. Fill the basket with a well-draining potting mix rich in organic matter. Instead of purchasing bagged potting mix, try your own blend, such as two parts sphagnum peat moss to one part finished compost and one part perlite. Leave about 2 inches of space to the basket edge so you can plant the remaining strawberry plants in the top. Mulch applied up to the top edge helps retain some moisture in the soil.

Care Requirements
Strawberries need full sunlight -- a minimum of 6 hours of direct sunlight daily. Soil in hanging baskets dries out much faster than ground soil. Daily watering might be required during the hottest, driest parts of the growing season to keep the soil moist, but not wet. Regular all-purpose fertilizer application every two weeks gives plants a boost during the flowering and fruiting stages, but is only necessary once monthly before flowering begins. Mix the fertilizer to approximately half strength for container strawberries. Mix a water-soluble, all-purpose fertilizer at a rate of 1/2 tablespoon of fertilizer to 1 gallon of water. Apply the fertilizer until the soil is evenly moist, using the fertilizer in place of the regular watering routine. Pinch off all flowers from day-neutral and alpine strawberries until July to delay the fruiting period.
Overwintering Strawberry Baskets
With proper care, strawberries grown in hanging baskets can be overwintered and produce more fruit the following year. Bring the entire basket indoors before the first frost, placing it in a protected location such as a garage or basement for the the winter. A garden shed or other unheated space works for overwintering, but spread a 2- to 3-inch layer of straw over the soil and around the crown of each plant to provide insulation. Burlap or old blankets wrapped around the container provide extra insulation to keep the soil warm. Water the plants when the soil feels dry, which is typically only necessary a few times each month. Strawberries can return outdoors in spring after all frost danger has passed. Replace the soil in the hanging baskets with fresh soil before rehanging them.
0
0
文章
Miss Chen
2017年10月25日

Climbing strawberry varieties are very similar to traditional strawberry plants, but the runners, or vines, can reach up to 40 inches in length. These strawberries grow well in the ground as well as in hanging baskets and containers. However, because of the longer vines, ground-planted climbing strawberries require a trellis to keep the fruit and foliage off of the ground.

Step 1
Wait until the early spring when freezing temperatures cease and the ground is no longer frozen. Look for a planting site that is well drained, receives six hours of sunlight per day, and has a dark soil composition. Areas that are slightly elevated are good sites for strawberries, because they aid in water drainage.
Step 2
Spread a general fertilizer, such as 10-10-10, over the planting side using 1 lb. for every 100 square feet of soil. Till the soil with a garden tiller to work the fertilizer six to eight inches into the soil

Step 3
Dig a hole in the soil that is the same depth as the roots of one for the climbing strawberry plants. Insert the roots into the hole, making sure that the area where the green stems emerge, called the crown, is above the soil. Fill in the hole but do not cover crown with soil.
Step 4
Plant additional climbing strawberry varieties in the same methods, spacing them 18 to 30 inches apart.
Step 5
Dig a 12-inch deep trench six inches behind the plants with a shovel. Insert a 4- to 5-foot tall trellis into the bottom of the trench and pack soil around the base to fill in the hole and to hold it upright. You can install a single long trellis or smaller ones for each plant.
Step 6
Water the soil to the same depth as the roots of the strawberry plants.
Step 7
Wait four to five weeks until the plant runners begin to grow. Lift the runners up to a vertical position and secure them gently to the trellis using gardener's tape. Loop the tape around the vine stems and tie in a knot behind the trellis.

Step 1
Wait until the early spring when freezing temperatures cease and the ground is no longer frozen. Look for a planting site that is well drained, receives six hours of sunlight per day, and has a dark soil composition. Areas that are slightly elevated are good sites for strawberries, because they aid in water drainage.
Step 2
Spread a general fertilizer, such as 10-10-10, over the planting side using 1 lb. for every 100 square feet of soil. Till the soil with a garden tiller to work the fertilizer six to eight inches into the soil

Step 3
Dig a hole in the soil that is the same depth as the roots of one for the climbing strawberry plants. Insert the roots into the hole, making sure that the area where the green stems emerge, called the crown, is above the soil. Fill in the hole but do not cover crown with soil.
Step 4
Plant additional climbing strawberry varieties in the same methods, spacing them 18 to 30 inches apart.
Step 5
Dig a 12-inch deep trench six inches behind the plants with a shovel. Insert a 4- to 5-foot tall trellis into the bottom of the trench and pack soil around the base to fill in the hole and to hold it upright. You can install a single long trellis or smaller ones for each plant.
Step 6
Water the soil to the same depth as the roots of the strawberry plants.
Step 7
Wait four to five weeks until the plant runners begin to grow. Lift the runners up to a vertical position and secure them gently to the trellis using gardener's tape. Loop the tape around the vine stems and tie in a knot behind the trellis.
0
0
文章
Dummer. ゛☀
2017年09月30日

Including the lipstick vine and basket vine, the Aeschynanthus genus includes remarkable hanging plants with showy red, orange or yellow terminal flowers that emerge from “tubes” which resemble lipstick cases. Better suited to its native rainforest habitat, Aeschynanthus presents a challenge for the indoor gardener. They generally require high humidity and warmth during the summer months, followed by a brief period of cold during the winter to stimulate a bloom.
Growing Conditions
Light: Bright, strong light, but not direct sunshine.
Water: Keep soil continuously moist throughout spring and summer, and reduce watering in the winter. Don’t let it completely dry out. Very high humidity is preferred. If you’re growing in a basket, you will need to water more frequently during the growing season. However, the exact watering schedule will be party determined by your humidity levels, temperature, and choice of potting media.
Temperature: Keep it warm and humid in the spring and summer, above 65ºF (18ºC). In the winter, a brief period of 55 to 65ºF (13 to 18ºC) will cause inflorescence.
Soil: A well-drained potting mix is best. Avoid heavy garden soils, especially if you’re growing the plant in a hanging basket. In general, the lighter the mix, the better, but keep in mind that very light mixes will drain faster and require more frequently watering. Also, it’s a good idea to repot your hanging plants more frequently, as they soil in a hanging basket tends to become exhausted faster than soil in pots.
Fertilizer: When new growth appears in the spring, feed with a controlled-release fertilizer or liquid fertilizer according to label directions. Liquid fertilizers are often best for hanging applications, because they provide a steady supply of food. However, for best effect, make sure to use the fertilizer with every application during the growing season. If it will be challenging to stick to this schedule, sprinkle the soil surface with a good controlled-release fertilizer at the beginning of the growing season.
Repotting
Repotting depends on your container choice. For hanging plants, you should repot in the beginning of every growing season. You can keep the plant in the same basket year after year, but you’ll still need to refresh the soil and, if the plant has become too large, divide it. You can pot the division up separately. If you’re growing in a container, repot either annually or every other year, depending on the size of the plant.
Propagation
Take cuttings in the spring, when the plant resumes normal growth. To successfully root cuttings, use a rooting hormone and provide bottom heat or use a covered rooting container. Take a cutting with several leaves and a length of stem. Strip away the bottom one or two sets of leaves to expose one or two growing nodes. Dip these into rooting hormone (if you’re using it), then bury the cutting and the exposed nodes into a clean potting mix. You can use a seedling mix if you have some on hand. Keep the cutting in a bright, warm place with high humidity. When you start to see new growth, you’ll know the cutting has rooted. Wait until the plant has put out several sets of new leaves before repotting to a more permanent container.
Grower’s Tips
Aeschynanthus are perfect as hanging or trailing plants. They require high humidity and warmth throughout the growing season, as well as strong (but not direct) light. After the season is over, cut the trailing stems back in preparation for another year—otherwise, it will tend toward leginess. Do not spray plants in bloom. These are perfect for a greenhouse, sunroom or conservatory.

Growing Conditions
Light: Bright, strong light, but not direct sunshine.
Water: Keep soil continuously moist throughout spring and summer, and reduce watering in the winter. Don’t let it completely dry out. Very high humidity is preferred. If you’re growing in a basket, you will need to water more frequently during the growing season. However, the exact watering schedule will be party determined by your humidity levels, temperature, and choice of potting media.
Temperature: Keep it warm and humid in the spring and summer, above 65ºF (18ºC). In the winter, a brief period of 55 to 65ºF (13 to 18ºC) will cause inflorescence.

Soil: A well-drained potting mix is best. Avoid heavy garden soils, especially if you’re growing the plant in a hanging basket. In general, the lighter the mix, the better, but keep in mind that very light mixes will drain faster and require more frequently watering. Also, it’s a good idea to repot your hanging plants more frequently, as they soil in a hanging basket tends to become exhausted faster than soil in pots.
Fertilizer: When new growth appears in the spring, feed with a controlled-release fertilizer or liquid fertilizer according to label directions. Liquid fertilizers are often best for hanging applications, because they provide a steady supply of food. However, for best effect, make sure to use the fertilizer with every application during the growing season. If it will be challenging to stick to this schedule, sprinkle the soil surface with a good controlled-release fertilizer at the beginning of the growing season.

Repotting
Repotting depends on your container choice. For hanging plants, you should repot in the beginning of every growing season. You can keep the plant in the same basket year after year, but you’ll still need to refresh the soil and, if the plant has become too large, divide it. You can pot the division up separately. If you’re growing in a container, repot either annually or every other year, depending on the size of the plant.

Propagation
Take cuttings in the spring, when the plant resumes normal growth. To successfully root cuttings, use a rooting hormone and provide bottom heat or use a covered rooting container. Take a cutting with several leaves and a length of stem. Strip away the bottom one or two sets of leaves to expose one or two growing nodes. Dip these into rooting hormone (if you’re using it), then bury the cutting and the exposed nodes into a clean potting mix. You can use a seedling mix if you have some on hand. Keep the cutting in a bright, warm place with high humidity. When you start to see new growth, you’ll know the cutting has rooted. Wait until the plant has put out several sets of new leaves before repotting to a more permanent container.

Grower’s Tips
Aeschynanthus are perfect as hanging or trailing plants. They require high humidity and warmth throughout the growing season, as well as strong (but not direct) light. After the season is over, cut the trailing stems back in preparation for another year—otherwise, it will tend toward leginess. Do not spray plants in bloom. These are perfect for a greenhouse, sunroom or conservatory.
0
0
文章
Dummer. ゛☀
2017年09月30日

Nematanthus (Goldfish Plant) is a genus of flowering plants of the family Gesneriaceae. All of its species are endemic to Brazil. The plant is generally an epiphyte in nature and a hanging-basket plant in cultivation.
If you have a high light area that calls for a hanging or table plant that flowers, Nematanthus are a perfect choice. They have hundreds of small, thick, shiny, dark green leaves and colorful flowers that resemble tiny goldfish. The flowers on a Nematanthus may be red, orange, or yellow. Plants are easy to care for, drought resistant, and, with proper care, can bloom all year.
Growing Conditions
Light: Place the Nematanthus in bright light, but protect it from direct sunlight. Put the plant a few feet away from a bright window, or place it next to a window covered with a sheer curtain. Curled leaves are an indication that the plant needs a bit more light.
Water: Water the Nematanthus regularly, and don’t allow the soil to dry out. Water to the point that the soil is moist, but never allow the soil to become soggy. Pour water out of the drainage saucer immediately, and do not allow the bottom of the container to sit in water.
Temperature: Keep the plants in a warm room and don’t allow temperatures to drop below 60ºF (15ºC). Don’t place the plant near heating vents or air conditioners, and protect the plant from cold drafts.
Soil: It like a rich potting soil that holds water but still drains quickly.
Fertilizer: Fertilize a Nematanthus every two weeks in the spring and summer when it is actively growing with a basic plant food at 1/2 the recommended strength. Feed the plant monthly in the fall and winter.
Pruning
Remove old flowers and prune back stems as needed to maintain size. Most are trailing plants grown in baskets and periodically they can be trimmed back to maintain the length of the stems.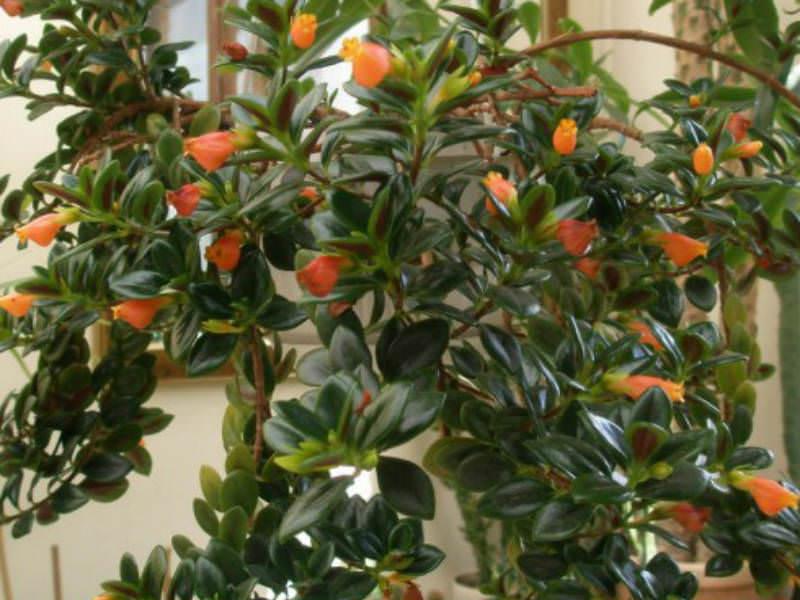
Repotting
Repot overcrowded plants in a larger container, or divide them and pot them up in separate containers; this will increase your quantity of plants easily.
Pests and Disease
Nematanthus have susceptibility to mealy bugs, cyclamen mites, aphids and thrip as well as whitefly. Under excessive moisture, they can have problems with root diseases.
Propagation
Propagate Nematanthus using stem cuttings from healthy new growth.

If you have a high light area that calls for a hanging or table plant that flowers, Nematanthus are a perfect choice. They have hundreds of small, thick, shiny, dark green leaves and colorful flowers that resemble tiny goldfish. The flowers on a Nematanthus may be red, orange, or yellow. Plants are easy to care for, drought resistant, and, with proper care, can bloom all year.

Growing Conditions
Light: Place the Nematanthus in bright light, but protect it from direct sunlight. Put the plant a few feet away from a bright window, or place it next to a window covered with a sheer curtain. Curled leaves are an indication that the plant needs a bit more light.
Water: Water the Nematanthus regularly, and don’t allow the soil to dry out. Water to the point that the soil is moist, but never allow the soil to become soggy. Pour water out of the drainage saucer immediately, and do not allow the bottom of the container to sit in water.
Temperature: Keep the plants in a warm room and don’t allow temperatures to drop below 60ºF (15ºC). Don’t place the plant near heating vents or air conditioners, and protect the plant from cold drafts.

Soil: It like a rich potting soil that holds water but still drains quickly.
Fertilizer: Fertilize a Nematanthus every two weeks in the spring and summer when it is actively growing with a basic plant food at 1/2 the recommended strength. Feed the plant monthly in the fall and winter.
Pruning
Remove old flowers and prune back stems as needed to maintain size. Most are trailing plants grown in baskets and periodically they can be trimmed back to maintain the length of the stems.

Repotting
Repot overcrowded plants in a larger container, or divide them and pot them up in separate containers; this will increase your quantity of plants easily.
Pests and Disease
Nematanthus have susceptibility to mealy bugs, cyclamen mites, aphids and thrip as well as whitefly. Under excessive moisture, they can have problems with root diseases.

Propagation
Propagate Nematanthus using stem cuttings from healthy new growth.
0
0
文章
Dummer. ゛☀
2017年09月29日

Scientific Name
Pelargonium peltatum (L.) L’Hér.

Common Names
Ivy-leaved Geranium, Ivy-leaf Geranium, Ivy Geranium, Cascading Geranium, Hanging Geranium
Synonyms
Dibrachya clypeata, Dibrachya peltata, Geraniospermum lateripes, Geraniospermum peltatum, Geranium peltatum, Pelargonium lateripes, Pelargonium x peltatum
Scientific Classification
Family: Geraniaceae
Genus: Pelargonium

Flower
Color: Pink
Bloom Time: Spring and early summer
Description
Pelargonium peltatum is a climbing, semi-succulent perennial, trailing through other trees and shrubs in its habitat. The climber has long, straggling shoots, which can reach up to 6.5 feet (2 m). This plant is characterized by its ivy-shaped leaves. Some of the leaves have distinctive zonal markings, but this is not a common characteristic. The inflorescence is an umbel of 2 to 9 pink flowers, with 5 dark-streaked or marked petals each up to 0.8 inch (2 cm) long. It flowers mainly in spring and early summer.
Hardiness
USDA hardiness zone 9b to 11b: from 25 °F (−3.9 °C) to 50 °F (+10 °C).

How to Grow and Care
Work organic compost into high-quality container potting soil that contains ingredients such as peat moss, vermiculite and perlite. Use this compost/soil mixture to fill pots for your Pelargoniums. Good drainage is essential to Pelargoniums so choose containers with adequate drainage holes. If your Pelargoniums are already in pots, spread organic compost lightly on the soil surface and work in, taking care not to dig up the plant’s roots.
Choose locations getting direct sun for most Pelargoniums. They need at least six hours of sun daily. Martha Washington and Regal types prefer a site that is shady in the afternoon. All Pelargoniums need afternoon shade if your area regularly sees summer temperatures exceeding 90 degrees Fahrenheit (32 degrees Celsius).
Feed your Pelargoniums every two weeks with a balanced fertilizer like 10-10-10 or 20-20-20. Buy fertilizer that dissolves in water for easier application. Every third watering, add Epsom salts — magnesium sulfate — to the plant water — 1 teaspoon per 1 gallon — to provide magnesium. Or, add a slow-release fertilizer to the soil mix when you plant the geraniums in the pot — it feeds them all season.
Origin
Native to southern Africa, particularly South Africa.
Pelargonium peltatum (L.) L’Hér.

Common Names
Ivy-leaved Geranium, Ivy-leaf Geranium, Ivy Geranium, Cascading Geranium, Hanging Geranium
Synonyms
Dibrachya clypeata, Dibrachya peltata, Geraniospermum lateripes, Geraniospermum peltatum, Geranium peltatum, Pelargonium lateripes, Pelargonium x peltatum
Scientific Classification
Family: Geraniaceae
Genus: Pelargonium

Flower
Color: Pink
Bloom Time: Spring and early summer
Description
Pelargonium peltatum is a climbing, semi-succulent perennial, trailing through other trees and shrubs in its habitat. The climber has long, straggling shoots, which can reach up to 6.5 feet (2 m). This plant is characterized by its ivy-shaped leaves. Some of the leaves have distinctive zonal markings, but this is not a common characteristic. The inflorescence is an umbel of 2 to 9 pink flowers, with 5 dark-streaked or marked petals each up to 0.8 inch (2 cm) long. It flowers mainly in spring and early summer.
Hardiness
USDA hardiness zone 9b to 11b: from 25 °F (−3.9 °C) to 50 °F (+10 °C).

How to Grow and Care
Work organic compost into high-quality container potting soil that contains ingredients such as peat moss, vermiculite and perlite. Use this compost/soil mixture to fill pots for your Pelargoniums. Good drainage is essential to Pelargoniums so choose containers with adequate drainage holes. If your Pelargoniums are already in pots, spread organic compost lightly on the soil surface and work in, taking care not to dig up the plant’s roots.
Choose locations getting direct sun for most Pelargoniums. They need at least six hours of sun daily. Martha Washington and Regal types prefer a site that is shady in the afternoon. All Pelargoniums need afternoon shade if your area regularly sees summer temperatures exceeding 90 degrees Fahrenheit (32 degrees Celsius).
Feed your Pelargoniums every two weeks with a balanced fertilizer like 10-10-10 or 20-20-20. Buy fertilizer that dissolves in water for easier application. Every third watering, add Epsom salts — magnesium sulfate — to the plant water — 1 teaspoon per 1 gallon — to provide magnesium. Or, add a slow-release fertilizer to the soil mix when you plant the geraniums in the pot — it feeds them all season.
Origin
Native to southern Africa, particularly South Africa.
0
0
成长记
cclecombe
2017年09月25日

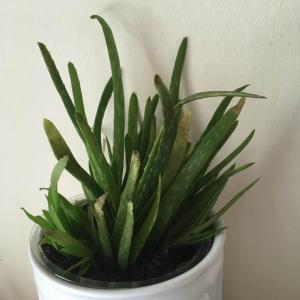
We did have this Aloe hanging on our window but I think the light is a little too intense for her, so she's back on the desk!

0
0
文章
Dummer. ゛☀
2017年09月22日

Disocactus flagelliformis commonly known as Rat Tail Cactus, is a cactus with a thick hanging stems, each with 8 – 13 ribs, up to 3.3 feet (1 m) long and up to 0.75 inches (1.9 cm) in diameter. The needle groups are tiny, almost fuzzy-looking and have 15 – 20 fine reddish-yellow spines each. Flowers are a beautiful magenta color, curved, up to 3 inches (7.5 cm) long and up to 1.5 inches (3.8 cm) in diameter.
Disocactus flagelliformis is epiphytic in the wild (it grows in trees). It is perfectly adapted to hanging baskets. It is the most cultivated species in the genus. Due to its ease of cultivation and attractive floral displays, Disocactus flagelliformis is often grown as an ornamental pot plant.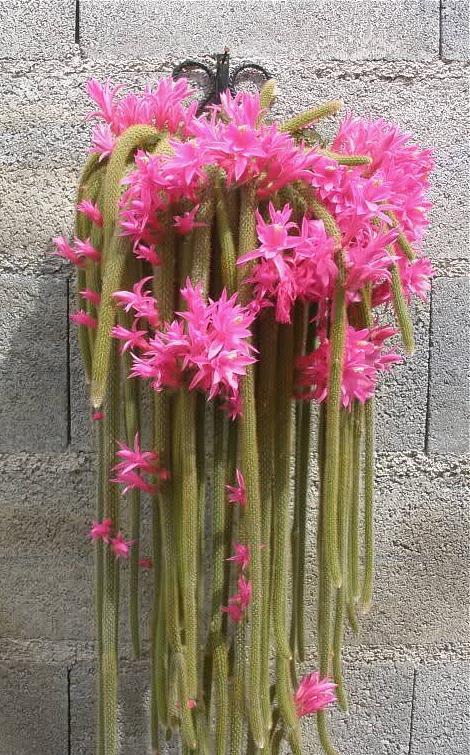
Growing Conditions
Light: Disocactus flagelliformis requires full sunlight. Hang the pot or basket in the sunniest window available. If possible, hang the plant outdoors in summer to give it fresh air and extra light.
Soil: A good draining soil mix that is gritty is advisable to use, which is sold and used for cacti and succulents.
Temperature: During the active growth period normal room temperatures are suitable. In winter these plants should be rested at 45 to 50 °F (7 to 10 °C), if possible, but they tolerate temperatures up to 59 to 61 °F (15 to 16 °C).
Watering: During the active growth period water plentifully, keeping the potting mixture thoroughly moist, but do not let plants stand in water. During the winter rest period just keep the mixture from drying out.
Fertilizing: Use half-strength liquid fertilizer sprayed on to the stems of the plant once every two weeks during the active growth period only.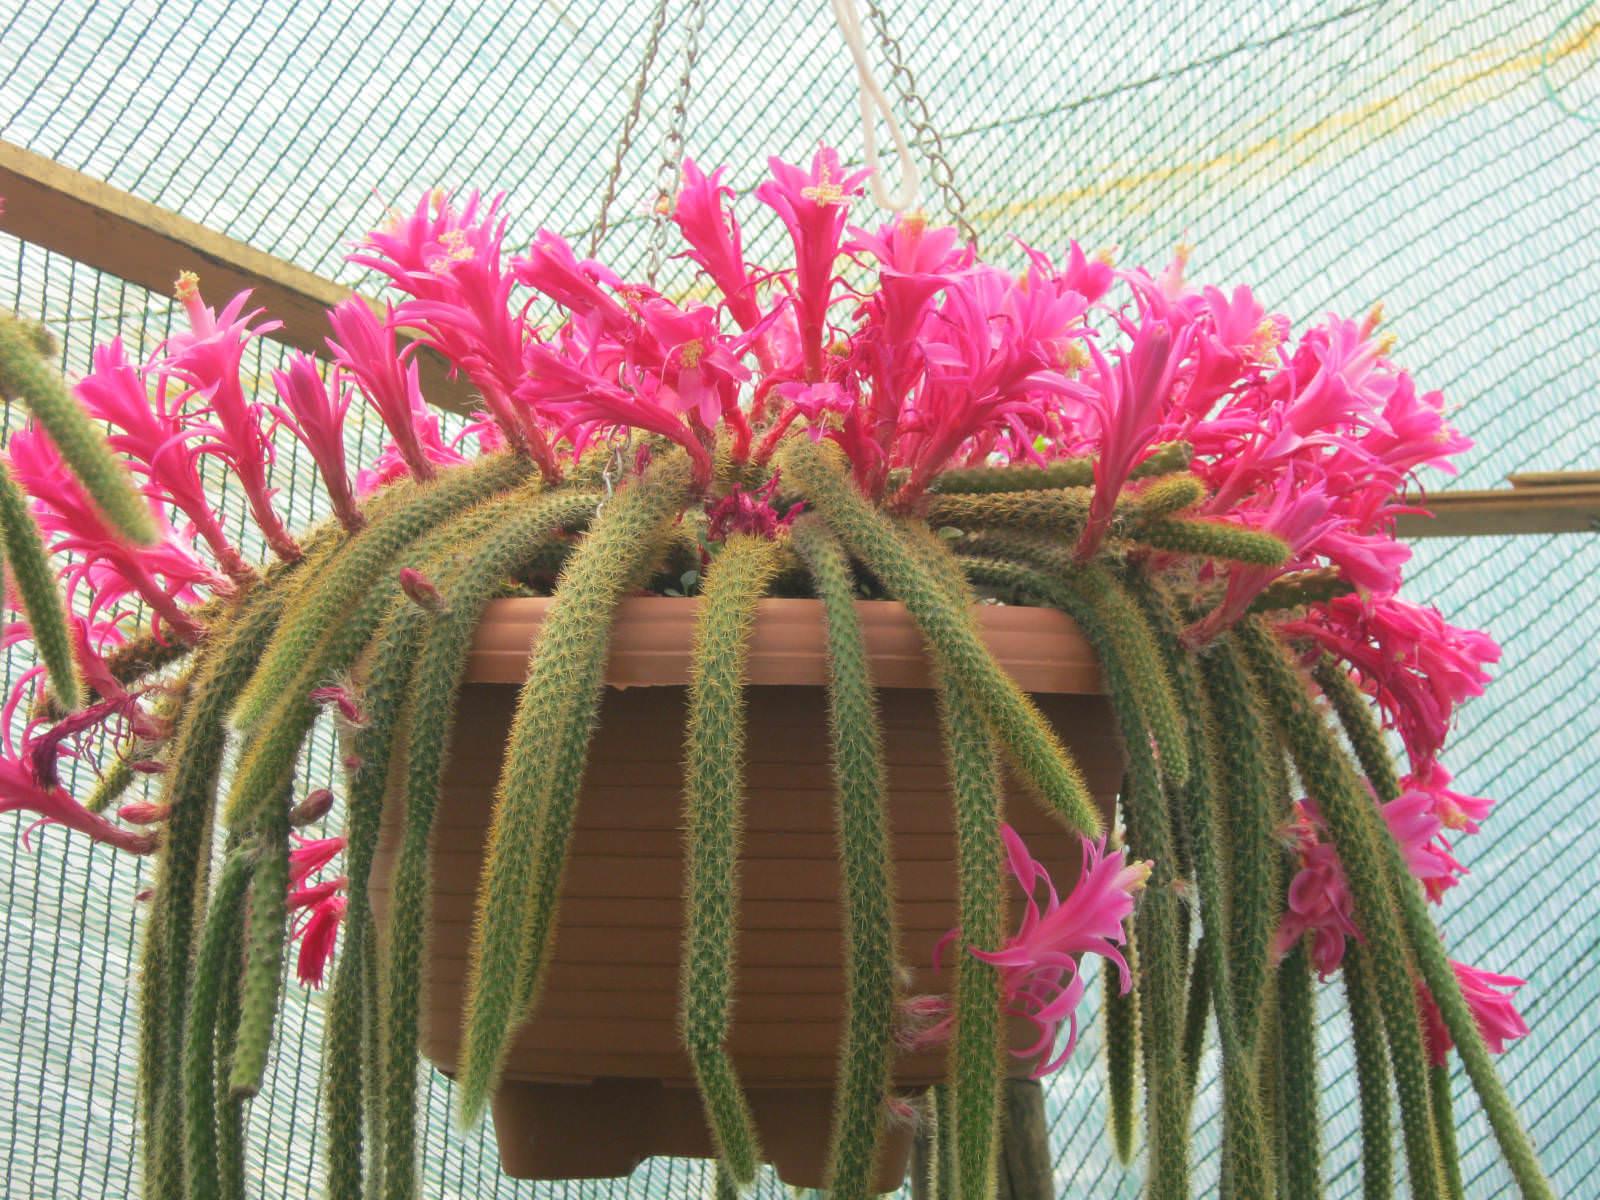
General Care
Disocactus flagelliformis is easy to cultivate and relatively fast growing cactus. Their trailing stems make these cacti ideal plants for a hanging basket. Line the basket with sphagnum moss before filling it with potting mixture and make sure it is hung where the prickly stems will not pose a treat to the unwary. If Disocactus flagelliformis is grown in a pot, hang the pot up or attache it to a high shelf. If it is left free-standing, it can soon be overbalanced by the lengthening stems.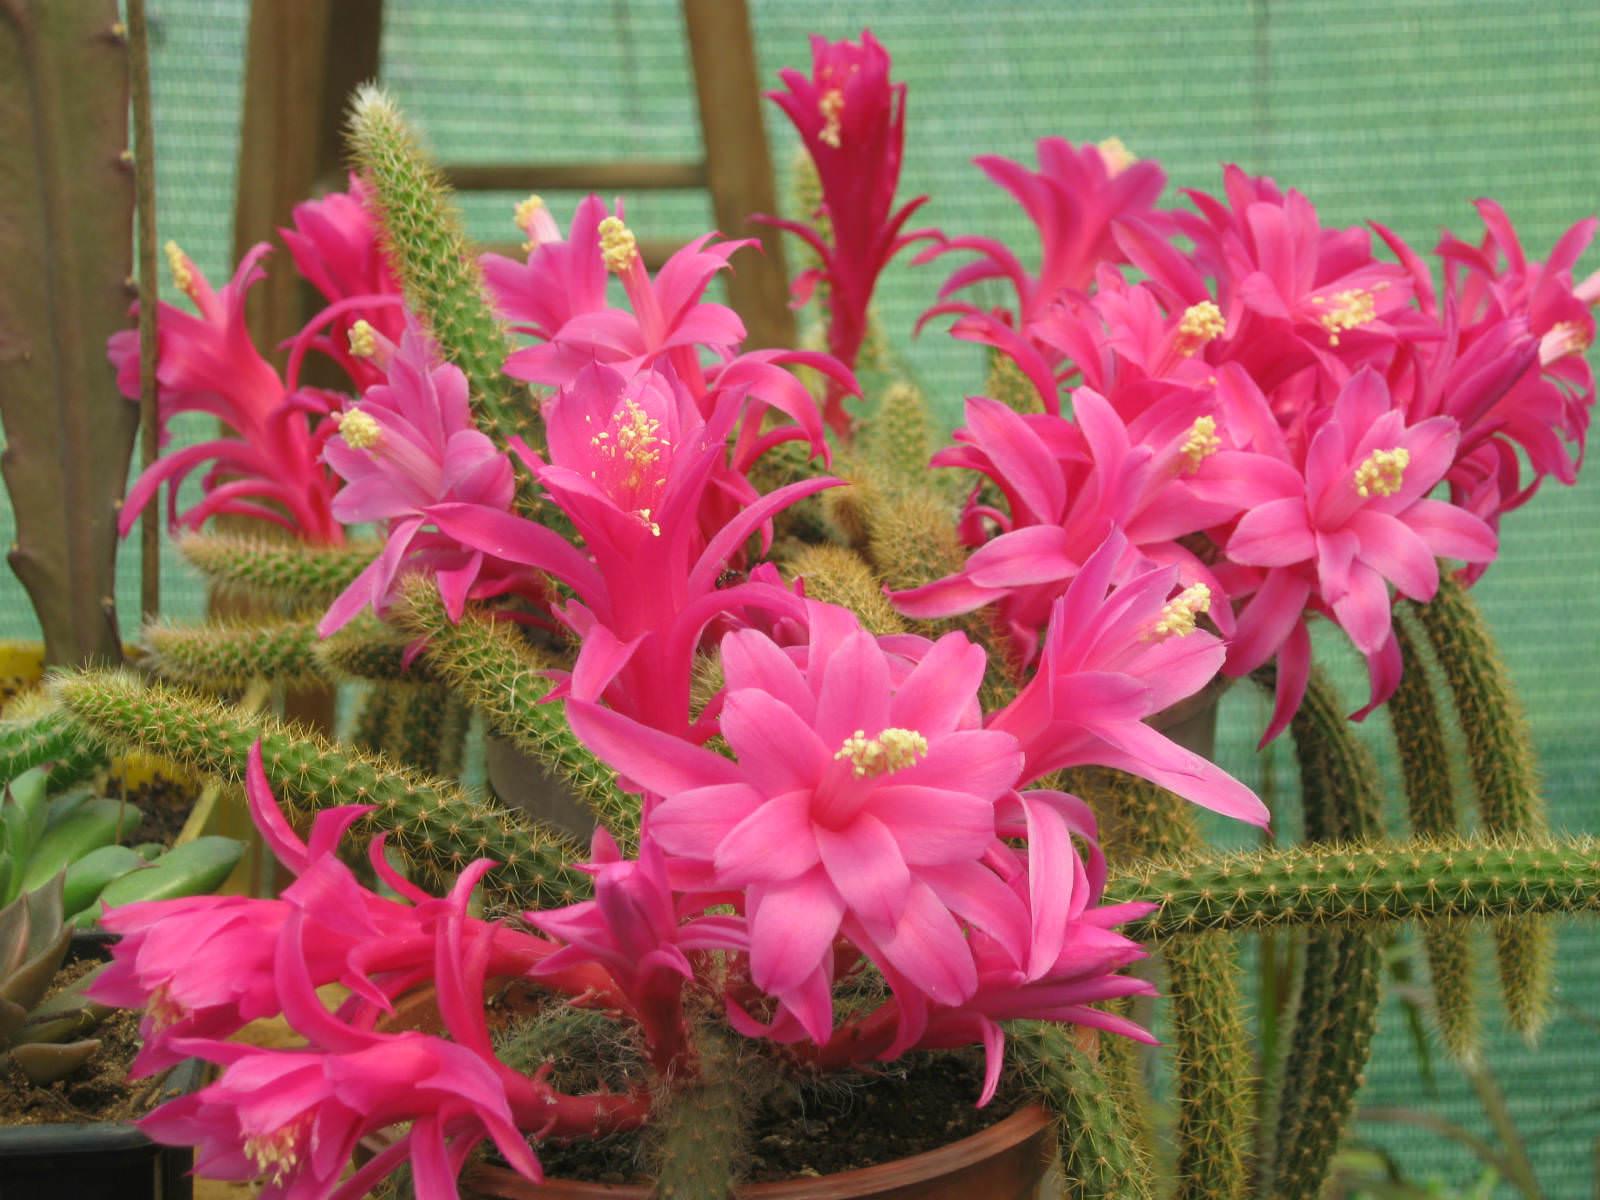
Propagation
To propagate, use either 6 inches (15 cm) tip or 6 inches (15 cm) segment of any part of the stem. Allow each cutting or segment to dry for three days; then insert it about 0.8 inch (2 cm) deep in a small pan or pot of the recommended potting mixture for mature plants; be sure that any stem segment is planted with the bottom end down. If this shallowly inserted cutting tends to fall over, it can be supported by being gently tied to a small wooden stick. Cultivation needs of cuttings are the same as those for mature Disocactus flagelliformis and rooting will occur within a few weeks.

Disocactus flagelliformis is epiphytic in the wild (it grows in trees). It is perfectly adapted to hanging baskets. It is the most cultivated species in the genus. Due to its ease of cultivation and attractive floral displays, Disocactus flagelliformis is often grown as an ornamental pot plant.

Growing Conditions
Light: Disocactus flagelliformis requires full sunlight. Hang the pot or basket in the sunniest window available. If possible, hang the plant outdoors in summer to give it fresh air and extra light.
Soil: A good draining soil mix that is gritty is advisable to use, which is sold and used for cacti and succulents.
Temperature: During the active growth period normal room temperatures are suitable. In winter these plants should be rested at 45 to 50 °F (7 to 10 °C), if possible, but they tolerate temperatures up to 59 to 61 °F (15 to 16 °C).
Watering: During the active growth period water plentifully, keeping the potting mixture thoroughly moist, but do not let plants stand in water. During the winter rest period just keep the mixture from drying out.
Fertilizing: Use half-strength liquid fertilizer sprayed on to the stems of the plant once every two weeks during the active growth period only.

General Care
Disocactus flagelliformis is easy to cultivate and relatively fast growing cactus. Their trailing stems make these cacti ideal plants for a hanging basket. Line the basket with sphagnum moss before filling it with potting mixture and make sure it is hung where the prickly stems will not pose a treat to the unwary. If Disocactus flagelliformis is grown in a pot, hang the pot up or attache it to a high shelf. If it is left free-standing, it can soon be overbalanced by the lengthening stems.

Propagation
To propagate, use either 6 inches (15 cm) tip or 6 inches (15 cm) segment of any part of the stem. Allow each cutting or segment to dry for three days; then insert it about 0.8 inch (2 cm) deep in a small pan or pot of the recommended potting mixture for mature plants; be sure that any stem segment is planted with the bottom end down. If this shallowly inserted cutting tends to fall over, it can be supported by being gently tied to a small wooden stick. Cultivation needs of cuttings are the same as those for mature Disocactus flagelliformis and rooting will occur within a few weeks.
0
0
文章
Dummer. ゛☀
2017年09月17日

Succulents with a trailing habit are best planted where they can hang vertically. If they’re placed on a flat surface, the leaves may become damaged when they come in contact with it.
However, you’re not limited to planting them in hanging baskets. You can plant hanging succulents in window boxes, where they can create a cascading design along the exterior of your home.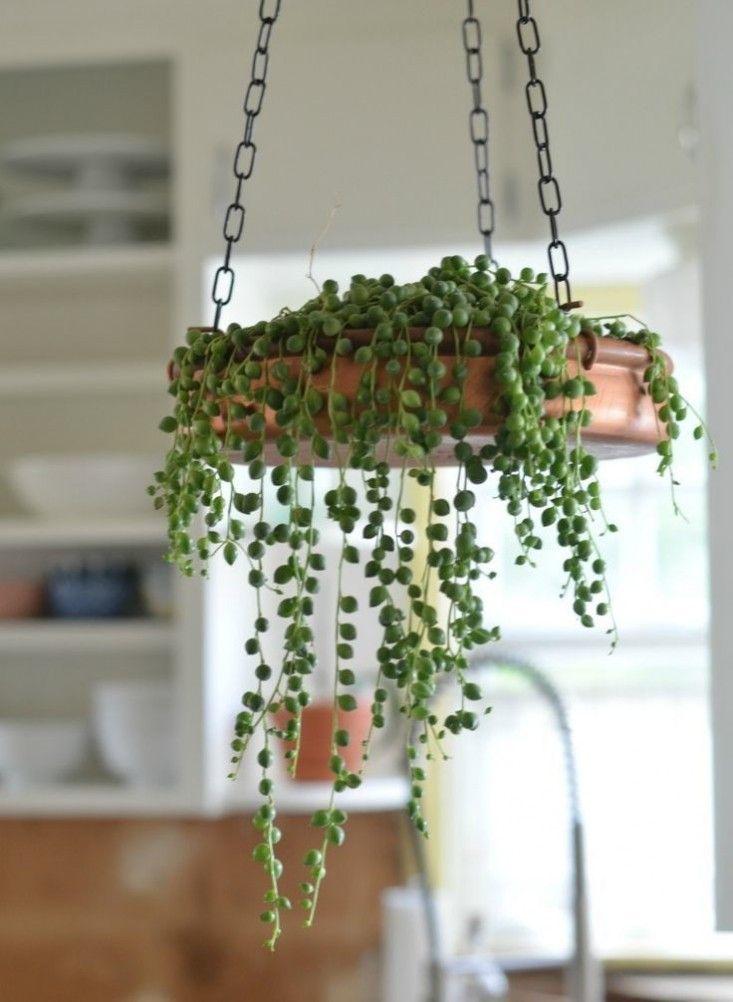
Hanging succulents grow well out of rock walls or hanging over arbors and trellises. You can even plant them in cracks in your landscape stones.

However, you’re not limited to planting them in hanging baskets. You can plant hanging succulents in window boxes, where they can create a cascading design along the exterior of your home.

Hanging succulents grow well out of rock walls or hanging over arbors and trellises. You can even plant them in cracks in your landscape stones.
0
0
文章
Dummer. ゛☀
2017年09月15日

Wilting plant leaves, sagging stems, and aborting flowers and fruits. Dry soil, especially where new plants have not had a chance to put down deep roots. Dry compost in pots and hanging baskets, and pots blowing over.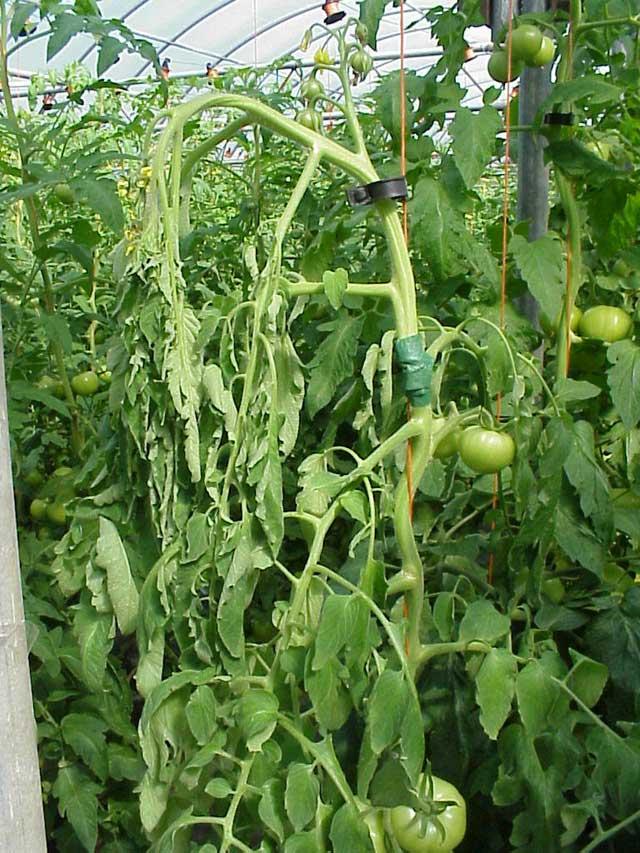
Plants affected
All plants are affected.
About Wilting through lack of water
Plants have a vascular system which enables water and nutrients to be taken from the environment through a complex root system.
The continual flow of water and nutrients ensures that the vascular system remains firm, and that the plant continues to grow in a healthy way.
Lack of water results in a loss of firmness which causes the symptoms of wilting.
Plants respond to lack of water by closing down areas of the vascular system, which consequently results in leaf, flower and fruit loss.
Plants can usually recover from short periods of lack of water, but sustained periods of drought often result in death.
Treatment
Chemical
Products containing the following chemical ingredients are all effective on Wilting through lack of water
There is no chemical control available for this problem.
Note: It is important to read manufacturer's instructions for use and the associated safety data information before applying chemical treatments.
Organic
Water wilted plants as soon as possible.
Plunge pots with very wilted plants into a bucket of water for an hour or so.
After plunging or watering, place pots with wilted plants in the shade to recover, and consider moving them to a shady spot permanently.
Move wilted plants out of windy spots, and avoid putting them back in the same place.
If the problem is affecting plants in the greenhouse, after watering them, damp down the floor with a hose or watering can.
Prevention
Regularly monitor plants for wilting symptoms.
Design a watering schedule for plants based on their individual needs. As a general guide, pots need watering once a day, hanging baskets twice a day, new plants in the border need careful monitoring in their first year and will probably need watering two or three times a week. Established border plants will have deeper roots and will benefit most from one long drink each week rather than a daily dose.
For potted and hanging basket plants, water-retaining gel granules can be used in the compost.
The base of the pot or basket can also be lined with a plastic bag to help retain water. If lining a pot, make a few small holes in the bag with a kitchen fork so the compost does not get waterlogged.
Avoid planting delicate plants in locations of intense sunlight, or strong winds.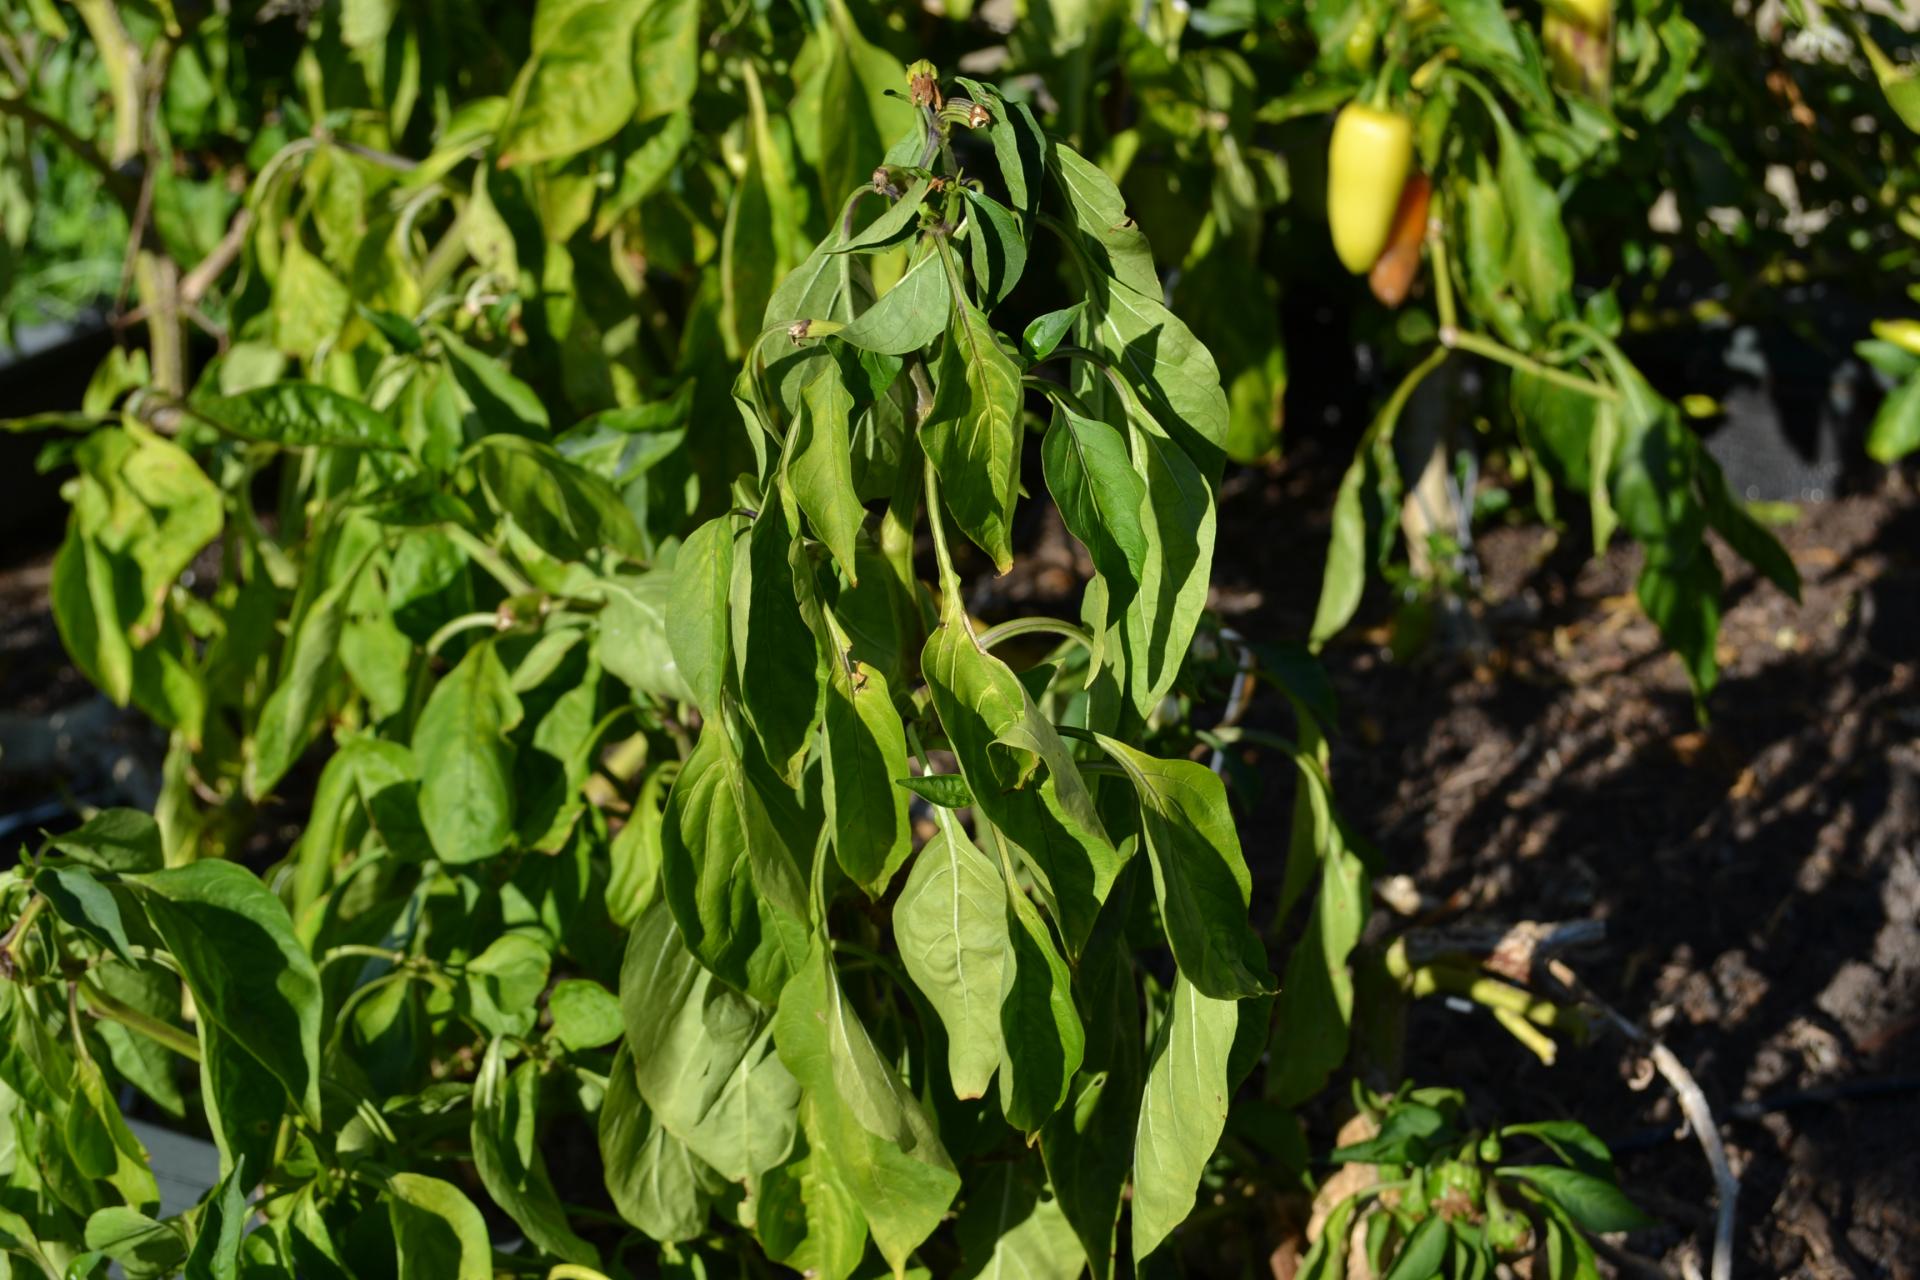
During summer use shading to protect greenhouse crops.
Incorporating mulch and organic material into the soil improves its water retention.

Plants affected
All plants are affected.
About Wilting through lack of water
Plants have a vascular system which enables water and nutrients to be taken from the environment through a complex root system.
The continual flow of water and nutrients ensures that the vascular system remains firm, and that the plant continues to grow in a healthy way.
Lack of water results in a loss of firmness which causes the symptoms of wilting.
Plants respond to lack of water by closing down areas of the vascular system, which consequently results in leaf, flower and fruit loss.
Plants can usually recover from short periods of lack of water, but sustained periods of drought often result in death.

Treatment
Chemical
Products containing the following chemical ingredients are all effective on Wilting through lack of water
There is no chemical control available for this problem.
Note: It is important to read manufacturer's instructions for use and the associated safety data information before applying chemical treatments.
Organic
Water wilted plants as soon as possible.
Plunge pots with very wilted plants into a bucket of water for an hour or so.
After plunging or watering, place pots with wilted plants in the shade to recover, and consider moving them to a shady spot permanently.
Move wilted plants out of windy spots, and avoid putting them back in the same place.

If the problem is affecting plants in the greenhouse, after watering them, damp down the floor with a hose or watering can.
Prevention
Regularly monitor plants for wilting symptoms.
Design a watering schedule for plants based on their individual needs. As a general guide, pots need watering once a day, hanging baskets twice a day, new plants in the border need careful monitoring in their first year and will probably need watering two or three times a week. Established border plants will have deeper roots and will benefit most from one long drink each week rather than a daily dose.
For potted and hanging basket plants, water-retaining gel granules can be used in the compost.

The base of the pot or basket can also be lined with a plastic bag to help retain water. If lining a pot, make a few small holes in the bag with a kitchen fork so the compost does not get waterlogged.
Avoid planting delicate plants in locations of intense sunlight, or strong winds.

During summer use shading to protect greenhouse crops.
Incorporating mulch and organic material into the soil improves its water retention.
0
0
文章
Dummer. ゛☀
2017年09月02日

Almost everyone who lives near oak trees has seen the small balls hanging in the tree branches, yet many still may ask: “What are oak galls?” Oak apple galls look like small, round fruit but they are actually plant deformities caused by oak apple gall wasps. The galls generally do not damage the oak tree host. If you want to know how to get rid of oak galls, read on for oak apple gall treatment.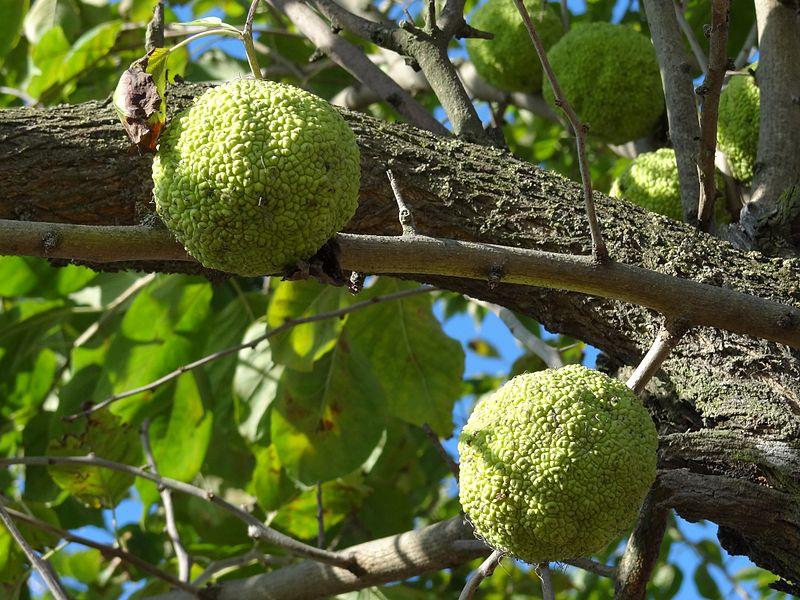
Oak Apple Gall Information
So what are oak galls? Oak apple galls appear in oak trees, most often black, scarlet and red oaks. They get their common name from the fact that they are round, like small apples, and hang in the trees.
Oak apple gall information tells us that galls are formed when a female oak apple gall wasp lays eggs in the central vein on an oak leaves. When the larvae hatch, chemical and hormone interaction between the wasp eggs and the oak causes the tree to grow the round gall.
Galls are essential to developing oak apple gall wasps. The gall provides a safe home as well as food for the young wasps. Each gall contains only one young wasp. If the galls you see are green with brown spots, they are still forming. At this stage, the galls feel a little rubbery. The galls get bigger as the larvae get bigger. When the galls dry out, the oak apple gall wasps fly from small holes in the galls.
Oak Apple Gall Treatment
Many homeowners assume that the galls damage the oak trees. If you think so, you’ll want to know how to get rid of oak galls. It is true that oak trees look odd after their leaves fall and the branches are hung with galls. However, the oak apple galls do not injure the tree. At the worst, a severe infestation might make leaves fall early.
If you still want to know how to get rid of oak gall wasps, you can rid the tree of galls by snipping them off with a sterilized pruner before they are dry.

Oak Apple Gall Information
So what are oak galls? Oak apple galls appear in oak trees, most often black, scarlet and red oaks. They get their common name from the fact that they are round, like small apples, and hang in the trees.
Oak apple gall information tells us that galls are formed when a female oak apple gall wasp lays eggs in the central vein on an oak leaves. When the larvae hatch, chemical and hormone interaction between the wasp eggs and the oak causes the tree to grow the round gall.

Galls are essential to developing oak apple gall wasps. The gall provides a safe home as well as food for the young wasps. Each gall contains only one young wasp. If the galls you see are green with brown spots, they are still forming. At this stage, the galls feel a little rubbery. The galls get bigger as the larvae get bigger. When the galls dry out, the oak apple gall wasps fly from small holes in the galls.

Oak Apple Gall Treatment
Many homeowners assume that the galls damage the oak trees. If you think so, you’ll want to know how to get rid of oak galls. It is true that oak trees look odd after their leaves fall and the branches are hung with galls. However, the oak apple galls do not injure the tree. At the worst, a severe infestation might make leaves fall early.

If you still want to know how to get rid of oak gall wasps, you can rid the tree of galls by snipping them off with a sterilized pruner before they are dry.
0
0
文章
Dummer. ゛☀
2017年08月30日

If “snakebush” makes you think of a long, scaly vine, you’re in for a surprise. According to snakebush plant information, this lovely little plant offers delicate mauve flowers that look wonderful in hanging baskets. So exactly what is a snakebush? Read on for tips on growing snakebush plants.
What is a Snakebush Plant?
Native to Western Australia, snakebush bears the scientific name of Hemiandra pungens, and it’s also known as the snake plant. But the only thing snake-like about it is how it stays very close to the ground. Snakebush plant information tells you that this tiny plant offers dense, pointed foliage that looks like needles. Its mauve or light purple flowers arrive in spring and last much of the summer. The flowers grow in tube shapes. Each blossoms has an upper “lip” with two lobes and a lower “lip” with three and carry a sweet fragrance.
Growing Snakebush Plants
Since snakebush is dense, and prostrate, it makes an excellent ground cover. Snakebush ground cover has the added advantage of being drought resistant when mature. You’ll need a sunny location to make this plant happy. Growing snakebush plants is easier in well-drained soil, but the plants will also survive in sites with poor drainage. On the other hand, you may have a hard time finding the seeds in commerce. You can grow snakebush by taking cuttings from a friend’s garden. Growing snakebush is fairly easy from cuttings.
Care of Snakebush
Once you’re able to acquire the snakebush, you’ll find that you won’t have much to do if you plant it in the right location. It is both drought and frost tolerant. Snakebush ground cover accepts temperatures down to 25 degrees Fahrenheit (-4 C.) without any damage. You’ll have a better experience growing snakebush plants if you live in a dry climate. Those gardeners in regions with hot, wet summer will have the hardest time. Care of snakebush plants in humid areas is difficult and the species cannot be grown reliably.
It works well as part of a low-maintenance backyard, beside the swimming pool or a courtyard garden. If you are putting in a cottage or flower garden, include snakebush in the mix.

What is a Snakebush Plant?
Native to Western Australia, snakebush bears the scientific name of Hemiandra pungens, and it’s also known as the snake plant. But the only thing snake-like about it is how it stays very close to the ground. Snakebush plant information tells you that this tiny plant offers dense, pointed foliage that looks like needles. Its mauve or light purple flowers arrive in spring and last much of the summer. The flowers grow in tube shapes. Each blossoms has an upper “lip” with two lobes and a lower “lip” with three and carry a sweet fragrance.

Growing Snakebush Plants
Since snakebush is dense, and prostrate, it makes an excellent ground cover. Snakebush ground cover has the added advantage of being drought resistant when mature. You’ll need a sunny location to make this plant happy. Growing snakebush plants is easier in well-drained soil, but the plants will also survive in sites with poor drainage. On the other hand, you may have a hard time finding the seeds in commerce. You can grow snakebush by taking cuttings from a friend’s garden. Growing snakebush is fairly easy from cuttings.

Care of Snakebush
Once you’re able to acquire the snakebush, you’ll find that you won’t have much to do if you plant it in the right location. It is both drought and frost tolerant. Snakebush ground cover accepts temperatures down to 25 degrees Fahrenheit (-4 C.) without any damage. You’ll have a better experience growing snakebush plants if you live in a dry climate. Those gardeners in regions with hot, wet summer will have the hardest time. Care of snakebush plants in humid areas is difficult and the species cannot be grown reliably.

It works well as part of a low-maintenance backyard, beside the swimming pool or a courtyard garden. If you are putting in a cottage or flower garden, include snakebush in the mix.
0
0


